DIOCAMRE01 - Surveillance Camera DIO - Free user manual and instructions
Find the device manual for free DIOCAMRE01 DIO in PDF.
User questions about DIOCAMRE01 DIO
0 question about this device. Answer the ones you know or ask your own.
Ask a new question about this device
Download the instructions for your Surveillance Camera in PDF format for free! Find your manual DIOCAMRE01 - DIO and take your electronic device back in hand. On this page are published all the documents necessary for the use of your device. DIOCAMRE01 by DIO.
USER MANUAL DIOCAMRE01 DIO
natural_image
Simple line drawing of a toilet or toilet with no text, numbers, or symbolsCaméra Wi-Fi
1x

natural_image
Technical line drawing of a wall-mounted device with three socket outlets connected to a power plug (no text or symbols)natural_image
Simple line drawing of a smartphone with wireless signal waves above a Wi-Fi antenna (no text or symbols)2. Installer la caméra
natural_image
Technical line drawing of a mechanical component with two views: top shows a circular component with internal features, bottom shows a cylindrical housing (no text or symbols)natural_image
Three technical line drawings of a device housing with internal components, shown from different angles (front, side, and top) without any text or symbols.Attention :
natural_image
Simple line drawing of a mechanical device with red cross marks (no text or symbols)3. Utilisation
text_image
Orange B 08:55 74 % Mes appareils Chacor Plug ENTRÉE DIOBELL-501 IPCAM-F104 JARDIN IPCAM-BED2 IPCAM-BED1natural_image
Simple line drawing of a cylindrical object with a central circular feature and concentric rings (no text or symbols)wifi-camera
1x
+
natural_image
Technical line drawing of a wall-mounted device with three socket outlets connected to a power plug (no text or symbols)natural_image
Illustration of a smartphone emitting sound waves to a speaker (no text or symbols)2. Installeren van de camera
natural_image
Technical line drawing of a mechanical component with two views: top shows a circular component with internal features, bottom shows a cylindrical housing (no text or symbols)natural_image
Three technical line drawings of a device housing with internal components, shown from different angles (front, side, and top) without any text or symbols.Let op:
natural_image
Simple line drawing of a mechanical device with red cross marks (no text or symbols)3. Gebruik
text_image
Orange B 08:55 74 % Mes appareils Chacon Plug ENTRÉE DIOSELL-801 IPCAM-F104 JARDIN IPCAM-BE02 IPCAM-BE01natural_image
Simple line drawing of a cylindrical object with a central circular feature and concentric rings (no text or symbols)cámara Wi-Fi
1×

natural_image
Technical line drawing of a remote control panel with a plug and socket (no text or symbols)natural_image
Simple line drawing of a smartphone with wireless signal waves above a microphone (no text or symbols)natural_image
Technical line drawing of a mechanical component with two views: top shows a circular housing and base plate, bottom shows a cylindrical housing (no text or symbols)natural_image
Three technical line drawings of a device housing with internal components, shown from top, front, and side views (no text or symbols)Atención:
natural_image
Simple line drawing of a mechanical device with red cross marks (no text or symbols)3. Uso
text_image
Mes appareils Chason Play ENTRÉE DIOBELL-B01 IPCAM-FI04 JARDIN IPCAM-BED2 IPCAM-RE01natural_image
Simple line drawing of a toilet or toilet with no text, numbers, or symbolsCâmara Wi-Fi
1x
+
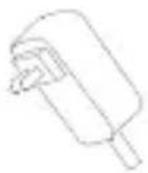
Adaptador de corrente 1,5m
1×
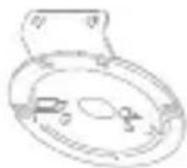
Suporte mural
1x
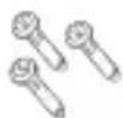
Parafusos
3x

Pequenos parafusos
2x
1×
natural_image
Technical line drawing of a remote control unit, showing front-mounted fan, rear-mounted device, and electrical outlet (no text or symbols)text_image
DiQ one GET IT ON Google Play Download on the App Storenatural_image
Illustration of a smartphone with wireless signal waves above a router (no text or symbols)natural_image
Technical line drawing of a mechanical component with two views: top shows a circular housing and base plate, bottom shows a cylindrical housing (no text or symbols)natural_image
Three technical line drawings of a device housing with internal components, shown from different angles (no text or symbols)Atenção:
natural_image
Simple line drawing of a mechanical device with red cross marks (no text or symbols)3. Utilização
text_image
Orange B 08:55 74% Mes appareils Chao de Hug ENTRÉE DIOSELL-801 IPCAM-F104 JARDIN IPCAM-BE02 IPCAM-BE01natural_image
Simple line drawing of a toilet or toilet with no text, numbers, or symbolsnatural_image
Technical line drawing of a three-pin electrical outlet with a power cord and socket (no text or symbols)text_image
DiQ one GET IT ON Google Play Download on the App Storenatural_image
Simple line drawing of a smartphone with wireless signal waves above a microphone (no text or symbols)natural_image
Technical line drawing of a mechanical component with two views: top shows a circular component with internal features, bottom shows a cylindrical housing (no text or symbols)natural_image
Simple line drawing of a mechanical component with no text or symbols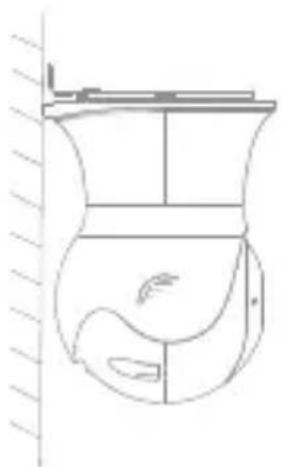
natural_image
Line drawing of a toilet with decorative elements, no text or symbols present
natural_image
Line drawing of a mechanical component with circular and rectangular features (no text or symbols)Achtung:
natural_image
Simple line drawing of a mechanical device with red cross marks (no text or symbols)3. Benutzung
text_image
Orange B 08:55 74 % Mes appareils Chacon Plug ENTRÉE DIOBELL-B01 IPCAM-F104 JARDIN IPCAM-BE02 IPCAM-FE01natural_image
Simple line drawing of a mechanical component with no text or symbolsTelecamera Wi-Fi
1×
natural_image
Technical line drawing of a wall-mounted device with three socket outlets connected to a power plug (no text or symbols)natural_image
Simple line drawing of a smartphone with sound waves and a speaker at the base (no text or symbols)2. Installare la telecamera
natural_image
Technical line drawing of a dual-chamber toilet fan assembly (no text or symbols)natural_image
Simple line drawing of a mechanical component with no text or symbols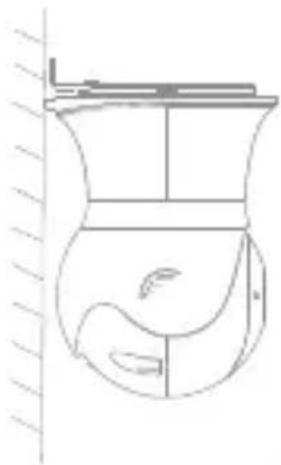
natural_image
Simple line drawing of a fish-shaped container with a side panel and handle, no text or symbols present.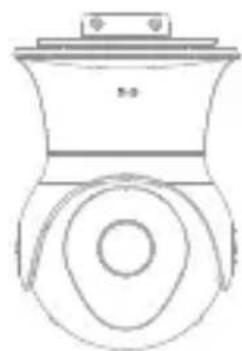
natural_image
Line drawing of a mechanical component with a circular base and top plate (no text or symbols)Avvertenza:
natural_image
Simple line drawing of a device with red X marks indicating prohibition or exclusion (no text or symbols)3. Utilizzo
text_image
Orange B 08:55 74 % Mes appareils Chacon Plug ENTRÉE DIOSELL-B01 IPCAM-FI04 JARDIN IPCAM-BE02 IPCAM-FE01natural_image
Simple line drawing of a mechanical component with no text or symbolsWiFi camera
1×
+
Power adaptor 1.5m
1x
Wall mount
1x
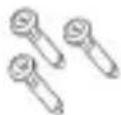
Screws
3x

Small screws
2x
1×

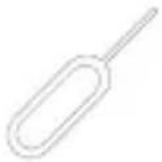
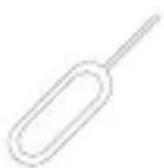
Quick Start GuideReset key
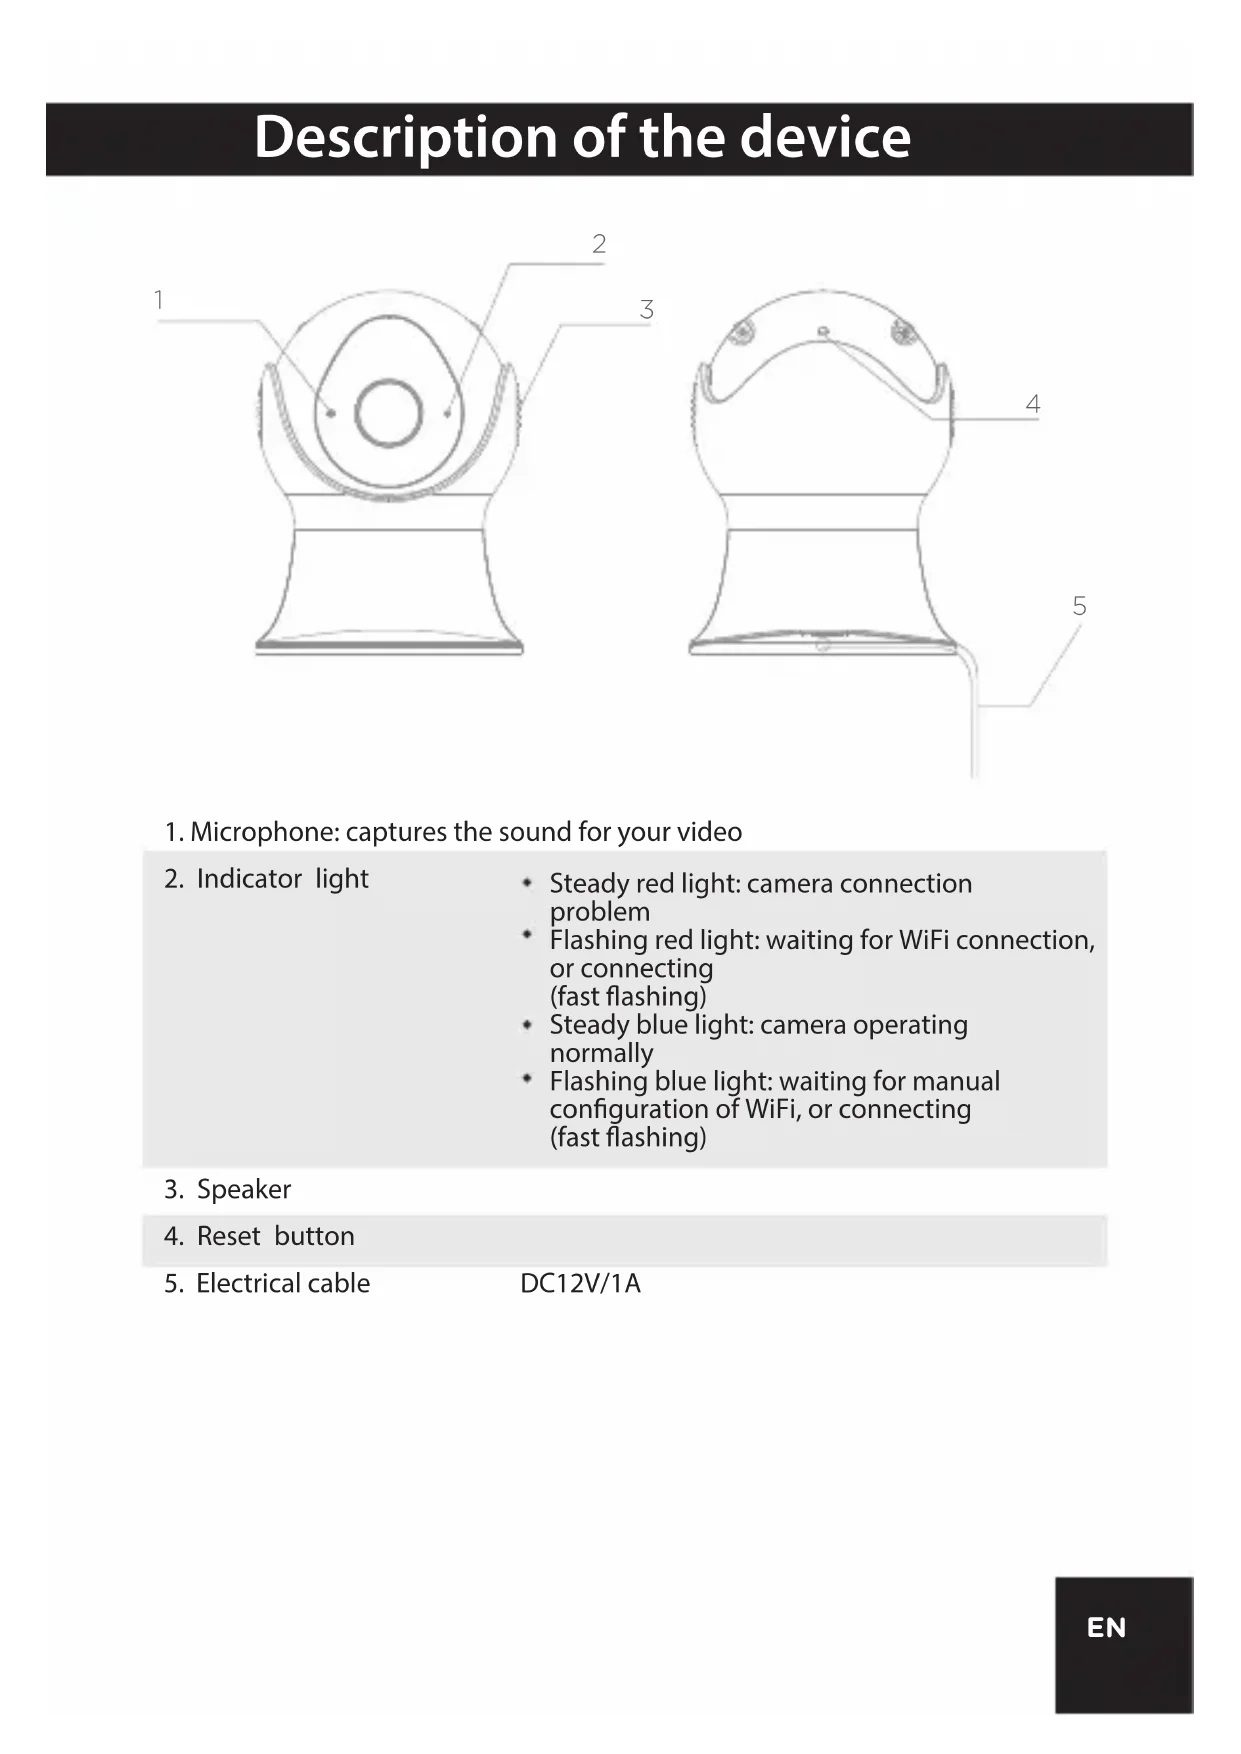
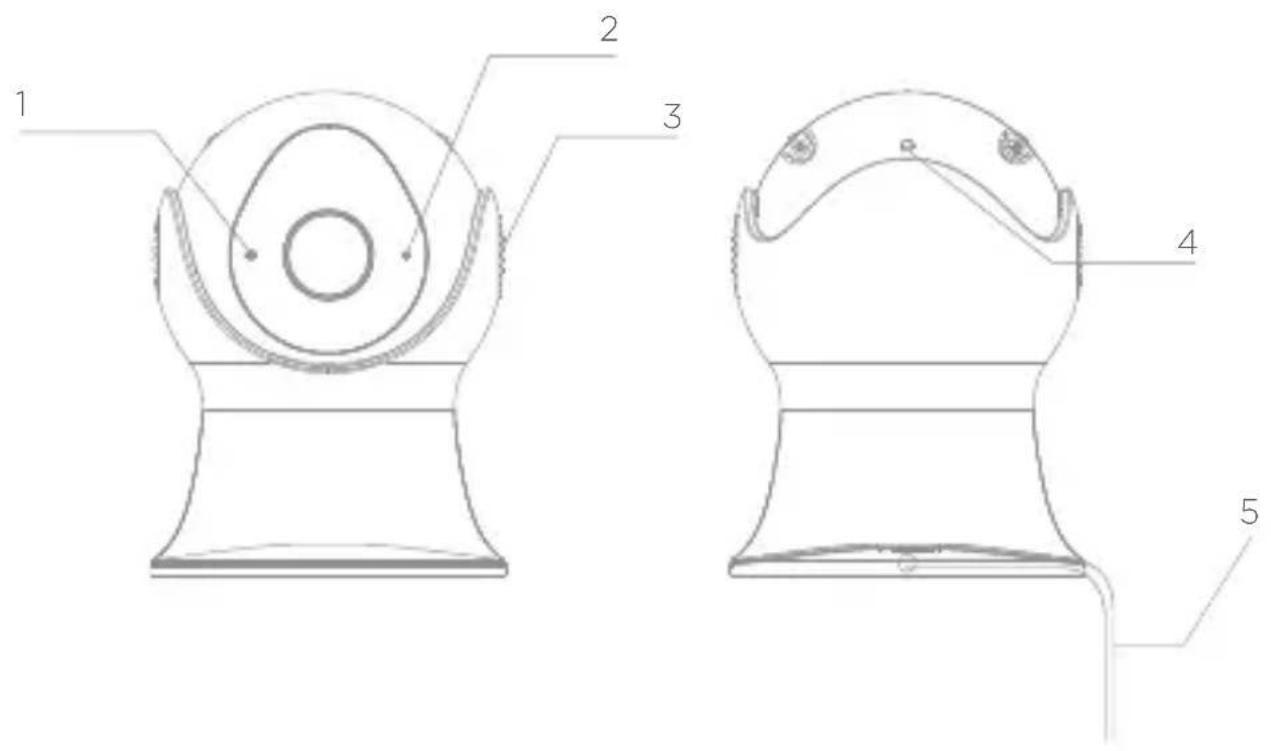
Description of the device
text_image
1 2 3 4 5- Microphone: captures the sound for your video
- Indicator light
• Steady red light: camera connection problem
- Flashing red light: waiting for WiFi connection, or connecting (fast flashing)
• Steady blue light: camera operating normally
- Flashing blue light: waiting for manual configuration of WiFi, or connecting (fast flashing)
- Speaker
- Reset button
- Electrical cable DC12V/1A
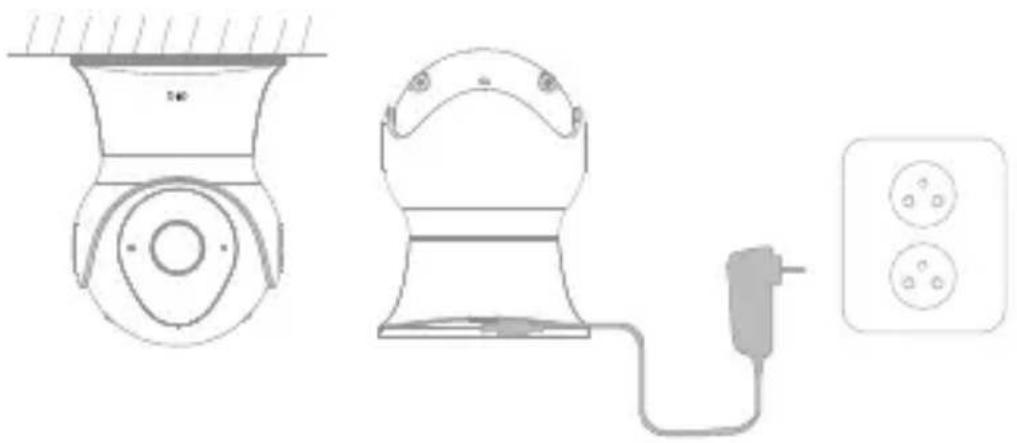
1. Connecting the camera
1 Connect the camera to the mains, making sure to push the cable home. The red indicator light starts to flash. After a few seconds, you will hear a beep. This indicates that the camera can be connected to WiFi via your smartphone or tablet.
natural_image
Technical line drawing of a three-pin electrical outlet with a power cord and socket (no text or symbols)2 Download the free DiO One application and create your account. The DiO camera are also compatible with the app "my Chacon"

text_image
DiQ one GDITION Google Play Download on the App Store3 Follow the instructions in the application to connect the camera to WiFi. Make sure your WiFi network is available. Add the camera to the application by clicking to the "+" choose the device to add and the select the way to proceed (Scan QR code or smart configuration).
Note:
- This camera only supports 2.4GHz WI-FI network (doesn't work with 5GHz)
- Make sure that the smartphone is well connected to the right Wi-Fi network. When you have to register the SSID, make sure you put the same Wi-Fi network and the right password.
- A camera can only be added to one account. If the camera has been already added, it cannot be added on another account.
natural_image
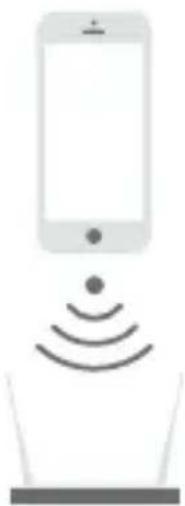
Simple line drawing of a smartphone with wireless signal waves above a laptop (no text or symbols)2. Installing the camera
1 Remove the protective tab from the lens.
2 If you place the camera on the ceiling:
- Secure the plastic mount to the ceiling using the screws provided.
- Screw the camera onto the mount.

natural_image
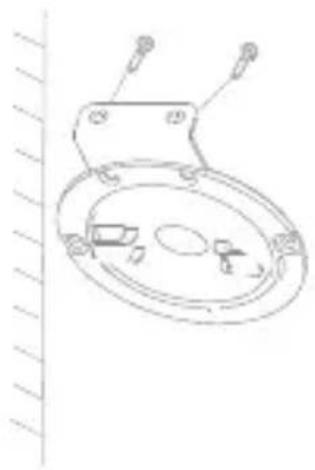
Technical line drawing of a mechanical component with two views: top shows a circular housing and base plate, bottom shows a cylindrical housing (no text or symbols)3 If you install the camera on a vertical wall:
- Secure the metal mount to the plastic mount using the two small screws provided.
- Secure the mount to the wall using the two screws provided (see illustration).
- Screw the camera onto the mount.
natural_image
Line drawing of a mechanical component with mounting bracket and internal components (no text or symbols)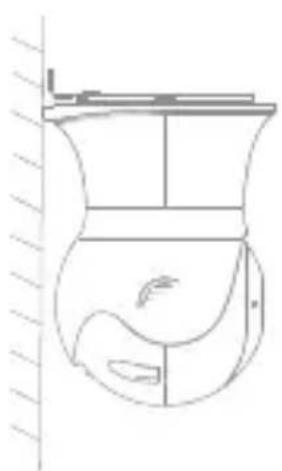
natural_image
Line drawing of a container with internal compartments and a fish inside (no text or symbols)
natural_image
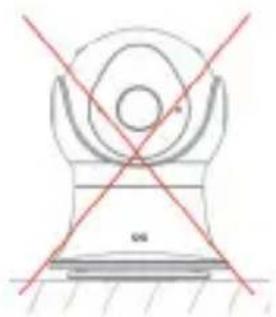
Line drawing of a mechanical component with circular and rectangular features (no text or symbols)Caution:
To ensure the waterproofness of your device, please place your camera with the lens facing down.
natural_image
Simple line drawing of a mechanical device with crosshair lines (no text or symbols)3. Use
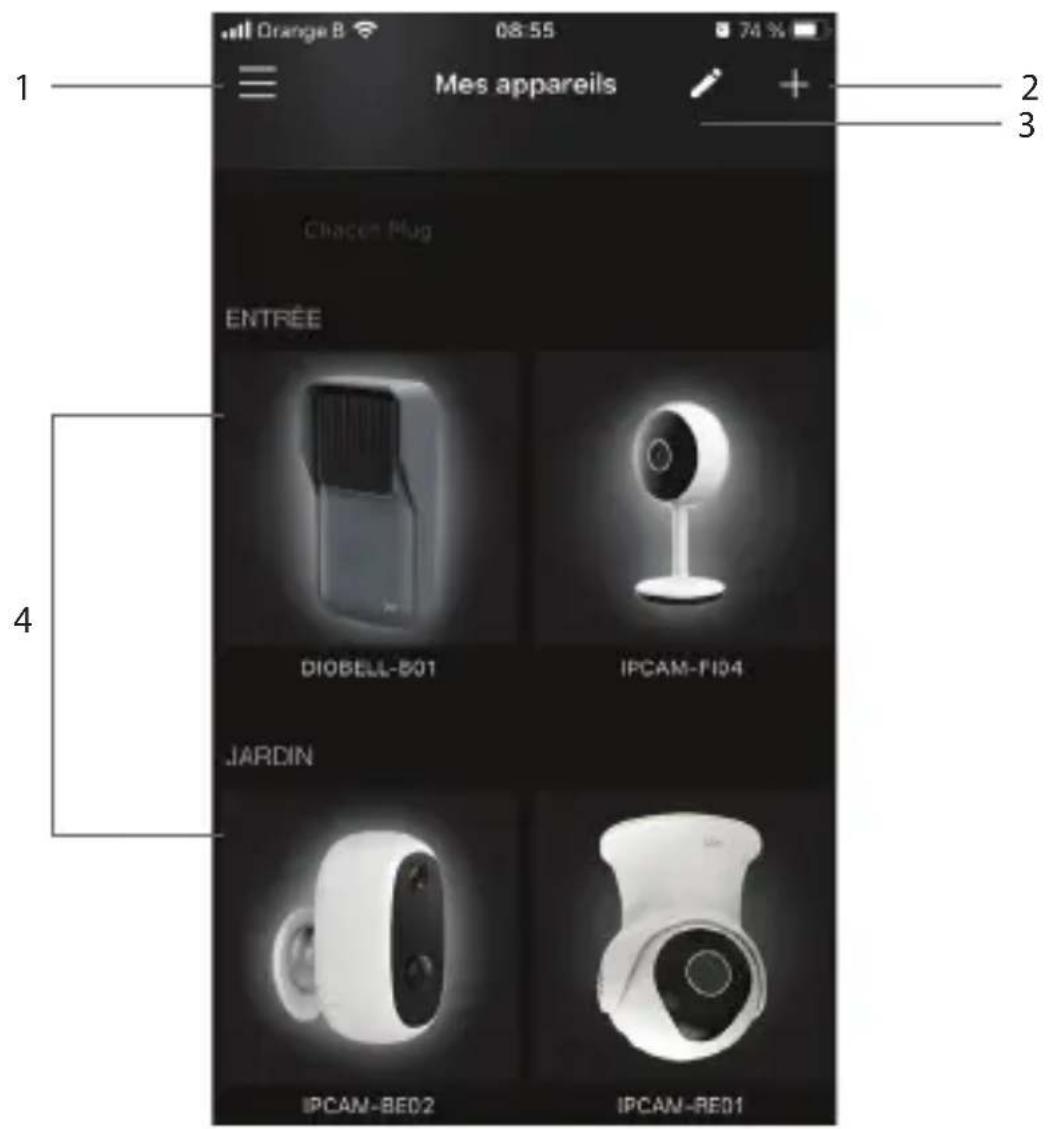
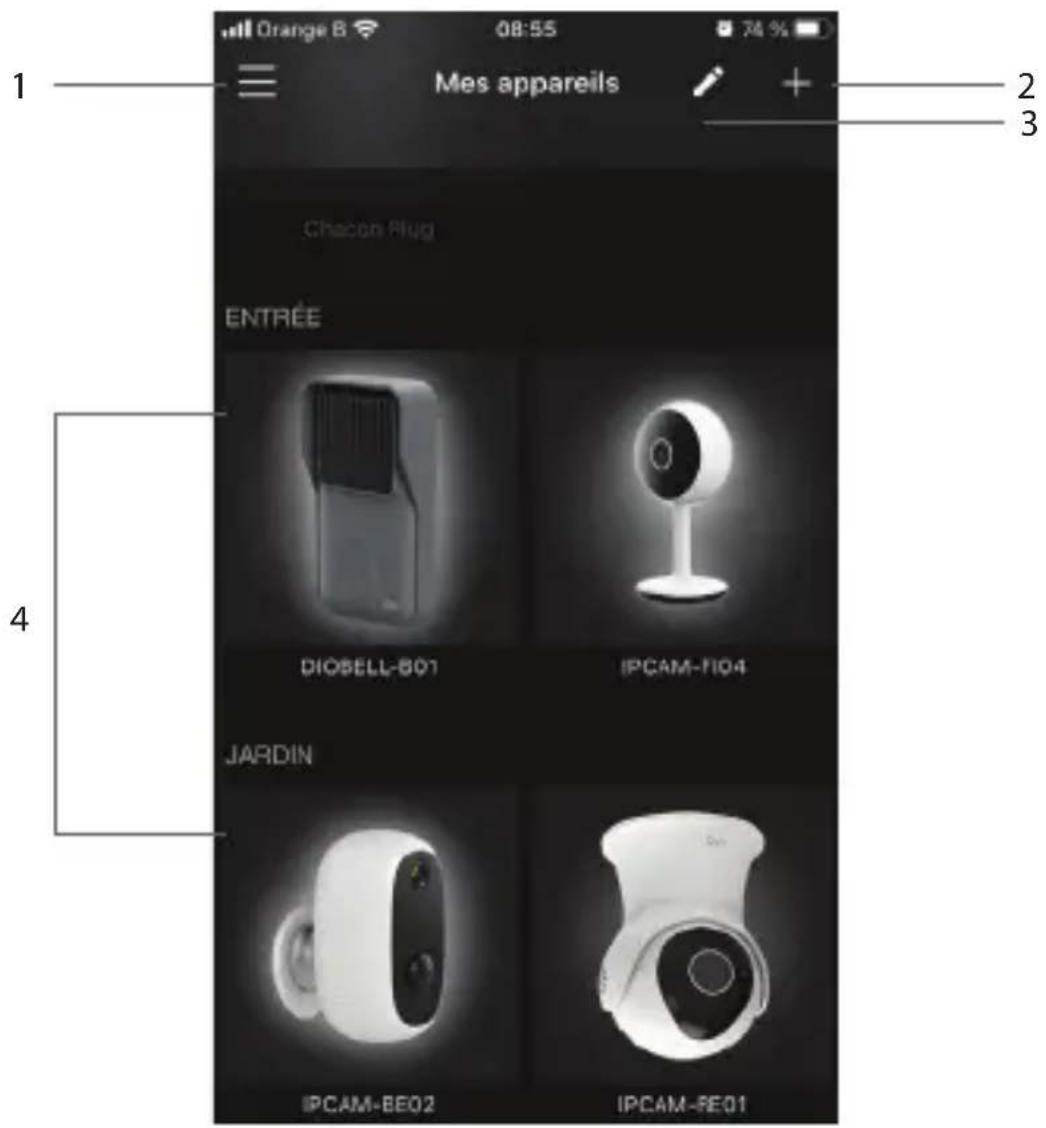
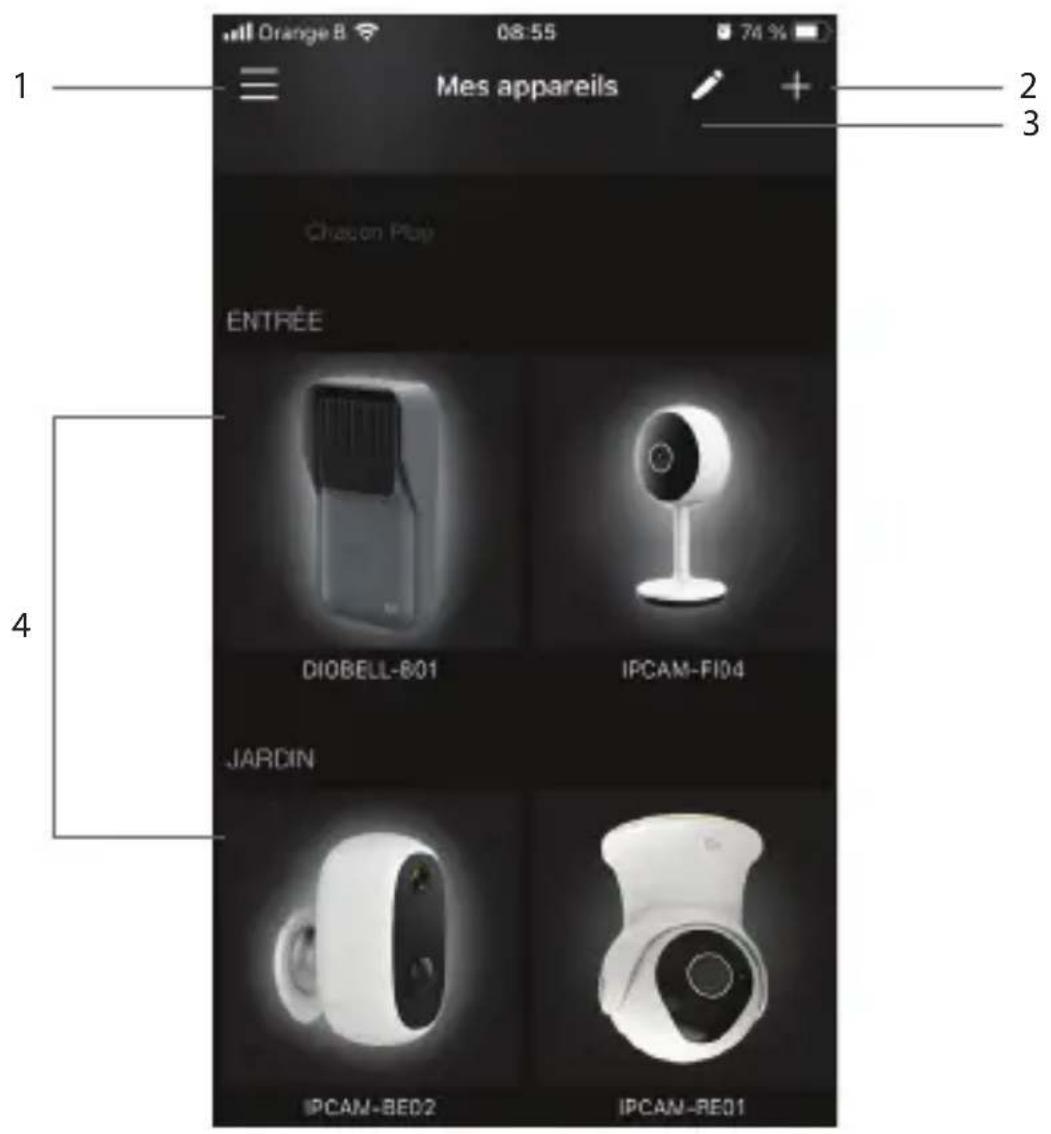
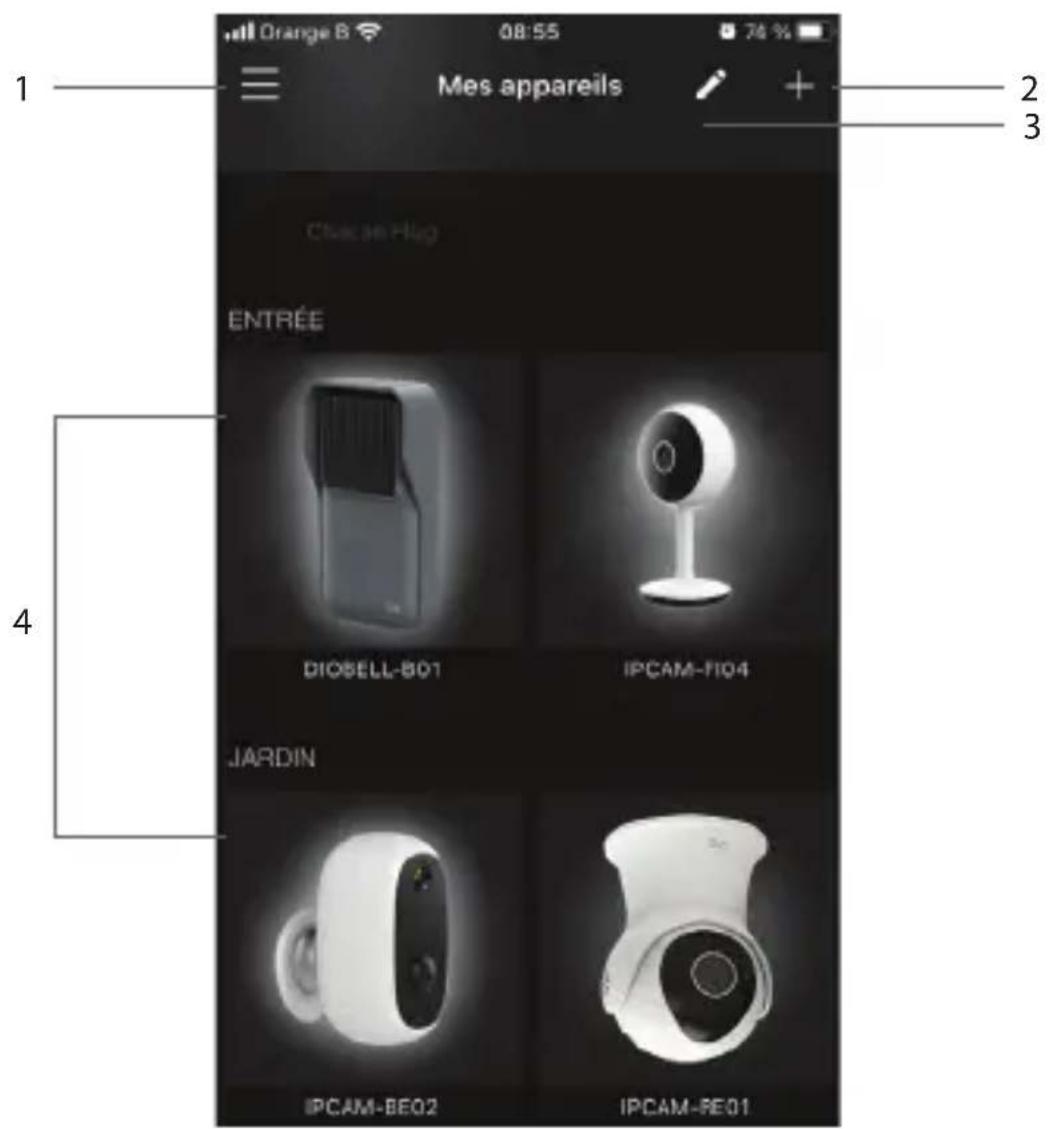
text_image
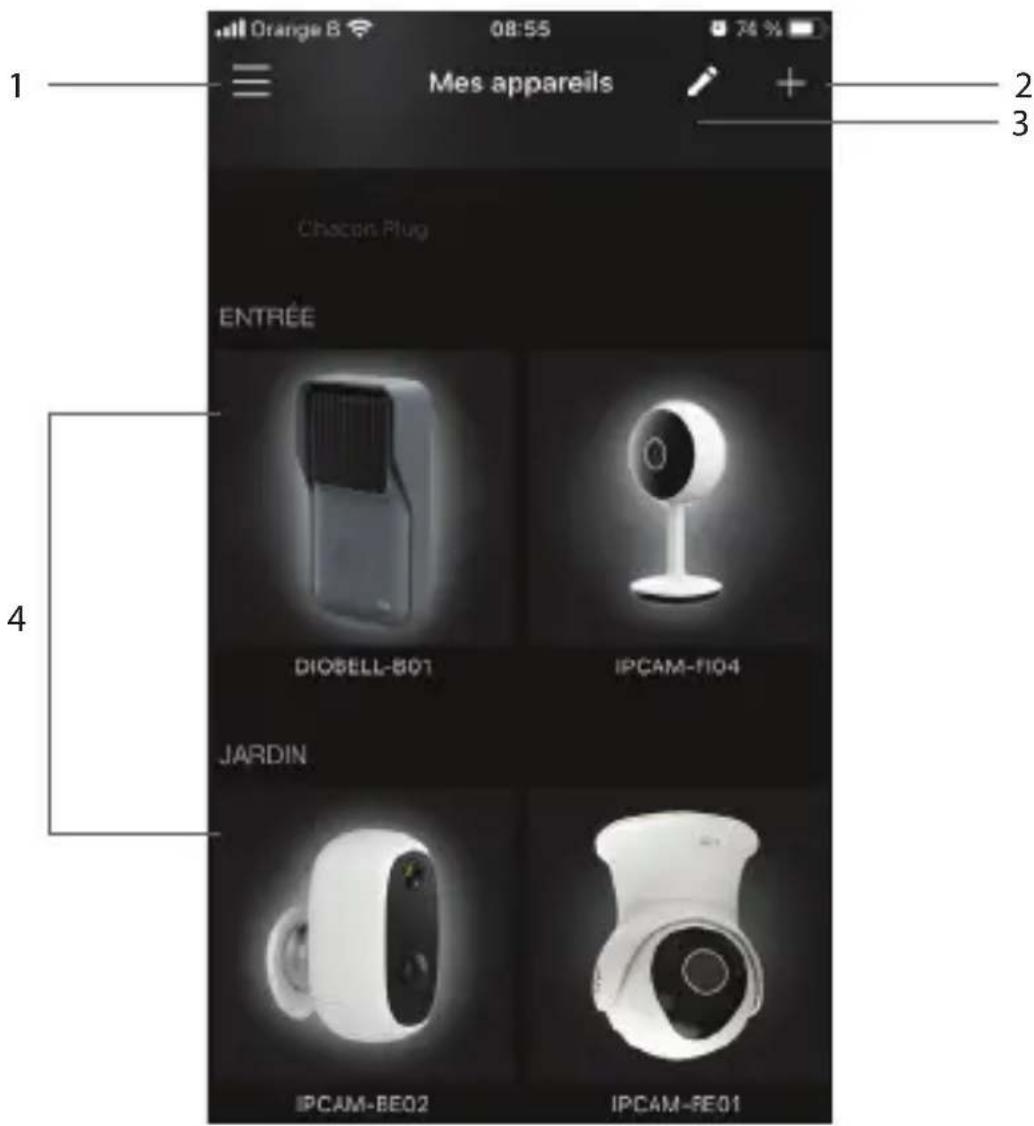
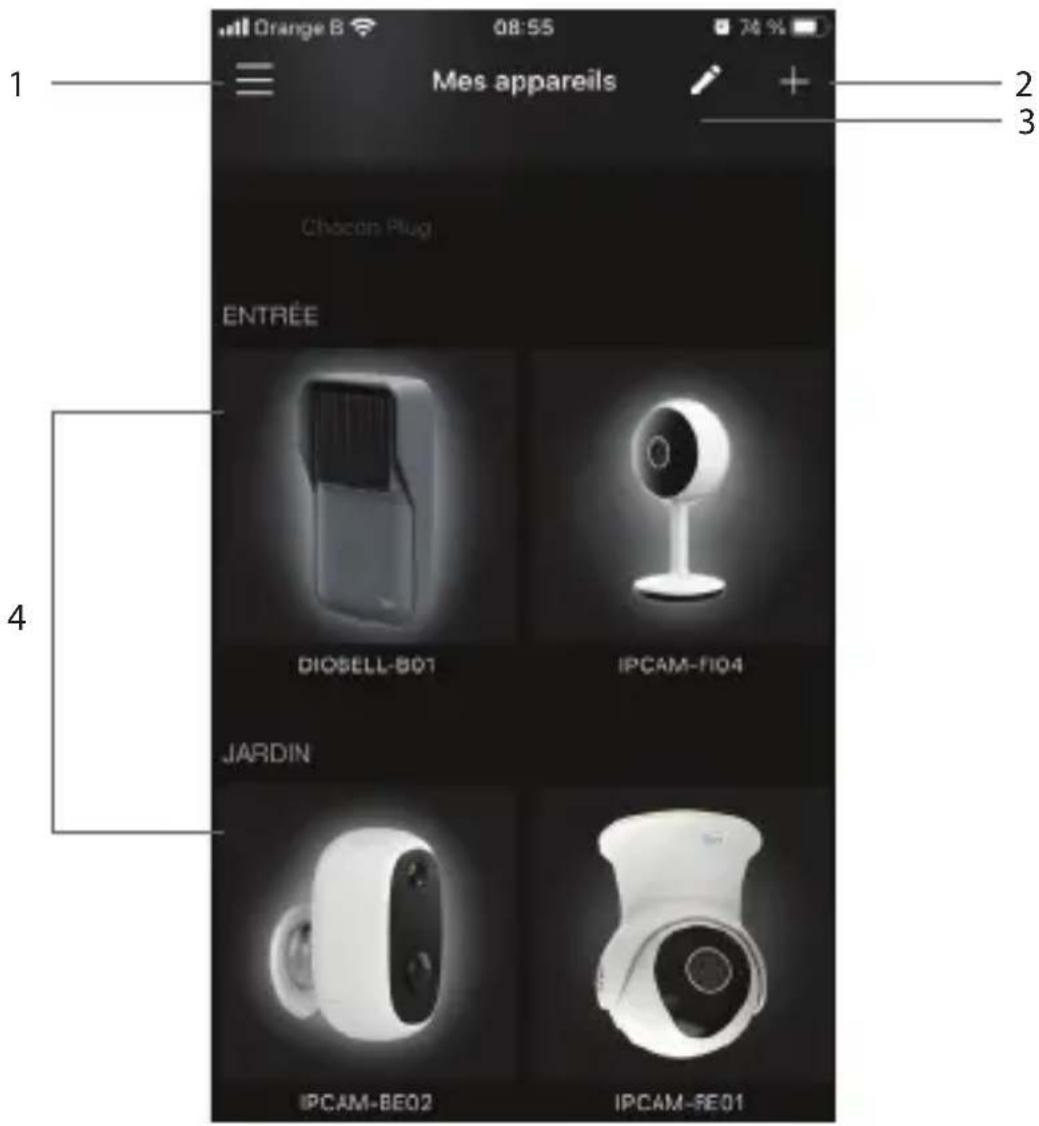
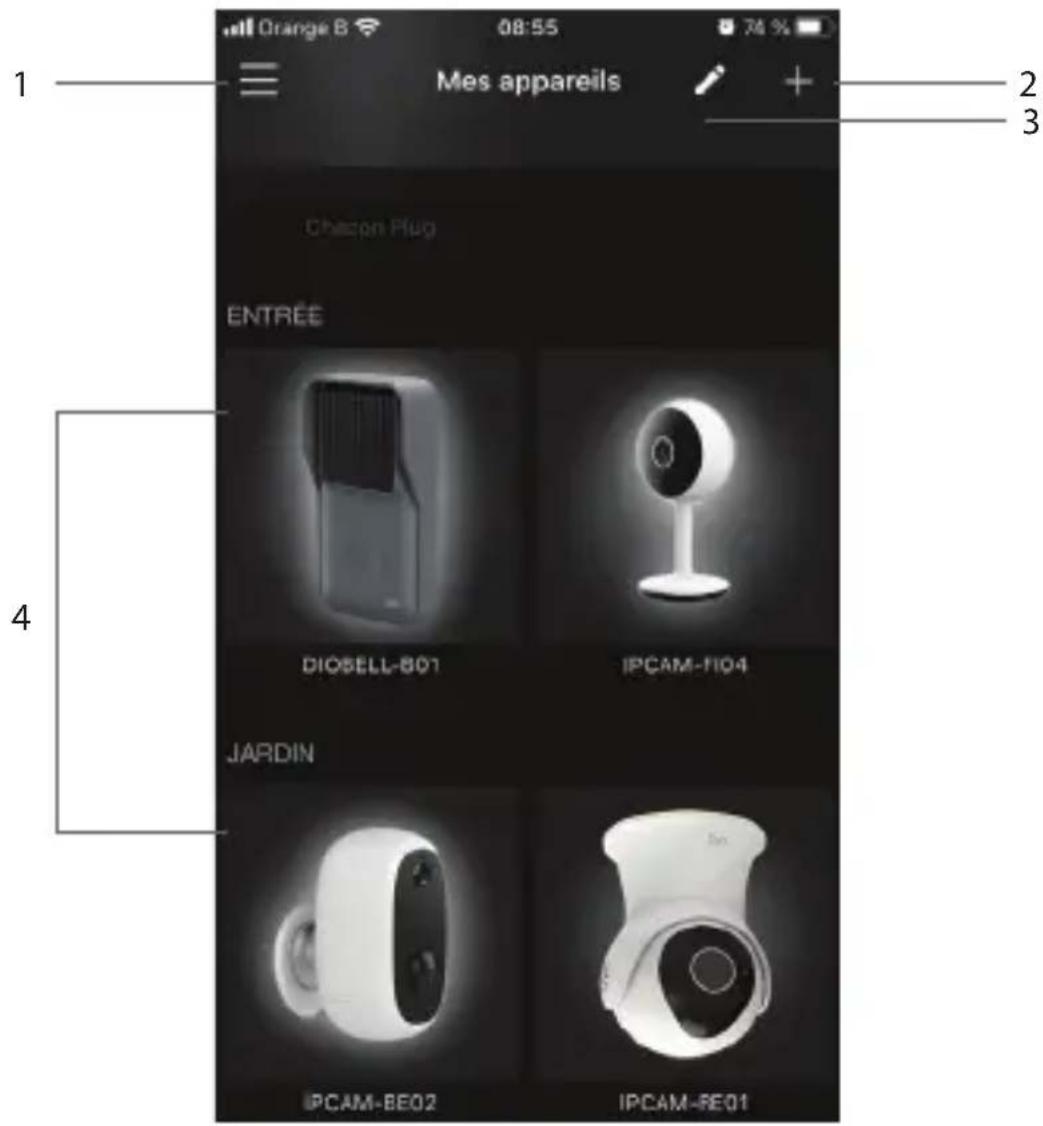
Orange B 08:55 74 % Mes appareils Chicon Plug ENTREE DIOSELL-801 IPCAM-F104 JARDIN IPCAM-BE02 IPCAM-BE01- Account Setup Menu
- To add a new appliance
- Access to the installed devices information
- Access to the camera user interface
Camera interface
text_image
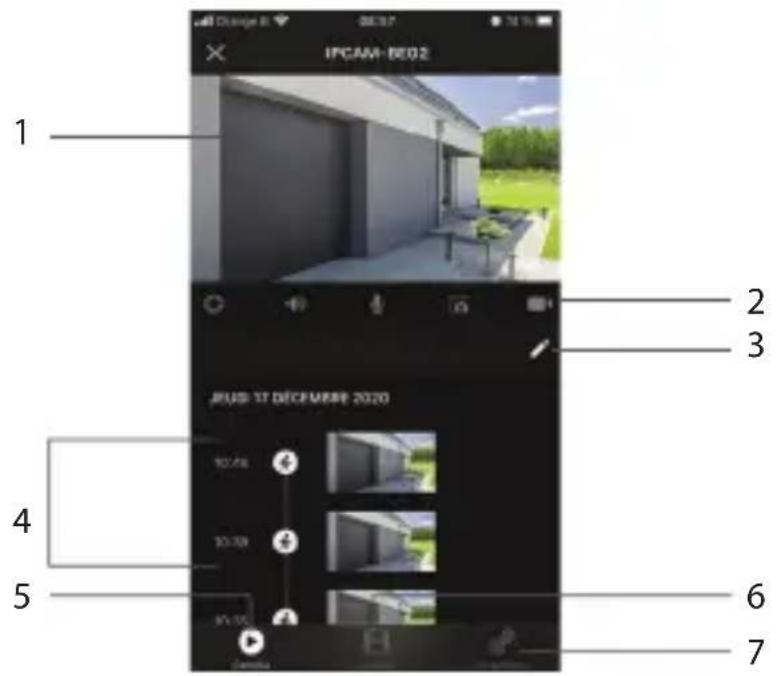
IPCAM-DE02 1 2 3 JULIS 17 DÉCEMIRE 2020 4 5 6 7- Live viewing
Press the image to
- Switch to full screen
- Show SD or HD image
Camera rotation: slide your finger up, down, left or right on the live broadcast.
-
Quick functions :
-
Activating/deactivating motion detection
- Listen to
- Talk
- Take a picture of the live video (recording on your smartphone)
-
Record the video in progress (recording on your smartphone)
-
Erase your motion or sound detections
- Recorded motion or sound detections
- Camera interface
- Viewing recordings
Thanks to the built-in memory card, you can record continuously for up to 72 hours even if you lose your connection to the Wi-Fi network.
It is possible to record only when motion or sound is detected, for 1, 3 or 5 minutes, to do so go to the configuration menu.
- Camera configuration menu
Camera settings menu
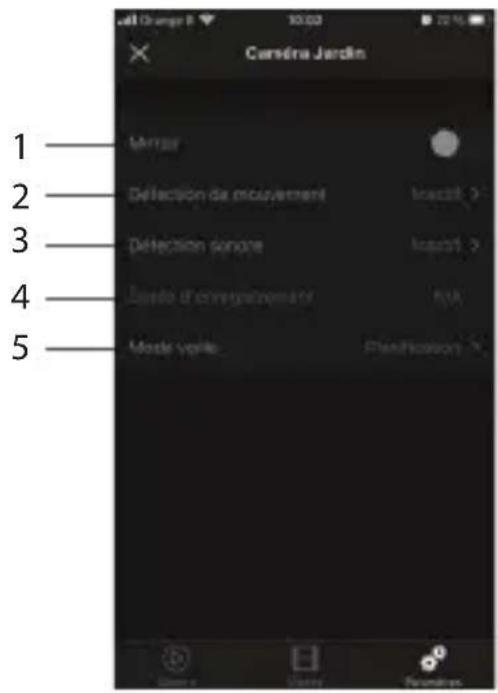
- Rotate the image of the video 180^ , if the camera is installed upside down.
- Activate/deactivate/adjust the sensitivity (low, medium or high) of the motion detection.
- Enable/ disable/ adjust the sensitivity of sound detection
- Recording options
In order to record the video only when motion or sound is detected, for 1, 3 or 5 minutes. - Activate/program/deactivate the standby mode
Activate the standby mode to prevent the camera from filming.
Device information
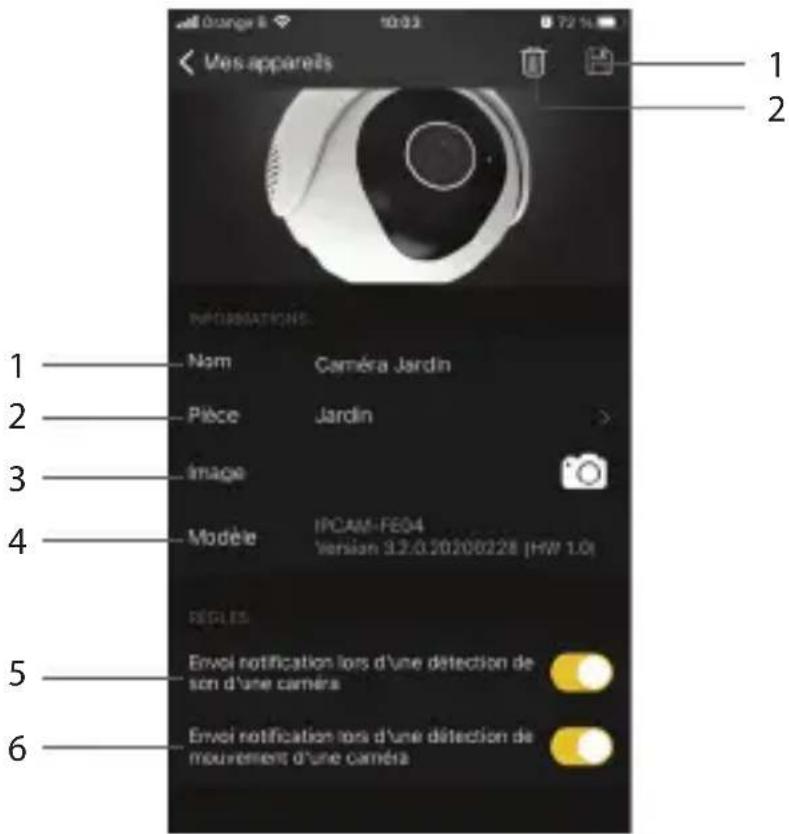
On the DiO One App home page, long press the object you wish to edit, or press the small pencil in the upper right corner of the screen and then the pencil of the device you wish to edit.
-
- Device name
- Location of the appliance
- Image of the device - possible to use your own image
- Camera software version.
If an update is available, a small red dot will appear next to the version.
5/6. Enable/disable push notifications in case of detection
To receive push notifications, you must enable "DiO One" notifications in your smartphone settings. - Save changes you have made
- Uninstall the camera from the account
4. Resetting
To restore the camera's factory settings, press the camera's reset button and hold for five seconds
Warning: If you wish to perform a complete reset (for a new owner), please delete the camera from your account in the application first, and then perform a reset.
5. Technical characteristics
• Video
- HD 1080p (1920X1080) / 25 fps
- Rotation: vertical -10° to 65° / horizontal 0 to 355°
- CMOS 1/2,9" sensor
- Adjustable motion detection (low, medium, high, or off)
- Night vision up to 10 m with infrared filter
- Digital zoom x4
• Audio: Built-in speaker and microphone
- Compatible with WiFi 802.11b /g /n - WPA /WPA2- Personal
• Frequency: WiFi 2.4 GHz
• Max. power: 11.5 mW EIRP
- Power adapter :
• Model : DCT12W120100EU-A0 - Input voltage: 100-240V\~
- Input frequency : 50/60Hz
• Output voltage : 12.0Vdc
• Output current : 1.0A - Output power: 12.0W
• Average active efficiency : 83.69%
• Efficiency at low load (10%): 78.25%
• No-load consumption : 0.068W - Outdoor use: IP54
- Operating temperature: -20^ to 50^
- Dimensions / weight: ∅75x105 mm / 235 g
6. Complete your installation
Complete your installation with DiO solutions to control your heating, your lighting, your shutters, your garden or to visualize what is happening at home with video camera.
Easy, qualitative, scalable and economical, discover all DiO connected home solutions on www.chacon.com
Courant Continu (CC)
Recyclage
In accordance with European WEEE directives (2002/96/EC) and in relation to accumulators (2006/66/EC), any electrical or electronic device or accumulator must be collected separately by a local system specialising in the collection of such waste. Do not dispose of these products with ordinary waste. Check the regulations in force. The logo shaped like a waste bin indicates that this product must not be disposed of with household waste in any EU country. To prevent any risk to the environment or human health due to uncontrolled scrapping, recycle the product in a responsible manner. This will promote the sustainable use of material resources. To return your used device, use the return and collection systems, or contact the original dealer. The dealer will recycle it in accordance with regulatory provisions.

Declaration of conformity
The undersigned, Chacon, declares that the WiFi equipment references: DiOCAM-FI01, DiOCAM-RI01 and DiOCAM-RE01 are in conformance with Directive 2014/53/EU. The complete text of the EU declaration of conformity is available at the following Internet address: www.chacon.be-support-téléchargements
There might be specific requirements concerning the installation and use of a surveillance camera in your place of residence (country, municipality, city). You are responsible for finding out about local requirements and applying them accordingly.
Avertissement
- The AC adapter must be connected inside the house and in a dry room only.
- Do not install near heat sources.
- Keep the AC adapter accessible so that it can be easily disconnected if necessary.
- If you need to clean the product, use a soft cloth.
Tip:
- Any material between the product and your Wi-Fi router reduces the operating distance (mainly: reinforced concrete wall, concrete wall, metal surfaces). Take this into account when determining the positioning of your camera.
- Prefer an installation sheltered from the camera, and at a height greater than 2.5m to limit accessibility.