DIOCAMRI01 - Surveillance Camera DIO - Free user manual and instructions
Find the device manual for free DIOCAMRI01 DIO in PDF.
| Product type | Indoor surveillance camera |
| Brand | DIO |
| Model | DIOCAMRI01 |
| Dimensions (L x W x H) | 58 x 64 x 68 mm |
| Weight | 180 g |
| Power supply | USB 5V/1A adapter (included) |
| Video resolution | HD 1080p (1920 x 1080) at 25 fps |
| Sensor | CMOS 1/3" |
| Night vision | Up to 10 m with infrared filter |
| Rotation | Vertical: -75° to +75°, horizontal: 0° to 350° (motorized) |
| Digital zoom | x4 |
| Audio | Built-in microphone and speaker (two-way audio) |
| Connectivity | Wi-Fi 802.11b/g/n, 2.4 GHz band only |
| Local storage | micro-SD card up to 128 GB (not included) |
| Detection | Motion and sound, adjustable sensitivity (low, medium, high) |
| Sleep mode (privacy) | Programmable via app or geofencing |
| App | DiOCam Plus (iOS and Android) |
| Operating temperature | -20°C to +50°C |
| Box contents | Camera, power adapter, USB cable 2 m, wall mount, double-sided sticker, 3 screws, protective film, quick start guide |
| Warranty | Online registration at www.getDiO.com/warranty |
| Maintenance and cleaning | Clean with a soft, dry cloth. Do not use chemicals. |
| Safety | Install indoors, away from heat sources and moisture. Unplug the adapter if needed. |
| Spare parts and repairability | No spare parts provided. For any repairs, contact customer service. |
Frequently Asked Questions - DIOCAMRI01 DIO
User questions about DIOCAMRI01 DIO
0 question about this device. Answer the ones you know or ask your own.
Ask a new question about this device
Download the instructions for your Surveillance Camera in PDF format for free! Find your manual DIOCAMRI01 - DIO and take your electronic device back in hand. On this page are published all the documents necessary for the use of your device. DIOCAMRI01 by DIO.
USER MANUAL DIOCAMRI01 DIO
www.getDiO.com/warranty
www.getDiO.com/warranty
www.getDiO.com/warranty
Register the guarantee
To register your guarantee, fill out the online form on
www.getDiO.com/warranty
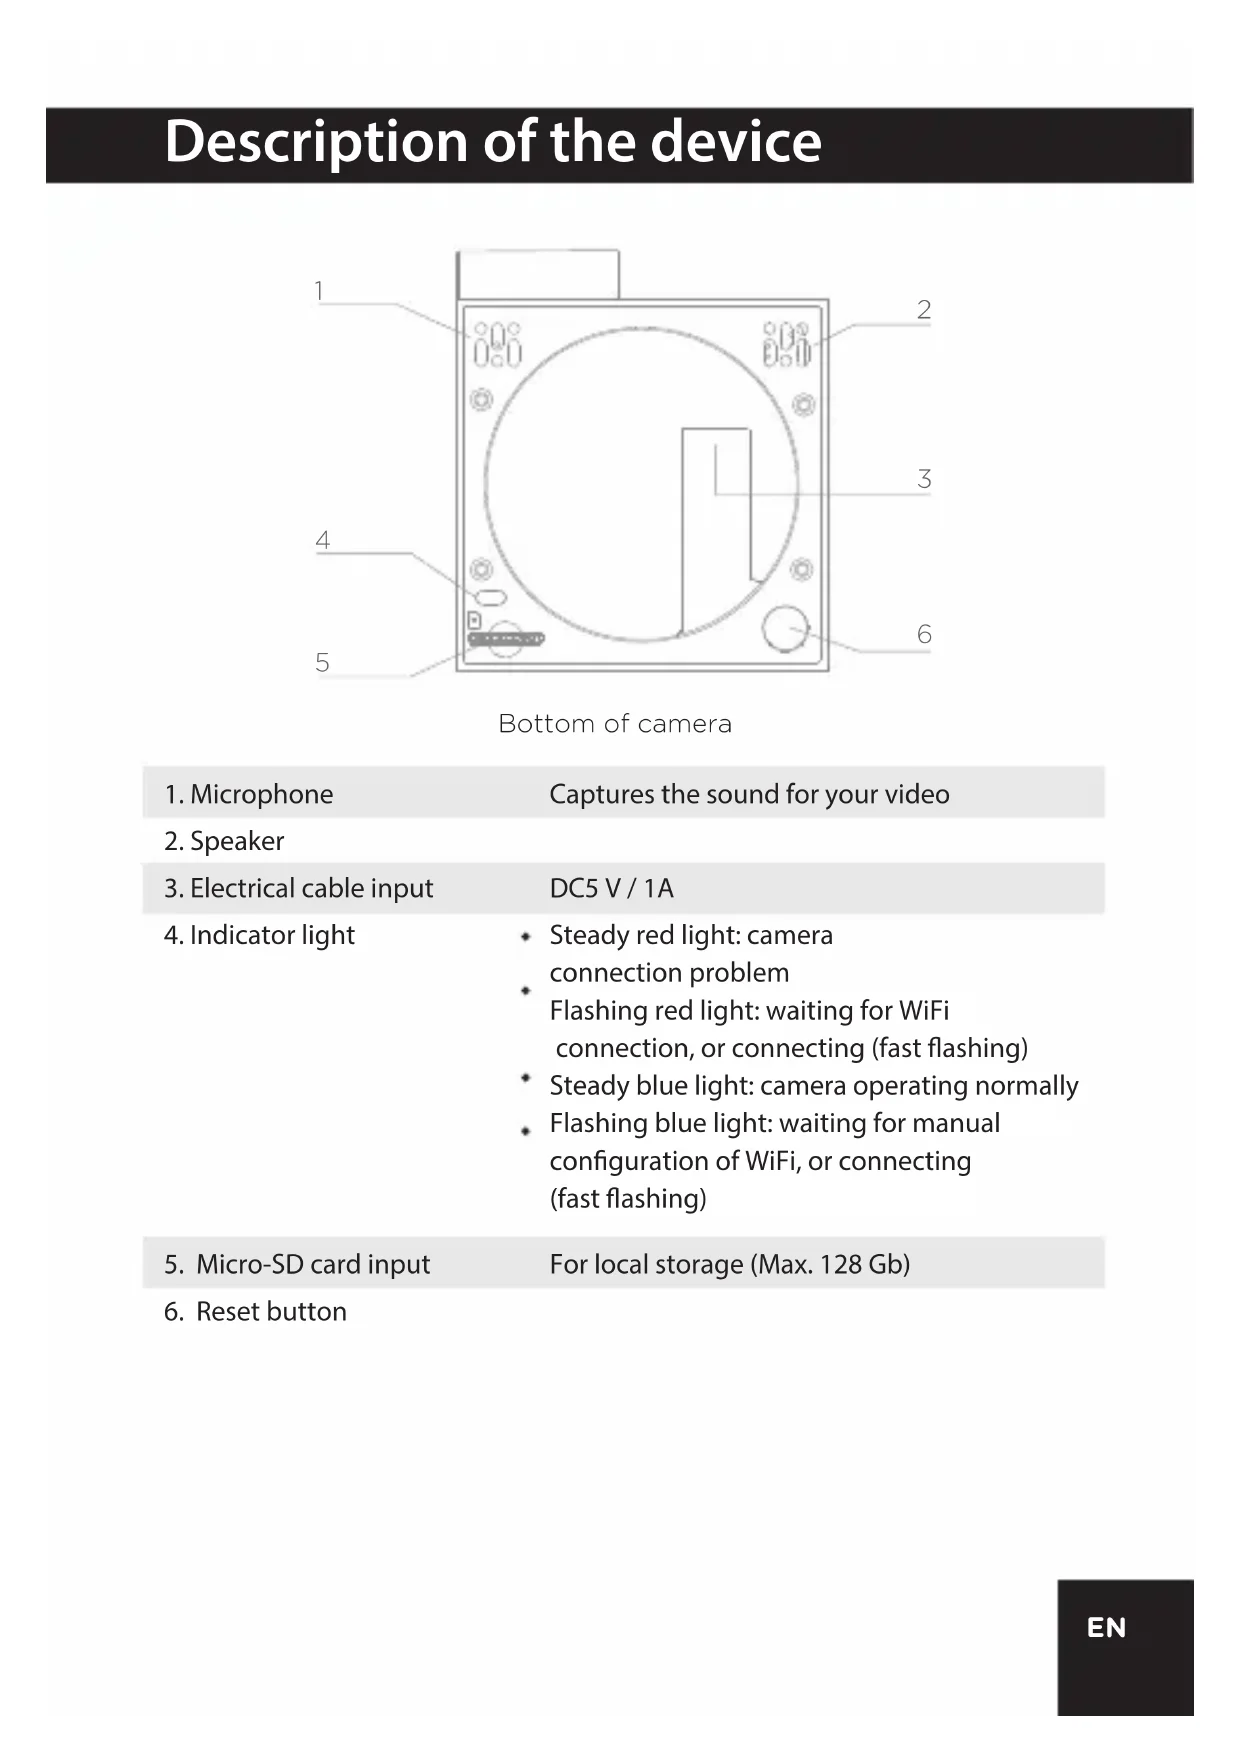
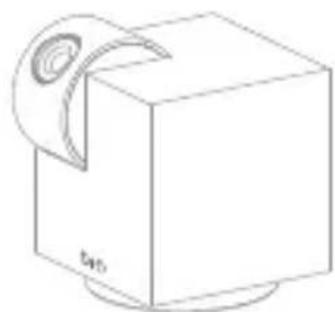
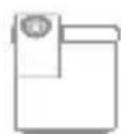
Description of the device
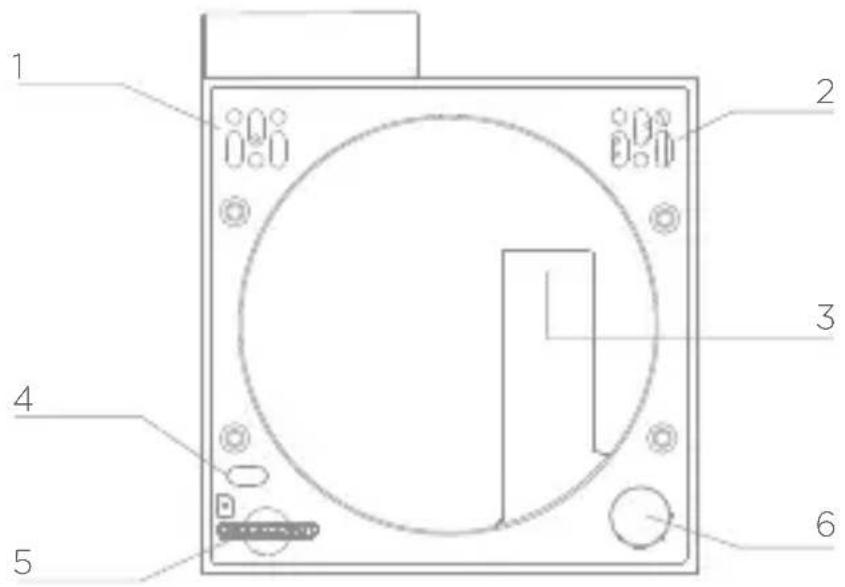
Bottom of camera
- Microphone
Captures the sound for your video
-
Speaker
-
Electrical cable input
DC5V/1A
- Indicator light
Steady red light: camera connection problem
- Flashing red light: waiting for WiFi connection, or connecting (fast flashing)
* Steady blue light: camera operating normally
- Flashing blue light: waiting for manual configuration of WiFi, or connecting (fast flashing)
- Micro-SD card input
For local storage (Max. 128 Gb)
- Reset button
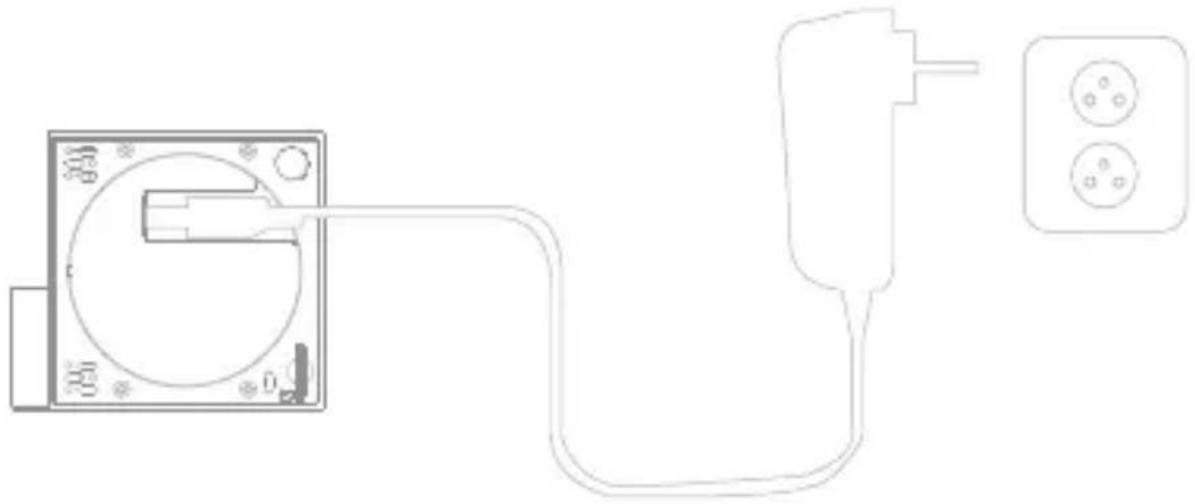
1. Connecting the camera
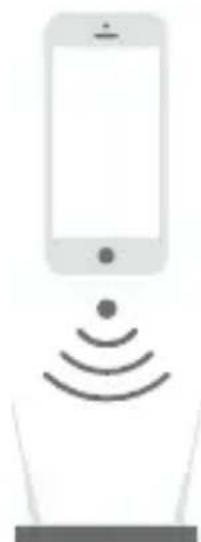
1 Connect the camera to the mains, making sure to push the cable home. The red indicator light starts to flash. After a few seconds, you will hear a beep. This indicates that the camera can be connected to WiFi via your smartphone or tablet.
2 Download the free DiOCam Plus application and create your account.
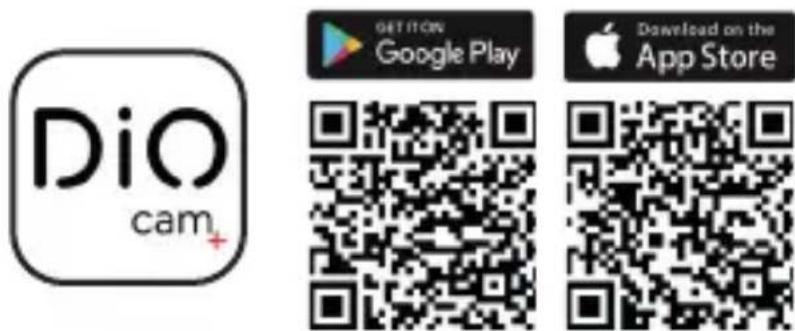
3 Follow the instructions in the application to connect the camera to WiFi. Make sure your WiFi network is available. Add the camera to the application by clicking to the "+" , choose the device to add and the select the way to proceed (Scan QR code or smart configuration).
Note:
- This camera only supports 2.4GHz Wi-Fi network (doesn't work with 5GHz)
- Make sure that the smartphone is well connected to the right Wi-Fi network. When you have to register theSSID, make sure you put the same Wi-Fi network and the right password.
- A camera can only be added to one account. If the camera has been already added, it cannot be added on another account.
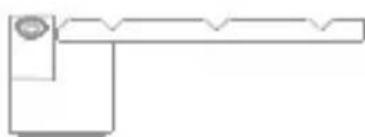
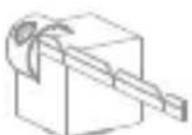
2. Installing the camera
1 Remove the protective tab from the lens.
2 If you position the camera horizontally, we recommend you use the double-sided sticker provided.
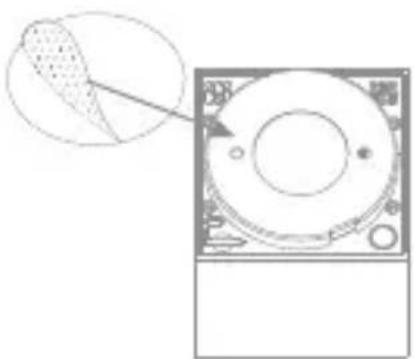
3 If you install the camera on a vertical surface or the ceiling, secure it using the mount provided.

Optional: Apply the protective film around the upper corners of the camera to prevent damage.
1
2
3
4
3.Use
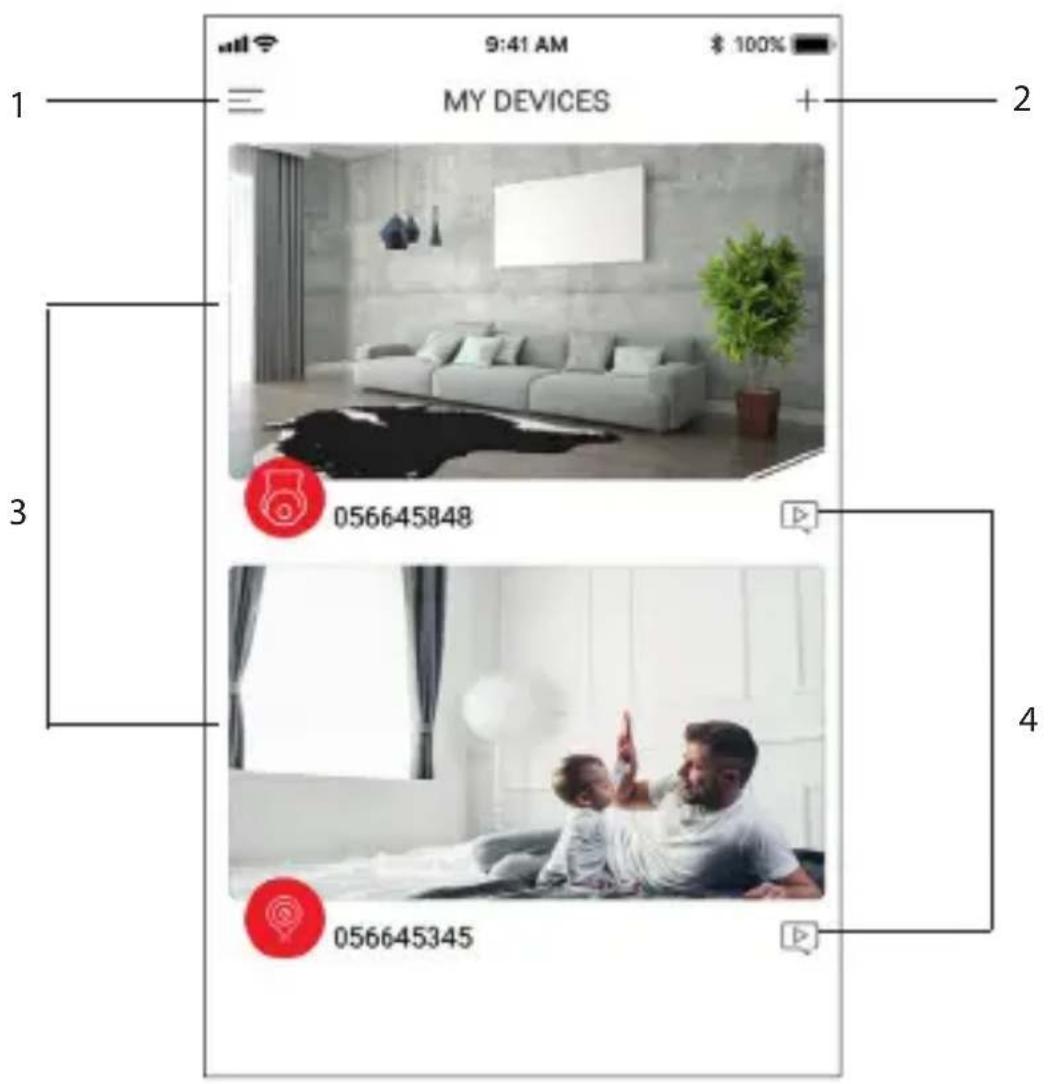
- Account settings menu
- To add a new device
- Camera interface
- Access the images saved when motion or sound is detected (only if enabled)
Camera interface
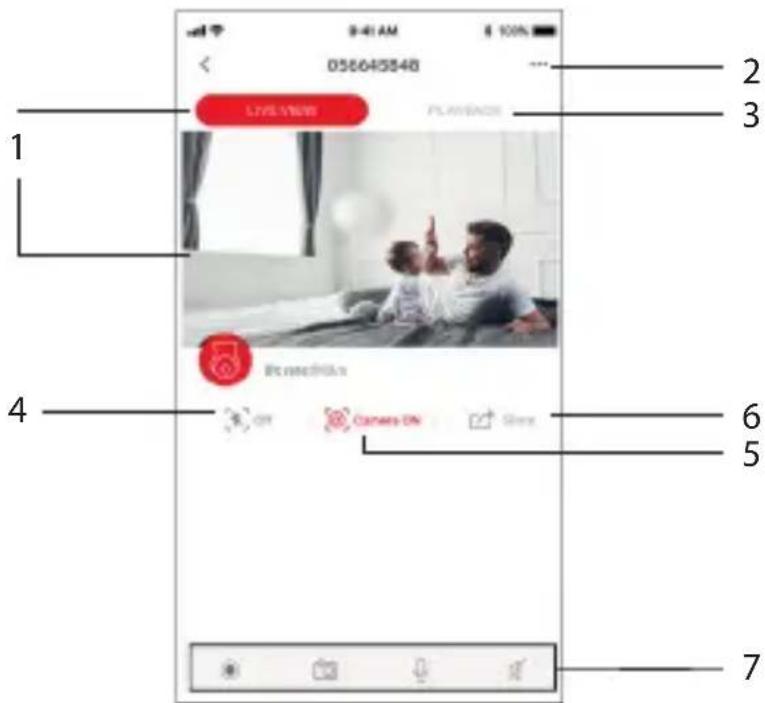
- Live view
Rotate camera: slide finger up,
down, left, or right on the live view.
- Camera settings menu
- Playback
To record your videos, you need to instal a micro-SD card in the camera.
You have then the option to record continuously or only in case of motion or sound detection. To do this, go into the settings menu.
- Motion detection on/off
- Sleep mode on/program/off
Enable Sleep mode to prevent the camera from recording. Private mode can be enabled manually whenever you wish, either by setting a time or via Locate mode, which puts the camera in Sleep mode automatically when you are at home.
- Share camera
To share the camera with someone else, the other person must first create their own account in the DiOCam Plus app. You must then add them as a friend.
For security reasons, guest accounts can only view (live and in playback) and receive detection alerts.
-
Manual functions:
-
Save current video (saved on your smartphone)
- Take a photo from the live video (saved on your smartphone)
- Speak
- Listen
Camera settings menu
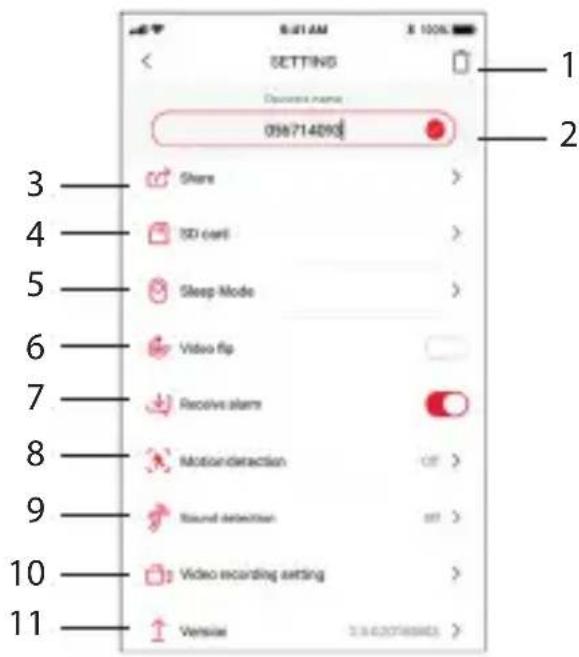
- Uninstall camera from account
- Name of device
- Share
To share the camera with someone else, the other person must first create their own account in the DiOCam Plus app. You must then add them as a friend.
- Format installed micro SD card
- Sleep mode on/program/off Enable Sleep mode to prevent the camera from recording. Private mode can be enabled manually, either by setting a time or via Locate mode, which puts the camera in Sleep mode automatically when you are at home.
- Flip the video image 180^ if the camera is installed upside down.
- Detection push notifications on/off To receive push notifications, you must enable "DiOCam Plus" notifications in your smartphone settings.
- Motion detection on/off/sensitivity adjustment (low, medium, or high)
- Sound detection on/off/sensitivity adjustment
- Recording options To record video only in case of motion or sound detection, for 1, 3, or 5 minutes.
- Camera software version If an update is available, a small red dot appears beside the version.
Account settings menu
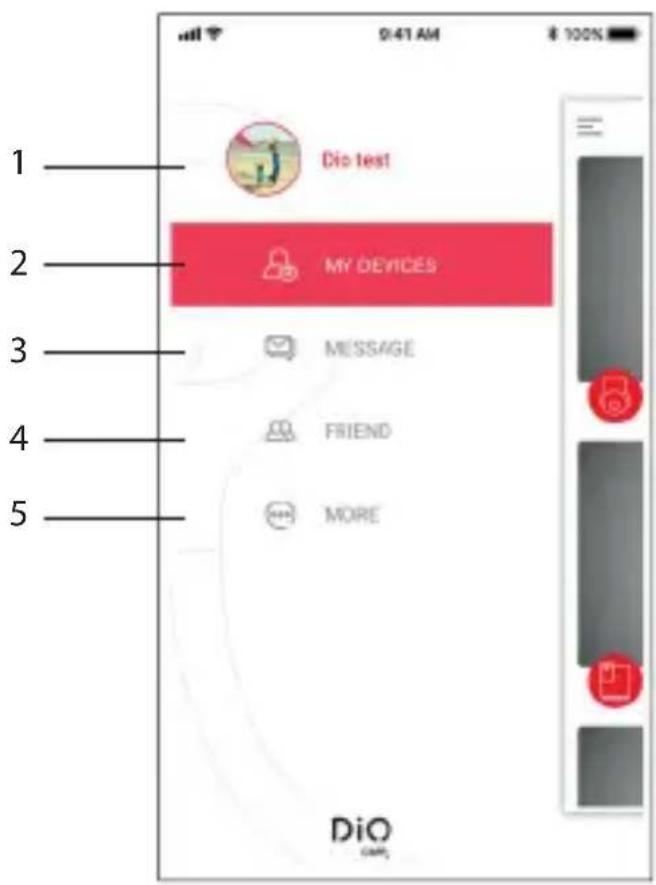
- Manage your account. Lets you change your profile picture, nickname, or password, and log out.
- My devices: to go back to the preview screen.
- Messages: view your alerts (motion and sound detection) and friend requests.
- Friends: invite a new friend (they must have created a DiOCam Plus account), manage your device sharing, and/or delete a friend.
- Options: lets you mute notifications, browse your saved photos and videos manually, and send us your comments.
4. Resetting
To restore the camera's factory settings, press the camera's reset button and hold for five seconds.
Warning: If you wish to perform a complete reset (for a new owner), please delete the camera from your account in the application first, and then perform a reset.
5. Technical characteristics
-
Video
-
HD 1080p (1920x1080) / 25 fps
- Rotation: vertical -75° to 75° / horizontal 0 to 350°
- CMOS 1/3" sensor
- Adjustable motion detection (low, medium, high, or off)
- Night vision up to 10m with infrared filter
- Digital zoom x4
Audio: Built-in speaker and microphone
Compatible with WiFi 802.11b /g /n - WPA/WPA2- Personal
Frequency:WiFi2.4GHz
Max. power = 44mW EIRP
USB adaptor: 5V/1A
- Operating temperature: -20^ to 50^
- Dimensions / weight: 58 × 64 × 68 mm / 180 g
6. Complete your installation
Complete your installation with DiO solutions to control your heating, your lighting, your shutters, your garden or to visualize what is happening at home with video camera.
Easy, qualitative, scalable and economical, discover all DiO connected home solutions on www.getDiO.com
Courant Continu (CC)
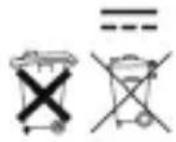
Recyclage
In accordance with European WEEE directives (2002/96/EC) and in relation to accumulators (2006/66/EC), any electrical or electronic device or accumulator must be collected separately by a local system specialising in the collection of such waste. Do not dispose of these products with ordinary waste. Check the regulations in force. The logo shaped like a waste bin indicates that this product must not be disposed of with household waste in any EU country. To prevent any risk to
the environment or human health due to uncontrolled scrapping, recycle the product in a responsible manner. This will promote the sustainable use of material resources. To return your used device, use the return and collection systems, or contact the original dealer. The dealer will recycle it in accordance with regulatory provisions.
Declaration of conformity
The undersigned, Chacon, declares that the WiFi equipment references: DiOCAM-FI01, DiOCAM-RI01 and DiOCAM-RE01 are in conformance with Directive 2014/53/EU. The complete text of the EU declaration of conformity is available at the following Internet address: www.chacon.be-support-telecharges
There might be specific requirements concerning the installation and use of a surveillance camera in your place of residence (country, municipality, city). You are responsible for finding out about local requirements and applying them accordingly.
Avertissement
- The AC adapter must be connected inside the house and in a dry room only.
- Do not install near heat sources.
- Keep the AC adapter accessible so that it can be easily disconnected if necessary.
- If you need to clean the product, use a soft cloth.
Tip:
-
Any material between the product and your Wi-Fi router reduces the operating distance (mainly: reinforced concrete wall, concrete wall, metal surfaces). Take this into account when determining the positioning of your camera.
-
Prefer an installation sheltered from the camera, and at a height greater than 2.5m to limit accessibility.