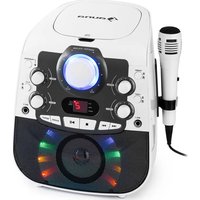
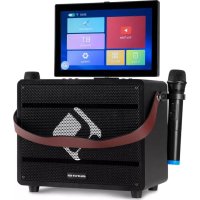
CenterStage 8 - Karaoke system Auna - Free user manual and instructions
Find the device manual for free CenterStage 8 Auna in PDF.
User questions about CenterStage 8 Auna
0 question about this device. Answer the ones you know or ask your own.
Ask a new question about this device
Download the instructions for your Karaoke system in PDF format for free! Find your manual CenterStage 8 - Auna and take your electronic device back in hand. On this page are published all the documents necessary for the use of your device. CenterStage 8 by Auna.
USER MANUAL CenterStage 8 Auna
Unit 6 Riverside Business Centre
Brighton Road
Shoreham-by-Sea
BN43 6RE
United Kingdom
Congratulations on purchasing this equipment. Please read this manual carefully and take care of the following hints to avoid damages. Any failure caused by ignoring the mentioned items and cautions mentioned in the instruction manual are not covered by our warranty and any liability. Scan the QR code to get access to the latest user manual and other information about the product.

CONTENTS
Safety Instructions 16
Overview and Control Panel 17
Operation and Functions 20
Hints on Disposal 24
TECHNICAL DATA
| Item number 10032834 | |
| Power supply 220-240 V ~ 50/60 Hz | |
| Max. microphone range | 10-15 m |
| VHF frequency | 179 MHz |
| Microphone transmitting power | 10 mv |
| BT frequency | 2.402-2.48 GHz |
| Radio-frequency power | 4 dBm |
| FM radio 87.5-108 MHz |
SAFETY INSTRUCTIONS
General information
- Lightning - If you are not going to use the device for a long time or if there is a storm, disconnect the plug from the electrical outlet and disconnect the device from the antenna connector. This will avoid damage to the product that may be caused by lightning or overvoltage.
- Overload - Do not overload power outlets, extension cords, or built-in power outlets, as this may result in a fire or electric shock.
- Foreign objects and liquid - Never push objects of any kind through openings in the device as they may touch dangerous voltage points or short out parts, which could result in a fire or electric shock. Never spill liquids of any kind on the device.
- Repairs and maintenance - Do not attempt to service this product yourself, as opening or removing covers will expose you to dangerous voltages or other hazards. Leave all maintenance to qualified service personnel.
- Damage requiring service - Disconnect the power plug from the outlet and consult a qualified specialist if any of the following conditions occur:
a) If the power cord or plug is damaged.
b) If liquid has been spilled or objects have fallen onto the product.
c) If the product has been exposed to rain or water.
d) If the product has been dropped or damaged.
e) If the product has a markedly reduced performance.
- Replacement parts - When replacement parts are required, make sure that the service professional who replaces the parts only uses replacement parts that have been approved by the manufacturer or that have the same characteristics as the original part. Unauthorized replacement may result in fire, electric shock or other hazards.
- Heat - Do not place the unit near heat sources such as radiators, heaters, stoves or other products (including amplifiers).
OVERVIEW AND CONTROL PANEL
Overview
1 Selection for USB/ TFNideo/Audio/ Bluetooth/FM radio
2 Press return to the menu or return to the previous layer in other interfaces
3 Movie play selection
4 Music song play
5 BT function
6. ACCP: Music Track function for Vocal accompaniment
7 MIC FIRST: Microphone priority
8 PREV: previous song/movie
9 PAUSE/PLAY: stop / play function
10 Next song/movie
11 LED Light switch (Power ON/OFF)
12 Numeric keys: 0 to 9 for select from the song /movie
13 DC 12V:12V Extra battery
14 Main volume adjust
15 DC 13V: Adapter input charging interface
16 Power switch (ON/OFF)
17 USB interface
18 TF card interface
19 Video/Audio input selection
20 Video/Audio output selection
21. MIC INPUT: Wired microphone interface
22. ECHO +/-: Echo Velum adjust
23. MIC.VOL: Microphone volume adjust
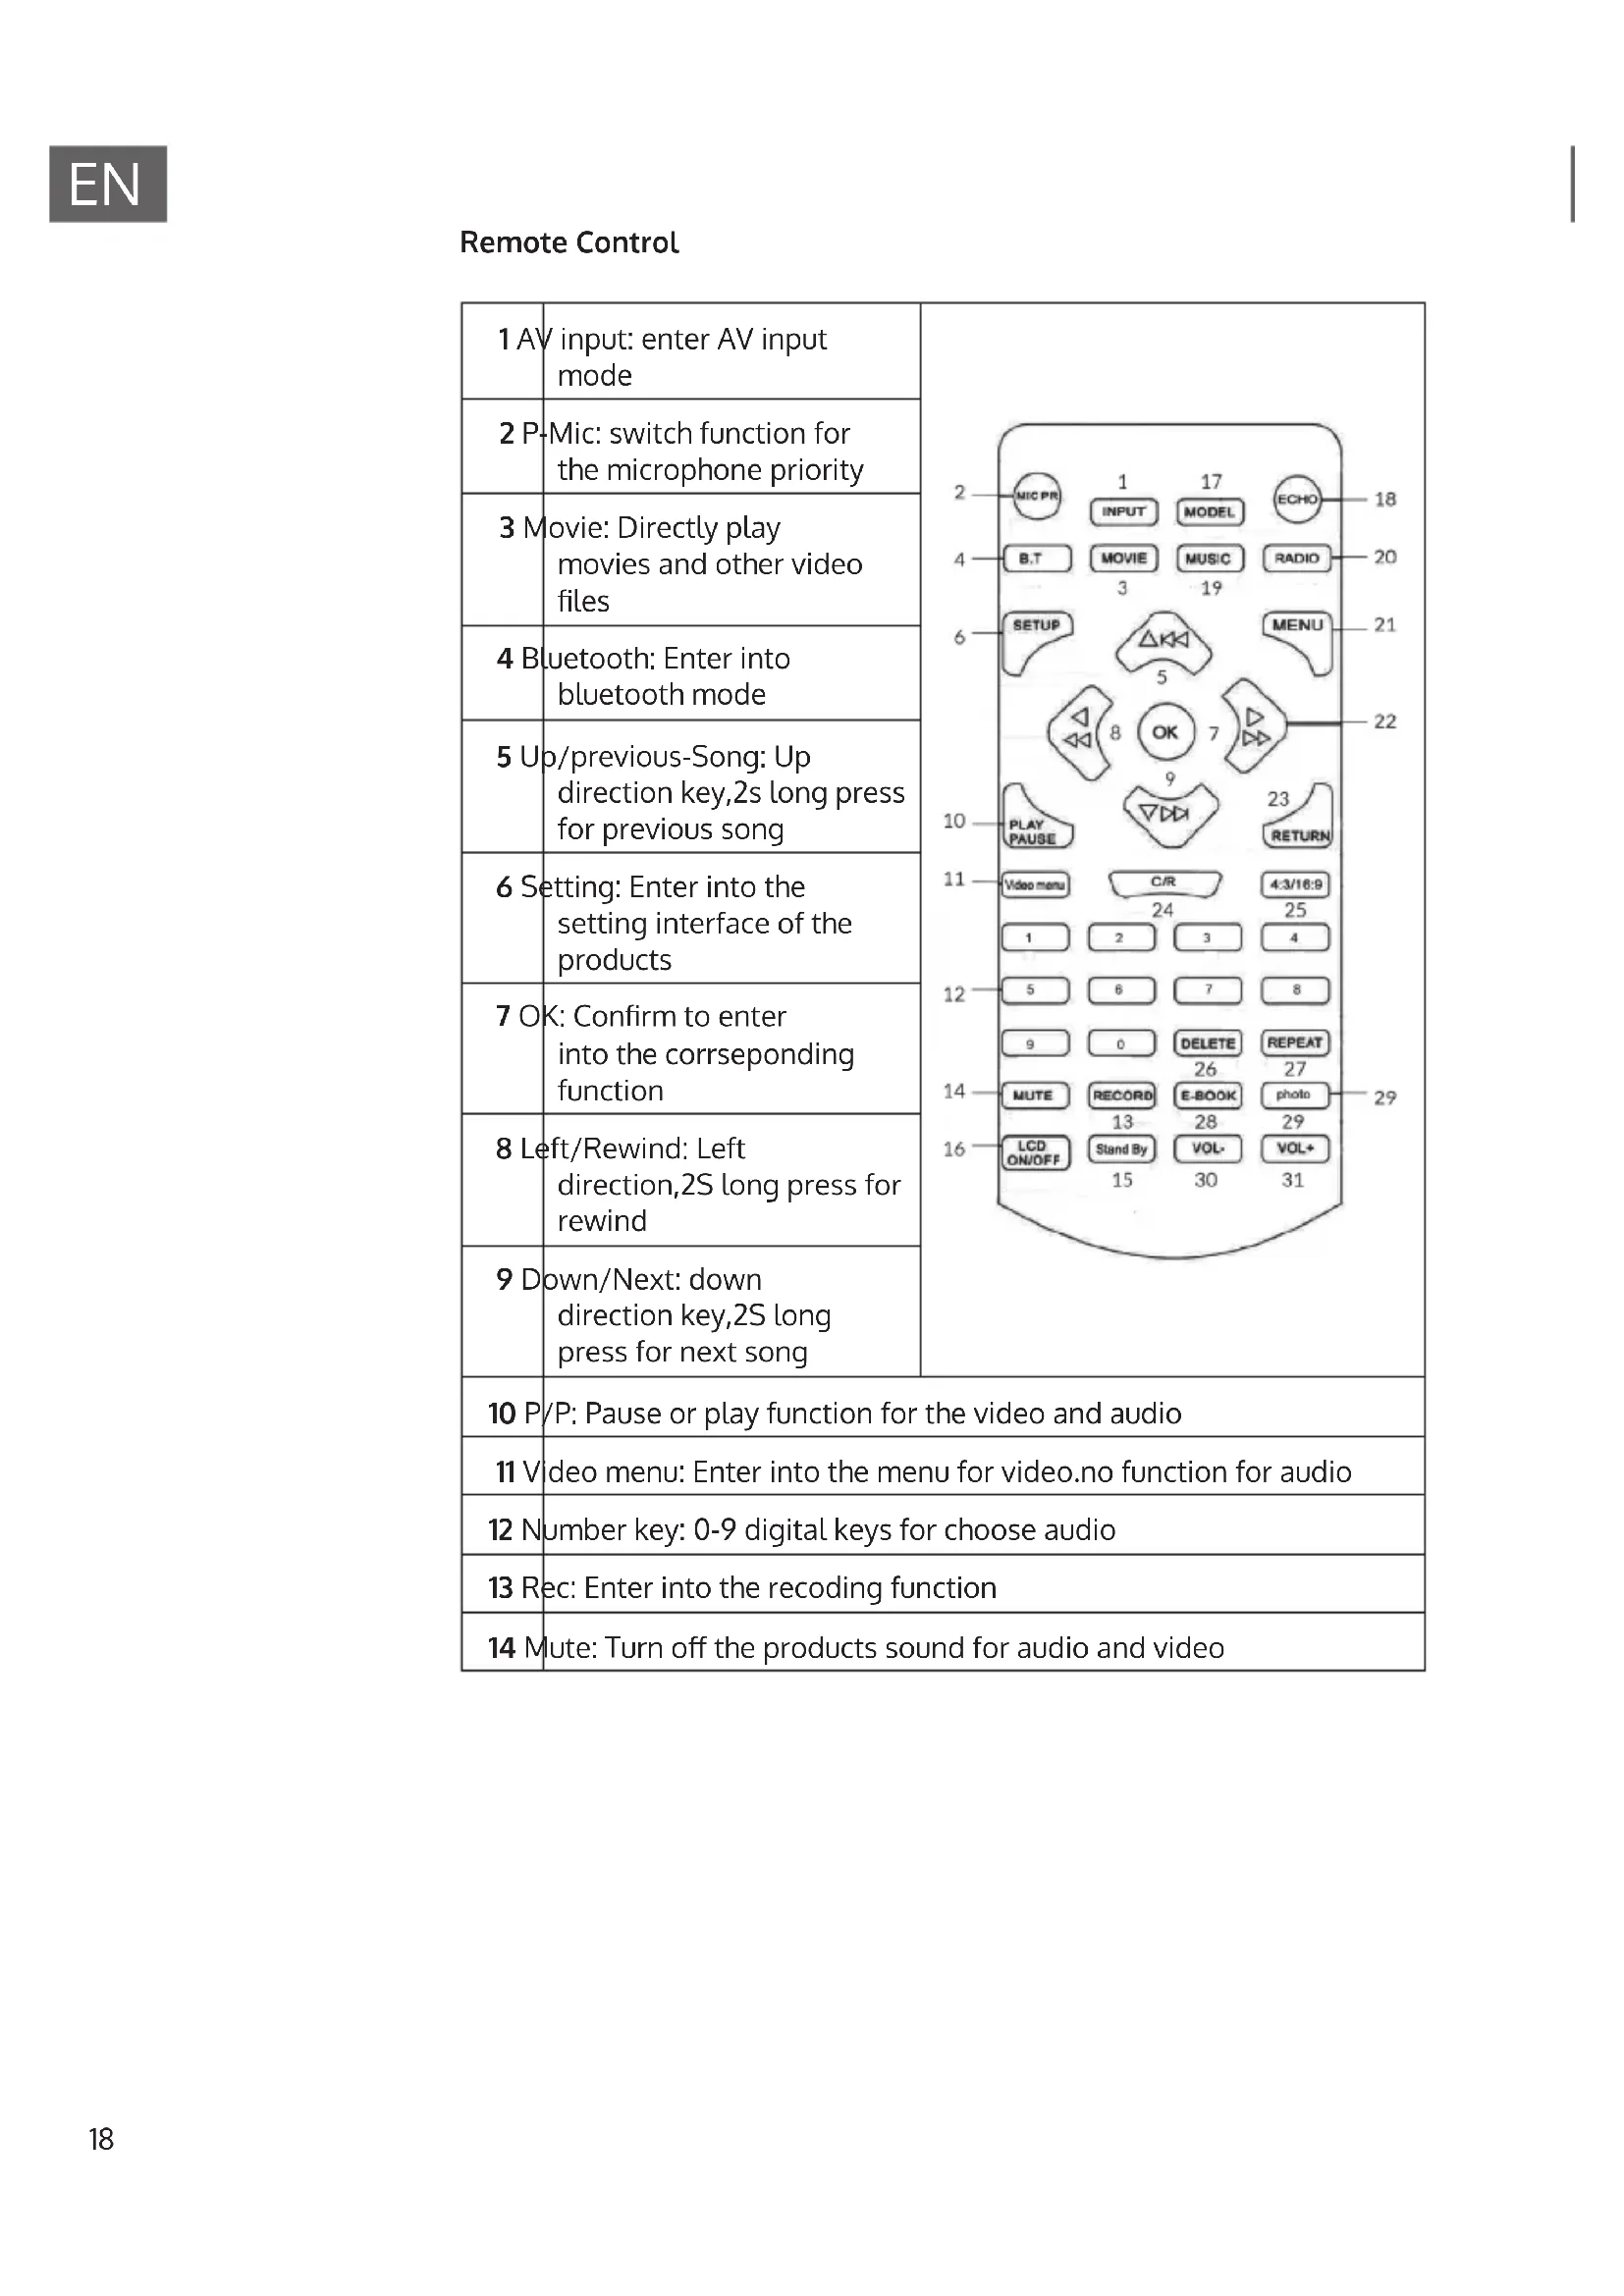
Remote Control
| 1 AV input: enter AV input mode | 2 Mic: switch function for the microphone priority |
| 3 Movie: Directly play movies and other video files | |
| 4 Bluetooth: Enter into bluetooth mode | |
| 5 Up/previous-Song: Up direction key,2s long press for previous song | |
| 6 Setting: Enter into the setting interface of the products | |
| 7 OK: Confirm to enter into the corresponding function | |
| 8 Left/Rewind: Left direction,2S long press for rewind | |
| 9 Down/Next: down direction key,2S long press for next song | |
| 10 P/P: Pause or play function for the video and audio | |
| 11 Video menu: Enter into the menu for video.no function for audio | |
| 12 Number key: 0-9 digital keys for choose audio | |
| 13 Rec: Enter into the recoding function | |
| 14 Mute: Turn off the products sound for audio and video | |
| 15 Stand by: stand by function for video,No function for audio | |
| 16 LCD on/off: turn off/on screen display | |
| 17 Mode: Toggle among modes of Bluetooth ,USB drive,TF card and FM radio | |
| 18 Echo: Switch the sound track for audio,Vocal accompaniment,switch between the original singer and vocal accompaniment (the same function as the soundtrack) | |
| 19 Music: Play music files directly | |
| 20 FM Radio: Enter into the FM radio | |
| 21 Menu: launch the corresponding mode radio | |
| 22 Right/fast forwards: To the right direction,2S long press for fast words | |
| 23 Reture: Return to the previous menu or the main interface | |
| 24 C/R: switch soundtrack for video and video | |
| 25 Selected: Selet the screen size (4: 3/16: 9) for Video (some model dont have this function) | |
| 26 Del: Delete the selected file from USB(some model dont have this function) | |
| 27 Repeat: Repeat single song or repeat all songs from audio | |
| 28 E-BOOK: Enter into ebook directly(some model dont have this function) | |
| 29 Photos: Enter into photos playback directly | |
| 30 Volume:- Decrease the Main volume | |
| 31 Volume [+] - increase the main volume. | |
OPERATION AND FUNCTIONS
BT-Connection
- Move BT icon in main interface and then press play/pause key to enter BT mode, or press BT key to directly enter BT mode.
- Start the BT function for tablet or mobile phone and then search the product and connect with it, after successful connection, use this product to enjoy the music in Tablet PC or mobile phone.
- Please maximize the BT volume of the tablet PC or cell phone and keep the product to be within the receiving range of BT signal; the distance for the trouble-free use of the local BT is of 10 meters.
Music Play
- Plug in the USB drive or TF card, the product will automatically enter the music play mode, or press the "music" key to enter the automatic music play.
- Press the play/pause key to play the music, press the key again to pause. Press the keys of "previous-song" or "next-song" to select the previous song/next song. Long press (hold for the three seconds, do not release) the keys of Previous-song/Next Song to implement functions of rewind and fast forward respectively. If there are lyrics in music files, the lyrics will be simultaneously displayed on the screen of the phone.
-
In the interface of music play, press the menu key, and then use the keys of Previous-song/Next -song to select move cursor; press the play key to change the following items in menu:
-
Repeat (repeat single song, repeat all songs, cancel repeat)
- Repeat A-B (repeat A-B, cancel repeat). Stereo (left channel, right channel, mixed output).
- Sound-effect mode(Normal mode, Concert Hall mode, Church model, Pastel mode, Live mode, Lobby mode). Select time duration(input the digits for seconds and minutes for music play) for random play(random play, cancel play).
-
In the music play interface, press the digital keys to directly select the song you want to play.
-
In the music play interface, press the return key to return to the main menu.
Using the Wireless VHF Microphone
The PA speaker comes with wireless microphones to get you started straight out of the box.
- Tune on the unit.
- Unscrew the bottom of the microphone to access the battery enclosure. Insert 2 AA batteries into the microphone. Take note the battery polarity when inserting the batteries.
- Replace the bottom microphone cover.
- The wireless microphone will flash once and automatically pair with the PA speaker, it is ready to use. If it does not flash, check that you have inserted the batteries correctly or replace old batteries.
- Adjust the volume of the microphone by turning the MIC VOL knob located on top control panel
Notes: Please do not operate the microphone directly in front of the PA speaker, please set the MIC VOL/ECHO at a lower level before turning on the wireless microphone. Operating the microphone incorrectly will cause a loud squealing noise. Please turn off the power switch when the wireless microphone is not in use. This will save the battery.
Using the Wired Microphone
You can connect the wired microphone to this unit using the MIC INPUT located on the top of control panel.
- Turn off the unit.
- Connect your wired microphone to the MIC INPUT located on top of the control panel.
- Adjust the microphone volume by tuning the MIC VOL/ECHO knobs located on top control panel.
Notes: You can use the wired microphone and wireless microphone at the same time.
VideoPlayback
- Plug the USB drive or TF card, the product will give priority to playing video files, or press the "movie" key to enter the automatic video play. Press the play/pause key to play the video files, press the key again to pause.
- Press the keys of Previous-song/Next-song to select the previous video/ next video. Long press(hold for three seconds, do not release) the keys of Previous-song/Next-song to implement rewind and fast forward functions.
-
In the video playback interface, press the menu key (display information of video file which is being played).
-
Repeat (repeat single, repeat all, cancel repeat). Stereo (left channel, right channel, mixed output). Track (track1, track 2).
- Sound-effect Mode (Normal mode, Concert Hall mode, Church mode, Pastel mode, Live mode, Lobby mode).
- Screen settings (4:3 crop mode, 16:9, 4:3 auto). Brightness (adjustable from 0-30).
- Select time duration (input the digital for seconds and minutes for video play).
-
Movie you want to play.
-
In the music play interface, press the Return key once, enter the video file list, and press the Return key twice in consecutive to return to the main interface.
Radio
- Enter the FM radio;
- Press the Menu key to select auto search, then press the play key to confirm, the product will automatically search the station. The station is automatically saved after finding its emitted signal.
- Press the keys of Previous-song/Next-song or digital keys to select radio station and listen to radio.
Audio-video input/output
- Plug AV cable into the audio and video input jack of the product, in the main interface.
- Move to the external input icon, then press the play/pause key to enter the input mode (press the remote control input key to enter the input mode).
- The product shows the images and sounds of the corresponding signal sources (can be connected to set-top boxes and other equipment).
File Management:
- Plug in the USB drive or TF card; in the main interface.
- Move the file management icon.
- Press the play/pause key to enter the file management interface; the product will automatically recognize file names in the USB drive or TF card, and show them in the list form.
- Press the keys of Previous-song/Next-song to select the file, then press the play/pause key again to play the selected file.
Settings
- In the main interface, move to the setting icon and press the play/ pause key to enter the setting page (or press setting key of the remote control to enter directly into the setting page).
- Bby using the keys of the up, down, left and right as well as play/pause key (or
-
confirm key of the remote control)you can modify settings, the following settings items can be adjusted:
-
The system language: There are two languages of chinese and English, the default one is English.
- Power volume: Can be adjusted within 0-40, the maximum default value is 40.
- Starting the backlight: The time duration for turning off the display backlight includes, five options for turning off the display backlight: 10 seconds, 30 seconds, 60 seconds, and 90 seconds, the default time duration for turning off the display backlight is "never".
- Brightness settings: Can be adjusted within 0-30, the default maximum brightness is of 30.
- Background settings: There are 10 background options; you can choose any one which is your favorite background as the background of the main interface.
- Restoring the factory settings: All settings of the product need to be restored to the factory state.
Note on charging the integrated battery
The device is equipped with a rechargeable battery for mains-independent operation. The battery is automatically charged as soon as the mains plug is plugged into an electrical outlet. The charging time of a completely exhausted battery is approx. 8 hours. After charging, the device switches over to trickle charging.
- Do not leave the unit permanently plugged into an electrical outlet.
- If the unit will not be used for a long time, recharge the battery every 30 days.
- Fully charge the battery before first use (8 hours). Only after the third charge does a completely exhausted battery reach full power.
- Turn the unit off after use to prevent further discharge of the battery. Deep discharge could damage the battery.
- When the battery is exhausted, the MP3 player starts to rush. In this case, charge the battery.
DISPOSAL CONSIDERATIONS

If there is a legal regulation for the disposal of electrical and electronic devices in your country, this symbol on the product or on the packaging indicates that this product must not be disposed of with household waste. Instead, it must be taken to a collection point for the recycling of electrical and electronic equipment. By disposing of it in accordance with the rules, you are protecting the environment and the health of your fellow human beings from negative consequences. For information about the recycling and disposal of this product, please contact your local authority or your household waste disposal service.
This product contains batteries. If there is a legal regulation for the disposal of batteries in your country, the batteries must not be disposed of with household waste. Find out about local regulations for disposing of batteries. By disposing of them in accordance with the rules, you are protecting the environment and the health of your fellow human beings from negative consequences.
DECLARATION OF CONFORMITY

Manufacturer:
Chal-Tec GmbH, Wallstrasse 16, 10179 Berlin, Germany.
Importer for Great Britain:
Chal-Tec UK limited
Unit 6 Riverside Business Centre
Brighton Road
Shoreham-by-Sea
BN436RE
United Kingdom
The complete declaration of conformity of the manufacturer can be found at the following link: https://use.berlin/10032834
Estimado cliente:
Unit 6 Riverside Business Centre
Brighton Road
Shoreham-by-Sea
BN436RE
United Kingdom
Unit 6 Riverside Business Centre
Brighton Road
Shoreham-by-Sea
BN43 6RE
United Kingdom
Unit 6 Riverside Business Centre
Brighton Road
Shoreham-by-Sea
BN43 6RE
United Kingdom