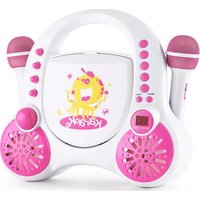
Rockpocket-A PK - Karaoke system Auna - Free user manual and instructions
Find the device manual for free Rockpocket-A PK Auna in PDF.


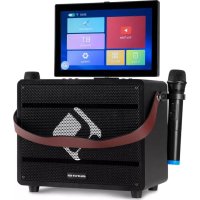
| Product Type | Portable Karaoke System |
| Brand | Auna |
| Model | Rockpocket-A PK |
| Dimensions (approx.) | 30 x 20 x 15 cm |
| Weight (approx.) | 2.5 kg |
| Power Supply | AC 100-240V via adapter or rechargeable battery |
| Battery | Built-in rechargeable lithium-ion, 2000mAh |
| Speaker Output | 2 x 10W RMS |
| Microphone | 2x wireless UHF microphones included |
| Bluetooth | Version 5.0, range up to 10m |
| Inputs | AUX 3.5mm, USB, SD card |
| Outputs | Line out (RCA) |
| Display | LED with basic controls |
| Echo Effect | Adjustable echo level for vocals |
| Playback Formats | MP3, WAV, WMA (from USB/SD) |
| Maintenance | Wipe with a dry cloth; avoid moisture and dust |
| Safety | Use only provided adapter; do not disassemble; keep away from water |
| Spare Parts Available | Microphones, adapters, cables (contact support) |
| Repairability | Modular design; some parts user-replaceable |
| General Information | Portable karaoke system for home parties |
Frequently Asked Questions - Rockpocket-A PK Auna
User questions about Rockpocket-A PK Auna
0 question about this device. Answer the ones you know or ask your own.
Ask a new question about this device
Download the instructions for your Karaoke system in PDF format for free! Find your manual Rockpocket-A PK - Auna and take your electronic device back in hand. On this page are published all the documents necessary for the use of your device. Rockpocket-A PK by Auna.
USER MANUAL Rockpocket-A PK Auna
Batterien einlegen

Congratulations on purchasing this equipment. Please read this manual carefully and take care of the following hints on installation and use to avoid technical damages. Any failure caused by ignoring the mentioned items and cautions mentioned in the operation and installation instructions are not covered by our warranty and any liability.
Contents
Technical Data 9
Important Precaution 9
General Safety Instructions 10
Product Description and Controls 11
Getting Started 12
CD Operation 12
Karaoke Operation 13
AUX IN Operation 14
Cleaning and Care 14
Troubleshooting 15
Environment Concerns 15
Declaration of Conformity 15
Technical Data
| Item Number 10031497 10031498 | |
| Power Source Network operation: 100-240 V ~ 50-60 Hz | Internal rechargeable battery : 2 x 1200mAh / 3.7 V Batteries: 6 x LR14 (Type C) |
| Power Consumption 8 W | |
| Speaker Power Output 2 x 1 W RMS | |
| Speaker Impedance 8 Ohm |
Important Precaution
Prevent Shock Hazard
- To reduce the risk of electric shock do not remove cover (on back).
- No user-serviceable parts inside. Refer servicing to qualified personnel.
- Make sure the plug can be fully inserted into the power outlet.
Protect against Laser Energy Exposure
- As the laser beam used in this compact disc player is harmful to the eyes, do not attempt to disassemble the casing.
- Stop operation immediately if any liquid or solid object should fall into the cabinet.
- Do not touch the lens or poke at it. If you do, you may damage the lens and the player may not operate properly.
- Do not put anything in the safety slot. If you do, the laser diode will be "ON" when the CD door is still open.
- If the unit is not to be used for a long period of time, make sure that all power sources are disconnected from the unit. Remove all batteries from the battery compartment, and unplug the AC cord from the wall outlet. Make it a practice to remove the AC cord by grasping the main body and not by pulling the cord.
- This unit employs a laser. The use of controls or adjustment or performance of procedures other than those specified here may result in exposure to hazardous radiation.

ATTENTION
This unit employs a laser Class 1. The use of controls or adjustment or performance of procedures other than those specified here may result in exposure to hazardous radiation.
On Playcement
- Do not use the unit in places which are extremely hot, cold, dusty or humid.
- Place the unit on a flat and even surface.
- Do not restrict the air-flow of the unit by placing it in a place with poor ventilation, by covering it with a cloth or by placing it on a carpet.
On Condensation
- When left in a heated room where it is warm and damp, water droplets or condensation may form inside the unit.
- When there is condensation inside the unit, the unit may not function normally.
- Let it stand for 1 to 2 hours before turning the power on, or gradually heat the room up and dry the unit before use.

IMPORTANT
Should any trouble occur, remove the power source and refer servicing to qualified personnel. Changes or modifications to this unit not expressly approved by the party responsible for compliance could void the user's authority to operate the equipment.
Protect your Furniture
This system is equipped with non-skid rubber 'feet' to prevent the product from moving when you operate the controls. These 'feet' are made from non-migrating rubber material specially formulated to avoid leaving any marks or stains on your furniture. However certain types of oil based furniture polishes, wood preservatives, or cleaning sprays may cause the rubber 'feet' to soften, and leave marks or a rubber residue on the furniture. To prevent any damage to your furniture we strongly recommend that you purchase small self-adhesive felt pads, available at hardware stores and home improvement centers everywhere, and apply these pads to the bottom of the rubber 'feet' before you place the product on fine wooden furniture.
General Safety Instructions
- Do not use this apparatus near water.
- Clean only with dry cloth.
- Do not block any ventilation openings. Install in accordance with the manufacturer's instructions.
- Do not install near any heat sources such as radiators, heat registers, stoves, or other apparatus (including amplifiers) that product heat.
- Protect the power cord from being walked on or pinched particularly at plugs, convenience receptacles, and the point where they exit from the apparatus.
- Only use attachments/accessories specified by the manufacturer.
- Use only with a cart, stand, tripod, bracket, or table recommended by the manufacturer, or sold with the product. When a cart is used, use caution when moving the cart/apparatus combination to avoid injury from tip-over.
- Unplug this apparatus during lightning storms or when unused for a long periods of time.
- Refer all servicing to qualified service personnel. Servicing is required when the apparatus has been damaged in any way, such as power-supply cord or plug is damaged, liquid has been spilled or objects have fallen into the apparatus, the apparatus has been exposed to rain or moisture, does not operate normally, or has been dropped.
-
This appliance shall not be exposed to dripping or splashing water and that no object filled with liquids such as vases shall be placed on the apparatus.
-
Do not overload wall outlet. Use only power source as indicated.
- Use replacement part as specified by the manufacturer.
- Upon completion of any service or repairs to this product, ask the service technician to perform safety checks.
- Power Sources - This product should be operated only from the type of power source indicated on the marking label. If you are not sure of the type of power supply to your home, consult your product dealer or local power company. For products intended to operate from battery power, or other sources, refer to the operating instruction.
- Object and Liquid Entry - Never push objects of any kind into this product through openings as they may touch dangerous voltage points or short-out parts that could result in a fire or electric shock. Never spill liquid of any kind on the product.
- Damage Requiring Service - Unplug this product from the wall outlet and refer servicing to qualified service personnel under the following conditions: a) When the power-supply cord or plug is damaged, b) If liquid has been spilled, or objects have fallen into the product, c) If the product has been exposed to rain or water, d) If the product does not operate normally by following the operating instructions. Adjust only those controls that are covered by the operating instructions as an improper adjustment of other controls may result in damage and will often require extensive work by a qualified technician to restore the product to its normal operation. e) If the product has been dropped or damaged in any way, and f) When the product exhibits a distinct change in performance - this indicates a need for service.
- Main plug is used as disconnect device and it should remain readily operable during intended use. In order to disconnect the apparatus from the mains completely, the mains plug should be disconnected from the mains socket outlet completely.
- The battery (battery or batteries or battery pack) shall not be exposed to excessive heat such as sunshine, fire or the like.
- Excessive sound pressure from earphones and headphone can cause hearing loss.
Product Description and Controls
1 POWER Button
2 PLAY/PAUSE Button
3 STOP/PRESET Button
4 SKIP+ Button
5 SKIP- Button
6 REPEAT Button
7 MEMORY Button
8 LED Display
9 Left Speaker
10 CD Door open/close Button
11 MIC VOLUME Control
12 ECHO Control
13 AUTO VOICE CONTROL
14 BALANCE Control
15 VOLUME Control
16 Right Speakerr
17 MIC 1 Jack
18 Battery Door
19 AUX Jack
20 DC Jack
21 MIC 2 Jack
22 Charging LED


Getting Started
- Make sure the AC adapter is connected of household power or 6 x "C" size (UM-2) batteries
- Risk of product damage! Make sure that the power supply voltage matches the voltage printed on the bottom of the unit.
- Risk of electric shock! When you unplug the AC adaptor, always pull the plug from the socket. Never pull the cord.
- Before you connect the AC adaptor, make sure that you have completed all the other connections.

Battery Operation
- Remove the Battery Door.
- Following the polarity (+ and -) diagram as shown inside the battery compartment, insert 6 'C' size (UM-2) batteries and replace the Battery Door.

Battery Warning
- Be sure that the batteries are installed correctly. Wrong polarity may damage the unit. - (a) Do not mix old and new batteries or (b) Do not mix alkaline, standard (carbon-zinc) or rechargeable (nickel-cadmium) batteries.
- If the unit is not to be used for an extended period of time, remove the batteries. Old or leaking batteries can cause damage to the unit and may void the warranty.
- Do not dispose of batteries in fire. Batteries may explode or leak.
- Do not try to recharge batteries not intended to be recharged; they can overheat and rupture.(Follow battery manufacturer's directions).

Using the internal battery

Connect the appliance to the power adaptor to charge the internal battery. During charging the charging LED lights up. When the charging LED goes out, the charging is complete. If the power adapter is not connected and additional batteries are inserted, these batteries are tapped. If you want to use the internal (rechargeable) battery, you have to take out the additional batteries.
CD Operation
- This player plays not only commercial CDs but also self-compiled CD-R/RW discs.
- Press the POWER BUTTON (#1) once to turn. The LED DISPLAY (#8) will light. The player will start reading the disc and will display "no" if no disc is loaded.
- Press CD DOOR OPEN/CLOSE BUTTON (#10) to open the CD Door. Carefully place an audio CD with its label side upward in the CD compartment and close the CD Door.
- The total number of tracks on the CD will appear in the LED DISPLAY (#8) after a few seconds.
- Press the PLAY/PAUSE BUTTON (#2). The CD will start playing from the first track.
- Adjust the VOLUME CONTROL (#15) to obtain the desired sound level from the Built-in Speakers. To suspend playing, press the PLAY/PAUSE BUTTON (#1) again. To resume playing, press the PLAY/PAUSE BUTTON (#1) again.
- You can choose to play your favorite track directly by pressing either the SKIP + BUTTON (#4) or SKIP - BUTTON (#5). The LED DISPLAY (#8) will indicate the track number selected.
- To locate a particular passage within a track, keep the SKIP + BUTTON (#4) or SKIP - BUTTON (#5) depressed until it is found.
- NOTE: Low level audio will be heard during the search process to assist in locating the correct point in the track.
REPEAT Play
- To repeat a particular track, press the REPEAT BUTTON (#6) once or until the REPEAT INDICATOR LED will start to flash.
- To repeat the entire CD, press the REPEAT BUTTON (#6)twice or until the REPEAT ALL INDICATOR LED will light up and stay lit.
- To clear the REPEAT function ,press the REPEAT button again.The REPEAT LED will turn off.
Programm Play
- This function allows the tracks to be played in a programmed sequence.
- In CD stop mode, press the MEMORY BUTTON (#7) once. The MEM indicator and Program Channel Number „0“ will appear and blink in the LED DISPLAY (#8) to prompt for input.
- Press the SKIP + BUTTON (#4) or SKIP -BUTTON (#5) to select the song to be programmed.
- Press the MEMORY BUTTON (#7) again to store selection. The Program Channel Number will change to "1" and blink to prompt for input 90 seconds.
- Press the SKIP + BUTTON (#4) or SKIP -BUTTON (#5) again to select the next song to be programmed and press the MEMORY BUTTON (#4) to store selection.
- Repeat steps 2 - 4 to program as many as 20 tracks.
- You may repeat the current programmed track or all programmed tracks by pressing the REPEAT (#6) once (one track) or twice (all tracks).
- Press PLAY/PAUSE BUTTON (#2) to start to play the tracks in a programmed sequence.
- Press STOP BUTTON (#3) once to stop playback.
- To cancel programmed play, press the STOP BUTTON (#3) again in STOP mode.
Notes on CD-R/RW Discs
- Because of non-standardized format definition/production of CD-R/RW discs, playback quality & performance are not guaranteed.
- Manufacturer is not responsible for the ability of CD-R/RW discs to play due to recording conditions such as PC performance, writing software, media ability, etc.
- Do not attach a label or seal to either side of the CD-R/RW disc. It may cause a malfunction.
Karaoke Operation
Sing a long with the music by plugging in the provided microphone into either one of the microphone jacks on the unit.

ATTENTION
Tapping or dropping the microphone while it is on can permanently damage your microphone. Resist the urge to swing the microphone around by the cord!
ECHO
Adjust the ECHO control to enhance your voice for a concert hall effect.
BALANCE
Adjust the BALANCE control between the prerecorded singer's voice and the music when using a multiplex karaoke disc.(Please see Glossary of term to learn more about multiplex on our website.)
AUTO VOICE CONTROL
AUTO VOICE CONTROL can be activated by pressing the A.V.C ON/OFF button. The vocals on the multiplex recording will be muted when the singer starts to sing through the microphone. When the singer stops to sing .the vocals will resume to normal.
Karaoke Glossary
In addition to all of the terminology associated with consumer electronics products, a few additional terms are
used almost exclusively in isaraake. These terms are meant to familiarize you with the world of Karaoke. The features listed below may rrot necessarily pertain to the particular model Singing Machine that you have. The following are some brief explanations of karaoke terms:
- ECHO: Echo adds depth and resonance to a singer's voice without affecting the music. This echo is produced by creating minor controlled feedback in the singers voice.
- Multiplex: Multiplex recordings contain 2 copies of the same song. One version is a stereo recording of the song without the lead singer. The second version is recorded with the music and background vocals on the left channel and the lead singer recorded on the right channel. This 'split track' recording allows you to control the volume afthe lead singer by adjusting the balance control. You can sing a duet with the lead singer or use the lead singer as a guide as you learn the song, gradually fading them out with the balance control until you are able to sing the song on your own.
- AUTO VOICE CONTROL: When the AVG function is activated, the vocals on a multiplex recording are eliminated as soon as the singer begins singing into the microphone. When the singer stops singing, the vocals on the multiplex recording are automatically re-activated. This useful function is used primarily during practice sessions while a singer is learning a song.
- Important note: AVG function only works wish multiplex retarding and not with standard audio recordings.
AUX IN Operation
- Provides an AUX IN JACK (#19) for connecting external audio devices like MP3 players and digital audio devices, and to listen to them through the speakers.
- Use an audio cable (not included) with one 3.5 mm stereo plug on each end of the cable.
- Plug one end of the cable into the AUX IN JACK (#19) and the other end into the Line-out Jack or Headphone Jack of your external audio device.
- Press POWER BUTTON (#1) repeatedly to select AUX IN mode.
- Start playing the device you plugged into the AUX IN JACK (#19).
- Slowly adjust both the volume controls the external device until you reach a comfortable listening level.
Note:
- If you connect this unit to the Line-Out Jack of your external device, you only need to adjust the volume control of the unit. If you connect to the Headphone Jack of your external device, you may need to adjust both the volume controls of your external device and the unit to obtain the desirable volume setting.
- Remember to turn off the unit when you have finished listening. Don't forget to switch off the power of your external audio device as well. Remember to disconnect the connection cable from the unit after use in order to be able to listen to CD music again.
Cleaning and Care
- Clean your unit with a damp (never wet) cloth. Solvent or detergent should never be used.
- Avoid leaving your unit in direct sunlight or in hot, humid or dusty places.
- Keep your unit away from heating appliances and sources of electrical noise such as fluorescent lamps or motors.
- If drop-outs or interruptions occur in the music during CD play, or if the CD fails to play at all, its bottom surface may require cleaning. Before playing, wipe the disc from the center outwards with a good soft cleaning cloth.

Troubleshooting Guide
| Symptom Possible Cause | Solution | |
| CD player will not play | Unit not in CD function mode. Select CD function mode. | |
| CD is not loaded properly. Load CD with label side up. | ||
| If the CD is self-compiled, the media used may not be compatible with the player. | Use better quality blank media and retest. | |
| Exhausted battery Replace the batteries. | ||
| CD skips while playing D | disc is dirty or scratched. Wipe CD with clean cloth or use. | |
| Intermittent sound from CD player | Dirty or defective disc. Clean or replace the defective disc. | |
| Dirty pick up lens. Use a CD lens cleaning disc to clean the lens. | ||
| Player is subject to excessive shock or vibration. | Relocate the player away from shock or vibration. | |
| Sound appears distorted at high volume setting | Volume control is set to maximum. Adjust Volume Control to a lower comfortable level. | |
| Batteries become low. Replace all the old batteries with new ones. | ||
Environmental Concerns

According to the European waste regulation 2012/19/EU this symbol on the product or on its packaging indicates that this product may not be treated as household waste. Instead it should be taken to the appropriate collection point for the recycling of electrical and electronic equipment. by ensuring this product is disposed of correctly, you will help prevent potential negative consequences for the environment and human health, which could otherwise be caused by inappropriate waste handling of this product. For more detailed information about recycling of this product, please contact your local council or your household waste disposal service.
Your product contains batteries covered by the European Directive. 2006/66/EC, which cannot be disposed of with normal household waste. Please check local rules on separate collection of batteries. The correct disposal of batteries helps prevent potentially negative consequences on the environment and human health.
Declaration of Conformity
Producer: CHAL-TEC GmbH, Wallstraße 16, 10179 Berlin, Germany

This product is conform to the following European Directives:
2014/35/EU (Low voltage)
2014/30/EU (EMC)
2011/65/EG (RoHS)
- BATTERIEN EINLEGEN
- CONTENTS
- IMPORTANT PRECAUTION
- PREVENT SHOCK HAZARD
- PROTECT AGAINST LASER ENERGY EXPOSURE
- ATTENTION
- ON PLAYCEMENT
- ON CONDENSATION
- IMPORTANT
- PROTECT YOUR FURNITURE
- GENERAL SAFETY INSTRUCTIONS
- PRODUCT DESCRIPTION AND CONTROLS
- GETTING STARTED
- BATTERY OPERATION
- BATTERY WARNING
- USING THE INTERNAL BATTERY
- CD OPERATION
- REPEAT PLAY
- PROGRAMM PLAY
- NOTES ON CD-R/RW DISCS
- KARAOKE OPERATION
- ECHO
- BALANCE
- AUTO VOICE CONTROL
- KARAOKE GLOSSARY
- AUX IN OPERATION
- NOTE
- CLEANING AND CARE
- TROUBLESHOOTING GUIDE
- ENVIRONMENTAL CONCERNS
- DECLARATION OF CONFORMITY
Brand : Auna
Model : Rockpocket-A PK
Category : Karaoke system