
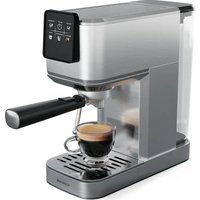
Grind & Brew - Coffee machine Klarstein - Free user manual and instructions
Find the device manual for free Grind & Brew Klarstein in PDF.

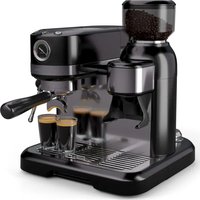
| Product type | Coffee machine with built-in grinder |
| Brand | Klarstein |
| Model | Grind & Brew |
| Maximum capacity | 10 cups |
| Compatible coffee types | Ground coffee or coffee beans |
| Bean hopper capacity | 120 g |
| Water tank | Graduated up to 10 cups |
| Grind adjustment | Yes, adjustable |
| Anti-drip valve | Yes |
| Keep warm | Yes, about 35 minutes |
| Hot plate | Yes |
| Power supply | 220-240 V ~ 50/60 Hz |
| Article number | 10035672 |
| Included accessories | Paper filter, glass carafe, funnel, lid |
| Cleaning | Removable parts washable with warm water |
| Descaling | Recommended regularly with household descaler or citric acid |
| Safety | Automatic shut-off after keep warm, burn protection |
Frequently Asked Questions - Grind & Brew Klarstein
User questions about Grind & Brew Klarstein
0 question about this device. Answer the ones you know or ask your own.
Ask a new question about this device
Download the instructions for your Coffee machine in PDF format for free! Find your manual Grind & Brew - Klarstein and take your electronic device back in hand. On this page are published all the documents necessary for the use of your device. Grind & Brew by Klarstein.
USER MANUAL Grind & Brew Klarstein
Unit 6 Riverside Business Centre
Brighton Road
Shoreham-by-Sea
BN436RE
United Kingdom
SICHERHEITSHINWEISE
Congratulations on purchasing this device. Please read the following instructions carefully and follow them to prevent possible damages. We assume no liability for damage caused by disregard of the instructions and improper use. Scan the QR code to get access to the latest user manual and more product information.

CONTENT
Safety Instructions 18
Device Overview and Control Panel 20
Commissioning 21
Brewing Coffee with Coffee Powder 21
Brewing Coffee with Coffee Beans 23
Tips for Making Coffee 27
Cleaning and Care 27
Dscaling 28
Troubleshooting 29
Hints on Disposal 29
TECHNICAL DATA
| Item number 10035672 | |
| Power supply 220-240 V ~ 50/60 Hz |
MANUFACTURER & IMPORTER (UK)
Manufacturer:
Chal-Tec GmbH, Wallstrasse 16, 10179 Berlin, Germany.
Importer for Great Britain:
Chal-Tec UK limited
Unit 6 Riverside Business Centre
Brighton Road
Shoreham-by-Sea
BN436RE
United Kingdom
SAFETY INSTRUCTIONS
- Read all the safety and operating instructions and retain them for future reference.
- The appliance is designed exclusively for private use and for the envisaged purpose. This appliance is not fit for commercial use.
- Don't use it outdoors. Keep it away from sources of heat, direct sunlight, humidity (never dip it into any liquid) and sharp edges. Do not use the appliance with wet hands. If the appliance is humid or wet, unplug it immediately.
- When cleaning or putting it away, switch off the appliance and always pull out the plug from the socket (pull the plug itself, not the lead) if the appliance is not being used and remove the attached accessories.
- Do not operate the machine without supervision. Never leave the operating machine unattended. If you leave the room you should always turn the device off. Remove the plug from the socket.
- The device and the mains lead have to be checked regularly for signs of damage. If damage is found the device must not be used.
- Do not try to repair the appliance on your own. Always contact an authorized technician. To avoid the exposure to danger, always have faulty cable be replaced only by the manufacturer, by our customer service or by qualified person and with a cable for the same type.
-
In order to ensure your children's safety, please keep all packaging (plastic bags, boxes, polystyrene etc.) out of their reach.
-
Place the coffee machine on a firm and flat surface. Position it so that it cannot tip over.
- Never apply accessory attachments which are not specified for this appliance.
- Do not touch hot parts of appliance.
- Do not place the device directly next to a gas or electric cooker or any other source of heat.
- The water tank must only be filled with cold water! Never open the filter cover during the boiling process, as otherwise this may cause burns.
- The appliance is only to be used as described in this user manual.
- Do not use the appliance for any commercial purposes.
- Any other use is not intended and can result in damages or personal injuries.
- The manufacturer assumes no liability for damages caused by improper use.
- This device may be only used by children 8 years old or older and persons with limited physical, sensory and mental capabilities and / or lack of experience and knowledge, provided that they have been instructed in use of the device by a responsible person who understands the associated risks.
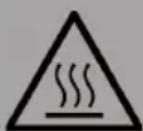
CAUTION
Danger of burns! To avoid burns, do not touch the surfaces during operation. The hot plate in particular can remain very hot for a long time during operation and even after switching off.
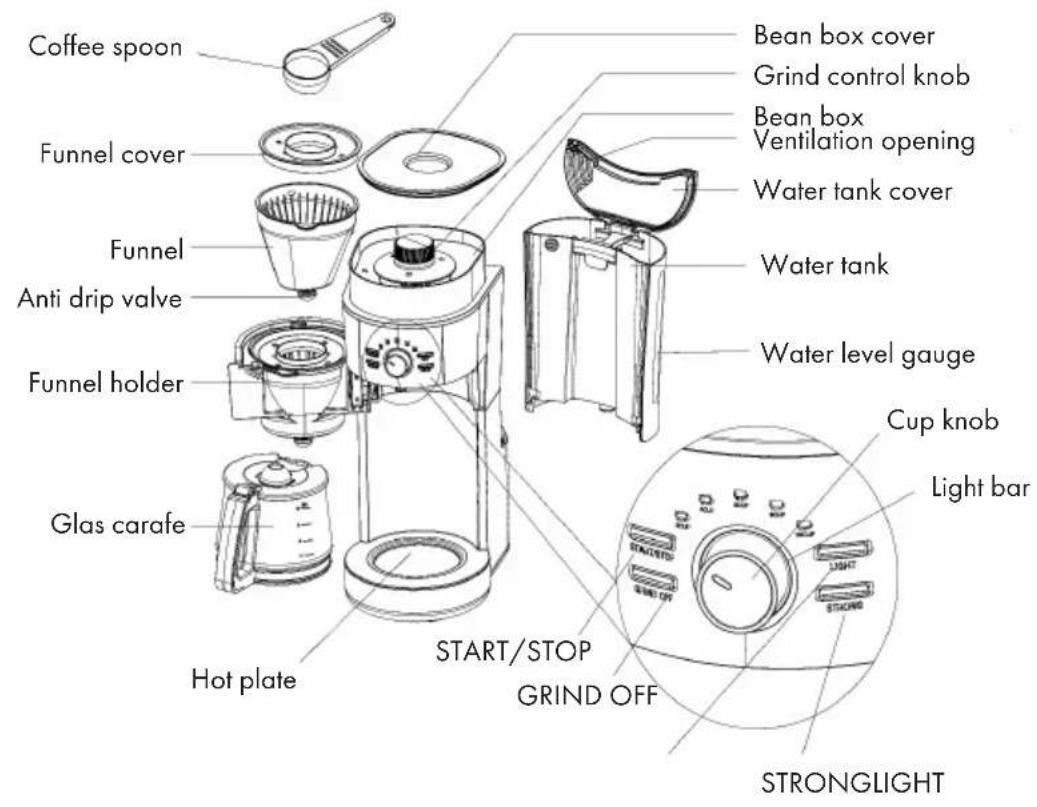
DEVICE OVERVIEW AND CONTROL PANEL
COMMISSIONING
Before the first use
Make sure that all accessories are complete and that the device is not damaged. Fill the water tank with water up to the maximum indicator and let the machine brew several times with water without adding coffee powder. Then pour the water away. Carefully clean all removable accessories, such as the funnel and funnel cover, with warm water.
BREWING COFFEE WITH COFFEE POWDER
- Open the water tank cover and fill the water tank with the desired amount of water. For example, if you fill the water tank to the 2'' mark, you will then receive 2 cups of coffee. Then close the water tank cover.
Note: Do not fill the water tank higher than the maximum mark. A maximum of 10 cups of coffee can be brewed.
- Open the funnel holder. Insert the funnel, paper filter and funnel cover into the funnel holder in the following sequence. Make sure that all accessories are properly attached to the machine.
- Insert the appropriate amount of ground coffee into the machine (see Table 1). Normally, one spoon of ground coffee is required per cup of coffee. However, this can be adjusted according to personal taste.
Note: The funnel holder must be in the closed position. Otherwise, the glass carafe cannot be placed on the hot plate normally and the brewing process cannot be carried out properly.
| Quantity of coffee (cups) | Coffee powder quantity (spoons) | Water quantity (scaling) |
| 2 2 2 | ||
| 4 4 4 | ||
| 6 6 6 | ||
| 8 8 8 | ||
| 10 10 10 | ||
| One spoonful of ground coffee corresponds to about 5-7 g. | ||
- Place the glass carafe on the hotplate as follows: First, align the spout of the glass carafe with the anti-drip valve. Then press the glass carafe horizontally forward so that the centre of the glass carafe is level with the anti-drip valve. The glass carafe must be positioned correctly.
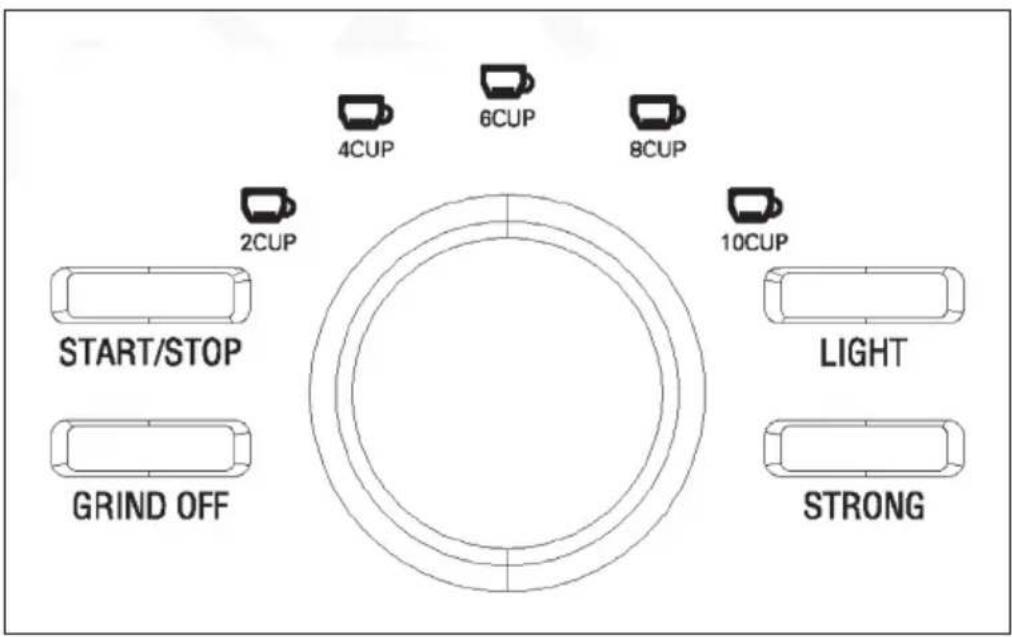
- Plug the power plug of the appliance into the power socket. All indicator lights will flash once. The "START/STOP" and "LIGHT" indicators will then light up permanently while the other indicators go out. Press the GRIND OFF button and then press the START/STOP button again. The unit starts operation. The "GRIND OFF" indicator light is permanently lit while the "START STOP" indicator light and the light bar flash. All other indicators are off.

CAUTION
Danger of burns! Never open the fi tter holder while the appliance is in operation, you could be scalded.
- After a while, the coffee from the coffee outlet will begin to flow into the glass carafe. If you hear a beeping sound, it means that the machine will switch to warm mode after the brewing process is finished. At this point, the "START/STOP" and "GRIND OFF" indicators will go out. The light bar is permanently lit. After keeping the appliance warm for about 35 minutes, the appliance beeps three times and all lights, including the light bar, go out.
- Press the START/STOP button again to interrupt the brewing process The "START/ STOP" indicator will then light up permanently. If you press the START/STOP button again, the brewing operation will continue.

CAUTION
Danger of burns! Never touch the ventilation opening of the water tank while the appliance is in operation, you could be scalded.
- After the brewing process is finished, remove the glass carafe from the machine to serve the coffee. To get the best coffee taste, serve the coffee immediately after brewing.
Note: The quantity of coffee does not correspond to the quantity of coffee used, as some water is absorbed by the coffee powder.
- Always unplug the appliance from the power outlet when the appliance is not in use.
Note: When pouring the coffee, the angle of inclination should not exceed 45 degrees from the vertical position. Pour the coffee slowly. Otherwise, the coffee may leak from the lid and from the coffee spout, creating the risk of burns.
BREWING COFFEE WITH COFFEE BEANS
- Open the water tank cover and fill the water tank with the desired amount of water. For example, if you fill the water tank to the 2'' mark, you will then receive 2 cups of coffee. Then close the water tank cover.
Note: Do not fill the water tank higher than the maximum mark. A maximum of 10 cups of coffee can be brewed. - Open the funnel holder. Insert the funnel, paper filter and funnel cover into the funnel holder in the following sequence. Make sure that all accessories are properly attached to the machine.
Note: The funnel holder must be in the closed position. Otherwise, the glass carafe cannot be placed on the hotplate normally and the brewing process cannot be carried out properly. - Fill coffee beans into the bean container. Then replace the lid of the bean container.
Note: The maximum capacity of the bean container is 120 g of coffee beans. - Place the glass carafe on the hot plate as follows: First align the spout of the glass carafe with the anti-drip valve. Then press the glass carafe horizontally forward so that the centre of the glass carafe is level with the anti-drip valve. The glass carafe must be positioned correctly.
-
Plug the power plug of the appliance into the power socket. All indicator lights will flash once. The "START/STOP" and "LIGHT" indicators will then light up permanently while the other indicators go out.
-
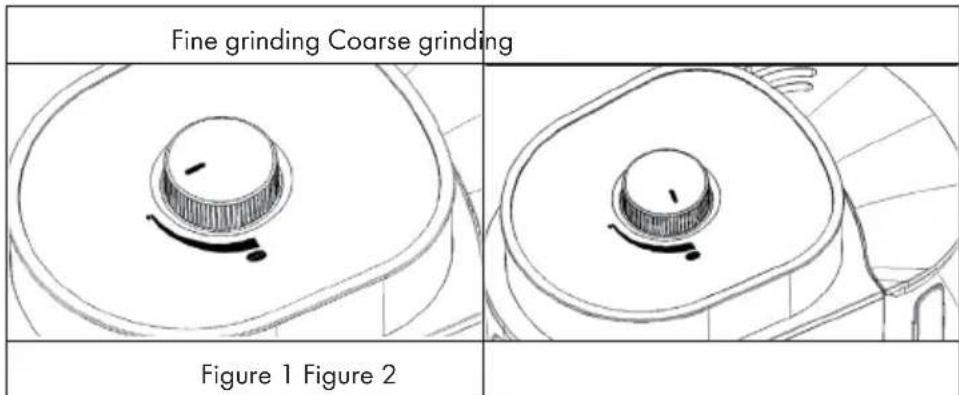
Select the desired coffee output quantity on the cup button. Then adjust the grind of the coffee on the grinder control (see fi gure 1 and fi gure 2). Then press the START/STOP button once. The machine starts operation and the coffee beans are ground, the "START/STOP" indicator light and the light bar fl ash.
- After the coffee beans have been ground, the machine starts the brewing process. After a while, the coffee starts to flow from the coffee outlet into the glass carafe. The "START/STOP" indicator and the light bar flash while the "LIGHT" indicator is permanently lit. If a beeping sound is heard, this means that the machine will switch to warm mode after the brewing process is finished. At this point, the "START/STOP" and "LIGHT" indicators go out. The light bar is permanently lit. After keeping the machine warm for about 35 minutes, it beeps three times and all the lights, including the light bar, go out.

CAUTION
Danger of burns! Never open the fi tter holder while the appliance is in operation, you could be scalded.
- Press the START/STOP button again to interrupt the brewing process. The "START/STOP" indicator will then light up permanently. To continue brewing, first press the GRIND OFF button and then the START/STOP button.

CAUTION
Danger of burns! Never touch the ventilation opening of the water tank while the appliance is in operation, you could be scalded.
- After the brewing process is finished, remove the glass carafe from the machine to serve the coffee. To get the best coffee taste, serve the coffee immediately after brewing.
Note: The quantity of coffee does not correspond to the quantity of coffee used, as some water is absorbed by the coffee powder.
- Always unplug the appliance from the power outlet when the appliance is not in use.
Note: When pouring the coffee, the angle of inclination should not be more than 45 degrees from the vertical position. Pour the coffee slowly. Otherwise, the coffee may leak from the lid and the coffee spout, creating the risk of burns.
Brewing strong coffee with coffee beans
- Open the water tank cover and fill the water tank with the desired amount of water. For example, if you fill the water tank to the 2'' mark, you will then receive 2 cups of coffee. Then close the water tank cover.
Note: Do not fill the water tank higher than the maximum mark. A maximum of 10 cups of coffee can be brewed.
- Open the funnel holder. Insert the funnel, paper filter and funnel cover into the funnel holder in the following sequence. Make sure that all accessories are properly attached to the machine.
Note: The hopper bracket must be in the closed position. Otherwise, the glass carafe cannot be placed on the hotplate normally and the brewing process cannot be carried out properly.
- Fill coffee beans into the bean container. Then replace the lid of the bean container.
Note: The maximum capacity of the bean container is 120 g of coffee beans.
-
Place the glass carafe on the hot plate as follows: First align the spout of the glass carafe with the anti-drip valve. Then press the glass carafe horizontally forward so that the centre of the glass carafe is level with the anti-drip valve. The glass carafe must be positioned correctly.
-
Plug the power plug of the device into the power outlet. All indicator lights will flash once. The "START/STOP" and "LIGHT" indicators will then light up continuously while the other indicators go out.
- Select the desired coffee output quantity on the cup button. Then adjust the grind of the coffee on the grinder control (see fi gure 1 and fi gure 2). Then press the STRONG button once. The "STRONG" indicator light is permanently lit. Then press the START/STOP button once. The machine starts operation and the coffee beans are ground. At this point, the "STRONG" indicator lights up permanently, while the "START/STOP" indicator and the light bar fl ash.

CAUTION
Danger of burns! Never open the filter holder while the appliance is in operation, you could be scalded.
- After the coffee beans have been ground, the machine starts the brewing process. After a while, the coffee starts to flow from the coffee outlet into the glass carafe. The "START/STOP" indicator and the light bar flash while the "LIGHT" indicator is permanently lit. If a beeping sound is heard, this means that the machine will switch to warm mode after the brewing process is finished. At this point, the "START/STOP" and "LIGHT" indicators go out. The light bar is permanently lit. After keeping the machine warm for about 35 minutes, it beeps three times and all the lights, including the light bar, go out.

CAUTION
Danger of burns! Never touch the ventilation opening of the water tank while the appliance is in operation, you could be scalded.
- Press the START/STOP button again to interrupt the brewing process. The "START/STOP" indicator will then light up permanently. To continue brewing, first press the GRIND OFF button and then the START/STOP button.
- After the end of the brewing process, remove the glass carafe from the machine to serve the coffee. To obtain the best coffee taste, serve the coffee immediately after brewing.
Note: The quantity of coffee does not correspond to the quantity of coffee used, as some water is absorbed by the coffee powder.
- Always unplug the appliance from the power outlet when the appliance is not in use.
Note: When pouring the coffee, the angle of inclination should not exceed 45 degrees from the vertical position. Pour the coffee slowly. Otherwise, the coffee may leak from the lid and from the coffee spout, creating the risk of burns.
TIPS FOR MAKING COFFEE
- A clean machine is essential for good tasting coffee. Therefore, clean the machine regularly (see the section entitled „Cleaning and care”). Always fill the water tank with fresh, cold water.
- Always store ground coffee in a cool and dry place. Seal it well after opening and store it in the refrigerator to preserve its freshness.
To get the best taste, use whole coffee beans and have them ground just before use. - Do not use coffee powder more than once, as this will reduce the taste. It is not recommended to heat coffee that has already cooled down as this will reduce the taste.
- Clean the machine if it is oily. Small drops of oil on the surface of freshly brewed black coffee are caused by the extraction of oil from the coffee powder.
- The more roasted coffee is used, the more often oiliness occurs.
CLEANING AND CARE
- Before cleaning and servicing the appliance, make sure that the appliance is switched off and the power plug is disconnected from the socket. Allow the appliance to cool down completely. To prevent electric shock, do not immerse the appliance and its non-removable accessories (power cord, power plug, etc.) under water or in other liquids.
- Clean all removable accessories, such as the filter cover, filter, glass carafe, water tank, etc., with warm water and a small brush.
- Push the anti-drip valve upwards 3 - 4 times to drain off any water residue.
- Rub the outer surfaces of the appliance with a damp cloth.
- Wipe the hot plate with a damp cloth and do not use aggressive cleaning agents for cleaning.
- Replace all parts in order to be able to use the device again.
DESCALING
To ensure that your coffee machine continues to operate efficiently, you should regularly clean it of the limescale deposits left by the water, depending on the water quality in your area and the frequency of use. We recommend removing limescale deposits as follows:
- Fill the water tank with water and descaler up to the maximum level indicated on the water tank (the ratio of water to descaler is 4:1. Follow the instructions in the descaler's operating manual. Only use "household decalcifier") You can also use citric acid instead of the descaler (the ratio of water to citric acid is 100:3).
- Place the glass carafe on the hot plate.
- Make sure that the funnel and the funnel cover are correctly inserted into the machine and that there is no coffee powder in the machine.
- Press the GRIND OFF button and then the START/STOP button to switch on the machine and let the descaling solution „brew".
- After brewing, switch the machine off from a cup.
- Leave the solution in the machine for 15 minutes and repeat steps 3-5.
- Switch the machine on and allow the solution to drain until the water tank is completely empty.
- Rinse the appliance with clean water at least three times in a row.
TROUBLESHOOTING
| Problem Possible Cause Suggested Solution | ||
| Coffee runs over. Ground cofoffee clogs theoutgoing of the funnel. | Clean the funnel. | |
| The ground coffee is so fine that block up the funnel. | Replace the currentground coffee. | |
| The unit is not running. The power cord is notplugged properly. | Plug the power wordproperly | |
| Failure inside theapppliance | Contacting professionalservices. | |
| There is little or no coffeedripping into the carafe. | No water in water tank. Fillin the tank withappropriate volume ofwater. | |
| Funnel clogs. Clean the funnel. | Use ground coffee lessfine than the current one.Or avoid compacting. | |
| Ground coffee is too finor compacted. | ||
| Coffee runs too fast. The groundcoffe is toorough. | Replace it with a morefine one. We recommendground coffee properlygrounded. |
HINTS ON DISPOSAL

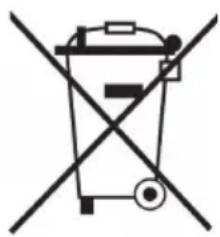
If there is a legal regulation for the disposal of electrical and electronic devices in your country, this symbol on the product or on the packaging indicates that this product must not be disposed of with household waste. Instead, it must be taken to a collection point for the recycling of electrical and electronic equipment. By disposing of it in accordance with the rules, you are protecting the environment and the health of your fellow human beings from negative consequences. For information about the recycling and disposal of this product, please contact your local authority or your household waste disposal service.
Estimado cliente:
Unit 6 Riverside Business Centre
Brighton Road
Shoreham-by-Sea
BN436RE
United Kingdom
Unit 6 Riverside Business Centre
Brighton Road
Shoreham-by-Sea
BN436RE
United Kingdom
CONSIGNES DE SECURITE
m = 311 ;
PRODUTTORE IMPORTATORE (UK)
Produtlore:
Chal-Tec GmbH, Wallstraße 16, 10179 Berlin, Germania.
Unit 6 Riverside Business Centre
Brighton Road
Shoreham-by-Sea
BN436RE
United Kingdom
NORMEDI SICUREZZA
- SICHERHEITSHINWEISE
- CONTENT
- TECHNICAL DATA
- MANUFACTURER & IMPORTER (UK)
- Manufacturer:
- Importer for Great Britain:
- SAFETY INSTRUCTIONS
- CAUTION
- DEVICE OVERVIEW AND CONTROL PANEL
- COMMISSIONING
- Before the first use
- BREWING COFFEE WITH COFFEE POWDER
- BREWING COFFEE WITH COFFEE BEANS
- Brewing strong coffee with coffee beans
- TIPS FOR MAKING COFFEE
- CLEANING AND CARE
- DESCALING
- TROUBLESHOOTING
- HINTS ON DISPOSAL
- Estimado cliente:
- CONSIGNES DE SECURITE
- PRODUTTORE IMPORTATORE (UK)
- Produtlore:
- NORMEDI SICUREZZA
Brand : Klarstein
Model : Grind & Brew
Category : Coffee machine