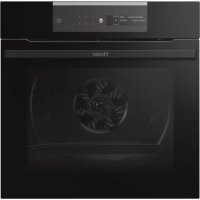
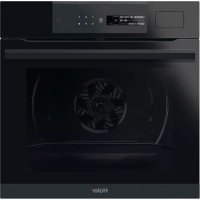
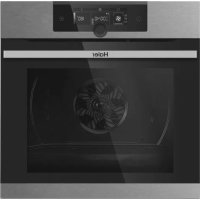
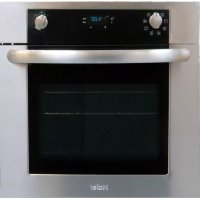
HWO45NM6SXB1 - Oven HAIER - Free user manual and instructions
Find the device manual for free HWO45NM6SXB1 HAIER in PDF.
Download the instructions for your Oven in PDF format for free! Find your manual HWO45NM6SXB1 - HAIER and take your electronic device back in hand. On this page are published all the documents necessary for the use of your device. HWO45NM6SXB1 by HAIER.
USER MANUAL HWO45NM6SXB1 HAIER
DERKABEL SASO H05RR-F 3x1,5mm² H05RR-F 3x2,5mm² H05VV-F 3x1,5mm² H05VV-F 3x2,5mm² H05RN-F 3x1,5mm² H05RN-F 3x2,5mm² H05V2V2-F 3x1,5mm² H05V2V2-F 3x2,5mm²EN 28 Dear Customer, We would like to thank you and congratulate you on your choice. This new product has been carefully designed and built using high-quality materials, and meticulously tested to ensure that it meets all your culinary requirements. Please read and observe these simple instruc- tions, which will enable you to achieve excellent results from the very rst use. This state-of- the-art appliance comes to you with our very best wishes. Important safety instructions Care and maintenance First use Respecting the environment The control panel Main product functions and useful tips Oven care and cleaning Replacing the oven lamp For the installer Summary
- This product is designed for domestic use.
- The manufacturer declines all responsibility for personal injury or property damage deriving from incorrect installation or improper, erroneous or unsuitable use.
- The appliance must not be used by people (including children) with physical, sensorial or mental impairments, or by people without the necessary experience or knowledge, unless they are supervised or instructed in the use of the appliance by a person responsible for their safety.
- Children must be supervised to ensure that they do not play with the appliance.
- Do not place aluminium foil, pots or similar objects in contact with the base inside the oven for cooking.
- The appliance gets very hot during use.
- Warning: do not touch the heating elements inside the oven. ATTENTION:
- If the door or the door gasket seals are damaged, the oven may not be used until it is repaired by a qualied service technician;
- This appliance and its internal components, especially electried parts, may only be repaired, modied or customised by the manu- facturer, its service department or similarly qualied persons. Incom- petent repairs can cause serious accidents, damage to the appliance and its surroundings, and malfunctions.
- Remember that even the replacement of the lamp inside the oven must be performed by qualied personnel, who will rst disconnect the appliance from the mains.
- If the appliance fails to operate or requires repair, please contact our service department.
- Only use original replacement parts. IMPORTANT:
- As a safety precaution, before cleaning the oven, always disconnect the plug from the outlet or remove the appliance’s power cord.EN 30
- In addition, avoid using acid or alkaline substances (such as lemon, vinegar, salt, tomatoes, etc.). Avoid using products containing chlo- rine, acids or abrasives, especially for cleaning painted parts.
- Although the cooking chamber is made of high-quality steel, incor- rect maintenance may cause corrosion;
- The oven must be cleaned periodically and all food residues must be removed;
- Do not clean the oven immediately after the dish has been removed as the residual droplets of steam are still very hot (risk of burns); check that the display shows a low residual temperature or none.
- Take care when opening the door when the oven is on as exiting steam can cause burns.
- If the electricity supply is interrupted, when it comes back on, you are required to empty the circuit, even though there should not be any water in it.
- Do not use rough abrasives or sharp metal scrapers to clean the glass door of the oven as they could scratch the surface and cause the glass to shatter.
- During cleaning, ensure that no water enters the appliance.
- Only use slightly damp rags.
- Never spray water inside or outside of the appliance.
- Do not use steam devices for cleaning as any water that penetrates could cause damage.
- Do not use the appliance for heating or humidifying the room.
- The appliance must be installed and used at an ambient temperature between 5°C and 35°C.
- If there is a risk of frost, any residual water in the pumps could freeze and damage them.
- Only use the thermal probe recommended for this oven.
- The food probe is an accessory only available with some product models.
- The set of 6 Gastronorm trays is available upon request. Care and maintenanceEN 31 IMPORTANT:
- The oven’s identication plate is accessible when the appliance is installed. This identication plate, which is visible when you open the door, contains all the information you will need when requesting replacement parts for the appliance. SERIAL TAG LOCATION:
- The oven should be thoroughly cleaned with soap and water, and carefully rinsed.
- Heat the oven for about 30 minutes at the maximum temperature; this eliminates all the residual manufacturing oils that could cause unpleasant odours during cooking. Use the circular plus fan function without accessories in the oven.
- Before using the accessories for the rst time, clean them carefully with a very hot alkaline washing solution and a soft cloth. First use
USING THE FLAT GRILL
To remove the at grill, pull the grill towards you until it stops and then lift, by pulling upwards, until it comes fully out. To insert the at grill, slide it in at an angle of 45° until it locks and then lower it horizontally and push all the way in.
USING THE PERFORATED TRAY
This tray is used for steam cooking and is posi- tioned on the at grill together with its support. If the at grill has a low drip tray, to remove it lift it slightly and slide it towards you. To re-insert it, slide it back until it is correctly seated. NOTE: the set of 6 Gastronorm trays is available upon request. We recommend also using it in combination with the drip tray to catch any food drips during cooking.EN 33 Respecting the environment The documentation for this appliance is printed on paper bleached without chlorine or recycled paper to contribute to protecting the environ- ment. The packaging was designed to prevent dam- age to the environment; these are ecological products that can be re-used or recycled. Recycling the packing saves raw materials and reduces the volume of industrial and domestic waste. THE PACKING MATERIAL is 100% recyclable and marked with the recycling symbol. Dispose of in compliance with local laws. The packing mate- rial (plastic bags, polystyrene parts, etc.) must be kept out of the reach of children as it is po- tentially dangerous. THIS APPLIANCE is marked in compliance with European Directive 2002/96/EC - Waste Electrical and Electronic Equipment (WEEE). By making sure that this product is disposed of correctly, the user contributes to preventing potential negative consequences for the envi- ronment and health. THE SYMBOL on the product or accompanying documenta- tion indicates that this product must not be treated as domes- tic waste, but must be delivered to a suitable collection point for the recycling of electrical and electronic equipment. DISPOSAL MUST BE MADE in compliance with local laws on waste disposal. FOR ADDITIONAL INFORMATION regarding the treatment, recovery and recycling of this product, contact the local oce of compe- tence, domestic waste collection service or the store where the product was purchased. BEFORE SCRAPPING, make it unusable by cutting the electrical cord.EN 34 The control panel Back MinusMy Taste OKDown PlusUpDisplay Lock On/O
Turn on / o the oven.Multifunction display with scrolling text.Access your latest settings or saved recipes (this only works from the rst screen).Use the arrows to scroll vertically through the menu and choose from the available options:Manual (traditional cooking functions), Steam Cooking (to use steam cooking, insert water into the designated drawer), Special Functions, Recipes, Cleaning, Settings.Conrm your choice and start cooking. Use the + and - symbols to increase and decrease the temperature and time values, andinsome cases activate and deactivate functions (e.g., pre-heating).Back to previous screen.Lock: hold together for 5 seconds to activate and deactivate.Pre-heating and delay-start functions are located in the options menu, below the temperature and time settings.ON / OFF00:11 DEMO MODE STAND-BYPRESS 6SECEN 35 Main product functions and useful tips Symbol Description Suggestions Multi-level Pre-set: 165°C Range: 50-230°C IDEAL FOR: pastries, biscuits, cakes, stued and braised dishes. Use this function to cook dierent foods at the same time on one or more shelf positions. Heat is distributed better and penetrates food better, thus reducing both pre-heating and cooking times. Aromas are not mixed. Allow about 10 minutes extra when cooking dierent foods together. Eco Multilevel Pre-set: 165°C Range: 50-230°C This mode is intended to save energy. Ideal for frozen or pre-cooked food, and small portions. The pre-heat time is very short and cooking tends to be slower. It is not recommended for heavy loads, e.g., large portions or large meal preparations. Grill Pre-set: 230°C Range: 50-230°C IDEAL FOR: grilled meat, sh, vegetables. This function only uses the top heating element and the grill level can be adjusted. Use with the door closed. Do not place white meats too close to the grill. Multi-level + Grill Pre-set: 210°C Range: 50-230°C IDEAL FOR: gratin and crispy food. This function combines the benets of multi-level cooking with the capacity to evenly cook multi-layer recipes and thicker pieces of food, grilling to lightly crisp the external surface. Grill + Fan Pre-set: 165°C Range: 50-230°C IDEAL FOR: whole pieces of meat (roasts). The top heating element is used with the fan to circulate the air inside the oven. Ideal for cooking thicker food items and whole pieces of meat, such as roast pork, poultry, etc.
- Turn the food halfway through cooking. WARNINGS:
- Make sure that the food is not too close to the grill.
- Pre-heating is necessary for red meats but not for white meats. OVEN COOKINGEN 36 Symbol Description Suggestions Steam Pure Pre-set: 100°C Range: 40-100°C By way of radial ventilation, the steam is distributed to ensure that the food is evenly heated and cooked. This oers the advantage of being able to cook on the three dierent levels at the same time, taking care to position any more ‘full-bodied’ foods on the higher level, and less dense foods - such as vegetables - on the lower levels (from the rst to the third). NOTE: During steam cooking, always place the lower stainless steel tray underneath the perforated cooking container, so as to collect any food scraps or condensate that may fall/drip. Steam Warm Pre-set: 130°C Range: 70-130°C During regeneration, the cooking chamber is heated with steam and warm air, which allows for the rapid and consistent heating of the food without drying it out. Based on the type of food being re-heated, this programme oers the possibility to adjust the temperature inside the oven, enabling you to manage this function as you please. Thistype of function is therefore particularly suitable for:
- Heating pre-cooked food from 70°C to 130°C;
- Preparing ready/semi-ready meals and frozen foods from 70°C to 130°C NOTE: For these types of meals, be sure to place suitable dishes in the oven (not made from synthetic or similar materials) and to position them above the grill, making sure to remove any lids. Steam Crisper Pre-set: 165°C Range: 50-230°C This type of cooking is called ‘professional cooking’ because the food being cooked is placed inside a cold chamber that has not been pre-heated. After turning on the oven, the food is initially exposed to steam (or is ‘steamed’). After a short period of exposure to the steam - depending on the lling volume and therefore the size of the food being cooked- the appliance automatically moves on to the second warm air phase. This type of function is particularly suited to large meat and seafood dishes, for example: large bread loaves made from white or wholemeal our with yeast or yeast dough at 190°C to 210°C, as well as lled and hollow pu pastry, whether fresh or frozen from 190°C to 210°C. NOTE: For best results when running two consecutive ‘professional cooking’ programmes, the oven must be cooled before introducing the second dish. STEAM COOKING USEFUL TIPS When using the steam oven, always start with the oven cold. Using steam in a hot oven (imme- diately after traditional cooking) is not recom- mended as the benets of cooking with steam will be cancelled out. For steam cooking, try to use the perforated stainless steel tray together with the lower stainless steel drip tray as much as possible. The rst, resting with its support on the at grill, allows the steam to fully cook the food whilst draining any residues released during cooking through the holes. The second lower tray, slid under the grill on its guides, will collect any drips and keep the oven chamber cleaner. When done cooking, the perforated tray sup- port can be used as a surface to keep the hot tray o the counter while you remove the food you just cooked. ATTENTION: Before using any steam functions, the water container must be lled. NOTE: The steam functions will not start until the door is closed. If the door is open, the mes- sage ‘CLOSE THE DOOR’ will be shown on the display.EN 37 Oven care and cleaning Replacing the oven lamp
This function performs a cleaning cycle by injecting steam into the cavity for 15 minutes. Atthe end of the cycle, any crusting that may have formed due to high-temperature cooking inside the oven cavity, will be softened and become much easier to remove.
This function performs a cleaning cycle of the circuit, so as to maintain cleanliness and ecacy over time. WATER DISCHARGE At the end of each steam cooking session - and after all the cleaning processes - we recom- mend discharging any residual water. By pressing the On/O button, before going to stand-by mode, follow the instructions on the screen to proceed with the water discharge.
1. Pull out the tank to the indicated mark
IMPORTANT: The oven lamp must have the following characteristics:
- Structure suitable for high temperatures (upto 300 °C);
- Power supply: see the V/Hz value on the serial number plate;
- Type G9 connector. ATTENTION: Make sure that the appliance is turned o before replacing the lamp to prevent electric shocks.
- To avoid damage, spread a tea towel for pots and pans inside the oven;
- Remove the screws holding the steel frame;
- Remove the old lamp by sliding it out of its seat and taking care not to break it;
- Insert the new bulb, taking care not to touch it with your hands (we recommend using adisposable latex glove);
- Replace the stainless steel frame, taking care not to pinch the silicone gasket seal;
- Re-insert the stainless steel screws you previously removed;
- Connect the appliance to the power.EN 38 For the installer
INSTALLING THE OVEN IN THE COUNTER
- The oven must be installed under a cooker top, in a column, or combined with the rela- tive food-warmer drawer.
- The dimensions of the space must be those shown in the gure.
- The cabinet material must be able to with- stand the heat.
- The oven must be centred within the walls of the cabinet and xed with the screws and bushings provided.EN 39 ELECTRICAL CONNECTION Before connecting the appliance to the mains, make sure that:
- the characteristics of the electrical system satisfy what is shown on the serial number plate applied to the front of the oven;
- the system has an eective earth connec- tion, compliant with current standards and laws. The earth connection is required by law. The cable must not, at any point, reach a temperature greater than 50°C above the ambient temperature. This oven must be connected to the mains through a power supply cable and plug that is compatible with the outlet of the electrical system that powers this oven. If a xed appliance does not have a power cord and plug, or another device that ensures discon- nection from the mains with a contact opening distance that allows for complete disconnec- tion under the conditions of excessive voltage category III, such disconnection devices must be provided by the mains power supply and must conform to the installation rules. The omnipolar socket or switch must be easy to reach when the appliance is installed. NOTE: The manufacturer declines all liability if the usual accident prevention standards and theabove instructions are not followed.