V 12 PRO - Compressor Güde - Free user manual and instructions
Find the device manual for free V 12 PRO Güde in PDF.
User questions about V 12 PRO Güde
0 question about this device. Answer the ones you know or ask your own.
Ask a new question about this device
Download the instructions for your Compressor in PDF format for free! Find your manual V 12 PRO - Güde and take your electronic device back in hand. On this page are published all the documents necessary for the use of your device. V 12 PRO by Güde.
USER MANUAL V 12 PRO Güde
Translation of the original instructions
FR
natural_image
Black and white photo of a fuel pump with attached probe and hose (no visible text or symbols)ENGLISH Please read the instructions carefully before starting the machine.
FRANÇAIS
text_image
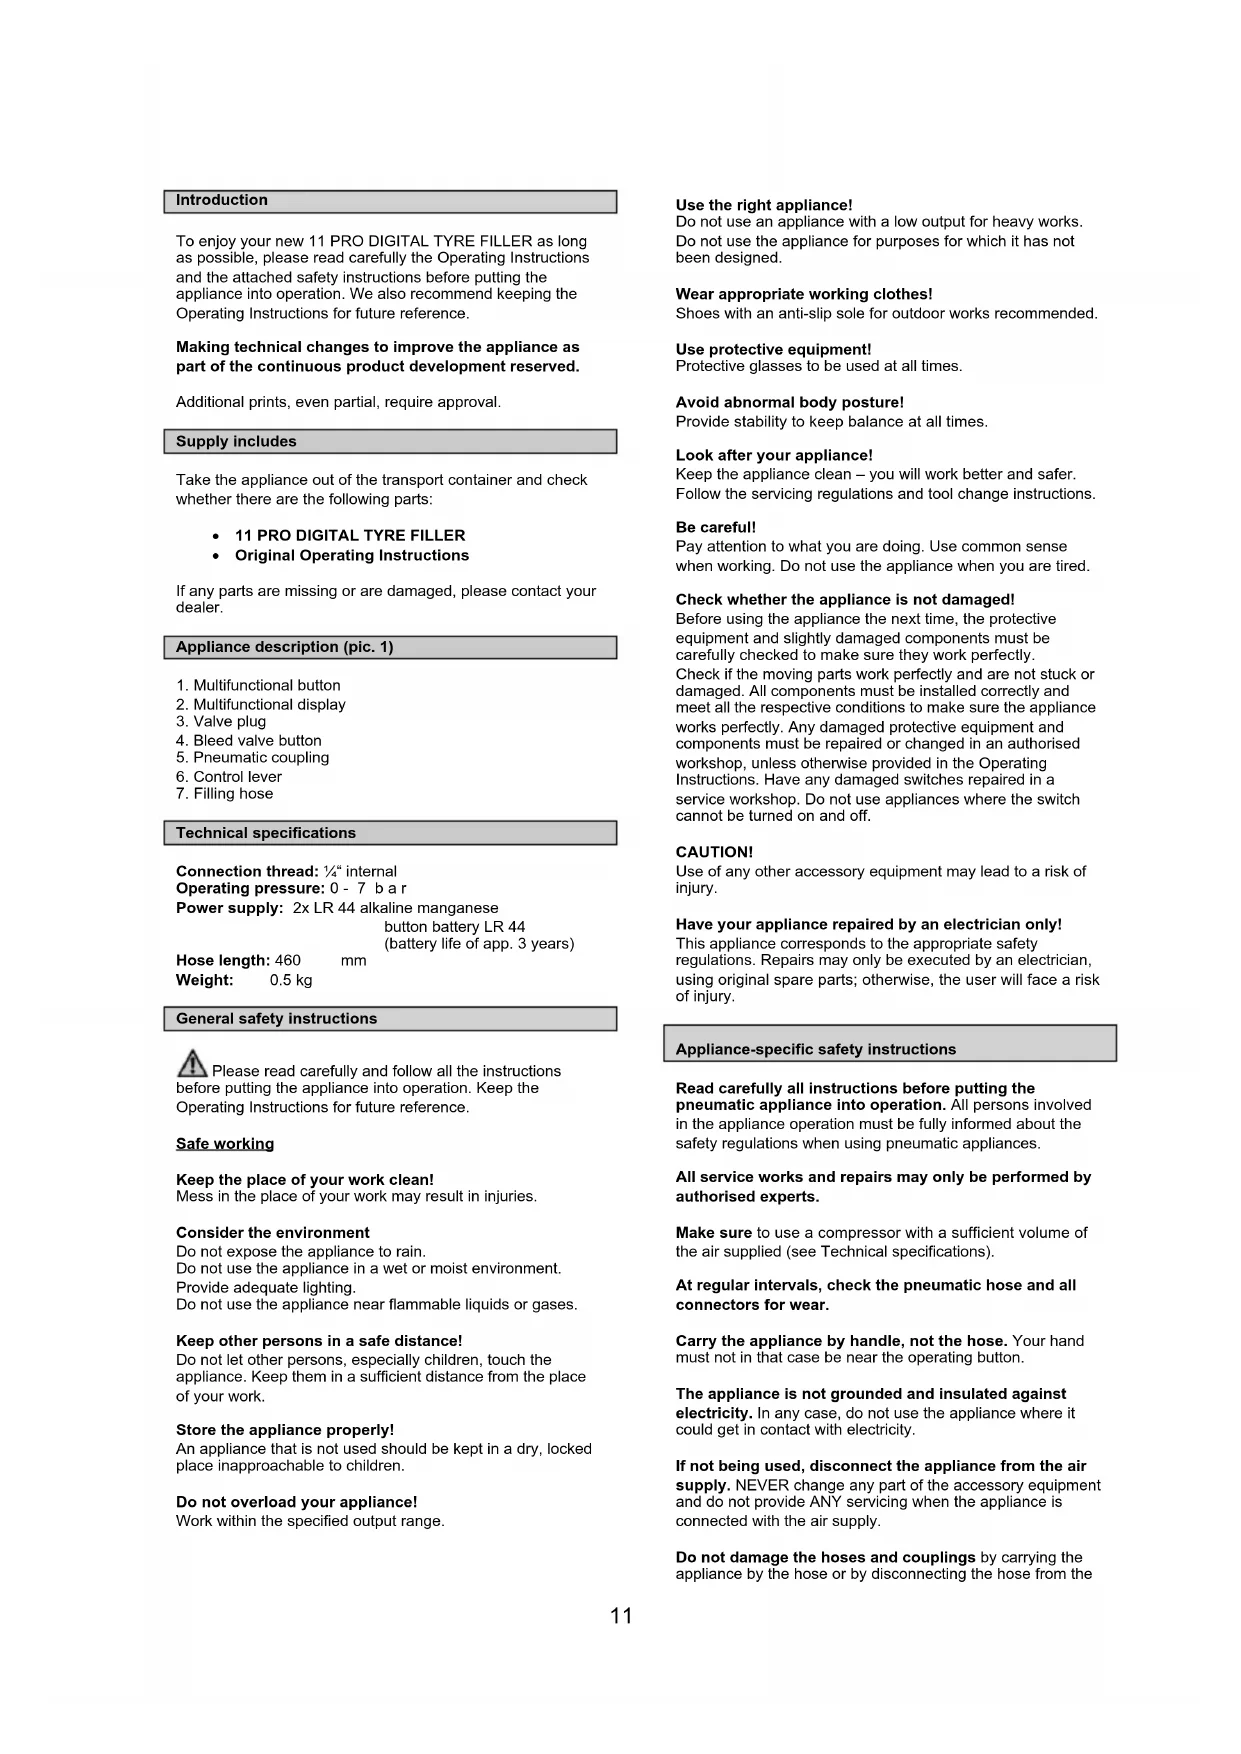
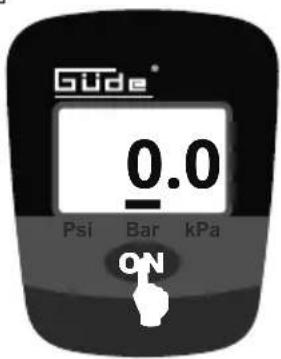
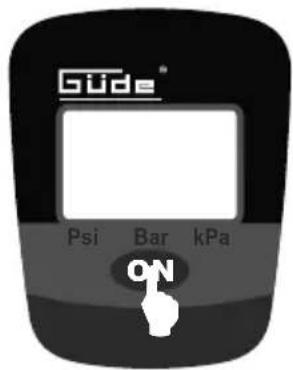
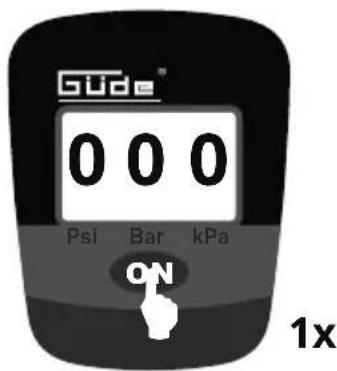
Güde® 0 Psi Bar kPa ON$$ \begin{array}{l} 1 x \ = O N \end{array} $$

text_image
Guide Psi Bar kPa ONtext_image
Güde® 0 Psi Bar kPa ONkPa
2
text_image
Güde® 0 Psi Bar kPa ONPsi
3
text_image
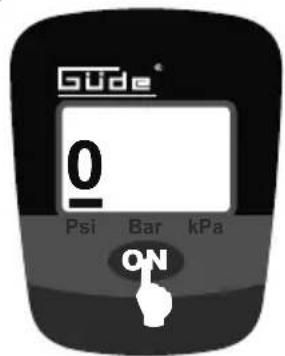
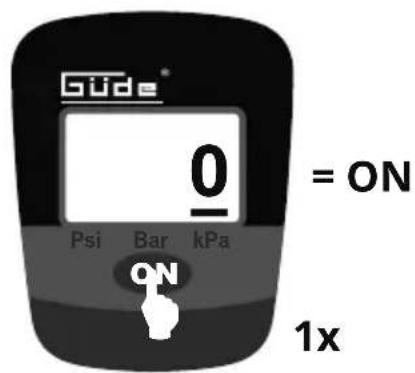
Güde® 0.0 Psi Bar kPa ONBar
| DE | Kalibrierung | CZ | Kalibrace |
| EN | Calibration | SK | Kalibrácia |
| FR | Étalonnage | HU | Kalibrálás |
| IT | Calibrazione | PL | Kalibracja |
| NL | Kalibratie |
1
text_image
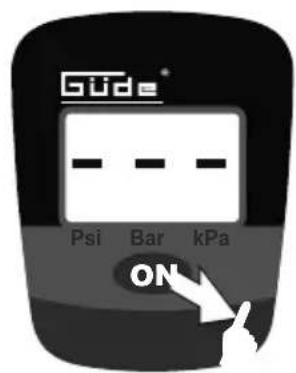
Gude® 0 = ON Psi Bar kPa ON 1x2
text_image
Güde® Psi Bar kPa ONDE Halten
EN Hold
FR Maintenir
IT Trattenere
NL Ingedrukt houden
CZ Přidržování
SK Držat
HU Tartás
PL Przytrzymać
5 sec
3
text_image
Guide Psi Bar kPa ON

text_image
Güde® - 0 - Psi Bar kPa ON4
text_image
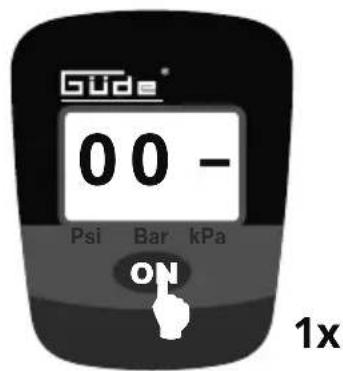
Gude® 00 - Psi Bar kPa ON 1x5
text_image
Gude 0 0 0 Psi Bar kPa ON 1x6
text_image
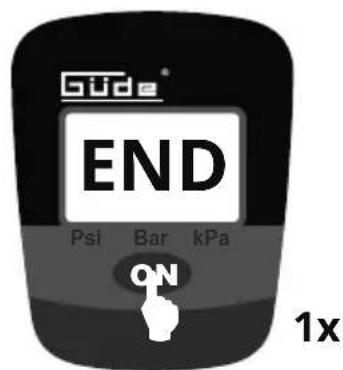
Guide END Psi Bar kPa ON 1x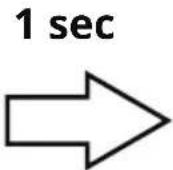
text_image
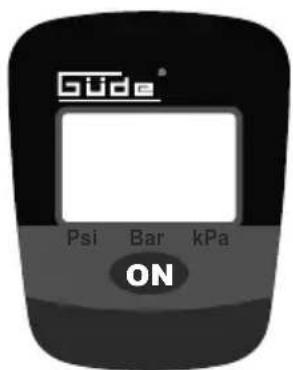
Güde® Psi Bar kPa ON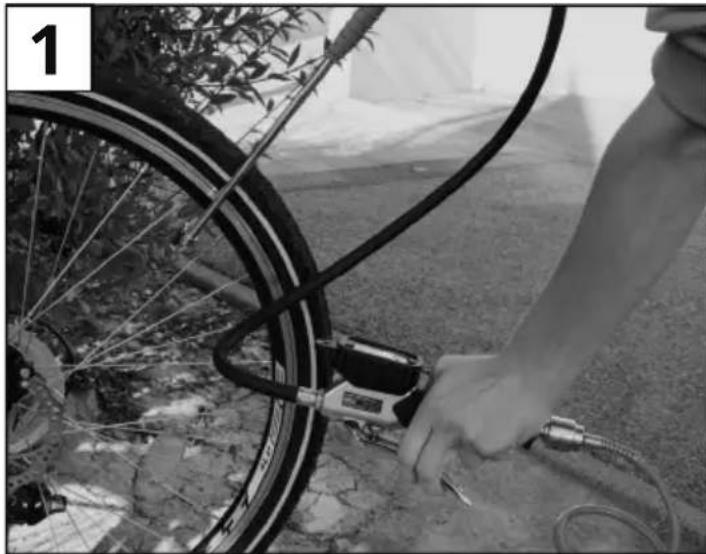
natural_image
Person using a bicycle tire to lift a cable outdoors (no visible text or symbols)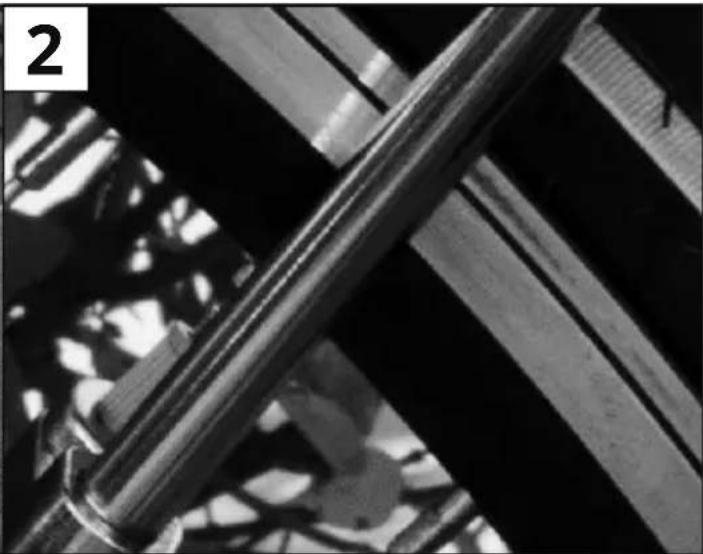
natural_image
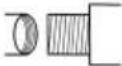
Close-up of intersecting metal rods and wires, no visible text or symbols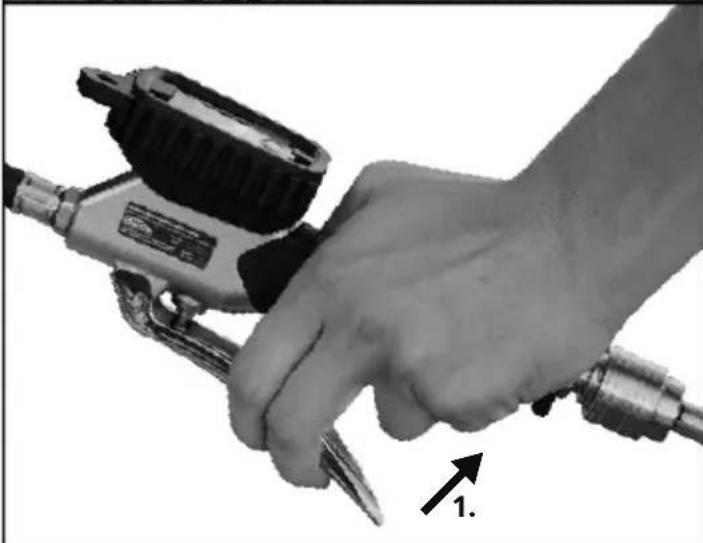
natural_image
Hand using a spray gun to apply a tool, with an arrow indicating direction (no text or symbols on the tool itself)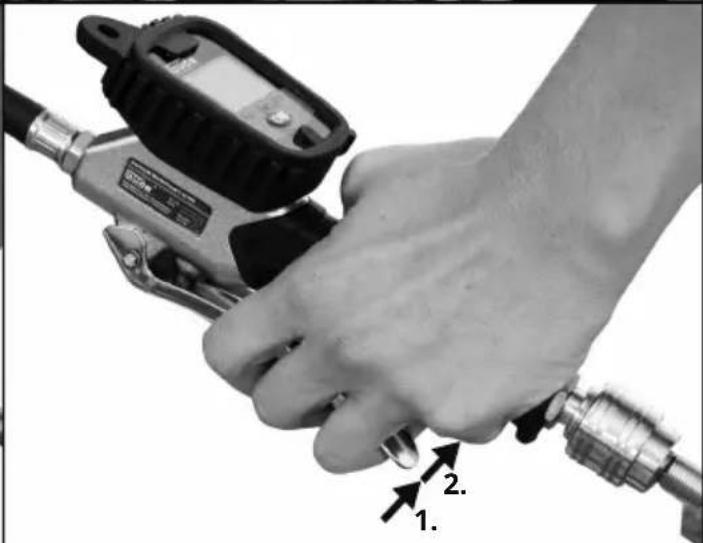
text_image
Close-up of a hand using a pressure relief gun with numbered callouts indicating parts 1 and 2.
natural_image
Abstract black line drawing with a downward arrow and curved shapes (no text or symbols)
natural_image
Abstract black line drawing with upward arrow and curved shapes (no text or symbols)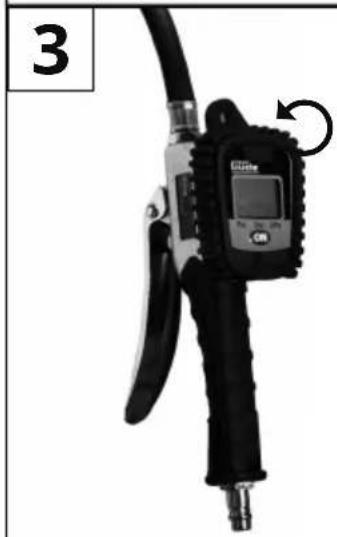
natural_image
Close-up of a black fuel pump device with a digital display and rotary scroll (no visible text or symbols)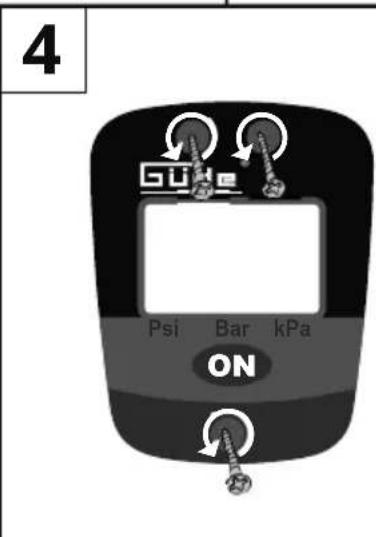
text_image
4 Psi Bar kPa ON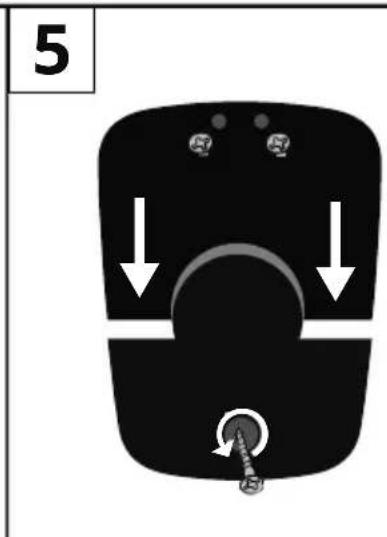
text_image
5Einleitung
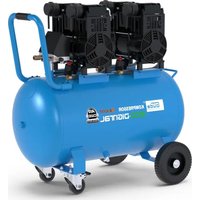
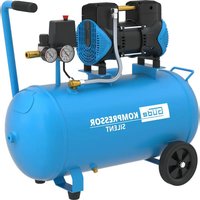
To enjoy your new 11 PRO DIGITAL TYRE FILLER as long as possible, please read carefully the Operating Instructions and the attached safety instructions before putting the appliance into operation. We also recommend keeping the Operating Instructions for future reference.
Making technical changes to improve the appliance as part of the continuous product development reserved.
Additional prints, even partial, require approval.
Supply includes
Take the appliance out of the transport container and check whether there are the following parts:
• 11 PRO DIGITAL TYRE FILLER
• Original Operating Instructions
If any parts are missing or are damaged, please contact your dealer.
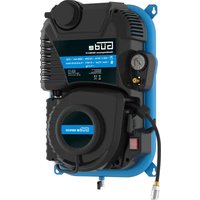
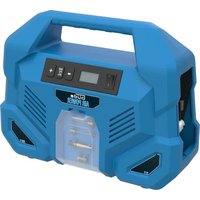
Appliance description (pic. 1)
- Multifunctional button
- Multifunctional display
- Valve plug
- Bleed valve button
- Pneumatic coupling
- Control lever
- Filling hose
Technical specifications
Connection thread: 14 " internal
Operating pressure: 0 - 7 bar
Power supply: 2x LR 44 alkaline manganese
button battery LR 44
(battery life of app. 3 years)
Hose length: 460 mm
Weight: 0.5 kg
General safety instructions

Please read carefully and follow all the instructions before putting the appliance into operation. Keep the Operating Instructions for future reference.
Safe working
Keep the place of your work clean!
Mess in the place of your work may result in injuries.
Consider the environment
Do not expose the appliance to rain.
Do not use the appliance in a wet or moist environment.
Provide adequate lighting.
Do not use the appliance near flammable liquids or gases.
Keep other persons in a safe distance!
Do not let other persons, especially children, touch the appliance. Keep them in a sufficient distance from the place of your work.
Store the appliance properly!
An appliance that is not used should be kept in a dry, locked place inapproachable to children.
Do not overload your appliance!
Work within the specified output range.
Use the right appliance!
Do not use an appliance with a low output for heavy works.
Do not use the appliance for purposes for which it has not been designed.
Wear appropriate working clothes!
Shoes with an anti-slip sole for outdoor works recommended.
Use protective equipment!
Protective glasses to be used at all times.
Avoid abnormal body posture!
Provide stability to keep balance at all times.
Look after your appliance!
Keep the appliance clean – you will work better and safer.
Follow the servicing regulations and tool change instructions.
Be careful!
Pay attention to what you are doing. Use common sense when working. Do not use the appliance when you are tired.
Check whether the appliance is not damaged!
Before using the appliance the next time, the protective equipment and slightly damaged components must be carefully checked to make sure they work perfectly.
Check if the moving parts work perfectly and are not stuck or damaged. All components must be installed correctly and meet all the respective conditions to make sure the appliance works perfectly. Any damaged protective equipment and components must be repaired or changed in an authorised workshop, unless otherwise provided in the Operating Instructions. Have any damaged switches repaired in a service workshop. Do not use appliances where the switch cannot be turned on and off.
CAUTION!
Use of any other accessory equipment may lead to a risk of injury.
Have your appliance repaired by an electrician only!
This appliance corresponds to the appropriate safety regulations. Repairs may only be executed by an electrician, using original spare parts; otherwise, the user will face a risk of injury.
Appliance-specific safety instructions
Read carefully all instructions before putting the pneumatic appliance into operation. All persons involved in the appliance operation must be fully informed about the safety regulations when using pneumatic appliances.
All service works and repairs may only be performed by authorised experts.
Make sure to use a compressor with a sufficient volume of the air supplied (see Technical specifications).
At regular intervals, check the pneumatic hose and all connectors for wear.
Carry the appliance by handle, not the hose. Your hand must not in that case be near the operating button.
The appliance is not grounded and insulated against electricity. In any case, do not use the appliance where it could get in contact with electricity.
If not being used, disconnect the appliance from the air supply. NEVER change any part of the accessory equipment and do not provide ANY servicing when the appliance is connected with the air supply.
Do not damage the hoses and couplings by carrying the appliance by the hose or by disconnecting the hose from the
air supply by pulling it. Make sure the hose does not get in touch with excess temperatures, oil and sharp edges. If damaged or worn out, the hose must be changed.
The air pressure when operating the appliance MUST
NOT be higher than 7 bar. Use a pressure regulator that will reduce the air pressure to 7 bar.
Behave responsibly to other persons.
Provide good stability.
Follow the compressor operation instructions/regulations.
Risk of explosion! Appliance not to be used in an explosion-risk environment. Maximum pressure to be adhered to. Compressed air to be used only.
CAUTION! A whistling filling hose to be held when filling and discharging. Do not bend the filling hose.
CAUTION! A whistling pneumatic hose to be held when opening the quick-acting coupling!
ATTENTION! Risk of trip! Avoid or, to be more specific, pay attention to pneumatic hoses leading over floor!
Safe working is only possible when you are relaxed and concentrated.
Protect yourself, other persons, animals, items and the environment by taking the necessary protective measures, training in operating the appliance and preventive measures that will avoid actual bodily harm, property and environment damage and accidents.
Any repairs may only be executed by the manufacturer or authorised service partners of the manufacturer.
Prohibitions: Handling; use in conflict with the designation; emergency repairs; other sources of energy; safety equipment removal or damage; use in case of leak or operating failures; no original spare parts; exceeding the given allowed operating pressure; work without protective equipment; transport of appliance under pressure, servicing, repairs, leaving the appliance unattended; use of different/incorrect lubrication; smoking; open fire; removal of sticky labels.
Never aim with the air flow at persons, animals, electrical parts and yourself.
Explanation of symbols
The following symbols are used in these Operating Instructions and/or on the appliance:
Product safety:
| CE | |
| Product corresponds to appropriate EU standards |
Prohibitions:
| Protect against rain, moisture and climatic influences! | Not to be fallen into hands of children |
Warning:
| Warning/caution |
Commands:
| Read carefully the Operating Instructions. Learn thoroughly how the appliance works before operating it. | Use ear protectors and protective glasses |
Environment protection:
| Dispose waste professionally so as not to harm the environment. | Packing cardboard material may be delivered to collecting centres for recycling. |
| Any faulty and/or disposed electric or electronic devices must be delivered to appropriate collection centres. |
Package:
 |  | ||
| Protect against moisture This side up | |||
 | |||
| Interseroh-Recycling | |||
Technical specifications:
 |  | |
| Operating pressure Connector | ||
 |  | |
| Hose length Weight | ||
Use as designated
The Güde tyre filler has only been designed to fill and regulate tyres with compressed air while keeping the maximum pressure (7 bar). Be sure to know that the tyre filler is not calibrated and cannot be calibrated.
The Güde tyre filler to be used only when you fully understand all the appliance features and are able to use the appliance without any limitation and after receiving all the respective instructions.
The appliance cannot be used for works other than those for which it has been designed and which are specified in the Operating Instructions. Any other use will be considered a use
in conflict with the designation. The manufacturer will not be liable for any consequential damage and injuries. Please be sure to know that the appliance has not been designed for industrial purposes.
Installation and putting the appliance into operation
Before putting the appliance into operation:
Follow the technical specifications, pictures, position numbers, use as designated provisions and the safety instructions. Carry out a visual inspection. Remove the battery cover on the tyre filler. Do the settings on the display.
Changing the battery
The display is supplied by 2 LR 44 alkaline manganese button batteries behind the display (battery life of app. 3 years)
If the display is not accurate or is working incorrectly, the button batteries must be changed. Take the following steps:
Remove the 3 screws on the top of the display and remove the upper part. Now the two button batteries can be changed for new ones.
Residual risks and protective measures
Neglecting the ergonomic principles Inadequate local lighting
Inadequate lighting represents a high safety risk. Adequate lighting must always be provided for work with the appliance.
Warranty
The warranty exclusively applies to material or manufacturing defects. An original purchase voucher with the purchase date must be provided for lodging a claim in the warranty period. The warranty does not cover any unauthorised use such as appliance overload, violent use, damage by a foreign person or an undesirable item. Failure to follow the Operating Instructions or assembly instructions and ordinary wear and tear are also excluded from the warranty.
Behaviour in case of emergency
Provide necessary first aid treatment corresponding to the injury nature and seek qualified medical help as soon as possible. Protect the injured person from other injuries and calm him/her down.
First aid kit must always be available in the place of your work in case of accident in accordance with DIN 13164. Material taken out of the first aid kit needs to be supplemented right away. If help is needed, please provide the following details:
-
Place of accident
-
Accident nature
-
Number of injured persons
-
Injury type
Disposal
The disposal instructions are based on icons placed on the appliance or its package. The description of the meanings can be found in the "Marking" section.
Transport package disposal
The package protects the appliance against damage during transport. Packing materials are usually chosen depending on their environmental friendliness and disposal method and can therefore be recycled.
Returning the package to material circulation saves raw materials and reduces waste disposal costs.
Parts of packages (e.g. foils, styropor) can be dangerous to children. Risk of suffocation! Keep parts of packages away from children and dispose them as soon as possible.
Disposal of batteries:
Used batteries not to be disposed as household waste. Deliver them to collection centres.
Operator requirements
The operator must carefully read the Operating Instructions before using the appliance.
Qualification
No special qualification is necessary for using the appliance apart from detailed instruction by an expert.
Minimum age
The appliance can only be operated by persons over 18 years of age. An exception includes youngsters operating the appliance within their professional education to achieve necessary skills under trainer's supervision.
Training
Using the appliance only requires appropriate instructions by a professional or reading the Operating Instructions. No special training necessary.
Servicing and cleaning
Avoid heavy running and leak:
- Lubricate the valve shank and the pivot of the control lever when in a no-pressure sta
- Seal the connection thread with a non-stick band.
Storing: Cleaned, dry, with no dust, not below 5°C.
Servicing works not specified in these Operating Instructions must be performed by authorised staff as there may be dangerous situations the operator is unable to handle. Spare parts may only be replaced by authorised staff.
Failures-causes/removal
| Failure Cause Removal | ||
| Tyre fillersupplying no air | Not connected tocompressed air sourceObstructionCompressor isswitched off | Connect the appliance tocompressed air sourceRemove the obstructionStart the compressor |
| Air escaping Leaking joint Seal the connection thread on the tyre filler again | ||
| Incorrect values are being shown | Appliance is not calibratedWeak or discharged batteriesIncorrect measure unit selected | Calibrate the applianceChange the batteriesSelect the required measure unit |
Maintenance
Do you have any technical questions? A claim? Do you need spare parts or the Operating Instructions?
You will be helped quickly and without needless bureaucracy at our webpage www.guede.com in the Services part. Please help us be able to assist you. To be able to identify your appliance when claimed, we need to know its serial No., order No. and year of production. All these details can be found on the type label. Enter the details below for future reference.
Serial No.
Order No.
Year of production:
Tel.: +49 (0) 79 04 / 700-360
Fax: +49 (0) 79 04 / 700-51999
E-Mail: support@ts.guede.com
Introduction
Translation of the EC-Declaration of Conformity
We, hereby declare the conception and construction of the below mentioned appliances correspond - at the type of construction being launched - to appropriate basic safety and hygienic requirements of EC Directives. In case of any change to the appliance not discussed with us the Declaration expires.
Notified Body Name: No: Adress:
Type Ex. Cert.-No.:

97/68/EC\_&2016/1628/EU
Emission No.: