
TMA5 - Anemometer Amprobe - Free user manual and instructions
Find the device manual for free TMA5 Amprobe in PDF.
| Product Type | Mini vane anemometer |
| Brand | Amprobe |
| Model | TMA5 |
| Power Supply | 1 x 3V battery (CR2032) |
| Measurement Functions | Wind speed, air temperature, relative humidity, wind chill (WCI), dew point (DP), wet bulb temperature (WBT), external probe temperature |
| Wind Speed Range | 0.5 to 44.7 mph, 60 to 3937 ft/min, 0.4 to 38.8 knots, 1.1 to 20.0 m/s, 0.8 to 72.0 km/h, 1 to 8 Beaufort |
| Wind Speed Accuracy | ±5% of reading or ±1 least significant digit (whichever is greater) |
| Air Temperature Range | 0 to 50°C (32 to 122°F) |
| Temperature Accuracy | ±1°C |
| Relative Humidity Range | 5 to 95% RH |
| Relative Humidity Accuracy | ±3.5% RH (at 25°C, 10 to 90% RH), ±5% RH (other ranges) |
| External Probe Temperature Range | -20 to 70°C (-4 to 162°F) |
| Display | LCD with 7 selectable units for speed and temperature |
| Hold Function | Yes, freezes the displayed value |
| Auto Power Off | Yes, after approximately 5 minutes of inactivity (disablable) |
| External Probe Included | Yes, TPK60 probe for external temperature |
| Dimensions | Compact, pocket size (not specified) |
| Weight | Lightweight (not specified) |
| Included Accessories | CR2032 battery, TPK60 probe, soft carrying case, wrist strap, manual |
| Maintenance and Cleaning | Clean with a soft cloth and a solution of water and mild detergent. Do not use chlorinated solvents or aromatic hydrocarbons. Replace the battery when the low battery symbol appears. |
| Warranty | 1 year against defects in materials and workmanship |
| Standards | CE, EN61326-1 for EMC |
Frequently Asked Questions - TMA5 Amprobe
User questions about TMA5 Amprobe
0 question about this device. Answer the ones you know or ask your own.
Ask a new question about this device
Download the instructions for your Anemometer in PDF format for free! Find your manual TMA5 - Amprobe and take your electronic device back in hand. On this page are published all the documents necessary for the use of your device. TMA5 by Amprobe.
USER MANUAL TMA5 Amprobe
Limited Warranty and Limitation of Liability
Your Amprobe product will be free from defects in material and workmanship for 1 year from the date of purchase. This warranty does not cover fuses, disposable batteries or damage from accident, neglect, misuse, alteration, contamination, or abnormal conditions of operation or handling. Resellers are not authorized to extend any other warranty on Amprobe's behalf. To obtain service during the warranty period, return the product with proof of purchase to an authorized Amprobe Test Tools Service Center or to an Amprobe dealer or distributor. See Repair Section for details. THIS WARRANTY IS YOUR ONLY REMEDY. ALL OTHER WARRANTIES - WHETHER EXPRESS, IMPLIED OR STAUTORY - INCLUDING IMPLIED WARRANTIES OF FITNESS FOR A PARTICULAR PURPOSE OR MERCHANTABILITY, ARE HEREBY DISCLAIMED. MANUFACTURER SHALL NOT BE LIABLE FOR ANY SPECIAL, INDIRECT, INCIDENTAL OR CONSEQUENTIAL DAMAGES OR LOSSES, ARISING FROM ANY CAUSE OR THEORY. Since some states or countries do not allow the exclusion or limitation of an implied warranty or of incidental or consequential damages, this limitation of liability may not apply to you.
Repair
All test tools returned for warranty or non-warranty repair or for calibration should be accompanied by the following: your name, company's name, address, telephone number, and proof of purchase. Additionally, please include a brief description of the problem or the service requested and include the test leads with the meter. Non-warranty repair or replacement charges should be remitted in the form of a check, a money order, credit card with expiration date, or a purchase order made payable to Amprobe® Test Tools.
In-Warranty Repairs and Replacement – All Countries
Please read the warranty statement and check your battery before requesting repair. During the warranty period any defective test tool can be returned to your Amprobe® Test Tools distributor for an exchange for the same or like product. Please check the "Where to Buy" section on www.amprobe.com for a list of distributors near you. Additionally, in the United States and Canada In-Warranty repair and replacement units can also be sent to a Amprobe® Test Tools Service Center (see address below).
Non-Warranty Repairs and Replacement – US and Canada
Non-warranty repairs in the United States and Canada should be sent to a Amprobe® Test Tools Service Center. Call Amprobe® Test Tools or inquire at your point of purchase for current repair and replacement rates.
In USA In Canada
Amprobe Test Tools Amprobe Test Tools
Everett, WA 98203 Mississauga, ON L4Z 1X9
Tel: 877-AMPROBE (267-7623) Tel: 905-890-7600
Non-Warranty Repairs and Replacement – Europe
European non-warranty units can be replaced by your Amprobe® Test Tools distributor for a nominalv charge. Please check the "Where to Buy" section on www.amprobe.com for a list of distributors near you.
European Correspondence Address*
Amprobe® Test Tools Europe
In den Engematten 14
79286 Glottertal, Germany
Tel.: +49 (0) 7684 8009 - 0
*(Correspondence only – no repair or replacement available from this address. European customers please contact your distributor.)

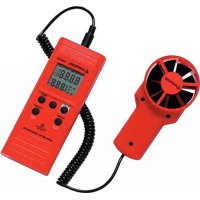
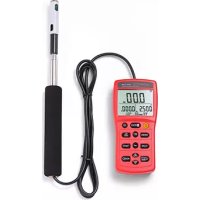
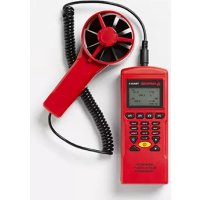
1) Vane impeller
2) Precision thermister temp. sensor & capacitive humidity sensor
3) LCD display
4) POWER and HOLD key
5) UNIT and MODE key
6) Battery compartment (on rear side)
7) Wrist strap holder
8) TPK60 probe socket
9) TPK60 probe
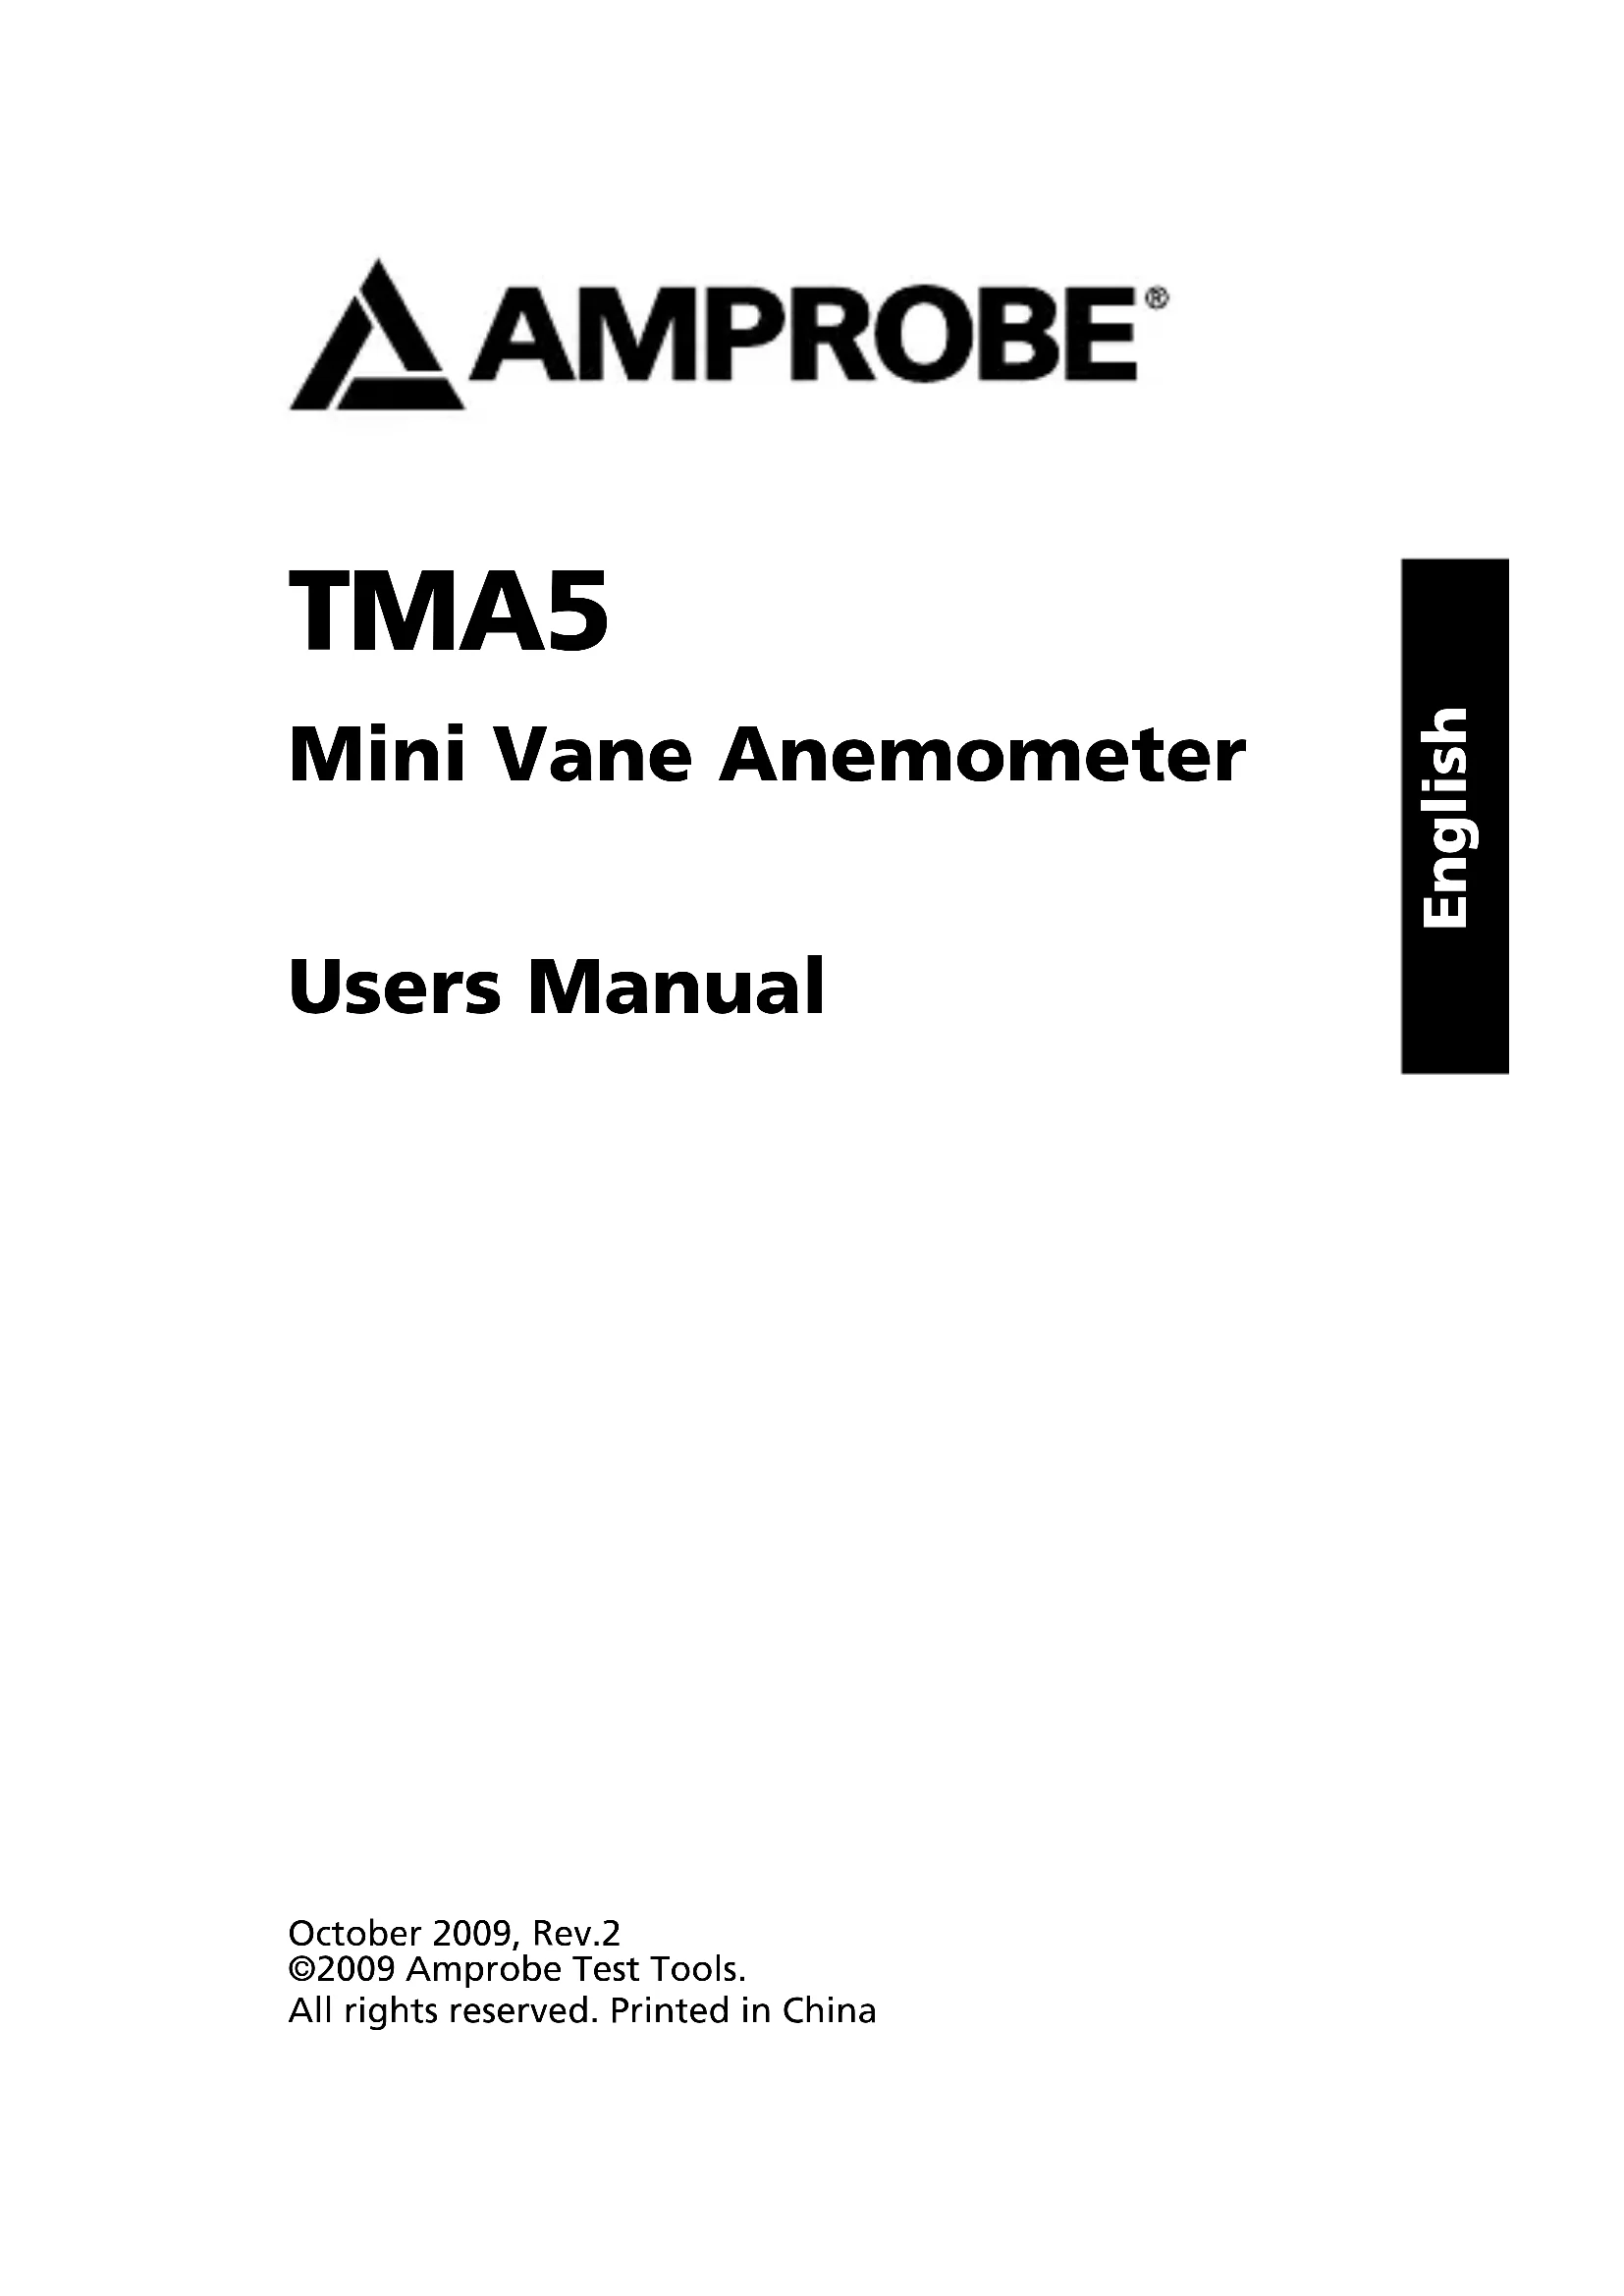
1) Air velocity unit
2) Primary LCD display:
Air velocity, Air temperature, relative humidity, Windchill (WCI), Dew point temp.(DP), Wet bulb temp. (WBT), probe temp.(EXT) in turns.
3) Unit of temperature. oC or oF selectable
4) Max. velocity indicator
5) To freeze the latest display.
6) Low battery indicator
7) Humidity indicator and unit

POWER / HOLD KEY:
• To turn on the meter
- Press more than 3 seconds to turn off the meter.e electricity waste and cost
• In normal mode, press to freeze the readings
- In power off mode, press more than 3 seconds to disable the auto sleep mode.

UNIT / MODE KEY:
- In normal mode, press to display different modes in turns: Velocity/Max. Velocity/Air Temp./Relative Humidity/Windchill/Dew Point Temp./Wet Bulb Temp./External Probe Temperature.
- In air velocity mode, press these two keys to change the air velocity unit.

- In any temperature mode, press these two keys to change the temperature unit.
CONTENTS
SYMBOLS 2
UNPACKING AND INSPECTION 2
INTRODUCTION ....3
Features 3
OPERATION ....3
Auto Power Off 4
SPECIFICATION 4
MAINTENANCE AND REPAIR 6
Battery Replacement ....7
TROUBLE SHOOTING 7
SYMBOLS
| Caution! Refer to the explanation in this Manual | |
| Conforms to relevant Australian standards | |
| CE | Complies with European Directives |
| Do not dispose of this product as unsorted municipal waste. |
⚠ WARNING and PRECAUTIONS
- The meter is accurate at low and mid-range air speeds. Consistent use at very high speed; i.e.: From the window of a fast-moving car will damage the impeller's bearing and cause inaccuracy.
- When you program the meter and then restart the meter, it will default to the last mode and unit used.
- You can remove the transparent protection film of the LCD if you feel the display is blurred.
UNPACKING AND INSPECTION
Your shipping carton should include:
1 TMA5 meter
1 TPK60 probe
1 CR2032 battery
1 Manual
1 Soft pouch
1 Wrist strap
If any of the items are damaged or missing, return the complete package to the place of purchase for an exchange.
Congratulations on your purchase of TMA5 mini anemometer. A convenient instrument to measure air flow, temperature and humidity.
Features
- Compact size design with a wrist strap
- Precision thermistor sensor & capacitive humidity sensor
- Easy two buttons operation
- Big display with 7 selectable units
• Data hold to freeze display
• External temperature probe included - Auto power off
OPERATION
- Hold the meter and target the air source from the rear of the unit. When holding the meter, hold it at arm's length and away from your body.
- Plug in the TPK60 probe if want to measure external temperature.
- Press"POWER/HOLD" button to turn on the meter.
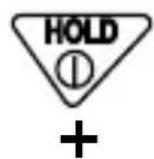
- The top LCD indicates the unit of wind speed and the primary display indicates the value (Fig.1)
- Press "POWER/HOLD" button to freeze the current reading. The "H" icon appear on LCD. Press again to release. (Fig.2)
-
Press"UNIT/MODE"button to switch the display from wind speed to max wind speed, air temperature, relative humidity, wind chill (WCI), Dew point temp. (DP), Wet bulb temp.(WBT) and probe temp.(EXT)
-
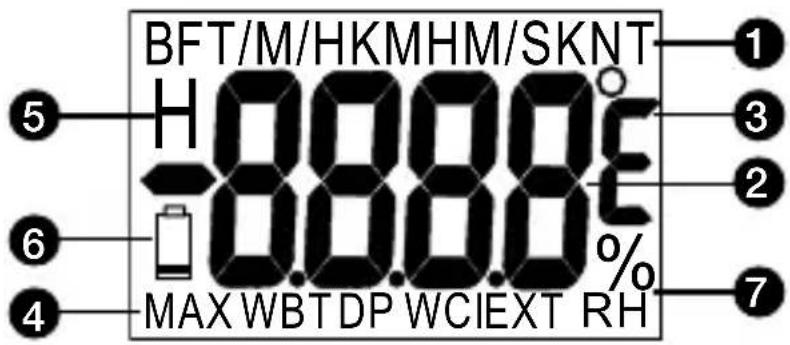
To change velocity unit, press "POWER/HOLD" and "UNIT/MODE" simultaneously while in velocity mode.
-
To change temperature unit, press "POWER/HOLD" and "UNIT/MODE" simultaneously while in any temperature mode.
-
Turn off the meter by pressing "POWER/HOLD" button more than 3 seconds.
-
Unplug the probe and put back the anemometer into soft pouch to protect the vane impeller.
Auto Power Off
This instrument will shut off automatically in approx. 5 minutes of inactivity. For operating over longer period of time, disable the sleep mode by pressing
"POWER/HOLD" more than 3 seconds before power on until a "n" appears in the middle of the screen (Fig.3) and then release key to return to the normal measurement mode.
SPECIFICATIONS
Velocity Range : 0.5\~44.7M/H, 60\~3937FT/M, 0.4\~38.8KNT, 1.1\~20.0M/S, 0.8\~72.0KMH, 1\~8BF
Resolution :0.1M/H,2FT/M,0.1KNT,0.1M/S,0.1KMH,1BF
Accuracy : +/-5% of reading or +/-last significant digit (whichever is greater)
Air Temp. Range :0\~50°C (32°F\~122°F)
Resolution : 0.1°C
Accuracy : +/-1°C
Humidity Range : 5\~95%RH
Resolution :0.1%RH
Accuracy : +3.5% RH (at 25°C, 10\~90%RH). others +5%
Ext. Probe Range : -20\~70°C (-4°F\~162°F)
Resolution : 0.1°C
Accuracy : +/-1°C
Dew Point Range : -20\~59.9°C (-4°F\~140°F)
Wet Bulb Range : -5\~59.9°C (23°F\~140°F)
Operation temp : 0\~50°C
Operation RH% : 0\~80%RH
Power Requirements : 1pcs 3V (Type: CR2032)
Windspeed unit :
M/S: meter per second,
KMH: Kilometer per hour
FT/M: Feet per minute
KNT: Knot
M/H: Mile per hour
BF: Beaufort
CE - EMC: Conforms to EN61326-1.
This product complies with requirements of the following European Community Directives: 89/336/EEC (Electromagnetic Compatibility) and 73/23/EEC (Low Voltage) as amended by 93/68/EEC (CE Marking). However, electrical noise or intense electromagnetic fields in the vicinity of the equipment may disturb the measurement circuit. Measuring instruments will also respond to unwanted signals that may be present within the measurement circuit. Users should exercise care and take appropriate precautions to avoid misleading results when making measurements in the presence of electronic interference.
If there appears to be a malfunction during the operation of the meter, the following steps should be performed in order to isolate the cause of the problem.
- Check the battery. Replace the battery immediately when the symbol "☐" appears on the LCD.
- Review the operating instructions for possible mistakes in operating
Except for the replacement of the battery, repair of the meter should be performed only by a factory Authorized Service Center or by other qualified instrument service personnel. The front panel and case can be cleaned with a mild solution of detergent and water. Apply sparingly with a soft cloth and allow to dry completely before using. do not use aromatic hydrocarbons or chlorinated solvents for cleaning.
The meter is accurate at low and mid-range air speeds. Consistent use at very high speeds., ie, From the window of a fast-moving car will damage the impeller's bearing and cause in-accuracy.
Battery Replacement
Replace your batteries when low battery icon appear on LCD. To replace the battery:
- Turn the battery compartment cover in a COUNTERCLOCKWISE direction to remove it. (Fig.4)
- Put the new battery between two contact pins and battery anode side faces up.
- Affix the battery compartment cover by turning it in a CLOCKWISE direction.
1. Power on but no display
a) Make sure the time of pressing power key is > 0.2 second.
b) Check the batteries are in place with good contact and correct polarity.
c) Replace battery or move away the battery for one minute and re-install.
2. Display disappear
a) Replace a new battery.
b) Disable the auto power off function before power on for long time using.
3. Error code
E02: The value is under range
E03: The value is over range
E04: The original data error results in this error (RH, WCI, DP, WBT)
E31: Circuit or sensor damaged
4. Wind speed reading is always zero
The wind speed components or circuit is damaged. Sent back for repair

Fig.1
Fig.2

natural_image
Simple black geometric shape resembling a stylized letter or symbol on white background (no text or labels)Fig.3

Fig.4
TMA5
Amprobe Test Tools Amprobe Test Tools
Everett, WA 98203 Mississauga, ON L4Z 1X9
Tél. : 877-AMPROBE (267-7623) Tél. : 905-890-7600
⚠ MISES EN GARDE ET PRECAUTIONS
Amprobe Test Tools Amprobe Test Tools
Everett, WA 98203 Mississauga, ON L4Z 1X9
Tel.: 877-AMPROBE (267-7623) Tel.: 905-890-7600
©2009 Amprobe Test Tools.
Amprobe Test Tools Amprobe Test Tools
Everett, WA 98203 Mississauga, ON L4Z 1X9
Tel.: 877-AMPROBE (267-7623) Tel.: 905-890-7600
Visit www.Amprobe.com for
- Catalog
- Application notes
• Product specifications - User manuals
- Limited Warranty and Limitation of Liability
- Repair
- In-Warranty Repairs and Replacement – All Countries
- Non-Warranty Repairs and Replacement – US and Canada
- Non-Warranty Repairs and Replacement – Europe
- POWER / HOLD KEY:
- UNIT / MODE KEY:
- CONTENTS
- SYMBOLS
- ⚠ WARNING and PRECAUTIONS
- UNPACKING AND INSPECTION
- Features
- OPERATION
- Auto Power Off
- SPECIFICATIONS
- Battery Replacement
- Power on but no display
- Display disappear
- Error code
- Wind speed reading is always zero
- TMA5
- ⚠ MISES EN GARDE ET PRECAUTIONS
- Visit www.Amprobe.com for
Brand : Amprobe
Model : TMA5
Category : Anemometer