Cafè Matisse 1363 - Coffee machine ARIETE - Free user manual and instructions
Find the device manual for free Cafè Matisse 1363 ARIETE in PDF.
User questions about Cafè Matisse 1363 ARIETE
0 question about this device. Answer the ones you know or ask your own.
Ask a new question about this device
Download the instructions for your Coffee machine in PDF format for free! Find your manual Cafè Matisse 1363 - ARIETE and take your electronic device back in hand. On this page are published all the documents necessary for the use of your device. Cafè Matisse 1363 by ARIETE.
USER MANUAL Cafè Matisse 1363 ARIETE
GB Operation and Safety Notes Page 14
Even though this device is made to fulfil the standards of the European Union and all possible sources of danger have been avoided, please read the following safety instructions carefully and only use the device
for its intended purpose to avoid accidents and damage. Keep the manual, so that you can refer to it later if necessary. If you wish to pass the device on to another person, please pass the manual on with it.
The information contained in this manual is labelled with the following symbols, which have the following meanings:
| Danger for children Risk of burns | ||
| Danger due to electricity Caution - Damage to property | ||
| Threat of damage due to other causes | ||
Intended use
You may use the device to make coffee. The device has not been designed for other purposes, the manufacturer accepts no responsibility for any damage caused by improper use. Improper use will invalidate the warranty.
Remaining risks
The structural characteristics of the device, which is the subject of this manual, do not guarantee protection from direct streams of water or steam.

CAUTION!
Risk of burns! Do not touch the outer metal parts or the filter holder while the device is in use, as this can lead to burns.
SAFETY INSTRUCTIONS
PLEASE READ THE OPERATING INSTRUCTIONS CAREFULLY PRIOR TO USE.
- This device is designed for use in homes and similar contexts, such as:
- employee kitchens in small shops or offices and other workplaces
-
farms
-
hotel rooms, guest houses and other residential environments
-
other kinds of hotel, such as Bed and Breakfast hotels
-
The manufacturer accepts no liability for improper use.
- You are recommended to keep the original packaging because our free customer service is not
intended for damage caused by improperly packaging the device when sending it to an appropriate custom service centre.
The device conforms to (EG) decree no. 1935/2004 of 27.10.2004 on materials and items intended to come into contact with food.

Danger for children
- This device may only be used by children from the age of 8 if they are supervised or instruction in how to use the machine safely and if they are aware of the risks it presents.
- Cleaning and maintenance must not be performed by children unless they are at least nine years old and are supervised. Please ensure that children cannot play with this unit.
Always store the appliance and its cable out of the reach of children under 8 years old. - Keep the packaging out of reach of children as it could be a potential source of danger.
- If you decide to dispose of the device, it is recommended that you make it unusable by severing the power supply cable. It is also recommended that you do not put
damaged parts loosely into bins as this could be a potential danger to children if they attempt to use the device as a toy.
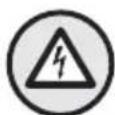
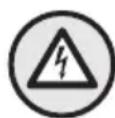
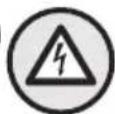
Danger due to electricity
- Persons with reduced physical, sensory or mental abilities, or persons lacking the necessary experience or knowledge of how to operate the device, may only use the device once they have been instructed in how to use the device safely and have been made to understand the related dangers in doing so.
- Please do not leave cables hanging where a child can reach them.
- Before connecting the device to the mains, ensure that the input voltage is compatible with the information on the technical data sheet under the device.
- Use of an extension cable which is not authorised by the manufacturer of the device can cause damage and accidents.
- Verify the device is not connected to the mains when filling it with water.
- Avoid allowing any of the electric components to make contact with water: This could lead it to short circuit!
Always remove the power plug before cleaning or maintenance.
- Never immerse the device in water or other liquids.

Threat of damage due to other causes
- Do not lift the device by the water tank, instead always lift it by its whole body.
- Find a well lit, clean surface with easy access to a plug.
- Avoid over filling the water tank.
- Never leave the appliance unattended whilst connected to the power supply.
The device must be placed and used on a stable surface. - Do not use the appliance if it has been dropped, if it has visible damage or if it is leaking. Do not use the device if the power supply or plug are damaged or the device looks defective. All repairs and replacements of the power cable may only be performed by Centro Assistenza Ariete or an engineer authorised by Ariete to prevent possible risks.

Caution - Risk of Damage
- Place the machine on a stable surface where it cannot be knocked over.
- Do not switch the device on if there is no water in the water tank as this will burn through the pump.
- Never fill the water tank with hot or boiling water.
- Do not place the machine on hot surfaces or near open flames to avoid damage to the casing.
- Do not use sparkling water (with added carbon dioxide).
- Only use the pads from the ESE system.
- Never put other items in the filter holder.
- Do not expose the machine to any environmental temperatures of under 0^ as the leftover water in the water tank will freeze and could cause damage to the machine.
- Do not use the device outdoors.
- This appliance must not be exposed to atmospheric conditions (rain, sun etc).
- After you have pulled the plug and the components have cooled down, only clean to device with a soft, light, damp cloth and a few drops of neutral, non-aggressive washing liquid (never use solvents which might damage plastic).
To dispose of the device properly according to European regulation 2012/19/EU please read the relevant package leaflet.
- ALWAYS KEEP THESE INSTRUCTIONS.

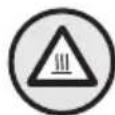
Risk of burns
- Never point the flow of steam or water towards your body, be careful with the steam /water pipe: Risk of burns!
- Do not touch the outer metal parts or the filter holder while the device is in use, as this can lead to burns.
- If water does not flow from the filter holder, this could be a result of a clogged filter. Unplug the power supply and wait for approximately ten seconds. Then remove the filter holder, which may lead to residual pressure and a spraying of water. Then you can proceed to clean the section pictured.
Description of the device
1 Espresso machine
Steam release button
3 ON/OFF button
4 Coffee release button
5 Steam button
6 Mains plug
7 Cup grill
8 Water collection container
9 Coffee grinder
10 Filter holder
11 Individual nozzle discs
Silicone perforated disk
13 Filter for 2 cups
14 1 cup/pad filter
15 Measuring spoon
16 Milk frother
17 Steam pipe
18 Detachable water tank
19 Lid (water tank)
Start-up
Before assembly, ensure that the mains voltage available corresponds to the operating voltage necessary for the appliance (see label).
Place the appliance on a flat, horizontal surface.
Remove the water tank 18.
Wash the water tank 18 before first use and fill it with fresh, still water (Fig. A) up to the "MAX" mark.
Put the water tank 18 back in place (Fig. B). Note: Make sure that the water tank 18 has been replaced correctly. Otherwise it may block the flow of the coffee.
Insert the plug 6 into a socket, which is available over an earthing device.
- Switching on for the first time
After you have filled the water tank 18 with fresh, still water, place a container with a capacity of at least half a litre under the filter holder connection and the steam pipe. Press the ON/OFF switch 3. Press the coffee release button 4. Wait for water to come out of the side of the filter holder. Press the steam release button 2 and allow the water to leave the steam pipe 17. Press the steam
release button 2 and the coffee release button 4 to stop the flow of water.
Upon first use or after a long period of inactivity, this process can require several minutes. For subsequent coffees, this will no longer be necessary.
Making coffee
Press the ON/OFF button 3 to switch the device on (Fig. C).
With ground coffee:
- Place the individual nozzle disc 11, the silicone perforated disc 12 and, for powdered coffee, the filter for 2 cups 13 or 1 cup 14 in the filter holder 10 (Fig. E).
Measure out the coffee in the filter and lightly press it together with the coffee grinder provided: for two coffees fill two measuring cups, for just one coffee, fill one measuring cup.
Note: If you put too much coffee powder in the filter 13, the filter holder 10 may be difficult to screw on and/or coffee may leak from the filter 13.
With pads:
Insert the filter for theipads filter holder 10 (see Fig. G).
Press the coffee pad with you fingers in the filter 14 underneath. The coffee pad must be exactly in the middle and inside the filter 14.
Secure the filterbldarning the filter holder handle from right to left. Make sure that the filter holder 10 is hooked on properly (Fig. H).
Place the cup under the filter holder discharge 10. When the relevant button 4 lights up, the machine is ready to release coffee. Press the coffee release button 4.
Press the coffee release button again to stop the flow of coffee.
Note: If the coffee pad is not correctly inserted into the filter 14 or not secured properly by the filter holder 10, drops of water may leak from the filter holder 10.
Note: Do not remove the filter holder 10 while coffee is still pouring. Otherwise there is a risk of scalding!
Note: If water does not flow from the filter holder 10, this could be a result of a clogged filter 13, 14. In
this case, switch the machine off, wait a few minutes and turn the filter holder 10 very slowly, because this may lead to residual pressure and a spraying of water.
Wait 10 seconds after pouring the coffee before you remove the filter holder 10.
To remove the filter holder 10, turn it slowly from right to left to avoid spraying water or coffee. Note: When removing the filter holder 10 the coffee pad may stay attached to the upper part of the device. To remove the coffee pad, turn the filter holder 10 as shown in Fig. K and let the coffee pad fall into the filter holder 10.
Stand-by Function:
When the device is switched on but no function is being performed, it will automatically switch itself off after 30 minutes. The appliance is now in stand-by mode. Press the ON/OFF button to switch the device on again.
Filling the water tank during use
Note: The water tank 18 should be filled before it becomes completely empty.
Press the ON/OFF button 3 to switch the device off (Fig. C).
Pull the power plug 6 from the socket.
Remove the water tank 18 and fill it with fresh, still water (Fig. A) up to the "MAX" mark.
Put the water tank 18 back in place (Fig. B). Note: Make sure that the water tank 18 has been replaced correctly. Otherwise it may block the flow of the coffee.
Insert the mains plug 6 into a standard household socket.
Press the ON/OFF button 3 to switch the device on.
If the water tank 18 is emptied completely, air may get into the circuit and block the flow of coffee. To ensure that the device can be used again, switch it off and let it cool down.
- Place a container under the filter holder area and switch on the device by pressing the ON/OFF button 3.
Press the coffee release button 4 and let at least one cup of water flow from the filter holder collector to restore the device.
Press the coffee release button again to stop the flow of water. The device should work properly again.
Making Cappuccinos
Press the steam button 5.
Wait until the steam button 5 stops flashing and is permanently lit.
Note: While you are waiting, steam may flow from the filter holder collector.
Submerge the steam pipe in the container with the milk which is to be frothed.
Now press on the steam release button 2 until you achieved your desired result.
To stop the steaming function, let go of the steam release button 2.
Press the steam button 5 again to switch off the steam function.
Reusing a machine to make coffee
To make a coffee immediately after making a cappuccino, wait until the coffee release button 2 lights up again. The device is ready to make coffee. Follow the instructions in the section "Making coffee".
USEFUL ADVICE FOR MAKING AN ESPRESS THE ITALIAN WAY
The strength of the coffee depends on the grinding degree setting, the amount of coffee in the filter holder and the pressure used to push the coffee down. The ground coffee in the filter holder should only be pressed lightly. The coffee only needs a few seconds to flow into the cup. The speed of coffee release can be regulated by adapting the amount of coffee powder in the filter holder or using coffee with a different grinding degree.
Cleaning the device
CAUTION!
Only perform the following cleaning processes if the device is switched off and unplugged.

CAUTION!
Regular maintenance and cleaning ensures a longer quality service.
CAUTION!
Each of these processes is only to be carried out when the machine has cooled down. Do not wash the detachable parts of the device in a dishwasher. Do not expose the device to direct flows of water.
Cleaning the filter 13, 14:
Check that the holes are not clogged and clean them with a small brush.
To remove any coffee powder or contamination, place a glass under the filter holder collector and run hot water out of the filter holder 10 with a used filter 13 or 14 without a coffee pad or coffee powder and proceed as described in the chapter "Cleaning the device".
Cleaning the silicone perforated disk 12
Rinse out the silicone perforated disk 12 under running water. Turn it so that the middle opening can be unblocked by removing the coffee powder that it stuck in it.
Cleaning the filter holder container:
If the device is not used for an extended period of time, coffee grounds may drop onto the filter holder collector. Remove these with a toothpick, a small sponge or by running water through it without the filter holder being inserted 10.
Cleaning the milk frother 16

CAUTION!
Only perform these processes when the steam pipe has cooled down to avoid scalding.
Unscrew the milk frothier from the steam pipe 17 and rinse it out in running water.
You can clean the steam pipe with a soft cloth. Screw on the milk frother 16 onto the steam pipe 17 tightly again. If necessary, clean the opening of the steam pipe 17 again with a pin. After each use, let a little steam out to remove any remains.
Cleaning the water tank 18:
Regularly clean the water tank or a damp cloth.
18 with a sponge
Cleaning the cup grill 7 and the water collection container 8:
Note: Empty the water collection container 8 periodically.
Remove the cup grill 7 and rinse it out under running water.
- Remove the water collection container 8, empty it and rinse it out under running water.
Cleaning the surface of the machine
CAUTION!
Only clean the permanent components of the machine with a damp cloth to avoid damage to the casing.
Descaling
Good maintenance and regular cleaning protect the device, ensure a longer lifespan and limit the build up of limescale. If the device still does not function
properly after some time because hard water and very calcareous water have primarily been used, the limescale must be removed to solve the problem. For this purpose you should only use the Ariete descaling agent NOCAL with a citric acid base.
This product can be purchased easily at an Ariete customer service centre. Ariete accepts no liability for damage to components of the Espresso machine from the use of non-compliant products with chemical additives. Follow the instructions on the instruction decalcifying agent leaflet.
Shutting down
In case of shut down, you must detach the machine from the power supply, empty the water tank and the collection container and clean the device (see the chapter "Cleaning the device"). In case of scrapping, you must take care to dispose of the different individual parts according to the applicable laws of the country in which the device is being used.
Troubleshooting
| Problem Cause Solution | ||
| Not releasing steam. | Too little water in the water tank 18: the pump has no suction. | Check whether the water tank 18 has been inserted correctly and that there is enough water in the water tank 18. Fill the water tank 18 with fresh, still water up to the "MAX" mark. |
| The opening of the steam pipe 17 is blocked. | Remove any film which has built up at the opening of the steam pipe 17 with a pin. | |
| Water flows out of the side of the filter holder 10. | The filter 13 is probably too full, meaning the filter 13 cannot be properly screwed into the frame. | Remove the filter holder 10 very slowly, because this may lead to residual pressure and a spraying of water. Clean the frame with a small sponge. Try it again with the correct amount of coffee. |
| There are bits of ground coffee on the seal of the coffee filter frame. | Try it again with the correct amount of coffee. | |
| The hole in the silicone perforated disk 12 is blocked. | Rinse out the silicone perforated disk 12 under running water. Turn it so that the middle opening can be unblocked by removing the coffee powder that it stuck in it. | |
| Water flows out of the side of the filter holder 10. | The release openings of the filter 13, 14 are blocked. | Remove the filter holder 10 very slowly, because this may lead to residual pressure and a spraying of water. Clean the filter's blocked holes 13, 14 with a brush or a pin. Clean the filter 13, 14 with the Ariete COFFEE CLEAN tablets, following the instructions on the packaging. |
| The coffee pad isn't working. | Change the coffee pad in the filter holder 10. | |
| The coffee is taking too long to pour or is not pouring at all. | The holes of the filter holder collector are clogged. | Run water from the machine without inserting the filter holder 10. If the water still flows irregularly from all of the holes, decalcify the device. Use the Ariete decalcifying agent NOCAL, which is available at the Ariete customer service centre. Follow the instruction on the decalcifying agent packaging. |
| The holes of the filter holder collector are clogged. | Remove the filter holder 10 very slowly, because this may lead to residual pressure and a spraying of water. Clean the filter's blocked holes 13 with a brush or a pin. Clean the filter with the Ariete COFFEE CLEAN tablets, following the instructions on the packaging. | |
| Coffee mixture ground too finely | Try a coarse-grained coffee mixture. | |
| Coffee pressed too hard | Press the coffee into the filter 13 with less pressure. | |
| The water tank 18 has not been correctly inserted. | Insert the water tank 18 up to the stop point. | |
| The hole in the silicone perforated disk 12 is blocked. | Wash the silicone perforated disk 12 under running water. Turn it so that the middle opening can be unblocked by removing the coffee powder that it stuck in it. | |
| Too little water in the water tank 18: the pump has no suction. | Check whether the water tank 18 has been inserted correctly and that there is enough water in the water tank 18. Fill the water tank 18 with fresh, still water up to the "MAX" mark. | |
| The coffee pad isn't working. | Change the coffee pad in the filter holder 10. | |
| The coffee pad is broken. | Remove the filter holder 10, clean the frame with a sponge and insert a new coffee pad. | |
| The coffee is not strong enough or is cold. | The coffee powder is ground too small. | To make hot, strong coffee, use a finer coffee powder. |
Tem, YTO6bI DeTn He ngpaJIc C npu6opom.
Bcerda depxknte npnbop n erokabeIb BHe 30HbI Doctyna DeTei do 8 jeT.
-Держinte упakOBky пибopa BHe 30ны ДОCTуна DeTeи, NOСКОЛьку OHa MOжETnpeДСТаВЯТь ДлЯ Hnx NOTEHцИльHyю ONaCHOCTb.
Ecnn Bbl peuTe yTnIn3npoBaTb np6Op, Mbl peKOMeHdyem CdeNaTbeO HeepnroHbIM K nCNoJb3OBaHNIO, HapnMpEpyTem nepepe3aHNy Ka6eJI. Kpome TOrO, Mbl TaKKe peKOMeHdyem OBe3BpeDHTb BCE DetaII np6opA, KOtOpBie npedCTabJIOT oco6yIO onaCHOCTb dIJa DeTei, ecII ONI 6yDyT nIpaTb C HmN.
Bo3MoJHbI yUeep6, Bbl3BaHHbI pyrMM npuHaMn
He noHmMaTe np6op 3a KOHTeHep IJIy BOdbI, pN IOHrTIN 6epntecb TOnbKO 3a BeCb KOpnyc.
- YctaHaBnBaIte npi6op Ha xopoio OcBeueHHo, uCToN IOBepxHOCTN C JERKIM DOCTyNOM Kpo3eTke.
- Избегашие перелINA KOHTeHepa ДлЯ ВОдbl.
He octabJnTe BkIIOueHHbI B cetb np6op 6e3 npncMOtpa. - Пибор Heo6xOДmo yctaHaBnBaTb И nCNoIb3OBaTb Ha cTa6nIb-HoN IOBepXHOCTn.
He nCnoIb3yIte npIbOp noCle erO naDeHnA, HAIuHnBnIMbIX NOdTBePckDeHn IIN yTeUKe BODbl. He nCnoIb3yIte npIbOp npNIOBpeKdEHN CTeBOrO 6JOKa IIN PO3eTKn IIN npN HAIuHn DeΦeKTA camoro npIbopa.ДЯ NCKIQUeHn BCEx PnCKOB BCE peMOHThBiE pa-60tbl, a TAKKe 3aMeHa cTeBOrO Ka6eJIa MOrYT OcyUeCTBnTbcra TOnbKO KOMpaHnei Centro Assistenza Ariete nIIyIPOJIHOMoueHHbIMn Ariete texHnKaMn.

OcToPOxHO - MaTePnaJIbHbIyUeep6
- YctaHaBnBaIte MaunHy Ha cta6nIbHOJ NOBepXHocTn, rDe OHa He MoKcT ONpOKnHyTbcra.
He BKJIIOUaIte MaUNHy c NyCTbIM KOHTeINHepOM dJa BOdbI, NocKOJbKY B IpOTnBHom Cnyae HAcOC MoKET nepeoropeTb.
HnBkoemcnyaeHeHanonHnTe KOHTeHep ropaeynnKnPauey BOIOI.
Bo n36eXaHne NOBpeXdEHN KOpnyca HN B KOEM Clyuae He CTaBbTeMaunHy Ha TOpYne NOBepxHOCTnIIN B6JIn3N OTKpbIToro ORHa.
He nCnoIb3yIte ra3npoBaHHyu BODy (c cOepeXaHneM yrJIeKncIoro ra3a).
IcnoJb3yIte nckJIIOHTeJIbHO yanDbI cnCTembl ESE.
HnB Koem cnyae He KnaIte B qnilbTpoepxataeNb NOCTOPOHHe npedMeTbl.
He noBepraTe MaunHy Bo3deiCTBnAM TempeatpybI Hxke 0^ NOCKOJIbky OCTaTKN BOJBI KOH-TeHepe MOyT 3aMep3HyTb IN npuHHtby uep6.
He nCnoIb3yIte npI6Op Ha otKpbITOM B03dUxE.
HeIb3a NOBBePraTb npi6Op BO3-DeiCTBnIO IORoHbIX BIIrHnI (doXdb, COJHcE n T.d.).
- После того кakштЕкер 6ыл ВblHуТ n3 cETn, a ropячne DeTaJINoOCTbIIn, npi6Op MOxHOb OUHCTNTbMЯrkO, cIeRka BnaJxHO TpIKNoC HeCKOLbKIMN KaIIaMn HeITpaJIbHOrO HearpeCCNBHO MOUSeRo CpeIcTBa (HnВ Koem cIyuae HeNCIOJIb3OBaTb pactBOPHTeJI, NockOLbky OHI MOryT NOBpeIITbПlaCTMaCCOBoe NOKpbITHe).
- Yka3aHnI NO HaJIeJkaUeYtIN3aCnN COrIaCHO EBpOneiCKoI DInpeKToBBe2012/19/EC npINBOJaTcB B COOTBETCTByIOUeM npINIOJKeHn K ypaKOBKe.
COXPAHJTE HACTOJIUEE PYKOBOCTBO IOKCPIYATAUIN.

Onachoctb oxkora
HnB Koem cnyae He HappaBnaIte CtpyIO BObI Ha ce6a,co6IHOaIte OCTOpOxKHOCTb Pn pa6oTe C npoBbIM/BOJHbIM 7JaHROM: OnacHOCTb OXORA!
He doTpaRnBaItec b Do hapyxHbIX MeTaJIInuecknx YacTei nФиЛьТрОДeРЖaTeЯ BO BpeMЯЗКСПлуaTuCmпPn6Opa, NocKoЛьКу3TO MoXeT npINBeCTN K OxKOram.
He npoxoHMOCTb BOdbI uepe3 1nBtroepKataJIb MOxET 6bITb Bbl3BaHa erO 3acopeHem. IpepBNTe NODaUy HAnpJxKeHnY I NOdoXnTe OKoNo 10 cekyn. Iocne Yero BblbTe 1nBtroepKaTeJIb, NCKOJIbKY BO3MOxHOE OCTaTOUHoe DaBLeHne MOxET pINBeCTN K pa36pbI3rNBaHnIO BObl. Iocne Yero Bbl Moxete npoJxKaTb OuNCTKy, KaK ONICAHO B COOTBETCTByIOUeM pa3dJe.
OnncanHe np6opa
1 3cnpecco-MaunHa
2 Khonka dny noayn npa
3 KhoNka BKN/ BblKJI
4 KhoNka BbIaun KoPe
5 Khonka napa
6 CeteboWTekep
7 PeeweTka-nOndTaBka dIy aWeK
8 Bovoc6opHnK
9 Koepe-HaIaNabNTeIb
10 ΦильТpoДержаTeNB
11 Dmck c poxxkOM
12 CnINIKHOBOBbI INCK
13 ΦильТр Ha 2淘汰
14 Φильтр ha 1 chaшky/yaIaIy
15 Mepnay loxka
16 BCneneHbATEnbIy MoJoka
17 Napolobay Tpy6ka
18 CbemHbI KOHTeHep DnB OBDbl
19 KpbIuKa (KoHTeHep DnA BODbI)
BbOДВэКсплуataцио
Ipeed BBODOM B 3KcNpyatauHIO y6eINTEcB TOM, YTO HAnpJxHeHne DOMaUHei CETn COOTBetCTByET pa6OyEmy HAnpJxHeHIO np6Opa, yKa3aHHOMy Ha TInOBoTbNIuKe.
YCTAHOBNTe np6Op Ha poBHyTO rOpN3OHTaJIbHyIO NOBepXHOCTb.
CHIMMTE KOHTeHep DJIa BODbI 18.
IpeepnepBbIM npimHeHem npomOte KOHTeHep DnBaBObl 18 n HanoJHnTe erO uCToBdoi6e3ra3a (Pnc.A) do yka3aHHoN OTMeTKN ,MAKC".
UcTaHOBnTe KOHTeHepIaBb18 (Pnc.B). Yka3aHHe: CneIte 3a npabINbHOn yCTaHOBKOJ KOHTeHepa Ira BODbl 18. B npOTnBHOM cIyuae MaunHa He CMOKeT npoN3BOIDt b KoPe.
BCTaBbTe uTKepe B p03eTk6, ochuHHyo COOTBETCTByUOzIM 3a3emJHeHEm.
O NepBoe BKJIIOUeHne
10ocne ounctkn KOHTeHepa dny BODbi 18 uNCTO BDOI 6e3 r3a nomeCTte NOd qnlbTpoepkaTeJIb n npOByTO Tpy6ky EMKoCTb ObemOM He
Mehee 0,5 n. HaxmTe Ha KhoNky BKl/BblkI 3. HaxmTe Ha KhoNky BbIaun KoFe 4. NdoJxIte, noka n3 fIbTpapepkaTe na He 6ydet BblTeKaTb Boda. HaxmTe Ha KhoNky Bblaun npa 2 n daIte BblteBBoe n3 napOBon Tpy6kn 17. Inra npekpaueHna BblTeKaHnBA BoDbl CHOba HaxmTe Ha KhoNky NoDaun npa 2 n KhoNky Bblaun KoFe 4.
Pn nepbom nCnoIb3ObaHnn nn noCne dNHTeNbHO npocToT 3TOT npoueecc MoXeT 3aHrTB HECKoJIbKO MHyT. IJn noCneDyUoIero npiroTOBHeHnKoPe Bbl-NOHNrTb 3TOT war 60JIbWe He NOHaDoBntcra.
PnroToBneHne Kope
ДяВКЛЮЧЕпriбopaнжмITEHAKHONKY BKJI/BbIKJ3 (Pnc.C).
Дя MONOTORO Kofoe:
YCTAHOBNTe Ha φnIbTpOpePkaTeNb 11 DnCK C pOXXKOM 12, CNIIKHOHBiN DnCK 13 N φnIbTp dIy MoIOTOrO 14 KoPe Ha 2 YaShKn 10 IIN 1 YaShKy (Pnc. E).
IIOJXHTe HxHoe KOINueCTBO KOpe BΦnIbTp n CJIerKa npIXMITE KOpe-HaIaNtEJIem 9:ДЯ 2 YauEe - NOHbIe IBe MEPHbIe IOXKN,ДЯ ODNHOu YauKIn - ONDy MEPHyTO IOXKY.
Yka3aHHe:ecnBΦnIbTp 136blno nOIOKeHO CnIuKOM 60JIbwoe KOINueCTBO KoPe,TOΦnIb- TPOdePkaTeJIb 106yDet TpydHO 3aKpyTNTb INn npN BbIaue KoPe, KoPe 6yDet BbITEKaTb N3 ΦnIbTpTa 13.
C yaJdAmn
UcTaHOBnTeΦnIbTpДЯчAnOB14BΦnIbTpO-epXaTeJIb 10(Pnc.G).
PnKMTe yanDy naIbUaMn 14 BO BHyTpB. YaJa da DOJXHa 6bITb paCNOJoxKeHa TOUHO B ueHTpe cnIbTpa 14.
3aTeM 3akpenite fnilbtpoepkaTeIb 10 B CBOEM
rHe3de Nytem eTo NOBOPTa BnEBO INN BnpBO.
Y6eNTecbBTOM,HTOfNilbtpoepkaTeIb 10
xopoio 3akpenien (Pnc.H).
IocTAbTe YaKu NOB BbIXoHHy TOpy6Ky QnIbTpOepXaTeN 10. Pn3ZaropAHm COOTBeTCTByIOUe KHOKN 4 MaUNHa rTOBa K BbIaue KoFe. HaxMnte Ha KhoNkY Bblaun KoPe 4.
Дяпррашениprouceca Bbydauн Kope CHOBa HaxMITE Ha KhoNky BbydauN Kope 4. Yka3aHne: Ecn YuAnDa He 6bIa KaK cJeDyET yCTaHOBJIeHa BФЛbTpE 14,ИиФиЛьТpoDEpKxATEJIb 10 He 6blДОЛЖHbIM O6pa3OM 3akpenIeH, I3ФИЛьТpoDEpKxATEJIa 10 MoKet ПPoCAuN- BaTbCra BOda.
Yka3aHHe BbIHMaIte pINbTpOepKataJIb 10 BO BpemBbIaUn KoPe. B npOTNBOM clyuae cyueCTByeT onaCHOCTb OXORA!
Yka3aHHe: HenpoxOIMOCb BObl uepe3 pIb- TPOdePkaTeIb 10 MOXeT 6bl Bbl3BaHa 13, 14 ero 3acopeHnem. B 3tOM clyuae BblIOHTe MaunHy Ha HeCKOJIbKO MmHyT N OCTOPOXHO BblKpyTIne PINbTPOdePkaTeIb 10, NOCKOJIbKY BO3MOXHoe OCTaTOUHoe DaBJIeHne MOXe TpINBeCTN K pa36pbI3rNBaHHO BObl.
Ipeed Tem KaK BbHyTb QnIbTpOepKaTeNb 10, nooXdTe np6bl. 10 cekyHn nocne Bidaun Kope.
IpyTOObI BbHytB pntepkatae10, 10 eHOeOBxOIMMO MeIeHNOBepHyTb BnpaBO nIN BnEBO, yTO6bl N36ExKaTb pa36pbI3rNBAHN BObl IIN KOfe.
Yka3aHHe: npn Cbeme qnlbTpOepKatae 10, yanda MoKeT 3aueNTbcra 3a BepXHOU qactb np6opa. TTo6bl BbyHTb yaIy, Heo6xOIMo HAKIOHtB qnlbTpOepKatae 10 (Pnc.K), TTO6bl YaJa cama BbInana 10 n3 Hero.
Функця рек imma oxndaHnA:
Pn OTCyTCTBn BbINONHReMbIX yHKnHa BKNIOueH HOM np6ope np6J. Upe3 30 MNHyT aKTHBnpyETc4 yHKUABTomATnueCKOrO OTKJIooHeH.N B3TO Bpemr np6Op haxoINTc8 B pexmE oKuJaHn. JnBKnIOueHn np6opa HaxmTe Ha KOnkY BKN/BbIKI 3
HanoJIHeHne KOHTeHepa BOOBO BpeM pa60TbI
Yka3aHHe: peKOMeHdyETc 3aONHrTb KOHTeHep 18 DO TOrO, KaK BOda TaM NOnHOCTbO 3aKOHuNTc.
ДЯВыкнюченяпибopaHAЖМTeHaKHONKY BKЛ/BbIKN 3 (Pnc.C).
BbIbTe wTeKepe 6 po3eTKn.
BbHbTe KOHTeHep DnRA BODbI HAnOJIHInTe eTo YNCToB BoD0B6e3ra3a(Pnc.A)do yka3aHHoOTMeTKMAKC"18.
UcTahOBuTe KOHTeHep DnBBoDbl 18 (Pnc. B). Yka3aHHe: CneIte 3a npabINbHOyCtAHOBKOJ KOHTeHepa DnBBODbl 18.B npOTNBHom cnyae MaunHa He cMOKeT pOn3BODHTb KoPe.
CHOBA BCTaBbTe WTEKepe B DOMaWHIO PO-3ETky.
ДяВКЛЮЧЕпriбopaнжмITEHAKHONKY BKJI/BbIKI 3.
EcnKoHTeHep 186yET COBepueHNO nycbIM,3TO MOKeT Bbl3BaTb NOnaDaHne BO3dyXa B Tpy6Kn, KaC CNeDCTBnE, NOMe7aet BblAaYe KoPe.ДЯ NOBTOPHOrIO NcNoIb3OBAHnRA KoPeBapKn peKO-MeHnyETcB BbIKNIOHTb ee N OCTaBNTb OxJaK-dTaTbCra.
IomeCTnTe EMKOCtB NOI rHe3dOM fHbTpOepKataTn BkNIOHTe np6Op nyTeM Haxatna KhoNk BKJ/BblKl 3.
HaxmTe KhONky BbIaun KoPe 4 n DnBocCTaHOBHeNy DnXKeHn BObI DaITe BbITEy HeMeHee OHOH YaIKN BObI N3 rHe3da QnIbTpO-dePkaTeI.
Дяпекрашени ВыITEканя BODы,CHOBA HaxMITE Ha KhoNky Nodaun napa 4и KhoNky BbIaun Kope. Tenepb npibop choBa pa6oTaet DOJXHbIM O6pa30M.
PnpiroToBneHne KaanyuHNO
HaxatbHa KhoNky noaun noaun napa 5.
I OdoKnte, noka KhoNka noaun npa 5 nepe- cTahET Mrratb u 6ydt ropeTB NOCTOHHO. Yka3aHne: BO Bpemr oXnHaHn u3 rHe3da fInlb- TPOdePkataeMa MoKeT BbIXoDnTb nap.
IomeCTte napOByIO Tpy6ky 17 B eMKoCTb CO BCNEHnBaEMbIM MONOKOM.
- ČeρхиTe KhoNky Nodaunnapa 2 HaxaToIdo noJyueHnjaeMOro pe3yNbTaTata.
Дпяпекрашени поадуни па отпстinte 2 Kногку.
BbIBoN3 3KcPnIyatauIN
B cnyae BbIBOda n3 3KcIpyaTauHn Heo6xOIMO OTKIOHTb IODaUy TOka, ONYCTOUITB N OUYCTNTB KOHTeHep dIa BODbl N BOIDOC6OpHNK (CM. pa3deJ "OuNCTka np6opa"). B cnyae yTuIN3aunn Heo6xOIMO CO6JIIODaTb DeIcTBYIOUne MeCTHbIe npedncaHnI NO yTuIN3aUN Pa3JIINHbIX KOMNOHETOB.
UctpaHHe HencnpabHocTei
Data n3roTOBJIeHn yka3aHa Ha KOpnyce n3deJInBa 3aunpObaHHOM Bunde SN wk/yrabcdefg,
rde WK-HeDJI npON3BOdCTBa
yr-ROI npOu3BOdCTBa
abcdefg-cepnHbH HOpE n3deJINr
CoOTBeTCTBye Tpe6OBAHnA M
TP TC 004/2011 «О 6e3oIacHocTи Hn3KOBOLbTHoro obOpyIOBaHnry, yTBepXdEN PeSeHnem KomnCm TAmOKeHHoro coo3a No768 ot 16 abrycTa 2011 roda
TP TC 020/2011 «Злелковиная COBmecTUMOCTb TexHnuecknx cpeDcTB», yTbepxdEN PeuHnem KomusCn TAmoxeHHoro coo3a No879 ot 9 deka6pra 2011 roda
HOpMaun O ceptnnkaun B npnIOxKeHH K rapaHTnHOMy TaIOHy n/nn Ha ynaKOBke n3dJIy.
220-240B\~-50Γu-850BT-KnaccI-IPX0
CdeIaHO B Kntae
HmnpTeP:OOO«MeMaTeX>
IOpndueckn aadpec:127006, ropoM MockBa, yuHa CaOBAr-TpynmpaHna, dom 16, cTpoEne 3, IOM. I, KOM 2
ФakTnueckn aDpec:119048, r. MockBa, yI. YcaYeBa, d.29, Kopnyc 3, nom.II, kOM.3
YTNIN3NPOBaTb COOTBcTCTBn C 3aKHOdaTeNbCTBOM MeCTa peaIN3aUN.
TapaANTnHbI cpoK 2 roJa. Cpok cnYk6bl n3deJInr 2 roJa.
HOpMaIgO CeptnDkaIIN B npInIOxHeHH K rapaHTnHOMy TaIOHy n/nn Ha ynaKOBke n3dJIy.
1 1
g Lgosblc lalbbll cnaolgbas jglal gaa a dglg 10
clxooe jra p adlaobab jlablgsaagp ggyg ydoy
egg wogabbl fjw hbs jgalplvocug abz ahtll doxl
:dllljalglg jlll lla 0oJgclogxlglde cdoe g
- JIabu auiy aol jbs j
.45 j451 p 4
aL 1yI Jc aJyI jbI bI
.
Ug.161 j0 161 j0j0 g j4y
.
.120g jLw Lg 1u1 161 1j
joo 1000000000000000000000000000000000000000
jglalb c 10
Jusu 1 jli aolg zo)duuobolublpduuuiy
.
ESE pJn no oogglll 1sLw g baae
.
J 1
jglj jgjjl 111
.
.
()
(20 ^11 1
1j j 1
a b a b w g b d ldd jS e.
Jlsw no n 2g ggs yds a brg aos
即 D = D
Jgbl t3g wU s jxu u g 1 JyI Juaaui a
.1234567890
Ogaa!olus
(CJ)jJ 3
:diqgabblggyy120
12 11
13 000000
10 E 14
9 8gall bclb1h20g jlll g aagall
o1g o8g dolololololololololololololololololololololololololololololololololololololololololololol
a1 = 23,a2 = - 43,b1 = 58,b2 = - 78
13 13
13 10
gaa11 10w9
10(GK)JdI Jda 8gaglll dI Lwgl
14 ylyy jai jgai 10
- 1
4gU Lg jgljno no no yIy
UU/19/4·17
.ogjll Joo
pIgUyI d cIoooyI iO

.
j:161/1j001p0b020j00j00
1.
jLalog aJlalau 1j
.
15
y
jlll Jol jly .Jg gge g
111 111 111 111 111
2000 155
.
j4x11 20g
gaaal ailo
j
1
8aaiy
j
a1 = 2,a2 = - 4,
( 0,14,0,14) ± 1
olubgooj
aolol
10
0aab1gagalllulwog
a 0
x^2 + y^2 = 1 有解 ( x,y) ^2 = 1^2 + 1^2
0sLw/ogS1 jx6 14
15
16
17
Juaaui Jlaaiol aui jj
1 4 0
2 4
3 4
4 4
5 jj
5 5 j g y j
j j j j j j j j j j j j j j j j j j j j j j j j j j j j j j j j j j j j j j j j j j j j j j j j j j j j j j j j j j j j j j j j j j j j j j j j j j j j j j
0gai jn jia 1ay ayy plaoaol olae
gaiy 1000000000000000000000000000000000000000000000000000000000
yIbI baiI gge gge JgaaJ dy dai
jll Jol oogall jab gag a d 102aagall g
g k jy jll Jol oogal jll.ogall nae paaa bgl
ae .wogkll qai jgsb hag tiooogall. hag laa agzao
gogall agsauo aas bq yjgc gssuill oggall 4
jab no daiaoo go golad
jie 2
1wj
Jg 10 g Jb j 100000000000000000000000000000000000000000000000
Jgbldoosooa aagaaal

Jus y.oojy aSlo j baa lool Js aLs Js
clz jI jalll oJy .ogawll allw 6 jI
.0J Lk1

14,13
.0x00oljgalsjy1pjlgsgaii slwipae jao
10 10 10 10 10 10 10 10 10
4.ogall jll sbol .ogall Jaoj oseau aJy jgssuuslbl
. jll Jolo 8 ogall oLw g J
oLw Jy ogall zio Jy j 4 ogall zio j bol
. jll Jolo 8 ogall
Cgl jy j 14 ogall oLw g zog p y 15: abgdo
Jalo no aU1 UaB j Bn j uS e p 10 xll Jalo
10 xll
10 10 10 10 10 10 10 10 10 10 10 10 10 10 10 10 10 10 10 10 10 10 10 10 10 10 10 10 10 10 10 10 10 10 24
- jxll Jolj 10. jxll Jolj 10. jxll Jolj 10. jxll Jolj 10. jxll Jolj 10. jxll Jolj 10. jxll Jolj 10. jxll Jolj 10. jxll Jolj 10. jxll Jolj 10. jxll Jolj
:1uueuwll aabbg
j 3. jy/1j 10
pduwylcljclj1jlaol
LolcUd1uJ 18 cUd1jz Jdo:abgdo
(CJ)jgljll 3 j 6
(AJS)jglal 18 llb lgl 11 j p
"MAX,o000
18(BJC)lgljz S
(UJ 18 11 j z J
.ogall gio j
.qljgl jgl 6 algol g oogy
.CJ)jgljll 3 gljll/12e 1
alg j 11 j k 18 11 j 15
. 18
. 18
.45 jg 45 jgl j 45 jgl jgl jgl jgl jgl jgl jgl jgl jgl jgl jgl jgl jgl jgl jgl jgl jgl jgl jgl jgl jgl jgl jgl jgl jgl jgl jgl jgl jgl jgl jgl jgl jgl jgl jgl jgl jgl jgl jgl jgl jgl jgl jgl jgl jgl jgl jgl jgl jgl jgl j
sJg 7 g0g j 8 8
a5b1cbw
1w
L 1
( x,y) = ( ab + 1,2)
Joo oo joo joo joo joo joo joo joo joo joo joo joo joo joo joo joo joo joo joo joo joo joo joo joo joo joo joo joo joo joo joo joo joo joo joo joo joo joo joo joo joo joo joo joo joo joo joo joo joo joo joo j oo JOOO OOOO OOOO OOOO OOOO OOOO OOOO OOOO OOOO OOOO OOOO OOOO OOOO OOOO OOOO OOOO OOOO OOOO OOOO OOOO OOOO OOOO OOOO OOOO OOOO OOOO OOOO OOOO OOOO OOOO OOOO OOOO OOOO OOOO Oooo
山
11 12 13 14 15 16 17 18 19 20 21 22 23 24 25 26 27 28 29 30 31 32 33 34 35 36 37 38 39 40 41 42 43 44 45 46 47 48 49 50 51 52 53 54 55 56 57 58 59 60 61 62 63 64 65 66 67 68 69 70 71 72 73 74 75 76 77 78 79 80
jll Jola Cog gog p a bglal g oagall y ay aliy
gog 13 jll Jola N do no Lwll u 10
los cia xilg oagall oolg14 g nabbl ngy jll
."jlaJI IaB, Paa, G

12 19
aIol o .Jlal 12 aai jgysyll w 3 abal . Iola ogagll lal na gagll aiaell aiai j
juydyl Jolo oolc
gall lla jn jSg aLgb gal glal plzai 15
aiai. Jlll c jabie IaIoo aIj y .Jalal Jolc
10. Jalal Jolgogg oosu
16.
1w
000000000000000000000000000000000000000000
17 16 16 16 16 16 16 16 16 16 16 16 16 16 16 16 16 16 16 16 16 16 16 16 16 16 16 16 16 16 16 16 16 16 16
18 1u1jz a
a 18 a1j
8 8 8 8 8 8 8 8 8 8 8 8 8 8