
Brave AS3102 - Vacuum Cleaner SOLAC - Free user manual and instructions
Find the device manual for free Brave AS3102 SOLAC in PDF.
| Brand | Solac |
| Model | Brave AS3102 |
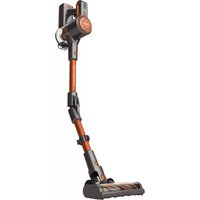
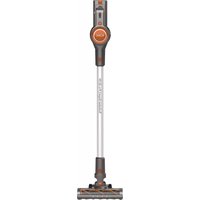
| Product Type | Canister Vacuum Cleaner |
| Power Supply | Mains, 220-240 V, 50/60 Hz, 10 A |
| Nominal Power | Approximately 800-1200 W (estimated) |
| Tank Capacity | Approximately 2 L (estimated) |
| Cable Length | Approximately 5 m (estimated) |
| Filtration | Motor filter + HEPA exhaust filter |
| Included Accessories | Flexible hose, telescopic tubes, crevice tool + multi-purpose brush, upholstery brush |
| Main Functions | Suction, power adjustment via switch, cable rewind, parking position |
| Maintenance | Empty tank after use, clean/replace filters every 50 hours |
| Safety | Unplug before cleaning, do not vacuum liquids or incandescent objects, do not immerse |
| Weight | Approximately 4-5 kg (estimated) |
| Dimensions (L x W x H) | Approximately 40 x 25 x 30 cm (estimated) |
| Warranty | Compliant with current legislation, contact authorized after-sales service |
Frequently Asked Questions - Brave AS3102 SOLAC
User questions about Brave AS3102 SOLAC
0 question about this device. Answer the ones you know or ask your own.
Ask a new question about this device
Download the instructions for your Vacuum Cleaner in PDF format for free! Find your manual Brave AS3102 - SOLAC and take your electronic device back in hand. On this page are published all the documents necessary for the use of your device. Brave AS3102 by SOLAC.
USER MANUAL Brave AS3102 SOLAC
Many thanks for choosing to purchase a TAU-RUS brand product.
Thanks to its technology, design and operation and the fact that it exceeds the strictest quality standards, a fully satisfactory use and long product life can be assured.
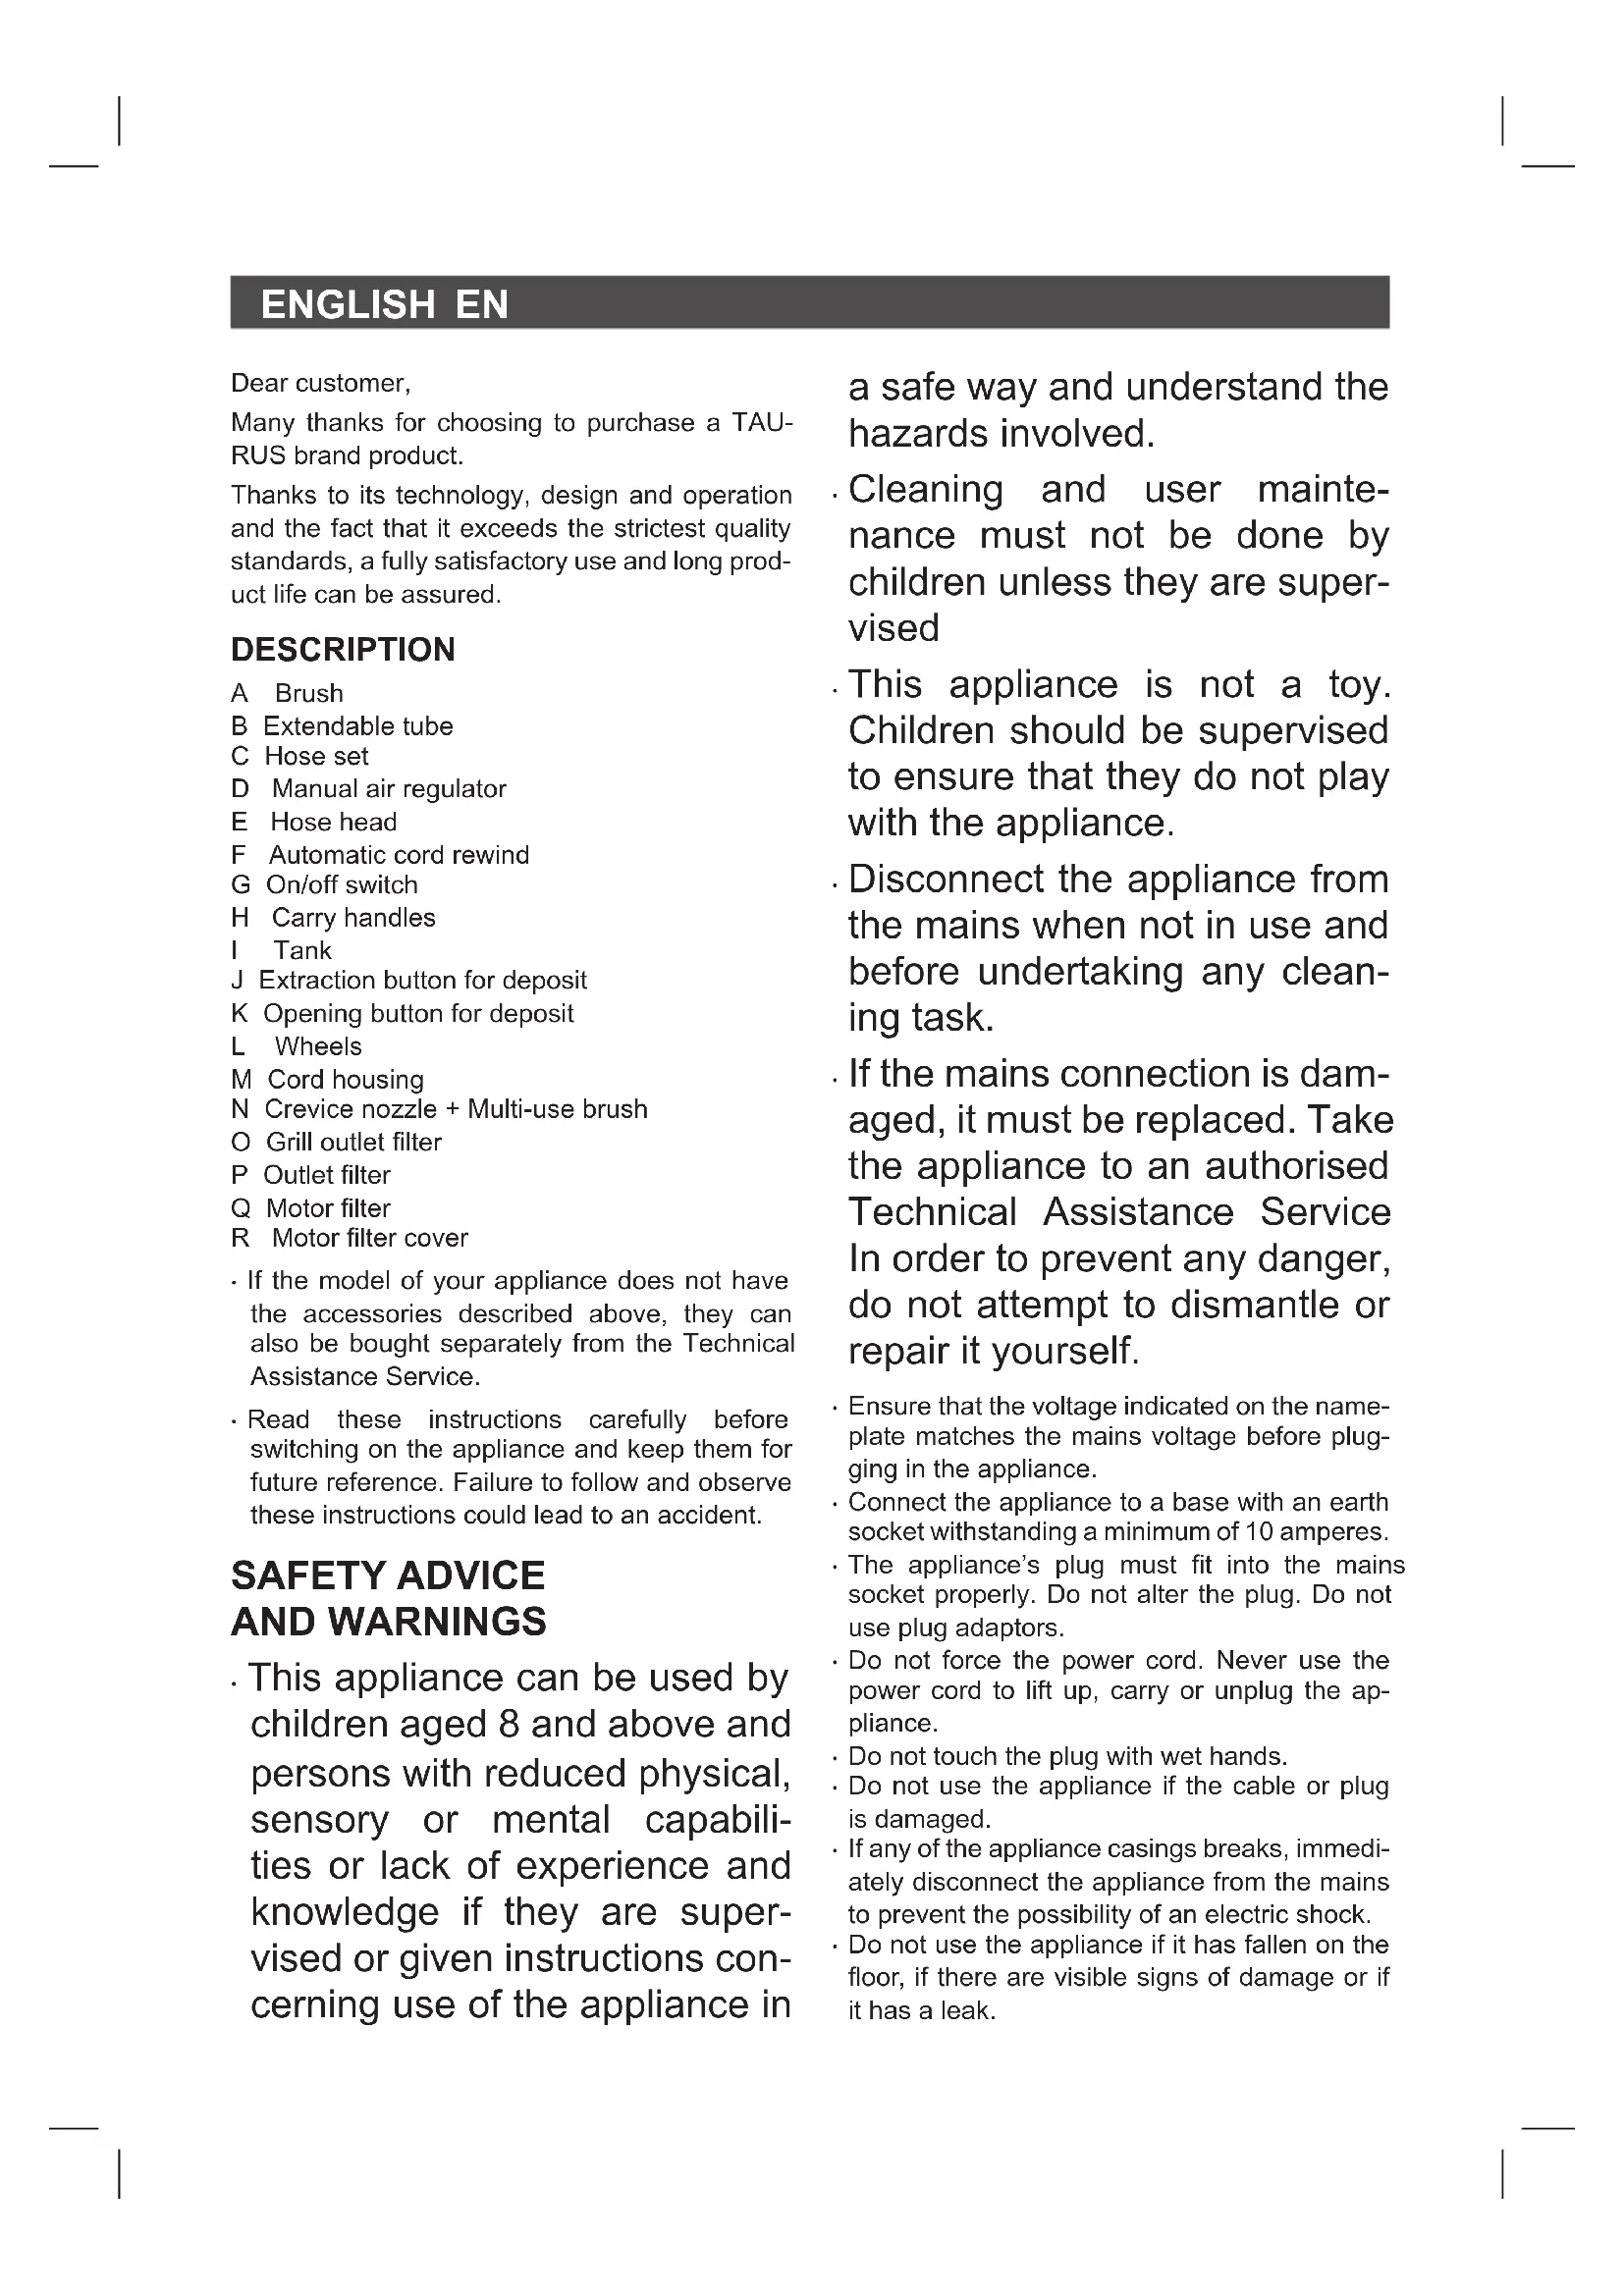
DESCRIPTION
A Brush
B Extendable tube
C Hose set
D Manual air regulator
E Hose head
F Automatic cord rewind
G On/off switch
H Carry handles
Tank
J. Extraction button for deposit
K Opening button for deposit
L Wheels
M Cord housing
N Crevice nozzle + Multi-use brush
O Grill outlet filter
P Outlet filter
Q Motor filter
R Motor filter cover
- If the model of your appliance does not have the accessories described above, they can also be bought separately from the Technical Assistance Service.
- Read these instructions carefully before switching on the appliance and keep them for future reference. Failure to follow and observe these instructions could lead to an accident.
SAFETY ADVICE AND WARNINGS
- This appliance can be used by children aged 8 and above and persons with reduced physical, sensory or mental capabilities or lack of experience and knowledge if they are supervised or given instructions concerning use of the appliance in
a safe way and understand the hazards involved.
. Cleaning and user maintenance must not be done by children unless they are supervised
This appliance is not a toy. Children should be supervised to ensure that they do not play with the appliance.
- Disconnect the appliance from the mains when not in use and before undertaking any cleaning task.
If the mains connection is damaged, it must be replaced. Take the appliance to an authorised Technical Assistance Service In order to prevent any danger, do not attempt to dismantle or repair it yourself.
- Ensure that the voltage indicated on the nameplate matches the mains voltage before plugging in the appliance.
- Connect the appliance to a base with an earth socket withstanding a minimum of 10 amperes.
- The appliance's plug must fit into the mains socket properly. Do not alter the plug. Do not use plug adaptors.
- Do not force the power cord. Never use the power cord to lift up, carry or unplug the appliance.
- Do not touch the plug with wet hands.
- Do not use the appliance if the cable or plug is damaged.
- If any of the appliance casings breaks, immediately disconnect the appliance from the mains to prevent the possibility of an electric shock.
- Do not use the appliance if it has fallen on the floor, if there are visible signs of damage or if it has a leak.
ENGLISH EN
USE AND CARE:
- Do not use the appliance if its filter(s) are not correctly in place.
- Do not use the appliance if its accessories are not properly fitted.
- Do not use the appliance to vacuum up water or any other type of liquid.
- Do not use the appliance if on/off switch doesn't works
- Use the appliance handle/s, to catch it or move it.
- This appliance is for household use only, not professional or industrial use.
- This appliance should be stored out of reach of children and/or those with reduced physical, sensorial or mental abilities or who are unfamiliar with its use.
- Make sure that dust, dirt or other foreign objects do not block the fan grill on the appliance.
- Use the appliance, its accessories and tools in accordance with these instructions. Take working conditions and job to be carried out into consideration. Using the appliance for anything other than its intended use can create hazards.
- Do not operate on areas which contain metal objects such as nails and/or screws.
- Never vacuum hot or sharp objects (cigarette butts, ash, nails, etc.).
SERVICE:
- Any misuse or failure to follow the instructions for use renders the guarantee and the manufacturer's liability null and avoid.
INSTRUCTIONS FOR USE
BEFORE USE:
- Make sure that all the product's packaging has been removed.
VACUUMING FUNCTION:
- Fit the hose unit to the vacuum cleaner's air intake. (Fig. 1)
To take off the vacuum hose, turn the hose to the left and pull outwards. (Fig. 2).
INSERTION OF ACCESSORIES INTO THE APPLIANCE'S GRIP:
- The appliance's grip is designed in such a way that it allows the insertion of the following accessories: (use the combination that best meets your requirements).
- Extendable extension tube: Designed to pro
vide access to surfaces which are out of reach and make floor cleaning comfortable, its length can be adjusted by using the adjustment control.
Vacuum cleaner base: Specially designed for cleaning floors (both rugs, carpets and hard floors), its base has a retractable brush that can be adjusted to two heights for greater efficiency on these floors. It is advisable to have the brush out for hard floors and the brush in for rugs and carpets.
- Crevice nozzle: specially designed for getting into cracks and difficult corners.
- Upholstery brush: Especially suitable for cleaning textile surfaces.
USE:
- Take the length of cable required out of the housing. (M)
- Connect the appliance to the mains.
- Turn the appliance on, by using the on/off switch (G)
ONCE YOU HAVE FINISHED USING THE APPLIANCE:
- Turn the appliance off, using the on/off switch. (G)
- Unplug the appliance to the mains.
- The cable housing allows the cable to be stored as well as extract the length of cable necessary to operate the device, avoiding risk of accident situations.
- Retract the cable by pressing the roller cable button and guide the cable into the appliance. (F)
Clean the appliance.
CARRY HANDLE/S:
- The device has a handle on the upper part so it can be transported easily and comfortably. (H)
PARKING POSITION:
- This appliance has one parking position for comfortable and straightforward storage.
- To use the horizontal parking position, fix the break pad hook to the hook situated on the rear side of the appliance (Fig. 3).
CLEANING
- Disconnect the appliance from the mains and let it cool before undertaking any cleaning task.
- Clean the appliance using a damp cloth with a few drops of detergent and then dry it.
- Do not use solvents, or products with an acid
EN
or base pH such as bleach, or abrasive products, for cleaning the appliance.
- Do not submerge the appliance in water or any other liquid, or place it under a running tap.
- Empty the vacuum deposit when dust is visible though the transparent walls, when it is full, or when the vacuum cleaner does not work to its full potential.
- Disconnect the dust box from the appliance. (Fig. 4)
- Open the lid of the dust box and empty the contents into the appropriate waste disposal receptacle. (K)
- Close the lid of the dust box. (Fig. 5)
- Attach the dust box to the appliance. (Fig. 6)
- Connect the hose to the vacuum cleaner's air intake. (Fig 1)
CHANGING THE FILTERS:
- Motor filter, it is advisable to periodically check the state of the filter, which should be cleaned/ replaced after every 50 hours of use.
HEPA type air outlet filter (high efficiency air filter which effectively removes spores, ash, dust mites, pollen ...), it is advisable to periodically check the condition of the filter, it should be cleaned/replaced after every 50 hours of use, or if a significant drop in suction power is noticed.
TO REMOVE FILTERS:
- Motor filter: Disconnect the dust box from the appliance. (Fig. 4)
- Open the cover (R) that contains the filter. (Fig. 7)
- Remove the filter (Q) from its housing. (Fig. 8)
To reassemble the filter, proceed with the above instructions, in reverse order. - Outlet filter: Open the air outlet grate, to access the filter (Fig. 9).
- Remove the filter (P) from its housing. (Fig. 8)
- To reassemble the filter, proceed with the above instructions, in reverse order.
SUPPLIES
- Supplies can be acquired from distributors and authorised establishments (such as filters, etc.) for your appliance model.
- Always use original supplies, designed specifically for your appliance model.
These supplies are available in specialist shops.
ANOMALIES AND REPAIR
- Take the appliance to an authorised technical support service if problems arise. Do not try to dismantle or repair without assistance, as this may be dangerous.
FOR EU PRODUCT VERSIONS AND/OR IN THE CASE THAT IT IS REQUESTED IN YOUR COUNTRY:
ECOLOGY AND RECYCLABILITY OF THE PRODUCT
- The materials of which the packaging of this appliance consists are included in a collection, classification and recycling system. Should you wish to dispose of them, use the appropriate public containers for each type of material.
The product does not contain concentrations of substances that could be considered harmful to the environment.
This symbol means that in case you wish to dispose of the product once its working life has ended, take it to an authorised waste agent for the selective collection of waste electrical and electronic equipment (WEEE)
This appliance complies with Directive 2014/35/EU on Low Voltage, Directive 2014/30/EU on Electromagnetic Compatibility, Directive 2011/65/EU on the restrictions of the use of certain hazardous substances in electrical and electronic equipment and Directive 2009/125/EC on the ecodesign requirements for energy-related products.
FRANÇAIS FR
Cher Client,
DLA URZADZEN WYPRODUKOWANYCH W UNII EUROPEJSKIEJ I W PRZYPADKU WY-MAGAN PRAWNYCH OBOWIAZUJACYCH W DANYM KRAJU:
EKOLOGIA I ZARZADZANIE ODPADAMI
OBCLYKBAHE HA YPEDA:
- HenpaBnHTo n3NoJ3BaHe Ha ypea nn HeCnzaBaHeTo Ha yka3aHnraTa 3a pa60Ta c Hero eOnacHo, anyInpa rapaHnraTa n OCbo6oxJaBa npoN3BOndTeJIr OTOTROBOPHOCT.
HAUYH HA YNOTPEBA
3ABENEJCKN INPEENY YNOTPEBA:
- YBepete ce, ye cTe OTCTpaHnIHN HAnbJIHO BcKaKbB BnD ONaKOBKa Ha ypeDa.
ФУHKLЛЯЗЗACMYKBAHE:
- 3akpenete Mapkyua KbM BcMykaTeJIHHaT OT-BOP Ha npaxocmykaKaTa. (Fig. 1)
3a da OTkaHte Mapkyu, 3aeDHO C Tp6bata Ha acnnpatopa, 3aBbptete crlo6kata Ha mapkya cpeuyacOBHNKOBata cTpeJIka, a cIeToBa ro n3terlne. (Fig. 2).
MOHTIPAHE HA IPIUCTABKA KbM PbKOXBATKATA HA YPEDA:
PbkoBbKaTaHa ypea e HanpaBeHa no TaKbB HauH, Ye N03BOJRA 3aKpenBaHeto Ha CneHNTE PnIcTAbKn: (N3NoN3BaNte KOMBuHa-uaTa, KOaTO hai-dO6pe OTROBapra Ha BaUnTe HyxDi):
TeleckonuHa yIbJIkaBaTa Tpb6a: HanpaBeHn 3a DoCTbN Ha OTdaJeHu NOBbpxHOCTn N3a JeCHO NouchBaHe Ha NODObE, NO3BOJBAtpeylnpaHe Ha TxAHata DJIIXHa Ype3 HATNCKaHe Ha 6byToHa 3a perya.
- HakpaHnK: CneuAnHo npEHa3HaueHa 3a NOUcTBAHe Ha NODObe (KAkTO MEKN MOKTeN KINIMM, Taka N TBpDn). B OCHOBATA CN NMa NODbXHa YeTKa C DBe CTeNeHN Ha N3BaXDa-He 3a No-eFHKacHO NocTBAHe Ha NODoBeTe. PpenOpbYBaMe Bu Da N3BaXdAte YeTkata 3a NOUcTBAHe Ha TBpDn NODOe N da J prN6Pate pni NOUcTBAHe Ha MOKTeN KINIMN.
- HakpanHK TnKoHne: CneuAnHO npedHa3-Haeh 3a cb6upaHe Ha npax OT TECHM MeCTa N TpydNOOCTbHN bTIN.
- YeTeKa 3a TaIuNcEpn: CneUaJIHo npEHa3Ha-ueHa 3a NoUcTbaHe Ha TEKCTUNHn NOBbpxHOCTN
YNOTPEBA:
- N3terIeTe OT xpaHnIInuTo Ka6eI C Heo6xo-dImaTa IbJnxHa. (M)
BG
BknIOyTe ypeDa B eIeKtpuYeckaTa Mpeka.
BknIoute ypeDa, ot npeKbcBaay 3a BkIIOUBAHe/naKIOUBAHe. (G)
CJIENIPIKJIIOUBAHE HA PABOTATA C YPEDA, HANPABETECJEDHOTO:
Cnpete ypea ot 6yToHa 3a BkIIOUbaHe/13- KIOUBAHe. (G)
- I3KIIIOUeTe ypeDa oT eIeKTpnueckaTa mpeka.
Mara3nHbT 3a Ka6ena No3B0JBa Da ce CbXpaHn I Da Ce N3BaDn Ka6en C Heo6xOImataIbJnxHa, 3a Da ce pa6OTn CypeDa, KOTOceN36RaBAT PnCKOBN NOLOKeHnE O T Ippeu3BnKBAHe Ha npou3WeCTBne.
HabnTe Ka6eNa KaTO HATnCHeTe 6yToHa 3a aBTOMaTHuHO Cb6npaHe Ha Ka6eNa n To npu-DbpxKaIte Cpka. (F)
-Почирете урEDA.
HEN3ПРABHOCTN I PEMOHT
B cnyuahn Hn3npaBHOCT OTHecTe ypeDa ByIbIhOMoUeH cepBn3 3a TexHnuecko o6cnyKaBe. MoI He ce ONITBaIte da pa3rno6BaTe ypeDa nn Da ro nonpaBAre ToBa e onaCHO.
3A PA3HOBUNHOCTNE EU HA TOBA N3-DEJNE I/IN B CNYUAY, INPUJOXUM 3A BAJATA CTPAHA:
ONA3BAHE HA OKOJIHATA CPEDA IN PEUKNJIIPAHE HA N3DEJNETO.
MaTePnAnIte, ot KOnTo e n3pa6oTeH To3nyeD ca npEbnDeHn B CnCTeMaTa 3a cb-6bpAne,KnacnФnKaun ne peuKlnpaHe Ha cBUnTe. Ako JeNaete Da ce OCBO6OJnte OT TxA, n3NoN3BaIte ObueCTBeHnTe KOHTeHepn, PpuroEn 3a BCEk ON DeJeHn Bn MaTePnAn.
B npodykta Hma KOHcHTpaunn Ha BeueCTBa, KOnTO MoRat Da ce CMrTaBpeHN 3a OKoHNHaTcpeJa.

To3n CmBOJ O3Haayaba, ye aKO KeNaete Da ce OCBo6Ondte OTypea, cne KaTO ekCNIoatauNOHHNtMy KINBOT e N3TEKbI,
Tp6Ba Da ro npedeTe no noDxOJaH aHuH Ha qnpMa 3a npepa6oTKa Ha OTnAdbU, OTOpn3npaHa 3a pa3dEHHc6npaHe Ha OTHO OToNDbUOn OT eJNeKtpnuecko n ENEKTOPOHO o6OpyDbaHe (OEEO).
Hactoansyypei3bJnHbA DnpeKtBa 2014/35/EU 3a Hnckn HnpeXeHn, DnpeKtBa 2014/30/EU 3a eIeKtpomarHHTHO cboTBeTCTBne n C DnpeKtBa 2011/65/EU 3a orpaHnueHnra T npuotpeba Ha HnKoN onpeJeHn OpanHn BeueCTBa B eIeKtpuYeCKn EeIeKtpoHn anapatni C DnpeKtBa 2009/125/EC 3a N3nCKBaHHaTa 3a ekONOruHn DN3aH, npINIOxIMM KbM N3deJIy, CBbp3aHc eHeprn.
ROMÁNA RO
Stimate client,
jai jie jie jia jia jia jia jia jia
joc 4c
2a 15
This product enjoys the recognition and protection of the legal guarantee in accordance with current legislation. To enforce your rights or interests you must go to any of our official technical assistance services.
You can find the closest one by accessing the following web link: http://solac.com
You can also request related information by contacting us by phone.
You can download this instruction manual and its updates at http://solac.com
DE) GARANTIE UND TECHNISCHER SERVICE
Unit 25 & 26, San Croy Office Park, Die Agora
Road, Croydon, Kempton Park, 1619
Johannesburg
(+27)0113925652
1
1
一
一
solac


- DESCRIPTION
- SAFETY ADVICE AND WARNINGS
- ENGLISH EN
- USE AND CARE:
- SERVICE:
- INSTRUCTIONS FOR USE
- BEFORE USE:
- VACUUMING FUNCTION:
- INSERTION OF ACCESSORIES INTO THE APPLIANCE'S GRIP:
- USE:
- ONCE YOU HAVE FINISHED USING THE APPLIANCE:
- CARRY HANDLE/S:
- PARKING POSITION:
- CLEANING
- EN
- CHANGING THE FILTERS:
- TO REMOVE FILTERS:
- SUPPLIES
- ANOMALIES AND REPAIR
- FOR EU PRODUCT VERSIONS AND/OR IN THE CASE THAT IT IS REQUESTED IN YOUR COUNTRY:
- ECOLOGY AND RECYCLABILITY OF THE PRODUCT
- FRANÇAIS FR
- DLA URZADZEN WYPRODUKOWANYCH W UNII EUROPEJSKIEJ I W PRZYPADKU WY-MAGAN PRAWNYCH OBOWIAZUJACYCH W DANYM KRAJU:
- EKOLOGIA I ZARZADZANIE ODPADAMI
- OBCLYKBAHE HA YPEDA:
- HAUYH HA YNOTPEBA
- 3ABENEJCKN INPEENY YNOTPEBA:
- ФУHKLЛЯЗЗACMYKBAHE:
- MOHTIPAHE HA IPIUCTABKA KbM PbKOXBATKATA HA YPEDA:
- YNOTPEBA:
- BG
- CJIENIPIKJIIOUBAHE HA PABOTATA C YPEDA, HANPABETECJEDHOTO:
- HEN3ПРABHOCTN I PEMOHT
- 3A PA3HOBUNHOCTNE EU HA TOBA N3-DEJNE I/IN B CNYUAY, INPUJOXUM 3A BAJATA CTPAHA:
- ONA3BAHE HA OKOJIHATA CPEDA IN PEUKNJIIPAHE HA N3DEJNETO.
- ROMÁNA RO
- DE) GARANTIE UND TECHNISCHER SERVICE
- solac
Brand : SOLAC
Model : Brave AS3102
Category : Vacuum Cleaner