
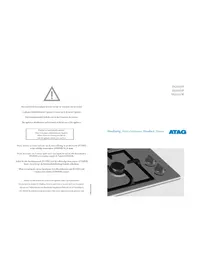
HEK6115U - Hob Atag - Free user manual and instructions
Find the device manual for free HEK6115U Atag in PDF.
| Product type | Built-in electric hob |
| Brand | Atag |
| Model | HEK6115U |
| Dimensions (H x W x D) | 95 x 600 x 530 mm |
| Electrical supply | 230 V ~ 50 Hz, 7.0 kW max |
| Number of zones | 4 |
| Type of zones | Rapid radiant (B) |
| Front left zone | Ø 145 mm, 1.5 kW |
| Rear left zone | Ø 180 mm, 2.0 kW |
| Rear right zone | Ø 145 mm, 1.5 kW |
| Front right zone | Ø 180 mm, 2.0 kW |
| Controls | 4 rotary knobs |
| Operation indicator | Yes, lights up as soon as a zone is on |
| Plate material | Stainless steel with cast iron zones |
| Installation | Built-in into worktop 30 to 50 mm thick |
| Safety | Hot surface, keep children away, do not use without a pan |
| Cleaning | Mild soapy water, non-abrasive sponge, dry after cleaning |
| Maintenance | Regularly apply a non-acid oil on the elements |
| Recommended electrical connection | Cable H05RR-F 5 x 1.5 mm² with at least 15 A plug |
| Protection class | Earth connection mandatory |
Frequently Asked Questions - HEK6115U Atag
User questions about HEK6115U Atag
0 question about this device. Answer the ones you know or ask your own.
Ask a new question about this device
Download the instructions for your Hob in PDF format for free! Find your manual HEK6115U - Atag and take your electronic device back in hand. On this page are published all the documents necessary for the use of your device. HEK6115U by Atag.
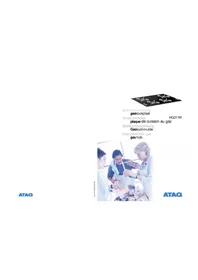
USER MANUAL HEK6115U Atag
Instructions for use 3-12
Installation guide 13-18
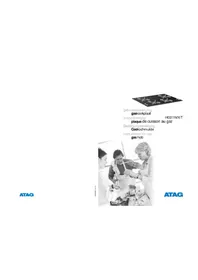
Cuisiner comfortable 10
Entretien
Général 11
Pannes
Polyethylenfolic (PE)
CFK-ficics Polystyrol (PS-Hartschaum).
These hobs have been designed for the true cooking enthusiast. This manual explains optimum use of the hobs. In addition to information on operation, you will also find background information that may be useful to you when using this product.
The electric hob
The fast cooking elements of the electric hob heat up evenly and fast. Also, the cooking elements are easy to clean.
Keep this manual carefully so that possible subsequent users can also benefit from it. The manual also serves as reference material for service technicians. Please, therefore, stick the appliance identification card in the space provided, at the back of the manual. The appliance identification card contains all the information that the service technician will need in order to respond appropriately to your needs and questions.
Enjoy your cooking!
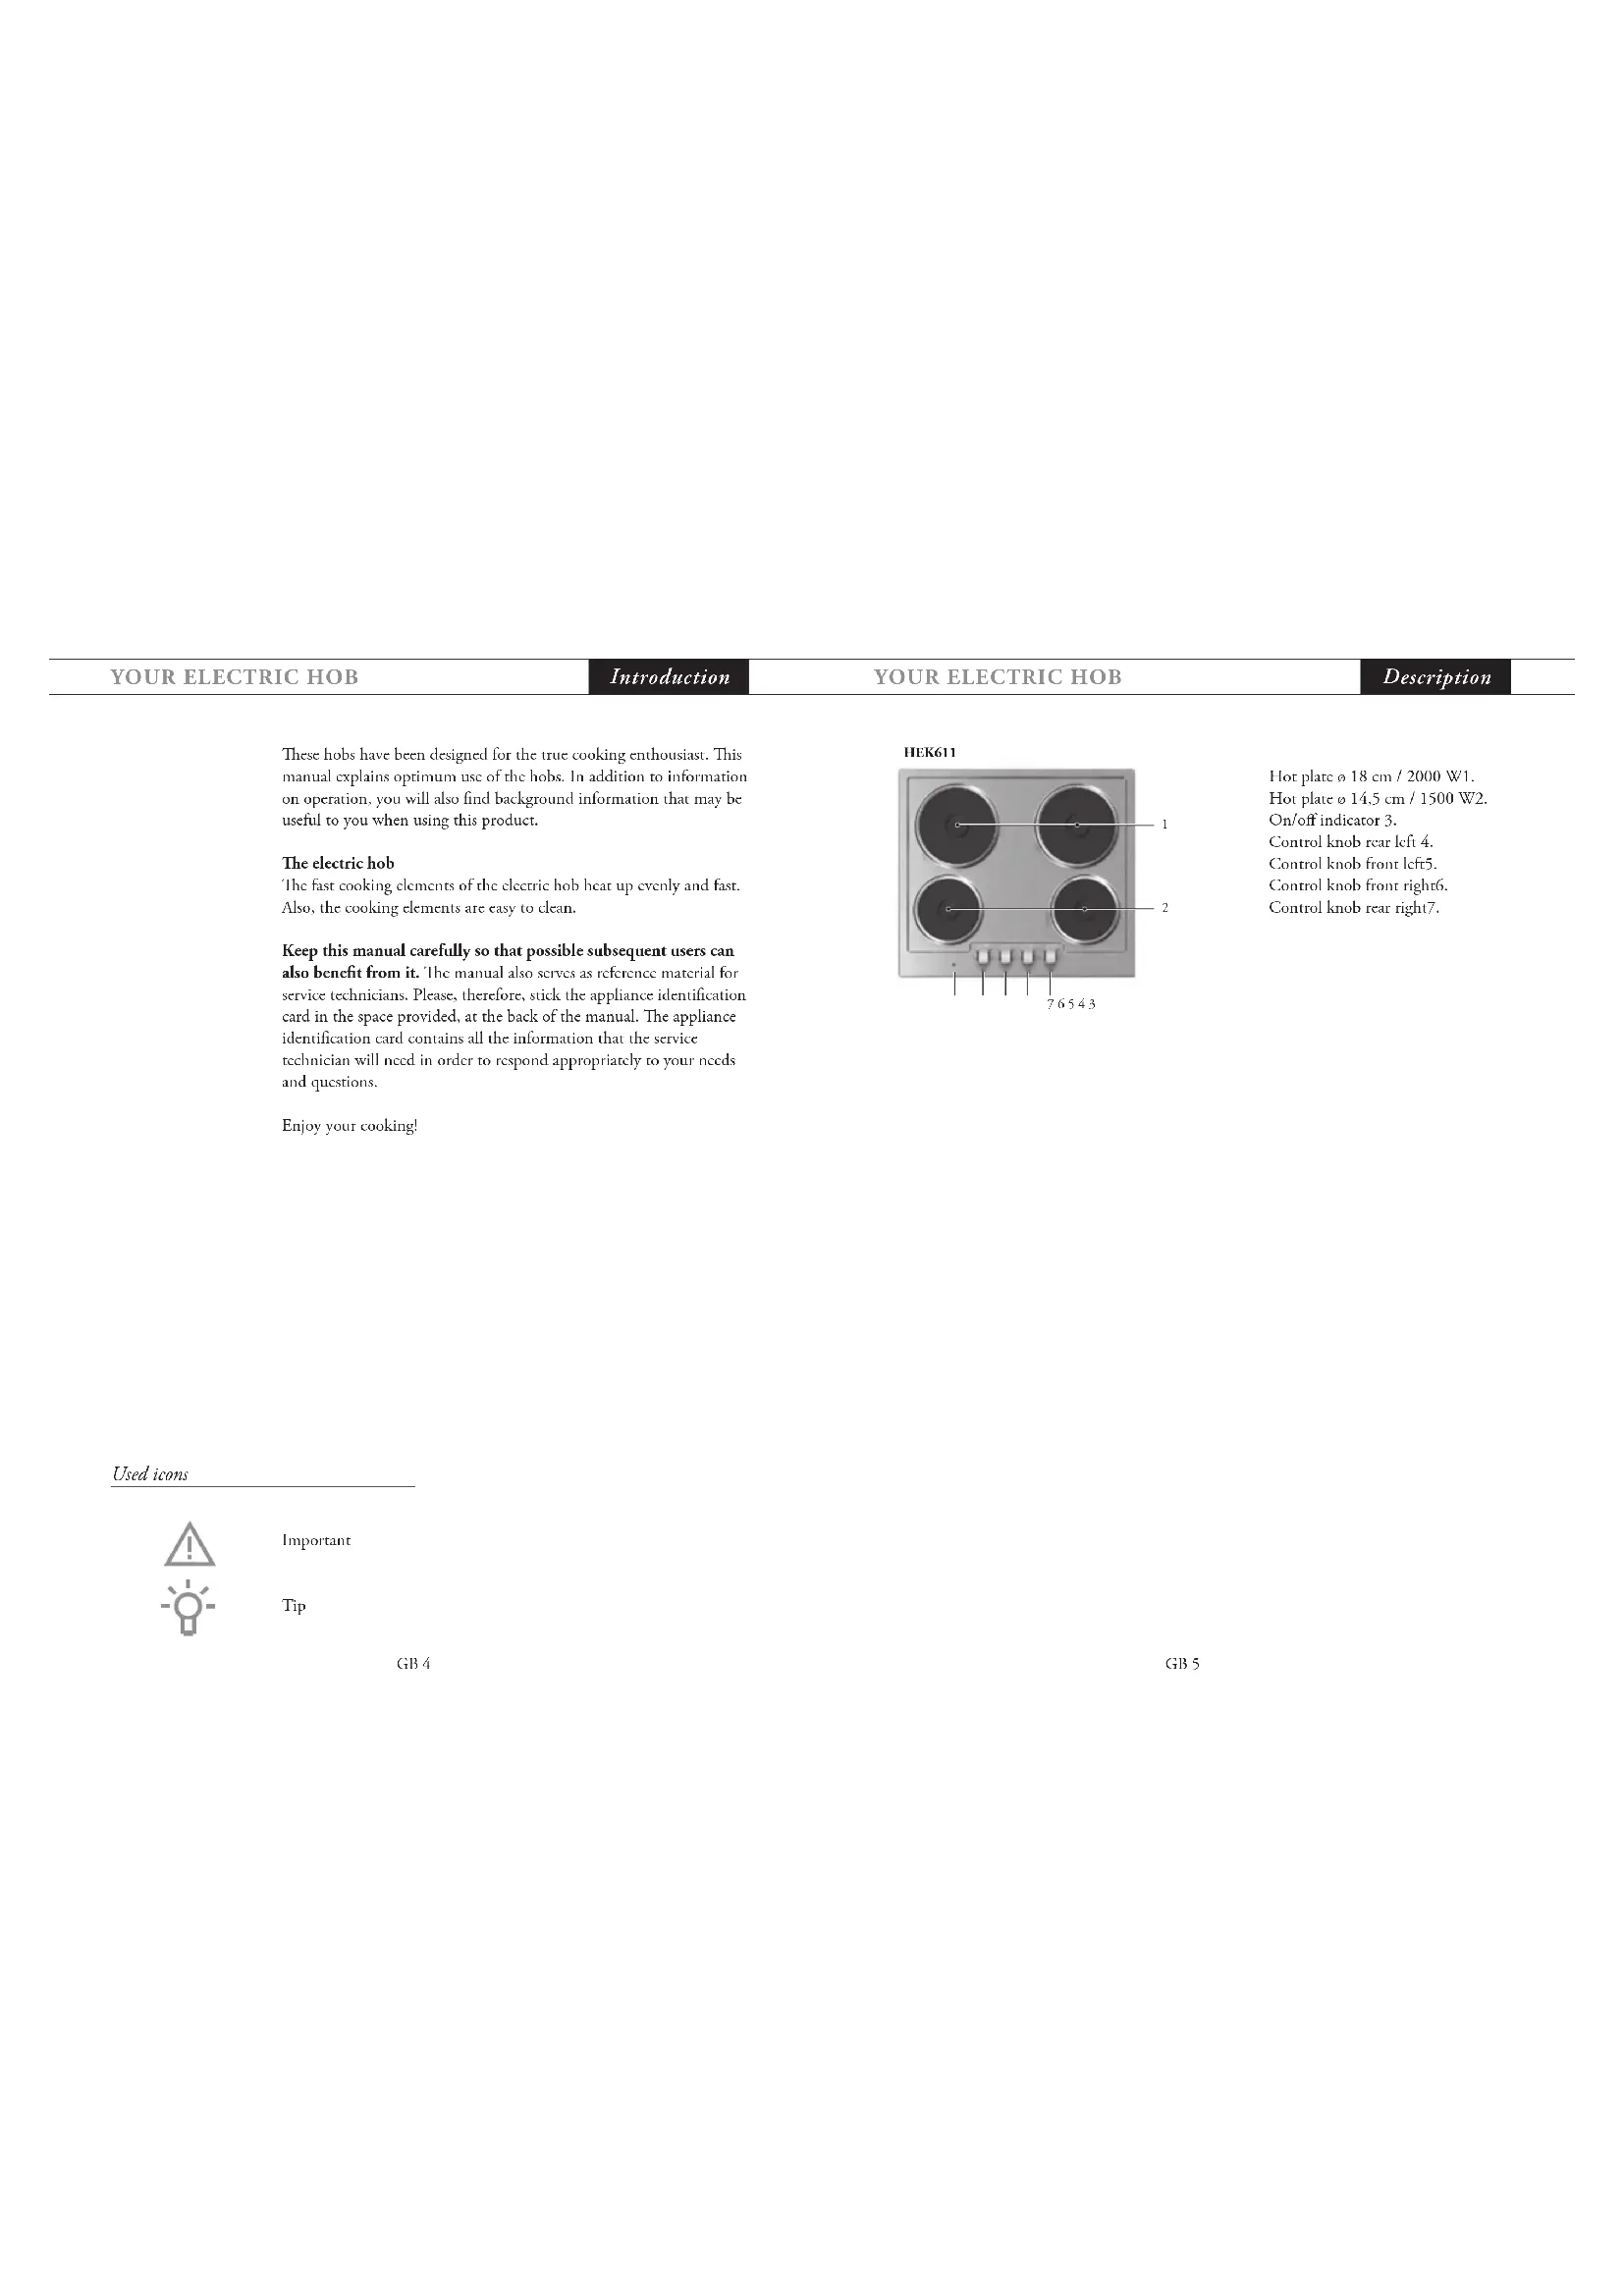
Hot platc 品 18 ~ c m / 2 0 0 0 W 1 Hot platc 品 14,5 ~ c m / 1 5 0 0 W 2
On/off indicator 3.
Control knob rcar kft 4.
Control knob front left5.
Control knob front right6.
Control knob rcar right7.
What you should pay attention to (general)

Never open the casing of the appliance.
Use the hob only for preparing dishes. The appliance is not suitable for space heating.
The appliance has been manufactured in accordance with the latest safety standards. However we do advise that mentally handicapped, disabled or retarded individuals do not use this appliance without the proper supervision of a competent person. The same applies to children.
Children should be supervised to ensure that they do not play with the appliance.
Always use suitable cooking utensils. Damage arising from the use of unsuitable pans or from boiling dry is excluded from the guarantee.
Grease and oil are flammable when overheated. Stay near the hob when preparing dishes.
Make sure that cables of electrical machines (such as a mixer) do not end up on hot cooking zones.
The hob gets very hot during use and also remains hot for some time after use. Do not allow small children near the hob during and soon after cooking.
- Never leave an empty pan on a cooking zone/hot plate that is switched on. Avoid the pan boiling dry.
- Never flambé under an extractor hood. The high flames can cause fire. Even if the ventilator is switched off.
- Ensure that there is adequate ventilation during use. Keep natural ventilation openings open.
- Do not use steam cleaners or high-pressure cleaners to clean the cooking hob, as this may result in an electric shock.
- If the connection cable becomes damaged, it should be replaced by the manufacturer's service department or by a person with equivalent qualifications, in order to prevent dangerous situations
What you should pay attention to (electric bob)

The hot plates get very hot during use and also remain hot for some time after use. Do not allow small children near the hob during and soon after cooking.
Never use the hot plates without any pans on it.
Never put aluminium foil directly onto the hot plates.
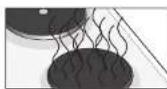
Remove spills as quickly as possible. Spills caused by boiling over of dishes such as red cabbage, thubarb and apple sauce in particular must be removed immediately. If they remain on the stainless steel surface for too long, the surface may discolour.
Moisture on the cooking surface may cause rust.
Operation
The cooking elements are made of cast iron. The heat is produced by filaments that are ring wise positioned in the element. The heat is transferred to the bottom of the pan by direct conduction. Each element is set in a stainless steel locking rim. When one or more elements are being used the indicator lamp on the control panel is on.
Switching on and off the bob
The first time you use the hob, first switch on all of the elements in the highest setting for 3 to 4 minutes without pans.
A special rust-resistant coating will be burnt off. This may result in an unpleasant odour. This is normal.
Switching on
Place a pan on a hot plate, press the control knob and turn it to the desired setting. The hot plate will then heat up.
Switching off
Turn the knob to the 0-setting. Cook with covers on the pan: this is quicker and less expensive. The hot plate remains warm for some time after it has been switched off. Make use of this extra heat in preparing your meals.
On/off indicator
As soon as a hot plate is switched on, the indicator lamp flashes.
Pans

For proper heat conduction, it is important that:
the pan has a solid, flat bottom;
the bottom of the pan is dry. Moisture on the cooking surface may cause rust;

the diameter of the pan is slightly larger than the diameter of the hot plate. Pans that are too small result in uneven distribution of the heat through the hot plate. As a result, the plate may become distorted or may even break. What is more: if a pan boils over, it will spill onto the cooking plate. In addition, the handles may become too hot and a lot of energy is lost.
OPERATION
Comfortable cooking
MAINTENANCE
General
Operation
A symbol above the control knob indicates which element is being used. The control knobs may be turned to the left as well as to the right.
Use a high setting (5-6) for:
boiling quickly;
shrinking down leaf vegetables:
scaring, mcat
frying steak, fish and potatoes:
cooking of pancakes and French toast;
deep frying.
Use an average setting (3-4) for:
cooking of pancakes;
well-done fish and small incat;
well-done big meat;
frying onions.
Use a low setting (1-2) for:
- cooking dishes with a cooking time of longer than 10 minutes;
braising vegetables;
defrosting leaf vegetables;
simmering bouillon;
preparing meat
keeping dishes warm;
completing the cooking of dishes.
Setting 0
In this position the element is switched off;
Cooking dishes with a cooking time of less than 10 minutes.
after the dish was brought to the boil first in a higher position.
Regular cleaning immediately after use prevents over-cooked food being able to become ingrained and cause stubborn stains that are difficult to remove.
Daily
Usc a mild cleaning agent to clean the hob. Do not use too much water as this can penetrate into the ventilation openings.
Elements
Wiping with a kitchen towel is usually sufficient.
Remove boiled over and burnt leftovers with the blunt side of a knife or a nonabrasivc sponge (Scotch Britc no. 373).
Always remove any remaining soap after cleaning and switch on the elements for a short while to evaporate the humidity.
Rub the plates every now and then with acid free oil (sewing machine oil) or with a maintenance product Collo Elektrol (drugstore).
Stainless steel rim
The stainless steel rim along the elements can be cleaned with a non-abrasive sponge (Scotch Brite no. 373). Remove the remains of the soap after cleaning, especially between the cast iron element and the stainless steel rim.
If the appliance does not work properly, this does not always mean that it is defective. Try to deal with the problem yourself first. Phone the service department if the advice given below does not help. Only authorised personnel may open the appliance or carry out work on the mains power supply. Damage caused by incorrect connection, incorrect installation or incorrect use is not covered by the warranty. In the case of faults visit the internet site 'www.atagservice.nl'.
| FAULT CAUSE SOLUTION | ||
| Hot plates do not get hot. | plug not (or not completely) in the socket. | Put the plug into the socket. |
| Fuse(s) in the meter cupboard defective. | Check the fuses in the meter cupboard. |
Warning

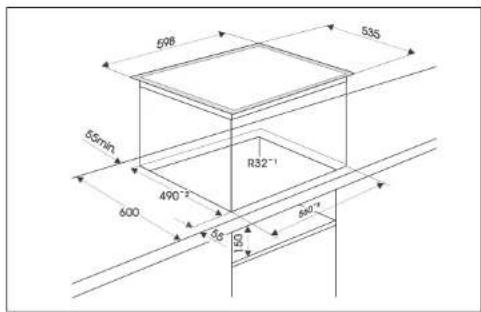
Panels and furniture lining of the kitchen cabinet receiving the hob must be treated with temperature resistant adhesives (100^) otherwise they might be discoloured or deformed because of inadequate temperature resistance. The cooking hob is intended for building into the worktop above the kitchen element of 60~cm width or more.
Bottom kitchen element must not be equipped with a drawer. If the kitchen element has a built-in horizontal shelf, it must be at a distance of not less than 15cm from the bottom surface of the worktop. The space between the shelf and the cooktop must be empty and may not be used for storage of utensils.
The use of hard wood decorative borders around the worktop behind the appliance is allowed, in case the minimum distance remains as indicated on the installation illustrations.
Minimum distance between the built-in cooktop and rear wall - is indicated at the illustration for the installation of the built-in cooktop.
The appliance may be installed in any worktop with a thickness from 30 mm to 50 mm .
Dimensions of the built-in hob opening
INSTALLATION INSTRUCTION
Installation procedure
INSTALLATION INSTRUCTION
Connection
Installation procedure
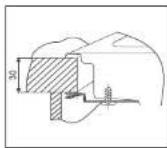
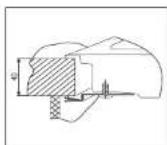

Worktop must be placed absolutely horizontal.
Suitably protect the edges of the cut aperture.
Attach the fixing brackets supplied with the device to the - underside of the hob. The assembly method depends on the thickness of the work top.
Stick the supplied self-adhesive seal to the bottom edges of the cooking hob.
Insert the hob into the cut aperture. Press the hob firmly towards the worktop from above.
Attention!
The power rating and required mains voltage are shown on the rating plate at the back of the oven. Connection should take place according to national and local regulations.
The seal between the hob and the work surface must be moisture-proof. The work surface must be absolutely level, as must the hob of course!
If the work surface is tiled it could be necessary to use liquid silicone rubber instead of the scaling strip.
If the hob is enclosed between the back and side panels a minimum distance of 400mm from these panels should be observed.
Tighten the mounting clips equally.
A hob should preferably not be positioned immediately above a refrigerator or freezer built-in below the worktop. If the hob has to be fitted above a refrigerator or freezer, ensure that the hob is well insulated.
General

When the appliance does not have a connecting cable and plug, then it may be connected to the mains only by an approved installer. After installation the wall socket and plug must be accessible at all times.
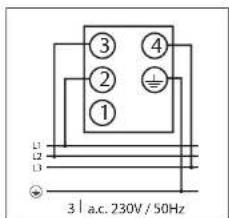
The power rating and required mains voltage are shown on the rating plate at the back of the oven. Connection should take place according to national and local regulations. This appliance requires 230V - 50 Hz AC.
The appliance should always be earthed.
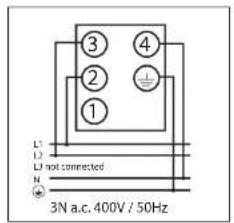
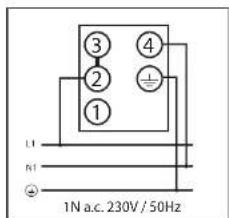
Usc good quality cable for connecting c.g. H05RRF, 1,5 or 2.5 mm² with 3 or 5 cores, depending on the regulations.
With following colour code:
brown = phasc L
blue = phase N
green/yellow earth
black=neutral or phase
Depending upon the wiring diagram, you can use the black cores for neutral or a phase.
The cable must have a plug suitable for a nominal load of at least 15 A. If you want to make a fixed connection, ensure that a multi-pole switch with a distance between contacts of 3mm is installed in the supply cable.
Wiring diagrams
There is a label showing the wiring diagrams on the underside of the appliance.

Note
Connection may be carried out by means of: rubber coated connection cables, model H05 RR-F 5x1,5 with yellow-green earthing cable; PVC insulated connection cables, model H05 VV-F 5x1,5 with yellow-green earthing cable; or any other suitable cables.
With a 5 wire cable and a 3 phase supply (3 IN AC) the wire not used must be isolated if it is live.
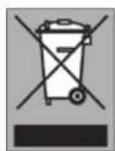
Disposal of appliance and packaging
By ensuring this product is disposed of correctly, you will help prevent potential negative consequences for the environment and human health, which could otherwise be caused by inappropriate waste handling of this product. The local authorities can provide you with the relevant information.
The packaging of this appliance is recyclable. It could have been made from:
cardboard;
polythene foil (PE):
CFK-free polystyrene (PS-hard foam).
You need to dispose of these materials responsibly in accordance with official regulations.
To draw attention to the fact that the segregated processing of electric household appliances is compulsory, this appliance carries the symbol of a crossed-out dustbin. This means that at the end of its working life, you may not dispose of the appliance as household refuse. Instead, you should hand it in at a special refuse collection centre run by the local authority or at a dealer's providing this service.
Segregated processing of household appliances avoids any negative effects on the environment and public health that might otherwise occur. It enables the recovery of the materials used in the production of this appliance, thus realising considerable savings in terms of raw materials and energy.
Technical data
On the label on the back of this equipment, you will find the total wattage, the required voltage and the frequency.
| HEK611 | |
| Dimensions height/width/depth (mm) 95/ | 600/530 |
| Electrical connection 3N AC 400, 50 Hz | |
| Voltage 230 V | |
| Total power max. 7,0 kW | |
| Switch type S = stepped switch | |
| Hob | N = normal hob B = hob for fast cooking |
| Left front | 145/1,5/B |
| Left rear | 180/2,0/B |
| Right rear | 145/1,5/B |
| Right front | 180/2,0/B |
| Hob total (kW) 7,0 | |
The appliance identification card is located on the bottom of the appliance.
Plak hier het toestel-identificatieplaatje.
Placez ici la plaque d'identification de l'appareil.
Kleben Sie hier das Gerätotypenschild ein.
Stick the appliance identification card here.
When contacting the service department, have the complete type number to hand.
Adressen en telefoonnummers van de serviceorganisatie vindt u op de garantiekaart. Les adresses et les numeros de téléphone du service après-vente se trouvent sur la carte de garantie. Adressen und Telefonnummern der Kundendienstorganisation finden Sie auf der Garantickarte. You will find the addresses and phone numbers of the service organisation on the guarantee card.

- Entretien
- Pannes
- The electric hob
- What you should pay attention to (general)
- What you should pay attention to (electric bob)
- Operation
- Switching on and off the bob
- On/off indicator
- Pans
- Use a high setting (5-6) for:
- Use an average setting (3-4) for:
- Use a low setting (1-2) for:
- Setting 0
- Daily
- Elements
- Stainless steel rim
- Warning
- Dimensions of the built-in hob opening
- Installation procedure
- Attention!
- General
- Wiring diagrams
- Note
- Disposal of appliance and packaging
- Technical data
Brand : Atag
Model : HEK6115U
Category : Hob