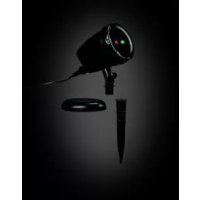
IAN 305984 - Light projector MELINERA - Free user manual and instructions
Find the device manual for free IAN 305984 MELINERA in PDF.



User questions about IAN 305984 MELINERA
0 question about this device. Answer the ones you know or ask your own.
Ask a new question about this device
Download the instructions for your Light projector in PDF format for free! Find your manual IAN 305984 - MELINERA and take your electronic device back in hand. On this page are published all the documents necessary for the use of your device. IAN 305984 by MELINERA.
USER MANUAL IAN 305984 MELINERA
text_image
PDF ONLINE www.lidl-service.comLASER-PROJEKTOR / LASER LIGHT PROJECTOR / PROJECTEURLASER
DE AT CH
LASER-PROJEKTOR
Assembly, operating and safety instructions
NL BE
LASERPROJECTOR
Before reading, unfold the page containing the illustrations and familiarise yourself with all functions of the device.
FR BE
text_image
Technical diagram of a mechanical device with numbered parts for identification and assembly reference.
text_image
A 1 2
text_image
B 1 6C

text_image
7 8 9D

text_image
10E

text_image
Technical diagram of a precision optical instrument with labeled parts 1 and 5Intended use......Page 12
Parts description......Page 12
Technical data......Page 13
Delivery contents......Page 13
Safety instructions....Page 13
Product-specific safety notes......Page 13
Assembly Page 14
Installing the ground stake in the ground Page 14
Assembling the laser projector....Page 14
Set-up......Page 14
Switching the product on/off Page 14
Using timer mode....Page 15
Adjusting the beam angle Page 15
Cleaning and care....Page 15
Disposal Page 15
Warranty and service......Page 16
Service address......Page 16
Manufacturer......Page 16
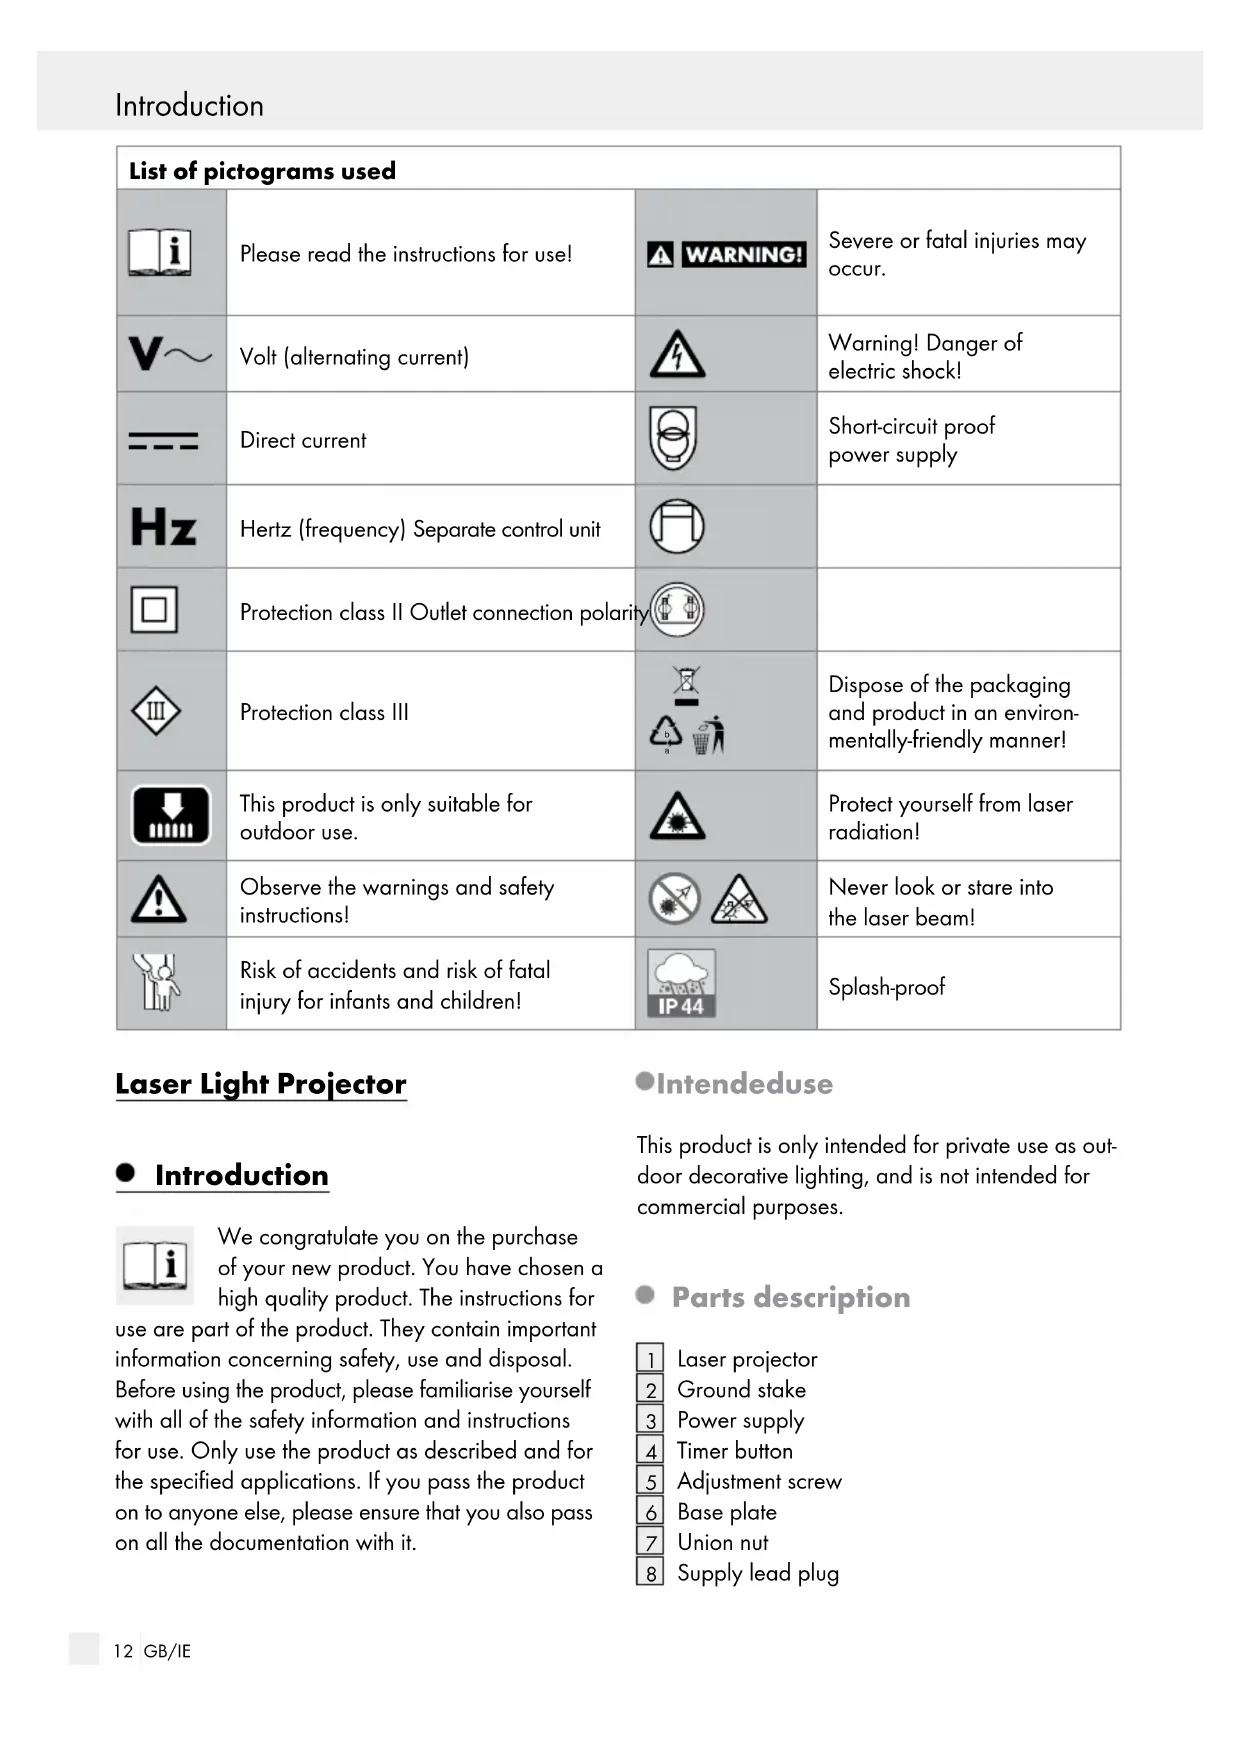
| List of pictograms used | |||
 | Please read the instructions for use! |  | Severe or fatal injuries may occur. |
 | Volt (alternating current) |  | Warning! Danger of electric shock! |
 | Direct current |  | Short-circuit proof power supply |
 | Hertz (frequency) Separate control unit |  | |
 | Protection class II Outlet connection polarity |  | |
 | Protection class III |  | Dispose of the packaging and product in an environmentally-friendly manner! |
 | This product is only suitable for outdoor use. |  | Protect yourself from laser radiation! |
 | Observe the warnings and safety instructions! |  | Never look or stare into the laser beam! |
 | Risk of accidents and risk of fatal injury for infants and children! |  | Splash-proof |
Laser Light Projector
- Introduction

We congratulate you on the purchase of your new product. You have chosen a high quality product. The instructions for
use are part of the product. They contain important information concerning safety, use and disposal.
Before using the product, please familiarise yourself with all of the safety information and instructions for use. Only use the product as described and for the specified applications. If you pass the product on to anyone else, please ensure that you also pass on all the documentation with it.
Intendeduse
This product is only intended for private use as outdoor decorative lighting, and is not intended for commercial purposes.
Parts description
1 Laser projector
2 Ground stake
3 Power supply
4 Timer button
5 Adjustment screw
6 Base plate
7 Union nut
8 Supply lead plug

Supply lead
On/off/mode button
- Technical data
Model number: 10415
Power supply
model number: JT-DC5V5W-H2-IP44
Input voltage: 220 - 240V \~, 50 - 60Hz
Output voltage: 5 V, 1 A
Luminous range: approx. 8 m
Laser class: 2
Protection type: IP44
Protection class: III/

- Delivery contents
1 Laser projector
1 Supply lead
1 Ground stake
1 Power supply
1 Base plate
1 Set of assembly
instructions and
instructions for use

Safety instructions
KEEP ALL SAFETY NOTICES AND INSTRUCTIONS FOR FUTURE REFERENCE!

RISK OF WARALING!
INJURY AND RISK OF ACCIDENTS FOR INFANTS AND
CHILDREN! Never leave children unsupervised with the packaging materials. It poses a danger of suffocation. Keep children away from the product.
This device may be used by children aged 8 years and up, as well as by persons with reduced physical, sensory or mental capacities, or lacking experience and / or knowledge, so long as they are supervised or instructed in the safe use of the device and understand the associated risks. Do not allow children to play with the device. Cleaning and user maintenance must not be performed by children without supervision.
- Do not use the product if you notice any signs of damage.
■ Never expose the product to high temperatures or moisture as this could damage the product.
Do not exert mechanical loads on the product!
Product-specific safety notes
In the event of damage, repairs or other problems with the laser projector, please contact an electrician.
CAUTION! RISK OF OVERHEATING!
Do not operate the product whilst it is still in the packaging.
■ Store the product in the original packaging after use to prevent accidental damage.
This product contains no parts which can be serviced by the user. The bulbs cannot be replaced.
Do not leave the product unattended while it is in use. Others could be blinded by the laser beam.
Protect yourself from laser radiation!

RISK OF INJURY! Make sure that when the laser projector is removed, the ground stake is also removed, so that it cannot pose any risk (e.g. stumbling over it).
STUMBLING HAZARD! Ensure that the supply lead 9 is laid in such a way that no one can walk on or stumble over it.
■ CAUTION LASER RADIATION! DO NOT LOOK INTO THE LASER BEAM!
LASER CLASS 2

text_image
LASER RADIATION DO NOT STARE INTO BEAM CLASS 2 LASER PRODUCT
text_image
P max.: <1 mW λ: 532 - 650 nm EN 60825-1:2014
LASER
2

Do not look directly into the laser beam or the laser beam outlet.
WARNING! Viewing the laser beam with optical instruments (e.g. magnifier, magnifying glass etc.) is associated with a risk of injury to the eyes.
Safety instructions / Assembly / Set-up
■ Never direct the laser beam at people, animals or reflective surfaces. Even looking briefly into the laser beam can cause damage to the eyes.

Avoid the risk of fatal injury from electric shock!
Before using the product, verify the available mains voltage corresponds with the required input voltage of the power supply 3 (220 - 240V\~, 50 - 60 Hz).
Before connecting the laser projector 1 to the mains, always check it and the power supply 3 for damage.
■ Never use the laser projector 1 if any damage is detected. If the supply lead 9 is damaged, the product must be rendered useless and must be disposed of appropriately.
- Protect the supply lead 9 from sharp edges, mechanical loads and hot surfaces.
■ Always unplug the power supply 3 from the wall socket before assembly, disassembly or cleaning.
Do not touch the power supply 3 of the laser projector 1 or the laser projector 1 itself with wet hands.
■ Only use the laser projector 1 with the delivered power supply 3 type (model no. JT-DC5V5W-H2-IP44). If this is not complied with, the warranty will be void.
This laser projector 1 is splash-proof (IP44). This protection class will only be maintained if the wall socket used also complies with at least this protection class.
Please remember the power supply 3 will continue to draw a small amount of electricity even without the laser projector 1 being operated so long as the power supply 3 is plugged into the wall socket. To switch the device off completely, unplug the power supply 3 from the wall socket.
■ Projections appear brightest in the darkness and may appear weaker due to other light sources, such as streetlights or garden lighting. The laser projector 1 is suitable for operation at temperatures between -23 °C and +38 °C (10 °F to 100 °F). If the laser projector 1 is
operated at temperatures at freezing point or lower, it may take up to ten minutes until it warms up or reaches its full luminosity.
Assembly
- Installing the ground stake in the ground
■ Wear safety gloves when installing the ground stake 2 in the ground. Do not install the ground stake 2
if the ground is frozen.
- Push the ground stake 2 far enough into the ground (lawn, flower bed) so that it is firm in the ground. Check that it is firmly positioned. Do not use excessive force, e.g. strike with a hammer, when you are pushing the ground stake 2 into the ground. This will damage the product.
- Assembling the laser projector
Assembling the laser projector 1 on the ground stake 2
Put the laser projector 1 onto the ground stake 2 as depicted in Figure A.
Assembling the laser projector 1 on the base plate 6
Put the laser projector 1 on the base plate 6 as depicted in Figure B.
Set-up
- Switching the product on / off
☐ Insert the plug of the supply lead 9 into the socket of the power supply 3. Please note the recesses in the socket of the power supply 3.
☐ Tighten the union nut 7 clockwise.
☐ Plug the power supply 3 into an easy to access wall socket! Select a wall socket where you can easily unplug the power supply 3.
☐ Insert the other end of the supply lead 9 into the socket of the laser projector 1. Please note the recesses in the socket of the laser projector 1.
☐ Tighten the union nut 7 clockwise.
☐ Press the on/off/mode button 10 to change the lighting modes as follows (see Fig. D):
1 press: lighting mode red, rotating
2 presses: lighting mode red, stationary
3 presses: lighting mode green, rotating
4 presses: lighting mode green, stationary
5 presses: combination, rotating
6 presses: combination, stationary
7 presses: laser projector off
• Using timer mode
☐ To turn on timer mode, hold the timer button 4 pressed for about 2 seconds after you have connected the product to your electricity supply. The timer button 4 will light up green when timer mode has been activated. The product will stay on for 6 hours and will then automatically switch off for 18 hours in timer mode. This pattern will repeat automatically.
Note: In timer mode, the laser projector will work in the last mode it was set to (see chapter „Switching the product on / off“).
☐ To deactivate timer mode, hold the timer button 4 pressed again for about 2 seconds. The light of the timer button 4 will go out.
- Adjusting the beam angle (see Fig. E)
☐ To adjust the beam angle of the laser projector 1 loosen the adjustment screw 5.
☐ Bring the laser projector 1 into the desired position and tighten the adjustment screw 5 hand-tight.
- Cleaning and care
WARNING! DANGER OF ELECTRIC
SHOCK! Unplug the power supply 3 from the wall socket.
WARNING! DANGER OF ELECTRIC
SHOCK! For reasons of electrical safety the device must never be cleaned with water or other liquids, or immersed in water.
■ Only clean with a dry, lint-free cloth.
●Disposal
The packaging is made entirely of recyclable materials, which you may dispose of at local recycling facilities.

Observe the marking of the packaging materials for waste separation, which are marked with abbreviations (a) and numbers (b) with following meaning: 1–7: plastics / 20–22: paper and fibre-board/80–98: composite materials.

The product and packaging materials are recyclable, dispose of it separately for better waste treatment. The Triman logo is valid in France only.

Contact your local refuse disposal authority for more details of how to dispose of your worn-out product.

Do not dispose of electric equipment in the household waste!
In accordance with the European Directive 2012/19/EC on waste electrical and electronic equipment and its translation into national law, used electrical equipment must be collected separately and recycled in an environmentally responsible way.
To help protect the environment, please dispose of the product properly when it has reached the end of its useful life and not in the household waste. Information on collection points and their opening hours can be obtained from your local authority.
● Warranty and service
Note: This product includes a 36 month warranty from the date of purchase. The product has been manufactured with care and thoroughly inspected prior to delivery. However, if defects in manufacturing or material arise during the warranty period, please contact your retailer immediately.
The warranty does not cover damages due to improper handling, failure to comply with the instructions for use, or manipulation by unauthorised persons. Most malfunctions are caused by incorrect operation. Therefore, please first refer to the instructions for use if a malfunction occurs.
Please contact the Uni-Elektra GmbH service address before returning products. The product may only be returned to us after contacting us. Shipments that are sent carriage forward will not be accepted. The performance of services under the warranty does not extend or restart the warranty period of 36 months.
Service address
Uni-Elektra GmbH
Kirchstr. 48
DE-72145 Hirrlingen
GERMANY
Tel.: 00800 888 11 333
GB uni-service-GB@teknihall.com
IE uni-service-IE@teknihall.com
IAN 305984
Please have your receipt and the item number (e.g. IAN 12345) ready as your proof of purchase when enquiring about your product.
Manufacturer
Uni-Elektra GmbH
Kirchstr. 48
DE-72145 Hirrlingen
GERMANY

CE