
ProClub MGK 9030 - Razor GRUNDIG - Free user manual and instructions
Find the device manual for free ProClub MGK 9030 GRUNDIG in PDF.
| Product Type | Multi-accessory Shaver / Trimmer |
| Brand | Grundig |
| Model | ProClub MGK 9030 |
| Power Supply | AC adapter 100-240 V ~ 50/60 Hz, output 5 V DC 1 A |
| Battery Type | Integrated rechargeable |
| Charging Time | Approx. 1 h 30 |
| Wireless Runtime | Up to 120 minutes |
| Cutting Head Width | 32 mm |
| Cutting Length Without Guide | 1.5 mm |
| Length Settings With Guides | From 1 to 25 mm depending on comb (15 positions) |
| Included Accessories | 3 adjustable combs, close shave head, nose hair head, detail head, single blade head, charging plug, cleaning brush, oil |
| Main Functions | Hair cutting, beard trimming, close shaving, nose hair trimming, body grooming, Turbo mode, BeardCare sensor |
| Protection Rating | IPX7 (body), IPX4 (adapter) |
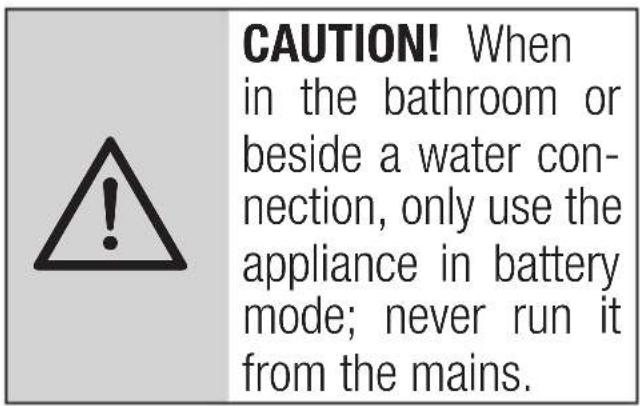
| Use in Bath/Shower | Yes, cordless |
| Cleaning | Under running water (detachable head) and cleaning brush |
| Lubrication | Recommended regularly with provided oil |
| Safety | Do not use while plugged in near water, unplug before cleaning, adapter not repairable |
| Blade Material | Ceramic / stainless steel |
| Display | LCD |
| Spare Parts and Repairability | Adapter and cutting head available from manufacturer; battery not user-replaceable |
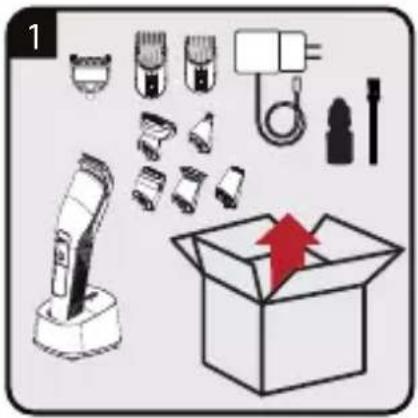
| Package Contents | Device, adapter, charging plug, 3 beard cutting heads, large and small shaver head, nose hair head, single blade head, detail cutting head, 2 combs, brush, oil, manual |
Frequently Asked Questions - ProClub MGK 9030 GRUNDIG
User questions about ProClub MGK 9030 GRUNDIG
0 question about this device. Answer the ones you know or ask your own.
Ask a new question about this device
Download the instructions for your Razor in PDF format for free! Find your manual ProClub MGK 9030 - GRUNDIG and take your electronic device back in hand. On this page are published all the documents necessary for the use of your device. ProClub MGK 9030 by GRUNDIG.
USER MANUAL ProClub MGK 9030 GRUNDIG
Multi Grooming Kit with Charging Dock User Manual

MGK 9030
DE-EN-TR-ES-FR-HR-PL
CONTENTS
| DEUTSCH 08-32 | |
| ENGLISH | 33-49 |
| TÜRKÜCE | 50-70 |
| ESPAÑOL | 71-92 |
| FRANÇAIS | 93-113 |
| HRVATSKI | 114-130 |
| POLSKI 131-148 | |


| B | D | |
| DE BETRIEB REINIGUNG UND PFLEGGE | ||
| EN OPERATION CLEANING AND CARE | ||
| TR KULLANIM TEMİZLEME VE BAKIM | ||
| FR FONCTIONNEMENT NETTOYAGE ET ENTRETIEN | ||
| ES FUNCIONAMIENTO LIMPIEZA Y CUIDADOS | ||
| HR RAD ČIŠÇENJE I ODRŽAVANJE | ||
| PL OBSŁUGA CZYSZCZENIE I KONSERWACJA | ||
Manufactory CO., LTD
Modellidentifikator:
ZD006M050100EU
Eingangsspannung:
100-240V~
Eingangsfrequency: 50/60Hz
Eingangsstrom: 0.3A
Please read this manual first!
Dear Customer,
Thank you for purchasing a Grundig product. We hope that you get the best results from your product which has been manufactured with high quality and state-of-the-art technology. Therefore, please read this entire user manual and all other accompanying documents carefully before using the product and keep it as a reference for future use. If you handover the product to someone else, give the user manual as well. Follow all warnings and information in the user manual.
Meanings of the symbols
Following symbols are used in various sections of this manual:

Important information and useful hints about usage.

WARNING:
Warnings against dangerous situations concerning the security of life and property.

Electrical insulation class.
1 Important safety and environmental instructions
Please read this instruction manual thoroughly prior to using this appliance! Follow all safety instructions in order to avoid damage due to improper use!
Failure to follow these instructions voids any granted warranty.
1.1 General safety
- The appliance is designed for domestic use only.
- This appliance is designed solely for trimming human hair and beards. Any other use is expressly prohibited.
Suitable for use in a bath or shower.
-
水 Suitable for cleaning under an open water tap.
-
Never use the appliance if it, the cutting head or the power adapter show any signs of damage. Contact authorized service.
1 Important safety and environmental instructions
- Only use the appliance with the parts and power adapter supplied.
- Caution! Always keep the appliance and power adaptor dry.
- When the appliance is being charged, on no account should it come into contact with water or any other liquid.
- After charging, always unplug the cable from the socket and disconnect the power adapter from the wall socket.
- Do not drop the appliance.
- Charging adaptor and power cable cannot be repaired once damaged. Please make sure that you dispose the charging adaptor in accordance with environmental directions. You can get your new charger from the manufacturer or authorised service provider.
1 Important safety and environmental instructions
- Never place the appliance, accessories or power adapter on or near hot surfaces.
- Check that the mains voltage on the rating label corresponds to your local mains supply.
- Keep the appliance out of the reach of children.
- Before cleaning or user maintenance operation first plug out.
- This appliance can be used by children aged from 8 years and above and persons with reduced physical, sensory or mental capabilities or lack of experience and knowledge if they have been given supervision or instruction concerning use of the appliance in a safe way and understand the hazards involved. Children shall not play with the appliance. Cleaning and user maintenance shall not be made by children without supervision.
- Do not open the appliance under any circumstances.
1 Important safety and environmental instructions
No warranty claims are accepted for damage caused by improper handling.
- This appliance contains batteries that are non-replaceable.
- WARNING: For the purposes of recharging the battery, only use the detachable supply unit provided with this appliance.
- WARNING: Detach the hand-held part from the supply cord before cleaning it in water.
- WARNING: Adaptor and charging base cannot fall in water.
- Do not squeeze or bend the power cord and do not rub in on sharp edges in order to prevent any damage. Keep the cord away from hot sur faces and open flames.
- If you keep the packaging materials, keep them out of the reach of children.
1 Important safety and environmental instructions
- This appliance is designed solely for trimming human hair and beards. Any other use is expressly prohibited.
- Before removing the battery, the product should be disconnected from the electricity supply. Observe the local legislation and regulations when disposing of the battery.
1.2 Compliance with the WEEE Directive and Disposing of the Waste Product:
This product complies with EU WEEE Directive (2012/19/EU). This product bears a classification symbol for waste electrical and electronic equipment (WEEE).

This symbol indicates that this product shall not be disposed with other household wastes at the end of its service life. Used device must be returned to official collection point for recycling of electrical and electronic devices. To find these collection systems please contact to your local authorities or
retailer where the product was purchased. Each household performs an important role in recovering and recycling of old appliance. Appropriate disposal of used appliance helps prevent potential negative consequences for the environment and human health.
1 Important safety and environmental instructions
1.3 Compliance with RoHS Directive
The product you have purchased complies with EU RoHS Directive (2011/65/EU). It does not contain harmful and prohibited materials specified in the Directive.
1.4 Package information

Packaging materials of the product are manufactured from recyclable materials in accordance with our National Environment Regulations. Do not dispose of the packaging materials together with the domestic or other wastes. Take them to the packag
ing material collection points designated by the local authorities.
1.5 Information on Waste Batteries
This symbol on rechargeable batteries/batteries or on the packaging indicates that the rechargeable battery/battery may not be disposed of with regular house hold rubbish. For certain rechargeable batteries/batteries, this symbol may be supple
mented by a chemical symbol. Symbols for mercury (Hg) or lead (Pb) are provided if the rechargeable batteries/batteries contain more than 0,0005 % mercury or more than 0,004 % lead.
Rechargeable batteries/batteries, including those which do not contain heavy metal, may not be disposed of with household waste. Always dispose of used batteries in accordance with local environmental regulations. Make enquiries about the applicable disposal regulations where you live.
20overview
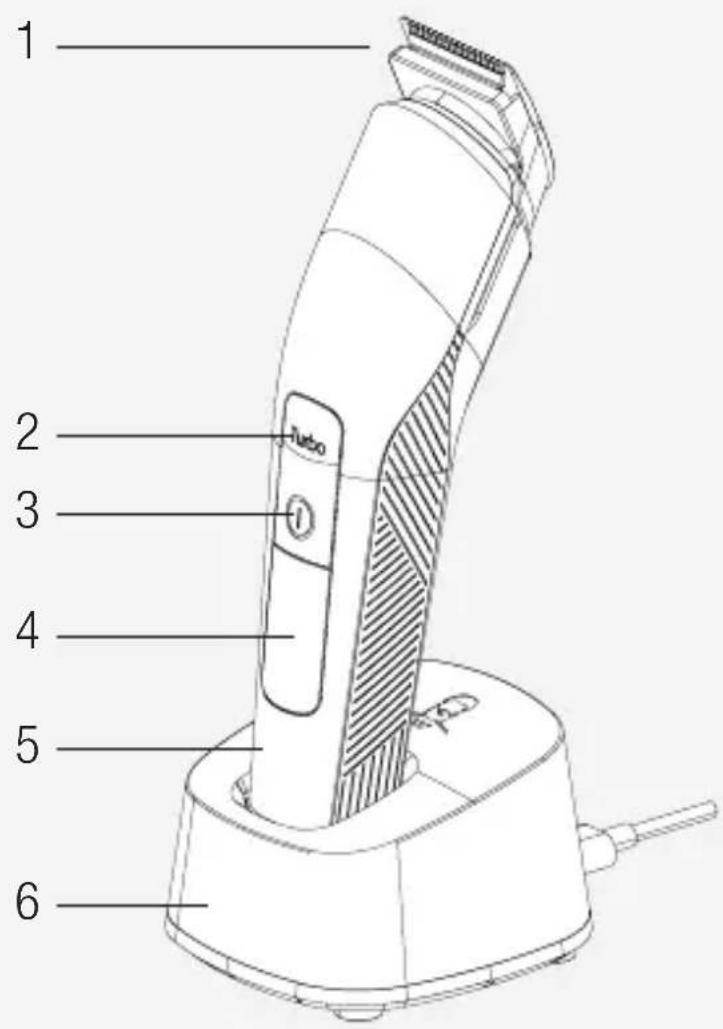
2.1 Controls and parts
See the illustrations on page 3.
- Cutting head
- High speed setting button (Turbo)
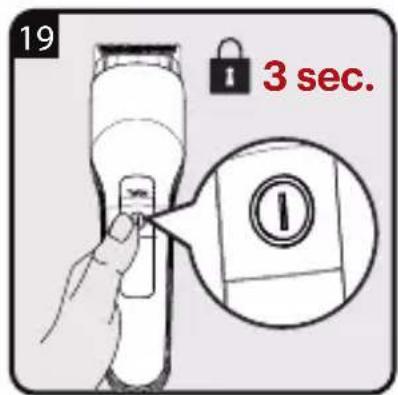
- On/Off switch
- LCD Display
- Body
- Charging dock
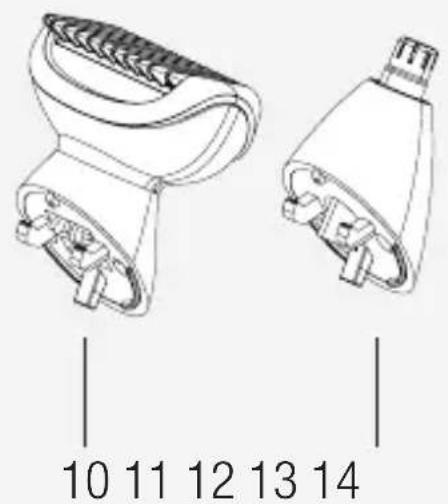
Accessories
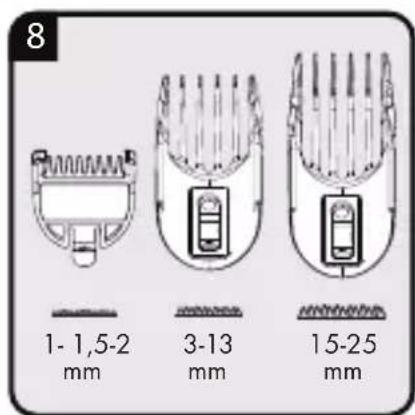
- Beard trimming head 1 (3-13 mm comb)
- Beard trimming head 2 (15-25 mm comb)
- Beard trimming head 3 (1-1,5-2 mm)
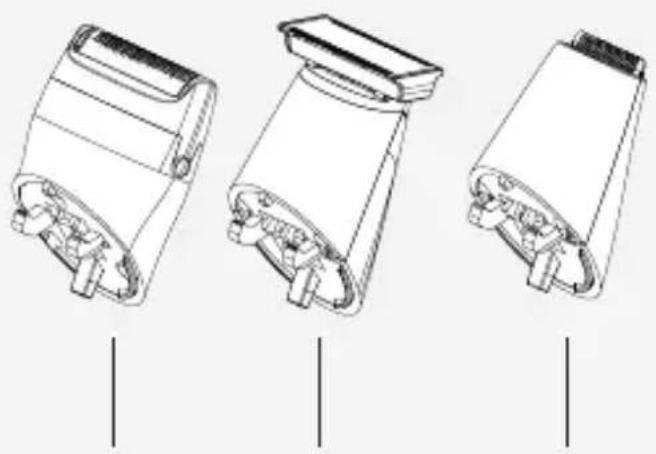
- Big shaving head
- Nose hair head
- Small shaving head
- One blade head
- Detail trimming head
Other Accessories
Power adapter
Charging plug
Cleaning brush
Oil
2.2 Technical data
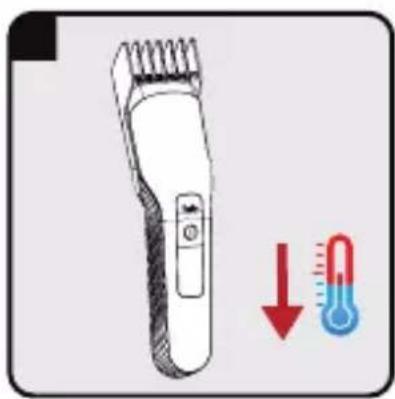
Operating temperature:
$$ + 5 ^ {\circ} \mathrm {C} - + 4 0 ^ {\circ} \mathrm {C} $$
Storage temperature:
$$ 0 ^ {\circ} \mathrm {C} - + 4 0 ^ {\circ} \mathrm {C} $$
Parameter of External Power Supply
Manufacturer: E-TEK Electronics
Manufactory CO., LTD
Model Identifier:
ZD006M050100EU
Input Voltage: 100-240V~
Input Frequency: 50/60Hz
Input Current: 0.3A
Output Voltage: 5.0V DC
Output Current: 1.0A
Output Power: 5.0W
Average active efficiency:
77.74%
20overview
Efficiency at low load(10%):
73.15%
No-load power consumption:
0.042W
Protection class:
Trimmer body IPX7
Adaptor IPX4
Batteries: Li-ion (Lithium-ion
rechargeable battery)
Electrical insulation class: II
Design and specifications subject to change without notice.
The values which are declared in the markings affixed on your appliance or other printed documents supplied with it represent the values which were obtained in the laboratories pursuant to the pertinent standards. These values may vary according to the usage of the appliance and ambient conditions.
3 Power supply
3.1 Operating with the power adapter
Check that the voltage indicated on the rating plate of the power adapter corresponds to your local power supply.
The only way to disconnect the appliance from the power supply is to unplug the power adapter.
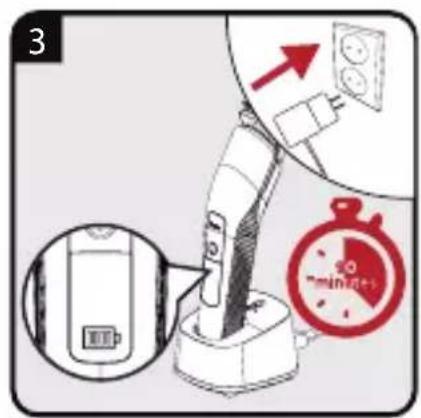
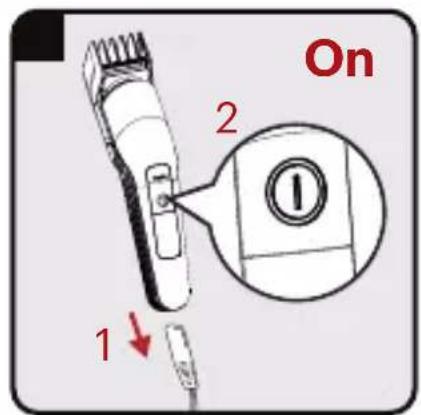
- Plug the charging plug into the appliance socket and the power adapter into the wall socket.

CAUTION! The groove on the charging plug must match the notch in the appliance socket.
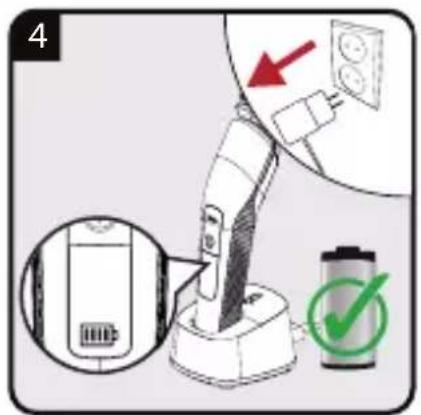
- LED battery symbol will start flashing, when the batteries are charged. Once the trimmer is completely charged, LED battery symbol will illuminate continually.

Charging time:1.5 hours when the battery is fully charged
-
LED battery symbol will start flashing when the unit reaches low battery capacity during operation.
-
When the batteries are discharged: LED battery symbol will not display.

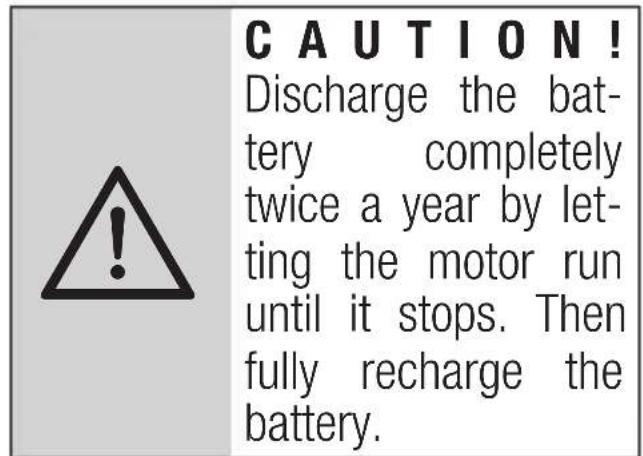
Discharge the appliance through normal use. Then recharge to full capacity. Maximum battery capacity will only be reached after several charging/discharging cycles.

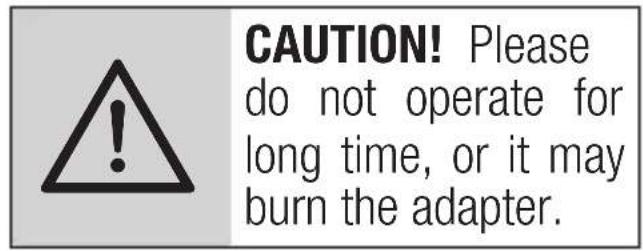
The adapter and unit may become warm while charging; this is normal operation.

When the appliance is fully charged, it has a cordless operating time of up to 120 minutes.
3 Power supply


3.2 Optimising the lifetime of the rechargeable battery

4Preparation

The trimming length without combing system is 1.5 ~mm .

Trimming without a comb is perfect for designer stubble.

Width of cutting head is 32mm
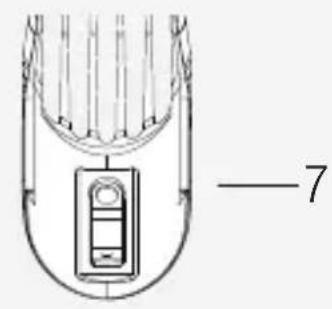
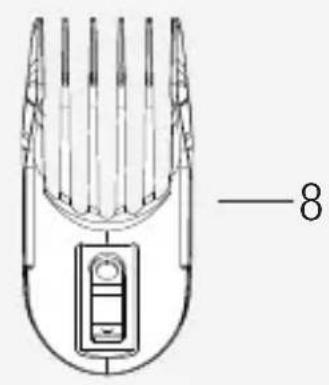
4.1 Setting the trimming length
The Adjustable comb allows the appliance to adjust in 15 different lengths:
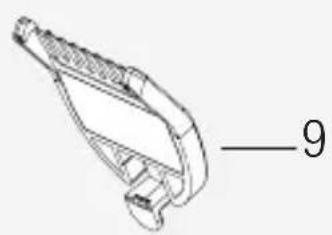
4.1.1 Adjustable comb (7, 8, 9)
| Beard trimming head 1 3 | mm |
| Beard trimming head 1 5 | mm |
| Beard trimming head 1 7 | mm |
| Beard trimming head 1 9 | mm |
| Beard trimming head 1 11 | mm |
| Beard trimming head 1 13 | mm |
| Beard trimming head 2 15 | mm |
| Beard trimming head 2 17 | mm |
| Beard trimming head 2 19 | mm |
| Beard trimming head 2 21 | mm |
| Beard trimming head 2 23 | mm |
| Beard trimming head 2 25 | mm |
| Beard trimming head 3 1 | mm |
| Beard trimming head 3 1,5 | mm |
| Beard trimming head 3 2 | mm |
5Operation
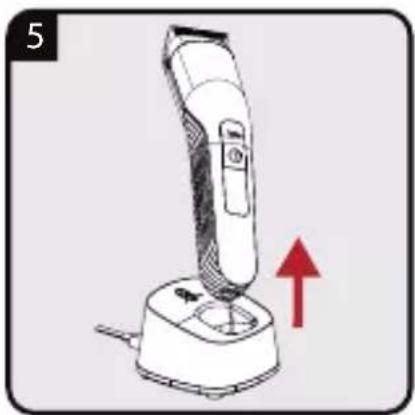
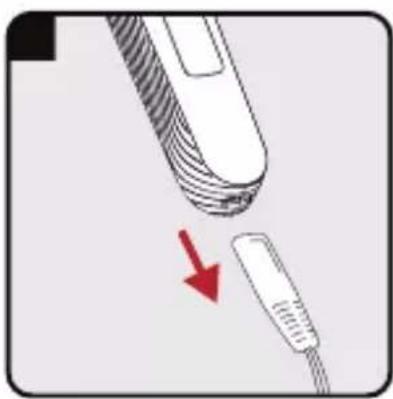
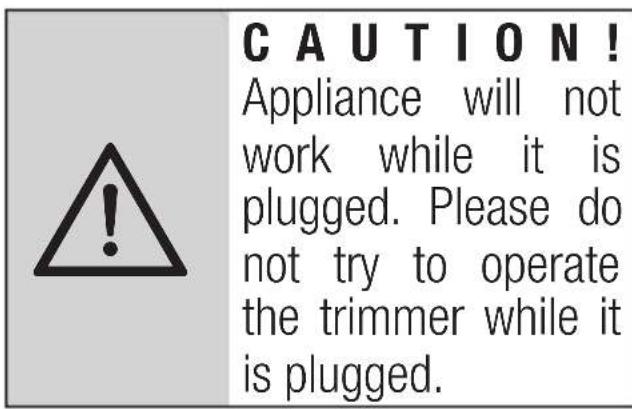
Before Using, remove the plug of adapter from the mains power socket and remove the connect wire from body .
We recommend to trim a small area first to familiarize yourself with the attachment comb.
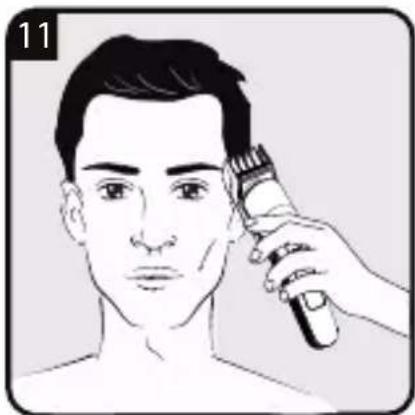
5.1 Cutting hair
Please use the head (7, 8, 9), (1).
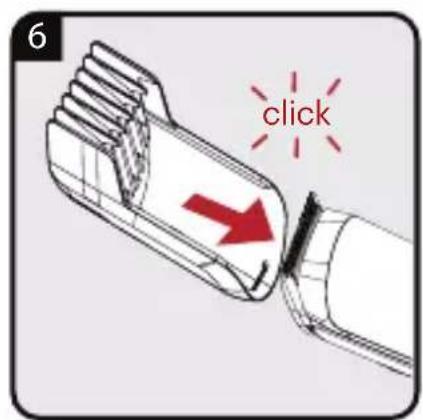
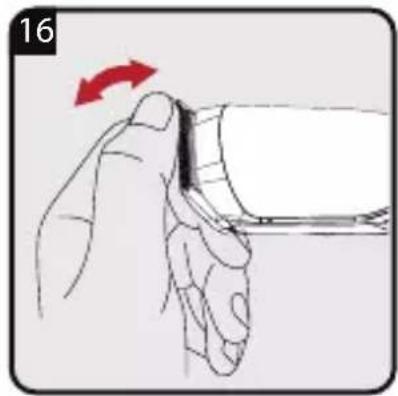
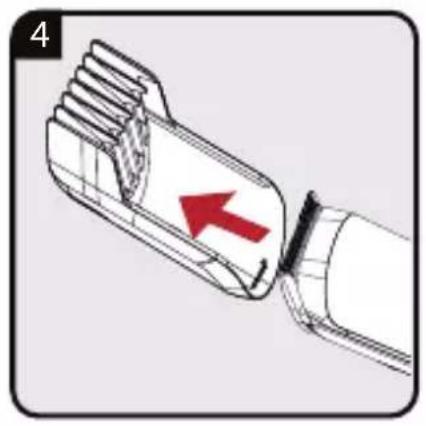
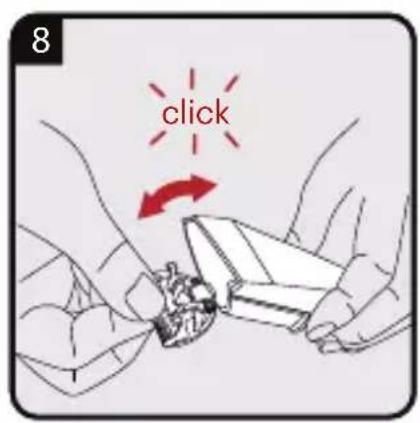
- If necessary, remove the attachment by holding the head and pushed away from the appliance.
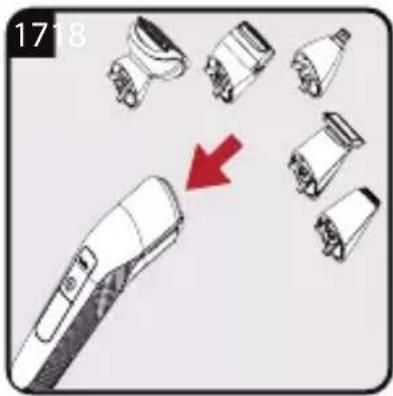
- Insert stainless steel cutting head carefully at the top and press down until it clicks into place.
- Place a towel around the neck and shoulders of the person whose hair you are trimming.
-
Make sure the person is seated so that their head is roughly at your eye level. Before trimming, comb the hair so that it falls naturally and you can see the direction in which it grows.
-
Press the (3) button to switch on the appliance and start cutting your hair.
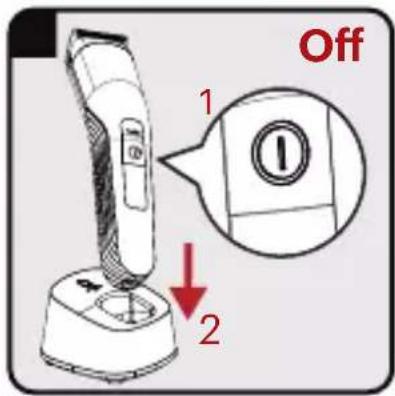
- Press the (3) button to switch off the appliance after use.
5.1.1 Useful tips
- Move the clipper upwards and out wards through the hair, a little at a time, against the direction of hair growth.
- The appliance will work most efficiently when cutting through the hair at its own speed. Never force the clipper through the hair. Never switch the clipper off whilst in the hair.
- For longer hair on top of the head, hold the hair between the fingers and cut to the desired length. Always work from the front to the back of the head.
- As you cut, take a break at regular intervals. You can always make a correction, but not once the hair has been cut.
5Operation
- Only cut a small amount the first time you use it. This is the only way to get used to the variable positions.
- Keep combing the hair. Only look for hair which is too long and comb out clippings.
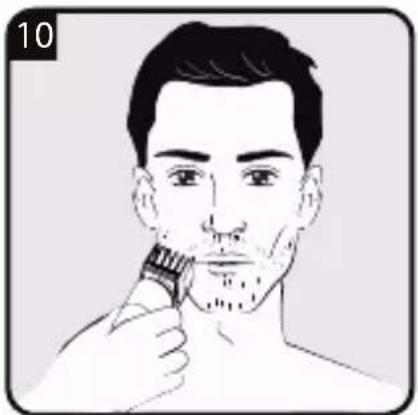
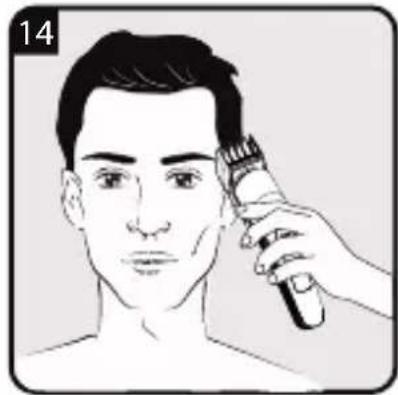
5.2 Beard trimming
Please use the beard trimming attachment (12) or (1).
- If necessary, remove the attachment by holding the head and pushed away from the appliance.
- Insert beard trimming attachment (12) or cutting hea (1) d carefully at the top and press down until it clicks into place.
- Loosen the beard hair by combing the beard in the direction the hair grows.
- Press the button (3) to switch on the appliance and start trimming your beard.
- Press the button (3) to switch off the appliance after use.
5.3 Trimming hair or beard to a certain length
Use accessories 7-8-9 for hair and 14 for beard.
- If necessary, remove the attachment by holding the head and pushed away from the appliance.
- Insert attachment (1) or (14) carefully at the top and press down until it clicks into place.
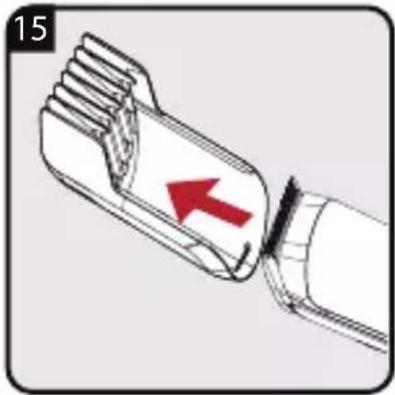
- Push the comb attachment carefully and firmly onto the rounded rear half of the cutting head from above and let it click into place. The attachment combs (7), (8) and (9) are compatible with the cutting head (1).

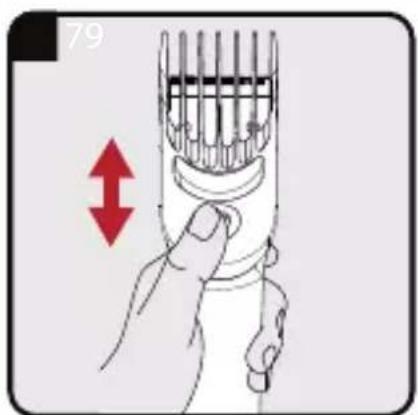
To adjust the small and large adjustable comb attachments 7, 8 and 9 press the middle of each attachment and push it up or down.
5Operation
- Press the button (3) to switch on the appliance and start trimming.
- Press the button (3) to switch off the appliance after use.
- After use, remove the comb attachment by pressing the locking tab at the back and lifting the comb attachment.
5.4 Trimming body hair to a certain length
Please use the head (10).
- Insert attachment (10) carefully at the top and press down until it clicks into place.
- Press the (3) button to switch on the appliance and start trimming your body hair.
- Press the (3) button to switch off the appliance after use.
5.5 Multistyling
Multi blade shaving attachment (13) for face and body.
- If necessary, remove the attachment by holding the head and pushed away from the appliance.
- Insert shaving attachment (13) carefully at the top and press down until it clicks into place.
- Press the (3) button to switch on the appliance and start shaving.
- Press the (3) button to switch off the appliance after use.
5.6 Removing hair from nose
- Attach the trimming attachment (11).
- To turn the appliance on, press the On/Off button (3).
- Insert the cutting unit gently into the nostril.

CAUTION! Do not insert the appliance too far into the nose during use.
5Operation
- Gently move the cutting edge in and out of the nostril while rotating the appliance.
- To turn the appliance off, press the On/Off button (3).
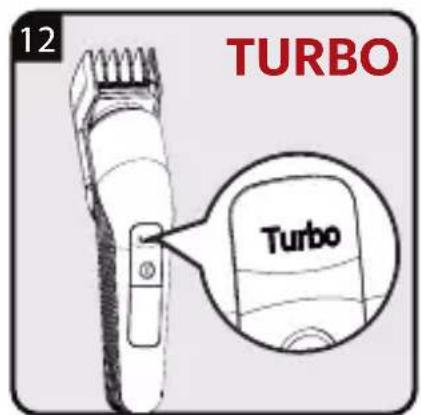
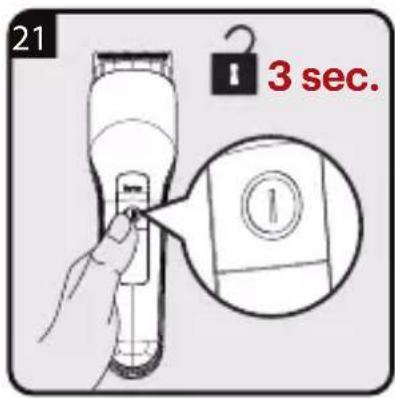
5.7 High speed setting button (2) (Turbo)
Device performance can be maximized by pushing the turbo button (2).
5.8 The usage of the BeardCare sensor
The BeardCare sensor detects in real time the density of the beard hair and adjusts the power of the motor accordingly. At Turbo Mode, the BeardCare sensor will be inactive.
6Information
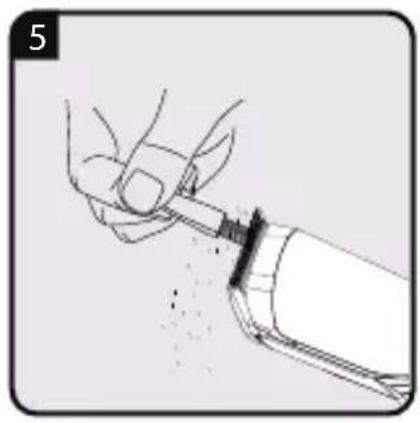
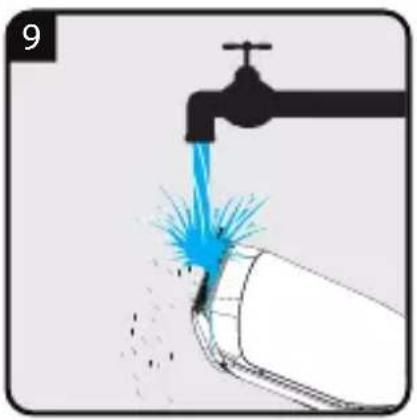
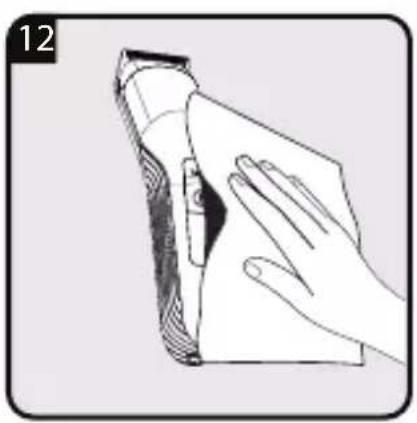
The appliance must be cleaned regularly so that you can continue to enjoy its top performance and optimum results.
6.1 Cleaning and care
Before cleaning, remove the plug of adapter from the mains power socket and remove the connect wire from body.

Never used liquids to clean the appliance. Use the cleaning brush provided and water only.

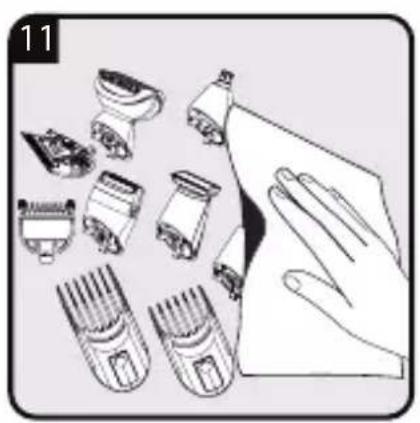
Remove any clippings after each use.

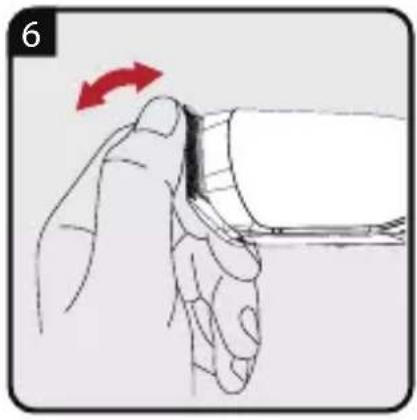
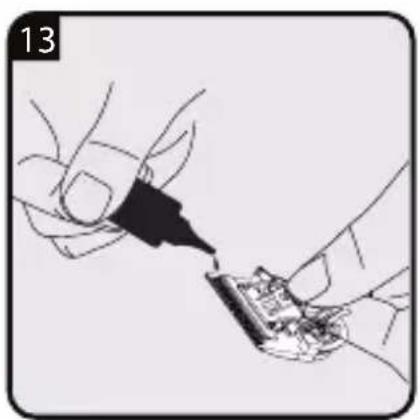
The cutting head of your appliance does not normally need to be oiled. If you want to maintain the original condition of the cutting head for as long as possible, it is worth oiling it at regular intervals (with the oil provided).
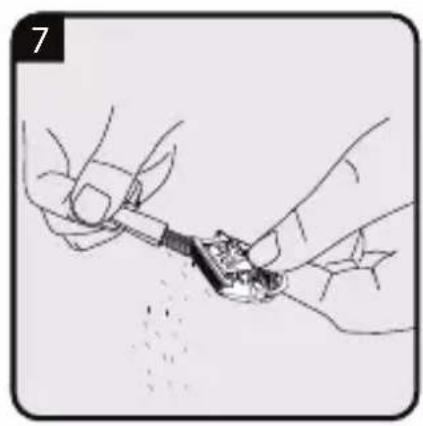
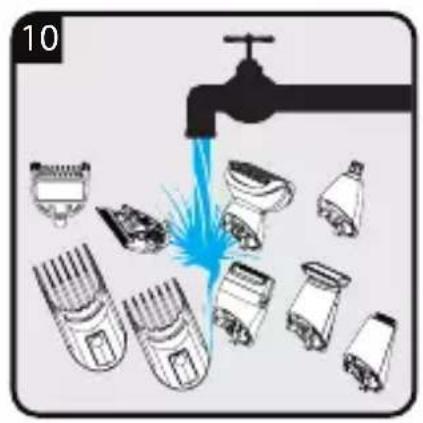
Using exclusively the cleaning brush, remove the hairs from the blade head. The blade head may be cleaned with water or other liquids.
If in regular use, the blade head should be oiled. For this, use the supplied blade oil.
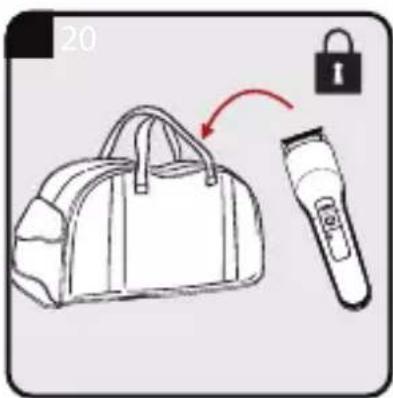
6.2 Storage
- If you do not plan to use the appliance for a long period of time, please store it carefully.
- Make sure that it is unplugged and is completely dry.
- Store the appliance in a cool, dry place.
- Make sure that the appliance is kept out of the reach of children.

For commissioning, general use and cleaning, please observe the instructions on pages 4-5-6 of this operating manual.
Manufactory CO., LTD
Model Tanimlayici:
ZD006M050100EU
Giris Voltaji: 100-240V~
Giris Frekansi: 50/60Hz
Giris Akimi: 0.3A
Cikis Voltaji: 5.0V DC
Cikis Akimi: 1.0A
Cikis gucu: 5.0W
Ortalamaktif verimlilik: 77.74%
Dusuk yükte verimlilik (%10): 73.15%
YüksüzGPC tuketimi:0.042W Koruma sinifl:
Makine govdesi IPX7
Adaptör IPX4
2 Genel bakis,
Manufactory CO., LTD
1.5 Batteries usages
Fabricant: E-TEK Electronics
Manufactory CO., LTD
Piles: Li-ion (pile Lithium-ion rechargeable)
Manufactory CO., LTD
Identifikator modela: ZD006M050100EU
Ulazni napon: 100-240V~
Producent: E-TEK Electronics
Manufactory CO., LTD


- Multi Grooming Kit with Charging Dock User Manual
- CONTENTS
- Please read this manual first!
- Meanings of the symbols
- Important safety and environmental instructions
- General safety
- Compliance with the WEEE Directive and Disposing of the Waste Product:
- Compliance with RoHS Directive
- Package information
- Information on Waste Batteries
- 20overview
- Controls and parts
- Accessories
- Other Accessories
- Technical data
- Efficiency at low load(10%):
- No-load power consumption:
- Protection class:
- Electrical insulation class: II
- Power supply
- Operating with the power adapter
- Optimising the lifetime of the rechargeable battery
- 4Preparation
- Setting the trimming length
- Adjustable comb (7, 8, 9)
- 5Operation
- Cutting hair
- Useful tips
- Beard trimming
- Trimming hair or beard to a certain length
- Trimming body hair to a certain length
- Multistyling
- Removing hair from nose
- High speed setting button (2) (Turbo)
- The usage of the BeardCare sensor
- 6Information
- Cleaning and care
- Storage
- Genel bakis,
- Batteries usages
Brand : GRUNDIG
Model : ProClub MGK 9030
Category : Razor