MS 8130 - Shaver GRUNDIG - Free user manual and instructions
Find the device manual for free MS 8130 GRUNDIG in PDF.

User questions about MS 8130 GRUNDIG
0 question about this device. Answer the ones you know or ask your own.
Ask a new question about this device
Download the instructions for your Shaver in PDF format for free! Find your manual MS 8130 - GRUNDIG and take your electronic device back in hand. On this page are published all the documents necessary for the use of your device. MS 8130 by GRUNDIG.
USER MANUAL MS 8130 GRUNDIG
Rotation Men's Shaver
User Manual
natural_image
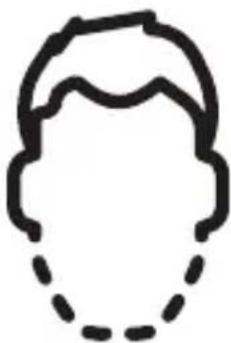
Simple line drawing of a human head with a dashed outline (no text or symbols)MS 8130
DE - EN - PL - FR - NO - SV - HR - SR - RO
CONTENTS
| DEUTSCH | 07-29 |
| ENGLISH 30-42 | |
| POLSKI | 43-56 |
| FRANÇAIS | 57-72 |
| NORSK | 73-85 |
| SVENSKA | 86-98 |
| HRVATSKI 99-112 | |
| CPПСКИ 113-125 | |
| ROMÂNĂ | 126-145 |
natural_image
Illustration of a hand holding a brush, a small tool, and a paper with a red arrow inside an open box (no text or symbols)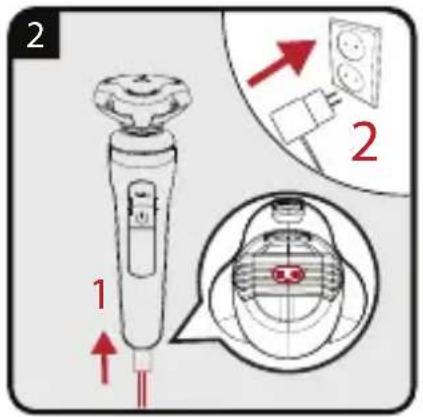
natural_image
Illustration of a person applying a toothbrush to their face (no text or symbols present)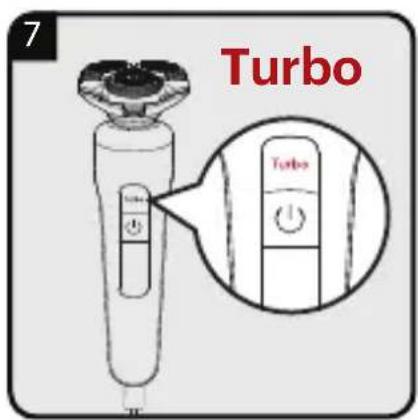

natural_image
Illustration of a person applying facial massage to the ear with red arrows indicating direction (no text or symbols)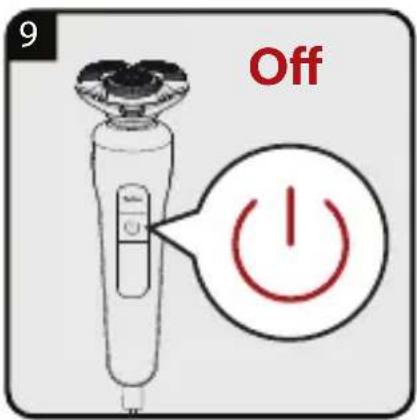

natural_image
Illustration of a person brushing their face with a brush (no text or symbols)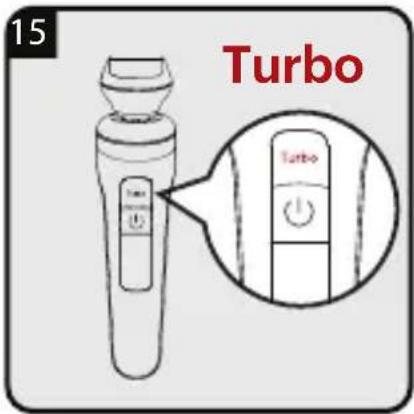
natural_image
Illustration of a person applying a hair to their face, no text or symbols present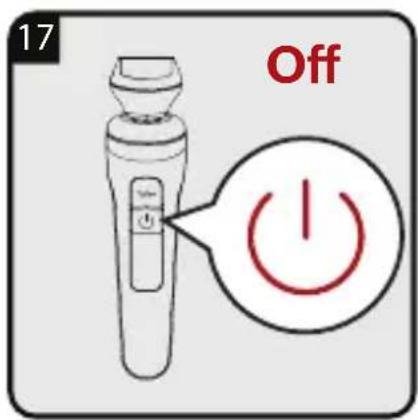
natural_image
Illustration of a handheld electric shaver with a magnified inset showing internal components (no text or symbols)
natural_image
Illustration of a hand using a tool to apply material to a mechanical component (no text or symbols visible)
natural_image
Cross-sectional diagram of a mechanical device with internal components and red directional arrows indicating rotation (no text or symbols)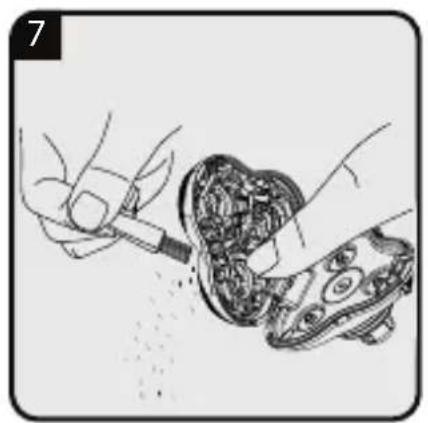
natural_image
Illustration of hands using a tool to remove or store material from a small bowl (no text or symbols visible)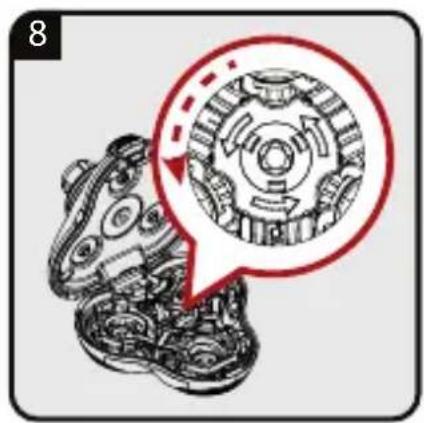
natural_image
Mechanical gear assembly diagram showing internal components and a highlighted section (no text or labels)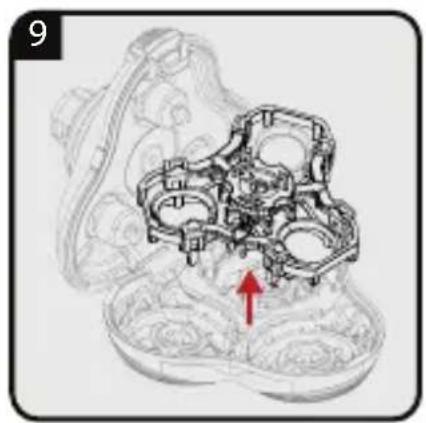
natural_image
Technical line drawing of a mechanical component with an arrow indicating a specific part (no text or symbols present)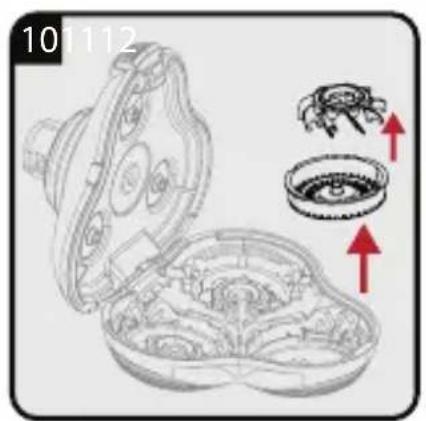
natural_image
Two hands operating a mechanical tool with a gear and a circular component, separated by a diagonal line (no text or symbols)

natural_image
Technical illustration of an engine cylinder assembly with a red arrow indicating a specific component (no text or symbols present)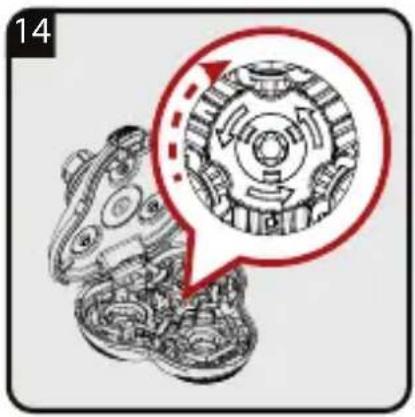
natural_image
Mechanical gear assembly diagram with a speech bubble highlighting a specific gear mechanism (no text or symbols present)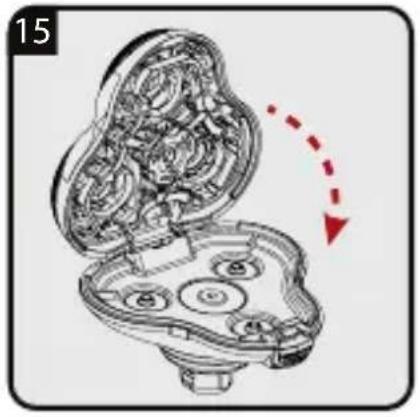
natural_image
Cross-sectional diagram of a mechanical device with internal components and a red dashed arrow indicating rotation (no text or symbols)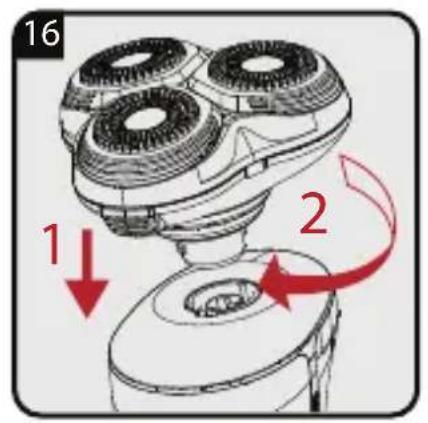
natural_image
Illustration of a hand pouring blue water from a faucet onto a surface, with no text or symbols present.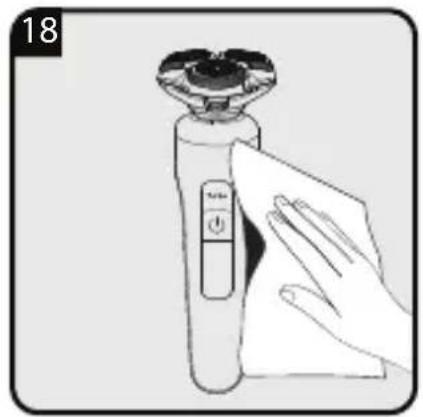
natural_image
Illustration of a hand cleaning a hairbrush with a cloth (no text or symbols)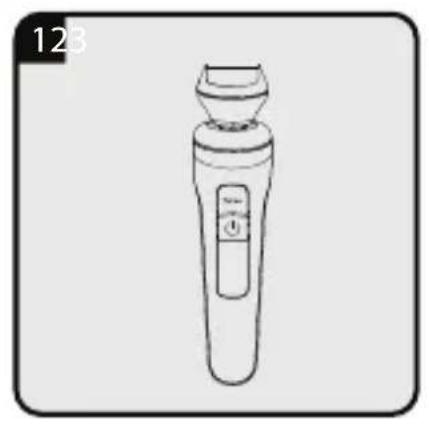
natural_image
Line drawing of a handheld electric brush (no text or symbols)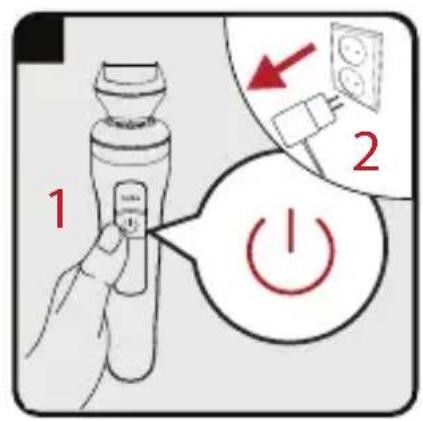
natural_image
Illustration of a handheld device with a red downward arrow indicating a drop or reduction point (no text or symbols present)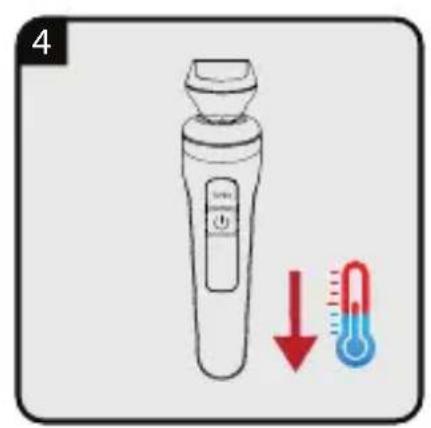

natural_image
Illustration of a hand using a tool to apply material or application (no text or symbols visible)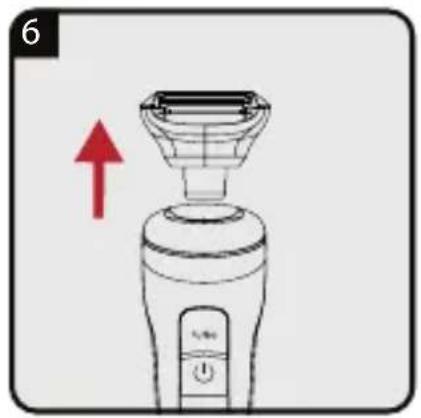
natural_image
Illustration of a hairbrush with a red upward arrow indicating motion (no text or symbols)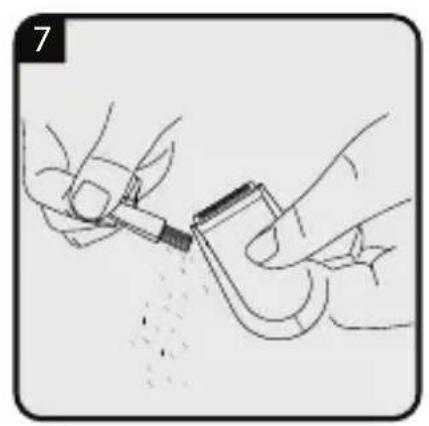
natural_image
Illustration of hands using a tool to apply material to a mechanical component (no text or symbols visible)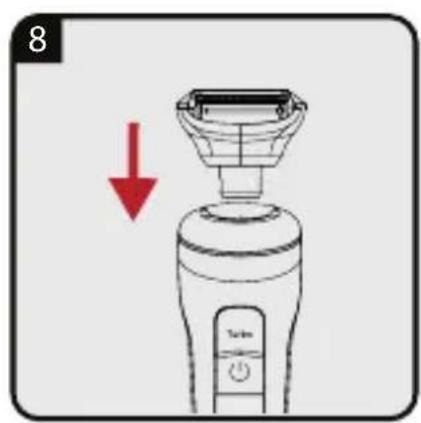
natural_image
Illustration of a faucet spraying water with a blue spray, showing liquid flow from a bucket (no text or symbols)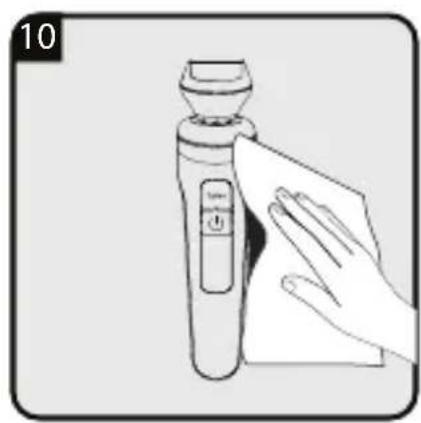
natural_image
Illustration of a hand cleaning a small electronic device with a cloth (no text or symbols) |  | |
| DE BETRIEB REINIGUNG UND PFLEGE | ||
| EN OPERATION CLEANING AND CARE | ||
| PL OBSŁUGA CZYSZCZENIE I KONSERWACJA | ||
| FR FONCTIONNEMENT NETTOYAGE ET ENTRETIEN | ||
| NO | DRIFT RENGJ∅RING OG VEDLIKEHOLD | |
| SV | ANVÄNDNING RENGÖRING OCH SKÖTSEL | |
| HR RAD ČIŠĆENJE I ODRŽAVANJE | ||
| SR RAD ČIŠĆENJE I ODRŽAVANJE | ||
| RO FUNCTIONAREA CURĂTAREA ŞI ÎNTRETINEREA | ||
natural_image
Symbol of a trash bin crossed with a diagonal line and a horizontal bar below (no text or labels)Manufactory CO., LTD
Modellidentifikator:
ZD006M050100EU
Eingangsspannung:
100-240V\~
Please read this manual first!
Dear Customer,
Thank you for purchasing a Grundig product. We hope that you get the best results from your product which has been manufactured with high quality and state-of-the-art technology. Therefore, please read this entire user manual and all other accompanying documents carefully before using the product and keep it as a reference for future use. If you handover the product to someone else, give the user manual as well. Follow all warnings and information in the user manual.
Meanings of the symbols
Following symbols are used in various sections of this manual:

Important information and useful hints about usage.

WARNING: Warnings against dangerous situations concerning the security of life and property.

Electrical insulation class.
1 Important safety and environmental instructions
Please read this instruction manual thoroughly prior to using this appliance! Follow all safety instructions in order to avoid damage due to improper use!
Failure to follow these instructions voids any granted warranty.
1.1 Safety warnings
- The appliance is designed for domestic use only.
- This appliance is designed solely for shaving human beard. Any other use is expressly prohibited.


- Never use the appliance if it, the shaver head or the power adapter show any signs of damage. Contact authorized service.
1 Important safety and environmental instructions
- Only use the appliance with the parts and power adapter supplied.
- Caution! Always keep the power adaptor dry.
- When the appliance is being charged, on no account should it come into contact with water or any other liquid.
- After charging, always unplug the cable from the socket and disconnect the power adapter from the wall socket.
- Do not drop the appliance.
- Charging adaptor and power cable cannot be repaired once damaged. Please make sure that you dispose the charging adaptor in accordance with environmental directions. You can get your new charger from the manufacturer or authorised service provider.
- Never place the appliance, accessories or power adapter on or near hot surfaces.
1 Important safety and environmental instructions
- Check that the mains voltage on the rating label corresponds to your local mains supply.
- Keep the appliance out of the reach of children.
- Before cleaning or user maintenance operation first plug out.
- This appliance can be used by children aged from 8 years and above and persons with reduced physical, sensory or mental capabilities or lack of experience and knowledge if they have been given supervision or instruction concerning use of the appliance in a safe way and understand the hazards involved. Children shall not play with the appliance. Cleaning and user maintenance shall not be made by children without supervision.
- Do not open the appliance under any circumstances.
No warranty claims are accepted for damage caused by improper handling.
1 Important safety and environmental instructions
- This appliance contains batteries that are only replaceable by skilled persons.
- WARNING: For the purposes of recharging the battery, only use the detachable supply unit provided with this appliance.
- WARNING: Detach the hand-held part from the supply cord before cleaning it in water.
- WARNING: Adaptor cannot fall in water.
- Do not squeeze or bend the power cord and do not rub in on sharp edges in order to prevent any damage. Keep the cord away from hot sur faces and open flames.
- If you keep the packaging materials, keep them out of the reach of children.
- This appliance is designed solely for shaving human beard. Any other use is ex pressly prohibited.
1 Important safety and environmental instructions
- Before removing the battery, the product should be disconnected from the electricity supply. Observe the local legislation and regulations when disposing of the battery.
1.2 Compliance with the WEEE Directive and Disposing of the Waste Product:
This product complies with EU WEEE Directive (2012/19/EU). This product bears a classification symbol for waste electrical and electronic equipment (WEEE).
natural_image
Simple line drawing of a trash bin with crossed x and y axes, no text or symbols presentThis symbol indicates that this product shall not be disposed with other household wastes at the end of its service life. Used device must be returned to offical collection point for recycling of electrical and electronic devices. To find these collection systems please contact to your local authorities or retailer where the product was purchased. Each household performs important role in recovering and recycling of old appliance. Appropriate disposal of used appliance helps prevent potential negative consequences for the environment and human health.
1 Important safety and environmental instructions
1.3 Compliance with RoHS Directive
The product you have purchased complies with EU RoHS Directive (2011/65/EU). It does not contain harmful and prohibited materials specified in the Directive.
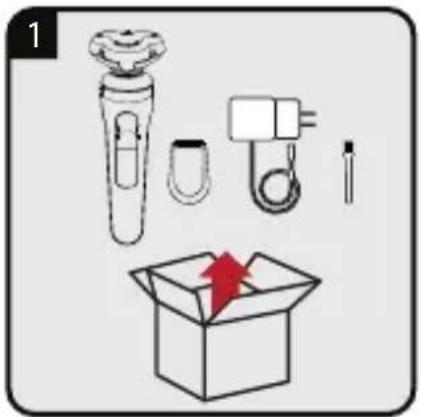
1.4 Package information

Packaging materials of the product are manufactured from recyclable materials in accordance with our National Environment Regulations. Do not dispose of the packaging materials together with the domestic or other wastes. Take them to the packaging material collection points designated by the local authorities.
1.5 Information on Waste Batteries
This symbol on rechargeable batteries/batteries or on the packaging indicates that the rechargeable battery/battery may not be disposed of with regular house hold rubbish. For certain rechargeable batteries/batteries, this symbol may be supplemented by a chemical symbol. Symbols for mercury (Hg) or lead (Pb) are provided if the rechargeable batteries/batteries contain more than 0,0005 % mercury or more than 0,004 % lead. Rechargeable batteries/batteries, including those which do not contain heavy metal, may not be disposed of with household waste. Always dispose of used batteries in accordance with local environmental regulations. Make enquiries about the applicable disposal regulations where you live.
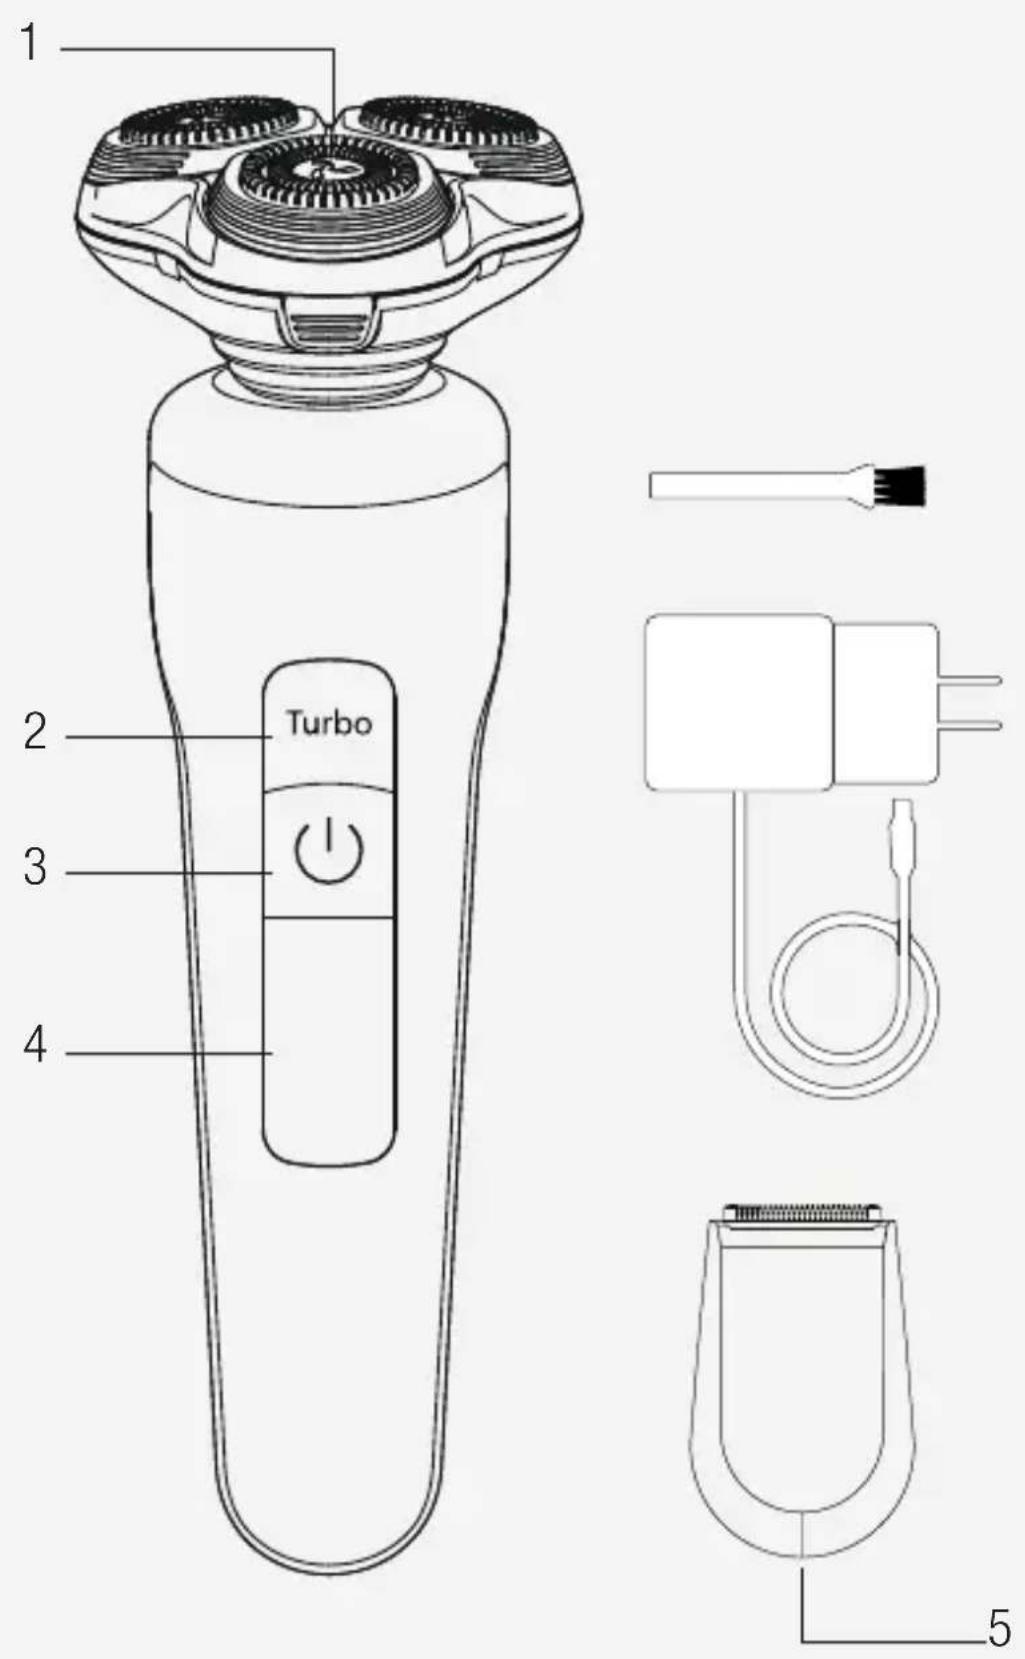
20overview
2.1 Controls and parts
See the illustrations on page 3.
- Shaver Head
- High speed setting button (Turbo)
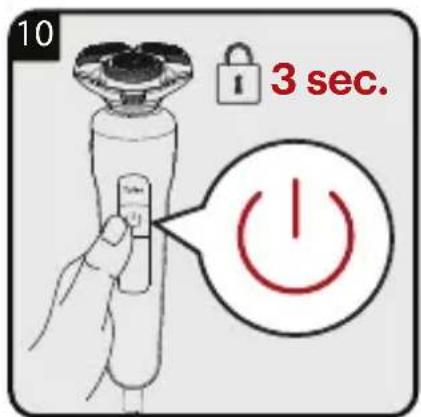
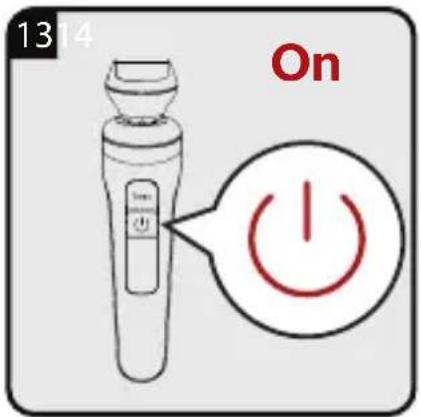
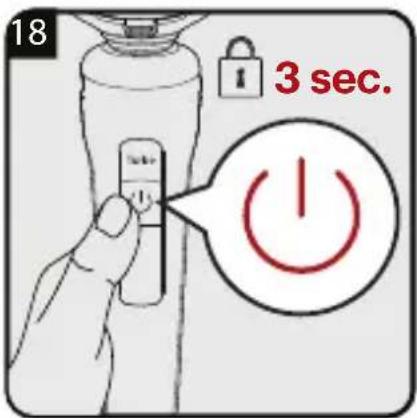
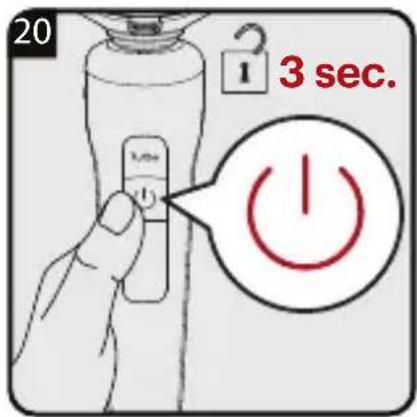
- On/Off switch
- LED Display
Accessories
- Trimmer head
Other Accessories
Power adapter
Charging plug
Cleaning brush
Soft Pouch
2.2 Technical data
Operating temperature:
$$ + 5 ^ {\circ} \mathrm{C} - + 4 0 ^ {\circ} \mathrm{C} $$
Storage temperature:
$$ 0 ^ {\circ} \mathrm{C} - + 4 0 ^ {\circ} \mathrm{C} $$
Parameter of External Power Supply
Manufacturer: E-TEK Electronics
Manufactory CO., LTD
Model Identifier:
ZD006M050100EU
Input Voltage: 100-240V\~
Input Frequency: 50/60Hz
Input Current: 0.3A
Output Voltage: 5.0V DC
Output Current: 1.0A
Output Power: 5.0W
Average active efficiency: 77.74%
Efficiency at low load(10%): 73.15%
No-load power consumption: 0.042W
Protection class:
Rotation men's shaver IPX7
Adaptor IPX4
Batteries: Li-ion (Lithium-ion rechargeable battery)
Electrical insulation class: ||
Design and specifications subject to change without notice.
The values which are declared in the markings affixed on your appliance or other printed documents supplied with it represent the values which were obtained in the laboratories pursuant to the pertinent standards. These values may vary according to the usage of the appliance and ambient conditions.
3 Power supply
3.1 Operating with the power adapter
Check that the voltage indicated on the rating plate of the power adapter corresponds to your local power supply.
The only way to disconnect the appliance from the power supply is to unplug the power adapter.
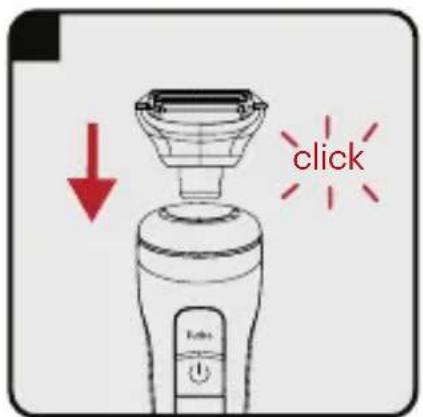
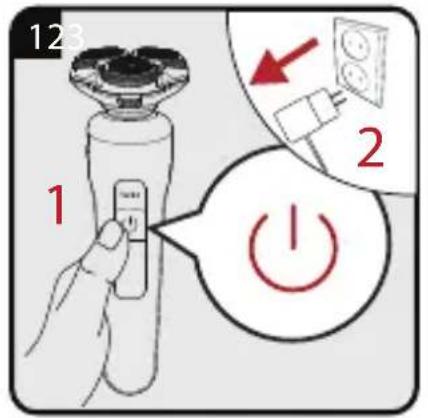
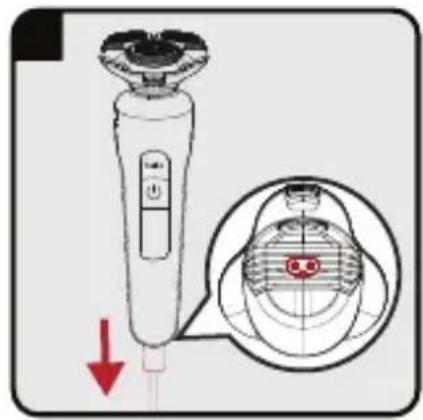
- Plug the charging plug into the appliance socket and the power adapter into the wall socket.

CAUTION! The groove on the charging plug must match the notch in the appliance socket.
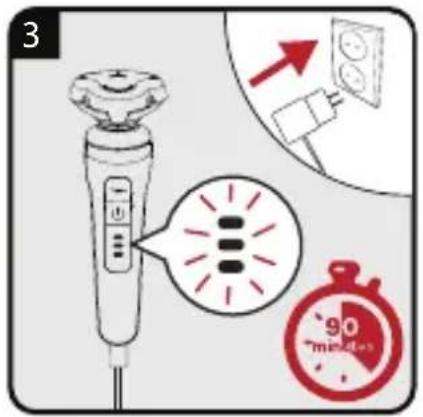
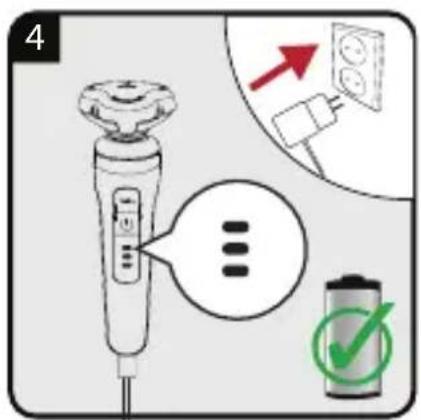
- LED lights will lit up one after another until it's fully charged. After full charge, lights will go out completely.

Charging time: 1.5 hours when the battery is fully charged
- LED lights will start flashing when the unit reaches low battery capacity during operation.
- When the batteries are discharged: LED lights will not display.

Discharge the appliance through normal use. Then recharge to full capacity. Maximum battery capacity will only be reached after several charging/discharging cycles.

The adapter and unit may become warm while charging; this is normal operation.
3 Power supply

When the appliance is fully charged, it has a cordless operating time of up to 70 minutes.

Unplug the adapter from the wall when not in use.

CAUTION! When in the bathroom or beside a water connection, only use the appliance in battery mode; never run it from the mains.

The appliance does not run from the mains when the battery is empty. Make sure the appliance is switched off during charging.
3 Power supply
3.2 Optimising the lifetime of the rechargeable battery

CAUTION! Do not leave the switch adapter plugged into the wall socket for more than 24 hours.

CAUTION! Discharge the battery completely twice a year by letting the motor run until it stops. Then fully recharge the battery.

CAUTION! Please do not operate for long time, or it may burn the adapter.
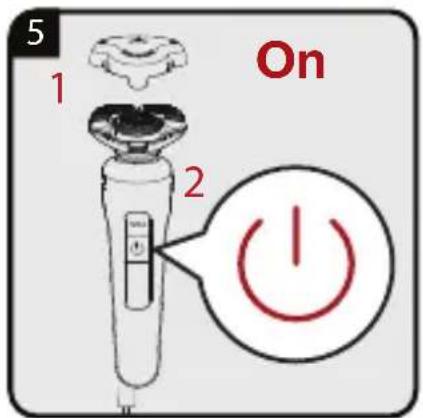
40operation
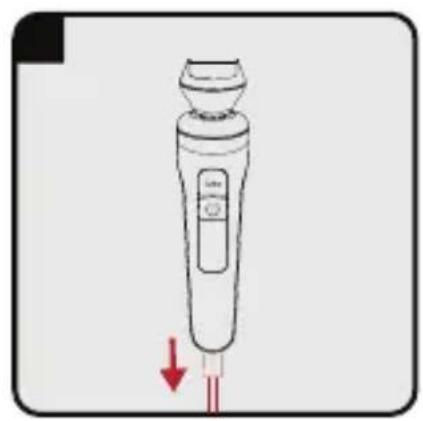
Before Using, remove the plug of adapter from the mains power socket and remove the connect wire from body.
We recommend to shave a small area first to familiarize yourself with the shaver head.
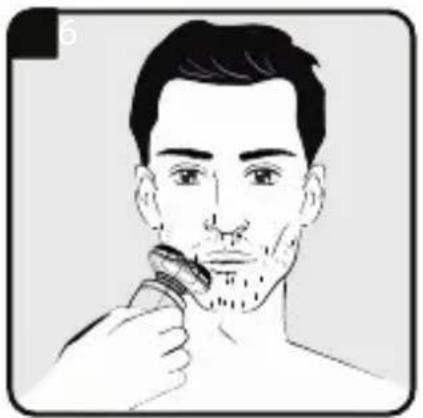
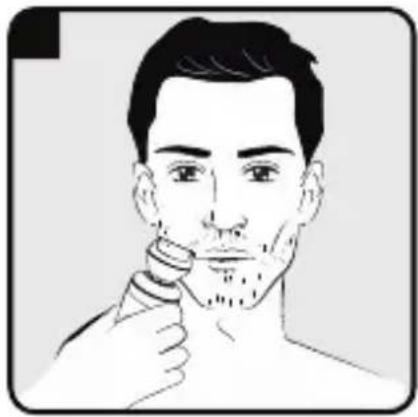
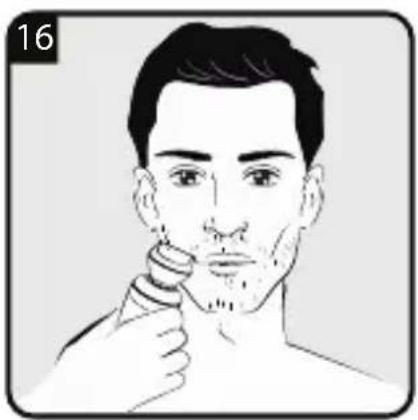
4.1 Beard shaving
- Apply light pressure only when shaving. Cut against the beard growth direction. Smooth the skin by stretching, when shaving challenging areas (e.g. beneath the chin).
- Always shave against the natural growth direction of facial hair. In case of abundant or full beard growth, which cannot be removed with one single shave, shave once fast and superficial and the repeat the procedure in a thorough manner for a second time.
- You get best results when using the device on dry skin.
- It may take about 2 weeks for your skin to adapt to dry shaving.
4.2 High speed setting button (2) (Turbo)
Device performance can be maximized by pushing the turbo button (2).
4.3 The usage of the BeardCare sensor
The BeardCare sensor detects in real time the density of the beard hair and adjusts the power of the motor accordingly. At Turbo Mode, the BeardCare sensor will be inactive.
4.4 Hair trimmer attachment
Attacheable Long Hair Trimmer (5) for sideburns and neck hair.
5Information
The appliance must be cleaned regularly so that you can continue to enjoy its top performance and optimum results.
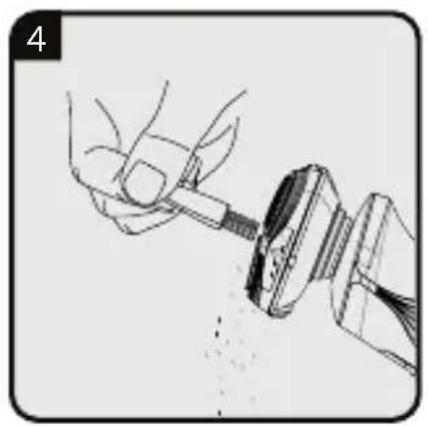
5.1 Cleaning and care
Before cleaning, remove the plug of adapter from the mains power socket and remove the connect wire from body.

Never used liquids to clean the appliance. Use the cleaning brush provided and water only.

Remove any clippings after each use.
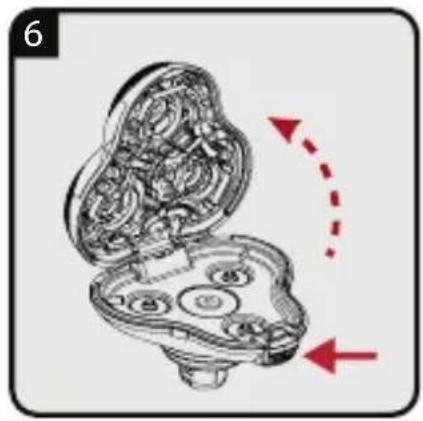
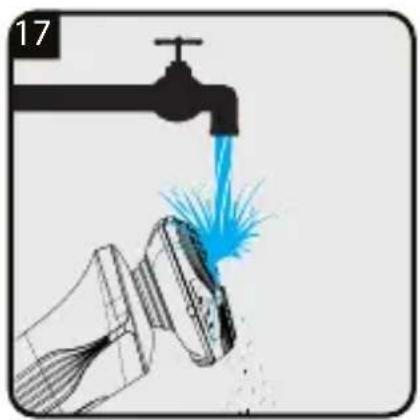
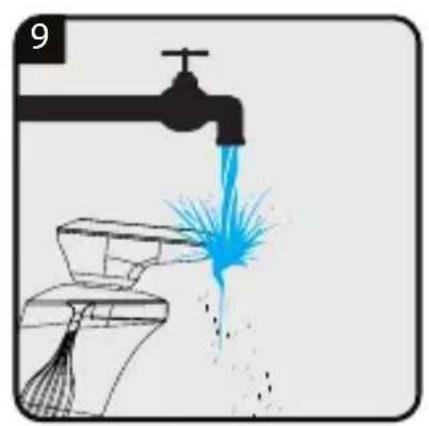
Remove the hairs from the shaving head only by using the cleaning brush. The shaving head can be cleaned with water or other appropriate fluids.

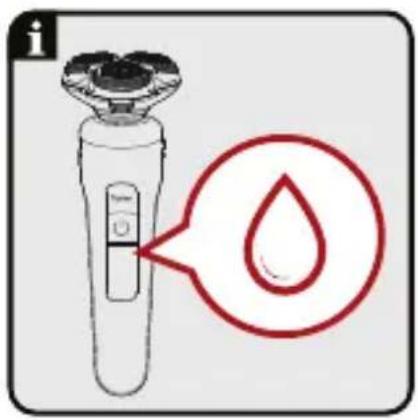
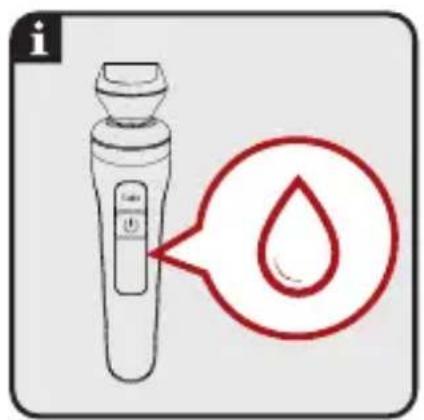
When the water icon lights up on the LED screen, clean the shaving head under running water.

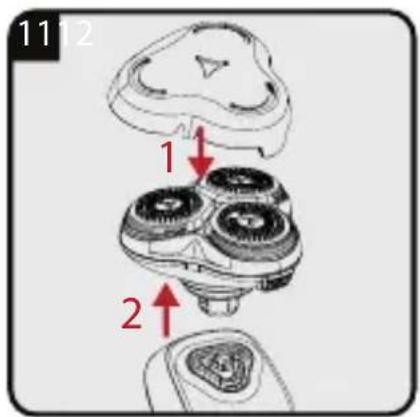
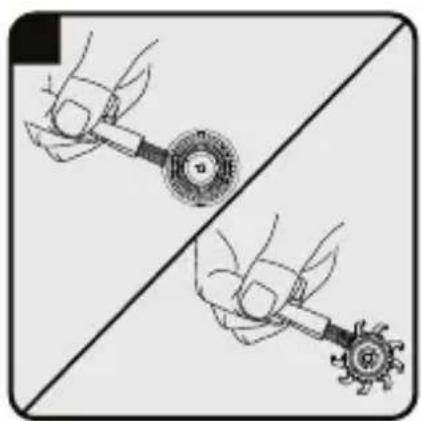
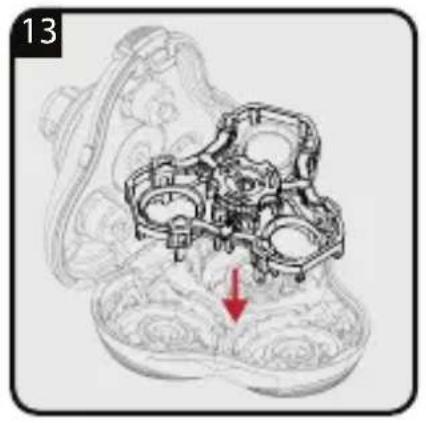
When replacing the blades (page 6, picture 12), align the gap in the blade (A) with the tab in the slot (B).
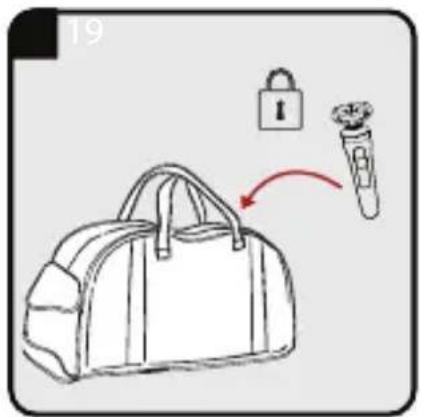
5.2 Storage
- If you do not plan to use the appliance for a long period of time, please store it carefully.
- Make sure that it is unplugged and is completely dry.
- Store the appliance in a cool, dry place.
- Make sure that the appliance is kept out of the reach of children.

For commissioning, general use and cleaning, please observe the instructions on pages 4-5-6-7-8 of this operating manual.
natural_image
Simple line drawing of a trash bin with crossed lines indicating no waste or discharge (no text or symbols)Producent: E-TEK Electronics
Manufactory CO., LTD
$$ 0. 3 \tilde {A} $$
natural_image
Symbol of a trash bin with crossed lines indicating no waste, and a solid black rectangle below (no text or labels)Manufactory CO., LTD
Piles : Li-ion (pile Lithium-ion rechargeable)
Classe d'isolatio
électrique: ||
natural_image
Simple line drawing of a trash bin with crossed lines and a blank rectangular base (no text or symbols)Manufactory CO., LTD
Modellidentifikator:
ZD006M050100EU
Inngangsspenning: 100-240V\~
natural_image
Simple line drawing of a trash bin with crossed lines and a blank rectangular base (no text or symbols)Manufactory Co., LTD
natural_image
Simple line drawing of a trash bin with crossed lines and a blank rectangular base (no text or symbols)Ovaj simbol označava da se ovaj proizvod ne smije odlagati zajedno s ostalim kućanskim otpadom na kraju njegovog radnog vijeka. Rabljeni uređaj mora se vratiti na službeno sabirno mjesto za recikliranje električnih i elektroničkih uređaja. Da biste pronašli te sustave za prikupljanje, obratite se lokal-
Manufactory CO., LTD
Identifikator modela:
ZD006M050100EU
Ulazni napon: 100-240V\~
natural_image
Simple line drawing of a trash bin with crossed lines indicating no waste or discharge (no text or symbols)Ovaj simbol označava da se ovaj proizvod ne sme odlagati zajedno s ostalim kućnim otpadom na kraju njegovog radnog veka. Korišćeni uređaj mora se vratiti na službeno mesto za sakupljanje za recikliranje električnih i elektronskih uređaja.
Manufactory CO., LTD
Identifikator modela:
ZD006M050100EU
Ulazni napon: 100-240V\~
natural_image
Simple line drawing of a trash bin with crossed lines and a solid black bar below (no text or symbols)Manufactory CO., LTD
- LED lights will start flashing when the unit reaches low battery capacity during operation.
- - When the batteries are discharged: LED lights will not display.