
0953 - Microwave Oven ARIETE - Free user manual and instructions
Find the device manual for free 0953 ARIETE in PDF.
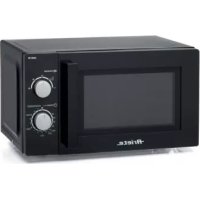
| Product type | Microwave oven |
| Brand | Ariete |
| Model | 0953 |
| Power supply | 220-240 V ~ 50 Hz |
| Microwave power | 800 W |
| Frequency | 2450 MHz |
| Capacity | 20 L |
| Turntable diameter | 25 cm |
| Power levels | 5 (10%, 30%, 50%, 80%, 100%) |
| Max timer | 95 minutes |
| Display | LED digital |
| Interior light | Yes |
| Turntable | Yes, glass |
| Child safety | Control panel lock |
| Multi-function cooking | Up to 2 stages |
| Auto menus | 8 presets (A-1 to A-8) |
| Defrost | By weight (100-2000 g) or by time |
| Delay start | Yes |
| Quick start | +30 seconds |
| Maintenance | Clean with a damp cloth, avoid abrasive products; regular cleaning of the turntable and rotating ring |
| Repairability | Any repair must be carried out by an authorized Ariete service center |
Frequently Asked Questions - 0953 ARIETE
User questions about 0953 ARIETE
0 question about this device. Answer the ones you know or ask your own.
Ask a new question about this device
Download the instructions for your Microwave Oven in PDF format for free! Find your manual 0953 - ARIETE and take your electronic device back in hand. On this page are published all the documents necessary for the use of your device. 0953 by ARIETE.
USER MANUAL 0953 ARIETE
The necessary precautions must be taken when using electrical appliances, and these include the following:
Make sure that the voltage on the appliance rating plate corresponds to that of 1. the mains electricity.
Never leave the appliance unattended when connected to the power supply; 2. unplug it after every use.
Never place the appliance on or close to sources of heat.3.
Always place the appliance on a flat, level surface during use.4.
Never leave the appliance exposed to the elements (rain, sun, etc....).5.
Make sure that the power cord does not come into contact with hot surfaces.6.
This appliance can be used by children aged from 8 years and above and 7. persons with reduced physical, sensory or mental capabilities or lack of experience and knowledge only if they have been given supervision or instruction concerning use of the appliance in a safe way and understand the hazards involved. Do not allow children to play with the appliance. Cleaning and user maintenance must not be carried out by children unless they are older than 8 and supervised.
Children under age 8 should not be allowed to handle appliance and its power 8. cord which must be kept out of their reach.
Never place the appliance body, plug or power cord in water or other liquids; 9. always wipe clean with a damp cloth.
Always unplug the power cord from the electricity mains before fitting or remov-10.
ing single attachments or before cleaning the appliance.
Always make sure that your hands are thoroughly dry before using or adjust-11. Using the switches on the appliance, or before touching the power plug or power connections.
To unplug the appliance, grip the plug and remove it directly from the power 12. socket. Never pull the power cord to unplug the appliance.
Do not use the appliance if the power cord or plug are damaged or if the appli-13. Since itself is faulty; all repairs, including substitution of power cord, must be carried out exclusively by an Ariete assistance centre or by authorized Ariete technicians in order to avoid all risks.
- In case of using extension leads, these must be suitable for the appliance power
to avoid danger to the operator and for the safety of the environment in which the appliance is being used. Extension leads, if not suitable, can cause operat ing anomalies.
Never allow the cord to dangle in places where it may be grabbed by a child.15.
Do not threaten the safety of the appliance by using parts that are not original 16. or which have not been approved by the manufacturer.
This appliance is designed for HOME USE ONLY and may not be used for com-17.
mercial or industrial purposes.
Any changes to this product that have not been expressly authorised by the 18. manufacturer may lead to the user's guarantee being rendered null and void.
In the event that you decide to dispose of the appliance, we advise you to make 19. it inoperative by cutting off the power cord. We also recommend that any parts that could be dangerous be rendered harmless, especially for children, who may play with the appliance or its parts.
Packaging must never be left within the reach of children since it is potentially 20. dangerous.
This appliance complies with Directives 2014/35/EU and EMC 2014/30/EU, as 21. well as to regulation (EC) No. 1935/2004 of 27/10/2004 on materials in contact with food.
For safety reasons, always connect the appliance to an earthed socket 22. according to the current electric regulations. AVOID ANY NON-COMPLIANT ELECTRIC INSTALLATION.
Wash all attachments thoroughly before use.23.
According to the placement of the kitchen, place the oven on a work surface or 24. a kitchen cabinet that can bear a temperature of at least 90^ .
Do not move appliance while operating.25.
Whilst operating, the metallic parts and the glass are hot: use the appliance 26. touching the metallic handle only.
Do not warm frying oil or grease up, as the temperature of oil cannot be control-27. led.
After use, clean the appliance inside with a damp cloth first, and then with a dry 28. cloth to remove any residues of food and fat. The fat residues may overheat and generate smoke or catch on fire.
If the materials in the oven cavity generate smoke or catch on fire, keep the door 29. closed, switch the oven off and unplug it.
Always shell and peel eggs, boiled eggs, potatoes, sausages, chestnuts, etc. 30.
before cooking.
Always use containers suitable for microwave cooking (e.g. heat-resistant 31. ceramic, glass or plastic containers). Never use metallic containers for microwave cooking as sparks may occur.
Whilst heating liquids up, always use a container with a wide opening and wait 32. at least 20 seconds before removing them from the oven to prevent sudden, explosive boiling. Never use the oven for boiling liquids.
WARNING: do not heat up liquids and food in sealed containers to prevent them 33. from exploding.
After cooking, the container may be very hot. Always use appropriate gloves or 34. mittens to remove food from the oven and direct the steam away from face and hands to prevent the risk of burn.
Allow the rotating base to cool down before cleaning it.35.
Do not put frozen food or cold kitchenware on the hot rotating base.36.
Make sure the kitchenware do not press against the inner walls of the oven 37. whilst cooking.
Do not use the appliance when the container with the ingredients is not placed 38. on the assembly seat.
- To prevent the oven from damaging, do not use it without liquids or food inside.
Clean the oven on a regular basis and remove any food residue. The failure to 40. comply with the appliance cleaning and maintenance precautions may damage the surface and jeopardize the status of the appliance itself, as well as causing danger situations.
To ensure an adequate ventilation, leave a space of min. 10cm between the wall 41. and the rear side of the oven, 5cm from the sides and 20cm from the top.
Do not place rags or dishes underneath the appliance.42.
- To dispose of product correctly according to European Directive 2012/19/EU, please refer to and read the provided leaflet enclosed with the product.
DO NOT THROW AWAY THESE INSTRUCTIONS
APPLIANCE DESCRIPTION (Fig. 1)
A Rotating ring
B Glass base
B Door handle
C Control panel
CONTROL PANEL DESCRIPTION (Fig. 2)
E Display
F "Microwave" button (microwave cooking)
G "Weight Defrost" button (Defrosting weight) / "Time Defrost" button (Defrosting time)
H "Clock / Preset" button (Clock setting)
1 "Stop / Clear" button
L "Start/ +30 sec. / Confirm" button
M "Time" / "Weight" / "Auto Menu" dial (Time/Weight/Default menu setting)
The microwaves are electromagnetic radiations that are also present in nature in the form of light waves (e.g. sunlight) and that, inside the oven, go through food from any directions and warm up the molecules of water, fat, and sugar. The heat is produced very quickly only in food, while the container warms up only indirectly for heat transfer from hot food. This prevents the food from adhering to the container, therefore it is possible to use very little fat or to avoid its use during the cooking process. The microwave cooking is deemed to be very healthy and dietetic since it is low fat. Furthermore, in comparison with the traditional systems, as cooking is at a lower temperature, the food dehydrates less, does not lose its nutrients and preserves its flavour more.
HOW TO OPERATE
CLOCK SETTING
When the microwave oven is plugged in, the display (E) will show "0:00" and a "beep" will be emitted.
- Press the button (H) "Clock / Preset" once; the hour indicator will start blinking.
- Rotate the dial (M) to increase or the decrease the values of hours (from 0 to 23).
- Press the button (H) "Clock / Preset", the minute indicator will start blinking.
- Rotate the dial (M) to increase or decrease the values of minutes (from 0 to 59).
- Press the button (H) "Clock / Preset" to confirm setting; the sign ". . ." will flash and the display (E) will show the time set.
WARNING:
If the clock is not set, it will not work when the appliance is plugged in.
The clock setting does not remain stored if the appliance is unplugged.
If no operations are carried out for 1 minute during the clock setting process, the appliance will go back to the previous settings automatically.
"MICROWAVE" COOKING
- Press the button (F) "Microwave", the display (E) will show the power "P100", which will flash.
- Press the button (F) "Microwave" several times or rotate the dial (M) for increasing or decreasing the values to select the required power, which will be shown on the display (E) ("P100" corresponds to 100% , "P80" to 80% , "P50" to 50% , "P30" to 30% , or "P10" to 10% ).
- Press the button (L) "Start / +30 sec. / Confirm" to confirm power.
- Rotate the dial (M) to increase or decrease the values of the cooking time (from 0:05 to 95:00 min.).
- Press the button (L) "Start / +30 sec. / Confirm" again to confirm the cooking time.
- The microwave oven will start cooking, the inner light will go on and the display will show the time left.
- To stop cooking, open the door or press the "Stop / Clear" button (I): the program set will be paused and the remaining time will stop on the display.
- To restart cooking, close the door and press the button (L) "Start / +30 sec. / Confirm": the remaining time will restart on the display.
- At the end of cooking, the oven will emit five "beeps".
Example: If it is required to use 80% of the oven power to cook for 20 minutes, proceed as described below:
1) Press the button (F) "Microwave" once, the display will show "P100" flashing.
2) Press the button (F) "Microwave" once more or rotate the dial (M) to select 80% of microwave power.
3) Press the button (L) "Start / +30 sec. / Confirm" to confirm, the display will show "P80".
4) Rotate the cooking setting dial (M) until the display shows "20:00".
5) Press the button (L) "Start / +30 sec. / Confirm" to start cooking.
- At the end of cooking, the oven will emit five "beeps".
| UsagePowerFunction | ||
| Soften the ice cream17%P10 | ||
| Vegetable soup, soften the butter or defrost33%P30 | ||
| Rice, fish, chicken, minced meat55%P50 | ||
| Stew, fishP80 | ||
| Heat up milk, water, vegetables, beverages100%P100 |
QUICK COOKING START
- With no setting, press the button (L) "Start / +30 sec. / Confirm" to start cooking with a 100% power for 30 seconds. In the microwave cooking or defrosting, pressing the button (L) again, it is possible to increase the cooking time of 30 seconds each time up to 95 minutes.
- Rotate the dial (M) to set the cooking time and then press the button (L) "Start / +30 sec. / Confirm" to start cooking.
DEFROSTING BY WEIGHT
- Press the button (G) "Weight / Time Defrost" until the display (E) shows "dEF1" (press the button once).
- Rotate the dial (P) to set the weight of food (from 100g to 2000g ).
- Press the button (L) "Start / +30 sec. / Confirm" to start defrosting.
- The defrosting time will be automatic according to the weight set.
- At the end of cooking, the oven will emit five "beeps".
DEFROSTING BY TIME
- Press the button (G) "Weight / Time Defrost" until the display (E) shows "dEF2" (press the button twice).
- Rotate the setting dial (L) to set the required defrosting time.
- Press the button (L) "Start / +30 sec. / Confirm" to start defrosting.
- At the end of cooking, the oven will emit five "beeps".
COOKING WITH PRE-SET MENUS (AUTO MENU)
- Without setting, rotate the dial (M) to select the required menu from "A-1" to "A-8" (see table below).
- Press the button (L) "Start / +30 sec. / Confirm" to confirm the menu.
- Rotate the dial (P) to set the weight, as shown on the table below.
- Press the button (L) "Start / +30 sec. / Confirm" to start cooking.
- At the end of cooking, the oven will emit five "beeps".
| DisplayWeightMenu | ||
| 200200 gA-1 Heating | ||
| 400400 g | ||
| 600600 g | ||
| 200200 gA-2 Vegel | ||
| 300300 g | ||
| 400400 g | ||
| 250250 gA-3 Fish | ||
| 350350 g | ||
| 450450 g | ||
| 250250 gA-4 Meat | ||
| 350350 g | ||
| 450450 g | ||
| 5050g (with 450 m | ||
| 100100g (with 800 | ||
| 200200 gA-6 Potato | ||
| 400400 g | ||
| 600600 g | ||
| 200200 gA-7 Pizza | ||
| 400400 g | ||
| 200200 gA-8 Soup | ||
| 400400 g |
MULTI-FUNCTION COOKING
For this kind of cooking, it is possible to set max. 2 functions.
If one of these is the defrosting one, set it as first function.
Example: To defrost food for 5 minutes and cook them at 80% power with the microwave function for 7 minutes, proceed as follows:
- Press the button (G) "Weight / Time Defrost" twice and the oven will show "dEF2".
- Rotate the dial (M) to set the defrosting time up to "05:00".
- Press the button (F) "Microwave", the display (E) will show the power "P100".
- Press the dial (M) to select 80% of microwave power.
- Press the button (L) "Start / +30 sec. / Confirm" to confirm, the display will show "P80".
- Rotate the dial (M) to set the cooking time up to "07:00".
- Press the button (L) "Start / +30 sec. / Confirm" to start cooking, the appliance will emit a sound indicating the start of the first function of defrosting and the countdown will begin. At the end of the first function, the appliance will emit a sound for the start of the second cooking function and a new countdown will begin.
- At the end of cooking, the oven will emit five "beeps".
DELAYED START
- Set the clock as previously described.
- Select the required cooking program. Example: If it is required to cook for 7 minutes with a microwave power of 80% :
- In delayed start mode is not possible to use "multi-function cooking".
- Press the button (F) "Microwave" once.
- Rotate the dial (M) to select 80% of microwave power; the display (E) will show the power "P80".
- Press the button (L) "Start / +30 sec. / Confirm" to confirm.
- Rotate the dial (M) to set the cooking time up to "07:00".
- After the previous steps, do not press the button (L) "Start / +30 sec. / Confirm". Set the delayed start time by proceeding as follows.
- Press the button (H) "Clock / Preset" once; the hour indicator will start blinking.
- Rotate the dial (M) to increase or the decrease the values of hours (from 0 to 23).
- Press the button (H) "Clock / Preset", the minute indicator will start blinking.
- Rotate the dial (M) to increase or decrease the values of minutes (from 0 to 59).
-
Press the button (L) "Start / +30 sec. / Confirm" to confirm setting.
-
The oven will emit two "beeps" when reaching the pre-set start time, then cooking will start automatically.
Note: The clock must be set from the beginning, otherwise the pre-set function does not start.
- At the end of cooking, the oven will emit five "beeps".
INFORMATION SHOWN WHILE COOKING
- During microwave cooking, pressing the button (F) "Microwave", the display will show the current power for 3 seconds.
- During cooking with pre-set menus, pressing the button (H) "Clock / Preset", the display will show the current time for 3 seconds and then the display will go back to the remaining cooking time.
- During cooking, pressing the button (H) "Clock / Preset", the display will show the current time for 3 seconds.
SAFETY FUNCTION FOR CHILDREN
- To stop the appliance, keep pressed the button (I) "Stop / Clear" for 3 seconds; the appliance will emit a long sound indicating the start of the safety state for children and the display will show the symbol
- To unlock the appliance, keep pressed the button (I) "Stop / Clear" for 3 seconds; the appliance will emit a long sound.
USEFUL INFORMATION
- The "beep" sound will be emitted once when the dial is rotated at the beginning.
- Press the button (L) "Start / +30 sec. / Confirm" to start cooking if the door is opened during cooking.
- Once having set a cooking program, if the button (L) "Start / +30 sec. / Confirm" is not pressed in 1 minute to confirm, on the display the current time will be shown and setting will be cancelled.
- The "beep" sound will be emitted only with an efficient pressure on the buttons.
- The "beep" sound will be emitted five times to indicate the end of cooking.
CLEANING AND MAINTENANCE
ATTENTION:
NEVER IMMERSE THE APPLIANCE BODY, THE PLUG AND THE POWER CORD IN WATER OR OTHER LIQUIDS, USE A DAMP CLOTH FOR CLEANING.
EVEN WHEN NOT IN USE, UNPLUG THE APPLIANCE BEFORE MOUNTING OR REMOVING THE SINGLE PARTS OR BEFORE CLEANING.
- The oven cavity must always be clean. When there are food/liquid residues inside the oven, clean the sides with a damp cloth. If the oven is very dirty, a mild detergent may be used. Avoid sprayers or too aggressive detergents as they may leave stains or strips or opacify the door surface.
- The outside surface are to be cleaned with a damp cloth only. To prevent the operating parts inside the oven from damaging, there must be no water traces in the ventilation openings.
- Often clean the door and the window on both sides, the sealed locks and the parts nearby, using
EN
a damp cloth, to remove squirts or residues. Do not use an abrasive detergent in any case.
- The control panel must always be dry. Clean it with a soft, damp cloth. When carrying out this procedure, leave the door open to prevent the oven from starting accidentally.
- Wipe steam from the inner/outside part of the door by means of a soft cloth. This may occur when working in high-humidity conditions and, therefore, it is normal.
- Sometimes, it is necessary to remove the glass base to clean it. Clean the base with soapy, warm water or a dish detergent.
- The rotating ring and the bottom of the oven must be kept cleaned to avoid too much noise, therefore clean them with water and mild detergent or a dish detergent. After having removed the ring for cleaning, re-position it properly.
- Remove the smell from the oven cavity by mixing a cup of water and the lemon juice and peel in a deep microwave container, put it into the oven and let the latter work for 5 minutes. Clean thoroughly and wipe with a soft cloth.
- For replacing the oven light, contact the dealer.
- Clean the oven on a regular basis and remove any food residue. Otherwise, the surfaces may deteriorate, thus reducing the appliance life or causing a risk condition.
AVENTISSEMENTS IMPORTANTES
LIRE CES INSTRUCTIONS AVANT L'EMPLOI
BESCHRIJVING VAN HET APPARAAT (Fig. 1)
TILBEREDNING MED "MIKROBØLGEOVN"
W celu zachowania bezpieczenstwa urzadzenia uzywac wyłacznie oryginalnych 16.XXXXXXXXXXXXXXXXXXXXXXXXXXXXXXXXXXXXXXXXXXXXXXXXXXXXXXXXXXXXXXXXXXXXXXXXXXXXXXXXXXXXXXXXXXXXXXXXXXXXXXXXXXXXXXXXXXXXXXXXXXXXXXXXXXXXXXXXXXXXXXXXXXXXXXXXXXXXXXXXXXXXXXXXXXXXXXXXXXXXXXXXXXXXXXXXXXXXXXXXXXXXXXXXXXXXXXXXXXXXXXXXXXXXXXXXXXXXXXXXXXXXXXXXXXXXXXXXXXXXXXXXXXXXXXXXXXXXXXXXXXXXXXXXXXXXXXXXXXXXXXXXXXXXXXXXXXXXXXXXXXXXXXXXXXXXXXXXXXXXXXXXXXXXXXXXXXXXXXXXXXXXXXXXXXXXXXXXXXXXXXXXXXXXXXXXXXXXXXXXXXXXXXXXXXXXXXXXXXXXXXXXXXXXXXXXXXXXXXXXXXXXXXXXXXXXXXXXXXXXXXXXXXXXXXXXXXXXXXXXXXXXXXXXXXXXXXXXXXXXXXXXXXXXXXXXXXXXXXXXXXXXXXXXXXXXXXXXXXXXXXXXXXXXXXXXXXXXXXXXXXXXXXXXXXXXXXXXXXXXXXXXXXXXXXXXXXXXXXXXXXXXXXXXXXXXXXXXXXXXXXXXXXXXXXXXXXXXXXXXXXXXXXXXXXXXXXXXXXXXXXXXXXXXXXXXXxxx
He nCnoIb3yIe npI6Op, ecn KoHTeHep c INHpeDneHTaMn yCTaHOBJIeH 38. HnpaBnIbHo.
He nCnoIb3yIe np6op nyCTbIM 6e3 Niu nn XnKocTn BHyTpB.39.
- Peru npo ouaute yxobky u daite octatkn nui. HecobnoeHne Mep npocopoxhoctn npoucTke n obcyxubAHn yctpoictBa moKet Nobpeintb nobepxhoctb uyxdunb coctoHne np6opa, a taKxe co3daBatb
NOTEHnnaHbHbIe ONaCHbIe CNTyaCIN.
Для правильно вентлициoctabte cboбогhoe npoctpaHCTBO He Mehee 10 cm 4 Mekdy cTeHKoI n 3aHneJyactbIO neu, 5 cm C 6OKOB n 20 cm B BepxHeJ yactn.
He knaite ha neyb noIoteHca nIi TapeIkn.42.
- B OTHOWeHn npaBnIbHOy TnIN3aunn npnbopa B COOTBcTbN C Ebponecko dnpeKTHBOy 2012/19/EU npoHTaTe nHΦopMaTHBbI JNCtOK, npnilaraembl K npnbopy.
COXPAHNTb NHCTPYKciuO
ОПИСАНЕ ПИБОРА (Pnc.1)
A IobopoTHoe KOJIbIoo
BCTeKnHnHaNoDcTaBka
C PyuKa DBePcbl
D NaHelen ynpabJeHHa
ONICAHNE PAHEJIYPABJEHNA (pnc.2)
E DnCpIeN
F KhoHa «Microwave» (npiroTOBHeHne B MmKpOBoHOBoN neu)
G Khonka «Weight Defrost» (Becдя pa3mopaxnBaHЯ) / Khonka «Time Defrost» (Время pa3mopaxnBaHЯ)
H KhoJa Ka «Clock / Preset» (HaCtpoJka Yacob)
I Khonka «Stop / Clear» (CtoN / C6poc)
L ① KhoIIka «Start / +30 sec. / Confirm» (Пуск / ПовТьердь)
M - - Perylantop《Time》/《Weight》/《Auto Menu》(HactpoKa BpeMeHn / Beca/ npedyctaHOBJIeHHOrO MeHIO)
MnKpOBoHbI - 3TO 3NEKTPOMaHHTHbIe N3nyeHnra, TaKKe PnncyTCTByUoIe B npnpoe B φOpme CBETOBbIX BOH (HaNPmEep, CoNHeuHOro CBeta), KOTOpBie BHyTpNi Neu IpnOHkaOT B NiUy CO BCEx CTOpOH HArpeBaHOT MoNeKyJIb BObl, Xupa n caxapa. TEnIIO BbIPa6aTBiBaETcR OueHb 6bICTPO TOnbKO B NiUeBBIX npOdyKTax, a KOtEINHep HArpeBaETcR ToJbKO KOCBeHHO, pInHMmaT EtnIO OT RopAeY NiU. 3TO npEDOTBpaUaet npUnnAnHe NiU N K KOtEINHep, NO3OMy B npOceCE pInrTOBLeHnRA MOnHO NcONb3OBaTb (NI, B HeKOTOpbIX CnyaX, BOO6Ie He NcONb3OBaTb) OueHb MaIo Xnpa. BBNDy Hn3KOrO coDEPKaHnRA Xnpa nprirotOBLeHne B MnkPoBOHOBOI neu CHTaETcR OueHb N0Je3HbIM N dIeTNueCKIM. KpOME TORO, IO cpABHeHIO C TpaDnCIOHNbIMN CNTeMaMIM, pInrTOBLeHnE NsII pONxCODIT npN BoOE Hn3Koi Tempepatye, TA KTO npOdyKbI, MeNbIe ObE-3BOxHBaYCb, He TepAOT CBOI NITaTeNBhIE BeIecTBA n COxPaHraIOT BKycOBbie KaYeCTBa.
MHCTPYKUNI NO IPNMEHEHIO
YCTAHOBKA YACOB
Korda MmKpOBoHOBa ney b noKlUoyeHa K 3neKtpocetn, Ha dinCnnee (E) oTo6pa3ntcA 0:00 , npo3ByuHT 3ByKOBo CnHaI.
CoOTBcTByeT Tpe6oBaHnIaM
TP TC 004/2011 «O 6e3oNaChocTn Hn3KOBbTHoro o6OpyObaHn, yTBepXdEn PeSeHnem Komccnn TaMoxeHHoro coo3a N768 ot 16 abrycta 2011 roda
He KopnctyBaTnca npnstpoem, kIIO nocuHa 3 iHrpeiEHTaMn He BcTaHOBne-38. Ha NaJexKHM YINHOM.
Ioo6 He nooKoDHTn piu, He KOpNCTyBaTncr HeU, RaKuo BCEpeHHi HemaepiDNH 39. a6o npOdykTIB dIy npiroToYBaHHa.
PeryIpaHNO MHTN iY Ta yCyBaTn MoXJIbBi 3aIIuKn iXi. HeDOTpImaHnR npabn 40. DOrJy 3a npIcTpoE M OKe Ipn3BecTn Do NOnKoJKeHHr NOBepxHi Ta nOriP-WeHHr CTAHy Camoro npIcTPOU, a TAKOX CTBOpHTN He6e3neuHi cnTyauii.
3a6e3neuHTB iDnOBiHy BeHTnlaIIO, 3aNnHTn npocTip mix cTioHO Ta 41. 3aHbOIO CTiHKoIO neyi npHaMHi B 10 cm, 36okIB - 5 cm, 3BepxY - 20 cm.
3a6bopohreTbcra KnaCTn NOBepx neyi cepBeTKn abo cKaTeptHn, a TaKox cTa-42. BNTn Nocyd.
PO3MOPOKXYBAHHI3 HACTPOIKOIO BAI
- HATNCHNYI KhoNky (G) "Weight / Time Defrost", 906 Na dncnnei (E) 3'ABVBCa HAnc "dEF1" (HATNCHNYI KhoNky Odnn pa3).
- Повернуtn руну ретуновань (M), уб заати вагу поруктв розморожьань вд 100do 2000 r.
- Hattchnyk (L) "Start / +30 sec. / Confirm", οo6 po3noaTn po3mopoxybaHn.
- Yac po3mopoxyBaHHa Bye Bn6paHo aBtOMaTHuHO, BHXoJrN i3 Bka3aHOi BaH.
-Писязавершени приготуваши пolyнaitь пяты корOTKINX 3ByKOBnx CnHaiB.
PO3MOPOXyBAHHI3 HACTPOIKOIO YACY
- HATINCHYTN KHONKY (G) "Weight / Time Defrost", ζοδ Na ДИСПЕI (E) 3'ЯВВСАнис "dEF2" (HATINCHYTN KHONKY ДИЧI).
-Повернуtn руков(M),цоб затубaxанчac po3mopoxyBaHЯ. - Hattchnyk (L) "Start / +30 sec. / Confirm", οo6 po3noaTn po3mopoxyBaHn.
-Пicязавершенипригування пolyhaIOb ПЯтб корOTKINX 3ByKOBnx CnHaiB.
ПИГOTУBAHЯ Y PEXKIMI MEHIO 3 ПОЕРДьо 3АДAHМN HACTPOYKAMN (ABTO MEHIO)
- Be3 BVeDeHn8 6yNb-8Knx HacTpoNkO NOBepHyTu pyuKy peryIIOBaHHa (M), 106 Bn6paTn 6bKaHaMeHIO BiD "A-1" Do "A-8" (dNv. Bka3aHy HnXue Ta6nio).
- Hatnchnyk (L) "Start / +30 sec. / Confirm", icosiTBePHTBnB6paHMeHIO.
-Поверну ручу Perуловань (M), цоб заати Bary npodyktib, як занayeho y tabлии HIXKYe. - Hatachnyk (L) "Start / +30 sec. / Confirm", 9o6 po3noatn npirotoBaHna.
-ПсЯЗавершени пиroтувань пolyhaOTb n'Ятб корOTKnx 3ByKOBnx CnHaIiB.
| ДиаппейBaraМени 1 Розер 2 Овочi 3 Роба 4 М'ясо | ||
| 200200 рA-1 | ||
| 400400 r | ||
| 600600 r | ||
| 200200 рA-2 | ||
| 300300 r | ||
| 400400 r | ||
| 250250 рA-3 | ||
| 350350 r | ||
| 450450 r | ||
| 250250 рA-4 | ||
| 350350 r | ||
| 450450 r | ||
| 5050 r (3 450 мл rap 800 мл г 6 Kapton. | ||
| 100100 r (3 800 мл г 6 Kapton. | ||
| 200200 rA | ||
| 400400 r | ||
| 600600 r | ||
| 200200 rA-7 Пица | ||
| 400400 r | ||
| 200200 rA-8 Сун - М | ||
| 400400 r |
BAIATOΦYHKLIOHAJIbHE IPNIROTYBAHH
Y daHomy pexkmi npiroTybaHHa MoXHa 3aDaTn 2 fHyKcii.
Якwo neped npirotoybaHHm iki npodykTN cnid po3MOPo3NTN, TO po3MOPoKyBaHH Tpe6a 3aDaTn YK nepuy cyHKciIO.
PnKna: Kno nOpi6H o p03Mop03n T npOdykTn npOTyROM 5 XBnIH, a NOTIM roTyBaTH ix Ha 80 % NotyxHocTI npOTyROM 7 XBnIH, cnD iArynHaCTynHM yHOM:
- Hatnchutykn Khonky (G) "Weight / Time Defrost" Dbiu, Na dincnnei neqi 3'raBntbcr haHnc "dEF2".
-Повернуtn pykoTky (M), цоб заати бaxани уас розморожьанняdo"05:00". - Hatnchnyt knonky (F) "Microwave" oDIN pa3; Na dinCnnei (E) bye BiO6paKatnc iHdkaTOp noTyXhOCTi "P100".
-Повернуtn рухаяку (M), цоб вибрази 80%notyxknocti mikpoxbilbooi neci. - Hatachnyk (L) "Start / +30 sec. / Confirm", Μος πιδινερπιτη; на дистпей буде вiodopa-jatис наимс "P80".
-Повернуtn pykoTky (M), цоб заати бaxани уас розморожьанняdo“07:00". - Hatnchyn Khonky (L) "Start / +30 sec. / Confirm", Μоб розноати приютуваня;nicяцboro npinctpiи вд actь оин корOTКИ 3ByKOBи сгнал,якь Вka3ye Ha 3anyck nepшоi Функii рoz-Mopoxуваня,а на диспій 6уde BiOobpaxatncя 3BOPOTHи BiDnik yacy.пicял завршеняпершоi Функii пinctriи вд actь оин корOTКИ 3ByKOBи сгнал,якь Вka3ye Ha 3anyck dpyrooi Функii приютуваня,i po3noCHetbcrgdpyrni 3BOpOTHи BiDnik yacy.
- Picn octatoohoro 3aBepenH npirotoBaHH npolyhAOTb n'YtB KOpOTKnx 3BykOBx CnHaJIb.
BIDKIADEHNI 3AUPCK
- HactpoTINrOdHHNK,ЯK3a3HaueHoBnIe.
- Bn6patn 6axaHy nporpamy npirotoybaHna. PnKnaI: JaKuo Tpe6a roTyBaTu npotrrom 7 XbuiH na 80% notyxkhoCTi mikpoxbnbOBoi neyi:
- Y pexnmi BiKnaedeHoro 3ayncky HEMOxNBO KOpNCyBaTncapeXNMOM "6araToofyHKioHaJIbHe npiroToYBaHHa".
- Hatnchnyt KhoNky (F) "Microwave" oDIn pa3.
- Поверну рухаяку (M), соб вибрази 80% потужноcti мірхьльовоі neч; на диспі (E) 6уд e biodobpaхатися зауненя потужноcti "P80".
- Hatnchnyt knonky (L) "Start / +30 sec. / Confirm", 9o6 niTBePdnt.
-Повернуту рухаяку (M),цоб заши божаши час розморожьанни do"07:00".
-Пися nonepeHbO 3a3NaeHnx KpokiB He HaTnCKaTN KhONky (L) "Start / +30 sec. / Confirm". 3a4aTn yac BiDknaeHoro 3anycky,ЯK 3a3NaeHo HnKue.
- HatncnytN KhoNky (H) "Clock / Preset" oINH pa3; Bka3iBnK rOINH noUHe 6IImaTn.
-Повернуту руну ретулювань (M), 3606 36iNbHTn abo 3MeHHTn 3HaueHn rOdn (Bid 0 do 23).
- Hatnchutykn KhoNky (H) "Clock / Preset" oIN pa3; Bka3iBnK XBnInn NoUHe 6JIMaTn.
- Повернуtn руну ретулювань (M), 3606 3618bunTu a60 3MeHunTu 3HaueHnXBnInn (BiD 0 do 59).
- Hatnchnyt KhoNky (L) "Start / +30 sec. / Confirm", icos piTBePdntn HacTroKn.
-Пич Видасты Два 3Вуковин сигнали, КOLи HaCTуппь уас BiДКладeHOrо 3aNyСky,nicя чOrо пriTOTУВАння рОЗПОЧЕТьсЯ ABTomaTиHOr.
Ipnmitka: Cnoataky cnid hactpoiTn roDHHNK, iHaKwe cyHKciBikKaedeHoro 3anycky He 6yde dIaTI.
-Пicязавершенипригotуваши пolyhaIOt b'ЯтбКОРOTKINX 3ByKOBnx CnHaiB.
IHΦOPMALI, IO BIDOBPAKACTbCg IID YAC PNIROTYBAHH
-Пдчаспри�otуваньу ржимi mixpoxbnboои nevi nicna haTnckaHня KhoNk (F) "Microwave" npotrom 3 cekyhd ha dincnnei 6yde bidoopaKaTnca noToUHa noTyxHiCTb.
-ПдчаспгOTуВанняЗIDноMeHIO 3 nonepedNbo 3aDAHIMn HAcTpoKamn nicJaHaTnCKaHHa KhoIKN (H) "Clock / Preset" Ha dinCpIeI npotraGM 3 cekyHd 6yde BiObpaJxATncr noToHm Yac; nICnYCboro Ha dinCpIeI 3HOBy 6yde BiObpaJxATncr Yac, kIn 3aIIuHaETbcr Do 3aBepWeHHa npGOTyBaHHa.
-Пд часпготуваньnicн haTиСkaHня KhoNk (H)“Clock/Preset" npotraym 3 cekyHd ha dinCnpei6yde BiodobpaXaTusc noToHnY quac.
3AIO6IXHA FYHKUJ 3AXNCTY BID KOPNUCTYBAHHJ 3 BOKY DITEH
- 3abokybatn npnstpi, hatachnyk Honky (I) "Stop / Clear" i ytpmybatn ii npotrom 3 cekynd; npnstpi Buaactb doBri 3BykoBn CnHaI, 10 Bka3ye Ha noatok 3anobixHoro peKIMy 3axncty BiD KopntyBaHHa 360ky dTei, a Ha dinCnnei 6yde BiOobpaxatncs CmBOJ
- Κόb ρο3bπokybaTn πριστρί, ytpmmybaTn KhoNky (I) "Stop / Clear" y haTncHeHMy noLoJxHHi npotrrom 3 cekyHd; πριστρί BnDactb DoBnR 3ByKOBn CnHaI.
KOPUCHA IHΦOPMALIJI
- 3BykoBn cnHan noaetbcra OIN pa3, KOJI pyUka peRyIIOBaHHra NOBepTaETbca Ha NoaTOK.
- Hatnchnyt NkHonky (L) "Start / +30 sec. / Confirm", 9o6 npodobxntn npirotybaHHn icnra toro, k BIDHNII IN DBepaT a n d qac npirotoyBaHH.
-Пися тoro,як задано поррamy пригOTуванья,якso He haTnCHyTN KhONky (L) "Start / +30 sec. / Confirm" npotrayom 1 xBnHnДЯ пIDТВерджЕнг,Ha dinCnpei 6уde BiOobpaKATncЯnotouнчac,a nonepedhi NaCTPoiKu BiDmiHrytbcr. - 3BykoBn CnHaI nOdaetbCra TInbKn 3a yMOBn HAcTnCKaHHa Na KHOJKN 3 DOCTaTHbOIO CnNOIO.
- 3BykoBn cnHan noaetbca n'raB, o6 Bka3aTn Ha 3aBepueHH npiroTyBaHH.
OuHsEHnTa DOrJaD
YBARA:
3A6OPOHЯETbCRA 3AHUPOBATN Y BODY TA IHSSI PIINH KOPNYC IPNCTPOIO, UTENCEJIbHy BNIKY A6O IPOBID ENEKTPNUHORO JKNBIIEHNA, A TAKOX KOPNUCTYBATNCRA BOIROIO TKAHINHOДЯ DOITJy 3A IPNCTPOEM.
IPEPITM,JK BCTAHOBHTN ABO 3HRTN YKICb CKIAIOBI YACTUHN 3 IPNCTPOIO 3 METOIO IOFJy 3A HNM,CIIID CNOATKY BNIHRTN UTENCELBHy BNIKY 3 PO3ETKN EJEKTPNUHORO JKBJIENHRA, HABITb JKUO IPNCTPIH HE IPAUOC.
- CπiD trpMaTn πiY uNcToO 3cepeHn. JaKIo BCEpeHni neci e 3aIiShKn iXi a6o piDiHa, BmHTn CTiHKn BOIoroIO cepBETKOIO. JaKIo niu dUxke 3a6pydHnIacra, MoHa BVkOpNCTOByBaTn He iDKn MmHn 3aci6. He KopncTyBaTnCra cnpEeM a6o IHsIMn HaTO CNJIbHMn MmHmN 3acobAm, OckIbKn NiCnHa Hx Ha NOBepxHi DBePcT MoKytB 3aIIuWATnCra PnIaMn a6o NOBepxHr DBePcT MOKe IOTbMЯHITn.
- 3obhihi nobepxhi cnid npocTo npotupatn BOIoroIO cepBeTKOIO. 06 3anobirn noWKoJKeHHIO pObouH x qactn H BCEpeDHHI neci, 3anobirn nOtpanJIaHHIO KpaneIb BODn Do BeHTNJraiHHX OTBopIB.
- Peru npotnpaTn DBePraTa Ta BIKOH3 06ox 6okiB, repMeTuHi OTBOpn Ta po3TaOBoHi nopA3 HMM NaCTHH BOIoroIO cepBETKOIO, u6 yCyHyTN 6pn3Kn Ta 3aIIuKn iXi. 3a6OpOnrEbCBAkopncTOByBaTn abpa3NBHI MmHi 3ac06n.
- 3abopohreTbcra 3BOIOxOyBaTu NaHeNb KOHTpOnIoo. II cniD npOTnpaTu TIlbKn M'koO, cyXoO cepBETKOIO. Pid Yac npOTnpaHn TpMaTu DBePcTa BIDuHNHeHmN, I06 niu BnPaKOBo Ha yBIMKhynacr.
- YKsqo BcepeHnHi a60 3OBHI DBePcT 3bepaetbcB OJORA, iI cIId BVteptN M'koIO cepBETKOIO. Take MoXJIbBO nID yac po6OToB yMOBaX NiDnUeHOI BOJorOCTi i CbiDuHTb npo HopMaJIbHy po6Otu npi-CTPOIO.
- Yac BiD yacy cniD BnMAtu CKJHy TApIKy, 06BnMTu II. IcNiD MNTu TEJIHO MUNbHO BOIO a6o 3aco6om dIg MTTT NOcyd.
-ПоворOTHe KINbue Ta OCHOBy cAmoi Neui CnId TpIMaTn B uNCTOTi, 3o6 3anobirn HAdMipHomy pIBHIO wUMy;ix CnId MNTu NERKIMM MmHIMM 3acO6aMn a60 3BnuAinHM 3acO6om dJr MNTTЯ nocdy. PicJRA MTTra KINbue CnId BCTaHOBHTn Ha Micce HaneXHM YInHOM. - ьпбabntncя He npmMHO 3anaxy B neqi, cnid 3miWATn y rIboki nocydnH i dny MikpoXbNboOoi neyi kyxlnk BODn, ciK Ta ukiKy IIMOnHa, noCTaBNTn II B niu i yBIMKHyTu Ha 5 XBNH. Notim BmHTn Ta peTeNbHO BNCuHTn M'koIO cepBeTKoIO.
- Koln Binhikhe notpe6a 3amHHTN Cbitno B neqi, cnid 3BepHyTncy do ynoBHOBaxeHoro npoabu.
- Perylaepno Mtni niu Ta ycBaTn MoKnnBi 3aIIuKn iXi. IHaKwe NOBepxHi npNCTpoIO MOkyTB i3 Yacom N0sKOndTncra, 1o npI3BeDe do ckOpouHHe TepmiHy eKcnIyatauI npNCTPOO a6o CTBopIn Tn He6e3neuHy cnTuauio.
aeg
1
1
a 1
ED = 1
y
Joo! J 1
J 1
$$ \left. \right.\left. \right.\left. \right.\left. \right.\left. \right.\left. \right.\left. \right.\left.\left.\left.\left.\left.\left.\left.\left.\left.\left.\left.\left.\left.\left.\left.\left.\left.\left.\left.\left.\left.\left.\left.\left.\left.\left.\left.\right.\right.\right.\right.\right.\right.\right.\right.\right.\right.\right.\right.\right.\right.\right.\right.\right.\right.\right.\right.\right.\right.\right.\right.\right.\right.\right\rangle_ {1} ^ {2} = 0, 0, 0, 0, 0, 0, 0, 0, 0, 0, 0, 0, 0, 0, 0, 0, 0, 0, 0, 0, 0, 0, 0, 0, 0, 0, 0, 0, 0, 0, 0, 0, 0, 0, $$
$$ \mathrm {V} \text {j} \text {i} \text {j} \text {i} \text {j} \text {i} \text {j} \text {i} \text {j} \text {i} \text {j} \text {i} \text {j} \text {i} \text {j} \text {i} \text {j} \text {i} \text {j} \text {i} \text {j} \text {j} \text {i} \text {j} \text {i} \text {j} \text {i} \text {j} \text {i} \text {j} \text {i} \text {j} \text {i} \text {j} \text {i} \text {j} \text {i} \text {j} \text {i} \text {j} \text {1 9 4 0} (\mathrm {E C}) ^ {\prime} \text {a l l a l l a l l a l l a l l a l l a l l a l l a l l a l l a l l a l l a l l a l l a l l a l l a l l a l l a l l a l l a l l a l l a l l a l l a l l a l l a l l a l l a l l a l l a l l a l l a l l a l l a} $$
$$ \therefore a _ {a b} \text {d} \quad \omega_ {a} \text {d} \text {d} \text {d} \text {d} \text {d} \text {d} \text {d} \text {d} \text {d} \text {d} \text {d} \text {d} \text {d} \text {d} \text {d} \text {d} \text {d} \text {d} \text {d} \text {d} \text {c o l l} \quad 4. 0 2 \quad J g y I j n j n j n j n j n j n j n j n j n j n j n j n j n j n j n j n j n j n j n j n j n j n j n j n j n j n j n j n j n j n j n j n j n j n j n j n j n j n j n j n j n j n j n j n j n j n j n j n j n j n j $$
$$ \text {a} \text {i} \text {i} \text {i} \text {i} \text {i} \text {i} \text {i} \text {i} \text {i} \text {i} \text {i} \text {i} \text {i} \text {i} \text {i} \text {i} \text {i} \text {i} \text {i} \text {i} \text {1 5} \text {1 5} \text {1 5} \text {1 5} \text {1 5} \text {1 5} \text {1 5} \text {1 5} \text {1 5} \text {1 5} \text {1 5} \text {1 5} \text {1 5} \text {1 5} \text {1 5} $$
$$ \therefore \text {a l l} \quad \text {i n} \quad \text {i n} \quad \text {i n} \quad \text {i n} \quad \text {i n} \quad \text {i n} \quad \text {i n} \quad \text {i n} \quad \text {i n} \quad \text {i n} \quad \text {i n} \quad \text {i n} \quad \text {i n} $$
$$ \cdot \rho_ {i} ^ {i} i = 1, j = 1, j = 2, \dots , j = n - 1 $$
$$ J a _ {i} \text {i} \text {i} \text {i} \text {i} \text {i} \text {i} \text {i} \text {i} \text {i} \text {i} \text {i} \text {i} \text {i} \text {i} \text {i} \text {i} \text {i} \text {i} \text {i} \text {i} \tag {24}, $$
$$ \therefore \text {a g i s} ^ {\circ} 9. \text {i n} \text {d i f} \text {y} \text {o r} \text {j} $$
$$ j _ {i j} = \sum_ {l = 1} ^ {n} j _ {l l} $$
$$ j _ {i} \dot {z} \dot {z} j _ {i} \dot {z} \dot {z} j _ {i} \dot {z} \dot {z} j _ {i} \dot {z} \dot {z} j _ {i} \dot {z} \dot {z} j _ {i} \dot {z} \dot {z} j _ {i} \dot {z} \dot {z} j _ {i} \dot {z} $$
$$ \cdot \mathrm {i d e a l} \quad \mathrm {j i d i a l} \quad \mathrm {n o i s e} $$
$$ . \dot {c} _ {i j} \dot {z} _ {j} \dot {z} _ {j} \dot {z} _ {j} \dot {z} _ {j} \dot {z} _ {j} \dot {z} _ {j} \dot {z} _ {j} \dot {z} _ {j} \dot {z} _ {j} \dot {z} _ {j} \dot {z} _ {j} \dot {z} _ {j}. $$
$$ \text {i} \int_ {\Omega} \text {a} _ {0} \text {a} _ {1} \text {a} _ {2} \text {a} _ {3} \text {a} _ {4} \text {a} _ {5} \text {a} _ {6} \text {a} _ {7} \text {a} _ {8} \text {a} _ {9} \text {a} _ {1 0} \text {a} _ {1 1} \text {a} _ {1 2} \text {a} _ {1 3} \text {a} _ {1 4} \text {a} _ {1 5} \text {a} _ {1 6} \text {a} _ {1 7} \text {a} _ {1 8} \text {a} _ {1 9}. $$
$$ \left. \right.\left. \right.\left. \right.\left. \right.\left. \right.\left. \right.\left. \right.\left.\left.\left.\left.\left.\left.\left.\left.\left.\left.\left.\left.\left.\left.\left.\left.\left.\left.\left.\left.\left.\left.\left.\left.\left.\left.\left.\right.\right.\right.\right.\right.\right.\right.\right.\right.\right.\right.\right.\right.\right.\right.\right.\right.\right.\right.\right.\right.\right.\right.\right.\right.\right.\right\rangle_ {i} ^ {j} = 0, j = 1, 2, 3, 4, 5, 6, 7, 8, 9, 1 0, 1 1, 1 2, 1 3, 1 4, 1 5, 1 6, 1 7, 1 8, 1 9, 2 0, 2 1, 2 2, 2 3, 2 4, 2 5, 2 6, 2 7, 2 8, 2 9, 3 0, 3 1, 3 2, 3 3, 3 4, 3 5, 3 6, 3 7, 3 8, 3 9, 4 0, 4 1, 4 2, 4 3, 4 4, 4 5, 4 6, 4 7, 4 8, 4 9, 5 0, 5 1, 5 2, 5 3, 5 4, 5 5, 5 6, 5 7, 5 8, 5 9, 6 0, 6 1, 6 2, $$
$$ . \dot {1} \dot {1} \dot {1} \dot {1} \dot {1} \dot {1} \dot {1} \dot {1} \dot {1} \dot {1} \dot {1} \dot {1} \dot {1} \dot {1} \dot {1} \dot {1} \dot {1} \dot {1} \dot {1} \dot {1} \dot {1}. $$
$$ \left. \right.\left. \right.\left. \right.\left. \right.\left. \right.\left. \right.\left.\left.\left.\left.\left.\left.\left.\left.\left.\left.\left.\left.\left.\left.\left.\left.\left.\left.\left.\left.\left.\left.\left.\left.\left.\left.\left.\left.\right.\right.\right.\right.\right.\right.\right.\right.\right.\right.\right.\right.\right.\right.\right.\right.\right.\right.\right.\right.\right.\right.\right.\right.\right.\right.\right] ^ {1} 9\right) $$
$$ \cdot \mathrm {i} _ {\mathrm {i}} \mathrm {j} _ {\mathrm {i}} \mathrm {k} _ {\mathrm {i}} \mathrm {l} _ {\mathrm {i}} \mathrm {j} _ {\mathrm {i}} \mathrm {k} _ {\mathrm {i}} \mathrm {l} _ {\mathrm {i}} \mathrm {j} _ {\mathrm {i}} \mathrm {k} _ {\mathrm {i}} \mathrm {l} _ {\mathrm {i}} \mathrm {j} _ {\mathrm {i}} \mathrm {k} _ {\mathrm {i}} \mathrm {l l} _ {\mathrm {i}} \mathrm {j} _ {\mathrm {i}} \mathrm {k} _ {\mathrm {i}} \mathrm {l l} _ {\mathrm {i}} \mathrm {j} _ {\mathrm {i}} \mathrm {k} _ {\mathrm {i}} \mathrm {l l} _ {\mathrm {i}} \mathrm {j} _ {\mathrm {i}} \mathrm {k} _ {\mathrm {i}} \mathrm {\cdot} \mathrm {a} _ {\mathrm {i}} \mathrm {g} $$
$$ \left. \int_ {a} ^ {b} \frac {\partial f}{\partial x} + \frac {\partial f}{\partial y} + \frac {\partial f}{\partial z}\right) \cdot \left(\int_ {a} ^ {b} \frac {\partial f}{\partial x} + \frac {\partial f}{\partial y} + \frac {\partial f}{\partial z}\right) = 0 $$
$$ \therefore e ^ {b 1} $$
$$ j a \quad a c g i d a l l \quad j i g i l y \quad j i s \quad (a b c) \quad (b c) \quad (c b) \quad (d c) \quad (e b) \quad (f b) \quad (g b) \quad (h b) \quad (i b) \quad (j b) \quad (k b) \quad (l b) \quad (m b) \quad (n b) $$
$$ \text {a d a n d} \text {a l g o l l} \text {a l b o m e d i s t r i b u t i o n} \text {2 . 0 r l a w l l p l a g a l l l l l l l l l l l l l l l l l l l l l l l l l l l l l l l l l l l l l l l l} $$
$$ \therefore \mathrm {J a} ^ {\prime} = \mathrm {J i} ^ {\prime} + \mathrm {i} ^ {\prime} \mathrm {d} \left[ \mathrm {e} ^ {\mathrm {j}} \right] ^ {\prime} + \mathrm {i} ^ {\prime} \mathrm {g} ^ {\prime} + \mathrm {g} ^ {\prime} \mathrm {s} ^ {\prime} + \mathrm {s} ^ {\prime} \mathrm {f} ^ {\prime} + \mathrm {f} ^ {\prime} \mathrm {b} ^ {\prime} $$
$$ \left. \right.\left. \right.\left. \right.\left.\left.\left.\left.\left.\left.\left.\left.\left.\left.\left.\left.\left.\left.\left.\left.\left.\left.\left.\left.\left.\left.\left.\left.\left.\left.\left.\left.\left.\left.\left.\right.\right.\right.\right.\right.\right.\right.\right.\right.\right.\right.\right.\right.\right.\right.\right.\right.\right.\right.\right.\right.\right.\right.\right.\right.\right.\right.\right.\right.\right.\right. $$
$$ \jmath_ {g} $$
J 154 154 154 154 154 154 154 154 154 154 154 154 154 154 154 154 154 154 154 154 154 154 154 154 154 15
.
1
Jgll 1c gblg ciiie 2
2
E U/19/4.17 2008 136 136 136 136 136 136 136 136 136
iiill 1

iiaai iie 1
()
A
A
C
D
()
E
()“Microwave”F
(aclllb) "Clock/Preset" H
()“Stop/Clear”
(/)"sec./Confirm 青 + / Start”L
/()“Time”/“Weight”/“Auto Menu”M - -
()
J 1111111111111111111111111111111111111111111111111
puiy
a c l l b u s
J 11 (E) 11
“
J 11111111111111111111111111111111111111
a < 1 即 b > 0
()·(M)
.()“Clock/Preset”
$$ \begin{array}{l} . (0 9 \mathrm {G} \cdot \mathrm {J a}) \text {d i f f l i d e} \text {f i t} \text {f i t} \text {f i t} \text {f i t} \text {f i t} (\mathrm {M}) \text {f i t} \text {f i t} \text {f i t} - \ \left. \right.\left. \right.\left. \right.\left. \right.\left. \right.\left. \right.\left. \right.\left. \right.\left. \right.\left. \right.\left. \right.\left.\left.\left.\left.\left.\left.\left.\left.\left.\left.\left.\left.\left.\left.\left.\left.\left.\left.\left.\left.\left.\left.\left. \text {的} \right]\right]\right]\right]\right]\right]\right]\right]\right]\right]\right]\right]\right]\right]\right]\right]\right]\right]\right]\right]\right]\right]\right] \ \cdot \text {g} \text {g} \text {g} \text {g} (\mathrm {E}) \text {g} \text {g} \text {g} \text {g} \text {g} \text {g} \text {g} \text {g} \text {g} \text {g} \text {g} \text {g} \text {g} \text {g} \text {g} \text {g} \text {g} \text {g} \text {g} \text {g} \text {g}, \dots , \text {g} \text {g} \text {g} \text {g} \text {g} \text {g} \text {g} \text {g} \text {g} \text {g} \text {g} \text {g} \text {g} \text {g} \text {g} \text {g} \text {g} \text {g} \text {g} \text {g}. \ \therefore a \dots \ \cdot \text {i} _ {j} \text {i} _ {j} \text {i} _ {j} \text {i} _ {j} \text {i} _ {j} \text {i} _ {j} \text {i} _ {j} \text {i} _ {j} \text {i} _ {j} \text {i} _ {j} \text {i} _ {j} \text {i} _ {j} \ \therefore \text {i} \leqslant \text {j} \leqslant \text {k} \leqslant \text {l} \leqslant \text {m} \leqslant \text {n} \leqslant \text {o} \leqslant \text {p} \leqslant \text {r} \leqslant \text {s} \leqslant \text {t} \leqslant \text {u} \leqslant \text {v} \leqslant \text {w} \leqslant \ \end{array} $$
$$ \left. \right.\left. \right.\left. \right.\left. \right.\left. \right.\left.\left.\left.\left.\left.\left.\left.\left.\left.\left.\left.\left.\left.\left.\left.\left.\left.\left.\left.\left.\left.\left.\left.\left.\left.\left.\left.\left.\left.\right.\right.\right.\right.\right.\right.\right.\right.\right.\right.\right.\right.\right.\right.\right.\right.\right.\right.\right.\right.\right.\right.\right.\right.\right.\right]\right]\right]\right] $$
$$ \therefore \overrightarrow {a} = \left| \overrightarrow {a} _ {1} \right| $$
$$ \left. \right.\left. \right.\left. \right.\left. \right.\left. \right.\left.\left.\left.\left.\left.\left.\left.\left.\left.\left.\left.\left.\left.\left.\left.\left.\left.\left.\left.\left.\left.\left.\left.\left.\left.\left.\left.\left.\left.\right.\right.\right.\right.\right.\right.\right.\right.\right.\right.\right.\right.\right.\right.\right.\right.\right.\right.\right.\right.\right.\right.\right.\right.\right.\right.\right.\right.\right. $$
$$ \begin{array}{l} \left. \right.\left. \right.\left. \right.\left. \right.\left. \right.\left. \right.\left. \right.\left. \right.\left. \right.\left. \right.\left. \right.\left. \right.\left.\left.\left.\left.\left.\left.\left.\left.\left.\left.\left.\left.\left.\left.\left.\left.\left.\left.\left.\left.\left.\left. \text {i} ^ {\prime} \right] ^ {\prime} \right] ^ {\prime} \right] ^ {\prime} \right] ^ {\prime} \right] ^ {\prime} \right] ^ {\prime} \right] ^ {\prime} \right] ^ {\prime} \right] ^ {\prime} \right] ^ {\prime} \right] ^ {\prime} \right] ^ {\prime} \right] ^ {\prime} \right] ^ {\prime} \right] ^ {1 0} - \right.\right.\right.\right.\right.\right.\right. \ \therefore \dot {z} \dot {z} \dot {z} \dot {z} \ \end{array} $$
$$ \begin{array}{l} \left. \right.\left. \right.\left. \right.\left. \right.\left. \right.\left. \right.\left. \right.\left. \right.\left. \right.\left. \right.\left. \right.\left. \right.\left. \right.\left. \right.\left. \right.\left. \right.\left. \right.\left. \right.\left. \right.\left. \right.\left. \right.\left. \right.\left. \right.\left. \right.\left. \right.\left. \right.\left.\left.\left.\left.\left.\left.\left.\left. \text {J} ^ {\prime} = 1, 0, 0, 0, 0, 0, 0, 0, 0, 0, 0, 0, 0, 0, 0, 0, 0, 0, 0, 0, 0, 0, 0, 0, 0, 0, 0, 0, 0, 0, 0, 0, 0, 0, 0 \right) ^ {\prime} = 1, 0, 0, 0, 0, 0, 0, 0, 0, 0, 0, 0, 0, 0, 0, 0, 0, 0, 0, 0, 0, 0, 0, 0, 0, 0, 0, 0, 0 \right) ^ {\prime} = 1, 1, 1, 1, 1, 1, 1, 1, 1, 1, 1, 1, 1, 1, 1, 1, 1, 1, 1, 1, 1, 1, 1, 1, 1, 1, 1, 1, 1, 1, 1, 1, 1, 1, \right) ^ {\prime} = - \right] ^ {\prime} = - \right] ^ {\prime} = - \right] ^ {\prime} = - \right] ^ {\prime} = - \right] ^ {\prime} = - \ \therefore 1 \dots J _ {2} \text {g i l l} (E) \left(" P) \dots\right) \text {a t a l l} \text {e} \text {s u s} \text {i} \text {i} \text {i} \text {i} \text {i} \text {i} \text {i} \text {i} \text {i} \text {i} \text {i} \text {i} \text {i} \text {i} \text {i} \text {i} \text {i} \text {i} \text {i} \text {i} \text {o} \text {o} \text {o} \text {o} \ . (\%) \cdot a _ {w i t} ^ {\prime \prime} P) ^ {\prime \prime} g 1 \% r \cdot a _ {w i t} ^ {\prime \prime} P r ^ {\prime \prime}, \% o \cdot a _ {w i t} ^ {\prime \prime} P o ^ {\prime \prime}, \% \Lambda \cdot a _ {w i t} ^ {\prime \prime} P \Lambda^ {\prime \prime} \ \end{array} $$
$$ . \text {d} _ {\text {d}} \left(\frac {1}{2} \frac {1}{2} \frac {1}{2} \frac {1}{2} \frac {1}{2} \frac {1}{2} \frac {1}{2} \frac {1}{2} \frac {1}{2} \frac {1}{2} \frac {1}{2} \frac {1}{2} \frac {1}{2} \frac {1}{2} \frac {1}{2} \frac {\cdot + 1}{\cdot + 1}\right) (L) " S t a r t / + 3 0 s e c / C o n f i r m" r l $$
$$ . (a _ {a} a _ {a} 9 0 \dots \dots \dots \dots \dots \dots) g b l l c d g m g l a i j g d y j l (M) $$
$$ \begin{array}{l} \left. \frac {1}{2} \left(\frac {1}{2} + \frac {1}{2}\right) \frac {1}{2} + \frac {1}{2}\right) (L) " S t a r t / + 3 0 s e c / C o n f i r m" \text {r l} \ \therefore \mathrm {s e l l} \mathrm {d i f} g \ \end{array} $$
$$ \begin{array}{l} \left. \right.\left. \right.\left. \right.\left.\left.\left.\left.\left.\left.\left.\left.\left.\left.\left.\left.\left.\left.\left.\left.\left.\left.\left.\left.\left.\left.\left.\left.\left.\left.\left.\left.\left.\left.\left.\right.\right.\right.\right.\right.\right.\right.\right.\right.\right.\right.\right.\right.\right.\right.\right.\right.\right.\right.\right.\right.\right.\right.\right.\right.\right.\right.\right.\right.\right.\right. \ \therefore \lim _ {b \to 1} \frac {b ^ {2} + - 3 b + 5}{b ^ {6} + 4 b + 2} \ \end{array} $$
$$ \begin{array}{l} \left. \text {J} _ {\text {J}} \text {J} _ {\text {J}} \text {J} _ {\text {J}} \text {J} _ {\text {J}} \text {J} _ {\text {J}} \text {J} _ {\text {J}} \text {J} _ {\text {J}} \text {J} _ {\text {J}} \text {J} _ {\text {J}} \text {J} _ {\text {J}} ^ {\prime}\right) (1) \left(\frac {}{} \omega_ {\omega} / \frac {}{} \omega_ {\omega} ^ {\prime}\right) " S t o p / C l e a r" \quad j z \leqslant \frac {}{} \frac {}{} \frac {}{} \frac {}{} \frac {}{} \frac {}{} \frac {}{} \frac {}{} \frac {}{} \frac {}{} \frac {}{} \frac {}{} \frac {}{} \frac {}{} \frac {}{} \frac {}{} \frac {}{} \frac {}{} \frac {}{} \frac {}{} \frac {}{} \frac {}{} \frac {}{} \frac {}{} \frac {}{} \frac {}{2 0 1 9} \ \therefore \text {a l l} \leq \text {a i a l l} \text {c i g g} \text {g y} \text {g w g} \text {l a w} \text {b g a l l} \ \end{array} $$
$$ \begin{array}{l} \left. / \epsilon_ {d} ^ {d}\right) (L) " S t a r t / + 3 0 s e c / C o n f i r m" \text {r} \text {l} \text {e} \text {b} \text {e} \text {a} \text {s} \text {w} \text {a} \text {b} \text {e} \text {l} \text {e} \text {f} \text {g} \text {i} \text {j} \text {k} \text {l} \text {o} \text {t} \text {e} \text {d} \text {e} - \ \therefore \text {a l l} \leqslant \text {a l l} \text {a l l} \text {a l l} \text {a l l} \text {a l l} \text {a l l} \text {a l l} \text {a l l} \text {a l l} \text {a l l} \text {a l l} \text {a l l} \text {a l l} \text {a l l} \text {a l l} \quad (\frac {\sqrt {2}}{2}, \frac {\sqrt {2}}{2}, \frac {\sqrt {2}}{2}, \frac {\sqrt {2}}{2}, \frac {\sqrt {2}}{2}, \frac {\sqrt {2}}{2}, \frac {\sqrt {2}}{2}, \frac {\sqrt {2}}{2}, \frac {\sqrt {2}}{2}, \frac {\sqrt {2}}{2}, \frac {\sqrt {2}}{2}, 1 + \ \left. \right.\left. \right.\left. \right.\left. \right.\left. \right.\left. \right.\left. \right.\left. \right.\left. \right.\left. \right.\left. \right.\left. \right.\left.\left.\left.\left.\left.\left.\left.\left.\left.\left.\left.\left.\left.\left.\left.\left.\left.\left.\left.\left.\left.\left. \text {的} \right]\right]\right]\right]\right]\right]\right]\right]\right]\right]\right]\right]\right]\right]\right]\right]\right]\right]\right]\right]\right]\right] \ \end{array} $$
$$ . \left. \right.\left. \right.\left. \right.\left. \right.\left. \right.\left. \right.\left. \right.\left. \right.\left. \right.\left. \right.\left. \right.\left. \right.\left. \right.\left. \right.\left. \right.\left. \right.\left. \right.\left. \right.\left. \right.\left. \right.\left. \right.\left. \right.\left. \right.\left. \right.\left. \right.\left. \right.\left. \right.\left. \right.\left. \right.\left. \right.\left. \right.\left. \right.\left. \right.\left{ \right.1 0 0 0 0 0 0 0 0 0 0 0 0 0 0 0 0 0 0 0 0 0 0 0 0 0 0 0 0 0 0 0 0 0 0 0 0 0 0 0 0 0 0 0 0 0 0 0 0 0 0 1 1\left. \right)\left. \right)\left. \right)\left. \right)\left. \right)\left. \right)\left. \right)\left. \right)\left. \right)\left. \right)\left. \right)\left. \right)\left. \right)\left. \right)\left. \right)\left. \right) $$
j00 1
()G)“Weight/TimeDefrost”
$$ . \left(\text {d e l g a} \text {j r j} \text {l e} \text {b i d}\right) (E) ^ {\prime \prime} \text {d E F} ^ {\prime \prime} \text {a l l} $$
$$ \dots \dots \dots \dots \dots \dots \dots \dots \dots \dots \dots \dots \dots \dots \dots \dots \dots \dots \dots \dots \dots \dots \dots \dots \dots \dots \dots \dots \dots \dots \dots \dots \dots \dots \dots \dots \dots \dots \dots \dots \dots \dots \dots \dots $$
$$ \therefore \text {d i s t a c e} \left(\frac {\partial f}{\partial x} + \frac {\partial f}{\partial y}\right) (L) = 3 0 \sec \left(- \frac {1}{2} \frac {\partial f}{\partial x} + \frac {\partial f}{\partial y}\right) $$
$$ \cdot \text {d} \text {a l l} \quad \text {j} \text {g} \text {o l l} \quad \text {e} \quad \text {c l i} \quad \text {l i l a l} \quad \text {d o w n} \quad \text {i d} \quad \text {d i} \quad \text {d i} \quad \text {d i} \quad \text {d i} \quad \text {d i} \quad \text {d i} \quad \text {d i} \quad \text {d i} $$
$$ . \text {a} _ {i j} ^ {i} \text {a} _ {j i} ^ {j} \text {a} _ {k l} ^ {l} \text {a} _ {l k} ^ {k} \text {a} _ {l j} ^ {j} \text {a} _ {l k} ^ {k} \text {a} _ {l j} ^ {j} \text {a} _ {l k} ^ {k} \text {a} _ {l j} ^ {j} \text {a} _ {l k} ^ {k} \text {a} _ {l j} ^ {j} $$
aagll buaa aaa
L (A/4+ /1) (L) "Start / +30 sec / Confirm"
.1JgJgJgJgJgJgJgJgJgJgJgJgJgJgJgJgJgJgJgJgJgJgJgJgJgJgJgJgJgJgJgJgJgJgJgJgJgJgJgJgJgJgJgJgJgJgJgJgJgJgJ
- 12 1 (12 +12) + 12 (L) “Start/ +30 sec/Confirm”
“gulj" 1
J 1 (G) "Weight / Time Defrost"
.dEFy"
.0
(E)“Microwave”
$$ . \quad . \quad . \quad . \quad . \quad . \quad . \quad . \quad . \quad . \quad . \quad . \quad . \quad . \quad . \quad . \quad . \quad . \quad . \quad . \quad . \quad . \quad . \quad . \quad . \quad . \quad . \quad . \quad . \quad . \quad . \quad . \quad . \quad . \quad . $$
$$ \therefore \frac {1}{2} \text {的} \left(\frac {1}{2}\right) = \frac {1}{2} \times 100 \% \cdot \frac {1}{2} \times 100 \% (M) $$
$$ \left. \right.\left. \right.\left. \right.\left. \right.\left. \right.\left. \right.\left. \right.\left. \right.\left. \right.\left. \right.\left. \right.\left. \right.\left. \right.\left. \right.\left.\left.\left.\left.\left.\left.\left.\left.\left.\left.\left.\left.\left.\left.\left.\left.\left.\left.\left.\left. \text {生} ^ {\prime} + 1 / 2\right) + 1 / 2\right) + 1 / 2\right) + 1 / 2\right) + 1 / 2\right) + 1 / 2\right) + 1 / 2\right) + 1 / 2\right) + 1 / 2\right) + 1 / 2\right) + 1 / 2\right) + 1 / 2\right) + 1 / 2\cdot + 1 / 2\right) + 1 / 2\right) + 1 / 2\right) + 1 / 2\right) + 1 / 2\right) + 1 / 2\right) + 1 / 2\right) + 1 / 2\right) + 1 / 2 $$
$$ \because P \wedge \cdot \quad \text {a l l} $$
$$ \because \cdot V: \cdot \cdot \cdot ” \rightarrow \rightarrow \rightarrow \rightarrow \rightarrow \rightarrow \rightarrow \rightarrow \rightarrow \rightarrow \rightarrow \rightarrow \rightarrow \rightarrow \rightarrow \rightarrow \rightarrow \rightarrow \rightarrow \rightarrow \rightarrow \rightarrow \rightarrow \rightarrow \rightarrow \rightarrow \rightarrow $$
$$ \left. \right.\left. \right.\left. \right.\left. \right.\left. \right.\left. \right.\left. \right.\left. \right.\left. \right.\left. \right.\left. \right.\left.\left.\left.\left.\left.\left.\left.\left.\left.\left.\left.\left.\left.\left.\left.\left.\left.\left.\left.\left.\left.\left.\left. \text {l l} \right]\right]\right]\right] + / / \text {l l} \right]\right]\right]\right]\right]\right]\right]\right]\right]\right]\right]\right]\right]\right]\right]\right]\right]\right]\right] $$
$$ \left. \right.\left. \right.\left. \right.\left. \right.\left. \right.\left. \right.\left. \right.\left.\left.\left.\left.\left.\left.\left.\left.\left.\left.\left.\left.\left.\left.\left.\left.\left.\left.\left.\left.\left.\left.\left.\left.\left.\left.\left.\right.\right.\right.\right.\right.\right.\right.\right.\right.\right.\right.\right.\right.\right.\right.\right.\right.\right.\right.\right.\right.\right.\right.\right.\right.\right.\right\rangle_ {0} ^ {1} = 0, 0, 0, 0, 0, 0, 0, 0, 0, 0, 0, 0, 0, 0, 0, 0, 0, 0, 0, 0, 0, 0, 0, 0, 0, 0, 0, 0, 0, 0, 0, 0, 0, 0, $$
$$ \cdot \cdot \cdot j l i i \cdot \cdot \cdot i d i s s o w a g e b l l i g h t l i g h t j l e l l $$
$$ \left. \right.\left. \right.\left. \right.\left. \right.\left. \right.\left. \right.\left. \right.\left. \right.\left. \right.\left. \right.\left. \right.\left.\left.\left.\left.\left.\left.\left.\left.\left.\left.\left.\left.\left.\left.\left.\left.\left.\left.\left.\left.\left.\left.\left. \text {的} \right]\right]\right]\right]\right]\right]\right]\right]\right]\right]\right]\right]\right]\right]\right]\right]\right]\right]\right]\right]\right]\right]\right] $$
$$ \hat {s} ^ {\prime} \hat {s} ^ {\prime} \hat {s} ^ {\prime} $$
$$ \therefore \dot {L} _ {\mathrm {a l l}} ^ {\prime} = \dot {L} _ {\mathrm {a l l}} ^ {\prime} + \dot {L} _ {\mathrm {a l l}} ^ {\prime} $$
$$ \therefore \lambda \cdot \text {a} _ {\text {s i n}} \text {J} _ {\text {d} ^ {2}} \text {i} _ {\text {g} ^ {2}} \text {g} _ {\text {g} ^ {2}} \text {g} _ {\text {g} ^ {2}} \text {g} _ {\text {g} ^ {2}} \text {g} _ {\text {g} ^ {2}} \text {g} _ {\text {g} ^ {2}} \text {g} _ {\text {g} ^ {2}} \text {g} _ {\text {g} ^ {1}} \text {g} _ {\text {g} ^ {1}} \text {g} _ {\text {g} ^ {1}} \text {g} _ {\text {g} ^ {1}} \text {g} _ {\text {g} ^ {1}} \text {g} _ {\text {g} ^ {1}} \text {g} _ {\text {g} ^ {1}} \text {g} _ {\text {(j)}} - $$
$$ \left. \right.\left. \right.\left. \right.\left. \right.\left. \right.\left. \right.\left. \right.\left. \right.\left. \right.\left. \right.\left. \right.\left. \right.\left. \right.\left. \right.\left. \right.\left. \right.\left. \right.\left. \right.\left. \right.\left. \right.\left. \right.\left. \right.\left. \right.\left. \right.\left. \right.\left. \right.\left. \right.\left. \right.\left. \right.\left. \right.\left. \right.\left.\left.\left. \text {i} _ {\text {i}} ^ {\text {i}} ^ {\text {i}} ^ {\text {i}} ^ {\text {i}} ^ {\text {i}} ^ {\text {i}} ^ {\text {i}} ^ {\text {i}} ^ {\text {i}} ^ {\text {i}} ^ {\text {i}} ^ {\text {i}} ^ {\text {i}} ^ {\text {i}} ^ {\text {i}} ^ {\text {i}} ^ {\text {o}} ^ {\text {o}} ^ {\text {o}} ^ {\text {o}} ^ {\text {o}} ^ {\text {o}} ^ {\text {o}} ^ {\text {o}} ^ {\text {o}} ^ {\text {o}} ^ {\text {o}} ^ {\text {o}} ^ {\text {o}} ^ {\text {o}} ^ {\text {o}} ^ {\text {o}} ^ {\text {o}} ^ {\mathrm {o}} ^ {\mathrm {o}} ^ {\mathrm {o}} ^ {\mathrm {o}} ^ {\mathrm {o}} ^ {\mathrm {o}} ^ {\mathrm {o}} ^ {\mathrm {o}} ^ {\mathrm {o}} ^ {\mathrm {o}} ^ {\mathrm {o}} ^ {\mathrm {o}} ^ {\mathrm {o}} ^ {\mathrm {o}} ^ {\mathrm {o}} ^ {\mathrm {o}} ^ {\mathrm {o}} _ {\mathrm {i} _ {\mathrm {i}}} ^ {\mathrm {i} _ {\mathrm {i}}} ^ {\mathrm {i} _ {\mathrm {i}}} ^ {\mathrm {i} _ {\mathrm {i}}} ^ {\mathrm {i} _ {\mathrm {i}}} ^ {\mathrm {i} _ {\mathrm {i}}} ^ {\mathrm {i} _ {\mathrm {i}}} ^ {\mathrm {i} _ {\mathrm {i}}} ^ {\mathrm {i} _ {\mathrm {i}}} ^ {\mathrm {o} _ {\mathrm {i}}} ^ {\mathrm {o} _ {\mathrm {i}}} ^ {\mathrm {o} _ {\mathrm {i}}} ^ {\mathrm {o} _ {\mathrm {i}}} ^ {\mathrm {o} _ {\mathrm {i}}} ^ {\mathrm {o} _ {\mathrm {i}}} ^ {\mathrm {o} _ {\mathrm {i}}} ^ {\mathrm {o} _ {\mathrm {i}}} ^ {\mathrm {o} _ {\text {i}}} ^ {\mathrm {o} _ {\mathrm {i}}} ^ {\mathrm {o} _ {\mathrm {i}}} ^ {\mathrm {o} _ {\mathrm {i}}} ^ {\mathrm {o} _ {\mathrm {i}}} ^ {\mathrm {o} _ {\mathrm {i}}} ^ {\mathrm {o} _ {\mathrm {i}}} ^ {\mathrm {o} _ {\mathrm {i}}} ^ {\mathrm {o} _ {\mathrm {i}}} _ {\mathrm {i} _ {\mathrm {i}}} ^ {\mathrm {o} _ {\mathrm {i}}} ^ {\mathrm {o} _ {\mathrm {i}}} ^ {\mathrm {o} _ {\mathrm {i}}} ^ {\mathrm {o} _ {\mathrm {i}}} ^ {\mathrm {o} _ {\mathrm {i}}} ^ {\mathrm {o} _ {\mathrm {i}}} ^ {\mathrm {o} _ {\mathrm {i}}} ^ {\mathrm {e} _ {\mathrm {i}}} ^ {\mathrm {e} _ {\mathrm {i}}} ^ {\mathrm {e} _ {\mathrm {i}}} ^ {\mathrm {e} _ {\mathrm {i}}} ^ {\mathrm {e} _ {\mathrm {i}}} ^ {\mathrm {e} _ {\mathrm {i}}} ^ {\mathrm {e} _ {\mathrm {i}}} ^ {\mathrm {e} _ {\mathrm {i}}} ^ {\mathrm {e} _ {\text {(1)}}} ^ {- 1} \right]\right]\right] $$
$$ \therefore \text {M i c r o w a v e} (\text {S u p p l i n g}) (F) ^ {\prime \prime} $$
$$ \cdot P \wedge \cdot \text {”} _ {\partial \mathcal {A}} (E) \text {a t} \text {a t} \text {a t} \text {a t} \text {a t} \text {a t} \text {a t} \text {a t} \text {a t} \text {a t} \text {a t} \text {a t} \text {a t} \text {a t} \text {a t} \text {a t} \text {a t} \text {m a x} \quad \% \wedge \cdot \text {j i d} (\mathrm {M}) $$
$$ . \frac {1}{2} \frac {1}{\sqrt {3}} \left(\frac {1}{2} \sqrt {3} + \sqrt [ 4 ]{3}\right) (L) " S t a r t / + 3 0 s e c / C o n f i r m" $$
$$ \because \cdot V: \cdot \cdot \cdot ” \rightarrow \text {g a l l} \quad \text {a d} \quad \text {b u i n a l} (M) \quad \text {a d} \quad \text {a l l} - $$
$$ / / \text {a l t} ^ {\prime} + / / \text {d i f f}) (L) " S t a r t / + 3 0 s e c / C o n f i r m" \text {j} \text {i} \text {i} \text {i} \text {i} \text {i} \text {i} \text {i} \text {i} \text {i} \text {i} \text {i} \text {i} \text {i} \text {i} \text {i} \text {i} \text {i} \text {i} \text {i} \text {i} \text {1} $$
$$ \therefore \text {L} \left. \right.\left. \right.\left. \right.\left. \right.\left. \right.\left. \right.\left. \right.\left. \right.\left. \right.\left. \right.\left. \right.\left. \right.\left. \right.\left. \right.\left. \right.\left. \right.\left. \right.\left. \right.\left. \right.\left. \right.\left. \right.\left. \right.\left. \right.\left.\left.\left.\left.\left.\left.\left.\left.\left.\left.\left. 1 0 0 0 0 0 0 0 0 0 0 0 0 0 0 0 0 0 0 0 0 0 0 0 0 0 0 0 0 0 0 0 0 0 0 0 0 0 0 0 0 0 0 0 0 0 0 0 0 0 0 1 1 1 1 1 1 1 1 1 1 1 1 1 1 1 1 1 1 1 1 1 1 1 1 1 1 1 1 1 1 1 1 1 1 1 1 1 1 1 1 1 1 1 1 1 1 1 1 1 1 2 \right]\right]\right]\right]\right]\right]\right]\right]\right]\right]\right] $$
$$ \therefore \text {J} \left(\frac {\partial f}{\partial x}\right) = \frac {\partial f}{\partial y} + \frac {\partial f}{\partial z} $$
$$ \therefore a c l = 1 $$
$$ . (\Uparrow \cup \cdot \cup) \cup \cup \cup \cup \cup \cup \cup \cup \cup \cup (M) \cup \cup \cup \cup \cup - $$
$$ \therefore \text {C l} \text {D} \text {L} \text {A} \text {I} \text {J} \text {S} \text {G} \text {H} \text {I} \text {J} \text {S} \text {G} \text {H} \text {I} \text {J} \text {S} \text {G} \text {H} \text {I} \text {J} \text {S} \text {G} \text {H} \text {I} \text {J} \text {S} \text {G} \text {I} \text {J} \text {S} \text {G} \text {I} \text {J} \text {S} \text {G} \text {I} \text {J} \text {S} \text {G} \text {I} \text {J} \text {S} \text {G} \text {I} \text {J} \text {S} \text {I I} (\mathrm {H}) ^ {\prime \prime} = C l o c k / P r e s e t ^ {\prime \prime}, $$
$$ . (0 9 \mathrm {s l} \cdot \mathrm {j a m b d a}) \ddot {\mathrm {d i f f}} \mathrm {d i f f} \mathrm {d i f f} \mathrm {d i f f} (\mathrm {M}) \dot {\mathrm {d i f f}} \mathrm {d i f f} - $$
$$ \cdot \text {b a l l} \quad \frac {\partial}{\partial t} \left(\frac {\partial f}{\partial t} + \frac {\partial f}{\partial t} \cdot + / \frac {\partial f}{\partial t}\right) (L) " S t a r t / + 3 0 s e c / C o n f i r m" $$
$$ \left. \text {i} _ {\mathrm {j}} \right] \text {i} _ {\mathrm {j}} \text {i} _ {\mathrm {j}} \text {i} _ {\mathrm {j}} \text {i} _ {\mathrm {j}} \text {i} _ {\mathrm {j}} \text {i} _ {\mathrm {j}} \text {i} _ {\mathrm {j}} \text {i} _ {\mathrm {j}} \text {i} _ {\mathrm {j}} \text {i} _ {\mathrm {j}} $$
$$ \therefore \text {a} _ {\text {a}} ^ {\prime} = \text {a} _ {\text {a}} ^ {\prime} \text {a} _ {\text {a}} ^ {\prime} \text {a} _ {\text {a}} ^ {\prime} \text {a} _ {\text {a}} ^ {\prime} \text {a} _ {\text {a}} ^ {\prime} \text {a} _ {\text {a}} ^ {\prime} \text {a} _ {\text {a}} ^ {\prime} \text {a} _ {\text {b}} ^ {\prime} \text {a} _ {\text {b}} ^ {\prime} \text {a} _ {\text {b}} ^ {\prime} \text {a} _ {\text {b}} ^ {\prime} \text {a} _ {\text {b}} ^ {\prime} \text {a} _ {\text {b}} ^ {\prime} \text {a} _ {\text {b}} ^ {\prime} \text {a b} $$
$$ \left. \text {"} \text {"} \text {"} \text {"} \text {"} \text {"} \text {"} \text {"} \text {"} \text {"} \text {"} \text {"} \text {"} \text {"} \text {"} \text {"} \text {"} \text {"} \text {"} \text {"} \text {"} ^ {\prime \prime} \right] \text {"} \text {"} \text {"} \text {"} \text {"} \text {"} \text {"} \text {"} \text {"} \text {"} \text {"} $$
$$ \mathrm {g a p h i} \mathrm {s l i t i e} \mathrm {d r i v e} \mathrm {c l o g e} $$
$$ \left. \right.\left. \right.\left. \right.\left. \right.\left. \right.\left. \right.\left. \right.\left.\left.\left.\left.\left.\left.\left.\left.\left.\left.\left.\left.\left.\left.\left.\left.\left.\left.\left.\left.\left.\left.\left.\left.\left.\left.\left.\right.\right.\right.\right.\right.\right.\right.\right.\right.\right.\right.\right.\right.\right.\right.\right.\right.\right.\right.\right.\right.\right.\right.\right.\right.\right.\right\rangle_ {1} ^ {2} = 0, 0, 0, 0, 0, 0, 0, 0, 0, 0, 0, 0, 0, 0, 0, 0, 0, 0, 0, 0, 0, 0, 0, 0, 0, 0, 0, 0, 0, 0, 0, 0, 0, 0, $$
$$ \therefore \ddot {a} \dot {i} \dot {a} \dot {j} $$
()“Clock/Preset”jIbciaiie
1
Jabu Jaua
()"Stop / Clear"
" 1
J (w/1) (I) "Stop / Clear" 1
Lg jgs
oia clog
a 1
12! 100 (y/4y+ /c) (L) "Start / +30 sec / Confirm"
1
/(L)"Start/+30sec/Confirm”
1 1
JrjI 1e Jbe bieb “auiu oJl” Jdau! p
1 1
aalgl aalil
4
aaiu g s i jg s i g oal a y g kll l u w g waaal g jlg jw
aaiiaaa
g
a 1
j 1 j 1 j 1 j 1 j 1 j 1 j 1 j 1 j 1 j 1 j 1 j 1 j 1 j 1 j 1 j 1 j 1 j 1 j 1 j 1 j 1 j 1 j 1 j 1 j 1 j 1 j 1 j 1 j 1
i 1
j 1 j 1 j 1 j 1 j 1 j 1 j 1 j 1 j 1 j 1 j 1 j 1 j 1 j 1 j 1 j 1 j 1 j 1 j 1 j 1 j 1 j 1 j 1 j 1 j 1 j 1 j
.20
- DO NOT THROW AWAY THESE INSTRUCTIONS
- APPLIANCE DESCRIPTION (Fig. 1)
- CONTROL PANEL DESCRIPTION (Fig. 2)
- HOW TO OPERATE
- CLOCK SETTING
- WARNING:
- "MICROWAVE" COOKING
- QUICK COOKING START
- DEFROSTING BY WEIGHT
- DEFROSTING BY TIME
- COOKING WITH PRE-SET MENUS (AUTO MENU)
- MULTI-FUNCTION COOKING
- DELAYED START
- INFORMATION SHOWN WHILE COOKING
- SAFETY FUNCTION FOR CHILDREN
- USEFUL INFORMATION
- CLEANING AND MAINTENANCE
- ATTENTION:
- EVEN WHEN NOT IN USE, UNPLUG THE APPLIANCE BEFORE MOUNTING OR REMOVING THE SINGLE PARTS OR BEFORE CLEANING.
- EN
- AVENTISSEMENTS IMPORTANTES
- LIRE CES INSTRUCTIONS AVANT L'EMPLOI
- BESCHRIJVING VAN HET APPARAAT (Fig. 1)
- TILBEREDNING MED "MIKROBØLGEOVN"
- COXPAHNTb NHCTPYKciuO
- ОПИСАНЕ ПИБОРА (Pnc.1)
- ONICAHNE PAHEJIYPABJEHNA (pnc.2)
- MHCTPYKUNI NO IPNMEHEHIO
- YCTAHOBKA YACOB
- PO3MOPOKXYBAHHI3 HACTPOIKOIO BAI
- PO3MOPOXyBAHHI3 HACTPOIKOIO YACY
- ПИГOTУBAHЯ Y PEXKIMI MEHIO 3 ПОЕРДьо 3АДAHМN HACTPOYKAMN (ABTO MEHIO)
- BAIATOΦYHKLIOHAJIbHE IPNIROTYBAHH
- BIDKIADEHNI 3AUPCK
- IHΦOPMALI, IO BIDOBPAKACTbCg IID YAC PNIROTYBAHH
- 3AIO6IXHA FYHKUJ 3AXNCTY BID KOPNUCTYBAHHJ 3 BOKY DITEH
- KOPUCHA IHΦOPMALIJI
- OuHsEHnTa DOrJaD
- YBARA:
- aeg
Brand : ARIETE
Model : 0953
Category : Microwave Oven