
SoloCam E20 - Camera batteries eufy - Free user manual and instructions
Find the device manual for free SoloCam E20 eufy in PDF.
| Product Type | Wireless security camera with built-in battery |
| Brand | eufy |
| Model | SoloCam E20 (equivalent to eufyCam Solo/Solo Pro T8130X/T8131X) |
| Approximate Dimensions | 80 x 80 x 120 mm |
| Approximate Weight | 200 g |
| Power Supply | Built-in rechargeable battery via micro USB port |
| Battery Type | Built-in rechargeable lithium-ion |
| Battery Life | Up to 3 months depending on usage |
| Video Resolution | 1080p Full HD |
| Night Vision | Yes, with photosensitive sensor |
| Viewing Angle | 140° (diagonal) |
| Motion Detection | Yes, with PIR sensor |
| Connectivity | Wi-Fi 2.4 GHz (IEEE 802.11 b/g/n) |
| Audio | Built-in microphone and speaker (two-way communication) |
| Storage | Cloud via eufy Security app (subscription) or local storage (optional hub) |
| Mobile App | eufy Security (iOS and Android) |
| Voice Assistant | Compatible with Amazon Alexa, Google Assistant (via hub) |
| Protection Rating | IP65 (weather resistant) |
| Operating Temperature | 0°C to 40°C |
| Mounting | Wall or ceiling mount with included bracket |
| Box Contents | Camera, mounting bracket, micro USB cable, screw kit, quick start guide |
| Maintenance and Cleaning | Clean with a soft, dry cloth. Avoid chemicals and excessive moisture. |
| Safety | Do not expose to extreme temperatures. Keep a distance of 20 cm from the body for RF compliance. Keep out of reach of children. |
| Spare Parts and Repairability | Built-in battery non-removable. Contact eufy support for repairs. |
| Certifications | CE, IC, RoHS |
Frequently Asked Questions - SoloCam E20 eufy
User questions about SoloCam E20 eufy
0 question about this device. Answer the ones you know or ask your own.
Ask a new question about this device
Download the instructions for your Camera batteries in PDF format for free! Find your manual SoloCam E20 - eufy and take your electronic device back in hand. On this page are published all the documents necessary for the use of your device. SoloCam E20 by eufy.
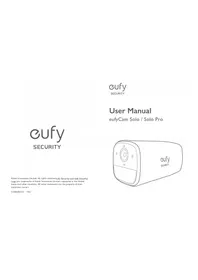
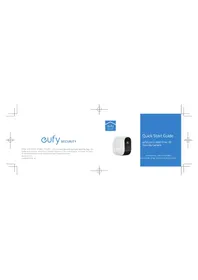
USER MANUAL SoloCam E20 eufy
Anker Innovations Limited. All rights reserved.eufy Security and eufy Security Logo are trademarks of Anker Innovations Limited, registered in the United States and other countries. All other trademarks are the property of their respective owners.
51005002337 V04
English
Deutsch
Espanol
Français
Italiano
Nederlandsl
TABLE OF CONTENTS
What's Included
0104
Setting up eufyCam Solo / Solo Pro
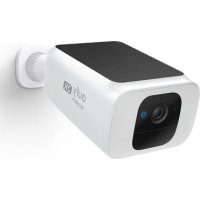
Product Overview
02 05
Mounting eufyCam Solo / Solo Pro
Charging your eufyCam
Solo/Solo Pro
03 08
Notice
WHAT'S INCLUDED
For eufyCam Solo / Solo Pro Installation
eufyCam Solo / Solo Pro Model:T8130X/T8131X
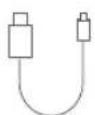
USB Cable
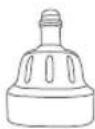
Mounting Bracket
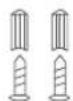
Mounting Screw Pack

User Manual
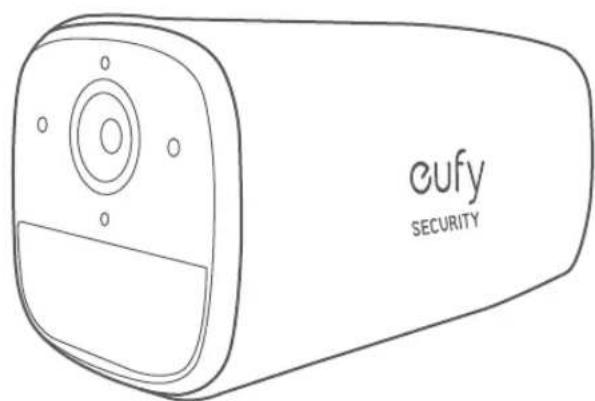
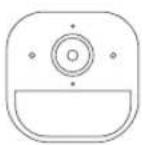
PRODUCT OVERVIEW
eufyCam Solo / Solo Pro
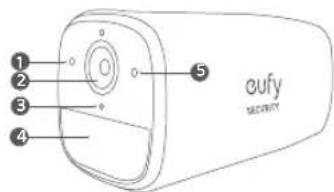
I. LED Indicator
2. Camera Lens
3. Microphone
4. Motion Sensor
5. Photosensitive Sensor
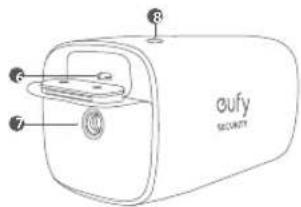
-
Micro USB Charging Port
-
Mounting Hole
8.SYNCBullon Press for 2s to enter setup mode - Press for 8s to reset
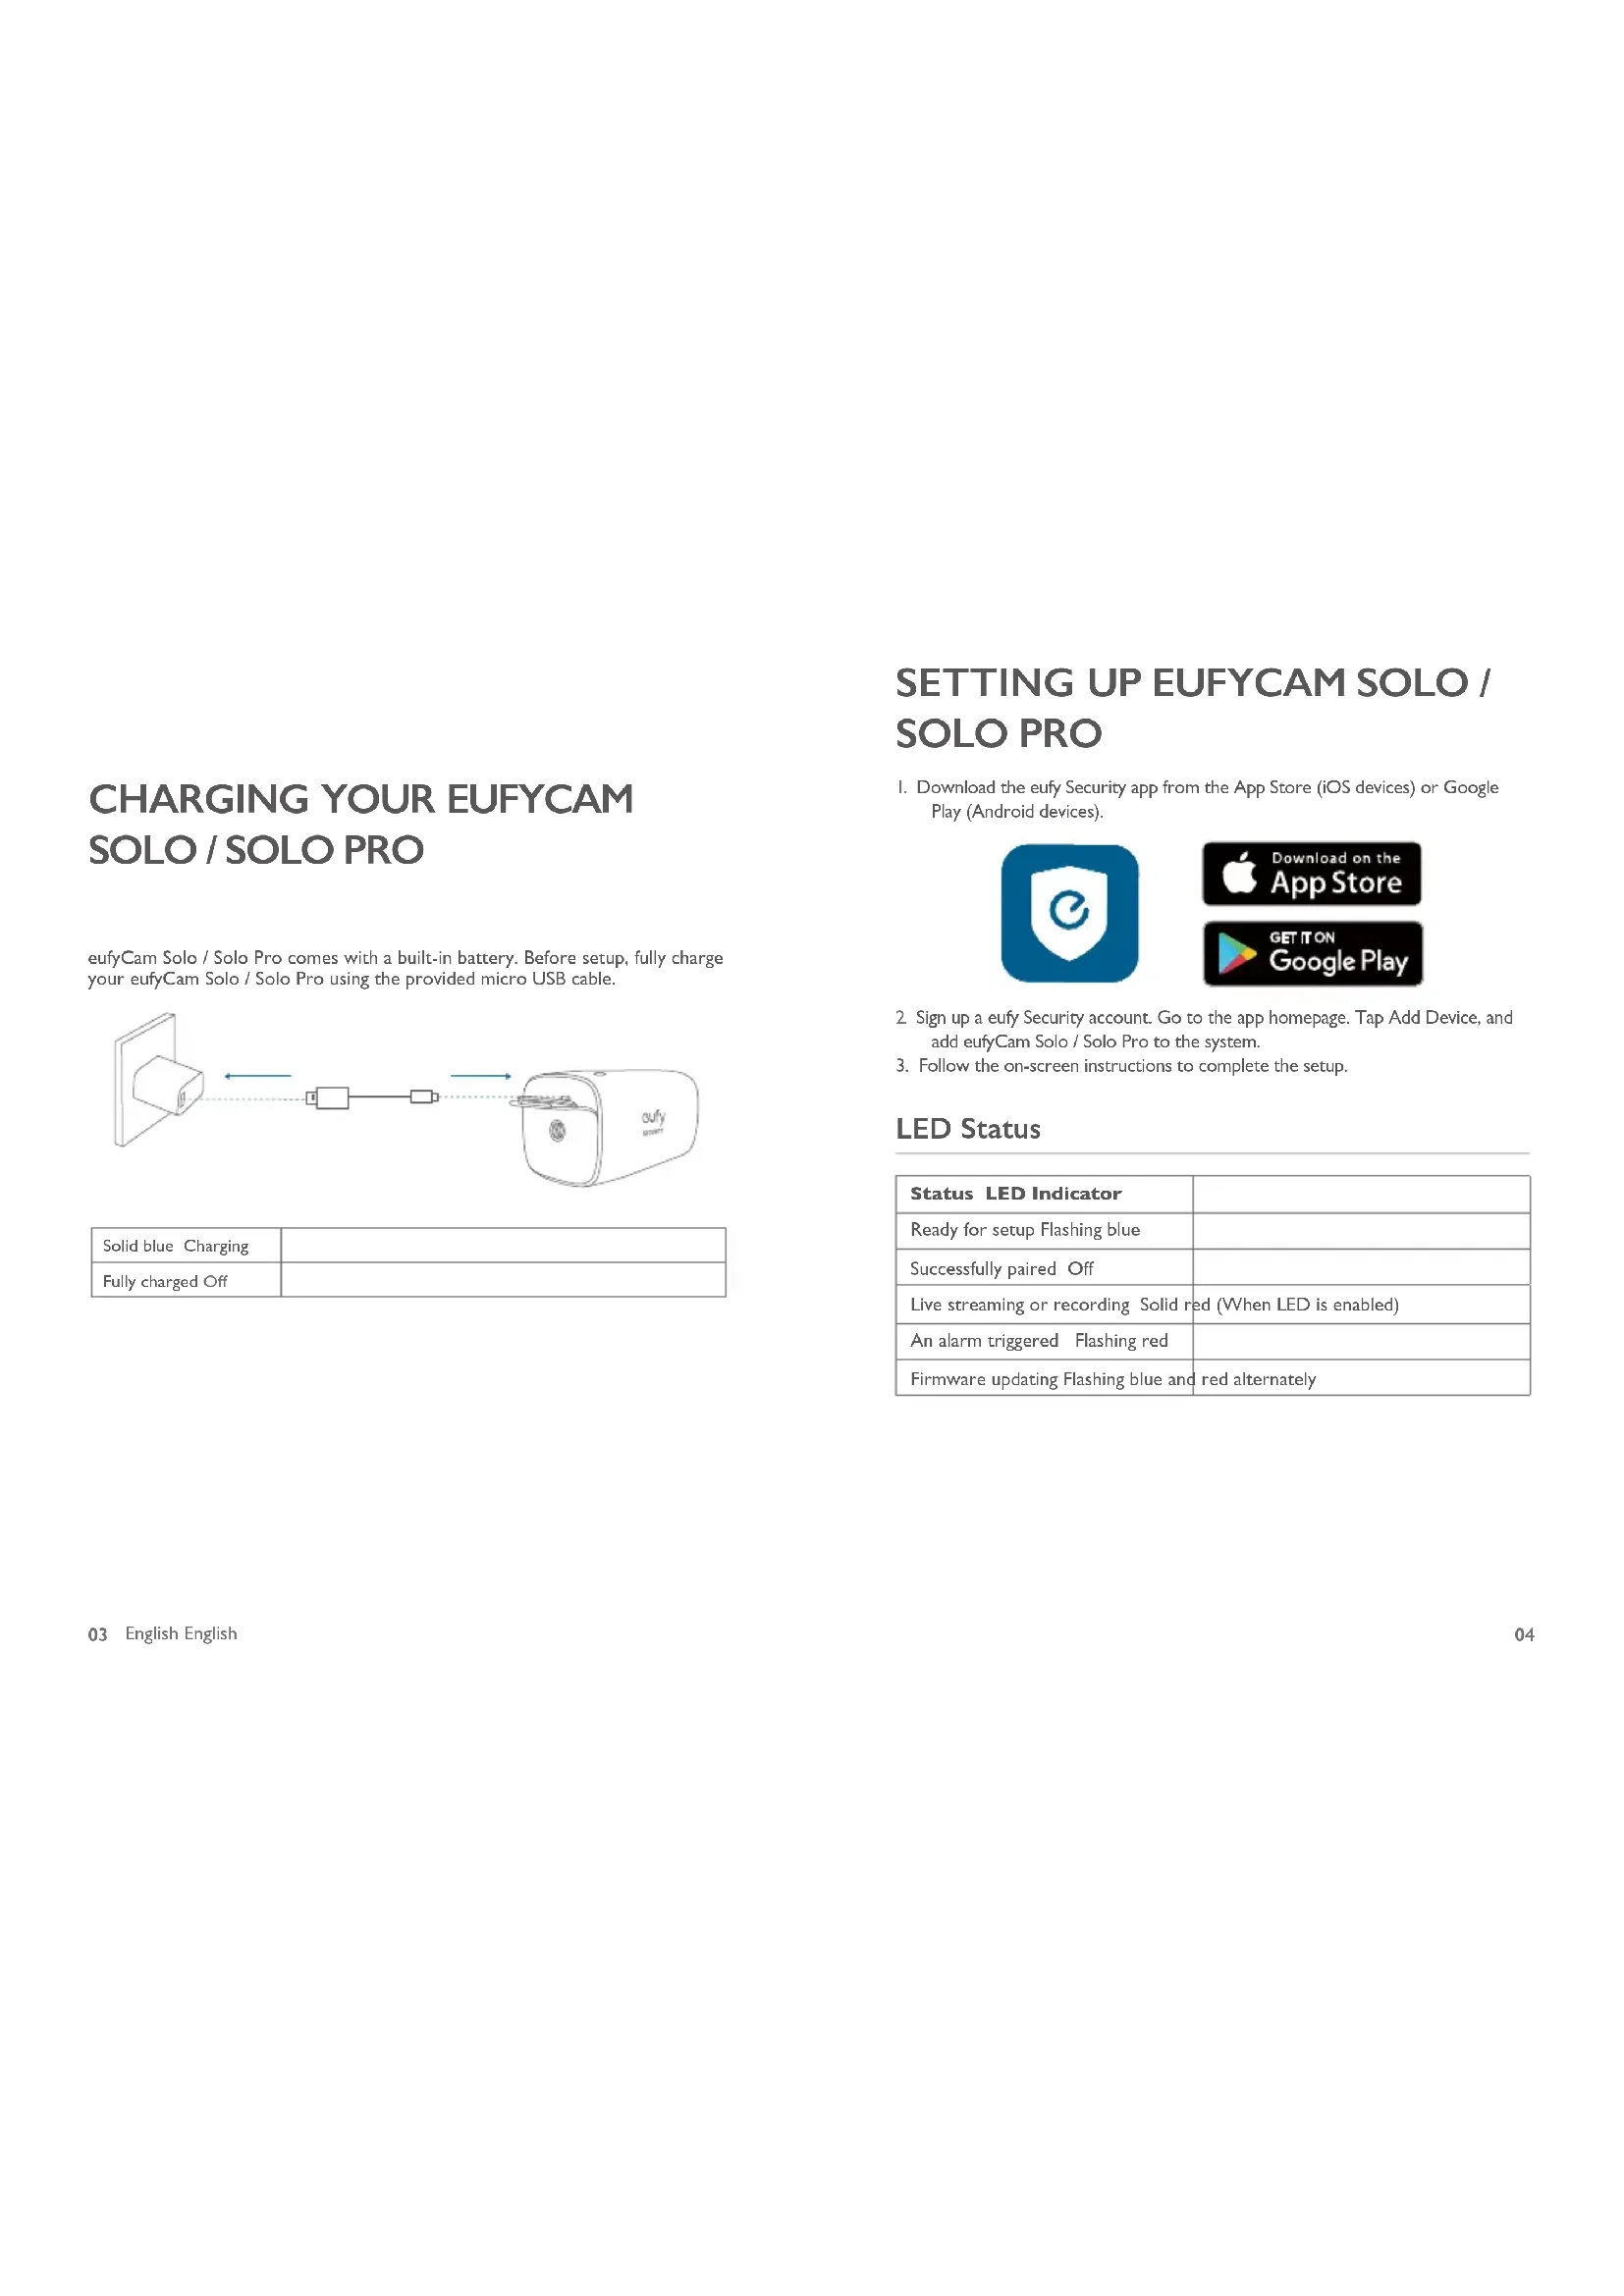
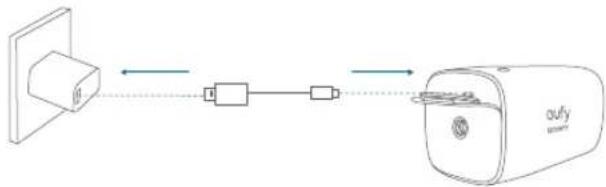
CHARGING YOUR EUFYCAM SOLO/SOLO PRO
eufyCam Solo / Solo Pro comes with a built-in battery. Before setup, fully charge your eufyCam Solo / Solo Pro using the provided micro USB cable.
| Solid blue Charging | |
| Fully charged Off |
SETTING UP EUFYCAM SOLO / SOLO PRO
- Download the eufy Security app from the App Store (iOS devices) or Google Play (Android devices).


- Sign up a eufy Security account. Go to the app homepage. Tap Add Device, and add eufyCam Solo / Solo Pro to the system.
- Follow the on-screen instructions to complete the setup.
LED Status
| Status LED Indicator | |
| Ready for setup Flashing blue | |
| Successfully paired Off | |
| Live streaming or recording Solid red (When LED is enabled) | |
| An alarm triggered Flashing red | |
| Firmware updating Flashing blue and red alternately | |
MOUNTING EUFYCAM SOLO / SOLO PRO
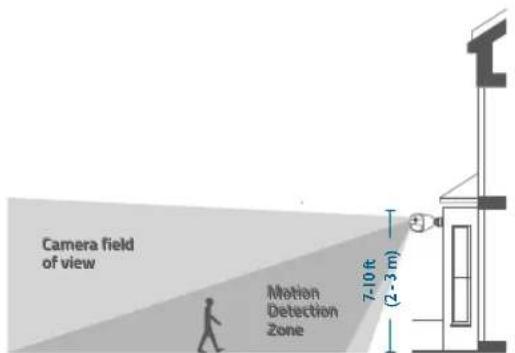
Select a Location
eufyCam Solo / Solo Pro can be mounted on a wall or ceiling. Select a location where you can get the desired view. We recommend hanging it 7-10 ft (2-3 m) above the ground.
Mount eufyCam Solo / Solo Pro
eufyCam Solo / Solo Pro can be mounted both outdoors and indoors.
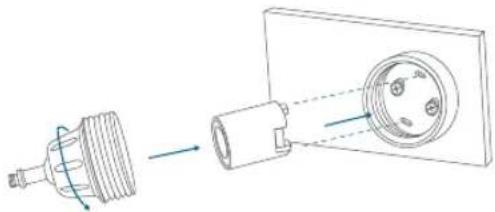
- Turn the knob of the mounting bracket clockwise to loosen and disassemble it.

- Place the mounting bracket against the wall. Drill holes with a 15/64 inch (5.99 mm) drill bit, then insert the anchors into the holes; anchors are necessary for walls that are made out of hard materials such as concrete, brick, or stucco.

- Firmly screw the base of the mounting bracket onto the wall. Fasten the ball knob of the bracket to the base of the bracket.
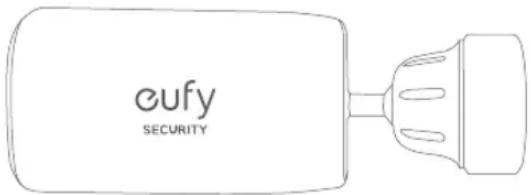
- Tighten eufyCam Solo / Solo Pro to the mounting bracket. Rotate the eufy Indoor Cam to adjust the view and check it using the live stream which you can access in the eufy Security app.
eufyCam Solo / Solo Pro can be also installed on the ceiling. Follow the steps 1-4 mentioned above to install it.
You are now all set to use your eufyCam Solo / Solo Pro.
For troubleshooting, check Help on the eufy Security app. Refer to the app page for LED indicator status.
NOTICE
FCC Statement
This device complies with Part 15 of the FCC Rules. Operation is subject to the following two conditions: (1) this device may not cause harmful interference, and (2) this device must accept any interference received, including interference that may cause undesired operation.
Warning: Changes or modifications not expressly approved by the party responsible for compliance could void the user's authority to operate the equipment.
Note: This equipment has been tested and found to comply with the limits for a Class B digital device, pursuant to Part 15 of the FCC Rules. These limits are designed to provide reasonable protection against harmful interference in a residential installation.
This equipment generates, uses and can radiate radio frequency energy and, if not installed and used in accordance with the instructions, may cause harmful interference to radio communications. However, there is no guarantee that interference will not occur in a particular installation. If this equipment does cause harmful interference to radio or television reception, which can be determined by turning the equipment off and on, the user is encouraged to try to correct the interference by one or more of the following measures: (1) Reorient or relocate the receiving antenna. (2) Increase the separation between the equipment and receiver. (3) Connect the equipment into an outlet on a circuit different from that to which the receiver is connected. (4) Consult the dealer or an experienced radio/TV technician for help.
FCC Radio Frequency Exposure Statement
The device has been evaluated to meet general RF exposure requirements. The device can be used in fixed/mobile exposure condition. The min separation distance is 20~cm
Notice: Shielded cables
All connections to other computing devices must be made using shielded cables to maintain compliance with FCC regulations.
The following importer is the responsible party.
Company Name: POWER MOBILE LIFE, LLC
Address: 400 108th Ave NE Ste 400, Bellevue, WA 98004-5541
Telephone: 1-800-988-7973
This product complies with the radio interference requirements of the European Community.
Declaration of Conformity
Hereby, Anker Innovations Limited declares that this device is in compliance with the essential requirements and other relevant provisions of Directive 2014/53/
EU. For the declaration of conformity, visit https://uk.eufylife.com/ This product can be used across EU member states.
Due to the used enclosure material, the product shall only be connected to a USB Interface of version 2.0 or higher.
The adapter shall be installed near the equipment and shall be easily accessible. Do not use the Device in the environment at too high or too low temperature, never expose the Device under strong sunshine or too wet environment.
The suitable temperature for T8130X/T8131X and accessories is 0^ - 40^ . When charging, please place the device in an environment that has a normal room temperature and good ventilation.
It is recommended to charge the device in an environment with a temperature that ranges from 5^ 25^ .
RF exposure information: The Maximum Permissible Exposure (MPE) level has been calculated based on a distance of d = 20cm between the device and the human body. To maintain compliance with RF exposure requirement, use product that maintain a 20cm distance between the device and human body.
CAUTION RISK OF EXPLOSION IF BATTERY IS REPLACED BY AN INCORRECT TYPE. DISPOSE OF USED BATTERIES ACCORDING TO THE INSTRUCTIONS
Wi-Fi Operating Frequency Range: 2412~2472MHz; Wi-Fi Max Output Power:18.70dBm
The following importer is the responsible party (contact for EU matters only) Anker Innovations Deutschland GmbH | Georg-Muche-Srasse 3, 80807 Munich, Germany
This product is designed and manufactured with high quality materials and components, which can be recycled and reused.
This symbol means the product must not be discarded as household waste, and should be delivered to an appropriate collection facility for recycling. Proper disposal and recycling helps protect natural resources, human health and the environment. For more information on disposal and recycling of this product, contact your local municipality, disposal service, or the shop where you bought this product.
IC Statement
This device complies with Industry Canada licence-exempt RSS standard(s). Operation is subject to the following two conditions:
When using the product, maintain a distance of 20cm from the body to ensure compliance with RF exposure requirements.
This product complies with the radio interference requirements of the United Kingdom.
Declaration of Conformity
Hereby, Anker Innovations Limited declares that the product type T8130X/T8131X is in compliance with Radio Equipment Regulations 2017. The full text of the UK declaration of conformity is available at the following internet address: https://uk.eufylife.com
Anker Technology (UK) Ltd I Suite B, Fairgate House, 205 Kings Road, Tyseley, Birmingham, B11 2AA, United Kingdom
INHALTS-VERZEICHNIS
Im Lieferumfang
12 15
Einrichten Des eufyCam Solo / Solo Pro
Produktübersicht
13 16
Montieren eufyCam Solo / Solo Pro
ios (iOS pblai Jai jil s jxi) App Store eufy Security 1 (Android pblai Jai jil s jxi) Google Play


euy Security 2
13.3
LED
eufyCam Solo / Solo Pro 1 yds 4 1
eufyCam Solo / Solo Pro 1 yds pss
. eufy Security 35
C
EELU
UuueuuuueuuuuuuuuuuuuuuuuuuuuuuuuuuuuuuuuuuuuuuuuuuuuuuuuuuuuuuuuuuuuuuuuuuuuuuuuuuuuuuuuuuuuuuuuuuuuuuuuuuuuuuuuuuuuuuuuuuuuuuuuuuuuuuuuuuuuuuuuuuuuuuuuuuuuuuuuuuuuuuuuuuuuuuUU
()
Wu
18.70 2
gssuususususususususususususususususususususususususususususususususususususususususususususususususususususususususususususususususus
CUSTOMER SERVICE
Kundenservice | Servicio de atencion al cliente | Service client
Servizio cliente | Klantenservice | Servico de Apolo ao Cliente |
Warranty

12-month limited warranty
Customer Support: support@eufylife.com
Anker Innovations Limited
Room 1318-19, Hollywood Plaza, 610 Nathan Road, Mongkok, Kowloon, Hong Kong

@EufyOfficial

@EufyOfficial

eufyofficial
- TABLE OF CONTENTS
- WHAT'S INCLUDED
- PRODUCT OVERVIEW
- CHARGING YOUR EUFYCAM SOLO/SOLO PRO
- SETTING UP EUFYCAM SOLO / SOLO PRO
- MOUNTING EUFYCAM SOLO / SOLO PRO
- Select a Location
- Mount eufyCam Solo / Solo Pro
- NOTICE
- FCC Statement
- FCC Radio Frequency Exposure Statement
- Notice: Shielded cables
- Declaration of Conformity
- IC Statement
- INHALTS-VERZEICHNIS
- EELU
- CUSTOMER SERVICE
- Warranty
Brand : eufy
Model : SoloCam E20
Category : Camera batteries