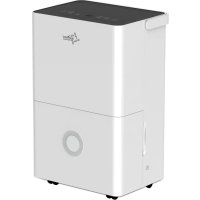
DryFix 30 - Dehumidifier SUNTEC - Free user manual and instructions
Find the device manual for free DryFix 30 SUNTEC in PDF.



| Product type | Dehumidifier |
| Brand | Suntec |
| Model | DryFix 30 |
| Power supply | 230 V ~ 50 Hz |
| Water tank capacity | Approx. 2.5 L (estimate) |
| Operating modes | Automatic, continuous dehumidification, internal drying |
| Target humidity setting | 30% to 80% in 5% steps |
| Fan speed | High and low |
| Timer | 0 to 24 hours |
| Child lock | Yes, key lock |
| Sleep mode | Yes, dimmed lighting, automatic operation |
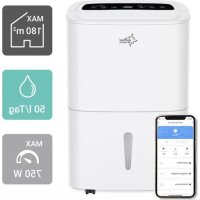
| Remote control | Via SUNTEC Wellness app (Wi-Fi) |
| Automatic defrost | Yes |
| Refrigerant | R290 (quantity < 1 kg) |
| Filter cleaning | Washable with water and mild detergent |
| Continuous drainage | Possible via drainage hose |
| Operating temperature | 5 °C to 32 °C |
| Warranty | 24 months |
| Spare parts | Available from the retailer |
Frequently Asked Questions - DryFix 30 SUNTEC
User questions about DryFix 30 SUNTEC
0 question about this device. Answer the ones you know or ask your own.
Ask a new question about this device
Download the instructions for your Dehumidifier in PDF format for free! Find your manual DryFix 30 - SUNTEC and take your electronic device back in hand. On this page are published all the documents necessary for the use of your device. DryFix 30 by SUNTEC.
USER MANUAL DryFix 30 SUNTEC
R290, GWP: 3, 70g = 0.00021t CO2e
Thank you for buying this product from Suntec Wellness. Please read the manual carefully before using the appliance. Retain this manual for future reference.
Safety Instructions
CAUTION!
This appliance can be used by children aged from 8 years and above and persons with reduced physical, sensory and mental capabilities or lack of experience and knowledge if they have been given supervision or instruction concerning use of the appliance in a safe way and understand the hazards involved. Cleaning and user maintenance shall not be made by children without supervision. Children of less than 3 years should be kept away unless continuously supervised. Children aged from 3 years and less than 8 years shall only switch on/off the appliance provided that it has been placed or installed in its intended normal operating position and they have been given supervision or instruction concerning use of the appliance in a safe way and understand the hazards involved.
Children aged from 3 years and less than 8 years shall not plug in, regulate and clean the appliance or perform user maintenance.
- Please read the instruction manual carefully before using your dehumidifier and keep it in a safe place.
- Please never put the appliance in water or any other liquid.
- Please place the appliance on a stable flat surface to avoid loud noises and vibrations.
- Never switch on the appliance in case of malfunction or if a cable or plug has been damaged, or if the appliance has been dropped or damaged in any other way.
- Repairs to electrical equipment must only be carried out
by qualified persons; incorrect repairs can be a major source of danger to users and will invalidate the warranty.
- Please unplug the appliance when not using it, before moving it and/or before cleaning it.
- Please only operate the appliance at the mains voltage indicated on the rating label.
- Please do not use an extension cord to connect the unit.
- Please use the appliance only in the household and only for the purpose for which it was designed.
- Please do not operate the appliance near heating appliances and flammable or hazardous objects.
- If the dehumidifier is used in a room with appliances that emit gas, the room must be regularly and frequently ventilated.
- Please empty and dry the water tank and the appliance if it is not used for a long time. This will prevent mould growth and unpleasant odours inside the appliance.
- Please do not place heavy objects on the appliance.
- Please do not hang curtains or wet clothes directly in front of the air outlet, this will cause the unit to overload.
- Do not lead the drainage tube outside when the temperature is low.
- Please empty the water tank before moving the unit to avoid water spillage.
- Please do not tip the appliance as leaking water may cause damage to the appliance.
- If the connection cable has been damaged, please contact your supplier to avoid danger.
-
If there is a smoke smell or smoke during operation, please unplug the appliance immediately and contact your supplier.
-
Please pull only on the plug and not on the cable.
- Please do not modify the unit in any way. Please do not attempt to disassemble or repair the unit yourself.
- Please operate the unit with dry hands only.
- Please do not insert any foreign objects into the unit.
- Please do not operate the appliance outside. Sun, rain, or low temperature may cause damage to the unit or electric shock.
- Please never cover the outlet or inlet of the unit.
- The unit should be placed at least 50~cm away from the wall or other obstacles/objects.
- Please keep the dust filter and air outlet/inlet grilles clean. They should be cleaned regularly to ensure best performance.
- Please do not switch off the device by pulling the power cord, please use the on/off button for this purpose.
Important: The appliance must always be stored and transported in an upright position. If in doubt, we recommend that you wait at least 24 hours before switching the hours before switching the unit on again.
- Please download the "SUNTEC Wellness" app from the App Store or Google Play and install it.
- Please follow the step-by-step instructions in the app to connect your device to the WLAN and set up the control.
If you have any further questions about the app, please visit our web page at www.suntec-wellness.de/suntec-app/


Installation
To save energy and ensure optimal performance of the appliance, please close all doors and windows in the room.
- Please place the appliance on a flat level surface.
- To avoid loud noises and vibrations, you can place a small carpet or rubber mat under the unit.
Parts
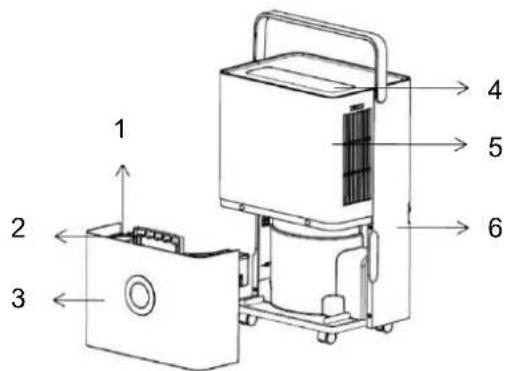
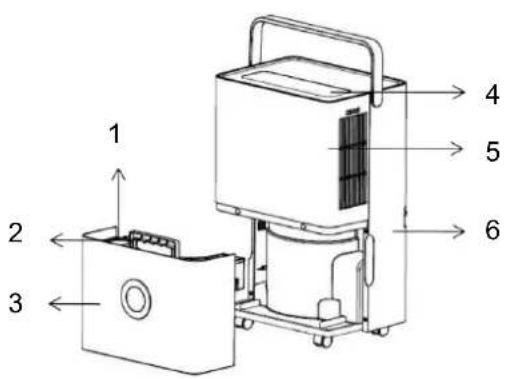
Front:

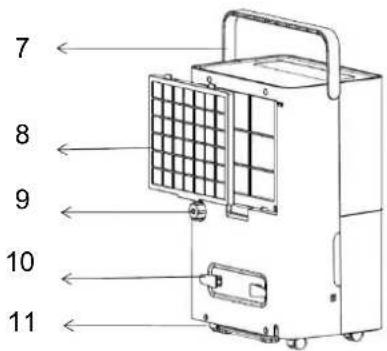
Back:
1 Water Tank
7 Handle
2 Water tank handle
8 Filter frame
3 Water tank cover
9 Drainage hole
4 Control panel
10 Power cord mount
5 Front
11 Wheels
6 Back Cover
Control Panel
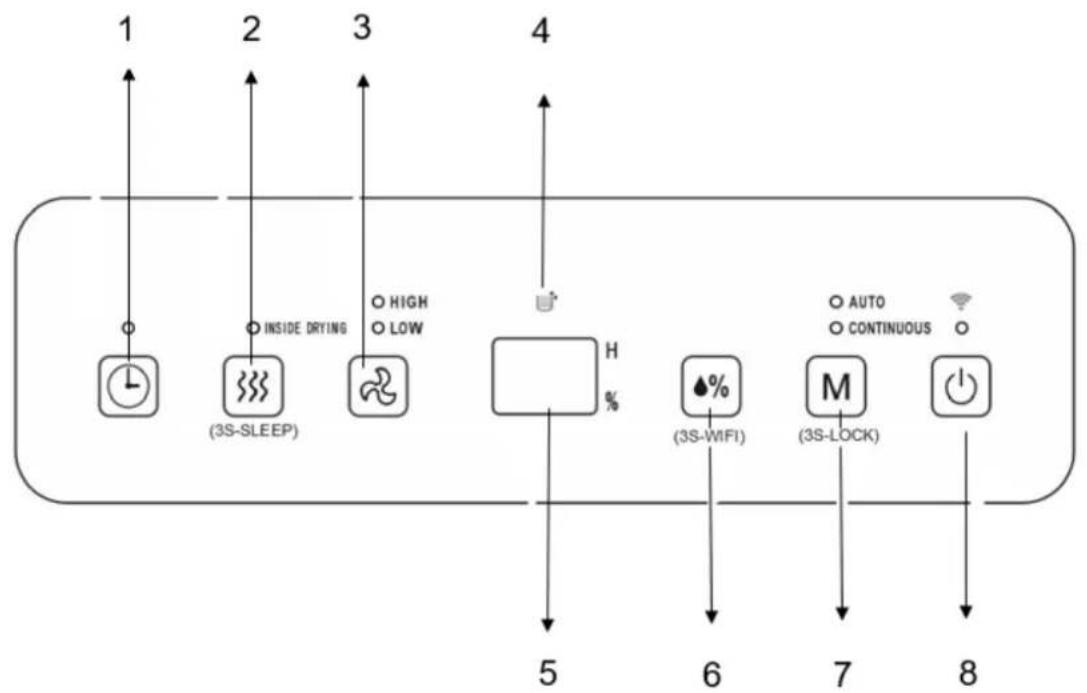
1 Timer button
5 LED display
2 Inner drying button
6 Humidity level button
3 Fan speed button
7 Mode button
4 Tank full indicator
8 On/Off button
Functions
On/off:
- Please plug in the unit.
- Please make sure that the water tank is empty before switching on.
- Please press the On/Off button (8) to switch the unit on or off.
The unit starts automatically with the previous setting.
Mode:
After switching on the unit, please press the mode button (7) to select between automatic and continuous dehumidification. The corresponding indication light lights up.
Automatic dehumidification:
- Please press the mode button (7) to switch on the automatic dehumidification function; the corresponding indicator lights up.
- The desired humidity level can be set between 30% and 80% in 5% steps by pressing the humidity level button (6).
- Press the fan speed button (3) to select between high and low wind speed.
- If the ambient humidity is 5% lower than the set humidity level, only the fan function will be activated. As soon as the room humidity gets 5% higher than the set value, the compressor will start automatically.
Continuous dehumidification:
- Please press the mode button (7) to switch on the continuous dehumidification function. This mode can be used without regard to the ambient humidity level. To select between high and low fan speed, please press the fan speed button (3). The humidity level cannot be set in this mode.
Internal drying:
- Please press the internal drying button (2) to activate this function. The drying process takes about one hour and prevents the growth of mold.
- To stop the drying process, please press the button (2) again. The unit will automatically get back to the operation with previous settings.
To stop the internal drying and switch the unit into stand-by mode, please press the On/Off button.
Timer:
- Please press the timer button (1) to set the timer from 0 to 24 hours. It takes about 5 seconds until the mode is set, during this time the timer key will not be available.
- When the unit is switched on, press the timer button to set the shut-off time as described above. The timer indicator will light up.
- When the unit is switched off, press the timer key to set the switch-on time as described before. The timer indicator will light up and the selected time will be shown on the display.
Child Lock
- Please press and hold the mode button (7) for 3 seconds to switch the child lock on or off. All indication lights and the display are switched off.
Wi-Fi:
- The WIFI function can only be activated in standby mode. Please press and hold the humidity level button (6) for 3 seconds to start WIFI mode. The display will start blinking rapidly to search for devices to pair.
- Please follow the step-by-step instructions in the app to connect your device to the WIFI and set up the control.
Sleep Mode:
- Please press and hold the "Internal Drying" button (2) for 3 seconds to disable/enable sleep mode.
- In sleep mode, all indication lights will be dimmed, the unit will automatically operate at low wind speed and target humidity 50% . The settings cannot be changed manually in sleep mode.
- If the ambient humidity is high, the unit will dehumidify with the low wind speed; if the ambient humidity is low, the compressor will stop working, only the ventilation function will be activated.
Drainage
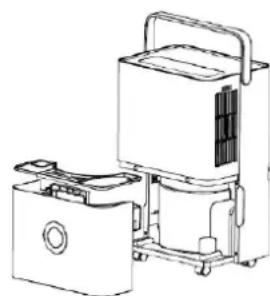
Water tank:
- As soon as the water tank is full, the unit stops working, a warning signal sounds, the 'water tank full' indicator (4) lights up on the control panel and error message "FL" will be shown on the display.
- Please switch off and unplug the unit.
- Carefully pull out the water tank and tip out the water by using the handle.
- Please clean and dry the empty tank, and carefully place it back into the machine.
Continuous drainage:
- Please pull the plug out of the outlet.
- Please remove the water tank from the appliance as described above and remove the drainage hose.
- Carefully push the water tank back into the appliance without the drainage hose.
- You will find the drainage opening on the back of the machine.
- Please insert the drainage hose into the opening and place the other end of the hose into a container sothat the water can drain off continuously.
- Please make sure that the hose is connected tightly to prevent the water from leaking.
Cleaning and maintenance
To avoid injuries, please switch off and unplug the appliance before starting service or cleaning.
Cleaning:
- Please unplug the unit.
Please clean the unit with a dry and soft cloth. For heavy dirt, please use a slightly damp cloth. - Please do not use any chemical products (such as petrol, alcohol, etc.). The unit's housing and the unit's surface may be damaged.
Cleaning the dust filter:
- Please open the filter cover on the backside of the unit and carefullyremove the filter.
- To remove dust from this filter, please use a vacuum cleaner or to tap itout carefully.
- If the filter is very dirty, wash it in water with neutral detergent, rinse wellwith water and let it dry. Carefully put the filter back into the unit and close the filter cover
Storage
- Please unplug the unit and bundle the power cord.
- Please empty the water tank, wipe out the tank with a cloth and reinstall it.
- Please clean the air filter as described above and then reinstall it in the unit.
- For storage, place the unit in an upright position and avoid direct sunlight.
Troubleshooting
| Problem | Cause | Solution |
| The unit is not working. | Is the unit connected to the power source? | Plug in the unit. |
| Is the 'water tank full' indicator lighting up (water tank is full or incorrectly placed)? | Empty the water tank and install it correctly. | |
| The ambient temperature is below 5° or above 32°. | The device should be operated at an ambient temperature of 5°C - 32°C. As soon as the ambient temperature rises/falls, the device can be operated again. | |
| The dehumidification performance is insufficient. | Is the air inlet or outlet blocked? | Check the air inlet and outlet and remove any obstructing objects. |
| Is the air filter dirty? | Clean the air filter as described in theoperating instructions. | |
| Is the room temperature/humidity too low high? | As soon as the ambient temperature and/or the humidity rises/falls, the device can be put back into operation. | |
| Air will not be exhausted. | Is the filter blocked? | Please clean the filter as described above. |
| Loud noises during start-up. | Does the unit stand upright on the stable surface? | Place check the position of the unit. |
| Is the filter blocked? | Please clean the filter as described above. | |
| The circulation of the refrigerant inside may cause noise. | The noise will disappear as soon as the refrigerant circuit has been stabilised. | |
| Unpleasant smells during start-up. | This is not a defect. | Unpleasant smells during start up are normal and will disappear after a short time. If the surrounding objects are heavily soiled, e.g. by cigarette smoke, this can also lead to unpleasant smells from the air outlet. |
| The water is dripping from the drainage hole. | The drainage hose is not firmly attached. | Please install the drainage hose correctly. |
| Water outlet is blocked. | If necessary, remove the foreign objects and place the drainage hose in the correct position. | |
| Frost formation occurs. | The ambient temperature is too low. | The unit has an automatic defrost function and can be operated again after defrosting. |
| Heated air will be exhausted. | This is normal, the air will heat up slightly inside the unit due to the motor. | Please switch off the unit after continuous operation and let the motor cool down. Then the unit can be operated again. |
| Error message FL. | Water tank is full | Please empty the water tank. |
| Error message E1. | The humidity sensor detects deviations. | Please contact your vendor. |
| Error message E2. | The room temperature sensor detects deviations. | Please contact your vendor. |
| Error message P1. | The unit is in defrost mode. | Please wait until the defrost mode deactivates automatically. The device can be operated again after defrosting. |
| Error message CL. | Internal drying is in progress. | The mode is automatically deactivated as soon as internal drying has been completed. The unit can then be operated again. |
| Error message LC. | The child lock is activated. | Please deactivate the child lock as described above. |
Refrigerant
(CE) N 842/2006: This dehumidifier contains the refrigerant R290. The amount of refrigerant is less than 1kg and is in a closed cooling circuit. The coolant does have zero ozone depletion potential, but is a so-called greenhouse gases under the Kyoto Protocol and may thus contribute to global warming, if it is released to the atmosphere. Therefore, only trained technicians with refrigerant certificate make a filling or emptying. Suntec your dehumidifier does not have to use if used properly and undamaged coolant circuit can be refilled with refrigerant.
R290, GWP: 3, 70g = 0.00021t CO2e
EC-Declaration of Conformity
The unit complies with the essential health and safety requirements of the European Union. The EC declaration of conformity is the basis for the CE marking of this unit. With the publication of this manual, all previous are not valid. SUNTEC, SUNTEC Wellness, KLIAMTRONIC and the Sun logo are registered trademarks. © 2021 SUNTEC WELLNESS GMBH
Note concerning protection of environment
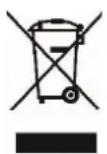
This product must not be disposed of via normal household waste after its service life but must be taken to a collection station for the recycling of electrical and electronic devices. The symbol on the product, the operating instructions or the packaging indicate such disposal procedures. The materials are recyclable in accordance with their respective symbols. By means of re-use, material recycling or any other form of recycling old appliances you are making an important contribution to the protection of our environment. Please ask your local council where your nearest disposal station is located.
No liability is assumed for printing errors and mistakes.
R290, GWP: 3, 70g = 0.00021t CO2e
R290, GWP: 3, 70g = 0.00021t CO2e
Controllo tramite smartphone / app SUNTEC Wellness
R290, GWP: 3, 70g = 0.00021t CO2e
R290, GWP: 3, 70g = 0.00021t CO2e
R290, GWP: 3, 70g = 0.00021t CO2e
Download on the App Store
Instalacija
U svru ustede energije i omogucavanja optimalnog učinka uredaja, molimo zatvorite sve prozore isva vrata u prostoriji.
- Molimo da uredaj postavite na ravnu podlogu.
Da bistie izbjegli glasne zvukove i vibracije, ispod urecaja mozete postaviti mali tepih ili gumenuprostirku.
KOMPONENTE
Izglde prednje strane:
1 Spremnik za vodu
2 Ruchka spremnika za vodu
3 Poklopac spremnika za vodu
4 Upravljacka ploča
5 Prednji dio
6 Stražnjdi dio
Izgld straznje strane:
7 Drska
8 Okvir filtra
9 Otvor za odvodnju
10 Spremište kabela
11 Kotaci
R290, GWP: 3, 70g = 0.00021t CO2e
EZ-izjava o sukladnosti
Urejaj je napravljen u skladu sa zahtjevima Europske unije glede zdravlja i sigurnosti. EZ izjava o sukladnosti osnova je za CE-oznaku na uredaju.
Izlaskom ovih uputa za upotrebu sve prethodne upute postaju nevažece. SUNTEC, SUNTEC Wellness,
KLIMATRONIC i logotip u obliku suntca su registirane marke. © 2021 SUNTEC WELLNESS GMBH.
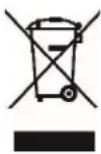
Ovaj simbolPokazuje da se ovaj proizvod unutar Europa ske unije ne smije baciti u obicni kucni OTPad. Kako bi se sprijecile moguce posljedice za okoliis i ljudsko zdravlje, molimo vas da zbrinete OTPadni uredaj odgovorno i da takoto poticiete odrzivu ponovnu uporabu materijala i sirovina. Urejak kome je proszao zivotni vijek predaje na priupnim stanicama ili se oblatite trgovini u kooj ste ga kopili. Tako ce proizvod biti ekološki zbrinut i sasvim sigurno recikliran.
Za zabune i za tiskarske pogreske ne preuzimamo nikakvo jamstvo.
Zahvalujemo Vam sto ste kupili ovaj uredaj marke Suntec Wellness. Prije prve upotrebe, molimo procitajte pažljivo ovaj prisucnik. Čuvajte ga za kasnije savjete ili ga predajte novom vlasniku ukoliko cete dati uredaj drugoj osobi.
Vremenski programator:
- Za podesavanje vremena od 0-24 sata molimo pritisnite tipku za vremenski programator (1). Potrebno je oko 5 sekundi za postavljanje radnog modusa, a za to vrijeme ne mozte pritisnuti tipku vremenskog programatora.
- Kada je urecdaj ukljucen, molimo pritisnite tipku za vremenski programator (1), da podesite vrijeme isključivanja na prethodno opisan način. Uključuje se svjetlosni indicator za vremensko programiranje.
- Kada je urežaj iskljucen, molimo pritisnite tipku vremenskog programatora (1) da podesite vrijeme uključivanja na prethodno opisan način. Indikator vremenskog programatora svijetli i odabrano vrijeme se prikazuje na zaslonu.
R290, GWP: 3, 70g = 0.00021t CO2e
EZ-izjava o sukladnosti
Aparat je napravljen u skladu sa zahtjevima Evropske unije u odnosu na zdravlje i sigurnost. EZ izjava o sukladnosti osnova je za CE-oznaku na aparatu. Izlaskom ovog uputstva za upotrebu sva prethodna uputstva postaju nevažeça. SUNTEC, SUNTEC Wellness, KLIKMATRONIC i logotip u obliku suntca su registrirane marke. © 2021 SUNTEC WELLNESS GMBH.
R290, GWP: 3, 70g = 0.00021t CO2
Izjava o skladnosti ES:
Naprava ustreza bistvenim zdravstvenim in varnostnim zahtevam Evropske unije. Izjava o skladnosti ES je osnova za oznako CE te naprave.
Z izdajo teh navodil za uporabo, vsa prejsnja postanejo neveljavna. SUNTEC, SUNTEC Wellness, KLIMATRONIC in logotip sonca so registirane blagovne znamke. © 2021 SUNTEC WELLNESS GMBH
Download on the App Store
Vgradnja
R290, GWP: 3, 70g = 0.00021t CO2e
R290, GWP: 3, 70g = 0.00021t CO2e
m = 311 ;
Download on the App Store
Beszerelés
R290, GWP: 3, 70g = 0.00021t CO2e
R290, GWP: 3, 70g = 0.00021t CO2e
For this appliance we assure 24 months warranty.
During the 24 months warranty we guarantee to repair your appliance free of charge or to provide your seller the spare parts free of charge if the appliance fails to work due to production failure.
Other claims are excluded from this warranty. We will not be liable for any defects caused by acts of nature, improper use, negligence of the instruction manual, damage from continuous use and damages during transportation.
This warranty card is only applicable with the according invoice.
In case of service please bring your purchased product to your seller.
Product name:
Serial number:
Name of buyer:
Date of purchase:
Stamp and signature of seller:
Manufacturer:
Suntec Wellness GmbH
Holzstraße 2
40221 Dusseldorf
Germany
SUNTEC WELLNESS GMBH
HOLZSTRABE 2
40221 DUSSELDORF
NÉMETORSZÁG
www.suntec-wellness.de
Garanciajegy
vasarlas helye
vasarlas datuma
cikszám/EAN
Kedves Vásárló,
- Safety Instructions
- CAUTION!
- Installation
- Parts
- Control Panel
- Functions
- On/off:
- Mode:
- Automatic dehumidification:
- Continuous dehumidification:
- Internal drying:
- Timer:
- Child Lock
- Wi-Fi:
- Sleep Mode:
- Drainage
- Water tank:
- Continuous drainage:
- Cleaning and maintenance
- Cleaning:
- Cleaning the dust filter:
- Storage
- Troubleshooting
- Refrigerant
- EC-Declaration of Conformity
- Note concerning protection of environment
- Instalacija
- KOMPONENTE
- EZ-izjava o sukladnosti
- Vremenski programator:
- Izjava o skladnosti ES:
- Download on the App Store
- Vgradnja
- Beszerelés
- Garanciajegy
Brand : SUNTEC
Model : DryFix 30
Category : Dehumidifier