DS401 - Hi-Fi System THOMSON - Free user manual and instructions
Find the device manual for free DS401 THOMSON in PDF.

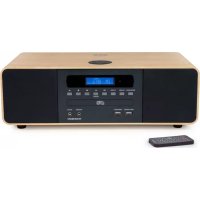
| Product type | Hi-Fi system with docking station |
| Brand | Thomson |
| Model | DS401 |
| Output power | 2×15 W + 30 W (subwoofer) |
| Power supply | AC 90-240 V, 50/60 Hz |
| Power consumption | 60 W |
| FM tuner | FM 87.5-108 MHz |
| Wireless connectivity | Bluetooth |
| Audio inputs | USB, SD, Aux (3.5 mm jack and RCA), Line in |
| Video output | Composite (RCA) |
| Docking station | iPhone/iPod and micro USB (Samsung Galaxy) |
| Mobile compatibility | iPhone, iPod, Samsung Galaxy S2/S3/S3 mini/Note/Note II/Galaxy Nexus |
| Functions | Clock, Alarm, Sleep timer, FM radio, Bluetooth/USB/SD playback |
| Remote control | Yes, with CR2025 battery |
| Display | LCD |
| Maintenance | Unplug before cleaning; use a damp, lint-free cloth. |
| Safety | Do not expose to water, for household use only, keep out of reach of children. |
| Package contents | Tower speaker, remote control, user manual, RCA cable |
| Importer | Bigben Interactive FRANCE, 396 Rue de la Voyette, 59814 Lesquin Cedex |
| Manufacturing | China |
Frequently Asked Questions - DS401 THOMSON
User questions about DS401 THOMSON
0 question about this device. Answer the ones you know or ask your own.
Ask a new question about this device
Download the instructions for your Hi-Fi System in PDF format for free! Find your manual DS401 - THOMSON and take your electronic device back in hand. On this page are published all the documents necessary for the use of your device. DS401 by THOMSON.
USER MANUAL DS401 THOMSON
natural_image
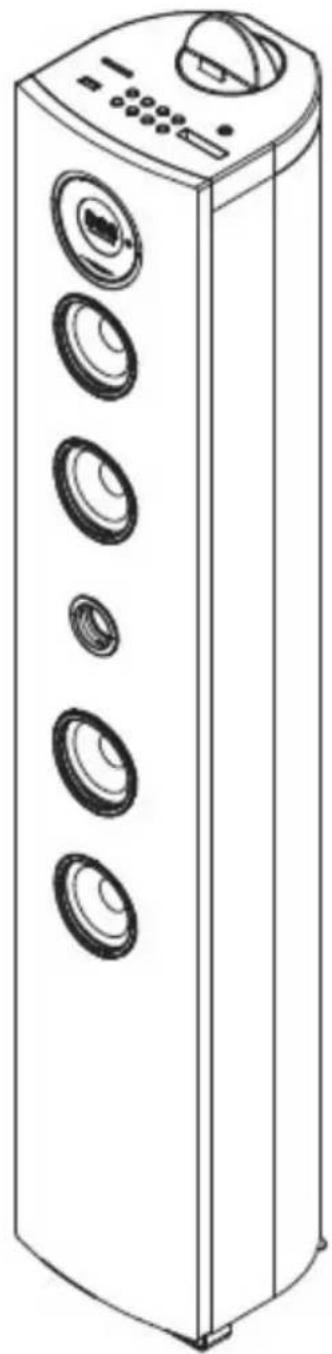
Line drawing of a tall industrial air conditioner unit with multiple circular speakers and control panel (no text or symbols)MODE D'EMPLOI
LISEZ COMPLÈTEMENT CE MANUEL D'UTILISATION AVANT D'UTILISER CET APPAREIL ET CONSERVEZ CE LIVRET POUR VOUS Y RÉFÉRER ULTÉRIEUREMENT.
Table des Matières
natural_image
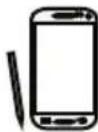
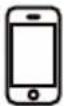
Simple diagram showing a device with an arrow pointing to a container and two separate devices (no text or symbols)Installation de la tour
natural_image
Electrical outlet with two socket headers connected to a power plug (no text or symbols visible)
customerservice@bigben-interactive.be
ESPAÑA, sat@bigbeninteractive.es
ITALIA, support@bigbeninteractive.it
www.bigben.eu
IPod Docking Compatibilities List

iPad
16Go 32Go 64Go

iPad 2
16Go 32Go 64Go

New iPad
16Go 32Go 64Go

iPhone 4
8Go 16Go 32Go

iPhone 4S
16Go 32Go 64Go

iPhone 3GS
4 ème génération
32Go 64Go

iPod nano
6ème génération
8Go 16Go

iPhone 3GS
16Go 32Go

iPhone
4Go 8Go 16Go

iPhone 3G
8Go 16Go

iPod
5ème génération
(vidéo)

iPod nano
5ème génération
(caméra vidéo)
8Go 16Go

iPod
5ème génération
(vidéo)
30Go

iPod touch
2ème génération
8Go 16Go
32Go 64Go

iPod nano
1ère génération
1Go 2Go 4Go

iPod classic
120Go 160Go
(2009)

Pod
4ème génération
(écran couleur)
40Go 60Go

iPod nano
4ème génération
(vidéo)
8Go 16Go

iPod
4ème génération
(écran couleur)
20Go 30Go

iPod classic
160Go (2007)

iPod
4ème génération
40Go

iPod touch
1ère génération
8Go 16Go 32Go

iPod
4ème génération
20Go

iPod nano
3ème génération
(vidéo)
4Go 8Go

iPod mini
4Go 6Go

iPod classic
80Go

iPod
3ème génération
30Go 40Go

iPod nano
2ème génération
(aluminium)

iPod
3ème génération
10Go 15Go 20Go

iPod touch
3ème génération
32Go 64Go

iPod touch
4ème génération
8Go 32Go 64Go
Micro USB Compatibilities List (charging & Audio playback))
Galaxy TAB (with Micro USB)
First time using the dock operation:
-
Settings
-
System
-
Accessory
-
Dock
-
Audio out mode
-
Use external speaker when device is docked


Samsung
Galaxy Note 2
THOMSON
DS401
SYSTEME 2.1
iPod / iPhone / Smartphones
USB/SD

natural_image
Line drawing of a tall industrial air conditioner unit with multiple circular speakers and control panel (no text or symbols)OPERATING INSTRUCTIONS
PLEASE READ THIS USER MANUAL COMPLETELY BEFORE OPERATING THIS UNIT AND RETAIN THIS BOOKLET FOR FUTURE REFERENCE.
Contents
| Sleep mode | 4 | |
| Getting Started 1 | Video Output from iPhone/iPod | 5 |
| In the Box 1 | Playing Your iPhone/iPodCharging and audio playback via your | 5 |
| Safety Instructions 1 | Samsung Galaxy | 5 |
| Battery Safety 2 | Listening to the radioUsing the Aux Input | 56 |
| Description of Parts 2 | Line in | 6 |
| Remove control 3 | Aux In | 6 |
| Setting Up your iTower 4 | Using USB/SD input | 6 |
| Powering Up 4 | Bluetooth Mode | 6 |
| Do's and Don't | 8 | |
| Care and Maintenance | 8 | |
| Setting Up clock 4 | Compatibilites List | 9 |
Charging your iPhone/iPod 4
The message “this accessory is not optimized for this iPhone” can be displayed when your iPhone is connected.
In any case, this will not damage your iPhone, this message is just for your information, you can press "dismiss" and listen your music.
It explains that reception of 3G or WIFI signal is weaker when your iPhone is connected.
Getting Started
Remove the appliance from the box. Remove any packaging from the product. Place the packaging inside the box and either or dispose of safely.
In the Box
Tower speaker unit
Remote control
Instruction manual
RCA cable
Safety Instructions
When using electrical appliances, basic safety precautions should always be followed. This appliance is not intended for use by persons (including children) with reduced physical, sensory or mental capabilities or lack of experience or knowledge. They should be given supervision and instruction in the use of the appliance by a person responsible for their safety. Ensure the appliance is not too close to heat emitting appliances or placed in direct sunlight. Check that the voltage indicated on the data plate corresponds with that of the local network before connecting the appliances to the mains power supply. Do not leave the appliance unattended whilst connected to the mains power supply. Do not immerse the appliance in water or any other liquids. It is imperative to unplug the power cord after the appliance has been used, before it is cleaned and whilst being repaired. Close supervision is required when using this appliance near children. Never leave the appliance within reach of children. Repairs to electrical appliances should only be performed by qualified personnel. Improper repairs may place the user at serious risk.
This appliance is intended for household use only and should not be used for industrial or
commercial purposes. Do not operate this appliance with a damaged plug or cord, after a malfunction or after being dropped or damaged in any way. Do not use this appliance for anything other than its intended use. This appliance must be placed on a stable, heat resistant surface. Do not push objects into any openings as damage to the appliance and/or electric shock may occur. Do not use this product in wet or bad weather conditions. This product is not a toy. Do not play music at excessive levels especially near children.
Battery Safety Always...
Ensure the battery compartments are secure. Only use the batteries recommended. Ensure correct fit of batteries, observing the plus and minus marks on both the battery and compartment. Replace a full set of batteries at one time. Store unused batteries in their packaging and keep away from metal objects that may cause a short circuit. Remove dead batteries from appliances that will not be used again for a long time. Supervise children with batteries at all times. Remember to keep button cell and AAA batteries away from small children as they can easily be swallowed. Seek medical attention if batteries are swallowed.
Never...
Dispose of batteries in a fire. Attempt to recharge ordinary batteries.
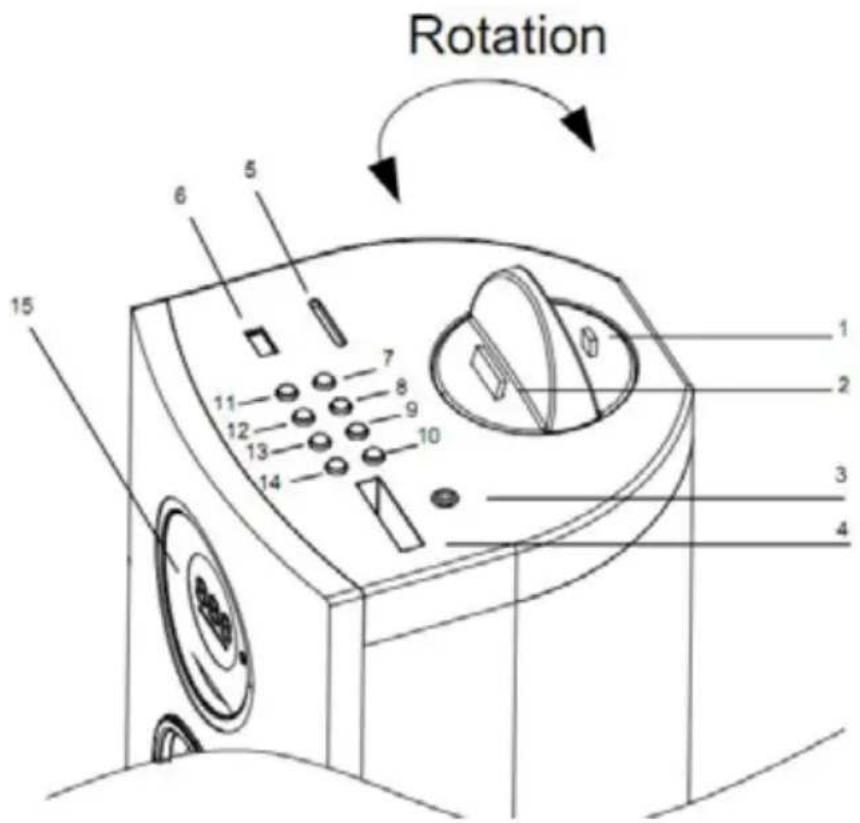
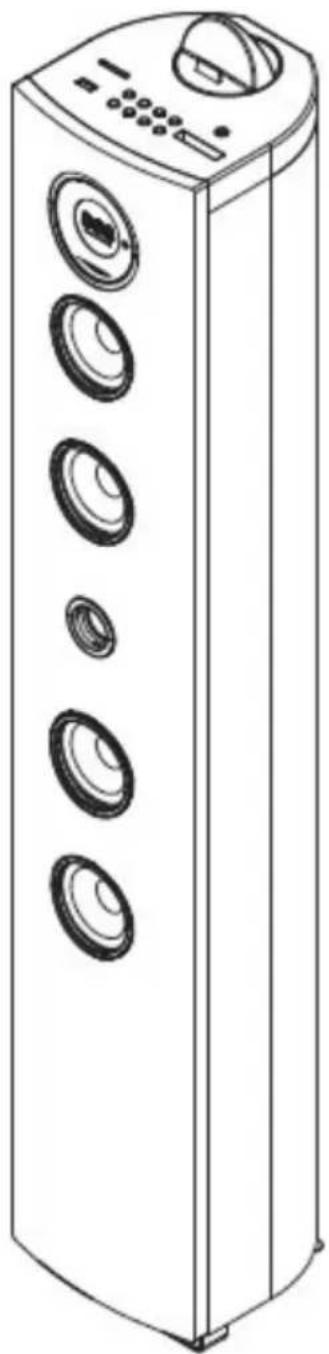
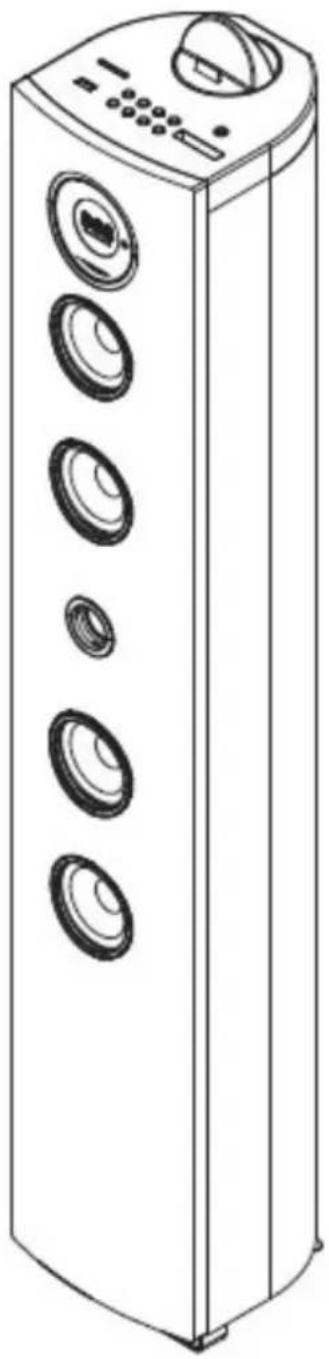
Description of Parts
-
Micro USB dock
-
iPhone/iPod/iPad dock
-
Line in
-
Remote slot
-
SD slot
-
USB slot
-
Standby
-
Function
-
Skip backward
-
Skip forward
-
Men/Time
-
Play/pause
-
Volume -
-
Volume +
-
LCD display
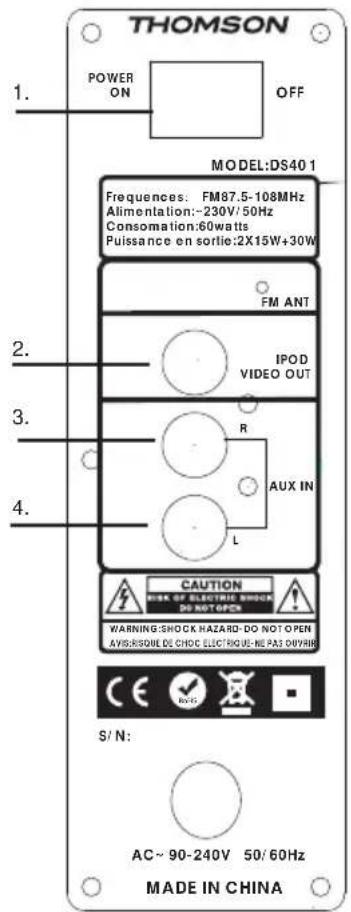
Back Panel
Video Out
- Power switch
- Video out
- Aux in R
- Aux in L
Remote Control
- Power
- Sleep
- Mute
- iPod menu
- Menu up
- Source
- Previous
- Enter
- Next
- Menu down
- Pause/Play
- Treble+
- Bass+
- Volume+
- Treble -
- Bass-
-
Volume-
-
Memory and set time
natural_image
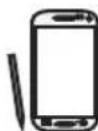
Diagram showing a device with a downward arrow and two circular components labeled 'CAUCON' (no text or symbols on the devices themselves)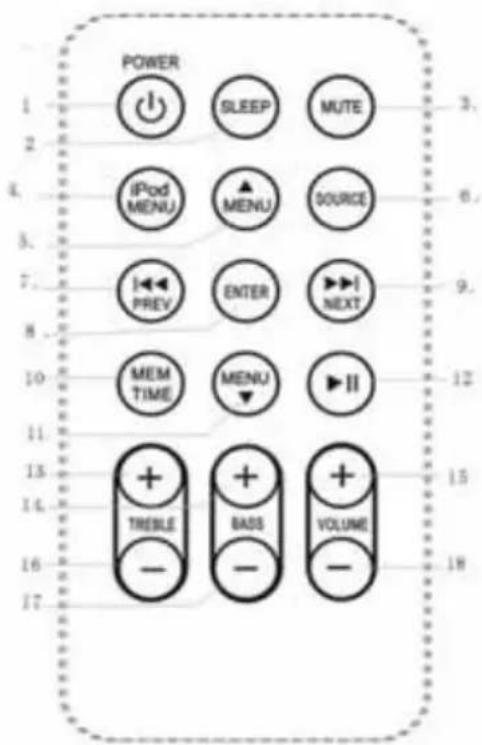
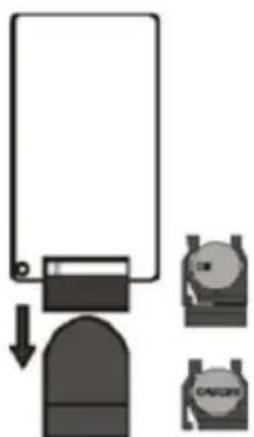
Using the Remote Control the Battery
Pull the clear tab from the battery compartment at the base (straight) end of the remote.
If your remote becomes intermittent or you find you have to move nearer the unit to operate, the battery probably needs to be replaced. To replace the battery, slide the battery holder from the base of the remote control. Remove the battery and replace with a 3Volt Lithium Cr2025 battery ensuring the +side is on the underside of the holder as you slide it back into the compartment.
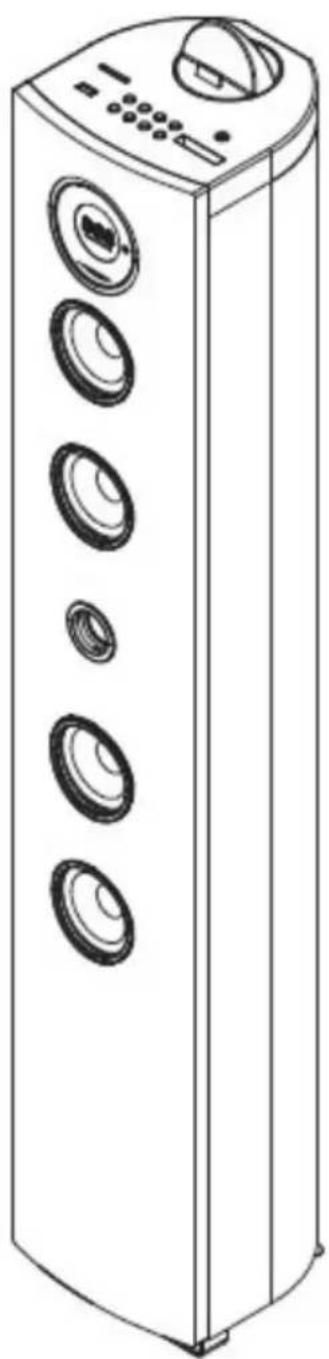
Setting up Your Tower
Carefully take the tower body and base out of the packaging. Stand the tower upright on the floor. The appliance is now ready for use.
natural_image
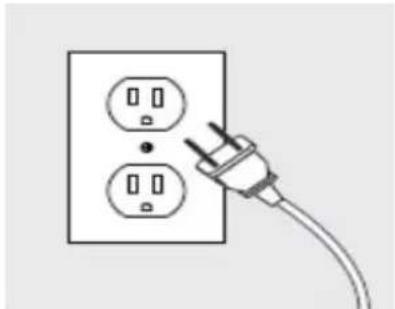
Electrical outlet with two socket plugs connected to a power plug (no text or symbols)Power
Place the unit in the desired position and unravel the mains cable. Insert the cable into the supply socket and switch on if applicable.
Setting Clock
After the unit is plugged into a mains supply or mains power failure, the display will show the "0:00" on the LCD display. The unit should be in standby mode to set the current clock.

- Press MEM/TIME button, the digits for the display will blink.
2 .Press the PREVIOUS/NEXT button repeatedly until correct hour is set. Press the MEM/TIME to confirm.
The hour setting; the minute digits on the display will blink. - Press the PREVIOUS/NEXT button repeatedly until correct minute is set. Press the MEM/TIME to confirm the minute setting.
Setting Alarm
Press and hold MEM/TIME button in shutdown state, the display will flash ON/OFF to select setting alarm or canceling alarm.
Press PREVIOUS/NEXT to select ON, and the display will blink.
Press PREVIOUS/NEXT button repeatedly to set hour. Press MEM/TIME to confirm, then press PREVIOUS/NEXT to set minute.
Press MEM/TIME to confirm, and then press PREVIOUS/NEXT to select iPod/Aux in status.
Press MEM/TIME to confirm.
When no iPod is connected, the unit will change to Aux in alarm automatically.
The volume would turn up from 0 to 25 gradually.
Sleep Mode
Press the SLEEP button, the display will blink. Press the button until the display shows the minute you want to set. You can set 10 to 90 minutes.
It blinks three times to confirm, and then return to the interface before. If you want to cancel the sleep mode, press to 00, after blanking three times, the sleep mode will cancel.
Charging your iPhone/iPod
You can charge your iPhone/iPod via the dock in either stand by or operation mode.
Your iPhone/iPod will automatically charging when it is docked.

Please ensure that the main power switch at the rear of the unit is in the on position.
Video Output from iPhone/iPod
- Connect the unit to your television using the composite video output.
- On your iPhone/iPod, navigate to VIDEOS> VIDEO SETTINGS 3. Dock the iPhone/iPod on the unit to begin playing a video from the docked iPhone/iPod.
Playing your iPhone or iPod
- Press the power button on the rear of the speaker or on the main console to turn the unit on.
- To select the iPhone/iPod playback function, press and hold the function button on until the red light below iPod illuminates.
- Connect your iPhone or iPod to the connector inside the dock.
- Press the play/pause button on the unit or on the remote control to begin playing music from the docked iPhone/iPod.
Charging and audio playback via your Samsung Galaxy
- press the power button to turn on or standby
- press the Function or function strut till that the displayed pattern "ADR"
-
put the Samsung galaxy phone on the Micro USB station.
-
The phone will displayed

and
less the

,then can playback the music via the tower.


Remark: compatible Samsung galaxy SII/ Galaxy SIII/Galaxy SIII mini/Galaxy note/Galaxy note II/Galaxy nexus
Listening to the radio
- Press the button on the unit or the remote control to select RADIO mode. The unit will be in FM radio mode.
- Select the desired radio station by pressing the PREVIOUS/NEXT button
- Press and hold PREVIOUS/NEXT button for 2 seconds, The unit will automatically start and search the frequencies for the previous or next strong station and stop on that station.

- Once you find a station you want to save, press the MEM button on the remote control, "P01" will be shown on the display, press M-up or M-dn until the desired memory position number appears on the display. Press the MEM again to confirm and save the current station.
Using the Line in or AUX Input
Analogue sound signals from other sources can input to the speaker. To select the Aux function button on the tower or repeatedly press the source button on the remote control until the displace shows AUX or LIN.
Line in Jack
Requires a 3.5mm cable
-
Connect a 3.5mm cable to the Aux in 1 jack. Connect the other end of the 3.5mm cable to an Mp3 player or other audio source.
-
Press the power button to turn the unit on.
-
Press the function button or source button on the remote to switch to Line In mode.

- Use the controls on the connected device to begin playing audio routed through the unit.
AUX In Auxiliary Input RCA
Requires an RCA cable
-
Connect an RCA cable to the Auxiliary Input. Connect the other end of the RCA cable to the audio output on your DVD player, stereo system, gaming system or television.
-
Press the power button to turn the unit on.
-
Press the function button or the SOURCE button on the remote control to switch to Aux In 2 mode.
-
Use the controls on the connected device to begin playing audio routed through the unit.

Using the USB/SD input
-
Plug your USB flash drive/Secure Digital Memory Card to the USB/SD converter, then connect the converter to the unit. Change the sequence may cause damage to the iPhone/iPod dock.
-
Press function once into the USB mode, the unit can play automatically.
-
Press function twice into the SD mode, the unit can play automatically.
-
Press MENU UP /MENU DOWN to select which folder you want to open. The display will shows the number of folder first. Otherwise the number of track.
-
Press PREVIOUS/NEXT to select track.
Bluetooth Mode
A. Pairing with a Bluetooth cell phone

Please make sure your cell phone is Bluetooth-enabled. Specific pairing steps may vary with different cell phones. Please refer to the user manual of your cell phone for further information. The general pairing steps are as follows:
a) Keep DS401 and Bluetooth cell phone within 1 meter when pairing.
b) Press Standby button, and press the function once into the Bluetooth mode
c) Switch on your cell phone's Bluetooth function and search for Bluetooth devices. After the search is completed, select "DS401"" from the Bluetooth device list.
d) According to indication, enter password or PIN No: "0000" and press "Yes" or "confirm".
e) After successful pairing, select "DS401" from the Bluetooth device list and press "connect".
B. Pairing with a Bluetooth stereo transmitter
Different Bluetooth transmitters have different pairing ways. Please refer to the user manual of your Bluetooth transmitter for further information. The general pairing steps are as follows:
a) Keep DS401 and Bluetooth transmitter within 1 meter when pairing.
b) Press Standby button, and press the function once into the Bluetooth mode
c) Switch on your Bluetooth transmitter and let it enter pairing mode.
d) The transmitter will search and connect with DS401 automatically. After successful connecting, the Bluetooth voice will change when connected successfully.
Remarks:
◆ DS401 will return to pairing mode automatically after disconnecting from a Bluetooth device.
C. Music Playback
Connecting with a A2DP cell phone or Bluetooth transmitter
a) Connect your cell phone or Bluetooth transmitter with DS401.
b) You can listen to your music from DS401 now when playing it back.
c) Press Vol+ to turn up the volume, press Vol- to turn down the volume.
d) Press ◀◀ to skip to the previous song and long press to Rewind.
e) Press ▶▶I to skip to the next song and long press to Fast Forward.
Remarks:
If there is an incoming call while DS401 is connected to your cell phone for music playback, it will pause at once when you answer the call and resume after the call ended. (Sometimes it will pause after end the call, it depend on your cell phone.)
Notes
Always unplug the appliance when not in use and before cleaning.
Do not play music at excessive volume levels as damage to hearing and/or the equipment may occur. Do not use this unit in wet or damp conditions.
Care and Maintenance
Always disconnect the unit from the mains power supply before cleaning. Clean the appliance with a soft, damp, lint free cloth. Do not use abrasives or harsh cleaners.
“Made for iPhone” and “Made for iPod” means that an electronic accessory has been designed to connect specifically to iPhone or iPod respectively, and has been certified by the developer to meet Apple performance standards. Apple is not responsible for the operation of this device or its compliance with safety and regulatory standards. iPhone and iPod are trademarks of Apple In., Registered in the U.S. And other countries. iPod not included. Not iPod shuffle compatible.
Samsung ® and Samsung Galaxy ® are trademarks of Samsung electronics. Registered in the U.S. And other countries
THOMSON is a trademark of TECHNICOLOR SA or its affiliates used under license to Bigben Interactive.

- Don't throw the electrical and electronic appliances into the usual dustbin.
- Bring them to a collecting point.
- Some parts contained in these appliances may be dangerous for health and environment.
Hereby, Bigben Interactive S.A., declares that the DS401 device complies with the essential requirements of the directive 1995/5/EC of the European Parliament and of the Council of 9 March 1999 on radio equipment and telecommunications terminal equipment and the mutual recognition of their conformity.
To download the full statement, please visit our website: http://www.bigben.eu/support and the section `declaration of conformity'.
Imported by Bigben Interactive SA
396, Rue de la Voyette
CRT2 - FRETIN
CS 90414
59814 LESQUIN Cedex
France
www.bigben.eu


Made in China

customerservice@bigben-interactive.be
ESPAÑA, sat@bigbeninteractive.es
ITALIA, support@bigbeninteractive.it
www.bigben.eu
Compatibilities List:
iPod Docking Compatibilities List

iPad
16Go 32Go 64Go

iPad 2
16Go 32Go 64Go

New iPad
16Go 32Go 64Go
iPhone 4
8Go 16Go 32Go

iPhone 4S
16Go 32Go 64Go

iPhone 3GS
4 ème génération
32Go 64Go

iPod nano
6ème génération
8Go 16Go

iPhone 3GS
16Go 32Go
iPhone
4Go 8Go 16Go

iPhone 3G
8Go 16Go

iPod
5ème génération
(vidéo)

iPod nano
5ème génération
(caméra vidéo)
8Go 16Go

iPod
5ème génération
(vidéo)
30Go

iPod touch
2ème génération
8Go 16Go
32Go 64Go

iPod nano
1ère génération
1Go 2Go 4Go

iPod classic
120Go 160Go
(2009)

Pod
4ème génération
(écran couleur)
40Go 60Go

iPod nano
4ème génération
(vidéo)
8Go 16Go

iPod
4ème génération
(écran couleur)
20Go 30Go

iPod classic
160Go (2007)

iPod
4ème génération
40Go

iPod touch
1 ère génération
8Go 16Go 32Go

iPod
4ème génération
20Go

iPod nano
3ème génération
(vidéo)
4Go 8Go

iPod mini
4Go 6Go

iPod classic
80Go

iPod
3ème génération
30Go 40Go

iPod nano
2ème génération
(aluminium)

iPod
3ème génération
10Go 15Go 20Go

iPod touch
3ème génération
32Go 64Go

iPod touch
4ème génération
8Go 32Go 64Go
Micro USB Compatibilities List (charging & Audio playback))

Samsung
Galaxy S2

Samsung
Galaxy S3
Samsung
Galaxy S3 mini

Samsung
Galaxy Nexus

Samsung
Galaxy S4

Samsung
Galaxy S4 mini
Samsung
Galaxy Note
Samsung
Galaxy TAB (with Micro USB)
First time using the dock operation:
-
Settings
-
System
-
Accessory
-
Dock
-
Audio out mode
-
Use external speaker when device is docked


Samsung
Galaxy Note 2
THOMSON
DS401
SYSTEME 2.1
iPod / iPhone / Smartphones
USB/SD
natural_image
Line drawing of a tall industrial air conditioner unit with multiple circular vented seating (no text or symbols)natural_image
Simple diagram showing a device connected to two labeled containers (no text or symbols present)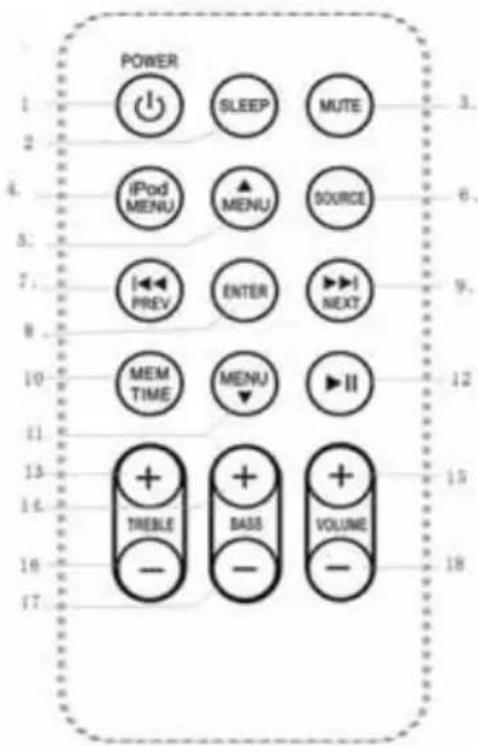
natural_image
Simple line drawing of an electrical outlet with two socket plugs and a power plug (no text or symbols)
Observaciones: compatible con Samsung Galaxy SII/ Galaxy SIII/Galaxy SIII mini/Galaxy note/Galaxy note II/Galaxy nexus
Imported by Bigben Interactive SA
396, Rue de la Voyette
CRT2 - FRETIN
CS 90414
59814 LESQUIN Cedex
France
www.bigben.eu


Fabricado en China
bigben INTERACTIVE
customerservice@bigben-interactive.be
ESPAÑA, sat@bigbeninteractive.es
ITALIA, support@bigbeninteractive.it
www.bigben.eu
IPod Docking Compatibilities List

iPad
16Go 32Go 64Go

iPad 2
16Go 32Go 64Go

New iPad
16Go 32Go 64Go

iPhone 4
8Go 16Go 32Go
iPhone 4S
16Go 32Go 64Go

iPhone 3GS
4 ème génération
32Go 64Go

iPod nano
6ème génération
8Go 16Go

iPhone 3GS
16Go 32Go

iPhone
4Go 8Go 16Go

iPhone 3G
8Go 16Go

iPod
5ème génération
(vidéo)

iPod nano
5ème génération
(caméra vidéo)
8Go 16Go

iPod
5ème génération
(vidéo)
30Go
iPod touch
2ème génération
8Go 16Go
32Go 64Go

iPod nano
1ère génération
1Go 2Go 4Go

iPod classic
120Go 160Go
(2009)

Pod
4ème génération
(écran couleur)
40Go 60Go

iPod nano
4ème génération
(vidéo)
8Go 16Go

iPod
4ème génération
(écran couleur)
20Go 30Go

iPod classic
160Go (2007)

iPod
4ème génération
40Go

iPod touch
1ère génération
8Go 16Go 32Go

iPod
4ème génération
20Go

iPod nano
3ème génération
(vidéo)
4Go 8Go

iPod mini
4Go 6Go

iPod classic
80Go

iPod
3ème génération
30Go 40Go

iPod nano
2ème génération
(aluminium)

iPod
3ème génération
10Go 15Go 20Go

iPod touch
3ème génération
32Go 64Go

iPod touch
4ème génération
8Go 32Go 64Go
Micro USB Compatibilities List (charging & Audio playback)

Samsung
Galaxy S2
Samsung
Galaxy S3

Samsung
Galaxy S3 mini

Samsung
Galaxy Nexus

Samsung
Galaxy S4

Samsung
Galaxy S4 mini

Samsung
Galaxy Note

Samsung
Galaxy TAB (with Micro USB)
First time using the dock operation:
-
Settings
-
System
-
Accessory
-
Dock
-
Audio out mode
-
Use external speaker when device is docked


Samsung
Galaxy Note 2
THOMSON
DS401
IMPIANTO 2.1
iPod / iPhone / Smartphone
USB / SD
natural_image
Line drawing of a tall industrial air conditioner unit with multiple circular speakers and control panel (no text or symbols)ISTRUZIONI D'USO
PRIMA DI UTILIZZARE L'APPARECCHIO, LEGGERE PER INTERO IL PRESENTE MANUALE E CONSERVARLO PER CONSULTAZIONI FUTURE.
Sommario
natural_image
Diagram showing a device connected to two circular components, one with a downward arrow and the other with a smaller circle (no text or symbols)natural_image
Simple line drawing of an electrical outlet with two outlets and a power plug (no text or symbols)Alimentazione

Nota: è necessario utilizzare un telefono compatibile Samsung Galaxy SII / Galaxy SIII / Galaxy SIII mini / Galaxy note / Galaxy note II / Galaxy nexus
Ascolto della radio
Imported by Bigben Interactive SA
396, Rue de la Voyette
CRT2 - FRETIN
CS 90414
59814 LESQUIN Cedex
France
www.bigben.eu


Prodotto in Cina
bigben INTERACTIVE
customerservice@bigben-interactive.be
ESPAÑA, sat@bigbeninteractive.es
ITALIA, support@bigbeninteractive.it
www.bigben.eu
iPod Docking Compatibilities List

iPad
16Go 32Go 64Go

iPad 2
16Go 32Go 64Go

New iPad
16Go 32Go 64Go
iPhone 4
8Go 16Go 32Go

iPhone 4S
16Go 32Go 64Go

iPhone 3GS
4ème génération
32Go 64Go

iPod nano
6ème génération
8Go 16Go

iPhone 3GS
16Go 32Go
iPhone
4Go 8Go 16Go
iPhone 3G
8Go 16Go

iPod
5ème génération
(vidéo)

iPod nano
5ème génération
(caméra vidéo)
8Go 16Go

iPod
5ème génération
(vidéo)
30Go
iPod touch
2ème génération
8Go 16Go
32Go 64Go

iPod nano
1ère génération
1Go 2Go 4Go

iPod classic
120Go 160Go
(2009)

iPod
4ème génération
(écran couleur)
40Go 60Go

iPod nano
4ème génération
(vidéo)
8Go 16Go

iPod
4ème génération
(écran couleur)
20Go 30Go

iPod classic
160Go (2007)

iPod
4ème génération
40Go

iPod touch
1ère génération
8Go 16Go 32Go

iPod
4ème génération
20Go

iPod nano
3ème génération
(vidéo)
4Go 8Go

iPod mini
4Go 6Go

iPod classic
80Go

iPod
3ème génération
30Go 40Go

iPod nano
2ème génération
(aluminium)

iPod
3ème génération
10Go 15Go 20Go
iPod touch
3ème génération
32Go 64Go
iPod touch
4ème génération
8Go 32Go 64Go
Micro USB Compatibilities List (charging & Audio playback)
Samsung
Galaxy S2
Samsung
Galaxy S3

Samsung
Galaxy S3 mini
Samsung
Galaxy Nexus
Samsung
Galaxy TAB (with Micro USB)
First time using the dock operation:
- Settings
2.System
- Accessory
4.Dock
-
Audio out mode
-
Use external speaker when device is docked

Samsung
Galaxy S4 mini
Samsung
Galaxy Note
Samsung
Galaxy Note 2
THOMSON
DS401
SYSTEME 2.1
iPod / iPhone / Smartphones
USB/SD
natural_image
Line drawing of a tall industrial air conditioner unit with multiple circular vented seating (no text or symbols)natural_image
Diagram showing a device connected to two circular components labeled 'CAGS' and 'CN', with no readable text or symbols.natural_image
Simple line drawing of an electrical outlet with two socket plugs and a power plug (no text or symbols)Alimentação

Nota: compatível com Samsung galaxy SII/ Galaxy SIII/Galaxy SIII mini/Galaxy note/Galaxy note II/Galaxy nexus
Ouvir rádio
Imported by Bigben Interactive SA
396, Rue de la Voyette
CRT2 - FRETIN
CS 90414
59814 LESQUIN Cedex
France
www.bigben.eu


Fabricado na China
bigben INTERACTIVE
customerservice@bigben-interactive.be
ESPAÑA, sat@bigbeninteractive.es
ITALIA, support@bigbeninteractive.it
www.bigben.eu
iPod Docking Compatibilities List

iPad
16Go 32Go 64Go

iPad 2
16Go 32Go 64Go

New iPad
16Go 32Go 64Go

iPhone 4
8Go 16Go 32Go

iPhone 4S
16Go 32Go 64Go

iPhone 3GS
4 ème génération
32Go 64Go

iPod nano
6ème génération
8Go 16Go

iPhone 3GS
16Go 32Go

iPhone
4Go 8Go 16Go
iPhone 3G
8Go 16Go

iPod
5ème génération
(vidéo)

iPod nano
5ème génération
(caméra vidéo)
8Go 16Go

iPod
5ème génération
(vidéo)
30Go
iPod touch
2ème génération
8Go 16Go
32Go 64Go

iPod nano
1ère génération
1Go 2Go 4Go

iPod classic
120Go 160Go
(2009)

Pod
4ème génération
(écran couleur)
40Go 60Go

iPod nano
4ème génération
(vidéo)
8Go 16Go

iPod
4ème génération
(écran couleur)
20Go 30Go

iPod classic
160Go (2007)

iPod
4ème génération
40Go

iPod touch
1ère génération
8Go 16Go 32Go

iPod
4ème génération
20Go

iPod nano
3ème génération
(vidéo)
4Go 8Go

iPod mini
4Go 6Go

iPod classic
80Go

iPod
3ème génération
30Go 40Go

iPod nano
2ème génération
(aluminium)

iPod
3ème génération
10Go 15Go 20Go
iPod touch
3ème génération
32Go 64Go

iPod touch
4ème génération
8Go 32Go 64Go
Micro USB Compatibilities List (charging & Audio playback))

Samsung
Galaxy S2
Samsung
Galaxy S3

Samsung
Galaxy S3 mini
Samsung
Galaxy Nexus

Samsung
Galaxy S4

Samsung
Galaxy S4 mini

Samsung
Galaxy Note

Samsung
Galaxy TAB (with Micro USB)
First time using the dock operation:
-
Settings
-
System
-
Accessory
-
Dock
-
Audio out mode
-
Use external speaker when device is docked


Samsung
Galaxy Note 2
THOMSON
DS401
SYSTEM 2.1
iPod / iPhone / Smartphones
USB/SD
natural_image
Line drawing of a multi-tiered server or rack unit with multiple circular speakers and control panel (no text or symbols)BEDIENUNGSANLEITUNG
natural_image
Simple diagram showing a device with a lock and two separate devices (no text or symbols)natural_image
Electrical outlet with two socket plugs and a power plug, shown in line (no text or symbols)Stromversorgung

Anmerkung: Kompatibel zu Samsung Galaxy SII/ Galaxy SIII/Galaxy SIII mini/Galaxy Note/Galaxy Note II/Galaxy Nexus
Radioempfang
Imported by Bigben Interactive SA
396, Rue de la Voyette
CRT2 - FRETIN
CS 90414
59814 LESQUIN Cedex
France
www.bigben.eu
Made in China

bigben INTERACTIVE
customerservice@bigben-interactive.be
ESPAÑA, sat@bigbeninteractive.es
ITALIA, support@bigbeninteractive.it
www.bigben.eu
Kompatibel mit:
iPod Docking Compatibilities List

iPad
16Go 32Go 64Go

iPad 2
16Go 32Go 64Go

New iPad
16Go 32Go 64Go

iPhone 4
8Go 16Go 32Go

iPhone 4S
16Go 32Go 64Go
iPhone 3GS
4 ème génération
32Go 64Go

iPod nano
6ème génération
8Go 16Go

iPhone 3GS
16Go 32Go
iPhone
4Go 8Go 16Go

iPhone 3G
8Go 16Go

iPod
5ème génération
(vidéo)

iPod nano
Sème génération
(caméra vidéo)
8Go 16Go

iPod
5ème génération
(vidéo)
30Go

iPod touch
2ème génération
8Go 16Go
32Go 64Go

iPod nano
1ère génération
1Go 2Go 4Go

iPod classic
120Go 160Go
(2009)

Pod
4ème génération
(écran couleur)
40Go 60Go

iPod nano
4ème génération
(vidéo)
8Go 16Go

iPod
4ème génération
(écran couleur)
20Go 30Go

iPod classic
160Go (2007)

iPod
4ème génération
40Go

iPod touch
1ère génération
8Go 16Go 32Go

iPod
4ème génération
20Go

iPod nano
3ème génération
(vidéo)
4Go 8Go

iPod mini
4Go 6Go

iPod classic
80Go

iPod
3ème génération
30Go 40Go

iPod nano
2ème génération
(aluminium)

iPod
3ème génération
10Go 15Go 20Go

iPod touch
3ème génération
32Go 64Go
iPod touch
4ème génération
8Go 32Go 64Go
Micro USB Compatibilities List (charging & Audio playback)
Samsung
Galaxy S2
Samsung
Galaxy S3

Samsung
Galaxy S3 mini

Samsung
Galaxy Nexus
Samsung
Galaxy S4

Samsung
Galaxy S4 mini
Samsung
Galaxy Note

Samsung
Galaxy TAB (with Micro USB)
First time using the dock operation:
-
Settings
-
System
-
Accessory
-
Dock
-
Audio out mode
-
Use external speaker when device is docked


Samsung
Galaxy Note 2
THOMSON
DS401
2.1-SYSTEEM
iPod/iPhone/smartphones
USB/SD

natural_image
Line drawing of a multi-tiered server or rack unit with multiple circular speakers and control panel (no text or symbols)VEILIGHEIDSINSTRUCTIES
LEES DEZE GEBRUIKSAANWIJZING VOLLEDIG DOOR ALVORENS DEZE EENHEID TE BEDIENEN, EN BEWAAR DIT BOEKJE VOOR UW ADMINISTRATIE.
Inhoud
natural_image
Simple diagram showing a device with an arrow pointing to a component and two separate devices (no text or symbols)natural_image
Electrical outlet with two socket plugs connected to a power plug (no text or symbols)Klok instellen

Opmerking: Compatible met Samsung galaxy SII/Galaxy SIII/Galaxy SIII Mini/Galaxy Note/Galaxy Note II/Galaxy Nexus.
Imported by Bigben Interactive SA
396, Rue de la Voyette
CRT2 - FRETIN
CS 90414
59814 LESQUIN Cedex
France
www.bigben.eu


Made in China
bigben INTERACTIVE
customerservice@bigben-interactive.be
ESPAÑA, sat@bigbeninteractive.es
ITALIA, support@bigbeninteractive.it
www.bigben.eu
IPod Docking Compatibilities List

iPad
16Go 32Go 64Go

iPad 2
16Go 32Go 64Go

New iPad
16Go 32Go 64Go

iPhone 4
8Go 16Go 32Go

iPhone 4S
16Go 32Go 64Go

iPhone 3GS
4 ème génération
32Go 64Go

iPod nano
6ème génération
8Go 16Go

iPhone 3GS
16Go 32Go

iPhone
4Go 8Go 16Go

iPhone 3G
8Go 16Go

iPod
5ème génération
(vidéo)

iPod nano
Sème génération
(caméra vidéo)
8Go 16Go

iPod
5ème génération
(vidéo)
30Go

iPod touch
2ème génération
8Go 16Go
32Go 64Go

iPod nano
1ère génération
1Go 2Go 4Go

iPod classic
120Go 160Go
(2009)

Pod
4ème génération
(écran couleur)
40Go 60Go

iPod nano
4ème génération
(vidéo)
8Go 16Go

iPod
4ème génération
(écran couleur)
20Go 30Go

iPod classic
160Go (2007)

iPod
4ème génération
40Go

iPod touch
1ère génération
8Go 16Go 32Go

iPod
4ème génération
20Go

iPod nano
3ème génération
(vidéo)
4Go 8Go

iPod mini
4Go 6Go

iPod classic
80Go

iPod
3ème génération
30Go 40Go

iPod nano
2ème génération
(aluminium)

iPod
3ème génération
10Go 15Go 20Go

iPod touch
3ème génération
32Go 64Go

iPod touch
4ème génération
8Go 32Go 64Go
Micro USB Compatibilities List (charging & Audio playback)

Samsung
Galaxy S2

Samsung
Galaxy S3

Samsung
Galaxy S3 mini
Samsung
Galaxy Nexus

Samsung
Galaxy S4

Samsung
Galaxy S4 mini

Samsung
Galaxy Note

Samsung
Galaxy TAB (with Micro USB)
First time using the dock operation:
-
Settings
-
System
-
Accessory
-
Dock
-
Audio out mode
-
Use external speaker when device is docked

Samsung
Galaxy Note 2