
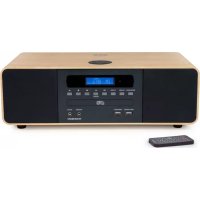
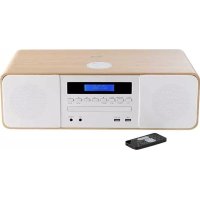
MIC256IBT - Hi-Fi System THOMSON - Free user manual and instructions
Find the device manual for free MIC256IBT THOMSON in PDF.
| Product type | Hi-Fi system |
| Brand | Thomson |
| Model | MIC256IBT |
| Power supply | AC 230 V~50 Hz, 0.3 A |
| Maximum consumption | 40 W |
| Audio output power | 15 W x 2 (RMS) |
| Speaker impedance | 4 Ω |
| Radio frequency bands | FM: 88.8 – 108 MHz |
| Bluetooth version | Not specified, compatible with Bluetooth devices |
| Bluetooth range | Approximately 10 meters |
| Supported audio formats | Audio CD, MP3 (on CD), audio files via USB |
| Main functions | CD player, FM radio, Bluetooth, USB, AUX input, Line input, Headphone jack, Clock/Alarm, Sleep timer, Equalizer |
| Wireless charging | Yes, charging area on top (9V-11A) |
| USB charging | Yes, USB port (5V / 2.1 A) |
| Display | LCD screen |
| Remote control | Yes, with CR2025 battery included |
| Care and cleaning | Unplug the device, clean with a soft dry cloth. Do not use abrasive products. |
| Safety | Do not open the enclosure, avoid exposure to water or flames, respect ventilation distances (10 cm), use batteries correctly. |
| Repairability and spare parts | Contact Thomson support at 09 69 32 59 62 (non premium rate call) or by email: support.thomson@bigben.fr |
| General information | Made in China, designed by Bigben Interactive SA, France. THOMSON brand under license. |
Frequently Asked Questions - MIC256IBT THOMSON
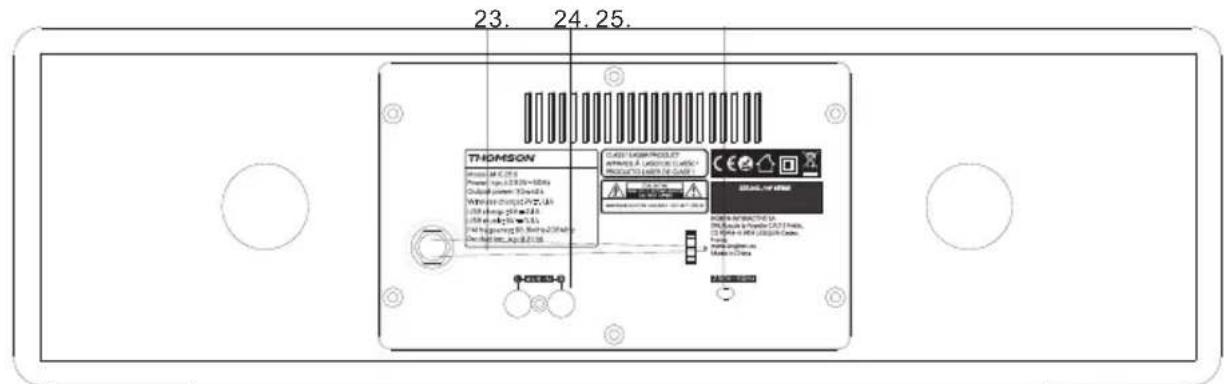
Enable Bluetooth on your phone and search for MIC250IBT/MIC256IBT.
Connect using password 0000 if necessary.
Once connected, the display shows Bluetooth connected.
Press CLOCK, then ENTER.
Select the 12H or 24H format using ◀◀/▶▶ buttons, confirm with ENTER.
Set the hour, minutes, year, month, and day in the same way.
In standby, press ALARM once or twice.
Select the alarm (1 or 2) with ENTER.
Set the hour, minutes, volume (0-30), source (CD/DAB/FM/USB/BUZZER), and duration (15-60 min).
Confirm with YES.
Select the RADIO source.
For automatic search, press and hold ▶ until the radio stops on a station.
For manual search, press ◀◀/▶▶.
You can store up to 30 stations using the MEM button.
Press the ▲ button to open the tray, place a CD (printed side up), then close.
Playback starts automatically.
Use ◀◀/▶▶ to change tracks and ▶II for pause.
Charging starts as soon as contact is established.
Output power is 9V-11A.
Make sure the source is correctly selected (Bluetooth, CD, etc.).
If no sound for 10 minutes, the device goes into auto standby.
Restart the device.
The remote control uses a CR2025 battery (included).
Insert the battery correctly and replace with the same type.
Use a soft, damp, lint-free cloth.
Do not use harsh or abrasive products.
For discs, wipe from the center outward with a clean soft cloth.
You can also visit the website www.bigben.eu.
User questions about MIC256IBT THOMSON
0 question about this device. Answer the ones you know or ask your own.
Ask a new question about this device
Download the instructions for your Hi-Fi System in PDF format for free! Find your manual MIC256IBT - THOMSON and take your electronic device back in hand. On this page are published all the documents necessary for the use of your device. MIC256IBT by THOMSON.
USER MANUAL MIC256IBT THOMSON
natural_image
Front view of a vintage audio workstation instrument with digital display and control knobs (no visible text or symbols)
natural_image
Black remote control device with keypad and red button (no visible text or symbols)MODE D'EMPLOI
LISEZ COMPLÈTEMENT CE MANUEL D'UTILISATION AVANT D'UTILISER CET APPAREIL ET CONSERVEZ CE LIVRET POUR VOUS Y RÉFÉRER ULTÉRIEUREMENT
Table des matières
Pour commencer 1
CLASS 1 LASER PRODUCT
CLASS 1 LASER PRODUCT APPAREIL LASER DE CLASSE 1 PRODUCTO LASER DE CLASE 1
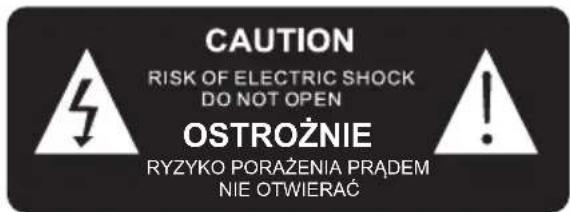
CAUTION
INVISIBLE LASER RADIATION WHEN OPEN AND INTERLOCKS DEFEATED. AVOID EXPOSURE TO BEAM

This product contains a low power laser device.
| PRODUIT DE CLASSE II | |
| COURANT CONTINU | |
| COURANT ALTERNATIF | |
| POUR USAGE INTÉRIEUR UNIQUEMENT |
BELGIQUE, customerservice@bigben-interactive.be
NEDERLAND, customerservice@bigben-interactive.nl
ESPANA, sat@bigbeninteractive.es
ITALIA, support@bigbeninteractive.it
www.bigben.eu
THOMSON
MIC250IBT
MIC256IBT
CD/ BLUETOOTH/ FM
USB/ AUDIO IN

natural_image
Front view of a vintage audio workstation instrument with digital display and control knobs (no visible text or symbols)
natural_image
Black handheld remote control with keypad and buttons (no visible text or symbols)OPERATING INSTRUCTIONS
PLEASE READ THIS USER MANUAL CAREFULLY BEFORE
OPERATING THIS UNIT AND RETAIN FOR
FUTURE REFERENCE
Contents
Getting Started 1
Safety and Notice 1
Care for your product 2
Care of the environment 3
What's in the box 3
Description of Parts 4
Remote 5
Power 5
Clock and Timers 6
Playing a compact disc (CD) 8
Remarks 12
12
Getting Started
- Remove the appliance from the box.
- Remove any packaging from the product.
- Place the packaging inside the box and either or dispose of safely.
Safety and Notice
Read and understand all instructions before you use this product. If damage is caused by failure to follow the instructions, the warranty does not apply.
Safety
Warning
- Never remove the casing of this apparatus.
- Never lubricate any part of this apparatus.
- Never place this apparatus on other electrical equipment.
- Keep this apparatus away from direct sunlight, naked Fames or heat.
- Never look into the laser beam inside this apparatus.
-
Ensure that you always have easy access to the power cord, plug or adaptor to disconnect this apparatus from the power
-
The apparatus shall not be exposed to dripping or splashing and no liquid-filled objects, such as vases, shall be placed on the apparatus.
- To ensure complete disconnection from the power input, the mains plug of the apparatus shall be disconnected from the mains.
- The mains plug of the apparatus must not be obstructed OR must be easily accessed during its intended use.
- Leave a minimum distance of 10 cm around the apparatus for sufficient ventilation
- The ventilation should not be impeded by covering the ventilation openings with items, such as newspapers, table-cloths, curtains, etc.
- No naked flame sources such as lighted candles should be placed on the apparatus
- Attention should be drawn to environmental aspects of battery disposal
-
The use of apparatus in moderate climates.
-
Read these instructions.
- Keep these instructions.
- Heed all warnings.
- Follow all instructions.
- Do not use this apparatus near water.
- Clean only with dry cloth.
- Do not block any ventilation openings. Install in accordance with the manufacturer's instructions.

- Do not install near any heat sources such as radiators, heat registers, stoves, or other apparatus (including amplifiers) that produce heat.
- Protect the power cord from being walked on or pinched, particularly at plugs, convenience receptacles, and the Point where they exit from the apparatus.
- Only use attachments/accessories specified by the manufacturer.
- Use only with the cart, stand, tripod, bracket, or table specified by the manufacturer or sold with the apparatus. When a cart is used, use caution when moving the cart/apparatus combination to avoid injury from tip-over.
- Unplug this apparatus during lightning storms or when unused for long periods of time.
- Refer all servicing to qualified service personnel. Servicing is required when the apparatus has been damaged in anyway, such as power-supply cord or plug is damaged, liquid has been spilled or objects have fallen into the apparatus, apparatus has been exposed to rain or moisture, does not operate normally, or has been dropped.
- Apparatus shall not be exposed to dripping or splashing.
- Do not place any sources of danger on the apparatus (e.g. liquid filled objects, lighted candles).
- Where the MAINS plug (or AC/DC adaptor) or an appliance coupler is used as the disconnect device, the disconnect device shall remain readily operable.
- Make sure there is enough free space around the product for ventilation.
- Batteries (battery pack or batteries installed) shall not be exposed to excessive heat such as sunshine, fire or the like.
- The rating label is placed on the back side of apparatus.
CAUTION
Danger of explosion if the battery is incorrectly replaced.
Replace only with the same or equivalent battery type.

WARNING
Do not ingest the battery (chemical burn hazard)
The remote control supplied with this product contains a coin/button cell battery. If the coin/button cell battery is swallowed, it can cause severe internal burns in just 2 hours and can lead to death.
Keep new and used batteries away from children.
If the battery compartment does not close securely, stop using the product and keep it away from children.
If you think batteries may have been swallowed or placed inside any part of the body, seek immediate medical attention.
Care for your product
- Always unplug the appliance when not in use and before cleaning.
- Do not play music at excessive volume levels as damage to hearing and or the equipment may occur.
- Do not use this unit in wet or damp conditions.
- Always disconnect the unit from the mains power supply before cleaning. Clean the appliance with a soft, damp, lint free cloth. Do not use abrasives or harsh cleaners.
Care of the environment

Your product is designed and manufactured with high quality materials and components, which can be recycled and reused.
Your product contains batteries covered by the European Directive 2006/66/EC, which cannot be disposed with normal household waste. Please inform yourself about the local rules on separate collection of batteries because correct disposal helps to prevent negative consequences for the environmental and human health.
When this crossed-out wheeled bin symbol is attached to a product it means that the product is covered by the European Directive 2002/96/EC. Please inform yourself about the local separate collection system for electrical and electronic products. Please act according to your local rules and do not dispose of your old products with your normal household waste. Correct disposal of your old product helps to prevent potential negative consequences for the environment and human health.

| CLASS II MATERIAL | |
| DIRECT CURRENT | |
| ALTERNATING CURRENT | |
| FOR INDOOR USE ONLY |
The lightning symbol inside an equilateral triangle warns the user of the presence inside the product of uninsulated hazardous electric voltages powerful enough to represent an electrocution risk.
What's in the box
Check and identify the contents of your package:
- Main unit
- Remote control
- User manual
- Micro USB cable
- Line in cable
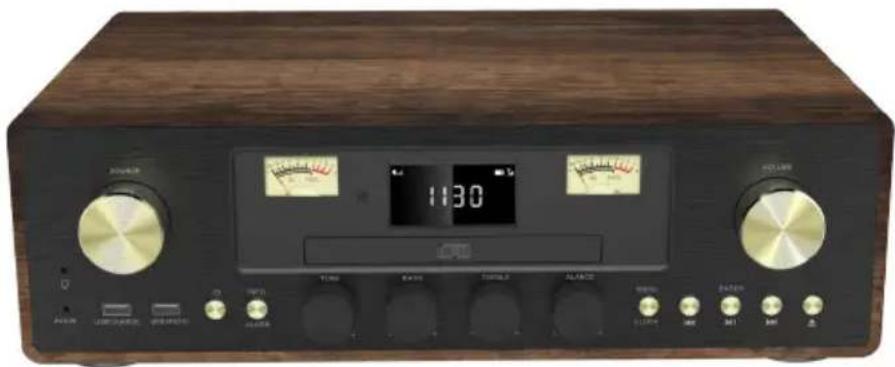
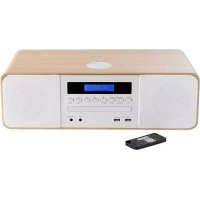
Description of Parts
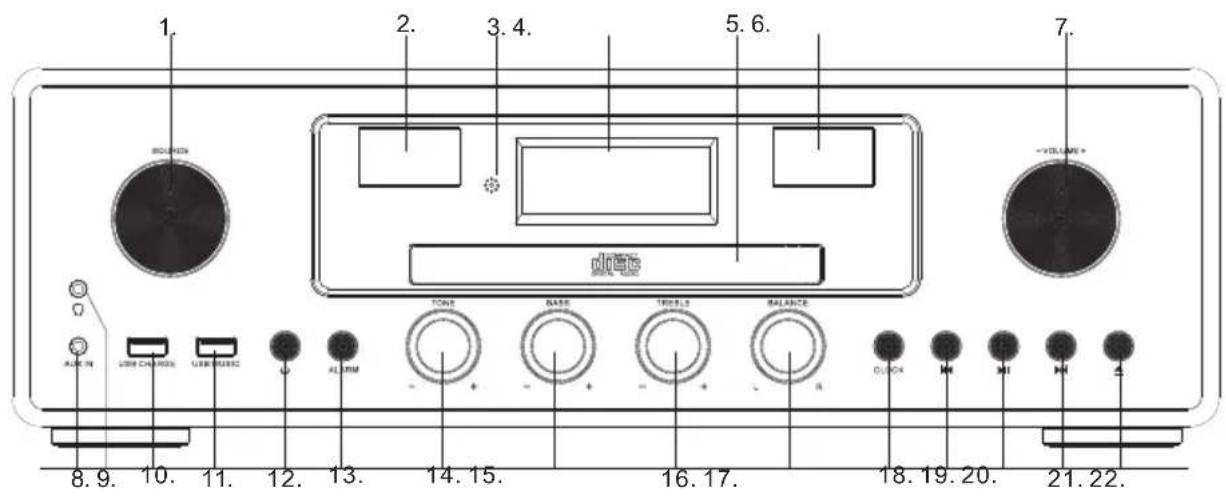
- Source knob
- Turn this knob to source: BT-FM-CD-USB-AUX-LINE
-
VU meter
-
Remote receiver
-
LCD display
-
CD door
-
VU Meter
-
Volume knob
- Line in jack
- Earphone jack
- USB charge port
- USB slot
- Power ON/OFF button
- Alarm
- Tone adjust knob
- Bass adjust knob
-
Treble adjust knob
-
Balance adjust knob
- Clock
- Prev button
- Play/Pause/Enter
- Next button
- CD Open/close button
- Radio ant
- AUX in
- AC power cable
- Wireless induction
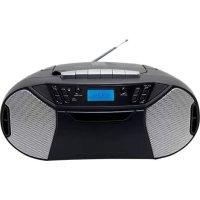
Remote
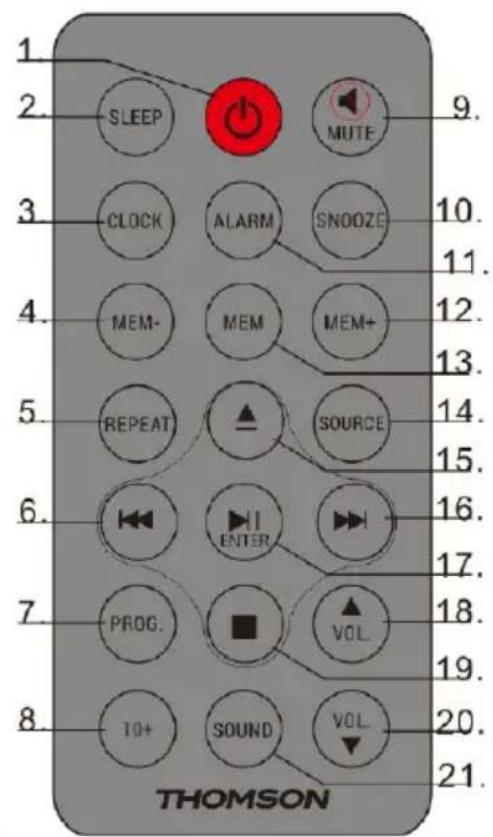
- Power on/off
- Sleep
- Clock
- MEM-
- Repeat
- Previous
- CD Programe
- 10+ in CD Programe
- Mute
- Snooze
- Alarm
- MEM+
- MEM
- Source
- Open/Close the CD door
- Next
- Play/Pause/Enter
- Volume+/Up
- Stop
- VOL-/Down
- Sound (EQ setting)
Power
CAUTION
- Risk of product damager! Make sure that the power voltage corresponds to the voltage printed on the back label.
- Risk of electric shock! When you unplug the AC power cord always pull the plug from the socket. Never pull the cord
- Before connecting the AC power cord, ensure you have completed all other connections

Place the unit in the desired position and unravel the mains cable. Insert the cable into the supply socket and switch on if applicable.
Auto standby
When playing media from a connected device, the Tower automatically switches to standby if:
- No button is pressed for 10 minutes,
- No audio from a connected device for 10 minutes.
Battery power
- Be sure that the batteries are inserted correctly to avoid damage to the appliance. Always remove the batteries when the appliance will not be used for a long period of time, as this will cause leakage to the batteries and subsequently damage to your set.
- Use batteries of the same type. Never use different types of batteries together.
- Do not throw the battery into the fire, or expose it to direct sunlight or similar heat sources.
- If the liquid contained in the batteries comes in contact with the eyes or skin, wash the area immediately and carefully with clear water and consult a doctor.
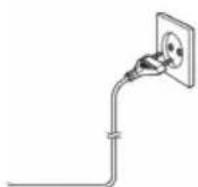
Unit power supply (mains 230V/50Hz)
Connect the power cable plug to the (230V) wall outlet.
Warning:
- Before using the unit, check that the local mains supply is compatible with the unit 230V (50Hz).
- Do not plug or unplug the power cable when your hands are wet.
- When planning not to use this unit for long periods of time (i.e. vacation etc.), disconnect the plug from the wall outlet.
- When disconnecting the power cord from the wall outlet, grasp the plug; do not pull the cord in order to avoid shock risks caused by the damaged cable.
Operation
Press the POWER button to turn the unit ON/OFF.
Adjusting the volume
Rotate the Volume knob clockwise to increase the volume.
Rotate the Volume knob anti-clockwise to decrease the volume.
Check the display, which will confirm the volume setting.
Mute Function
Press the MUTE button on the remote control. The volume is muted and "Volume Muted" will appear on the LCD display. Press this button again to cancel the mute function.
Clock and Timers
Setting the clock and date
After the unit is plugged into a mains supply or following a mains power failure, the display will show the current time and date on the LCD display. The unit should be in standby mode to set the current clock.
- Press the CLOCK button; "Time setup" is displayed. Press ENTER to confirm; "time wizard interval" is displayed.
- Press |◀◀/▶▶| to select "24H" or "12H". Press ENTER to confirm. The hour digits on the display will blink.
- Press |◀◀ / ▶▶▶ to set the hour; press ENTER to confirm. The minutes digits on the display will blink.
- Press |◀◀ / ▶▶▶ to set the minutes; press ENTER to confirm. The year digits on the display will blink.
- Press ◀◀/▶▶ to set the year; press ENTER to confirm. The month digits on the display will blink.
- Press |◀◀/▶▶| to set the month; press ENTER to confirm. The day digits on the display will blink.
- Press |◀/▶| to set the day; press ENTER to confirm. Press |◀/▶| to select "YES/NO"
Setting the alarm
Note: Check that the radio has the correct time and date before you set an alarm.
This unit may be used as an alarm clock. The Bluetooth device, CD/USB device or DAB/FM radio is activated to play at a preset time.
- Press the POWER button to switch the unit to standby mode.
- Make sure that you have set the clock correctly.
-
Press the ALARM button in shutdown state; press ALARM twice to set Alarm.
-
"Alarm 1 (or 2) Setup" is displayed. Press the ENTER button to select.
- "Alarm 1 (or 2) Wizard On time" is displayed and the hour digits for the alarm will flash.
- Press I repeatedly to set the hour. Press ENTER to confirm.
- Press I/▶ to set the minutes. Press ENTER to confirm.
- Press |◀◀/▶▶| to select the Alarm volume from 0 to 30. Press ENTER to confirm.
- Press |◀◀/▶▶| to scroll to OFF/CD/DAB/FM/USB/BUZZER status. Press ENTER to confirm.
- Press the ◀◀/▶▶ button to scroll to the alarm duration. You can choose from 15, 30, 45 and 60 minutes. Press the ENTER button to select. Press ◀◀/▶▶ to select YES and press ENTER to save the alarm.
- The display will show the current time and Alarm 1 (or Alarm 2).
Snooze
- Whenever the alarm (alarm 1, alarm 2) comes on, it can be temporarily suspended for a short period of approximately 9 minutes, by pressing the "SNOOZE" button once.
- The alarm (alarm 1, alarm 2) will then automatically come on again after the 9-minute "snooze" period has ended.
- And the "snooze" symbol will show on the display to remind you that the snooze function is active.
- To deactivate the snooze, press and release the "POWER" key once.
Sleep Timer
- Repeatedly press the SLEEP button; you can set 90/80/70/60/50/40/30/20/10 minutes. This is useful for falling asleep to music at night.
- If you want to cancel the sleep mode, repeatedly press SLEEP to select OFF; the sleep mode will cancel.
FM Radio
Carefully extend the telescopic aerial to its full length. You can program a maximum of 30 preset radio stations (FM)
Auto Scan
- Rotate the SOURCE key to select "RADIO" mode.
- Long press the ▶|| button, and your radio will scan and stop automatically when it finds a station of sufficient signal strength (30 stations preset).
- After a few seconds, the display will update. The display will show the station frequency.
- Press MEM to view the preset radio stations
- Press MEM+ or MEM- to view or listen to the stored radio stations.
- To find other stations, press and hold the button as before.
- To scan the FM band in the opposite direction (high frequencies to low frequencies), press the ▶ button and hold for 2 seconds.
Manual Scan
- Rotate the SOURCE key on the main unit to select "RADIO" mode.
- Press ◀◀◀ or ▶▶◀ to tune to a station. Each press on the tuning button will change the frequency up or down by 100 kHz.
- Once you find a station you want to save, press the MEM button on the remote control. "P01" will be shown on the display; press MEM+/MEM-until the desired memory position number appears on the display. Press the MEM again to confirm and save the current station.
- Press MEM+ or MEM- to view or listen to the stored radio station.
(Note: When the waveband end is reached, the radio will recommence tuning from the opposite waveband end. If no stations are found, please ensure the aerial is extended and test the reception by doing another auto scan in a different location.)
Bluetooth Mode
You must follow several steps to connect your mobile phone:
- Activate Bluetooth from your mobile phone (please refer to your phone's user manual)
- Press the POWER button to turn on the unit, then rotate the SOURCE button repeatedly until the "Bluetooth" indicator appears on the LCD display. It will be ready to pair automatically.
- Use your mobile phone to search for the Bluetooth device named MIC250IBT"/"MIC256IBT.
- Your mobile phone will find "MIC250IBT"/"MIC256IBT" and will present the option to connect or not. Please connect to it using the password "0000" (if any). When you are successfully connected, the Bluetooth indicator "Bluetooth connected" appears on the LCD display.
Automatically Connecting with Your Phone
Pairing is only needed the first time the unit and phone are used together. When the unit and phone have been paired once, they will automatically connect when the unit is on and Bluetooth is activated on the phone. The next time you power on, the unit will automatically connect to the most recently connected mobile phone.
Press and hold ▶ to disconnect the Bluetooth.
Play from a Bluetooth Device
After successful Bluetooth connection, press the ▶|| button to play. Press the |◀◀ or ▶▶| button to skip the tracks backwards or forwards. To pause or resume play, press the ▶|| button again. Press and hold the button ▶▶ to disconnect Bluetooth.
Playing a compact disc (CD)
NOTE: Never touch the laser lens inside the CD compartment. Clean the laser lens using a CD cleaner disc if it becomes dirty.
- Press the POWER button to turn on the unit.
- Rotate the SOURCE button repeatedly to select the CD function.
- Press and hold the ▲ button to open the CD door and insert a CD into the tray (with printed label side facing up).
- Press and hold the ▲ button again to close the CD DOOR and the disc will rotate for a few seconds, then play the 1st track automatically.
- To temporarily stop playback, press the ▶|| button, and to resume playback, press it again.
- Press the button to STOP play.
PREVIOUS/NEXT TRACK
- The ◀◀ and ▶▶ buttons are used to jump to a different track number or to scan disc tracks at high speed.
- Press the ◀ button once to hear the beginning of the current track. Press it two or more times to hear previous tracks on the disc.
- Press the button to hear the next track on the disc.
- Press and hold the button. The current track will be scanned and move backwards to the previous track(s); When the desired track section is found, release the button and normal play will resume.
- Press and hold the ▶▶| button; the current track will be scanned and move forward to the next track(s). When the desired track section is found, release the selected button and normal playback will resume.
REPEAT FUNCTION
The CD REPEAT button may be used to repeat a single track or repeat all tracks on a compact disc.
- Press the REPEAT button once during playback; the "REPEAT ONE" sign will appear on the LCD display for about 2 seconds. The same track will be repeated over and over.
- Press the REPEAT button a second time to repeat all tracks. The "REPEAT ALL" sign will appear on the LCD display for about 2 seconds.
- To cancel repeat play, press the REPEAT button repeatedly until "REPEAT OFF" appears on the LCD display for about 2 seconds.
PROGRAM FUNCTION
The Program feature may be used to program up to 20 tracks to play in a selected order.
-
While in stop mode only (CD is not playing), press and hold the PROG button for 2 seconds, and the LCD display will show the wording "P 01" and "T 01" starts to flash.
-
Press the left button to allocate the desired track.
-
Press the PROG button to select and store the track into the memory.
-
Repeat step 2 to 3 to select up to 20 tracks.
-
To play the selected tracks (in the program mode), press the ▶II button.
-
Press the button to hear the previous programmed track or press the button to hear the next programmed track.
Note: After all programmed tracks have been played, the CD player will return to the stop mode.
- To clear the programmed tracks from memory, press the ■ button twice.
MP3 DISC SECTION
-
Press the POWER button to turn on the unit.
-
Rotate the SOURCE button repeatedly to select CD Mode.
-
Close the CD Door and the disc will rotate for a few seconds and then play the 1st track automatically.
-
Press the land buttons to choose a track.
-
To temporarily stop playback, press the button; to resume, press the button again.
-
Press the button to stop play.
Note: Because MP3 discs have a large capacity, disc access times are a little longer.
Repeat Playing Function
Single Track Repeat
Press the REPEAT button once to repeat a single track. The display appears as "Repeat one".
Whole Disc Repeat
In Play mode, press the REPEAT button 2 times to repeatedly play all tracks on the disc. The display will show "Repeat All".
To cancel repeat play, press the REPEAT button repeatedly until the "Repeat off" sign appears.
PROGRAM PLAY
The tracks on the disc can be programmed to play in any order (up to 20 tracks can be programmed). Note: this can only be done while in Stop mode
-
Press the PROG button while in Stop mode. "P01" "F01" will appear on the display and "T001" will flash.
-
Press the ◀◀ or ▶▶ button to select the desired tracks in the album, then press the PROG button to store in the memory.
-
The first track number is now stored in the memory, and the program number changes to "P02", waiting for your next selection.
-
Repeat Steps 1 – 3 to program additional tracks.
After programming is finished, press the ▶ button, and programmed play begins from the first programmed track. The player stops automatically after all programmed tracks have been played. (Press the ■ button twice to cancel the programmed tracks memory).
Playing Music via USB
This device has been developed using the latest technical advances in the USB field. However, given the wide range of USB storage device types that are currently on the market, we unfortunately cannot guarantee full compatibility with all USB storage devices. For this reason, in rare cases, there may be problems in playing back files from USB storage devices. This is not due to device malfunction.
-
Press the POWER button to turn on the unit.
-
Rotate the SOURCE button repeatedly until 'USB' appears on the display.
-
Connect a USB storage device directly to the USB port. The display briefly shows the number of folders and then the total number of tracks. Playback will automatically start after a few seconds.
-
Operation of the control buttons is the same as for MP3 playback. Please refer to MP3 DISC SECTION operations as described previously.
NOTES:
• Always directly connect a USB storage medium to the USB port to prevent any malfunctions.
- The USB port is not designed for charging external devices.
- Important: Switch the device to a different operating mode before you remove the USB storage device.
AUX Input Jack
- Press the POWER button to turn on the unit.
- Rotate the SOURCE button repeatedly to select the Aux-In mode. 'Aux-In' will appear on the LCD display.
- Connect the AUX connect wire from the line out jack of your personal player (e.g. portable MP3 player) to the AUX input jack.
- Start playback from your personal player.
Line Input Jack
- Press the POWER button to turn on the unit.
- Press the SOURCE button repeatedly to select the Line-In mode. 'Line-In' will appear on the LCD display.
- Connect the Line connect wire from the line out jack of your personal player (e.g. portable MP3 player) to the Line input jack.
- Start playback from your personal player.
SOUND setting
With your unit switched on (not in Standby mode):
- Press the SOUND button to enter the menu options.
- Use the ◀◀/▶▶ button to set the EQ function (e.g. Normal, Classic, Jazz, Pop, Rock) according to your individual preferences.
Wireless Charger Function
Simply place your wireless charging device on the wireless charger area indicated on the top surface and charging will begin on contact.
Output power is 9V = 1A
USB Charging
The USB port is designed for charging external devices, such as smart phones.
Output power is 5V = 2.1A
Phone Jack
- Rotate the Volume to set a low volume
- Insert the headphones into the phone jack.
WARNING! Risk of hearing impairment
- Set a low volume on the playback device before connecting the headphones to the sound source.
- Avoid excessive volume, particularly over extended periods or frequent use. Excessive volume can result in permanent hearing impairment.

Specification:
Power: AC230V\~ 50Hz 0.3A
Remote control power source: 3 Volt Lithium CR2025 battery (included)
Frequency ranges: FM: 88.8 – 108MHz
Bluetooth: 2402-2480MHz
Max.consumption: 40W
Speaker impedance: 4 ohms
Total music output: 15W X 2
Remark: The maximum connection distance is around 10 meters. Please place your Bluetooth speaker as close as possible to this device to avoid the connection being disturbed.
About the disks
 | HandlingDo not touch the underside of disks.Hold disks by the edges to avoid leaving fingerprints on the surface.Any dust, fingerprints or scratches may cause a malfunction.Never affix a label or sticky tape to the disk. |
 | StoragePut disks back in their case after use.Never expose disks to direct sunlight or heat sources. Never leave disks inside a car parked in full sunlight. |
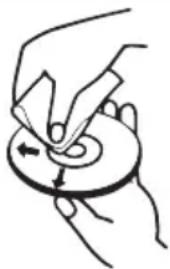 | CleaningUse a clean, soft, lint-free cloth to clean the disk, working from the centre outwards in a straight line. Do not use solvents such as petrol, thinners, commercially available cleaners or antistatic sprays for vinyl disks. |
Remarks:
Don't discard the electrical and electronic appliances in the regular waste disposal.

• Take them to a collection point.
- Some components in these appliances may be hazardous to health and the environment.
- In order to save energy when the unit has no sound output for a while, the unit will be switched to stand-by automatically. It can be switched ON by using the POWER selector again.
- If there is an incoming call while "MIC250IBT" / "MIC256IBT" is connected to your cell phone for music playback, it will pause at once when you answer the call and resume after the call ended. (Sometimes it will pause after end the call, it depend on your cell phone.)
- The Bluetooth® word, mark and logo are registered trademarks owned by Bluetooth SIG, Inc. and any use of such marks by Bigben Interactive is under license. Other trademarks and trade names are those of their respective owners.
- THOMSON is a trademark of TECHNICOLOR SA or its affiliates used under license to Bigben Interactive.
- You can find the information on the plate located at the back of the unit.
The undersigned, Bigben Interactive declares that the radio equipment of the "MIC250IBT" / "MIC256IBT" type complies with the 2014/53/EU directive.
The complete text is available at https://www.bigben-interactive.co.uk/support/
Made in China
Manufactured by BIGBEN INTERACTIVE SA
396, Rue de la Voyette
CRT2 - FRETIN
CS 90414
59814 LESQUIN Cedex - France
www.bigben.eu


Fabricant : Bigben Interactive FRANCE
396, Rue de la Voyette, C.R.T. 2, Fretin, CS90414 - 59814 Lesquin Cedex, France
BELGIQUE, customerservice@bigben-interactive.be
NEDERLAND, customerservice@bigben-interactive.nl
ESPAÑA, sat@bigbeninteractive.es
ITALIA, support@bigbeninteractive.it
www.bigben.eu
THOMSON
MIC250IBT
MIC256IBT
CD/ BLUETOOTH/ FM
USB/ ENTRADA DE AUDIO

natural_image
Front panel of a vintage audio workstation with digital display and control knobs (no visible text or labels)
natural_image
Black remote control device with keypad and red button (no visible text or symbols)CAUTIONRISK OF ELECTRIC SHOCKDO NOT OPEN  PRECAUCIÓNRIESGO DE DESCARGA ELÉCTRICANO ABRIR PRECAUCIÓNRIESGO DE DESCARGA ELÉCTRICANO ABRIR | MATERIAL DE CLASE II |  |
| CORRIENTE CONTINUA |  | |
| CORRIENTE ALTERNA |  | |
| SOLO PARA USO EN INTERIORES |  |
BELGIQUE, customerservice@bigben-interactive.be
NEDERLAND, customerservice@bigben-interactive.nl
ESPAÑA, sat@bigbeninteractive.es
ITALIA, support@bigbeninteractive.it
www.bigben.eu
THOMSON
IT
MIC250IBT
MIC256IBT
CD / BLUETOOTH / RADIO FM
USB / INGRESSO AUDIO

natural_image
Front view of a vintage analog audio workstation with digital display and control knobs (no visible text or labels)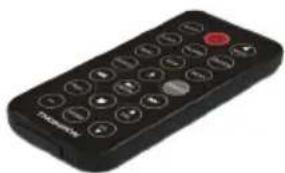
natural_image
Black handheld remote control with keypad and buttons (no visible text or symbols)ISTRUZIONI D'USO
PRIMA DI UTILIZZARE L'APPARECCHIO, LEGGERE PER INTERO IL PRESENTE MANUALE E CONSERVARLO PER CONSULTAZIONI FUTURE
Indice

| MATERIALE DI CLASSE II | |
| CORRENTE CONTINUA | |
| CORRENTE ALTERNATA | |
| UTILIZZARE SOLO IN AMBIENTI CHIUSI |
BELGIQUE, customerservice@bigben-interactive.be
NEDERLAND, customerservice@bigben-interactive.nl
ESPANA, sat@bigbeninteractive.es
ITALIA, support@bigbeninteractive.it
www.bigben.eu
THOMSON
MIC250IBT
MIC256IBT
CD / BLUETOOTH / FM
USB / ENTRADA DE ÁUDIO

natural_image
Front view of a vintage audio workstation instrument with digital display and control knobs (no visible text or symbols)
natural_image
Black handheld remote control with keypad and buttons (no visible text or symbols)
| MATERIAL DE CLASSE II | |
| CORRENTE CONTÍNUA | |
| CORRENTE ALTERNADA | |
| APENAS PARA USO INTERIOR |

- Manípulo da fonte
BELGIQUE, customerservice@bigben-interactive.be
NEDERLAND, customerservice@bigben-interactive.nl
ESPANA, sat@bigbeninteractive.es
ITALIA, support@bigbeninteractive.it
www.bigben.eu
THOMSON
MIC250IBT
MIC256IBT
CD/BLUETOOTH/UKW
USB/AUDIO-EINGANG

natural_image
Front panel of a vintage audio amplifier with digital display and control knobs (no visible text or symbols)
natural_image
Black handheld remote control with keypad and buttons (no visible text or symbols)BEDIENUNGSANLEITUNG
CLASS 1 LASER PRODUCT
CLASS 1 LASER PRODUCT APPAREIL LASER DE CLASSE 1 PRODUCTO LASER DE CLASE 1
CAUTION
INVISIBLE LASER RADIATION WHEN OPEN AND INTERLOCKS DEFEATED. AVOID EXPOSURE TO BEAM
This product contains a low power laser device.


BELGIQUE, customerservice@bigben-interactive.be
NEDERLAND, customerservice@bigben-interactive.nl
ESPANA, sat@bigbeninteractive.es
ITALIA, support@bigbeninteractive.it
www.bigben.eu
THOMSON
MIC250IBT
MIC256IBT
CD/ BLUETOOTH/ FM
USB/ AUDIO IN
natural_image
Front panel of a vintage audio amplifier with digital display and control knobs (no visible text or symbols)
natural_image
Black handheld remote control with keypad and buttons (no visible text or symbols)INSTRUKCJA OBSŁUGI
PRZED UŻYCIEM URZĄDZENIA NALEŻY UWAŻNIE PRZECZYTAĆ NINIEJSZĄ INSTRUKCJĘ OBSŁUGI. INSTRUKCJĘ NALEŻY ZACHOWAĆ NA PRZYSZŁOŚĆ
Spis treści
Pierwsze kroki 1
CLASS 1 LASER PRODUCT
CLASS 1 LASER PRODUCT APPAREIL LASER DE CLASSE 1 PRODUCTO LASER DE CLASE 1
CAUTION
INVISIBLE LASER RADIATION WHEN OPEN AND INTERLOCKS DEFEATED. AVOID EXPOSURE TO BEAM
This product contains a low power laser device.

| MATERIAL KLASY II |  |
| PRĄD STAŁY |  |
| PRĄD PRZEMIENNY |  |
| TYLKO DO UŻYTKU W POMIESZ-CZENIACH |  |
BELGIQUE, customerservice@bigben-interactive.be
NEDERLAND, customerservice@bigben-interactive.nl
ESPAÑA, sat@bigbeninteractive.es
ITALIA, support@bigbeninteractive.it
www.bigben.eu
- MODE D'EMPLOI
- Table des matières
- CLASS 1 LASER PRODUCT
- CAUTION
- THOMSON
- CD/ BLUETOOTH/ FM
- USB/ AUDIO IN
- OPERATING INSTRUCTIONS
- Contents
- Getting Started
- Safety and Notice
- Safety
- Warning
- Care for your product
- Care of the environment
- What's in the box
- Power
- Auto standby
- Battery power
- Unit power supply (mains 230V/50Hz)
- Warning:
- Operation
- Adjusting the volume
- Mute Function
- Clock and Timers
- Setting the clock and date
- Setting the alarm
- Snooze
- Sleep Timer
- FM Radio
- Auto Scan
- Manual Scan
- Bluetooth Mode
- Automatically Connecting with Your Phone
- Play from a Bluetooth Device
- Playing a compact disc (CD)
- PREVIOUS/NEXT TRACK
- REPEAT FUNCTION
- PROGRAM FUNCTION
- MP3 DISC SECTION
- Repeat Playing Function
- Whole Disc Repeat
- PROGRAM PLAY
- Playing Music via USB
- NOTES:
- AUX Input Jack
- Line Input Jack
- SOUND setting
- Wireless Charger Function
- USB Charging
- Phone Jack
- WARNING! Risk of hearing impairment
- Specification:
- About the disks
- Remarks:
- USB/ ENTRADA DE AUDIO
- CD / BLUETOOTH / RADIO FM
- USB / INGRESSO AUDIO
- ISTRUZIONI D'USO
- Indice
- BEDIENUNGSANLEITUNG
- INSTRUKCJA OBSŁUGI
- Spis treści
Brand : THOMSON
Model : MIC256IBT
Category : Hi-Fi System