
GS 200 - Dashcam AIPTEK - Free user manual and instructions
Find the device manual for free GS 200 AIPTEK in PDF.
| Product type | Dashcam (car camera) |
| Brand | Aiptek |
| Model | GS 200 |
| Dimensions (L x W x H) | 71 x 64 x 48 mm |
| Weight | 95 g |
| Power supply | DC 12-24 V, 1 A input (cigarette lighter); DC 5 V, 1 A output; built-in Li-ion battery 250 mAh |
| Main functions | Full HD recording, 140° wide-angle lens, collision detection, loop recording, traffic sign recognition, motion detection |
| Display | 2.0-inch (5 cm) LCD, 480 x 240 pixels, sliding |
| Video resolution | Full HD 1920x1080 30fps, HD 720p 60fps, WVGA 854x480 30fps, VGA 640x480 30fps |
| File format | H.264 (.mov) for video, JPEG for photo |
| External memory | micro SDHC card from 8 to 32 GB (Class 6 minimum) |
| Connectivity | USB 2.0, AV output (3.5 mm jack), optional GPS connector |
| Sensor | CMOS 1/3", 3.5 megapixels |
| Operating temperature | 0 °C to 60 °C |
| Storage temperature | -20 °C to 70 °C |
| Warranty | Warranty void if device is disassembled or punctured |
| Maintenance and cleaning | Avoid contact with liquids; clean with a dry cloth; do not expose to extreme temperatures |
| Safety | Do not install in the driver's field of vision; do not use controls while driving; disconnect the cigarette lighter after engine stop |
| Spare parts and repairability | Optional rearview mirror mount available at www.iaptekshop.de; battery replaceable only by an authorized service center |
Frequently Asked Questions - GS 200 AIPTEK
User questions about GS 200 AIPTEK
0 question about this device. Answer the ones you know or ask your own.
Ask a new question about this device
Download the instructions for your Dashcam in PDF format for free! Find your manual GS 200 - AIPTEK and take your electronic device back in hand. On this page are published all the documents necessary for the use of your device. GS 200 by AIPTEK.
USER MANUAL GS 200 AIPTEK
Thank you very much for purchasing this product. Before you start, you are recommended to read this manual step by step to obtain the best results with your new car camcorder. We wish you enjoy it.
AIPTEK Team
About the Product
GS 200 is the latest car camcorder (Dashcam) from Aiptek's Papago series. This car camcorder is specifically designed for video recording during driving. In case of emergency the embedded bump sensor automatically detects the accident and saves the action on protected memory. The Full HD video resolution and 140^ wide-angle lens record full action on the road in best quality.
Important Notice
- Please do not install this car camcorder at a place that would obstruct or reduce a driver's view. Make sure your usage comply with the applicable regulations of your state or country.
- Do not drop, puncture or disassemble the device and charger; otherwise the warranty will be voided.
- Avoid all contact with liquids. Dry your hands before using the device.
- Use the device with care. Avoid pressing hard on the device body.
- Use only the accessories supplied by the manufacturer.
- Keep the device out of the reach of infants.
- When you get off the car, do not leave the device on the dashboard where it is subject to direct sunlight or extreme temperatures (too high or too low) which tend to degrade or damage the unit and it's normal functionality.
- For your own safety, do not operate the controls of the product while driving. This product is intended to be used as a car camcorder only.
#
- The cigarette lighter of your car may or may not continue to supply power after the engine is turned off. Please disconnect the charger from the cigarette lighter before leaving the car to prevent the car battery from depletion or other accidents.
- The battery of the car camcorder is integrated in the device. Do not disassemble and modify the device. The battery should be replaced by an authorized service center only.
- For software or manual update, please visit the official website: http://www.ajtek.eu
If the time arises to dispose your product, please recycle all the components possible. Batteries and rechargeable batteries are not to be disposed in your domestic waste! Please recycle them at your local recycling point. Together we can help to protect the environment.


Package Content


Optional Accessory
An optional rear-view mirror mount is available for purchase on our official website www.iaptekshop.de

Product Overview
②
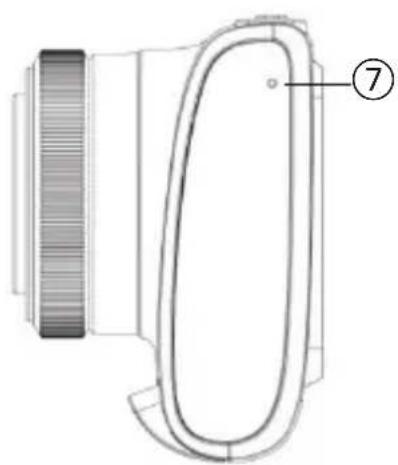
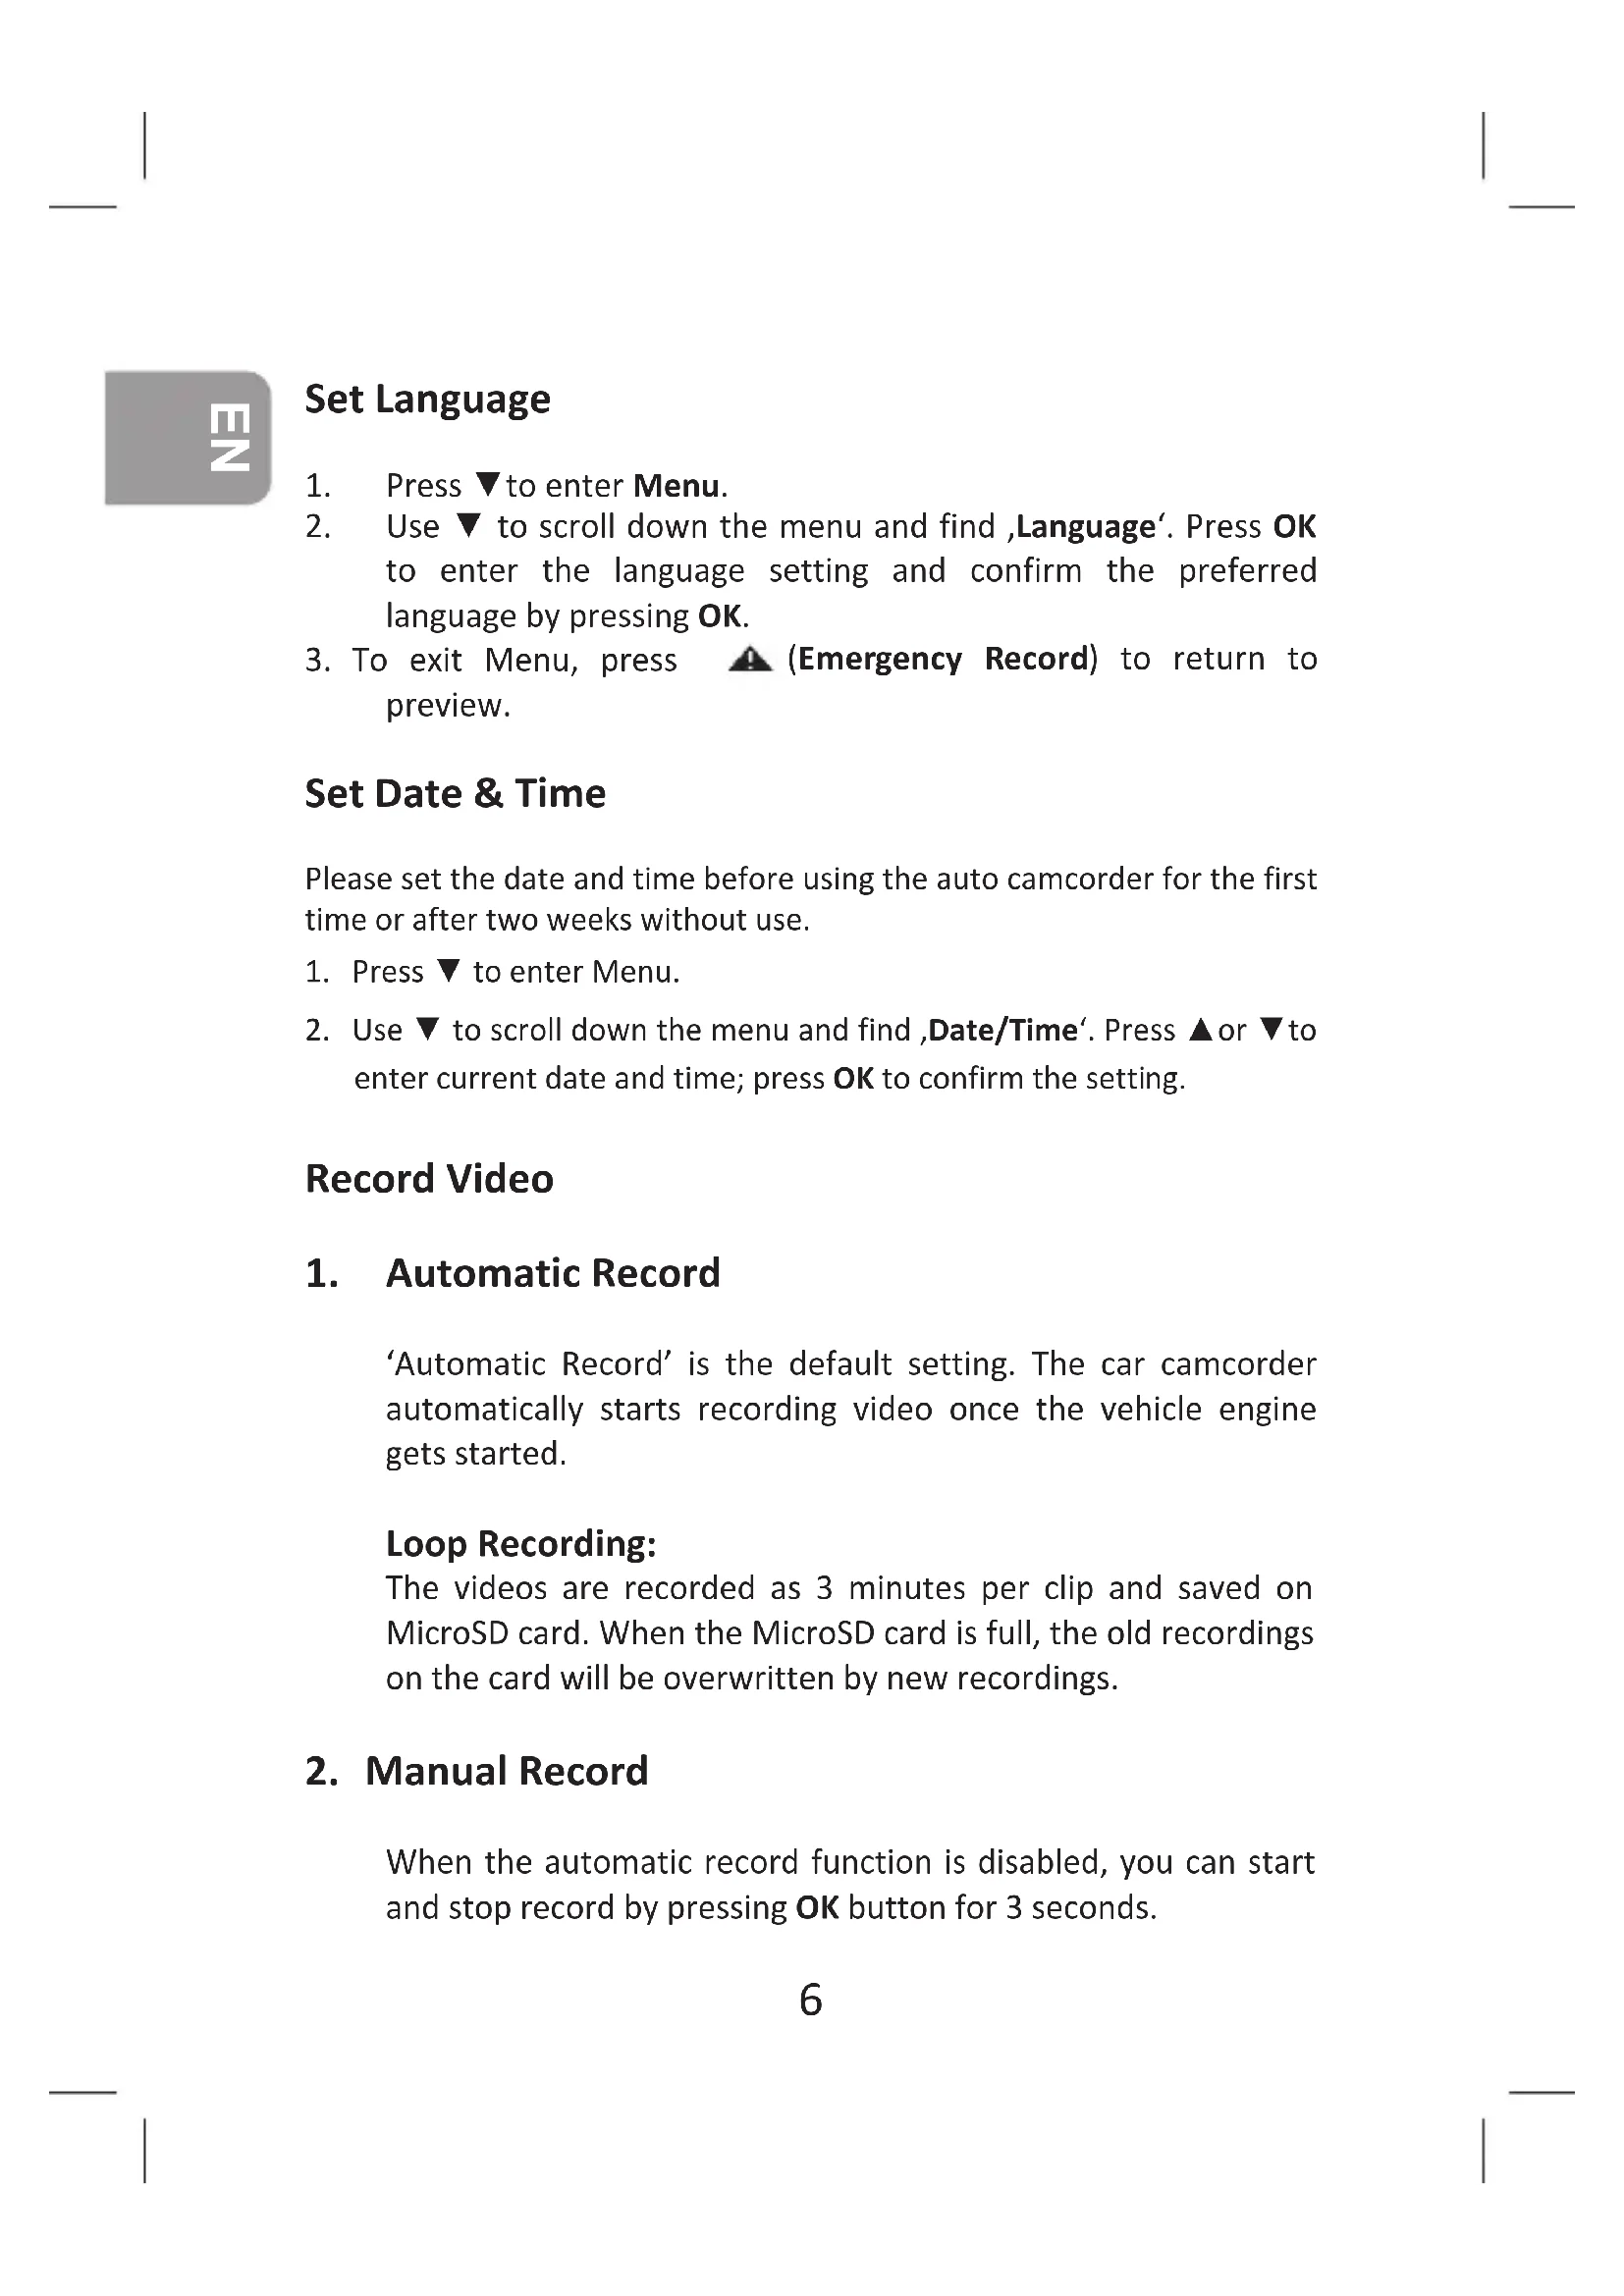
① Lens
② Slide out LCD display (hidden)
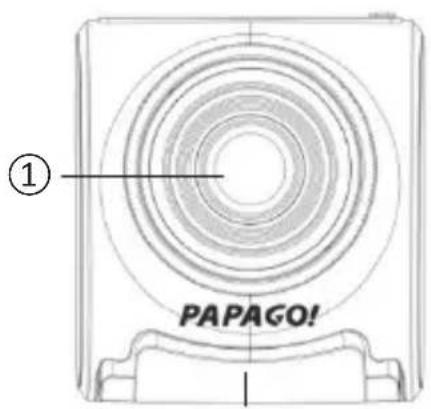
③ Power connector / Mini USB port
④ MicroSD card slot
⑤ AV-out port
⑥ Power ON/Off
⑦ Microphone
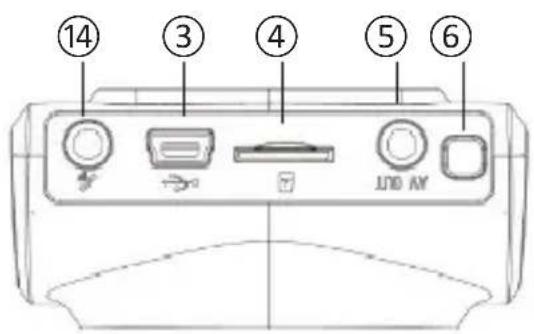
⑧ Holder clip
Emergency Record/Exit
10 OK/Manually Start or Stop Record
⑪ Slide out LCD display
⑫ Playback / Up
③ Menu / Down / Snapshot
GPS connector (optional, inactive)
#
Use a Memory Card
- Insert and remove the memory card when the car camcorder
is turned off. Do not remove the memory recording. This may damage the memory card.
- Use a MicroSD card with at least Class 6 and 8 GB, Max. 32 GB.
- Be sure to format the MicroSD card before the initial usage to ensure read / write stability.
- We strongly recommend that the memory card is strictly used for this car camcorder only.
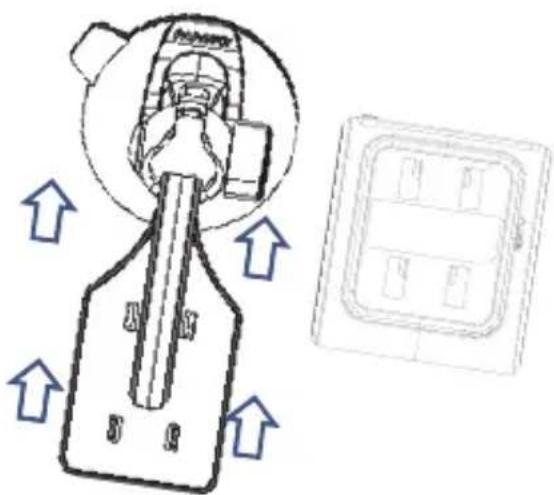
Install the Car Camcorder
-
Connect the four sockets on the rear side of the car camcorder to the windshield mount. Pull the windshield mount up until the hooks click into place firmly.
-
Position the suction-cup in a position of the windshield without obstructing the view.
Connect the Power
- Connect one end of the car charger to the mini USB connector on the car camcorder.
- Plug the other end of the car charger to the cigarette lighter socket of your car. When the vehicle engine is started, the car camcorder automatically turns on.


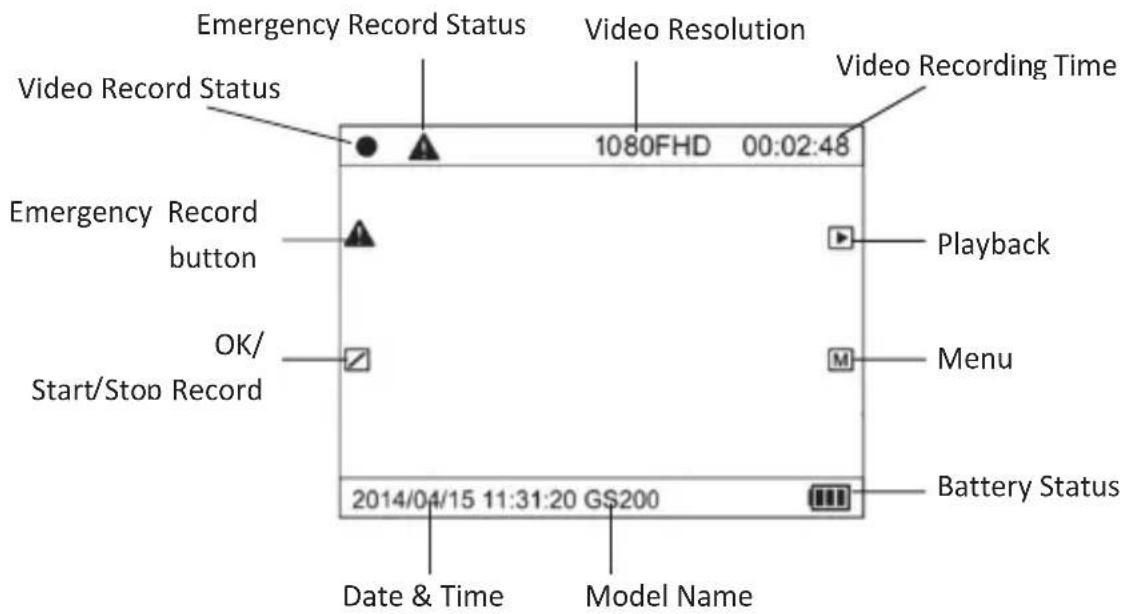
Screen Icons
#
Set Language
- Press to enter Menu.
- Use to scroll down the menu and find, Language'. Press OK to enter the language setting and confirm the preferred language by pressing OK.
- To exit Menu, press (Emergency Record) to return to preview.
Set Date & Time
Please set the date and time before using the auto camcorder for the first time or after two weeks without use.
- Press to enter Menu.
- Use to scroll down the menu and find, Date/Time'. Press or to enter current date and time; press OK to confirm the setting.
Record Video
1. Automatic Record
'Automatic Record' is the default setting. The car camcorder automatically starts recording video once the vehicle engine gets started.
Loop Recording:
The videos are recorded as 3 minutes per clip and saved on MicroSD card. When the MicroSD card is full, the old recordings on the card will be overwritten by new recordings.
2. Manual Record
When the automatic record function is disabled, you can start and stop record by pressing OK button for 3 seconds.
3. Emergency Record :
- Bump Auto Record
When 'Bump Auto Record' (recommended) function is enabled (see options in Menu), the car camcorder automatically saves current video clip (3 mins) in the folder named RO (Read-Only) when an impact on the vehicle is detected. The videos in Read-Only folder (RO) are locked from deletion.
- Manual Emergency Record
During a recording session, you can manually press the emergency record button to start emergency recording.
NOTICE!
- During Bump Auto Record and Manual Emergency Record, a yellow symbol will be displayed on the screen. Please wait until the symbol disappears on the screen to finish the emergency recording.
- During emergency recording, press or to enter playlist or Menu will stop the emergency recording.
- Emergency recording saved under Read-Only folder (RO) takes up to 30% of the memory capacity. When emergency recording reaches 30% maximum capacity, to avoid missing the latest emergency recording, the oldest emergency recording files will be replaced by new recording.
- To avoid the oldest emergency recording to be overwritten, please make copy of the emergency recording files right after the event happened.
Recording Capacity at Full HD resolution:
| Type M | Memory Card Capacity 8 GB | 16 GB 32 | GB | |
| General Record | 70% Capacity 5,6 GB 11.2 GB | 22.4 GB | ||
| Max. recorded time (min.) 56 | min 1h 52 min | 3h 44 min | ||
| Emergency Record | 30% Capacity 2.4 GB 4.8 GB | 9.6 GB | ||
| Max. recorded time (min.) 24 | min 48 min | 1h 36 min |
Take Snapshot
During general video recording, you can press for 3 seconds to take one snapshot.
Change Settings in MENU
- Press to enter Menu.
- Use or to select a menu option and press OK to enter the selected menu and confirm preferred setting.
Press (Emergency Record) to exit the Menu.
1. Video Resolution
Set the video resolution for recording.
2. Date Stamp
Enable or disable date stamp on video clips.
3. Bump Auto Record
Set the G-sensor sensitivity level or disable the automatic emergency record in case of collision. It is highly recommended to turn on this function. Options: Low/Middle/High Sensitivity/Off
4. Automatic Record
Enable or disable automatic record when the car camcorder connects to power supply.
5. Driver Safety
TFC (Traffic) Sign Recognition (TSR)
Enable or disable the recognition of speed limit sign and display the sign on the LCD screen when the sign is recognized. This is a new function under ongoing improvement.
30
NOTICE!
- There's no guarantee that all the speed limit signs will be recognized. Vehicle speed, poor weather, lighting condition, and faded color of the sign would affect the accuracy of recognition.
- The driving safety functions with alarm or warning signals, including any visual or audible reminding signals, should not replace your decision-making and judgment required for proper and safe operation of the vehicle.
6. Motion Detection
When motion detection is enabled, the car camcorder automatically stops recording when there's no detected movement for 60 seconds. If a motion is detected in the scene, the car camcorder automatically starts recording again.
#
7. Microphone
Enable to disable (mute) the audio during video recording.
8. Beep Sound
Enable or disable toggle beep sound when you press a button.
9. EV (Exposure Value)
Manually adjust the exposure to gain better effect when the preview image appears too bright or too dark.
10. Frequency
Set flicker frequency to 50Hz or 60Hz based on local power supply. Default is 50Hz for European countries.
11. TV Mode
Set the TV type when connecting the car camcorder to a TV.
PAL: suitable for European and Middle East countries
NTSC: suitable for American and Asian countries
12. Screen Saver
Set or disable screen timeout to turn off the display.
14. Format
Format (Delete) all the files on the MicroSD card.
WARNING!
Data including emergency recording is irrecoverable after formatting. Please make a backup copy of the videos and photos before formatting the card.
15. Default
Reset all the settings to factory default.
16. Version
Display the current firmware version used on the car camcorder.
Playback / Delete / Protect Video
To playback video or photo files, press to enter playlist. Press OK to enter video /photo folder. Use or to browse thumbnails and press OK to select the file.
- Press OK again to start the playback.
- Follow the instructions on screen, you can delete or lock current file. A locked file is protected from deleting.
- To return to playlist, press Emergency Record button.
- To return to preview, press again Emergency Record button.
Connect to PC
- Connect the car camcorder with PC by using the USB cable.
- The car camcorder will automatically turn on and switch to 'Removable drive' mode.
- File type:
MOVIE:
1) General recorded video clips are saved under 'MOVIE' folder.
2) Emergency recorded video clips are saved under 'RO' (Read-Only) folder.
PHOTO: snapshots are saved.
Connect to TV
- Connect the car camcorder to your TV with an AV cable (not included) via AV-Out port.
- Set the signal source of the TV to AV.
N3
Specifications
| Image Sensor 3.5 Mega-pixel (2304 x 1536) CMOS sensor, 1/3" | |
| Video Resolution /Frame Rate/Aspect Ratio | FULL HD: 1920x1080, 30 fps, 16:9 HD 720p: 1280x720, 60 fps, 16:9 HD 720p: 1280x720, 30 fps, 16:9 WVGA: 854x480, 30 fps, 16:9 VGA: 640x480, 30fps, 4:3 |
| Snapshot Resolution 2 MP: 1920x1080, 16:9 | |
| File Format H.264 (.mov), JPEG | |
| Internal Memory 128 MB, not available for storage | |
| External Memory micro SDHC from 8 GB up to 32 GB (min. Class 6) | |
| LCD Display | 2.0" (5.0 cm) diagonal, 480 x 240 pixels, slide-out design |
| View Angle 140° | |
| Aperture Range F2.2 | |
| Focal Length f=3.00 mm | |
| Focus Range 250 cm ~∞ | |
| Microphone Yes (On, Off) | |
| Internal Speaker Yes | |
| Date/Time/RTC Yes/Yes/Yes (On, Off) | |
| White Balance Auto | |
| Exposure Control -1 ~ +1 | |
| Bump Auto Record Yes (Off, High, Mid, Low Sensitivity) | |
| Loop Recording Yes (3 min per video clip) | |
| Auto Recording Yes (On, Off) | |
| Emergency Recording | Yes (Bump Auto Record, manual) |
| Motion detection | Yes (On, Off) |
| Traffic Sign Recognition (Beta) | Yes (On, Off) |
| Screen Saver | Yes (1 Min / 3 Min / Off) |
| Interface | USB 2.0, AV-Out port (3.5 mm jack, NTSC/PAL supported), MicroSD card slot |
| Input Power Supply | DC: 12 V - 24 V, 1 A (cigar car charger) |
| Output Power Supply | DC: 5 V, 1 A |
| Battery Type | Embedded, 250 mAh Li-Ion, rechargeable |
| Operation Temperature | 0 °C ~ 60 °C |
| Storage Temperature | -20 °C ~ 70 °C |
| Dimensions (L×W×H) 71 mm x 64 mm x 48 mm | |
| Weight | 95 g |
82-GS200-V1