B3 - Smartwatch POLAR - Free user manual and instructions
Find the device manual for free B3 POLAR in PDF.
User questions about B3 POLAR
0 question about this device. Answer the ones you know or ask your own.
Ask a new question about this device
Download the instructions for your Smartwatch in PDF format for free! Find your manual B3 - POLAR and take your electronic device back in hand. On this page are published all the documents necessary for the use of your device. B3 by POLAR.
USER MANUAL B3 POLAR
Darmstädter Straße 59
D-64572 Büttelborn
GERMANY
Polar Electro France S.A.S
Z.I. Maysonnabe
3 allée Latécoère
B.P. 233
64205 Biarritz Cedex
FRANCE
Donaufelder Straße 101
A-1210 Wien
AUSTRIA
VitaSport NV
Vriesenrot 3 - Hoogveld
BE-9200 Dendermonde
BELGIUM
Polar Ibérica SA
Ports d'Europa 100
08040 Barcelona
SPAIN
Polar Electro Nederland B.V.
Postbus 1044
NL-1300 BA Almere
THE NETHERLANDS
Health and Sport
Av. Ricardo Soriano, 32. 1º, 5
29600 Marbella, Malaga
SPAIN
natural_image
Two people jogging on a beach, wearing athletic wear (no visible text or symbols)DEUTSCH 2
ENGLISH 16
FRANÇAIS 28
ESPAÑOL 40
NEDERLANDS 52
ITALIANO 64
PORTUGUES 76

natural_image
Gradient color swatch with grayscale squares and a gray square labeled 'PORTUGUEST' on the right (no other text or symbols)Inhalt
natural_image
Line drawing of a hand using a tool to cut a piece of paper (no text or symbols present)natural_image
Illustration of a person wearing a smartwatch with a hand adjusting the wrist area (no text or symbols present)natural_image
Line drawing of two hands adjusting a small object on a person's torso (no text or symbols)natural_image
Line drawing of a person wearing a boxing belt and high back (no text or symbols)Quelle: American College of Sports Medicine. ACSM's Guidelines for Exercise Testing and Prescription. Williams & Wilkins, 2000.

Copyright © 2003 Polar Electro Oy, 90440 Kempele, Finnland.
- How to Put Your Heart Rate Monitor On .....16
- Functions and Modes of Heart Rate Monitor..18
- How to Set up Your New Receiver......20
- How to Start and Stop .....20
- Functions During Exercise......21
- After Exercising 22
- How to Recall File Stored in Memory .....22
- Settings 23
- Target Heart Rate Zone 24
- Resetting 25
- Minimizing Possible Risks in Exercising with Heart Rate Monitor....26
- Technical Specifications....26
- Limited Polar International Guarantee .....27
- Disclaimer....27
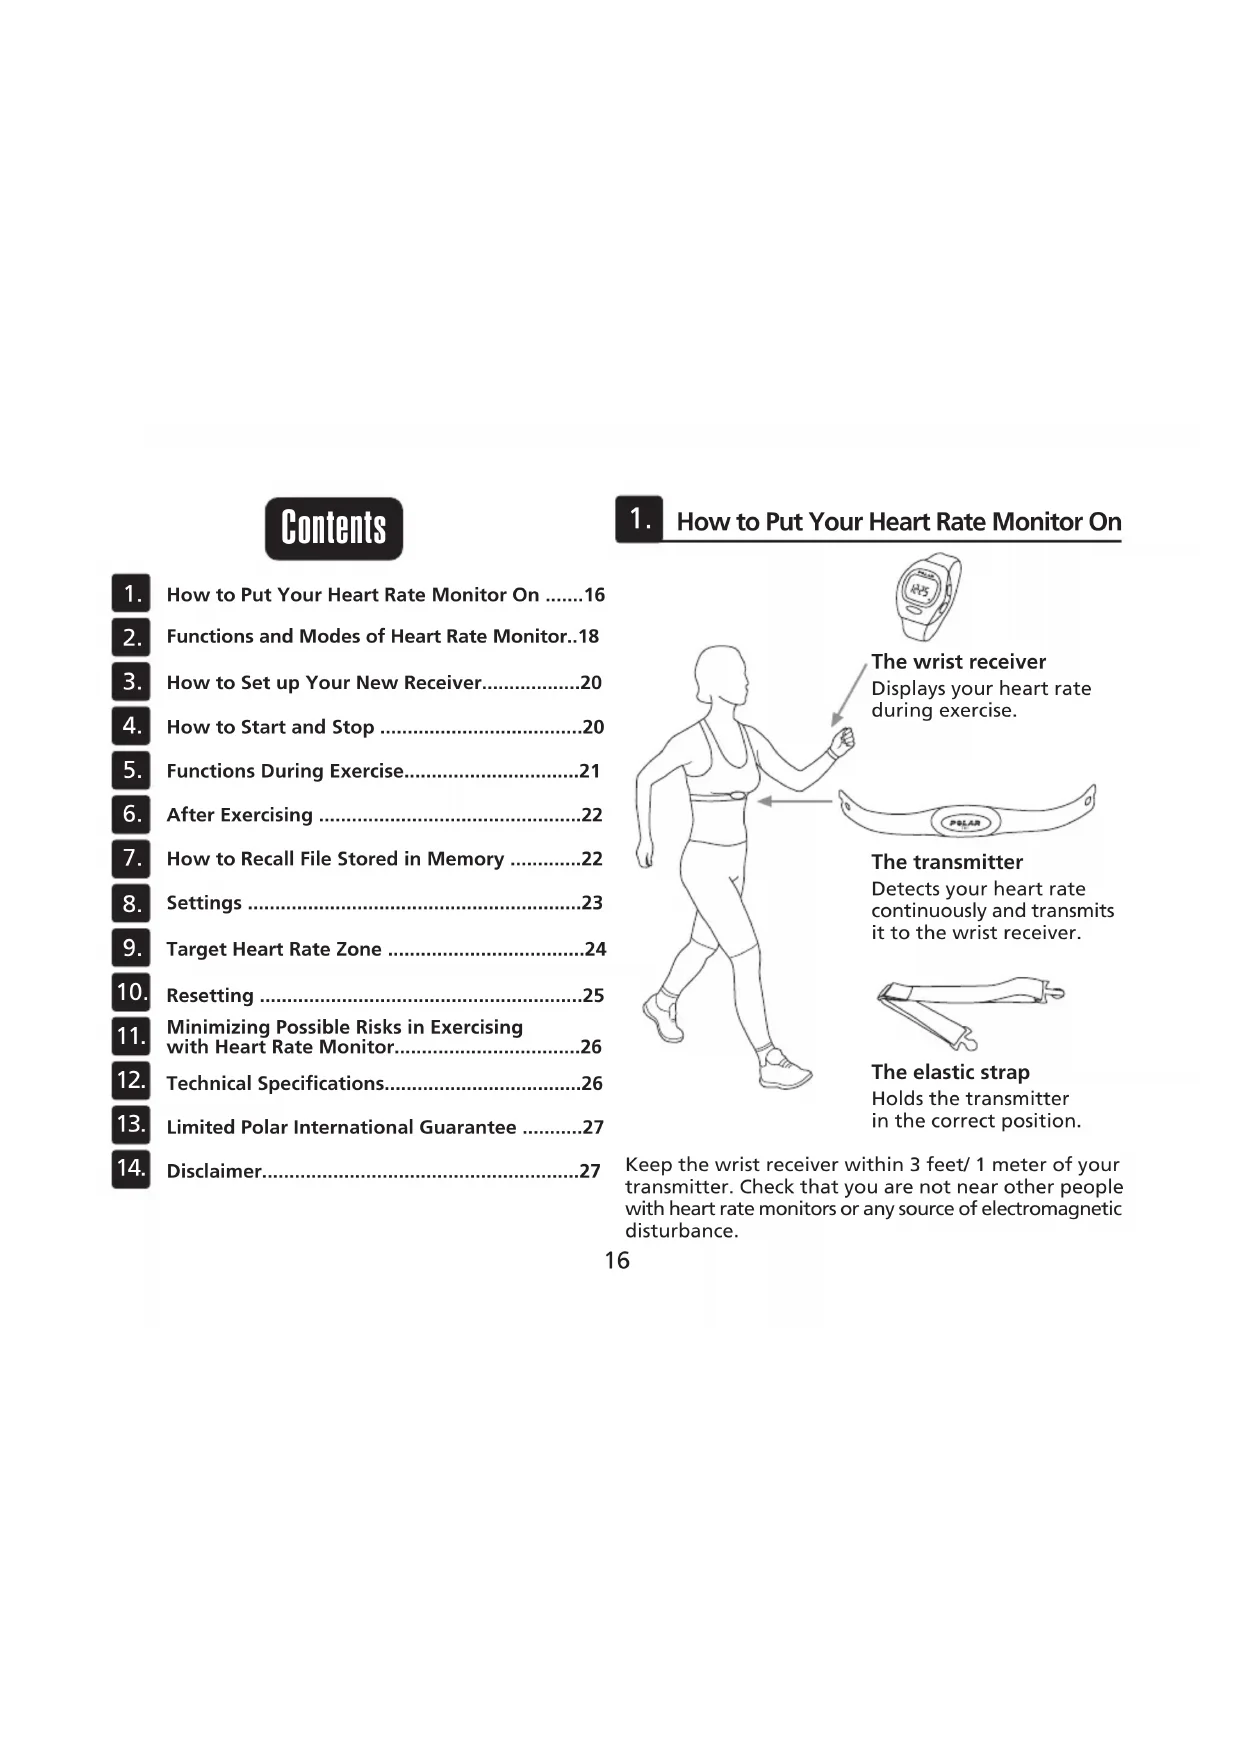
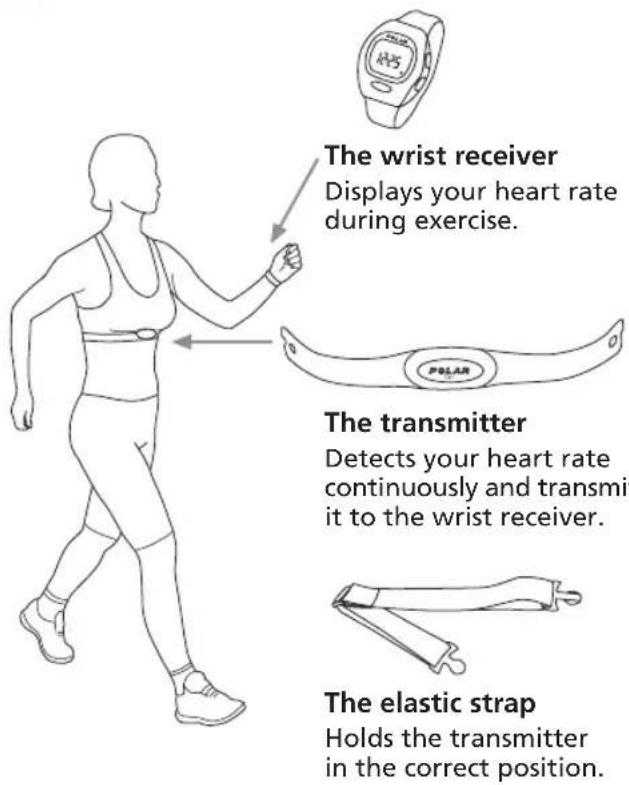
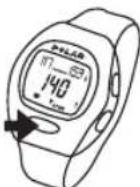
1. How to Put Your Heart Rate Monitor On
text_image
The wrist receiver Displays your heart rate during exercise. The transmitter Detects your heart rate continuously and transmit it to the wrist receiver. The elastic strap Holds the transmitter in the correct position.Keep the wrist receiver within 3 feet/ 1 meter of your transmitter. Check that you are not near other people with heart rate monitors or any source of electromagnetic disturbance.
natural_image
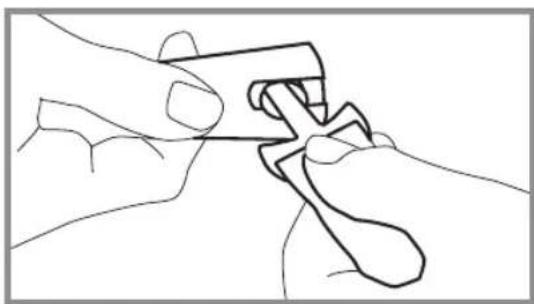
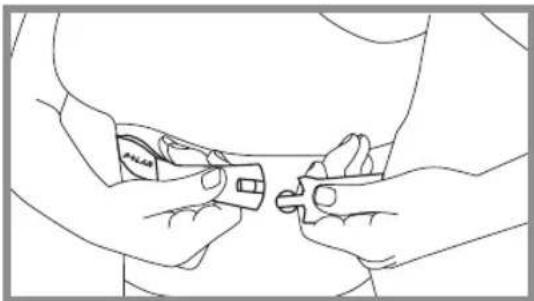
Line drawing of hands using a tool to adjust or install a mechanical component (no text or symbols)- Attach the transmitter to the elastic strap.
natural_image
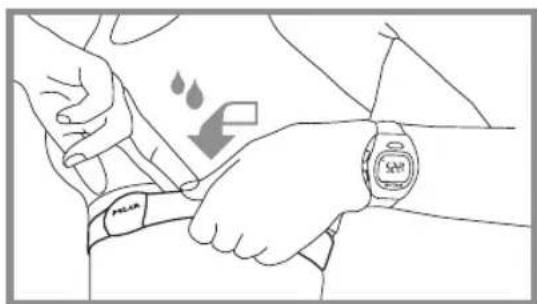
Line drawing of a person wearing a smartwatch with a hand adjusting the wrist area (no text or symbols)- Lift the transmitter off your chest and moisten the two grooved electrode areas on the back.
natural_image
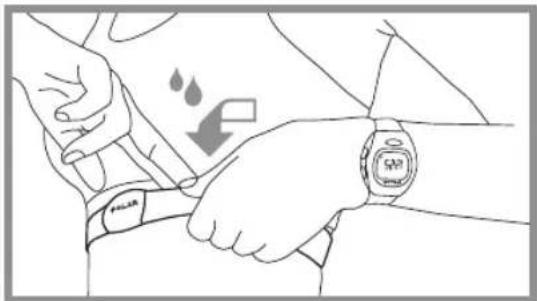
Line drawing of two hands holding small objects, possibly tools or devices, against a plain background (no text or symbols)- Adjust the strap length to fit snugly and comfortably. Secure the strap around your chest, just below the chest muscles, and buckle it.
natural_image
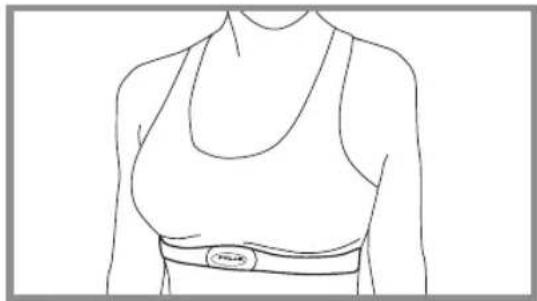
Line drawing of a person wearing a high-temperature top and belt (no text or symbols)- Check that the wet electrode areas are firmly against your skin and the Polar logo is in a central, upright position.

2. Functions and Modes of Heart Rate Monitor
text_image
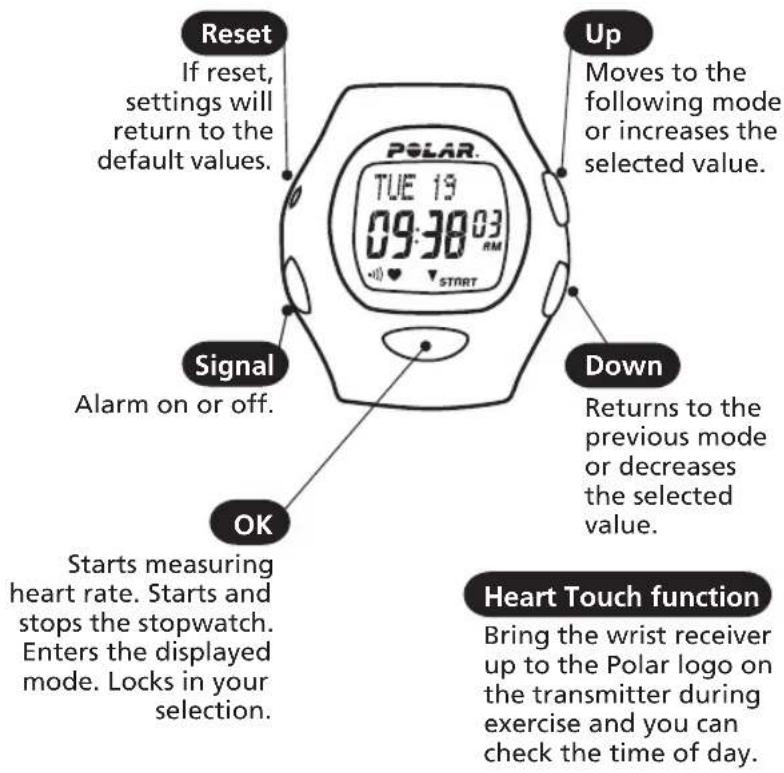
Reset If reset, settings will return to the default values. Signal Alarm on or off. OK Starts measuring heart rate. Starts and stops the stopwatch. Enters the displayed mode. Locks in your selection. Up Moves to the following mode or increases the selected value. Down Returns to the previous mode or decreases the selected value. Heart Touch function Bring the wrist receiver up to the Polar logo on the transmitter during exercise and you can check the time of day.How to operate the set buttons
- To move forward or back, press Up or Down button.
- To choose the value to begin adjusting, press OK. It will begin blinking.
- Press Up or Down button to adjust the value (The digits run faster if you press and hold the button).
- Wherever you are in the settings, you can return to the Time of day display by pressing and holding OK.
- Quick enter to the Alarm settings: In the Time of day display press and hold Signal button.
From Time of day display
Press OK once starts measuring heart rate Press OK once
Press OK twice starts recording exercise
From Time of day display
Press up once File
Press up twice Setting
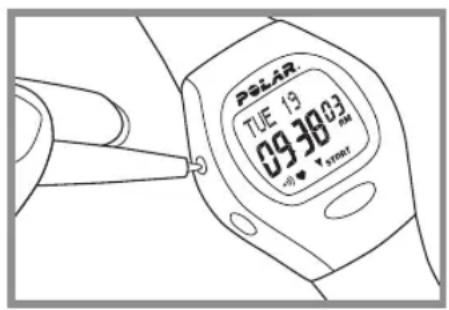
Time of day display mode
- Starting point for all functions
• Shows date and time
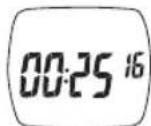
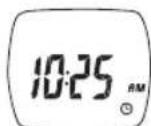
When the alarm is turned on, the symbol • appears on the Time of day display. When the alarm comes on it will sound for one minute or you can turn it off by pressing any of the four buttons.
Exercise recording mode
- In the Exercise mode you measure your heart rate and record your exercise information in a file.
- You can view different information while the heart rate monitor is measuring heart rate.
File mode
- Shows the data recorded during the exercise. See "How to Recall File Stored in Memory" chapter.
Setting mode
- Set different values starts measuring heart rate target heart rate limits
- watch functions; alarm, time (24h or 12h time mode), date
3. How to Set up Your New Receiver
- Press any of the four buttons twice to activate the receiver. TIME is displayed. 12h is flashing.
- Once awakened, the receiver will guide you through the necessary settings.
Scroll up or down to set the right values. Press OK to lock your selection.
Set the following: 24h or 12h time mode Time of day Date
After the settings are complete, the receiver automatically goes to the Time of day display. You can cancel the setting by pressing and holding OK.
4. How to Start and Stop
How to Start
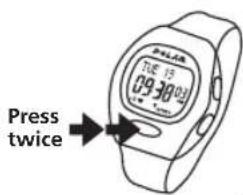
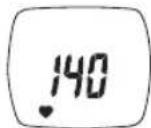
- In the Time of day display press OK. Your heart rate appears in a few seconds.
text_image
Press twice- Press OK again. The stopwatch starts running and you can start exercising. The exercise data will only be recorded if you have turned the stopwatch on.
Or
- Press and hold OK button to start measurement. The stopwatch and the exercising recording start. Your heart rate will appear in a few seconds.
How to Stop
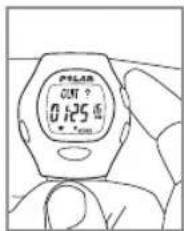
- Press OK to stop the stopwatch. QUIT and paused stopwatch appear. Measurement is paused Exercise is no longer recorded.
Press once
- Press Up or Down button to exit the Exercise mode.
The receiver shows the Time of day display within 5 minutes if there is no heart rate reception or if you forget to quit the heart rate measurement mode when you stopped the stopwatch and removed the transmitter from your chest.
text_image
Polar OUT ? 0.125 面5. Functions During Exercise
- Press Signal button to turn the target zone alarm sound on or off.
- Check the time of day by bringing the wrist receiver up to the Polar logo on the transmitter.
-
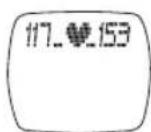
Scroll up to select what values you want to view in the upper row of the display during exercise.
-
Heart rate in the target zone is displayed as absolute heart rate
- Fitness bullets
For every 10 minutes in TZ, a 📄 appears.

-
Scroll down to select what you want to view in the lower row of the display.
-
Heart rate in beats per minute.
- Exercise time
- Time of day
- You can pause the stopwatch by pressing OK. Repressing OK will restart the stopwatch.
After restart you will see the heart rate in the lower row.
6. After Exercising
- Carefully wash the transmitter with a mild soap and water solution.
- Rinse it with pure water.
- Dry the transmitter carefully with a soft towel.
-
Keep the wrist receiver clean and wipe off any moisture.
-
Store the heart rate monitor in a clean and dry place. Dirt impairs the elasticity and functioning of the transmitter. Sweat and moisture can keep the electrodes wet and the transmitter activated, which shortens battery life.

The combined impact of moisture and intense abrasion may cause a black color, which might stain light-colored clothes especially, to come off the transmitter's surface.
7. How to Recall File Stored in Memory
From Time of day display
Press up once File
Press OK Exe. Time
Press up once Average HR
Press up once In Zone
- While in the Time of day display mode press Up or Down until FILE is displayed.
- Press OK.
- Scroll up or down to recall the exercise information:
EXE. TIME Total exercise time
AVERAGE HR Average heart rate of the exercise
IN ZONE Time spent in target zone
8. Settings
From Time of day display
Press up twice Setting
Press OK Limits Set
Hi Limit
Low Limit
From Limit Set
Press up once Watch Set
Alarm off/on, Alarm time
Time
Date
From Watch Set
Press up once Setting
8.1. Settings step by step
1. LIMITS – setting target heart rate zone limits
- Start from the Time of day display
- Press Up or Down until display changes to SETTING
- Press OK, LIMITS SET is displayed
- Press OK again, HI LIMIT is displayed
- Press Up or Down button to determine the upper limit (default 160)
- Press OK, LO LIMIT is displayed
- PressUp or Down button to determine the lower limit (default 80) (the lower limit cannot be set above the upper limit)
- Press OK, LIMITS SET is displayed
ENGLISH
2. WATCH – time and day determination
Alarm
- Press Up button to advance from LIMITS display to WATCH SET, press OK (or in the Time of day display press and hold Signal button -> WATCH SET)
- ALARM ON or OFF blinks
- Select alarm on or off
Press OK - If you set the alarm on: set the alarm time
In 12 h time mode, select AM/PM, press OK - Hours blink on the display, press Up or Down button to select the correct hour, press OK
- Minutes blink on the display, press Up or Down button to select the correct minutes
Press OK
Time
TIME is displayed
- Press Up or Down button to select 24h or 12h time display
Press OK
- In 12h time mode, select AM/PM with Up or Down button, press OK
• TIME and blinking hours are displayed
- Press Up or Down button to select correct time, press OK
TIME and blinking minutes are displayed
- Press Up or Down button to select correct time, press OK
9. Target Heart Rate Zone
Date
The date is displayed differently depending on which time mode has been chosen.
12h mode:
MONTH -> DAY -> YEAR
24h mode:
DAY -> MONTH -> YEAR
• MONTH / DAY appears
- Press Up or Down button to select the desired value
Press OK
DAY / MONTH appears
- Press Up or Down button to select the desired value
Press OK
YEAR and the blinking number are displayed
- Press Up or Down button to select the year
- Press OK, press and hold OK to return to the Time of day display
Your target heart rate zone is a range between the lower and upper heart rate limits expressed as percentages of your maximum heart rate ( HR_max ).
To find your target heart rate zone, you need to know your maximum heart rate ( HR_max ). To estimate yout HR_max , use the following formula:
$$ \mathrm{HR} _ {\max} = 2 2 0 - \text { age } $$
Your HR_max = 220 - ____ = ____

When your heart beats at 50-60% of your HR _max , you're in the light intensity zone. This kind of exercise is easy; ex. daily activities and light chores. It delivers some health benefits.

Push on to 60-70% of your HR _max and you're in the light to moderate intensity zone. This is good for health, fitness and for weight loss. It also improves endurance.

At 70-85% of your HR _max , you've moved into the moderate to heavy intensity zone. This is harder work, but effective for strengthening aerobic fitness and endurance especially for people exercising more regularly.
The following table shows target heart rate zones in beats per minute estimated from age. For an accurate measure of your maximum and exercise heart rates, visit your doctor for an exercise stress test.
| Age | HRmax(220-age) | Light intensity | Light to moderate intensity | Moderate to heavy intensity |
| 20 200 | 100-120 | 120-140 | 140-170 | |
| 25 195 | 97-117 117-136 | 136-165 | ||
| 30 190 | 95-114 114-133 | 133-161 | ||
| 35 185 | 92-111 111-129 | 129-157 | ||
| 40 180 | 90-108 108-126 | 126-153 | ||
| 45 175 | 87-105 105-122 | 122-148 | ||
| 50 170 | 85-102 102-119 | 119-144 | ||
| 55 165 | 82-99 99-115 | 115-140 | ||
| 60 160 | 80-96 96-112 | 112-136 | ||
| 65 155 | 77-93 93-108 | 108-131 |
10. Resetting
text_image
PLEAR TUE 19 09:38 02:00 + - V smartResetting clears the settings which return to the default values.
If there are no reactions to any buttons, reset the receiver.
- Press RESET button with a pen tip.
Display becomes full of digits. - Press any of the four buttons once.
If you don't press any button after resetting, within one minute the wrist receiver goes to the battery saving mode.
Wake up by pressing any of the buttons twice.
11. Minimizing Possible Risks in Exercising with Heart Rate Monitor
Exercise may include some risk, especially for those who have been sedentary.
Before starting a regular exercise program you are recommended to answer to the following questions for health status checking. If the answer is yes to any of the questions, we recommend to consult a doctor before starting an exercise program.
- Have you not exercised for the past 5 years?
- Do you have high blood pressure?
- Do you have high blood cholesterol?
- Do you have symptoms of any disease?
- Are you taking any blood pressure or heart medication?
- Do you have a history of breathing problems?
- Are you recovering from a serious illness or medical treatment?
- Do you use a pacemaker or another implanted electronic device?
- Do you smoke?
- Are you pregnant?
Note that in addition to exercise intensity, medications for heart, blood pressure, psyche, asthma, breathing etc. as well as some energy drinks, alcohol and nicotine, can affect heart rate.
It is important to be sensitive to your body's reactions during exercise. If you feel unexpected pain or excessive fatigue when exercising, it is recommended to stop the exercise or continue at a lighter intensity.
If you are allergic to any substance that comes into contact with the skin or if you suspect an allergic reaction due to using the product, check the listed materials in the "Technical Specifications" chapter. To avoid any skin reaction risk with the transmitter, wear it over a shirt. However, moisten the shirt well under the electrodes to ensure flawless operation.
Notice to persons with pacemakers, defibrillator or other implanted electronic device. Persons who have a pacemaker use the Polar heart rate monitor at their own risk. Before starting use, we always recommend an exercise test under doctor's supervision. The test is to ensure the safety and reliability of the simultaneous use of the pacemaker and the heart rate monitor.
Technical Specifications
All Polar heart rate monitors are designed to indicate the level of physiological strain and intensity in sports and exercise. No other use is intended or implied. Heart rate is displayed as number of heartbeats per minute (bpm).
Transmitter
Battery type: Built-in Lithium Cell
Battery life: Average 2500 hours of use
Operating temperature: -10 °C to +50 °C / 14 °F to 122 °F
Material: Polyurethane
Waterproof
Elastic Strap
Buckle material: Polyurethane
Fabric material: Nylon, polyester and natural rubber including a small amount of latex
Wrist Receiver
Battery type: CR 2032
Battery life: Average 2 years (1h/day, 7 days/week)
Operating temperature: -10 °C to +50 °C / 14 °F to 122 °F
Water resistance: to 30 meters/100 feet, only OK button can be pressed in water
Wrist strap: Polyurethane
Wrist strap buckle: Polyoxymethylene
Back cover: Stainless steel complying with the EU Directive 94/27/EU and its amendment 1999/C 205/05 on the release of nickel from products intended to come into direct and prolonged contact with the skin.
Accuracy of heart rate measurement: ± 1% or ± 1 bpm, whichever larger, definition applies to steady state conditions
Default settings
Time of day 12h
Alarm clock ......OFF
Zone alarm....On
Upper Limit 160
Lower Limit 80
Limit values
Chronometer....23 h 59 min 59 s
Heart rate limits....30 - 199 bpm
13. Limited Polar International Guarantee Discla 14.r
- This limited Polar international guarantee is issued by Polar Electro Inc. for the consumers who have purchased this product in the USA or Canada. This limited Polar international guarantee is issued by Polar Electro Oy for the consumers who have purchased this product in other countries.
- Polar Electro Inc. / Polar Electro Oy guarantees to the original consumer/ purchaser of this product that the product will be free from defects in material or workmanship for two years from the date of purchase.
- Please keep the receipt or International Guarantee Card, which is your proof of purchase!
- Guarantee does not cover battery, damage due to misuse, abuse, accidents or non-compliance with the precautions; improper maintenance, commercial use, cracked or broken cases.
- Guarantee does not cover any damage/s, losses, costs or expenses, direct, indirect or incidental, consequential or special, arising out of, or related to the product. During the guarantee period the product will be either repaired or replaced at an authorized service center free of charge.
- This guarantee does not affect the consumer's statutory rights under applicable national or state laws in force, or the consumer's rights against the dealer arising from their sales/purchase contract.

This CE marking shows compliance of this product with Directive 93/42/EEC.
Copyright © 2003 Polar Electro Oy, 90440 Kempele, Finland.
All rights reserved. No part of this manual may be used or reproduced in any form or by any means without prior written permission of Polar Electro Oy.
In this user's manual or in the package of this product are the names and logos marked with a ^TM symbol trademarks of Polar Electro Oy, and the names and logos marked with a ^® symbol registered trademarks of Polar Electro Oy.
This product is protected by one or several of the following patents: FI 88223, DE 4215549, FR 92.06120, GB 2257523, HK 113/1996, SG 9591671-4, US 5491474, FI 88972, DE 9219139.8, FR 92.09150, GB 2258587, HK 306/1996, SG 9592117-7, US 5486818, FI 96380, US 5611346, EP 665947, DE 69414362, FI 68734, DE 3439238, GB 2149514, HK 812/1989, US 4625733, FI 100924, FI 100452, US 5840039, FI 4150, DE 20008882.3, FR 0006504, FI 4069, US 6272365, FR 9907823, GB 2339833, DE 29910633, FI 104463, US 6183422, FI 4157, DE 20008883.1, FR 0006778, WO 97/33512, GB 2326240.
Other patents pending.
- The material in this manual is for informational purposes only. The products it describes are subject to change without prior notice, due to the manufacturer's continuous development program.
- Polar Electro Inc. / Polar Electro Oy makes no representations or warranties with respect to this manual or with respect to the products described herein. Polar Electro Inc. / Polar Electro Oy shall not be liable for any damages, losses, costs or expenses, direct, indirect or incidental, consequential or special, arising out of, or related to the use of this material or the products described herein.
Table des matières
natural_image
Line drawing of hands using a tool to adjust or install a mechanical component (no text or symbols)natural_image
Line drawing of a person wearing a smartwatch with a hand adjusting the wrist area (no text or symbols)natural_image
Line drawing of two hands holding a small object, possibly a tool or device, against a plain background (no text or symbols)natural_image
Line drawing of a person wearing a high-contrast torso and belt (no text or symbols)ALARM OFF/ON, Fonction réveil
TIME
DATE
Copyright © 2003 Polar Electro Oy, 90440 KEMPELE, Finlande.
natural_image
Line drawing of hands using a tool to adjust or install a mechanical component (no text or symbols)natural_image
Illustration of a person wearing a smartwatch with a hand adjusting the wrist area (no text or symbols present)natural_image
Line drawing of two hands performing a medical procedure on a patient's torso (no text or symbols present)natural_image
Line drawing of a person wearing a high-brimmed sportswear with a circular logo on the chest (no text or symbols)Presionar Up (Arriba) WATCH SET
ALARM OFF/ON (Activar/desactivar alarma), Alarm time (Hora de la alarma)
TIME (Hora)
DATE (Fecha)
WATCH SET
Presionar Up (Arriba) SETTING
8.1 Ajsutes: paso a paso
natural_image
Line drawing of hands using a tool to adjust or install a mechanical component (no text or symbols)natural_image
Line drawing of a person wearing a smartwatch with a hand adjusting the wrist area (no text or symbols)natural_image
Line drawing of two hands holding a small object, possibly a tool or device, against a plain background (no text or symbols)natural_image
Line drawing of a person wearing a high-contrast torso and belt (no text or symbols)Uw HFmax = 220 - ____ = ____


Copyright© 2003 Polar Electro Oy, 90440 Kempele, Finland.
natural_image
Line drawing of hands using a tool to cut or adjust a piece of paper (no text or symbols present)natural_image
Illustration of a person adjusting a smartwatch with a downward arrow indicating motion (no text or symbols)natural_image
Line drawing of two hands adjusting a small object on a person's torso (no text or symbols)natural_image
Line drawing of a person wearing a high-brimmed torso and belt (no text or symbols)Premere OK LIMITS SET
HI LIMIT
LOW LIMIT
LIMITS SET
Premere Su WATCH SET
Allarme Target Zone....On
Limite max 160
Limite min 80
Copyright © 2003 Polar Electro Oy, 90440 Kempele, Finland.
natural_image
Line drawing of hands using a tool to cut or adjust a piece of paper (no text or symbols present)- Prenda o transmissor à tira elástica.
natural_image
Illustration of a person adjusting a smartwatch with a downward arrow indicating motion (no text or symbols)natural_image
Line drawing of two hands adjusting a small object on a person's torso (no text or symbols)natural_image
Line drawing of a person wearing a high-brimmed torso and belt (no text or symbols)ALARM OFF/ON, Hora do alarme
TIME
DATE
Ajuste do Relógio
Copyright © 2003 Polar Electro Oy, 90440 KEMPELE, Finlândia