C600BS - Radio THOMSON - Free user manual and instructions
Find the device manual for free C600BS THOMSON in PDF.
| Product type | Alarm clock with vibrating puck |
| Brand | Thomson |
| Model | C600BS |
| Main power supply | 5V / 2A mains adapter (included) |
| Backup power supply | 3 AAA batteries (not included) |
| Display | LED screen, 4 brightness levels |
| Time mode | 12h / 24h (switch) |
| Alarm | Sound and/or vibration, 3 volume and vibration levels |
| Snooze function | Repeat every 9 minutes |
| Automatic alarm stop | After 30 minutes (if not interrupted) |
| USB port | Output 5V / 1A for phone charging |
| Vibrating puck | Wireless, operates with 3 AAA batteries (not included) |
| Puck battery indicator | LED: off (no battery), solid on (discharged), flashing 1x/10s (ok), 5x/5s (not connected) |
| Maintenance and cleaning | Unplug, use a soft cloth, no abrasive products |
| Safety | Do not open, do not expose to water, minimum distance of 20 cm from the body |
| Repairability | Refer any repairs to a qualified technician |
| Manufacturer | Bigben Interactive FRANCE |
| Compliance | Directive 2014/53/EU |
| Customer service | Phone 09 69 32 59 62 (non-premium rate call), email support.thomson@bigben.fr |
Frequently Asked Questions - C600BS THOMSON
User questions about C600BS THOMSON
0 question about this device. Answer the ones you know or ask your own.
Ask a new question about this device
Download the instructions for your Radio in PDF format for free! Find your manual C600BS - THOMSON and take your electronic device back in hand. On this page are published all the documents necessary for the use of your device. C600BS by THOMSON.
USER MANUAL C600BS THOMSON
MODE D'EMPLOI
LIRE ATTENTIVEMENT CE MANUEL D'UTILISATION AVANT TOUTE UTILISATION DU PRODUIT – À CONSERVER EN VUE D'UNE CONSULTATION ULTÉRIEURE
BBI_C600BS_1506_Ver1
Table des matières
Prise en main 2
| Class II material | |
| Direct current | |
| Alternating current | |
| For indoor use only |

natural_image
Technical line drawing of a battery and its wire, no text or symbols presentDÉCLARATION DE CONFORMITÉ
BELGIQUE, customerservice@bigben-interactive.be
NEDERLAND, customerservice@bigben-interactive.nl
ESPAÑA, sat@bigbeninteractive.es
ITALIA, support@bigbeninteractive.it
www.bigben.eu
THOMSON
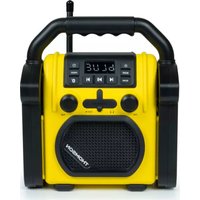
C600BS
Alarm Clock with Bed Shaker

natural_image
Digital THOMSON digital alarm clock with '7:10' display and a white circular button beside it (no text or symbols on device body)OPERATING INSTRUCTIONS
PLEASE READ THIS USER MANUAL CAREFULLY BEFORE
OPERATING THIS UNIT AND RETAIN FOR
FUTURE REFERENCE
BBI_C600BS_1506_Ver1
Getting Started 14
Safety warning and notice 14
What's in the box 16
Diagram of the LED Display & Control 17
Features and Functions 19
Operating Instruction 19
Care of environment 22
Extra information 22
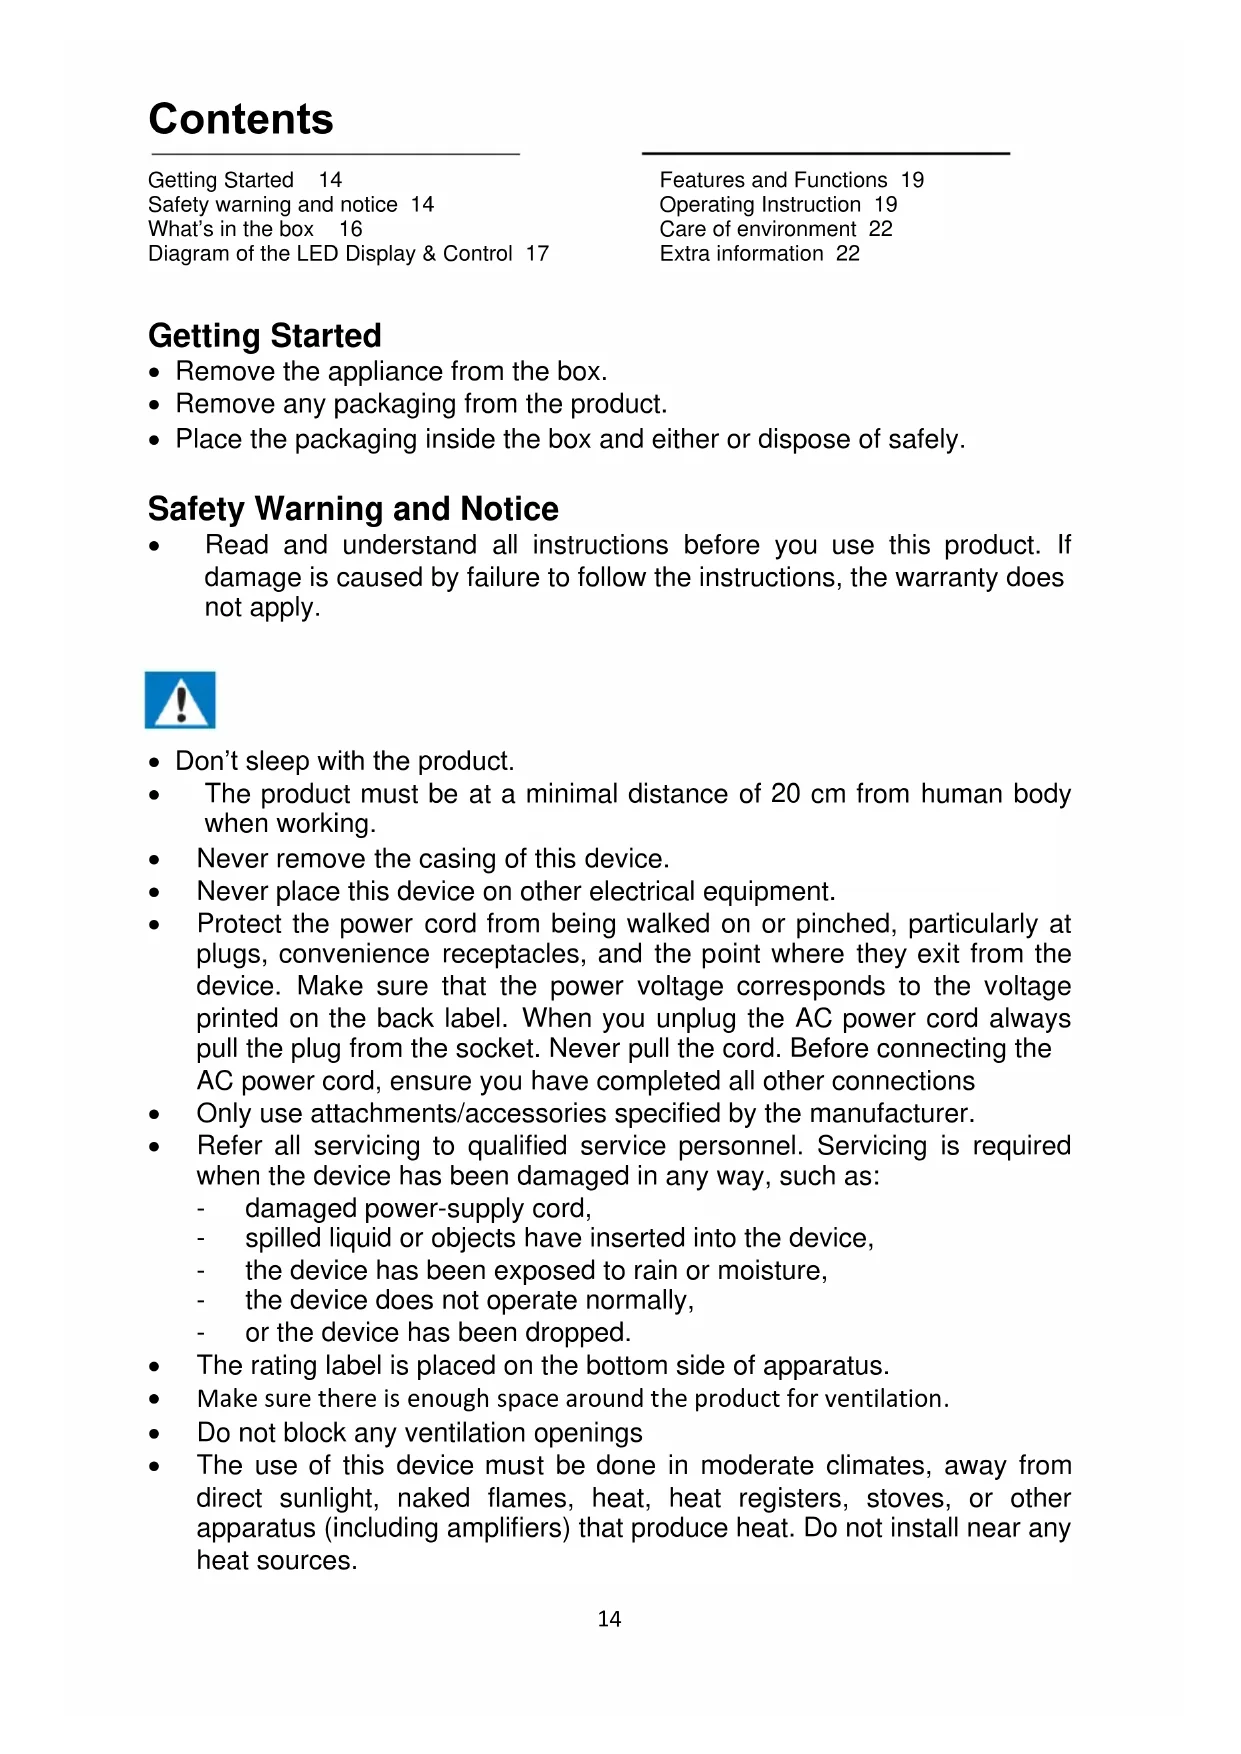
Getting Started
- Remove the appliance from the box.
- Remove any packaging from the product.
- Place the packaging inside the box and either or dispose of safely.
Safety Warning and Notice
- Read and understand all instructions before you use this product. If damage is caused by failure to follow the instructions, the warranty does not apply.

- Don't sleep with the product.
- The product must be at a minimal distance of 20 cm from human body when working.
• Never remove the casing of this device. - Never place this device on other electrical equipment.
- Protect the power cord from being walked on or pinched, particularly at plugs, convenience receptacles, and the point where they exit from the device. Make sure that the power voltage corresponds to the voltage printed on the back label. When you unplug the AC power cord always pull the plug from the socket. Never pull the cord. Before connecting the AC power cord, ensure you have completed all other connections
- Only use attachments/accessories specified by the manufacturer.
- Refer all servicing to qualified service personnel. Servicing is required when the device has been damaged in any way, such as:
- damaged power-supply cord,
- spilled liquid or objects have inserted into the device,
- the device has been exposed to rain or moisture,
- the device does not operate normally,
-
or the device has been dropped.
-
The rating label is placed on the bottom side of apparatus.
• Make sure there is enough space around the product for ventilation. - Do not block any ventilation openings
-
The use of this device must be done in moderate climates, away from direct sunlight, naked flames, heat, heat registers, stoves, or other apparatus (including amplifiers) that produce heat. Do not install near any heat sources.
-
Batteries (battery pack or batteries installed) shall not be exposed to excessive heat such as sunshine, fire, etc.
- Unplug before cleaning. Never lubricate any part of this device. Clean the appliance with a soft cloth. Do not use abrasives or harsh cleaners. Ensure that you always have easy access to the power cord, plug or adaptor to disconnect this device from the power if necessary.
- Do not use this apparatus near water. It must not be in contact with dripping or splashing. Do not use this unit in wet or damp conditions.
- Unplug this device during lightning storms or when unused for long periods of time.
- This appliance can be used by children aged from 8 years and above and persons with reduced physical, sensory or mental capabilities or lack of experience and knowledge if they have been given supervision or instruction concerning use of the appliance in a safe way and understand the hazards involved. Children shall not play with the appliance. Cleaning and user maintenance shall not be made by children without supervision.
- This appliance must only be supplied at safety extra low voltage corresponding to the marking on the appliance.
- The battery must be removed from the appliance before it is scrapped; The appliance must be disconnected from the supply mains when removing the battery.
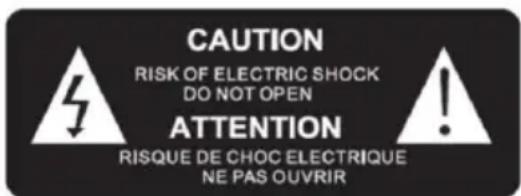

The lightning symbol inside an equilateral triangle warns the user of the presence inside the product of uninsulated hazardous electric voltages powerful enough to represent an electrocution risk.

The exclamation point within a triangle indicates the presence of important operating and maintenance (servicing) instructions in the literature accompanying the unit.
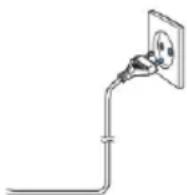
Place the unit in the desired position and unravel the mains cable. Insert the cable into the supply socket and switch on if applicable.
| Class II material |  |
| Direct current |  |
| Alternating current |  |
| For indoor use only |  |

Note the following information: Only use the power supplies listed below.
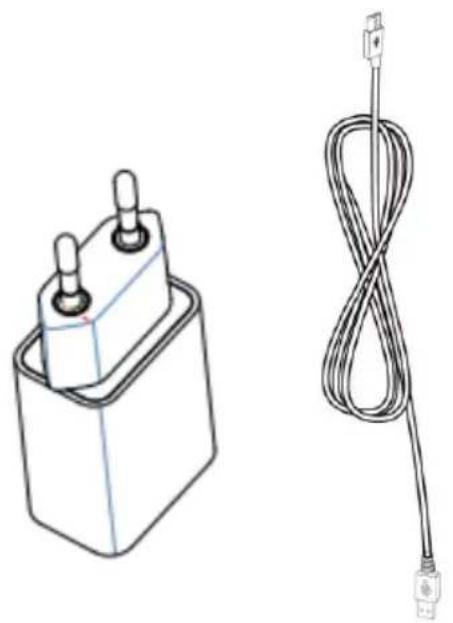
What's in the box?
Check and identify the contents of your package:
- Alarm Clock 1 pc
- Micro USB power cord 1 pc
- Shaker 1 pc
- User manual 1 pc
• Euro power adapter 1 pc
Diagram of the LED Display & Control Display
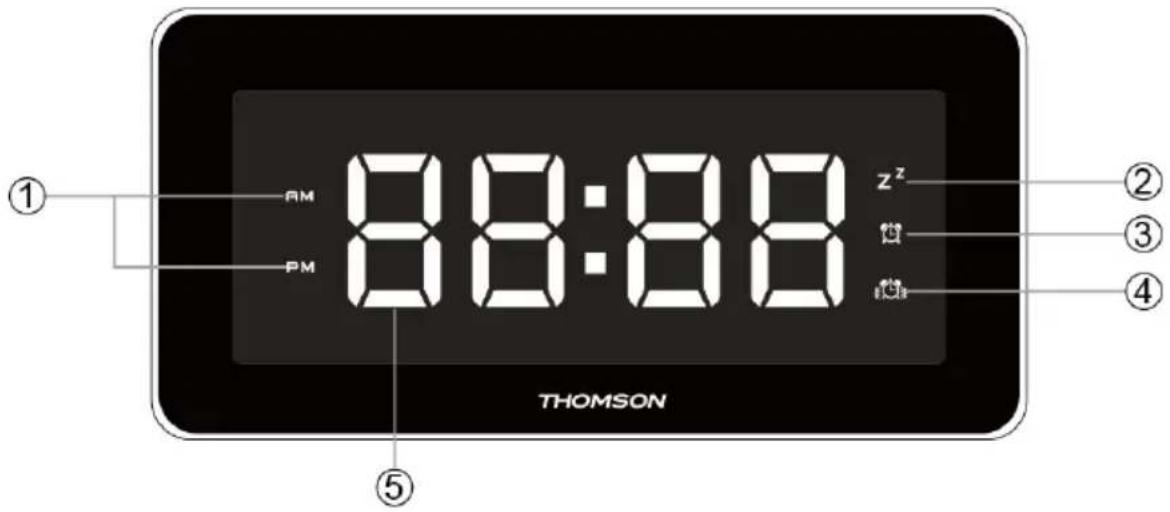
- AM/PM
- Snooze
- Alarm
- Vibrating alarm
- Time display
Top Controls
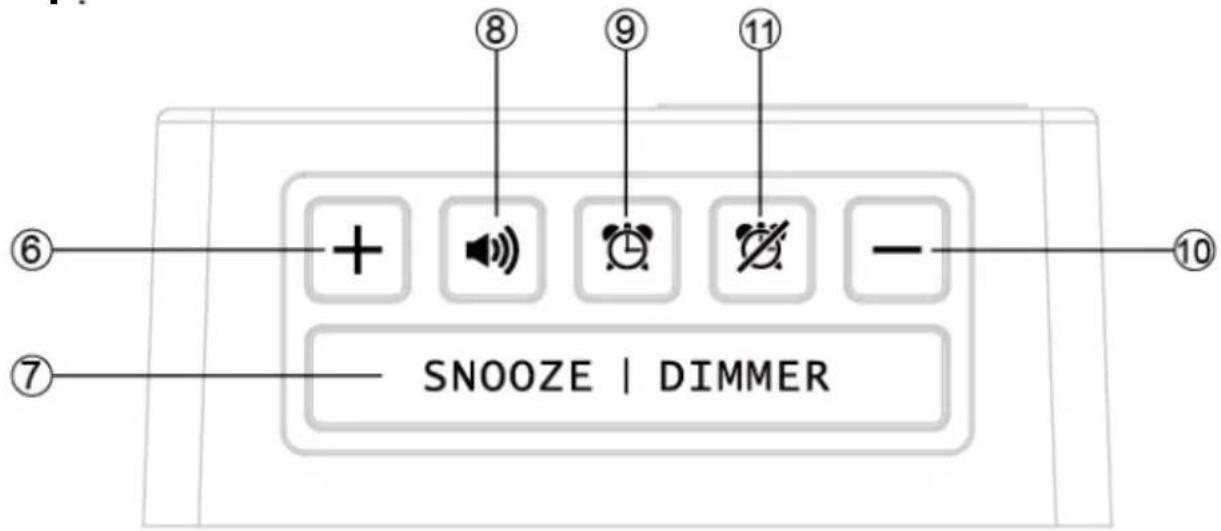
- Press to adjust clock and alarm time
- Snooze / LED dimmer
- Alarm volume
- Alarm time setting
- Press to adjust clock and alarm time
- Alarm Off
Controls on the back
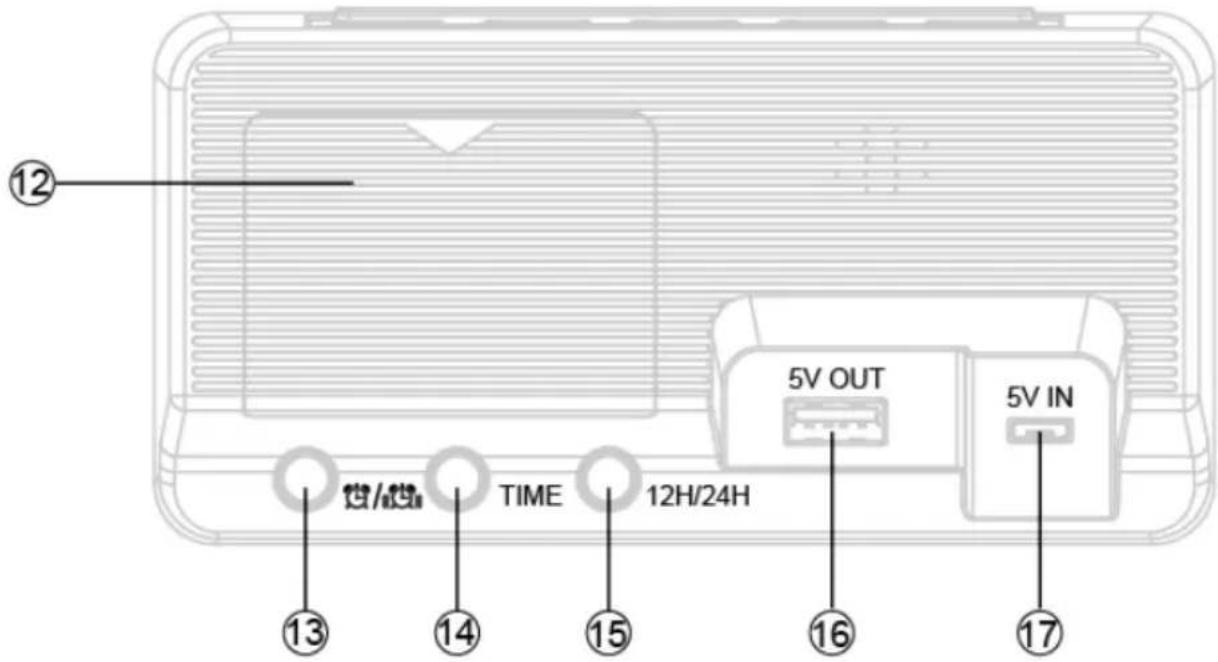
- Battery compartment
- Alarm mode switch (Buzzer/Vibration/Buzzer&Vibration)
- Time setting
- 12H/24H mode switch
- USB charging output
- External power input-DC 5V
Power adapter
natural_image
Technical line drawing of a battery and its wire, no text or symbols presentFeatures and Functions
- Alarm: Easy operating, High/Medium/Low alarm volume, Snooze
- Clock: Large LED screen to display, 12/24 hour mode
- 4 level dimmable display
- 5V 1A USB charging port
- Standby mode
- Dual Alarm Mode: Shaker/Ringtone
- One touch to turn off the alarm
Operating Instruction
1) Turn on the Device & the Shaker
Connect the micro USB power cable to the 5V power adapter (supplied) and push the micro USB connection into the power input port on the back of the device or install 3 AAA batteries(not included). On battery mode, USB charging function can not work and the LED display will turn to standby mode after 10 seconds.
Install 3 AAA batteries (not included) into the shaker to turn on the shaker. The shaker is on when it vibrates for a second. It will connect with the device automatically as the shaker is paired with the device before it leaves the factory. If it fails to connect with the device, please refer to the label on the bottom of the device to re-pair.
2) Time Setting
Press the TIME button on the back of the device. The time display will begin to flash. Press+/-to set the time by minutes. Or press and hold +/- to select time quickly (Recommended). Press the TIME button to confirm time setting (If no further buttons are pressed within 10 seconds, it will confirm the setting and exit automatically).
3) 12H/24H Mode
Use the 12H/24H switch behind the unit to select 12 hour or 24 hour display. In 12H mode, AM or PM will display on the screen.
4) Alarm Setting
Press button to set the alarm. 12:00 and the alarm icon will flash on the screen. Press +/- button to select time by minutes. Or press and hold +/- button to select time quickly (Recommend). Then press button to confirm the setting. The alarm icon will stop flashing automatically if no further buttons are pressed within 10 seconds.
If the alarm is not cancelled, the alarm works everyday.
5) Turn off Alarm
When the alarm sounds, press and hold SNOOZE button to turn off alarm. The alarm icon will display on the screen. The Alarm will work again the next day. When the alarm sounds, press button, then the alarm is cancelled. The alarm icon disappears.
6) Alarm Mode Setting
Press ALARM MODE button on the back of the device to switch between buzzer, vibration or buzzer & vibration. The icon is for buzzer and the icon is for vibrating alarm and the is for buzzer & Vibration. If choosing vibration or buzzer & vibration alarm, please make sure you have installed 3 AAA batteries (not included) inside the bed shaker.
The default alarm mode is buzzer & vibration.
7) Alarm Volume & Vibrating Level
On buzzer mode, press 📋 button to switch High (V3) / Medium (V2) / Low (V1) alarm volume. The default volume is medium volume. V1, V2 and V3 icons are displayed on the screen.
Setting the vibrating level is same as setting alarm volume.
8) Snooze
When the alarm sounds:
1: Press the SNOOZE button to activate the snooze function. The snooze icon Z^Z will be displayed and the alarm will activate again after 9 minutes. Press and hold the SNOOZE button to turn off snooze mode and the snooze icon Z^Z disappears.
2: The alarm will sound for 30 minutes if no button is pressed. After 30 minutes, the alarm will switch off automatically for the day. The alarm will work again the next day.
9) Display Brightness Adjustment
Press the SNOOZE button to adjust brightness of the LED display. There are 4 brightness levels.
10) USB Charging
The USB charging port supports charging mobiles and supplies 1A charging current.
11) LED Battery Indicator on the Shaker
LED is off: No battery is inserted or power is too low.
LED is always on: Low battery. Please replace the batteries.
LED is flashing 1 time every 10 seconds: The shaker works properly.
LED is flashing 5 times every 5 seconds: The shaker is not connected with the alarm clock.
Battery Operated Mode
When the device is powered by batteries only, the display will turn off after 10 seconds and the alarm will only sound for 3 minutes. USB charging function does not work.
The battery life can last for one year normally.
We recommend the use of a long-life batteries to ensure maximum performance.
Power Adapter
The power adapter equipped is 5V 2A.
Adaptor specification
- Adaptor manufacturer name or trademark: W&T ELECTRONICS CO.,LTD.
- Adaptor Model Number: W&T-AD1912E050200EU
- Input voltage and frequency: 100-240V\~50/60Hz 0.35A
• Output voltage, current, power: 5.0V 2.0A 10.0W
• Average active efficiency: 78.7%
• Efficiency at low load (10%): 80% - No-load power consumption: 0.07W
12) Restore Factory Settings
To restore factory settings, press the TIME and buttons for 5 seconds at the same time. After hearing a DiDi sound, all settings are cleared.
Care of the environment

Attention should be drawn to environmental aspects of battery disposal.

When this crossed-out wheeled bin symbol is attached to a product it means that the product is covered by the European Directive 2002/96/EC. Please inform yourself about the local separate collection system for electrical and electronic products. Please act according to your local rules and do not dispose of your old products with your normal household waste. Correct disposal of your old product helps to prevent potential negative consequences for the environment and human health.
Extra information
- THOMSON is a trademark of TECHNICOLOR SA or its affiliates used under license to Bigben Interactive.
- You can find the information on the plate located at the back of the unit.
DECLARATION OF CONFORMITY
The undersigned, Bigben Interactive declares that the radio equipment of the C600BS complies with the 2014/53/EU directive.
The complete text is available at https://www.bigben-interactive.co.uk/support/
Fabricant : Bigben Interactive FRANCE
- Rue de la Voyette, C.R.T. 2, Fretin,
CS90414 - 59814 Lesquin Cedex, France
BELGIQUE, customerservice@bigben-interactive.be
NEDERLAND, customerservice@bigben-interactive.nl
ESPAÑA, sat@bigbeninteractive.es
ITALIA, support@bigbeninteractive.it
www.bigben.eu
THOMSON
C600BS
natural_image
Digital THOMSON digital alarm clock with '7:10' display and a white circular button beside it (no text or symbols on device body)| Class II material | |
| Direct current | |
| Alternating current | |
| For indoor use only |

natural_image
Technical line drawing of a battery and its wire, showing top and side views (no text or symbols)59814 LESQUIN Cedex - Francia
www.bigben.eu
Correo electrónico: support.thomson@bigben.fr
natural_image
Digital THOMSON digital alarm clock with '7:10' display and a white circular button beside it (no text or symbols on device body)ISTRUZIONI PER L'USO
LEGGERE IL PRESENTE MANUALE CON ATTENZIONE PRIMA DI METTERE IN FUNZIONE IL DISPOSITIVO E CONSERVARLO PER UNA CONSULTAZIONE FUTURA.
BBI_C600BS_1506_Ver1
Introduzione 37
| Class II material | |
| Direct current | |
| Alternating current | |
| For indoor use only |

natural_image
Technical line drawing of a battery and its wire, no text or symbols present59814 LESQUIN Cedex - France
www.bigben.eu
Email: support.thomson@bigben.fr
| Class II material |  |
| Direct current |  |
| Alternating current |  |
| For indoor use only |  |

natural_image
Technical line drawing of a battery and its wire, no text or symbols presentCaracterísticas e Funcionalidades
https://www.bigben-interactive.co.uk/support/
Fabricado na China
59814 LESQUIN Cedex - França
www.bigben.eu
E-mail: support.thomson@bigben.fr
natural_image
Digital THOMSON digital alarm clock with '7:10' display and a white circular button beside it (no text or symbols on device body)GEBRAUCHSANWEISUNG
| Class II material | |
| Direct current | |
| Alternating current | |
| For indoor use only |

natural_image
Technical line drawing of a battery and its wire, showing top and side views (no text or symbols)http://www.bigben-interactive.co.uk/support/
Made in China
natural_image
Digital THOMSON digital alarm clock with '7:10' display and a white circular button beside it (no text or symbols on device body)GEBRUIKSINSTRUCTIES
LEES DEZE GEBRUIKSAANWIJZING AANDACHTIG DOOR VOOR GEBRUIK VAN HET TOESTEL EN BEWAAR HET DOCUMENT VOOR TOEKOMSTIG GEBRUIK
BBI_C600BS_1506_Ver1
Aan de slag 73
| Class II material |  |
| Direct current |  |
| Alternating current |  |
| For indoor use only |  |