
RR300 - Radio THOMSON - Free user manual and instructions
Find the device manual for free RR300 THOMSON in PDF.
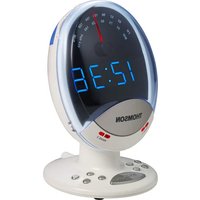


| Product Type | Portable Radio |
| Brand | Thomson |
| Model | RR300 |
| Frequency Bands | AM / FM |
| Dimensions (approx) | 150 x 80 x 30 mm |
| Weight (approx) | 300 g (without batteries) |
| Power Source | 2 x AA batteries (not included) or AC adapter (5V DC, 500 mA) |
| Display | Digital LCD with backlight |
| Alarm Function | Yes, with snooze |
| Sleep Timer | Yes, adjustable 15-90 minutes |
| Audio Output | Built-in speaker (3W), 3.5mm headphone jack |
| Preset Stations | 20 (10 AM, 10 FM) |
| Tuning Method | Digital with auto-scan and manual |
| Antenna | Built-in ferrite bar for AM, telescopic for FM |
| Cleaning | Wipe with a soft, dry cloth; do not use solvents |
| Safety Precautions | Do not expose to water or extreme temperatures; use recommended batteries |
| Spare Parts / Repair | Contact Thomson support for service; no user-serviceable parts inside |
Frequently Asked Questions - RR300 THOMSON
User questions about RR300 THOMSON
0 question about this device. Answer the ones you know or ask your own.
Ask a new question about this device
Download the instructions for your Radio in PDF format for free! Find your manual RR300 - THOMSON and take your electronic device back in hand. On this page are published all the documents necessary for the use of your device. RR300 by THOMSON.
USER MANUAL RR300 THOMSON
RR300
It is important to read this instruction book prior to using your new product for the first time.
Safety Information
EN
CAUTION:
For UK Only
CONNECT THE MAIN LEAD INTO AC MAINS POWER SOCKET
POWER SUPPLY 230V. It must not be connected to D.C. mains.
Note: The mains lead of the set is fitted with a moulded plug. If the mains socket are not compatible or if for any reason the plug is removed please follow the directions below. The moulded plug cannot be rewired and if removed must be disposed of safely.
DO NOT under any circumstances plug the severed plug into any mains socket as this could result in electric shock.
Important: If the plug is removed, rewire the new plug as follow:
The wires in the mains plug are coloured in accordance to the following code:
BLUE = NEUTRAL & BROWN = LIVE
If the colours of the wires in the mains lead of this apparatus may not correspond with the coloured markings identifying the terminals in your plug, proceed as follows:
BLUE wire to the terminal coded N (Neutral) or coloured black.
BROWN wire to the terminal coded L (Live) or coloured red.
DO NOT make any connection to the terminal in the plug which is marked by the letter E or by the earth symbol or coloured green or green and yellow.
A fused plug must be fitted with a 3A fuse approved by ASTA or BS1362 and fuse covers must be always be securely replaced. If your set does not work, the fuse may be blown.

MAINS CONNECTIONS
MAINS OUTLET POWER SUPPLY: 230V ~50Hz
Note: Power is fed to the unit even when it is not functioning.
To cut the power supply off, the power cable must be unplugged.
Note: The mains plug is used as the disconnect device and it shall remain readily operable and easily accessed by the user during the apparatus is in intended use.

Safety Information
Rating Information : At the bottom of the unit.
This unit complies with the existing requirements.

In accordance with the rating plate of the unit, this unit complies with current standards concerning electrical safety and electromagnetic compatibility.

Please respect the environment
Before throwing any batteries away, consult your distributor who may be able to take them back for specific recycling.

Have a Blast-Just Not in your eardrums
Make sure you turn down the volume on the unit before you put on headphones. Increase the volume to the desired level only after headphones are in place.

THE LIGHTNING FLASH AND ARROWHEAD WITHIN THE TRIANGLE IS A WARNING SIGN ALERTING YOU OF "DANGEROUS VOLTAGE" INSIDE THE PRODUCT.
CAUTION
RISK OF ELECTRIC SHOCK DO NOT OPEN
CAUTION: TO REDUCE THE RISK OF ELECTRIC SHOCK, DO NOT REMOVE COVER (OR BACK). NO USER-SERVICEABLE PARTS INSIDE. REFER SERVICING TO QUALIFIED SERVICE PERSONNEL.

THE EXCLAMATION POINT WITHIN THE TRIANGLE IS A WARNING SIGN ALERTING YOU OF IMPORTANT INSTRUCTIONS ACCOMPANYING THE PRODUCT.
SEE MARKING ON BOTTOM / BACK OF PRODUCT
WARNING TO PREVENT FIRE OR ELECTRICAL SHOCK HAZARD DO NOT EXPOSE THIS PRODUCT TO RAIN OR MOISTURE.
Safety Information
EN

• Make sure that you keep your set away from water and high temperatures.
- Do not use your System immediately after transporting it from a cold place to a warm place, as condensation may cause the system to malfunction.
- Keep your unit away from humid areas and abnormally hot places.
- To prevent personal injury, do not reverse any batteries.
- The use of apparatus in moderate climates.
- The apparatus shall not be exposed to dripping or splashing, and no objects filled with liquids, such as vases, shall be placed on the apparatus.
- No naked flame sources, such as lighted candles, should be placed on the apparatus.
- Attention should be drawn to the environmental aspects of battery disposal.
- Minimum distances (2cm) around the apparatus for sufficient ventilation.
- The ventilation should not be impeded by covering the ventilation opening with items, such as newspaper, table-cloths, curtains, etc.
- The rating plate is located at the bottom cabinet of the apparatus.
Ecology

Help protect the environment - we recommend that you dispose of used batteries by putting them into specially designed receptacles.
Maintenance

Clean the unit with a soft cloth, or a damp chamois leather. Never use solvents.
Technical Specification:
Power supply - AC 230V ~50Hz
Clock backup: 9V = 6F22
Power consumption: 5W

Your THOMSON product is designed and manufactured with high quality materials and components which can be recycled and reused.
This symbol means that
electrical and electronic equipment, at their end-of-life, should be disposed of separately from your household waste. Please, dispose of this equipment at your local community waste collection/recycling centre.
In the European Union there are separate collection systems for used electrical and electronic product.
Please, help us to conserve the environment we live in!
Table of Contents
Safety Information
Table of Contents ...... 1
Before Your Begin 2
Battery Back-Up Operation 2
Power Failure Indicator 3
General Controls 4
Left View 4
Right View 5
Top View 5
Display 5
Radio 6
Built-In AFC 6
Antennas 6
Turning on/off the Radio 6
Selecting Bands 6
Tuning to Stations 6
Night Light 6
Turning on/off the Night Light 6
Operating the Clock 7
Setting Clock 7
Setting Wake Time 7
Selecting Wake Source 7
Wake to Tone 8
Wake to Radio 8
Cancel Wake Settings 8
Turning off Alarm 9
Sleep Mode 9
Nap Mode 10
Snooze Operation 11
Before You Begin
EN
Battery Back-Up Operation
The power failure protection circuit will not operate unless battery is installed.
When the battery backup functions, the digital display will not light, however, the wake function still occurs during the power interruption if remaining battery power is adequate.
Normal operation will resume after AC power is restored so you will not have to reset the time or wake.
Install battery as follow:
- Remove battery compartment door (located at the bottom of the radio) by applying thumb pressure to the tab on battery door and then lift the door out and off the cabinet.
- Connect a 9-volt battery to the connector plug.
- Replace the compartment door.

Note: Note:
Power is fed to the unit even when it is not functioning. To cut the power supply off, the power cable must be unplugged.
The descriptions and characteristics in this owner's manual are for the purpose of general reference only and not as a guarantee. In order to provide you with the highest quality product, we may make changes or modifications without prior notice. The English version serves as the final reference on all product and operational details should any discrepancies arise in other languages.
Before You Begin

Note: Note:
Alkaline (NEDA 1604A/IEC 6LR61) batteries are recommended. Carbon-zinc battery may be used but memory holding time will be substantially reduced. Memory holding time for a fresh alkaline battery is approximately 8 hours (if radio or alarm are not operated) which should take care of short, nuisance-type AC power failures. To preserve battery life, the unit should remain plugged into an AC outlet. As the battery gets older, its voltage drops and memory may be lost. Be sure to replace the battery periodically. Battery should be removed if the unit will be stored for more than one month. Leaky battery can badly damage the clock radio.
Power Failure Indicator
When AC power is interrupted (disconnected) for a short period of time, both time and alarm settings will change (unless battery is installed). After AC power is restored (reconnected), the Digital Display will blink to indicate that power was interrupted and you should readjust the time and alarm settings.
General Controls
EN

- Turns radio on and off.
SLEEP - Activates sleep function.
FWD - Increases clock time in clock, wake, snooze, sleep and nap setting mode.
REV - Decreases clock time in clock, wake, snooze, sleep and nap setting mode.
WAKE 1 - Activates Wake 1 settings and changes wake 1 mode.
WAKE 2 - Activates Wake 2 settings and changes wake 2 mode.
NAP - Activates nap function.
DIMMER - Adjusts display brightness.
SNOOZE - Enters snooze mode where the alarm will quiet but will sound again once the snooze period is over.
Left View
TUNING - Tunes radio frequency.
AM/FM - Selects between FM and AM radio band.
General Controls
Right View
VOLUME + / - - Adjusts volume level.
TIME SET: LOCK/WAKE 1/WAKE 2/CLOCK - Selects clock setting mode, wake setting mode and lock mode.
Top View
LIGHT - Turns night light on and off.
Display
NAP - Nap is activated.
WAKE 1 - Wake 1 to tone.
WAKE 1 ♪ - Wake 1 to radio.
WAKE 2 - Wake 2 to tone.
WAKE 2 ♪ - Wake 2 to radio.
Radio
EN
Built-In AFC
The Built-In Automatic Frequency Control (AFC) works only on FM. It helps to reduce drift on FM reception and to keep the radio locked in on the FM station to which it is tuned.
Antennas
AM Antenna - A built-in ferrite rod antenna eliminates the need for an outside antenna for AM reception. Rotating the unit slightly may improve reception of distant AM stations.
FM Aerial wire - Move and extend the wire for better FM reception
Turning on/off the Radio
Press the ⏻ button to turn on the radio.
Press again to turn off the radio.
Selecting Bands
Slide the band switch on the side of the unit to select between FM and AM band.
Tuning to Stations
Turn the TUNING knob on the side of the unit to tune up and down radio frequency.
Night Light
Turning on/off the Night Light
Press the LIGHT button on the top of the unit to turn on the night light. Press again to turn off the night light.
Operating the Clock
Setting Clock
Your digital clock operates on a 24-hour standard mechanism.
- Slide the TIME SET: LOCK/WAKE 1/ WAKE 2/CLOCK switch to CLOCK to enter clock setting mode.
- Press REV or FWD to set the time. Press and hold the respective buttons to fast reverse or fast forward clock time.
- Slide the TIME SET: LOCK/WAKE 1/WAKE 2/CLOCK switch to LOCK.

Tip: Tip:
The ":" flashes on the display in clock setting mode.
Setting Wake Time
- Slide the TIME SET: LOCK/WAKE 1/ WAKE 2/CLOCK switch to select WAKE 1 or WAKE 2 setting mode.
- Press REV or FWD to set wake time. Press and hold the respective buttons to fast reverse or fast forward wake time.
- Slide the TIME SET: LOCK/WAKE 1/WAKE 2/CLOCK switch back to the LOCK position.

Tip:
The ":" flashes on the display in wake time setting mode.
Selecting Wake Source
Press WAKE 1 or WAKE 2 repeatedly to select wake source for the corresponding wake setting (tone ♩ / radio ♪ ).
The respective wake indicator lights when the wake function is activated.
Operating the Clock
Wake to Tone
When wake to tone is selected, the red indicator lights beside the 🔔 icon.
Wake to Radio
When wake to radio is selected, the red indicator lights beside the 📋 icon.

Note:
The unit equips with GRAD-U-G WAKE, the alarm tone volume will increase gradually to its maximum in about 30 to 45 seconds.
Setting Wake Station
- Select radio band.
- Select desired station.
- Adjust the volume by turning
VOLUME.
Cancel Wake Settings
To cancel the wake function permanently, press WAKE 1 or WAKE 2 repeatedly until the red indicator beside the corresponding wake icon turns off.

Tip:
If you set SLEEP function with low volume level before going to bed, we advise using Wake to Tone mode to wake you up since its volume will automatically increase.
Operating the Clock
Turning off Alarm
Silence the alarm momentarily
Press SNOOZE to turn the alarm off temporarily. The alarm will sound again when the snooze period is over.
Stop the alarm
Press ⏻. Then, the alarm will be on the following day at the same time.

Tip:
You can activate the previously set alarm time by pressing the WAKE 1, WAKE 2, or WAKE 2 button.

Note:
When AC power is interrupted and the unit is operating through the DC backup batteries, all wake modes will work with buzzer instead.
Sleep Mode
In sleep mode, the unit will turn off automatically after a specified time.
Setting Sleep Time
- Press SLEEP, then the time display will show 0:59 and the radio will turn on.
- While holding SLEEP, press REV or FWD to set the sleep time.

Note:
The sleep time range is from 1 minute to 2 hours.
- Release SLEEP and the display reverts to current time.
Operating the Clock
EN
Sleep to Radio
The radio is turned on after step 1 in Setting Sleep Time and you may select the station as usual. The radio will turn off when the preset time elapses. If you decide to turn off the radio sooner, press SNOOZE or 🔒.
View Remaining Sleep Time
Press SLEEP to read the remaining sleep time.

Note:
When SLEEP is activated again, the sleep time will be the same as the one you have set before.
Nap Mode
This function wakes you up after a short period of time. Only alarm sound can be selected for NAP.
- Press and release the NAP button. The NAP indicator flashes.
- During this period, adjust nap time by pressing REV or FWD.

Note:
The nap range is from 10 minutes to 2 hours.

Tip:
Nap time increases and decreases at an interval of 10 minutes.
- Press NAP to confirm nap time or if no button is pressed after 5 seconds, the clock will be shown. The NAP indicator lights.
Operating the Clock
View NAP time
Press NAP once to show time left.
Cancel NAP
Press and hold NAP until the NAP indicator turns off and the current time shows on the display.
Stop the Nap alarm
Press NAP or follow "Turning off Alarm".

Note:
Nap will not be activated again the following day at the same time.
Nap alarm is equipped with GRAD-U-WAKE
Snooze Operation
This operation allows extra sleep time after the alarm is on.
The alarm can be turned off temporarily until the snooze period is over by pressing SNOOZE.
Snooze function can be used repeatedly up to 2 hours. After this, the alarm will turn off until the next alarm conditions are met.
Set the "quiet" period as follows:
- Press and hold SNOOZE.
- Press REV or FWD to adjust snooze time. Release the button, and the "quiet" period is set.

Note:
The "quiet" period ranges from 1 to 30 minutes (default is 9 minutes).
THOMSON
46, quai Alphonse Le Gallo
92648 Boulogne
Cedex FRANCE
5609621A
www.thomson.net


- SAFETY INFORMATION
- CAUTION
- FOR UK ONLY
- CONNECT THE MAIN LEAD INTO AC MAINS POWER SOCKET
- BLUE = NEUTRAL & BROWN = LIVE
- MAINS CONNECTIONS
- ECOLOGY
- MAINTENANCE
- TECHNICAL SPECIFICATION
- TABLE OF CONTENTS
- BEFORE YOUR BEGIN
- GENERAL CONTROLS
- RADIO
- NIGHT LIGHT
- OPERATING THE CLOCK
- BEFORE YOU BEGIN
- EN
- BATTERY BACK-UP OPERATION
- NOTE: NOTE
- POWER FAILURE INDICATOR
- BUILT-IN AFC
- ANTENNAS
- TURNING ON/OFF THE RADIO
- SELECTING BANDS
- TUNING TO STATIONS
- TURNING ON/OFF THE NIGHT LIGHT
- SETTING CLOCK
- TIP: TIP
- SETTING WAKE TIME
- TIP
- SELECTING WAKE SOURCE
- WAKE TO TONE
- WAKE TO RADIO
- NOTE
- SETTING WAKE STATION
- CANCEL WAKE SETTINGS
- TURNING OFF ALARM
- SILENCE THE ALARM MOMENTARILY
- STOP THE ALARM
- SLEEP MODE
- SETTING SLEEP TIME
- SLEEP TO RADIO
- VIEW REMAINING SLEEP TIME
- NAP MODE
- VIEW NAP TIME
- CANCEL NAP
- STOP THE NAP ALARM
- SNOOZE OPERATION
Brand : THOMSON
Model : RR300
Category : Radio