
CT350 - Radio THOMSON - Free user manual and instructions
Find the device manual for free CT350 THOMSON in PDF.


| Product type | Analog alarm clock radio |
| Brand | Thomson |
| Model | CT350 |
| Dimensions (W x H x D) | 220 x 130 x 85 mm |
| Weight | 450 g |
| Power supply | Mains 230 V AC / 2 LR20 batteries (not included) |
| Power consumption | 5 W operating |
| Frequency ranges | FM 87.5 - 108 MHz / AM 522 - 1620 kHz |
| Speaker | 7.5 cm wideband speaker |
| Main functions | FM/AM radio, alarm clock, night light, sleep timer, digital display |
| Display | Backlit LCD screen |
| Time setting | Manual via buttons |
| Headphone jack | 3.5 mm jack |
| Antenna | FM telescopic antenna |
| Color | Black |
| Housing material | ABS plastic |
| Maintenance and cleaning | Wipe with a soft dry cloth. Do not use abrasive cleaners. |
| Safety | Do not expose to moisture. Unplug before cleaning. |
| Spare parts and repairability | Batteries, mains adapter (optional). Contact Thomson customer service. |
Frequently Asked Questions - CT350 THOMSON
User questions about CT350 THOMSON
0 question about this device. Answer the ones you know or ask your own.
Ask a new question about this device
Download the instructions for your Radio in PDF format for free! Find your manual CT350 - THOMSON and take your electronic device back in hand. On this page are published all the documents necessary for the use of your device. CT350 by THOMSON.
USER MANUAL CT350 THOMSON
INFORMATIONS SUR LES PILES (non fournies)
customerservice@bigben-interactive.be
ESPAÑA, sat@bigbeninteractive.es
ITALIA, support@bigbeninteractive.it
www.bigben.eu
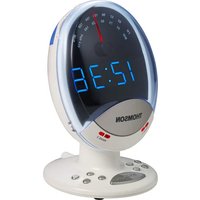
Radio Alarm Clock with temperature display Model : CT350
OPERATING INSTRUCTIONS
PLEASE READ THIS USER MANUAL COMPLETELY BEFORE OPERATING THIS UNIT AND RETAIN THIS BOOKLET FOR FUTURE REFERENCE.

This symbol, representing a lightning bolt inside an equilateral triangle, is intended to alert the
user to the presence of uninsulated, dangerous voltage in the product's enclosure that is high enough to present a risk of electrical shock.

This symbol, representing an exclamation mark inside an equilateral triangle, is intended to alert the user
to the presence of operating and maintenance instructions in the documentation accompanying the product.

This symbol complies with the standards in force for this type of product.

Disposing of the appliance at the end of its life this appliance bears the WEEE mark (Waste of
Electric and Electronic Equipment) signifying that, at the end of its life cycle, it should not be disposed of with household waste, but at a recycling centre. The recycling of waste contributes to the conservation of our environment.

Disposing of batteries at the end of their life In order to respect the environment, do not throw
used batteries out with household waste. Dispose of them at your nearest recycling centre or at a used battery collection point.

Your product is designed and manufactured with high quality materials and components, which can be recycled and reused.

This symbol means that this unit is double insulated. An earth connection is not required.
This apparatus includes this label:
WARNING CONCERNING USE AND INSTALLATION
ATTENTION: To avoid all risk of fire or electrical shock, do not expose the appliance to rain or humidity. Therefore, the appliance should not be used near a water supply point or in a humid location (bathroom, swimming pool, sink,
etc).
ATTENTION: Never immerse the appliance in water or in any liquid whatsoever.
- Do not place any object containing water (e.g. vases, etc.) on the appliance.
- Do not place the appliance in full sunlight, close to heating equipment or any heat source, or in a location subject to excessive dust or mechanical shocks.
- Do not expose the appliance to extreme temperatures. The appliance is designed for use in moderate climates.
- Do not place any object that produces heat (candle, ash tray, etc.) close to the appliance.
- Place the appliance on a surface that is flat, rigid and stable.
- Do not install the appliance in an inclined position. It is designed to work solely in a horizontal position.
• Install the appliance in a location with sufficient ventilation to avoid internal overheating. Avoid restricted spaces such as bookcases, cabinets, etc.
- Do not obstruct the appliance's ventilation openings.
- Do not install the appliance on a soft surface, such as a carpet or blanket, that might block the ventilation openings.
- Do not place heavy objects on the appliance.
- This appliance is not a toy; do not allow children to use it unsupervised.
- Never let children insert foreign objects into the appliance.
- Due to the effect of electrostatic and/or fast electrical transient phenomena, the product may not operate properly and will need to be reset by the user.
MAINS VOLTAGE ADAPTER
- This appliance is designed to operate with the adapter supplied. If you replace the adapter, use one that has the same characteristics.
- The adapter should not be obstructed or should be readily accessible during use.
- If you need to use an extension cord, take all necessary precautions to ensure that no-one can trip over it or get tangled up in it.
- Do not plug in or unplug the adapter when your hands are not dry.
- To avoid all risk of fire or electrical shock, do not expose the appliance to rain or humidity. Therefore, the appliance should not be used near a water supply point or in a humid location.
INFORMATION ABOUT BATTERIES (not supplied)
- The appliance must be equipped with the appropriate batteries in order to function properly.
- Only recommended batteries should be used.
- Polarity must be respected when inserting batteries.
- The batteries should be inserted in such a way as to avoid any short circuit.
- Do not mix used and new batteries.
- Do not mix alkaline, standard (carbon-zinc) and rechargeable (nickel-cadmium) batteries.
- Do not recharge or try to open the batteries. Do not throw the batteries in the fire.
- Replace all batteries at the same time with identical batteries.
- Remove the batteries when unused for a long time.
• If the liquid contained in the batteries comes in contact with eyes or skin, wash the area immediately and carefully
with clear water and consult a doctor.
- Battery shall not be exposed to excessive heat such as sunshine, fire or the like.
ATTENTION: Danger of explosion if batteries are not inserted correctly.
MAINTENANCE AND CLEANING
Consult the following table if there is a problem with the appliance.
MAINTENANCE AND CLEANING
- Unplug the appliance before cleaning it.
- Remove fingerprints and dust with a soft and slightly damp cloth. Do not use abrasive products or solvents that may damage the appliance's surface.
ATTENTION: Never immerse the appliance in water or in any liquid whatsoever.
- If it is not used for a long time, unplug the appliance and remove the batteries.
TECHNICAL SPECIFICATIONS
FM Radio frequency ranges : FM : 87.5 to 108MHz
Mains voltage adaptor : Input : 100-240V \~ 50/60Hz 0.25A
Output : 5V 1000mA
USB Charging : >500 mA
Power Consumption: 5 Watts
Note: Unit design and specifications are subject to change without notice. The manufacturer reserves the right to make the necessary improvements.
WHAT'S IN THE BOX
- Main unit
- DC adaptor
- User manual
BATTERY BACK-UP
The back-up system ensures that the clock continues to function in the event of a power-cut.
- Open the battery compartment on the underside of the apparatus.
- Insert 2 x 1.5V LR03 / AAA batteries, polarity as indicated (+/-).
- Close the battery compartment.
- In battery backup mode, no radio and dimmer setting function, alarm has wake by buzzer only.


DESCRIPTION OF THE PRODUCT
- Volume
- Tuning
- Speaker
- LCD Display
- Standby
- Clock Set / Sleep Time
- Snooze Sensor
- Alarm 1
-
Alarm 2
-
DC Adaptor Input
- LCD Dimmer
- USB Charger
- Back Up Batteries Compartment
- FM Antenna
- Passive Subwoofer
- Temperature Sensor
USE
INSTALLATION
- Plug the mains adaptor into the DC IN socket.
- Insert the mains adaptor plug in the power connector at the back of the device.
- The time will be shown at standby mode and TIME at 0.00.
SETTING THE TIME AND DATE
- Press CLOCK SET button on at standby mode in 2 second to enter the clock setting
• The hours display flashes the (clock set) - Turn the TUNING wheel to set the hours
- Then press CLOCK SET to set a minutes
- Repeat above steps to set a minutes / year / month / day
ALARM SETTING
ALARM 1 and ALARM 2 settings
The device has 2 different alarms that can be set on different modes (BUZZ, RADIO, WEEK and WEEKEND).
- Press ALARM 1 button on at standby mode in 2 second to enter the alarm setting
• The hours display flashes - Turn the TUNING wheel to set the hours
- Then press ALARM 1 to set a minutes
- Turn the TUNING wheel to set the minutes
- Press ALARM 1 to set a wake by Buzzer "Zzz" or wake by Radio
ACTIVATING AND SELECTING ALARM1 OR ALARM2 MODE
- Press or repeatedly to select the type of alarm function:
- Press 1 to activate an alarm, the alarm time will be shown on display
- With a 📋: week icon the alarm rings week date
- Without a week icon the alarm rings everyday
DEACTIVATING THE ALARM
- To deactivate alarm 1 or alarm 2, press ⏻ or ⏱ repeatedly until the alarm lights turn off.
ALARM REPEAT (SNOOZE)
- Touch or pass your hand over the SNOOZE SENSOR proximity sensor to stop the alarm. The alarm will sound every 9 minutes. The word SNOOZE flashes intermittently until the alarm sounds again.
USING THE RADIO
- Press STANDBY to switch on the radio and the LCD screen will display the FM frequency.
- Turn the TUNING wheel to search for the frequency. The frequency steps are of 0.05 MHz.
- Turn the VOLUME wheel to adjust the volume.
Note: use and position the wire aerial to improve reception of FM signals.
INDOOR THERMOMETER
Measuring the indoor temperature:
- The device's built-in probe measures the indoor room temperature. It is permanently displayed at the bottom of the LCD screen.
- Indoor temperature range: -9^ +40^
- Press DIMMER to adjust the backlight intensity of the LCD screens.
USB CHARGER SOCKET
- The USB port provides up to 500mA power and charge your mobile phones or tablets. This unit cannot charge Apple's device due to their power authentication requirement.
TO SET SLEEP FUNCTION
This unit can switch to standby automatically after a set period of time.
- Press SLEEP repeatedly to select a set period of time (in minutes).
- When sleep timer is activated, minutes is displayed.
Don't throw the electrical and electronical appliances into the usual dustbin.
- Bring them to a collecting point.
• Some parts contained in these appliances may be dangerous for health and environment.
Imported by BIGBEN INTERACTIVE SA
396, Rue de la Voyette
CRT2 - FRETIN
CS 90414
59814 LESQUIN Cedex - France
www.bigben.eu


Made in China
bigben INTERACTIVE
customerservice@bigben-interactive.be
ESPAÑA, sat@bigbeninteractive.es
ITALIA, support@bigbeninteractive.it
www.bigben.eu
THOMSON is a trademark of TECHNICOLOR SA or its affiliates used under license to Bigben Interactive.
customerservice@bigben-interactive.be
ESPAÑA, sat@bigbeninteractive.es
ITALIA, support@bigbeninteractive.it
www.bigben.eu
customerservice@bigben-interactive.be
ESPAÑA, sat@bigbeninteractive.es
ITALIA, support@bigbeninteractive.it
www.bigben.eu
WECKSIGNAL WIEDERHOLEN (SNOOZE)
customerservice@bigben-interactive.be
ESPAÑA, sat@bigbeninteractive.es
ITALIA, support@bigbeninteractive.it
www.bigben.eu
WAARSCHUWING OVER GEBRUIK EN INSTALLATIE
BESCHRIJVING VAN HET PRODUCT
- Volume
- Tuning
- Luidspreker
- LCD-scherm
- Standby
- Clock Set/Sleep Time
- Sluimersensor
- Alarm 1
-
Alarm 2
-
Ingang gelijkstroomadapter
- LCD-dimmer
- USB-lader
- Compartiment back-upbatterijen
- FM-antenne
- Passieve subwoofer
- Temperatuursensor
GEBRUIK
INSTALLATIE



- INFORMATIONS SUR LES PILES (non fournies)
- Radio Alarm Clock with temperature display Model : CT350
- OPERATING INSTRUCTIONS
- WARNING CONCERNING USE AND INSTALLATION
- MAINS VOLTAGE ADAPTER
- INFORMATION ABOUT BATTERIES (not supplied)
- MAINTENANCE AND CLEANING
- TECHNICAL SPECIFICATIONS
- WHAT'S IN THE BOX
- BATTERY BACK-UP
- DESCRIPTION OF THE PRODUCT
- USE
- INSTALLATION
- SETTING THE TIME AND DATE
- ALARM SETTING
- ACTIVATING AND SELECTING ALARM1 OR ALARM2 MODE
- DEACTIVATING THE ALARM
- ALARM REPEAT (SNOOZE)
- USING THE RADIO
- INDOOR THERMOMETER
- USB CHARGER SOCKET
- TO SET SLEEP FUNCTION
- bigben INTERACTIVE
- WECKSIGNAL WIEDERHOLEN (SNOOZE)
- WAARSCHUWING OVER GEBRUIK EN INSTALLATIE
- BESCHRIJVING VAN HET PRODUCT
- GEBRUIK
- INSTALLATIE
Brand : THOMSON
Model : CT350
Category : Radio