
Xrange 10x42 - Laser pointer MINOX - Free user manual and instructions
Find the device manual for free Xrange 10x42 MINOX in PDF.
| Brand | MINOX |
| Model | Xrange 10x42 |
| Product type | Binoculars with laser rangefinder |
| Magnification | 10x |
| Objective diameter (mm) | 42 |
| Exit pupil (mm) | 4.2 |
| Interpupillary distance (mm) | 58 – 78 |
| Field of view at 1000 m (m) | 106 |
| Minimum focus distance (m) | 4 |
| Diopter adjustment (dpt) | ±3 |
| Operating temperature range (°C) | -10 to +50 |
| Maximum measuring range (m) | 2800 (large objects) / 1600 (people/game) |
| Measurement accuracy (m) | ±1 (up to 1000 m) / ±2 (up to 2800 m) |
| Measurement units | Meter and yard |
| Display | OLED, 5 brightness levels |
| Display | Distance, angle, horizontal distance equivalent |
| Power source | 1 CR2 lithium battery (3 V) |
| Battery life | Approximately 4000 measurements |
| Housing material | Magnesium |
| Nitrogen filling | Yes |
| Waterproof | IPX7 |
| Dimensions (H x W x D in mm) | 152 x 132 x 52 |
| Weight (g) | 990 |
| Order number | 80408390 |
| Warranty | 2-year statutory warranty, extension possible |
| Cleaning | Microfiber cloth, MINOX optical cleaning kit |
| Laser safety | Class 1, do not point into eyes |
Frequently Asked Questions - Xrange 10x42 MINOX
User questions about Xrange 10x42 MINOX
0 question about this device. Answer the ones you know or ask your own.
Ask a new question about this device
Download the instructions for your Laser pointer in PDF format for free! Find your manual Xrange 10x42 - MINOX and take your electronic device back in hand. On this page are published all the documents necessary for the use of your device. Xrange 10x42 by MINOX.
USER MANUAL Xrange 10x42 MINOX
Blaser Sporting Limited
Unit 12
The Pines
Broad Street
Guldorf
Surrey G13.3B+
In den USA
Blaser USA 403 East Ramsey, Suite 301
With these binoculars featuring an integrated laser rangefinder from MINOX, you have chosen a product of highest optical quality and mechanical precision. These instructions are to help you benefit from the full performance spectrum of your X-range 10x42 binoculars.
We wish you lots of enjoyment and a perfect view at all times.
CONTENTS
Welcome to MINOXI 20
Contents 21
Getting to know your laser rangefinder. 22
Overview of control elements 23
Scope of delivery. 23
Explanation of symbols & safety instructions. 24
First use 26
Adjusting your binoculars. 26
The menu navigation of your rangefinder. 29
Maintenance and care. 33
Serial number 33
Technical data 34
Conditions of warranty 36
Customer service 37
Imprint 37
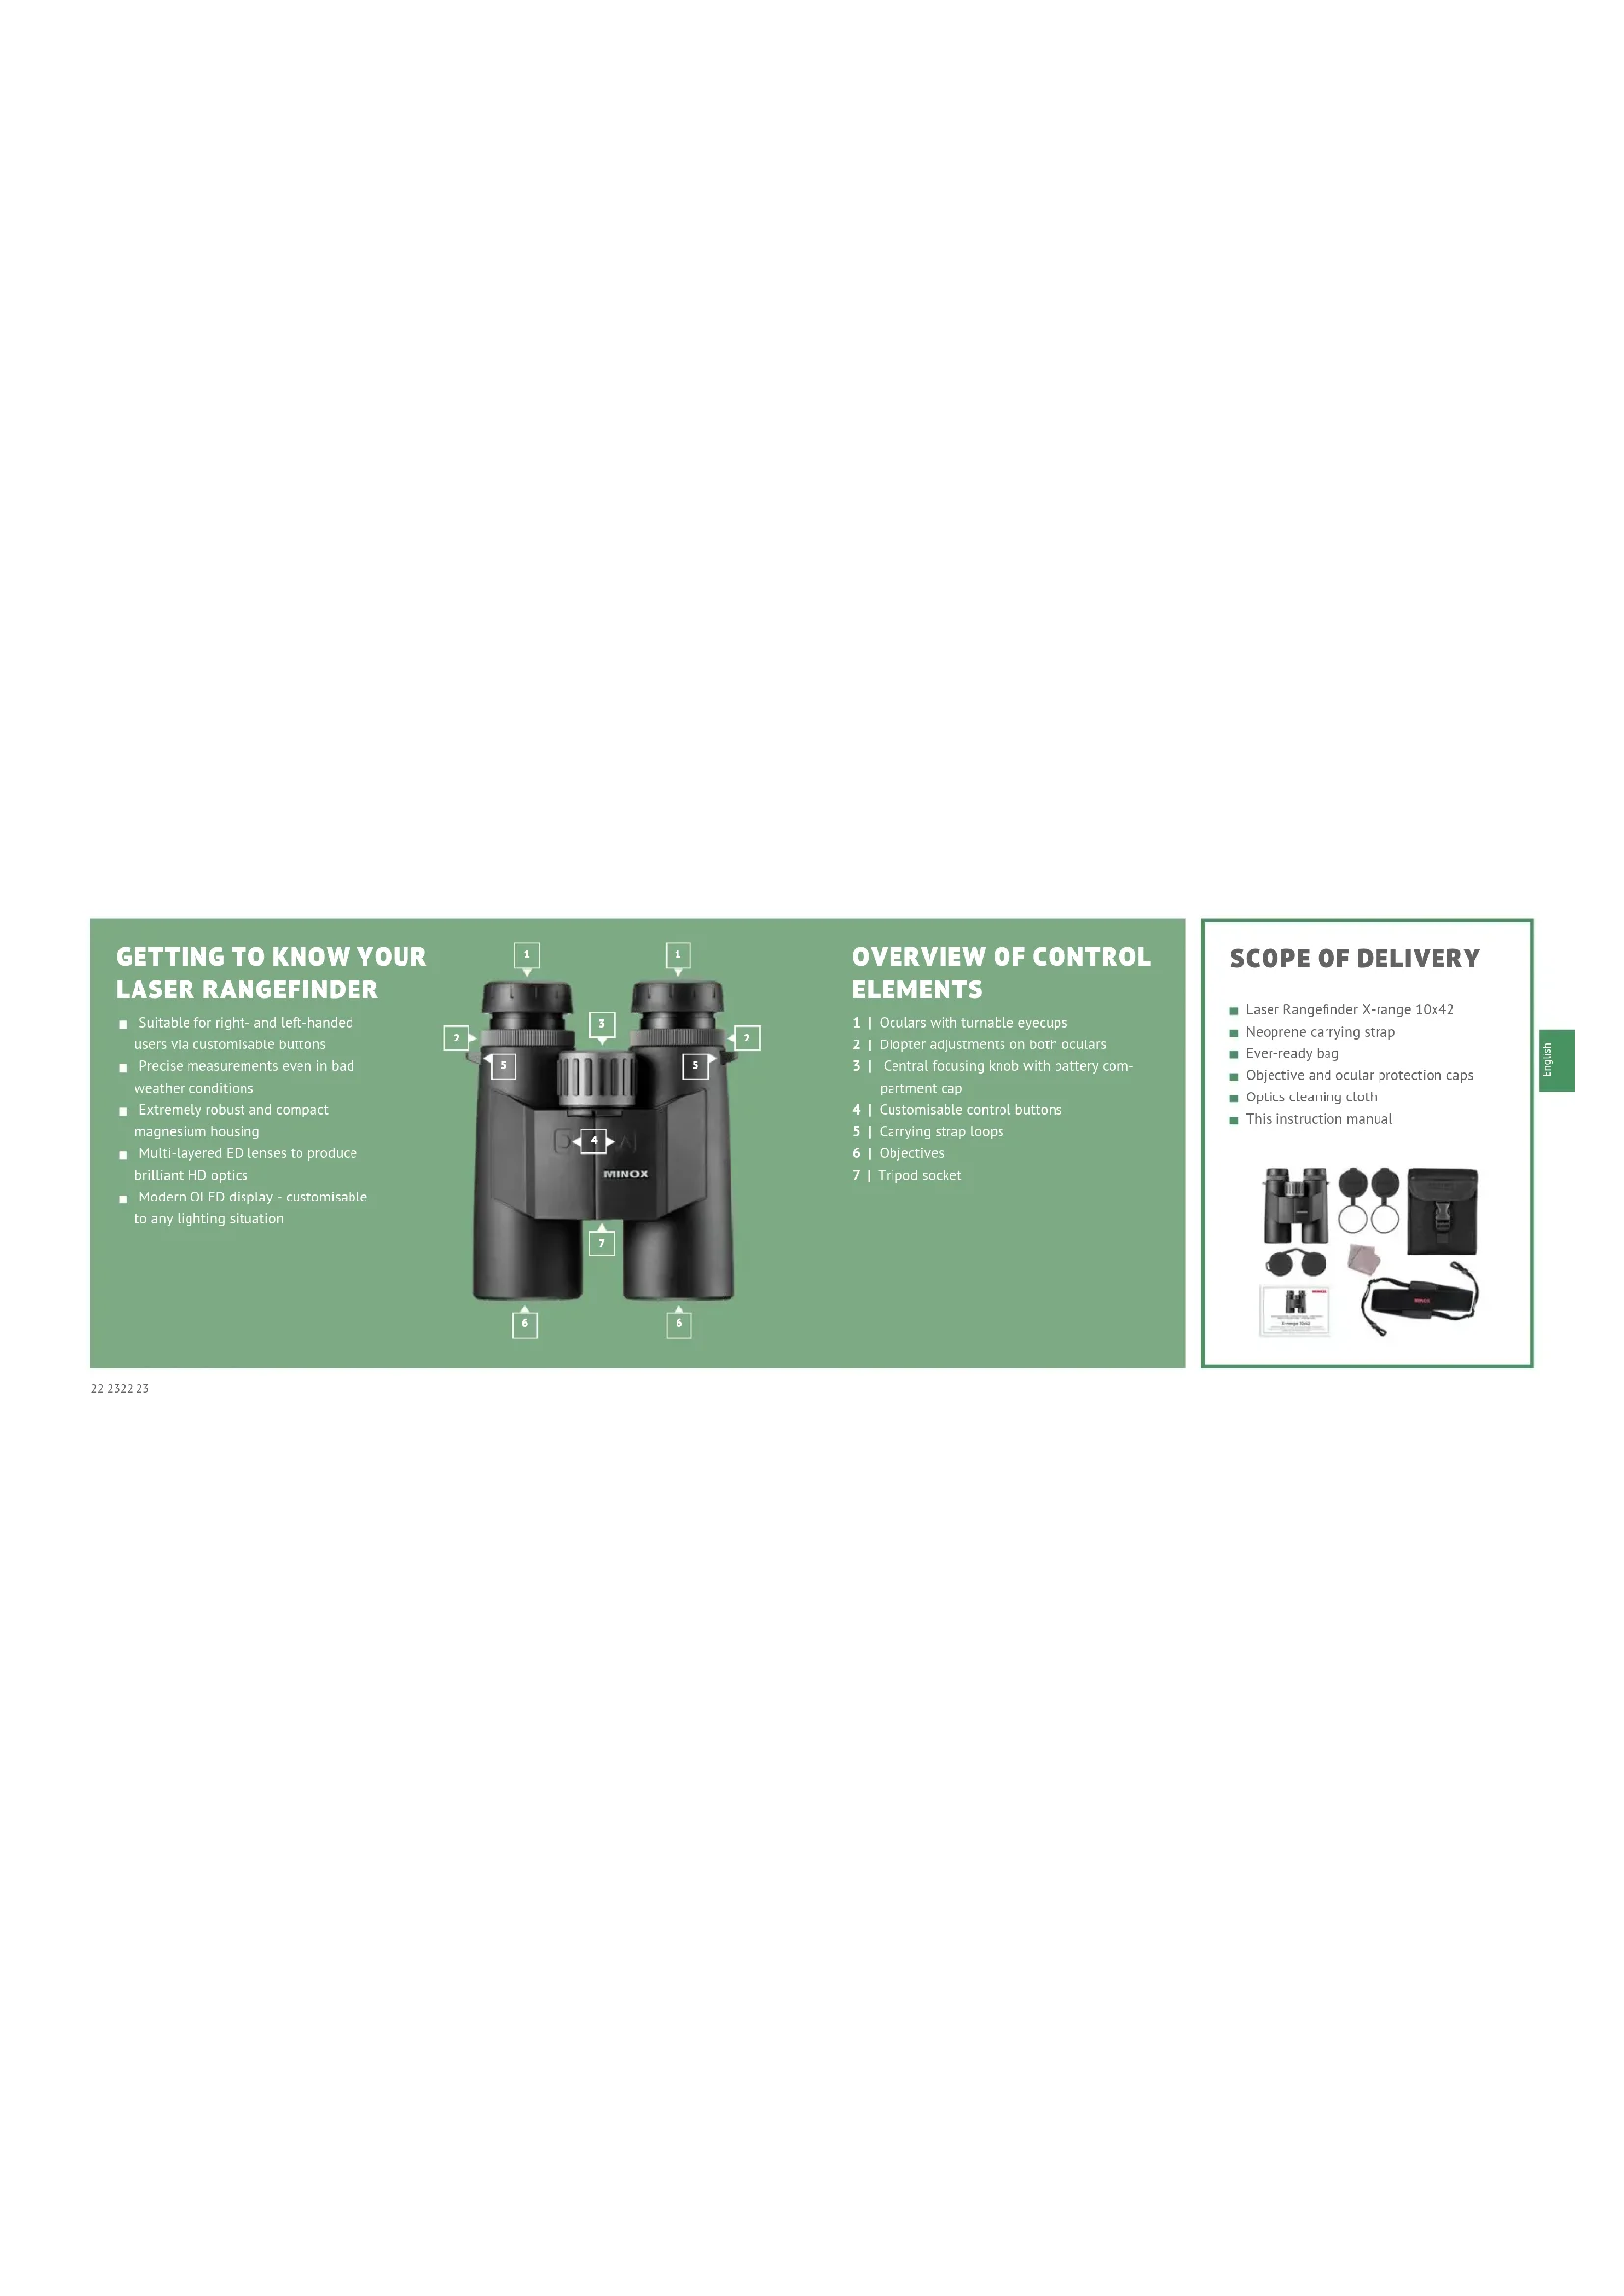
GETTING TO KNOW YOUR LASER RANGEFINDER
Suitable for right- and left-handed users via customisable buttons
Precise measurements even in bad weather conditions
Extremely robust and compact magnesium housing
Multi-layered ED lenses to produce brilliant HD optics
Modern OLED display - customisable to any lighting situation
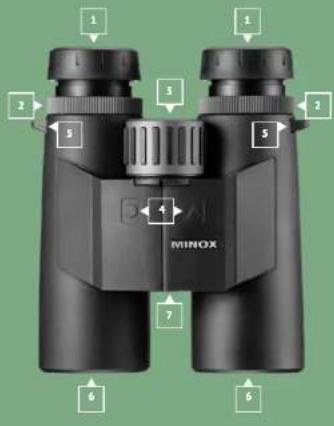
OVERVIEW OF CONTROL ELEMENTS
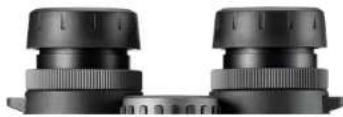
1 | Oculars with tumable eyecups
2 | Dipteter adjustments on both oculars
3 | Central focusing knob with battery cam portment cap
4 | Customisable control buttons
5 | Carrying strap loops
6 | Objectives
7 Tripod socket
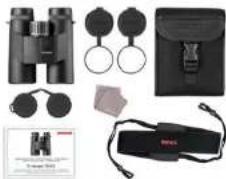
SCOPE OF DELIVERY
Laser Rangefinder X-range 10x42
Neoprene carrying strap
Ever-ready bag
Objective and ocular protection caps
Optics cleaning cloth
This instruction manual
EXPLANATION OF SYMBOLS & SAFETY INSTRUCTIONS
This instruction manual is part of the MINOX Laser Rangefinder X-range 30x42 (hereinafter named only "X-range" or "binoculars"). It is part of the product and contains important information on commissioning, handling and disposal. Please carefully read the operating instructions, especially the safety instructions, before using the binoculars for the first time. Non-compliance with these operating instructions can cause damage to the binoculars. The operating instructions are based on the standards and rules applicable within the European Union. Observe also country-specific guidelines and laws if used outside the EUI Keep the operating instructions for the further use. If you pass the X-range binoculars on to a third party, be sure to include this user manual. Use the binoculars only as described in this manual. Any other use is considered improper and can lead to material damage. The manufacturer or dealer assumes no liability for damage caused by improper or incorrect use, and for unauthorised modifications.
We have made every effort to ensure that these operating instructions are as complete and accurate as possible. Nevertheless, it cannot be guaranteed that errors or omissions will not have occurred during the printing process. The accessories included in the delivery may differ slightly from those described. This package can be changed without prior notice.
The following symbols and signal words are used in these operating instructions, on the device or on the packaging.

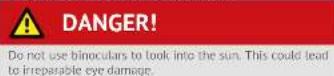
DANGER!
This symbol/signal word indicates a hazard with a high degree of risk, which if not avoided, will result in death or serious injury.

WARNING!
This signal word warns of possible damage to property.

NEVER look directly at the sun or into laser sources with your binoculars. This can cause irreparable damage to the eyes.

Be sure not to allow your binoculars to get into the hands of children. There is a danger of swallowing small parts or strangulation caused by the carrying strap.

Do not touch metallic surfaces if the binoculars have become very hot or very cold.

Always replace the protective caps after use. This protects the tenses from damage and can avoid fire hazard caused by the bundling of sunlight through your binoculars.
Additional safety instructions regarding the laser and batteries
The product implements an invisible laser beam. Please pay attention to the following:
Do not point the laser at eyes.
Do not point the laser at people
Do not look into the laser with optical devices.
Remove your finger from the measuring button when you are not measuring. This will prevent accidental activation of the laser.
DO NOT DISassemble, alter or repair the binoculars yourself. The laser can be hazardous to your health.


WARNING
This product has been tested to meet the following standards: CLASS 1 LASER PRODUCT.
INVISBLE LASER RADIATION: NEVER LOOK WITH OPTICAL DEVICES INTO THE LASER (BINOULCARS, TELESCOPES)
This device complies with the regulations for laser class 1 in accordance with applicable standards IEC 60825-1:2007. Edition 2 (TUV SUD), EN 60825-1:2007 and CE according to EN 61326-1:2013.
This product complies with the regulations according to the FDA 21 CFR 1040.10 and 1040.11, and meets the requirements of FDA performance standards and the FCC Rules and Regulations section 15 B:2018 using the test method ANISC63.4.2014.
The operation of the device is subject to the following restrictions:
(1) This device may not cause harmful interferences, and (2) this device must allow the reception of any interferences, including those that may cause undesirable operation.
MINOX GmbH, Ziegelstadet 20, 88316 Isry, Germany
CR2 lithium battery safety instructions
Make sure that the polarity is correct when inserting the battery (+/-)
Do not attempt to charge the battery.
Do not show the barriers into fire or water.
Do not disassemble the battery.
When discarding the battery, please observe applicable laws.
FIRSTUSE
Check the scope of delivery

DANGER!
There is a danger of suffocation for children who may play with the packaging film. Do not let children play with the packaging film. They can get caught in it and choke to death.
- Remove the binoculars out of the packaging and remove all protective foils.
- Check if the scope of delivery is complete.
- Check whether the binoculars or individual parts are damaged. If this is the case, do not use it and contact our service team.
Service & Support
D-35578 Wetzlar, Germany
+49(0)7562/9813501
service@minox.com
ADJUSTING YOUR BINOCULARS
Your binoculars use an invisible laser to measure distances. The measurement is made by calculating the time needed for the laser to reach the targeted object and return to the binoculars. The accuracy of your measurement depends on climatic and environmental conditions and can also be influenced by the colour, surface texture, size and structure of the object to be measured. The following points are important to ensure an optimal measurement: clear view, medium brightness, strong colour of the measured object, flat measurement angles, and an even surface structure on the object. The measuring range is reduced by the following: high humidity, strong sunlight, dark colours of the object to be measured, large angles and uneven surfaces on the object.
Adjusting your eyecups
To ensure that people wearing glasses also have an optimal field of view, MINOX binoculars are equipped with rotating eyecups. The tunable and lockable eyecups are used for setting the correct distance between your eye and the surface of the eyepiece lens. Depending on your personal comfort, the preferred setting can be made to suit eyeglass wearers and even those who do not wear glasses.
For use without glasses
Those who do not wear glasses should turn the eyecups on both oculars, all the way out to the left (counterclockwise) until they are locked into position. The binoculars are now set at the correct distance to the eyes.
Use with glasses
If you wear glasses, leave the rotating eyecups on both oculars at the original position as they were when you purchased them, or turn the oculars all the way to the right until they stop turning. Like this, you can see the entire field of view without the annoying vignetting on the edge.
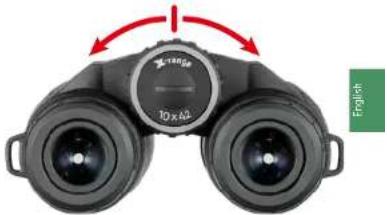
The right distance between the eyes
Look through the oculars of your binoculars and adjust the angle of the hinged tubes until you have a single circular image.
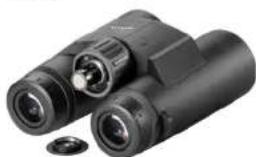
Inserting or replacing the battery
Open the battery compartment by turning the cover with a tool or a coin to the left (counterclockwise). Insert a CR2 battery with the positive end into the shaft. The negative pole is now towards the battery cover. Then carefully screw the cover back on (clockwise) as far as it will go. Always pay attention to use only a CR2 battery. If you do not use the binoculars for a longer period of time, remove the battery to prevent leakage.
Batterie Warning
The CR2 battery has enough power for about 4,000 measurements made at an average temperature of 20^ Celsius. If the battery charge is lower than 20% , the battery symbol will blink three times after activating the display. You can continue using the binoculars, but you should replace the battery as soon as possible.
Attaching a tripod
For a shudder-free image, we recommend using a tripod, especially with binoculars with higher magnifications. The MINOX tripod adapter is available as an optional accessory for this purpose.
Remove the screw cap on the bottom of the binoculars and attach the MINOX tripod adapter into the tripod socket. Keep the screw cap in a safe place and reattach it after removing the tripod adapter.
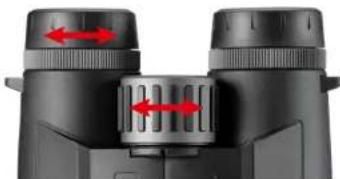
The correct diopter settings for the display
Activate the display by pressing the measuring button. Now turn the diopter compensation to the left or right until you have acquired the desired setting and until you can see the display sharply.
Focusing
For the best possible image sharpness, you must adjust the optics of the binoculars to match your individual vision. To do this, please proceed as follows:
-
First, look at a stationary object in the distance. With the left eye closed, turn the focusing knob until the object in view has become perfectly sharp. The display and the object are now in perfect focus.
-
Next, look at the same object in the distance with the right eye closed and turn the dropper adjustment ring on the left eyepiece until the object is perfectly sharp.
- Your MINOX binoculars are now set to the individual vision for both eyes.
- When observing objects at various distances, you will have to refocus accordingly. Simply use the focus adjustment knob to obtain a clear and sharp image.
THE MENU NAVIGATION OF YOUR RANGEFINDER

Activate the display
Briefly press the right button on the binoculars. The display is now visible. After switching the device off, the last display setting will be saved. The display will automatically deactivate after 10 seconds. The menu items can be selected by pressing the measuring button (default: right). To confirm your selection, al
ways press the menu button (default: left). The menu will then automatically move to the next menu item.
Menu mode
To activate the menu mode, press the menu button for about 3 seconds. Here you can change your settings. You can exit the menu by pressing the button again for a hit longer than 3 seconds, or simply wait for 10 seconds after the last push of any button.
Setting EHD:

(1)
4
Measurement reading
2 : x^ ( x) = y^ ( x) : 2 : x^ ( x) = y^ ( x) : y = x
1544
In this setting, the distance in the direct line of sight to the object is indicated in the upper part of the display. The angle in relation to the corrected distance measurement (equivalent horizontal distance) is indicated in the lower part of the display.
Button configuration
Default setting: Measurement button right The function of the two control buttons on your binoculars can be swapped. This increases your operating convenience if you are left or right handed. The assignment of the buttons can be changed by moving the circle in the display to the right or left. The side on which the circle is located, represents the side of the measuring button.
Scan mode
With this function you can perform continuous measurements. Measurements are triggered every 1% of a second. You can activate the scan mode by continuously pressing the measuring button while measuring the distance. After 3 seconds, scanning is activated and all functions are constantly updated according
52355233
to the display settings. Upon releasing the measuring button, the device will automatically return to the normal measuring functions. This can be helpful in determining the distance to moving objects.
Battery indicator

The battery indicator will flash if the battery voltage drops below 2.4 Volts. This is an indication that you should change the battery soon. If the battery voltage drops below 2.3 Volts, the device will automatically switch off.
MAINTENANCE AND CARE
To provide as much protection as possible for your MINOX binoculars, it is recommended to use the carrying case when storing your binoculars.
Cleaning the binoculars
Keep your MINOX binoculars clean and dry. Avoid exposing the binoculars to extreme heat. Remove dust and foreign particles on the housing with a soft moist cloth. If your binoculars have been used at a lake or have been exposed to salt water, we recommend that you rinse them with freshwater. Over a period of time, sea salt can damage the objective lenses and optical quality of your binoculars.
Cleaning the objective and ocular lenses
Contamination of the lenses by foreign bodies like sand, dust, grease, drops of water or fingerprints reduce the image quality of your MINOX binoculars (Image sharpness and contrast). Foreign bodies should be carefully removed using a very soft brush before cleaning the lenses.
Heavier contamination or fingerprints on the lenses can be removed with an optical cleaning cloth and special lenses cleaned
We recommend using the MINOX optical cleaning set (order no. 80405-463). You can also obtain other suitable optical cleaning agents from specialist retailers.
SERIAL NUMBER
The serial number can be found on the underside of the battery compartment cover, after you have removed it.

TECHNICAL DATA
| MODEL X-range 10x42 | |
| Magnification 10x | |
| Entry pupil (mm) ±2 | |
| Exit pupil (mm) 4.2 | |
| Interpupillary distance (mm) 58 - 78 | |
| Field of view at 1,000 m (m) 106 / 6.1° | |
| Close focus (m) 4 | |
| Diopter adjustment (dpt.) ±3 | |
| Operating temperature °C -10° to +50° | |
| Maximum measurable distance (m) | *2800 (large objects) 1600 (humans & wildlife)* |
| Measuring unit Meter and Yards | |
| Measurement accuracy up to 1,000 m (m) | ±1 |
| Measurement accuracy up to 2,800 m (m) | ±2 |
| Display OLED |
| MODEL X-range 10x42 | |
| Display brightness levels | 5 |
| Display options | Distance & angle, Distance & horizontal distance* |
| Battery life | approx. 4,000 measurements |
| Power supply | 1x CR2 Lithium (3V) |
| Housing | Magnesium |
| Nitrogen purged | Yes |
| Waterproof according to IPX7 | Yes |
| Measurements (mm | HxWxD) | 152x132x52 |
| Weight (g) | 990 |
| Order no. | 80408390 |
| MINOX Comfort Service | Yes |
CONDITIONS OF WARRANTY
With the purchase of this MINOX binocular, you have acquired a product that has been manufactured and inspected in accordance with especially high quality standards. For this product, we provide a legal warranty of 2 years in accordance with the following regulations from the day of purchase at an authorised dealer:
1. During the warranty period we shall compensate complaints based on faulty manufacture with repair, replacement of defective parts or by replacement with an identical flawless product at our own discretion. Consequential claims, regardless of manner or legal argument in connection with this warranty, will not be accepted.
2. Claims under warranty are null and void if the defect has been caused by improper handling - which also can include the combined use of non MINOX accessories - If the MINOX product is serviced by unauthorised persons or workshops, or if the serial number has been made unreadable.
3. Warranty claims can only be made by submission of the printed receipt as proof of purchase from an authorised dealer.
- When submitting claims under warranty, please return the MINOX binocular together with the proof of purchase and a description of the complaint to MINOX GmbH in Germany, or the nearest MINOX dealer.
Tourists may, if necessary, make use of the MINOX dealer in the country in which they are travelling (within the warranty terms of MINOX GmbH) by presenting the printed proof of purchase.
EXTENDED MINOX WARRANTY SERVICE
Take advantage of the extended MINOX product warranty and register your MINOX product.
Find out more at www.minox.com/service.
CUSTOMER SERVICE
In the case of a claim, our customer service can be contacted at the following address:
In Germany
MINOX GmbH
Technical Service
Wilhelm Loh-Str. 1
35578Wetzlar
IMPRINT
In all other countries, send your MINOX binoculars to the dis
tributor authorised by MINOX. You can find their address at:
www.minox.com/en/dealer-locator
BIENVENUE CHEZ MINOX!
Service & Assistance
Lb Standard Preage:Standard
CONDITIONS DE GARANTIE
Blaser Sporting Limited
Unit 12
The Pines
Broad Street
Guildford
Surrey
GU33B
États-Unis
403 East Ramsey, Suite 301
Valgrnuleimiae metres
Blaser Sporting Limited
Unit 12
The Pines
Broad Street
Guldorf
Surrey G13.3B+
En los EE. UU.
Blaser USA
403 East Ramsey, Suite 301
San An 78216
www.minox.com/en/dealer-locator/
BENVENUTO IN MINOX!
We reserve the right to make changes in construction and des
The MINOX brand is a registered trademark of MINOX GmbH.