JNI280UHD60FP - Monitor Japannext - Free user manual and instructions
Find the device manual for free JNI280UHD60FP Japannext in PDF.
Download the instructions for your Monitor in PDF format for free! Find your manual JNI280UHD60FP - Japannext and take your electronic device back in hand. On this page are published all the documents necessary for the use of your device. JNI280UHD60FP by Japannext.
USER MANUAL JNI280UHD60FP Japannext
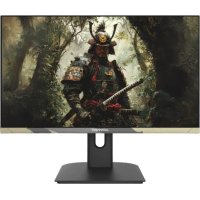
28-inch wide UHD 60Hz LED LCD Monitor
SAFETY PRECAUTIONS Please be sure to read all the included instructions and manuals carefully before using. Warning ● Place the monitor on a stable, at surface and avoid exposing it to high or low temperatures, humidity, or dust to prevent the risk of re or electric shock. ● Do not use the monitor in a location where water or moisture is present, as this could result in serious injury or cause a re. ● Do not attempt to open the cabinet of the monitor, as there are high voltage parts inside that could be dangerous or cause a re. ● If the power supply unit becomes damaged, contact our service center or the retailer instead of attempting to inspect or repair it yourself. ● Before use, ensure that all cables are properly connected, and the power cord is not damaged. If any damage or issues are found, contact the retailer immediately. ● The narrow slots and openings on the top or back of the cabinet are necessary for ventilation. Do not block these holes. Also, be sure not to place the monitor near or on a heat source, such as a heater, without proper ventilation. ● Do not insert foreign objects or spill liquids into the openings of the monitor’s cabinet, as this may cause damage or malfunctions. ● Use only the type of power supply indicated on the label of the product when operating the monitor. If you are unsure of the power supply type in your area, contact your local power company. ● Do not overload power strips or extension cords with excessive current. Overloading can result in electric shock and is extremely dangerous. ● To protect the monitor from damage caused by power surges, unplug the device’s power cord during extended periods of non-use or during thunderstorms. ● For optimal performance, use this product with a PC that has a properly congured socket and falls within the AC100-240V range. ● If you experience any technical issues or have any questions about the monitor, please contact an authorized service technician or retailer. ● For safe operation, always connect the grounding wire before plugging the power cord into the outlet. And when removing the grounding wire, be sure to unplug the power cord rst. ● This product is not designed for continuous use for 24 hours. Do not use the product continuously for 24 hours. When not in use for a long time, unplug the power plug. ● The included power cord is for this product only. Do not use it with other equipment. Note ● When cleaning the monitor, do not use cleaners or detergents containing alcohol or acetone. Be sure to use a liquid crystal monitor-specic cleaner. Do not directly spray liquid cleaners onto the screen. Please be careful as there is a risk of electric shock or re if the cleaner liquid drips into the monitor interior. Do not rub the LCD panel with hard objects as it is easily damaged. ● When lifting or moving the monitor, be sure to turn o the power switch and unplug all cables and power cords in advance. When setting up the monitor, lift it correctly. When lifting or transporting the monitor, hold the edge of the main unit. Never lift the monitor with the stand or cable.5 Please take care of your eyes when using ● Using in a dark room or for long periods of time can strain your eyes. ● Take a 5-10 minute break every hour and use in a moderately lit room.
ABOUT CLEANING AND PRECAUTIONS
● Before cleaning this product, turn o the power switch and unplug all cables and power cords. Maintenance Method ● LCD panel: Gently wipe with a clean, soft cloth specically for LCD panels. Do not use tissue paper. For hard-to-remove dirt, use a soft cloth slightly dampened with a neutral cleaner specically for LCD panels. ● Cabinet: Wipe with a soft cloth dampened with a neutral cleaner. The following symptoms are normal for the monitor: ● During initial use, there may be screen ickering due to the nature of the backlight. If this occurs, turn o the power and turn it back on again to conrm. ● Depending on the desktop pattern or displayed color and brightness, there may be uneven brightness. ● There may be a few pixels that are constantly lit or not lit. ● If the same image is displayed for a long time, there may be residual images even after switching to a dierent image. The screen will slowly recover, or turning o the power for a few hours can also x this. ● Depending on your computer, the image may appear shifted. Adjust the screen position from the OSD (on-screen display) menu (for VGA port only). ● If the screen ashes, goes completely black, or stops working, do not attempt to repair it yourself. Contact the service center or retailer to request repairs. WELCOME ! Thank you for purchasing the JAPANNEXT 28-inch wide LCD monitor. The panel supports UHD (3840X2160) resolution. We recommend using it at UHD resolution to fully utilize its capabilities. Its full performance cannot be achieved with resolutions lower than UHD.6
- Please note that the panel should be handled with care. Please be careful not to push down on the LCD surface with your ngers or any other object from above, as there is a risk of damaging the panel
- When installing, please be sure to handle the screws carefully to avoid dropping them.
1. Place the stand base on a at and stable surface.
2. Slowly lift the monitor and insert the support column into the stand base until you hear a click.
3. Conrm that the monitor and stand are rmly secured.
- Forcing the stand on the back may cause damage.
- It supports tilt adjustment. Please be careful not to tip over the monitor when tilting it towards you. How to remove the support column While pressing [PUSH], pull out the support column. How to remove the stand base Grasp the tab and pull out the stand base.
- As it may be dicult to remove, please be careful not to injure yourself while working. PUSH HOOK7 QUICK START GUIDE (CONTINUED) Connecting to a Computer
1. Make sure that the power of the monitor and computer is turned OFF before connecting
2. Attach the cable (HDMI, DP) that is compatible with the monitor to the monitor.
Attach the same cable to the computer.
3. Turn ON the power of the monitor and computer.
Warning: To work safely, always connect the ground wire before plugging in the power plug.
(Only if there is a ground link). Also, when disconnecting the ground connection, always unplug the power plug from the outlet rst. Note: HDMI, DP cables should not be connected simultaneously, as this may cause malfunctions.Please connect only one cable to one computer.8
CONTENTS OF THE PACKAGE
1/ Audio output port: Please connect headphones or speakers and use it. 2/ DP port: It is a DP 1.2 compatible port. 3/ HDMI 1 port: It is a HDMI 2.0 compatible port. 4/ HDMI 2 port: It is a HDMI 2.0 compatible port. 5/ USB port: It is a port for rmware updates. 6/ Power plug: Please connect the power adapter and use it. CONNECTORS Rear of the monitor Warranty card Power cable Power adapter HDMI cable VESA mounting screws x4 (M4x8mm) Manual
- The included power cable is only for use with this product. Please do not use it with other devices.
- Please note that the design, specications, and appearance of the product may be subject to change without prior notice for product improvement purposes.
INPUT SOURCE Auto Source Input source selection
HDMI1 HDMI2 BRIGHTNESS /CONTRAST Brightness 0-100 Brightness adjustment Contrast 0-100 Contrast adjustment DCR On/Off DCR settings Energy Save On/Off Energy settings COLOR SETTING Gamma 1.8/2.0/2.2/2.4/2.6 Gamma adjustment Picture Mode Standard Picture mode selection Photo Movie Game FPS RTS Color Temperature Normal Color temperature settings Warm Cool User Hue 0-100 Hue adjustement Saturation 0-100 Saturation adjustement Low Blue Light 0-100 Blue light filter settings PICTURE QUALITY SETTING Sharpness 0-100 Sharpness adjustement Response Time Off/High/Middle/Low Response speed settings Noise Reduction Off/High/Middle/Low Noise reduction settings Dynamic Luminous Control On/Off Dynamic Luminous Control settings DISPLAY Aspect Ratio WideScreen/4:3/1:1/Auto Image ratio selection AUDIO Mute On/Off Mute settings Volume 0-100 Volume adjustment Audio Source DP/HDMI1/HDMI2 Audio source selection MULTI-WINDOW Multi-Window Off/PIP Mode/PBP 2Win Multi-Window settings Sub Win2 Input DP/HDMI1/HDMI2 Window2 source selection PIP Size Small/Medium/Large Subwindow size selection PIP Position TopLeft/BottomLeft/TopRight /BottomRight Subwindow position selection Swap Swap between sub and main window OSD Language English/日本語/Français OSD Language selection OSDH-Position 0-100 OSD horizontal position adjustment OSDV-Position 0-100 OSD Vertical position adjustment OSD Transparency 0-100 OSD transparency adjustment OSD Time Out 5-60 OSD display time settings OSD Rotation Normal/90/180/270 OSD rotation settings OTHER FreeSync(Adaptive Sync) On/Off FreeSync(Adaptive Sync) settings HDR Off/Auto/ON HDR settings FW Update Update firware Reset Reset settings to factory defaults11 HDR function is only available for HDR content If you turn on the HDR setting in Windows 10, the desktop display may appear darker than when in Standard Dynamic Range (SDR) mode. This is because the monitor’s interpretation of HDR and SDR signals diers, and is not a malfunction. Please turn o the HDR function for normal PC use. Depending on the specications of the graphics card, photos and text may not be displayed correctly when the HDR function of the monitor is on. Note: To enable the HDR function, the connected device and content must be HDR compatible. Note: Even in Windows 10 Fall Creators Update (version 1709), the Windows HDR settings will not be displayed if the graphics card does not support HDR. How to open the settings screen: [Settings] > [System] > [Display] > [HDR] ABOUT HDR HDR stands for High Dynamic Range, which is a display technology that can express a wider range of brightness than the conventional SDR (Standard Dynamic Range). When the HDR MODE in the screen (OSD) menu is set to AUTO, if there is compatibility between the player and the content, the monitor will automatically enable the HDR function. Depending on the settings of Windows 10, HDR may not be displayed properly. Please check the settings for HDR in Windows 10.12 Symptoms Checkpoint Power LED does not turn ON
- Have you pressed the power button on the monitor and conrmed that it is turned on?
- Conrm that the power cord is correctly connected to both the monitor and the power outlet. Power LED is on, but there is no image
- Has the blank screen saver been activated? Move the mouse or keyboard to check.
- Check that the brightness and contrast are not set to minimum.
- Conrm that the signal cable is correctly connected to both the monitor and the computer.
- Check that the pins on the signal cable are not bent and that the cable is not damaged.
- Is the computer powered on? If you have another monitor, try connecting it to the computer to conrm that it is working correctly.
- Does the computer’s signal timing match the specications of the monitor? The image is distorted or there are wave pat- terns in the video
- Conrm that the signal cable is correctly connected to both the monitor and the computer.
- Move any electrical equipment that may be causing electrical interference away from the monitor.
- Is the voltage normal? Do not use a octopus wiring setup.
- Does the computer’s signal timing match the specications of the monitor? The position of the image is shifted to one side The size of the image is incorrect
- Is the computer’s resolution correct?
- Does the computer’s signal timing match the specications of the monitor? The screen is too bright / too dark
- Adjust the brightness and contrast settings from the screen (OSD) menu. The image is blurry or unclear
- Set the display resolution on the PC to the same native resolution as the recommended screen mode of the monitor.
- Does the computer’s signal timing match the specications of the monitor?
- Check that the pins on the signal cable are not bent and that the cable is not damaged. The video color is o • Check that the pins on the signal cable are not bent and that the cable is not damaged.
- Adjust the red/blue/green color settings from the screen (OSD) menu.
- Reset the settings from the screen (OSD) menu.
- Does the computer’s signal timing match the specications of the monitor? Cannot display UHD • This product supports a maximum resolution of 3840x2160 (UHD), including HDMI, DP. However, some graphics cards may not support 3840x2160. Please check with your nearest dealer or manufacturer regarding the hardware limitations of your computer. Abnormal noise • Is the cable correctly connected? FAQ
- Please note that the design, specications, and appearance of the product may be changed without notice for product improvement.
- Please note that the design, specications, and appearance of the product may be changed without notice for product improvement.