46670 - Food Warmers Vollrath - Free user manual and instructions
Find the device manual for free 46670 Vollrath in PDF.
| Brand | Vollrath |
| Model | 46670 |
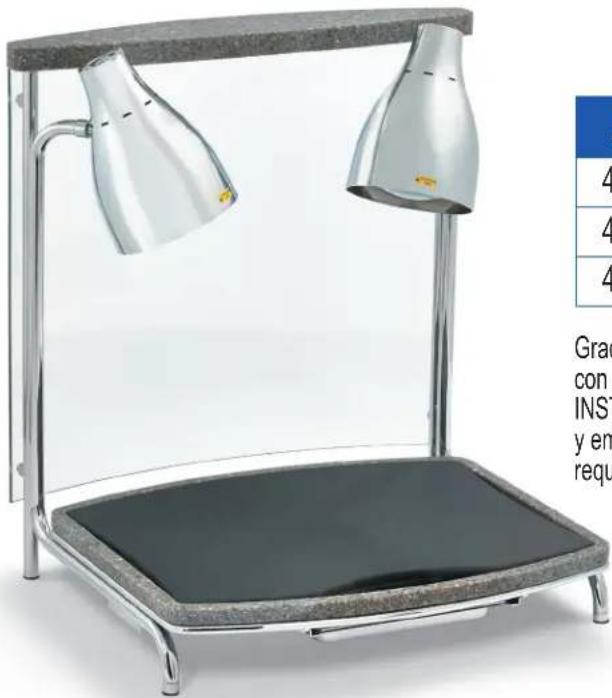
| Product type | Professional heat lamp with cutting station |
| Intended use | Cutting and holding cooked foods hot in commercial food service |
| Supply voltage | 120 V |
| Maximum power | 500 W |
| Rated current | 4.2 A |
| Plug type | NEMA 5-15P (grounded plug) |
| Heat lamp power | 250 W (shatter-resistant) |
| Number of lamps | 1 |
| Recommended holding temperature | At least 60 °C (140 °F) |
| Minimum distance from walls | 10 cm (4 in) |
| Materials | Stainless steel (frame), glass (sneeze guard), plastic (cutting board) |
| Dishwasher safe | Cutting board, base and drip pan only |
| Cleaning | Do not immerse, use mild cleaners, no steel wool |
| Warranty period | 1 year |
| Repairability | Non-user-serviceable parts, contact authorized service |
Frequently Asked Questions - 46670 Vollrath
User questions about 46670 Vollrath
0 question about this device. Answer the ones you know or ask your own.
Ask a new question about this device
Download the instructions for your Food Warmers in PDF format for free! Find your manual 46670 - Vollrath and take your electronic device back in hand. On this page are published all the documents necessary for the use of your device. 46670 by Vollrath.
USER MANUAL 46670 Vollrath
natural_image
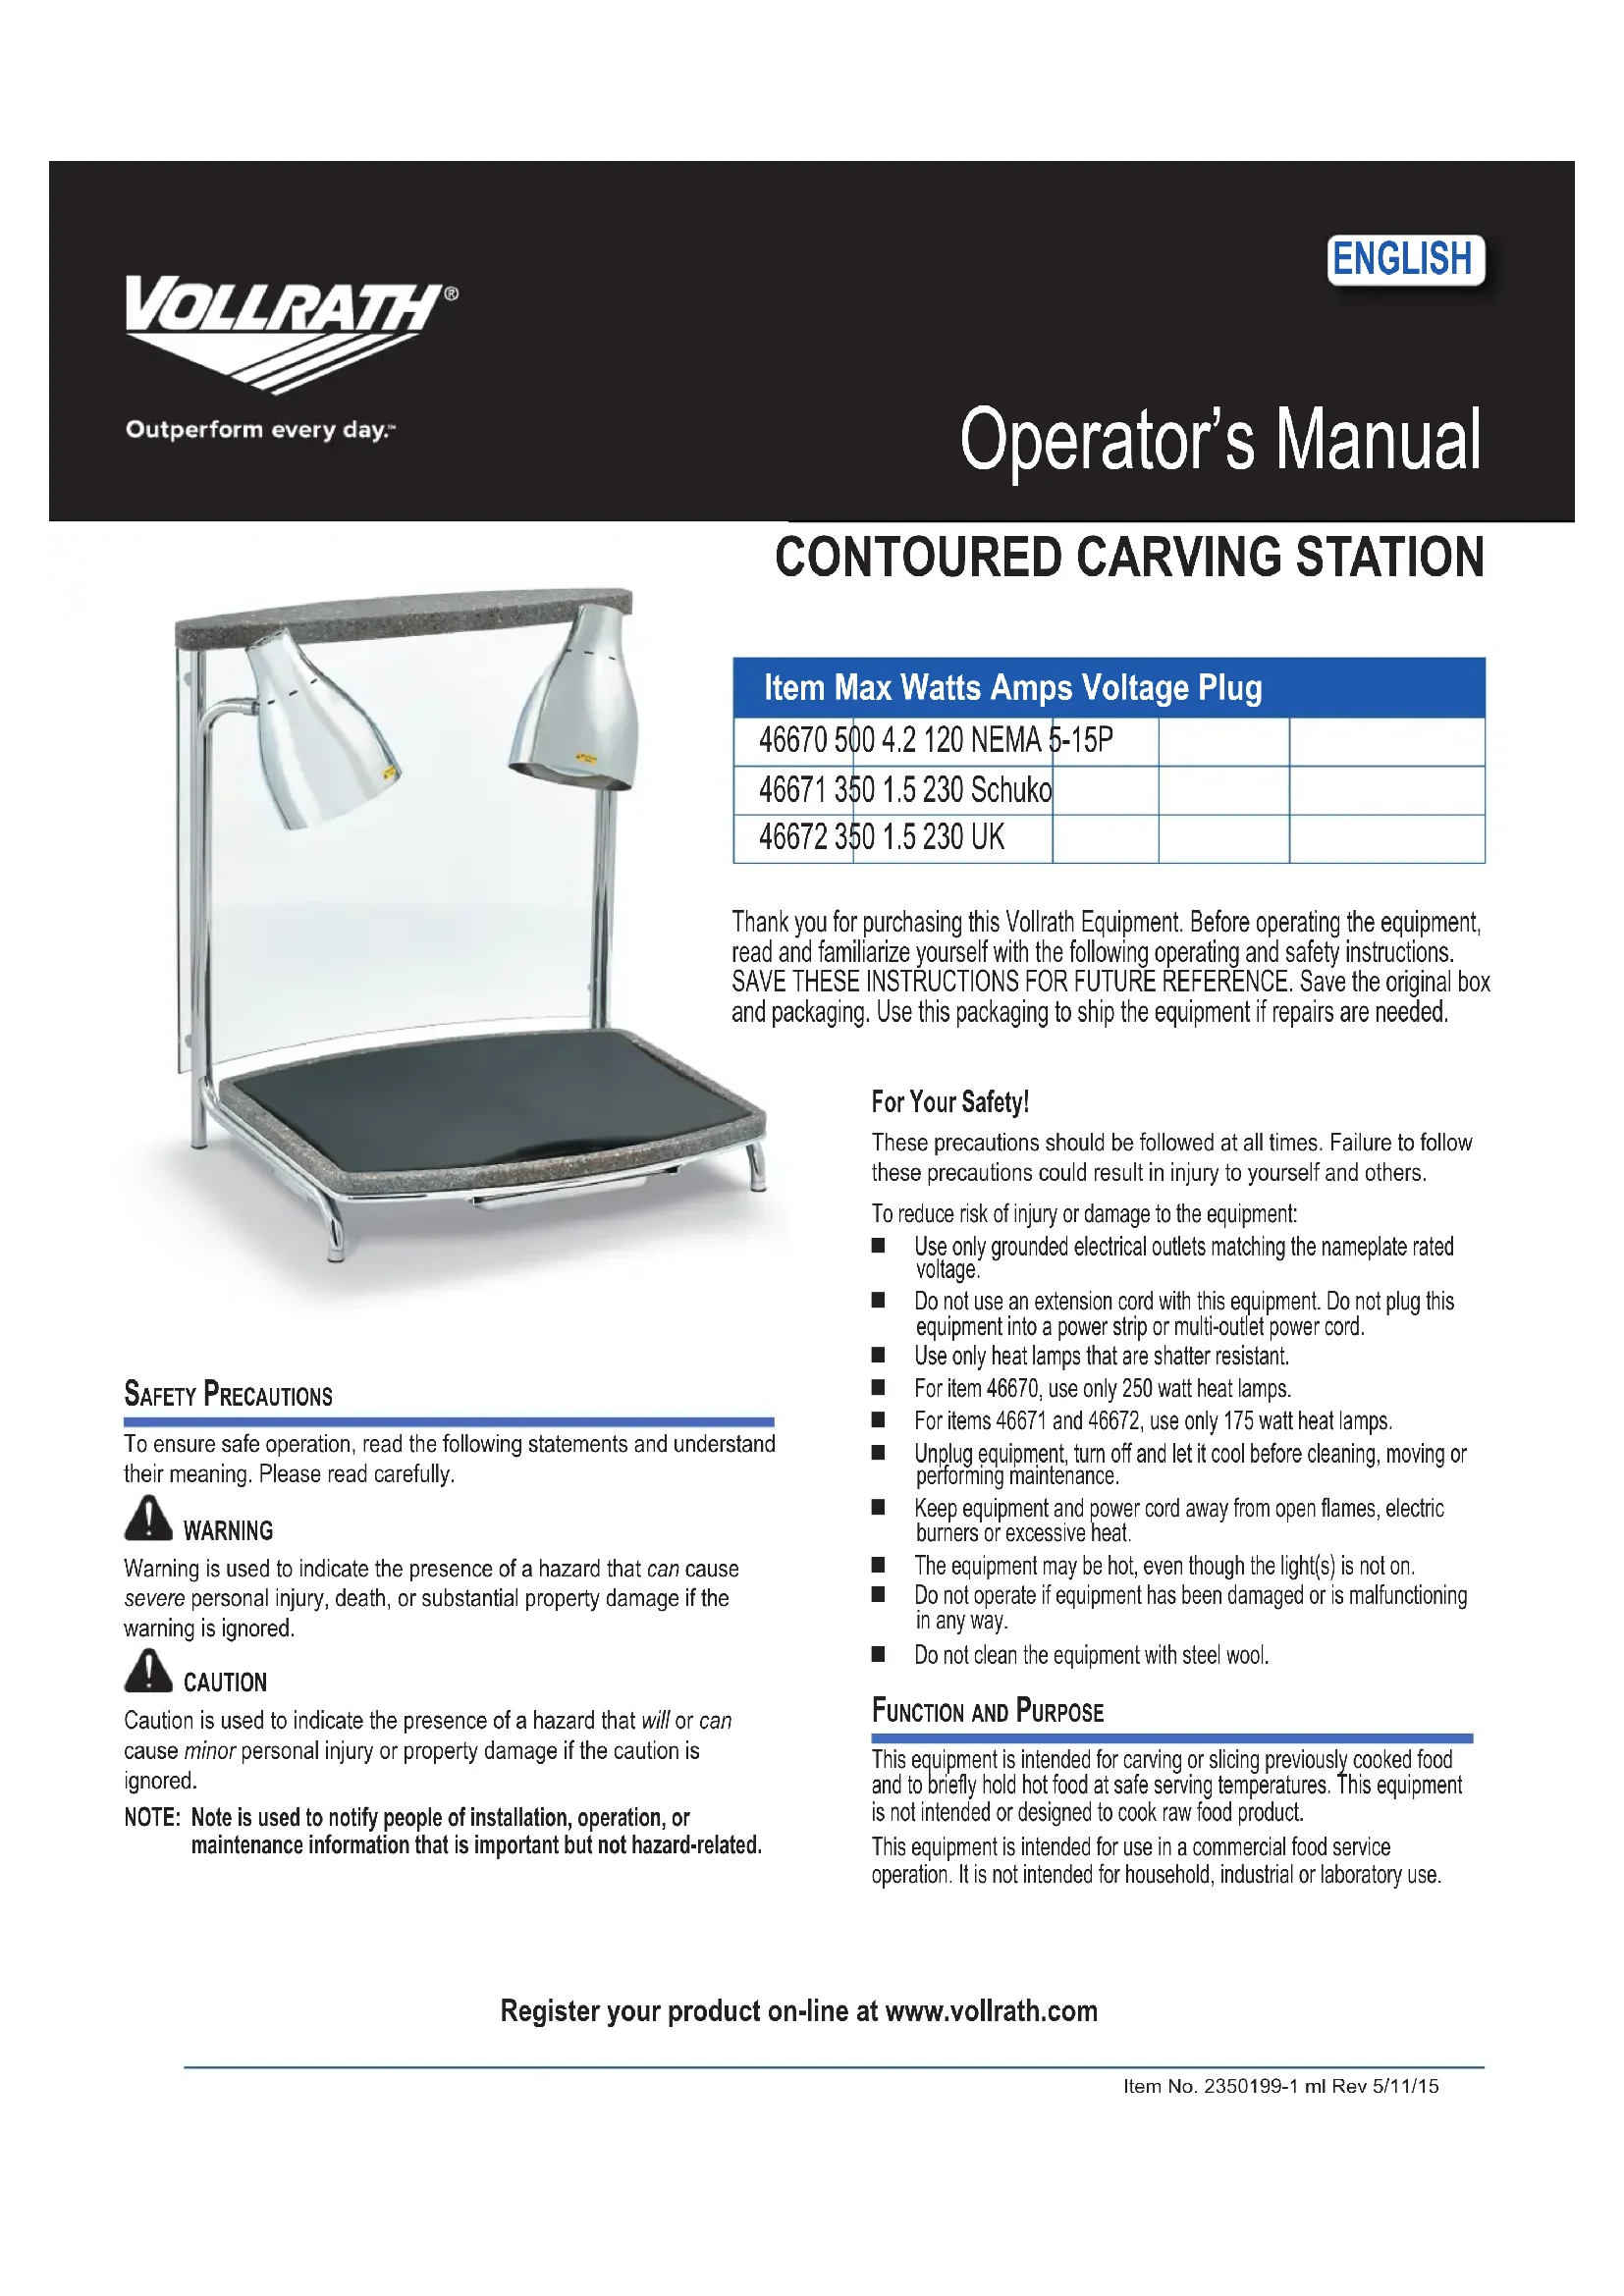
Modern desk lamp with adjustable armrest and black base, no visible text or symbols on the lamp itselfItem Max Watts Amps Voltage Plug
| 46670 500 4.2 120 NEMA 5-15P | ||
| 46671 350 1.5 230 Schuko | ||
| 46672 350 1.5 230 UK |
Thank you for purchasing this Vollrath Equipment. Before operating the equipment, read and familiarize yourself with the following operating and safety instructions. SAVE THESE INSTRUCTIONS FOR FUTURE REFERENCE. Save the original box and packaging. Use this packaging to ship the equipment if repairs are needed.
SAFETY PRECAUTIONS
To ensure safe operation, read the following statements and understand their meaning. Please read carefully.

WARNING
Warning is used to indicate the presence of a hazard that can cause severe personal injury, death, or substantial property damage if the warning is ignored.

CAUTION
Caution is used to indicate the presence of a hazard that will or can cause minor personal injury or property damage if the caution is ignored.
NOTE: Note is used to notify people of installation, operation, or maintenance information that is important but not hazard-related.
For Your Safety!
These precautions should be followed at all times. Failure to follow these precautions could result in injury to yourself and others.
To reduce risk of injury or damage to the equipment:
■ Use only grounded electrical outlets matching the nameplate rated voltage.
■ Do not use an extension cord with this equipment. Do not plug this equipment into a power strip or multi-outlet power cord.
■ Use only heat lamps that are shatter resistant.
■ For item 46670, use only 250 watt heat lamps.
■ For items 46671 and 46672, use only 175 watt heat lamps.
■ Unplug equipment, turn off and let it cool before cleaning, moving or performing maintenance.
- Keep equipment and power cord away from open flames, electric burners or excessive heat.
■ The equipment may be hot, even though the light(s) is not on.
■ Do not operate if equipment has been damaged or is malfunctioning in any way.
■ Do not clean the equipment with steel wool.
FUNCTION AND PURPOSE
This equipment is intended for carving or slicing previously cooked food and to briefly hold hot food at safe serving temperatures. This equipment is not intended or designed to cook raw food product.
This equipment is intended for use in a commercial food service operation. It is not intended for household, industrial or laboratory use.
Register your product on-line at www.vollrath.com
ASSEMBLY
To ensure correct installation and operation, read the following instructions and understand their meaning. Please read carefully.
Tools Needed:
■ Large flat surface on which to assemble the Contoured Carving Station
■ Soft cloth such as table cloth or towel to protect the assembly surface and Contoured Carving Station from scratches
Phillips screw driver
Prepare Components
- Remove the cutting board base, hardware bag and the glass breath guard from their packaging.
- Carefully set the breath guard onto the flat assembly surface, curved side face up. DO NOT stand on end.
- Remove all packing material and tape, as well as any protective plastic from the equipment.
- Clean any glue residue left over from the plastic or tape.
Install the Breath Guard
text_image
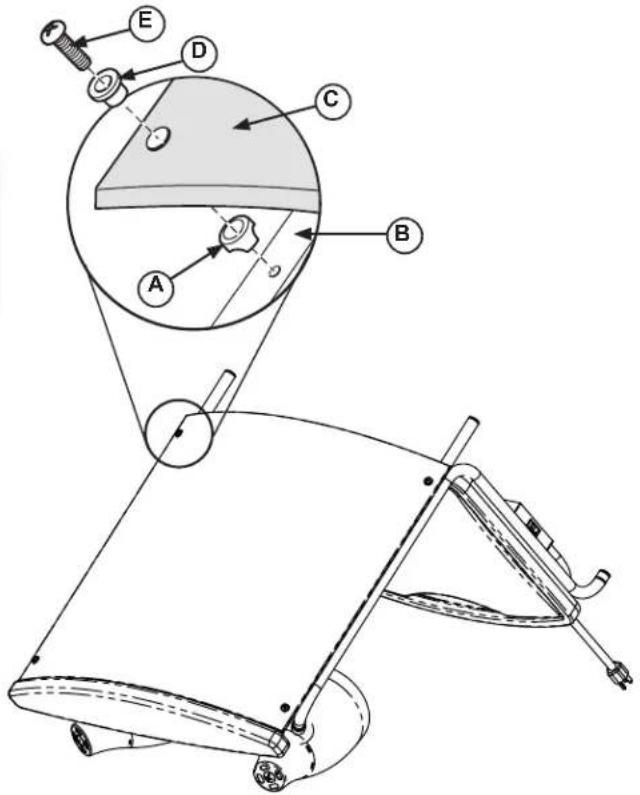
Technical diagram of a mechanical device with labeled components A, B, C, D, and E, showing internal components and motion paths.Figure 1. Install Breath Guard.
- Position the Contoured Carving Station frame on the flat assembly surface in the orientation shown in Figure 1.
- Insert special washer (D) into the holes in breath guard glass (C).
- Position spacer (A) on frame tubing (B) in front of the hole. Slide the screw (E) through the special washer (D), breath guard glass (C) spacer (A) and into the hole on the frame tubing (B). Turn the screw (E) several turns. Do not tighten at this time.
- Repeat step 3 for all four locations. After breath guard and hardware is in place tighten all screws (E) snugly.
Insert Components
- Set the Contoured Carving Station into the upright position as shown in Figure 2.
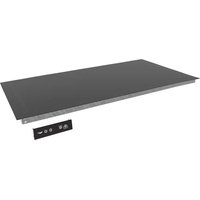
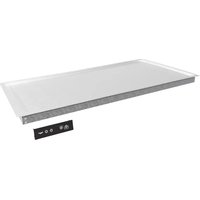
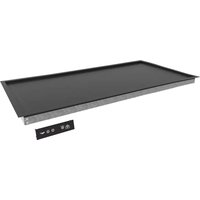
- Insert the cutting board base (C) cutting board (B) and drip pan (D) components as shown in Figure 2.
FEATURES AND CONTROLS
text_image
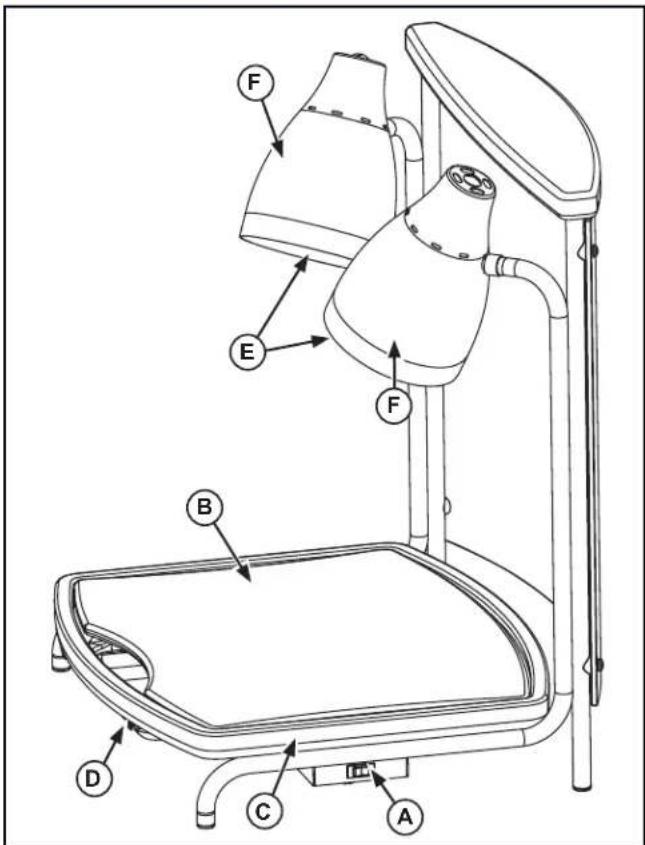
Technical diagram of a medical or laboratory device with labeled parts A through FFigure 2. Features and Controls.
Ⓐ ON/OFF POWER SWITCH. Switches the heat lamps power "ON" or "OFF".
⑧ CUTTING BOARD. Surface that the food product is carved or sliced.
© CUTTING BOARD BASE. Surface that the cutting board sets on. Channels the food product liquid refuse into the drip pan.
(D) DRIP PAN. Tray that collects oil and liquid from the food product.
⑤ HEAT LAMP. Helps keep the food product warm during the carving or slicing operation.
⑤ HEAT LAMP SHADE. Holds the heat lamp.
OPERATION
NOTE: Before using this equipment it must be cleaned and dried thoroughly. Clean all surfaces before use. Failure to clean surfaces before using the unit could cause food contamination.
NOTE: There must be a minimum of 4" (10cm) between the equipment and any surrounding walls. The surrounding walls must be made of noncombustible materials.
NOTE: The equipment must be installed in accordance with local fire and building regulations.

WARNING
Electrical Shock Hazard.
Keep water and other liquids from entering the inside of the equipment. Liquid inside the equipment could cause an electrical shock.

CAUTION
Burn Hazard.
Do not touch hot food, liquid, heat lamps or other surfaces while equipment is heating or operating.
- Clean and sanitize the cutting board (B), cutting board base (C), and drip pan (D) following the Cleaning and Sanitizing section of this manual.
- Verify the cutting board (B), cutting board base (C), and drip pan (D) are clean and positioned correctly.
- Plug electrical power cord into a grounded outlet matching the nameplate rated voltage. Switch the on/off power switch (A) to the "ON" position.
- Place the precooked prepared food product onto the cutting board (B). Process food product according to safe food handling guidelines.
Food Safety Precautionary Note:
Monitor food temperature closely for food safety. The United States Public Health Service recommends that hot food be held at a minimum of 140 °F (60 °C) to help prevent bacteria growth. Check the food product temperature often.
- When not in use, switch the on/off power switch (A) to the "OFF" position and unplug the power cord.
CLEANING AND SANITIZING
To maintain the appearance and increase the service life, clean your equipment daily.
NOTE: Do not immerse the cord, plug or equipment in water or any other liquid.
NOTE: Do not use caustic or abrasive cleaners on this unit.
-
Turn the on/off power switch (A) to the "OFF" position. See Figure 2.
-
Allow the equipment to cool completely before cleaning.
-
Remove the cutting board (B), cutting board base (C), and drip pan (D). See Figure 2.
- Wash hands.
- In a clean basin or sink, in a solution of clean warm water and correctly diluted food compatible sanitizing solution soak and wash the cutting board (B), cutting board base (C), and drip pan.
- Remove the parts from the basin or sink and allow them to air dry. Or, wash the cutting board (B), cutting board base (C), and drip pan in a commercial dishwasher.
- If a stain on the carving station base is not responsive to soap and water, then use an abrasive cleanser and buff with a light duty Scotch-Brite™ pad, using a circular motion. Should the stain require additional treatment, you may need to sand the surface lightly with a fine sandpaper (220 grit or higher), then buff with a light duty Scotch-Brite™ pad. DO NOT USE STEEL WOOL PADS.
- For gray discoloration caused by cutting with metal utensils, clean gently using a cleanser recommended for rust removal such as Zud ^® or Bar Keepers Friend ^® .
- For hard water deposits, scrub with a general cleanser such as Bon Ami®.
- Clean the breath guard with a high quality glass cleaner.
- Clean the tubing with a damp soapy sponge and dry immediately.
MAINTENANCE (CHANGING HEAT LAMPS)

CAUTION
Burn Hazard.
Do not touch hot food, liquid, heat lamps or other surfaces while equipment is heating or operating.
- Turn the on/off power switch (A) to the "OFF" position. See Figure 2.
- Allow the equipment to cool completely before proceeding.
- Remove the heat lamp (E) by unscrewing it from the heat lamp shade (F). Use only heat lamps that are shatter resistant. Vollrath recommends:
| Item | Watts | Voltage | Heat | Lamp - Clear | Heat Lamp - Red |
| 46670 | 250 | 120 GE | 47724 or Halco 404066 | Philips 600530 | |
| 46671 | 175 | 230 Philips | 128959 | ||
| 46672 | 175 | 230 Philips | 128959 |
Discard old heat lamps in an environmentally responsibly manner.
- Install new heat lamp (E) into the heat lamp shade and tighten.
TROUBLESHOOTING
| Problem Possible cause Course of Action | ||
| Heat lamps donot work whenswitched to the"ON" position. | Unit is not plugged in. | Plug equipment in. |
| Circuit breaker istripped. | Reset circuit breaker. If the circuitbreaker continues to trip, contactauthorized service agency. | |
| Heat lamp(s) areburned out. | Replace heat lamp(s). | |
SERVICE AND REPAIR
There are no user serviceable parts within this appliance. To avoid serious injury or damage, never attempt to repair the unit or replace a damaged power cord yourself. Do not send units directly to The Vollrath Company LLC. Please contact Vollrath Technical Service from the list below.
VOLLRATH Technical Service • 1-800-628-0832 • Email: techservicereps@vollrathco.com
When contacting Vollrath Technical Service, please be ready with the item number, model number (if applicable), serial number, and proof of purchase showing the date the unit was purchased.
WARRANTY STATEMENT FOR THE VOLLRATH CO. L.L.C.
This warranty does not apply to products purchased for personal, family or household use, and The Vollrath Company LLC does not offer a written warranty to purchasers for such uses.
The Vollrath Company LLC warrants the products it manufactures or distributes against defects in materials and workmanship for a period of one year, except as specifically described in our full warranty statement. In all cases, the warranty runs from the date of the end user's original purchase date found on the receipt. Any damages from improper use, abuse, modification or damage resulting from improper packaging during return shipment for warranty repair will not be covered under warranty.
For complete warranty information, product registration and new product announcement, visit www.vollrath.com.

www.vollrath.com
| The Vollrath Company, L.L.C.1236 North 18th Street | Vollrath Europe BVBeneluxbaan 7 | Vollrath of ChinaVollrath Shanghai Trading Limited | Vollrath de Mexico S. de R.L. de C.VPeriferico Sur Edificio 2-C |
| Sheboygan, Wisconsin53081-3201 USA | 5121 AD RIJENThe Netherlands | 29D, 855 South Pu Dong RoadShanghai, China 200120 | Col. Santa Maria Tequepexpan45601 Tlaquepaque, Jalisco Mexico |
| Main Tel: 920-457-4851 | +31161870005 | Tel: 86-21-50589580 | Tel: (52) 333-133-6767 |
| Main Fax: 920-459-6573 | Tel: (52) 333-133-6769 | ||
| Service Tel: 920-457-4851 | Fax: (52) 333-133-6768 | ||
| Service Fax: 920-459-5462 |