Windmaschine 23 - Fan Sonnenkönig - Free user manual and instructions
Find the device manual for free Windmaschine 23 Sonnenkönig in PDF.
User questions about Windmaschine 23 Sonnenkönig
0 question about this device. Answer the ones you know or ask your own.
Ask a new question about this device
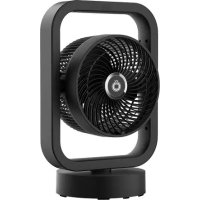
Download the instructions for your Fan in PDF format for free! Find your manual Windmaschine 23 - Sonnenkönig and take your electronic device back in hand. On this page are published all the documents necessary for the use of your device. Windmaschine 23 by Sonnenkönig.
USER MANUAL Windmaschine 23 Sonnenkönig
09 - GARANTIE / CONFORMITÉ / MISE AU REBUT 23FR
NOTE: To reduce the risk of fire or electric shock, do not use this Floor Fan with any solid-state speed control device.FR
PROBLÈME CAUSE POSSIBLE MESURES
09 - GARANTIE / CONFORMITÉ / MISE AU REBUT
NOTE: To reduce the risk of fire or electric shock, do not use this Floor Fan with any solid-state speed control device.IT
Please read and understand these manual completely before attempting to assemble, operate or install the product. This manual contains important information about the installation, operation and maintenance of this convector. General safety information is presented on these first pages and is also found throughout this manual. Retain this manual for future reference and to educate new users of this product. This manual should be read in conjunction with the labeling on the product. Safety precautions are essential when dealing with mechanical or electronic powered equipment. These precautions are required when using, storing and maintaining this item. Using this equipment with due respect and caution will reduce the possibility of personal injury or property damage. Inspect the unit for damage after removing the packaging. If damage is suspected, do not operate the device and contact a specialist. The recyclable packaging material must not be kept accessible to small children, but must be disposed of properly. This device may only be used for the purpose for which it was expressly designed. Any other use is to be considered improper and consequently dangerous. The supplier is not liable for any personal injury and/or dama- ge to property resulting from improper or incorrect use. Repairs to electrical equipment may only be carried out by qualified personnel. Improperly performed repairs and modifications to the equipment may result in dangerous consequences for the user, whereupon warranty claims will be rejected. The following basic precautions should always be followed when handling electrical equipment:
- Do not leave the appliance when it is connected to a power source. Unplug it from the outlet when not in use and before servicing.
- Do not allow the appliance to be used as a toy. Pay close attention when the appliance is used by or near chil- dren.
- Use this appliance ONLY as described in the manual.
- Do not use this appliance with a damaged cord or plug. If the appliance is not working correctly, or if it has been
- dropped, damaged, left outdoors, or dropped in water, return it to a service center.
- Do not pull or carry this appliance by the cord, use the cord as a handle, close a door on the cord, or pull the cord around sharp edges or corners. Do not run the appliance over the cord. Keep the cord away from heated surfaces.
- Do not unplug this appliance by pulling on the cord. To unplug, grasp the plug, not the cord.
- Do not handle the plug or appliance with wet hands.
- Do not put any objects into the openings of the appliance. Do not use the appliance with any opening blocked; keep free of dust, lint, hair, and anything else that may reduce air fiow.
- Keep hair, loose clothing, fingers, and all body parts away from the openings and moving parts.
- Turn off all controls before unplugging appliance.
- Use extra care when using on or near stairs.
- If the Floor Fan is not working as it should, has missing parts, has been dropped, damaged, left outdoors, or dropped into water, call customer service.
- Do not run the cord under carpeting. Do not cover the cord with throw rugs, runners, or similar coverings.
- Do not route the cord under furniture or appliances. Arrange the cord away from traffic area and where it will not be tripped over.EN
This instruction manual uses the following safety alert symbols and words to alert people to hazardous situations and the risk of personal injury or property damage.
DANGER: Indicates an imminently hazardous situation which, if not avoided, will result in death
WARNING: Indicates a potentially hazardous situation which, if not avoided, result in death
or serious injury CAUTION: Indicates a potentially hazardous situation which, if not avoided, may result in minor or moderate injury. NOTICE: Indicates a practice notrelated to personal injury which, if not avoided, may result in property damage. TO REDUCE THE RISK OF INJURY, USERS MUST READ INSTRUCTION MANUAL. DO NOT RUN UNATTENDED. DO NOT PICK UP FLAMMABLE, COMBUSTIBLE OR HOT MATERIALS. DO NOT USE AROUND EXPLOSIVE DUST, LIQUIDS OR VA- PORS. ELECTRICAL DEVICES PRODUCE ARCS OR SPARKS WHICH CAN CAUSE FIRE OR EXPLOSION. DO NOT USE AT FIL- LING STATIONS OR ANYWHERE GASOLINE IS STORED OR DISPENSED. DO NOT VACUUM TOXIC OR CARCINOGENIC MA- TERIALS OR OTHER HEALTH ENDANGERING MATERIALS SUCH AS ASBESTOS OR PESTICIDES. ALWAYS USE PROPER EYE AND RESPIRATORY PROTECTION. TO REDUCE THE RISK OF ELECTRICAL SHOCK, DO NOT EXPOSE TO RAIN. STORE INDOORS. WHEN SERVICING, USE ONLY IDENTICAL REPLACEMENT PARTS. DO NOT TO BE USED AS A STEP STOOL. An extension cord must have adequate wire size (AWG or American Wire Gauge) for safety. The smaller the gauge number of the wire, the greater the capacity of the cable, that is, 16 gauge has more capacity than 18 gauge. An undersized cord will cause a drop in line voltage resulting in loss of power and overheating. When using more than one extension to make up the total length, be sure each individual extension cord contains at least the minimum wire size. The following table shows the correct size to use. If in doubt, use the next heavier gauge. The smaller the gauge number, the heavier the cord. If an extension cord is to be used outdoors it must be marked with the suffix W-A or W following the cord type designation. For example – SJTW-A indicates it is acceptable for outdoor use. Minimum Gauge for Cord Sets Ampere Rating Volts Total Length of Cord in meters 120 V
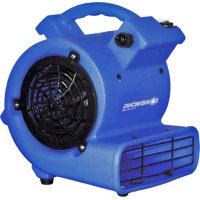
Power 130 W Voltage / Frequency 220 Volt~ / 50 Hz Power cord 3.05 m Weight 4 kg Dimension 30 x 30 x 25 cm GROUNDING INSTRUCTIONS This appliance must be grounded. If it should malfunction or break down, grounding provides a path of least resistance for electric current to reduce the risk of electric shock. This appliance is equipped with a cord having an equipment-grounding conductor and grounding plug. The plug must be inserted into an appropriate outlet that is properly installed and grounded in accordance with all local codes and ordinances. This appliance is for use on a nominal 220-volt circuit, and has a grounded plug that looks like the plug illustrated in sketch A. A tempo- rary adapter that looks like the adapter illustrated in sketches B and C may be used to connect this plug to a 2-pole receptacle as shown in sketch B if a properly grounded outlet is not available. The temporary adapter should be used only until a properly grounded outlet (sketch A) can be installed by a qualified electrician. The green colored rigid ear, lug, or the like extending from the adapter must be connected to a permanent ground such as a properly grounded outlet box cover. Whenever the adapter is used, it must be held in place by a metal screw. Make sure that the appliance is connected to an outlet having the same configuration as the plug. No adapter should be used with this appliance.EN
Current protector 1EN
2. To use the unit, place the unit in the area most suitable for the application. Several factors need to be con-
sidered; the unit must be placed close enough to an AC outlet to be plugged in, there must be a minimum clearance of two feet from either side of the unit to allow for proper air flow, and the unit should not be placed where it can become a tripping or safety hazard.
3. Place unit in the proper operating position for the application. Refer to the operating positions section in
4. To use multiple Floor Fans, refer to the multiple Floor Fan instructions in this section.
5. Plug unit into the wall.
6. Turn unit on and select air speed by turning the switch, located near the top handle, clockwise, then turn on
the timer knob on ON or OFF-3H.
7. When the drying job is completed, turn the unit off and follow the directions for storage in this manual.
8. This unit comes with receptacles for use with multiple units. To use this feature, position the first Floor Fan
following the instructions listed above in this section. This unit may be turned on while connecting multiple units.
9. Use only on a level and stable surface to prevent the Floor Fan from falling and possibly causing injury or
10. Plug the second unit into one of the receptacles on the first unit. Place the second unit in the operation
position and the area most suitable for the application. The second unit may be turned on at this time.
11. A third unit may be plugged into the remaining receptacles on the first unit or plugged into one of the
12. receptacles in the second unit. The third unit maybe turned on at this time.
13. If desired, follow the same steps to add more units (no more than 6 units total, including the main unit).
14. The receptacles on the unit are equipped with a circuit protector that will shut off power to the unit should
the receptacles become overloaded. If this happens, move the switch to the off position on the unit and any units connected to it. Press the reset button located above the receptacle; then turn the unit on and any units connected to it. NOTE: To reduce the risk of fire or electric shock, do not use this Floor Fan with any solid-state speed control device.EN
1. Turn clockwise to set the timer to count down the minutes to an
2. The timer can be set for up to 180 minutes (3 hours).
3. When the timer reaches the “OFF” position, the unit stops working.
When set to the „ON“ position, it will work constantly. Power Switch
4. Turn to “0” position to switch the Floor Fan OFF. Turn to any speed
position to switch the Floor Fan ON.
5. Turn clockwise to set the desired fan speed.
6. There are 3 speeds: I, II, III. I is the lowest speed and III is the highest.
1. Unboxing status: The timer knob and switch are both at 0 (OFF).
2. Operating status: First, turn the power switch to III, II, or I; then turn the
timer counterclockwise to ON (Figure 1) or clockwise to OFF-3H (Figure 2). TimerPower Figure 1 Figure 2 NOTE: When the timer is set to ON, the machine will continue to run until shut down manually. To shut it down, turn the power switch to or turn the timer knob to OFF. NOTE: When the timer switch is set to OFF-H, the machine is in the timing state and will automatically shut down when the timer ends. Figure 1 Figure 2 Figure 3 OPERATION POSITIONS The Floor Fan may be set in one of three operating positions. Pick the position best suited for your application.
1. Use the down position for applications such as drying wet floors, shampooed carpets, etc. To use this posi-
tion simply place the unit on its base (Figure1).
2. Use the angle position for applications such as drying plaster on walls or drying wet furniture. To use this
position, tilt the unit backwards so it rests on the support (Figure2).
3. Use the up position for applications such as drying paint on the ceiling. To use this position, lay the unit on
the back side with the front grill pointing towards the ceiling (Figure3).EN
WARNING: Unplug before disassembling or servicing.
WARNING: All disassembly and reparis should be performed by qualified personnel.
WARNING: If the supply cord is damaged, it must be raplaced by the manufacturer,
its sevice agent, or similary qualified persons in order to avoid a hazard.
1. Before storing the Floor Fan it should be cleaned.
2. Use a cloth dampened only with water and mild soap.
3. Never let any liquid get inside the Floor Fan.
4. Never immerse any part of the Floor Fan into a liquid.
5. Wrap the power cord around the carry handle on the top of the unit to keep it untangled.
07 - TROUBLESHOOTING
Minor problems often can be fixed without calling customer service.
PROBLEM POSSIBLE CAUSE CORRECTIVE ACTION
Unit will not run. 1. No power to unit.
3. Circuit breaker tripped.
2. Turn on the power switch and
Unit runs but Floor Fan makes loud scraping noise.
1. Unit has been severely jolted
causing blower wheel to rub against housing or housing to deform.
1. Contact customer service.
Unit runs blower vibrates exces- sively.
1. Dirt build up on one side of Air
2. Severe jolt has bent motor
2. Contact customer service.
Unit runs but blower wheel does not turn.
1. Blower wheel is jammed
1. Contact customer service.
Unit runs briefly, then shuts off on overload.
1. Intake grille and /or exhaust
grille is obstructed.
2. Motor bearings are failing or
motor has developed an internal electrical fault.
1. Remove obstruction.
Warranty All products are checked from our company before the delivery. In case that there is a lack on your product, please contact the vendor. Please bring your proof of purchase for guarantees. Please save the packaging materials of the unit. Disposal Please remove the ASCHTRO 15 properly. You can bring the product to any specialist dealer fort he removal. CE declaration of Conformity This device complies with the following standards: EMC BS EN --:+A:+A: BS EN -: +AC:+A:+A: + A: + A: + A: +A: BS EN : +AC: EN --: + A:+A: EN IEC -: EN IEC --: +A: EN IEC -: RoHS //EU (EU)/ EMC //EU CE-MD //EC DISPOSAL INSTRUCTIONS FOR THE ELECTRICAL PART OF THE PRODUCT In accordance with Article 26 of the Decree-Law of 14 March 2014 implementing Directive 2012/19/EC, and the Law of 31 March 2015 implementing Directive 2015/863/EU on the reduction of the use of hazardous substances in electrical and electronic equipment and on waste management. The crossed-out dustbin symbol on the machine or packaging indicates that the waste generated at the end of its useful life must be collected separately from other waste. The user must therefore take the device to the appropriate collection points at the end of its service life. Sort electronic and electrical waste or send back to the retailer when purchasing new, equivalent devices in a one-to-one process. Appropriate separate collection for subsequent com- missioning of the equipment to be recycled, treatment and environmentally sound disposal helps to avoid possible adverse effects on the environment and health, and promote the reuse and/or recycling of the materials to which they belong. Misuse of this product by the user will result in the application of the administrative penalties provided for in the applicable legislation. Batteries contained in the device must be disposed of separately in the appropriate containers for the collection of used batteries.