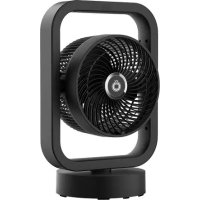
Livorno - Fan Sonnenkönig - Free user manual and instructions
Find the device manual for free Livorno Sonnenkönig in PDF.
User questions about Livorno Sonnenkönig
0 question about this device. Answer the ones you know or ask your own.
Ask a new question about this device
Download the instructions for your Fan in PDF format for free! Find your manual Livorno - Sonnenkönig and take your electronic device back in hand. On this page are published all the documents necessary for the use of your device. Livorno by Sonnenkönig.
USER MANUAL Livorno Sonnenkönig
- INDEX 1 Safety instructions p. 45
- 2 Technical specifications p. 46
- 3 Requested tool p. 47
- 4 Preparation p. 48
- 5 Assembly p. 49
- 5 Operating your fan p. 52
- 6 Instructions of the remote control p. 53
- 8 Connection diagram p. 53
- 9 Cleaning p. 54
- 10 Warranty / Disposal / Technical change EN45 1 Safety instructions Please read before first commissioning the safety instructions carefully and observe the safety in- structions to prevent damage due to misuse, improper operation, and improper environmental condi- tions to be avoided. Keep these for later reference. Check the device after removing the packaging for damage . Do not put the unit in case of suspected corruption in operation and consult a specialist. The recyclable packaging material must not be stored or disposed accessible for young children , but must be disposed of properly. This appliance is only for the purpose for which it was explicitly developed. Any other use is regarded as improper and therefore dangerous . The supplier is not liable for damage to persons and / or pro- perty damage due to an improper or incorrect use. This appliance can be used by children aged from 8 years and above and persons with reduced phy- sical, sensory or mental capabilities or lack of experience and knowledge if they have been given su- pervision or instruction concerning use of the appliance in a safe way and understand the hazards involved. Children shall not play with the appliance. Cleaning and user maintenance shall not be made by children without supervision. Repairs to electrical appliances must only be carried out by trained personnel only. Improperly per- formed repairs and alterations to the equipment can have dangerous consequences for the user accor- ding to what the warranty will be rejected. This product has passed through extensive quality assurance process. Every care has been taken to ensure that it reaches you in perfect condition. Warning! When using electric tools, basic safety precautions should be followed to reduce the risk of fire, electric shock and personal injury, including the following. p. 54
- Read all these instructions before attempting to operate this product and save these in- structions.
- Check the voltage indicated on the rating plate. This tool is designed for a 230V 50Hz electric supply.
- Do not use electrical extension cord with this fan.
- Do not introduce your fingers through the front case. Do not let children introduce their fingers through the front case. Do not introduce any foreign body into the front case.
- Do not let hair, net curtains, tablecloth, clothes or curtains next to the openings of the fan. They could be aspiring into the fan, causing damaged or injuries.
- Do not use the fan if the cable or plug is damaged or if they have been damaged in any way. Send the fan to customer service or have it repaired by a specialist.
- Periodically check the electric cable of this fan. lf the electric cable is damaged, it must be replaced by the manufacturer, its after sales service or by a similar qualified person in order to avoid a danger.
- Do not use this fan outside.
- Do not use this fan in a damp area such as bathroom.
- The fan should not be operate without a base nor used laying on its side.
- Do not place the electrical cord under a cover. Do not overlay the cord with little covers or such element. Place the cord in an area where there are not any risk to stumble over it.
- Do not operate the fan in an area where gasoline is used or stocked, painting or such flam- mable liquids.
- Use this fan only as it is describe in this manual.
- Do not try to throw off this fan, there are not any piece that could eventually be repaired by the user. If you need maintenance, please send back the fan to the agent.
- No part of this fan must be replaced by the user. The fan should not be opened by user. Modell LIVORNO Voltage 220-240 V Frequency 50 Hz Power 70 Watt Dimensions 0 123 x 33.5 cm Volume 40-60 db (A) 2 Technical specifications EN47 3 Requested tools
1 x Receiver 1 x Support rod 3 x Rotor blades Cross pin / R pin Screws and washers 1 x Mounting plate 1 x Upper Cover 1 x Lower Cover 1 x Remote Control 1 x Motor Mounting plate Receiver for Remote control Upper Cover Support rod Lower Cover R pin motor housing Fixed block for 2 wings Cross pin Rotor blades EN48
4 Preparation Important: When using an existing outlet box, make sure the box is securely attached to the building struc-ture and can support the full weight of the fun. Failure to do this can result in serious injury or death. Tools needed to install your fan: - A drill - Magnetic Phillips screwdriver - Flat magnetic screwdriver Turn off circuit breakers and wall swich to the fan supply line leads. War- ning: Failure to disconnect power supply prior to installation may result in serious injury or death. Determine mounting method to use. A: closemount B: Downrod mount or angle mount. (only some models) Important: If using the angle mount, check to make sure the ceiling angle is not steeper than 25°
Check to make sure blades are at least 60 cm from any obstruc-tion. Check downrod length to ensure blades are at least 2.3 m above the floor. EN4949
MOUNTING THE MOUNTING PLATE
Choose the right location for your fan and take all necessary safety precautions before you start the in- stallation. Loosen the screws on the side of the roof support as shown in the illustration below. Draw your drill holes through the panel with a pencil, placing them on the ceiling. Drill the holes with a drill bit. Check that your holes fit well on the board and then tighten the screws. Do the same operation on a woo- den beam with a very fine drill bit to guide the screw so that it is not at an angle in the wood. With drywall, try to find the metal structure to ensure the stability of the fan. Without a metal structure, the fan should not be mounted on plasterboard below 9 mm. In the case of drywall, you can add a rubber or foam pad un- der the board. Drywall can create „sound box“ and the slightest vibrations will be amplified significantly. If your electrical outlets are already in place, make sure they are placed in the centre of the mounting plate. Tighten the screws so that the panel lies flat against the ceiling. CEILING RODS Take the already mounted ceiling rod consisting of: Hemisphere, extension (the rod), a flat through bolt, a locking pin at the end of the through bolt. Disassemble the parts star- ting with the hemisphere. To do this, unscrew the screw on the side. Carefully slide the hemisphere downwards and you will access a cylinder to be re- moved. Slide the hemisphere upwards to remove it. Remove the pin from the through bolt at the other end of the rod. Remove the through bolt.
COPPLING Take the canopy and the decorative motor cover, and slide it through your chosen rod. Take the cables coming out of the motor and push them into the lower rod so that they come out the other side. Attention, put the rod in the right direction, the hemisphere hole upwards and screw hole downwards to the motor. Now take the hemisphere, push it through the rod, set the cylinder, mount the hemisphere to block the cylin- der and screw the hemisphere tight. Be careful not to break or bend the cables. Attach the rod to the bottom of the motor over the coupling located above the motor as shown in the fol- lowing figure. Pass the through bolt through the coupling and the rod, careful for the cables! Guide the pin, then screw the three screws around the coupling, the ceiling rod should not move, it must hold tight. Slide the decorative cover down, screw it tight. Finally, place your fan on the mounting plate, the hemisphere goes into the mounting plate, make sure the pin on the plate goes well into the groove of the hemisphere. EN5151 ELECTRICAL CONNECTIONS Remove the receiver from the remote control and slide it under the hemisphere of the fan. Be careful not to damage the receiver‘s side cables. Connect the eclectic network to the terminal or domino located on the mounting plate. Be careful, do not reverse the phase and neutral cables. Pay attention to the black cable, this is the receiving antenna. Connect the cables that come out of the fan with the plug to the cables of the Domino‘s output. Make sure that the cables are properly connected to the terminal block. Working carefully with the cables without for- cing the connectors, reassemble the canopy. Rotate the canopy to secure it in its housing, use the screws to secure the canopy.
Find the marks to install 3 wings on the motor. Place the three wings without tightening them to the end at this point. When the three wings are installed, adjust them so that the distance between the wings is minimal. Now tighten the screws to the maximum. CAUTION! Do not operate the fan without the blades installed . The motor is equipped with a safety mode that prevents normal operation of the motor. L-Line: Black N-Line: White E-Line: Green+Yellow E-Line: Green+Yellow Empfänger EN52
6 Operating the fan Models with remote control: - Select the ventilation speed by pressing the speed control on the remote control (High speed - Medium speed - Low speed - OFF). - Do not expose the remote control to direct sunlight. - Do not attempt to recharge expired batteries. There are special batteries that are clearly mar- ked. - Keep batteries away from fire to avoid explosion. - Proper testing of the fan After installing the fan, switch on the fan. Control the blade rotation and solidity: if the fan fluc- tuations are only moderate, switch off the fan and proceed as follows:
1. loosen the screws.
2. check that the distance between the four flat connectors is equal.
Tighten the screws again. 4. Check the distance between the ceiling and the outer end of each of the blades. They must be the same.
5. switch on the fan and check whether the fan is now working properly. 6.
6. if the fan still does not work properly, start again from point 1 or contact an electrician.
EN5353 7 Instructions of the remote control LIGHT ON/OFF: Press the button to switch the light on the unit on or off. LOW: Press this button to select the low speed. MED: Press this button to select the average speed. HI: Press this button to select the high speed. STOP: Press this button to turn off the unit. 1H-8H: Use these buttons to control the timer function. Change the batteries by sliding the cover down as shown by the arrow. (1.5V / AA, 2 pieces) The unit has a remote control for convenient and efficient use. For the remote control to work, it must always be pointed at the fan. Before using the remote control, please take a few minutes to familiarise yourself with the fun- ctions: To operate the ceiling fan with the remote control, the supplied receiver must be installed be- forehand as described in the „Installation“ section of this manual. To use the remote control, you must insert 2 batteries into the bottom of the remote control. of the remote control. LEARNING HOW TO USE THE REMOTE CONTROL For turning on the receiver, press and hold the “STOP” button for 3 seconds. Light will (if instal- led) blinks 2 times. They will be synchronized when hear a prolonged signal. 8 Connection diagram
Neutral (white)Neutral (white) Phase (black)Phase (black) Antenna Connection to the fan Connection to the power supply Receiver54 Warranty All products are checked from our company before the delivery. In case that there is a lack on your product, please contact the vendor. Please bring your proof of purchase for guarantees. Disposal Please remove the heater properly. You can bring the product to any specialist dealer fort he removal. Technical changes Technical changes in technique and design are possible. Please save the packaging materials of the unit. CE declaration of Conformity This device complies with the following standards EN 55014-1:2017 EN 55014-2:2015 EN 55015:2013+A1:2015 EN 60335-1:2012/AC:2014 EN 60335-2-80:2003+A1:2004+A2:2009 EN 61000-3-2:2014 EN 61000-3-3-2013 EN 61547:2009 EN 62233:2008 2015/863 2014/30/EU 2014/35/EU 206/2012/EU 10 Warranty / Disposal / Technical change 9 Cleaning
- Ensure that the fan is unplugged from the power socket before starting.
- Parts should be cleaned with a soft dry cloth.
- Dirt marks should be removed with a mild soap (detergent) and a damp cloth. Ensure that all traces of the soap film are removed with a damp cloth.
- Do not use gasoline or solvents that may damage the fan.
- Care should be taken to ensure that water (or other liquid) does not enter the fan motor housing or the speed control unit.
- Do not dip the fan into the water or in any other liquid. EN55
DISPOSAL INSTRUCTIONS FOR THE ELECTRICAL PART OF THE PRODUCT In accordance with Article 26 of the Decree-Law of 14 March 2014 implementing Directive 2012/19/ EC, and the Law of 4 March 2014 implementing Directive 2011/65/EC on the reduction of the use of hazardous substances in electrical and electronic equipment and on waste management. The crossed-out dustbin symbol on the machine or packaging indicates that the waste genera- ted at the end of its useful life must be collected separately from other waste. The user must therefore take the device to the appropriate collection points at the end of its service life. Sort electronic and electrical waste or send back to the retailer when purchasing new, equivalent devices in a one-to-one process. Appropriate separate collection for subsequent commissio- ning of the equipment to be recycled, treatment and environmentally sound disposal helps to avoid possible adverse effects on the environment and health, and promote the reuse and/or recycling of the materials to which they belong. Misuse of this product by the user will result in the application of the administrative penalties provided for in the applicable legislation. Batteries contained in the device must be disposed of separately in the appropriate containers for the collection of used batteries.
DISPOSAL OF BATTERIES AND ACCUMULATORS
In accordance with Legislative Decree 188 of 20 November 2008 implementing Directive 2006/66/ EC on batteries, accumulators and related waste, the symbol of the crossed-out waste bin on the battery indicates that the disposal of used batteries is prohibited in household waste. Single-use and rechargeable batteries contain substances that are highly polluting for the environment. The user is obliged to dispose of used batteries at collection points in the muni- cipality or in appropriate containers. This service is free. In this way, legal requirements are adhered to and the environment protected. The symbols identifying hazardous materials that may be present in single-use and rechargeable batteries are as follows: Hg = Mercury, Cd = Cadmium, Pb = Lead.Company Armin Schmid Olensbachstrasse 9–15 CH-9631 Ulisbach Tel. Int. +41 58 611 60 00 Tel. Nat. 0848870850 info@sonnenkoenig.ch www.sonnenkoenig.ch Company Armin Schmid Peter-Henlein-Strasse 5 D-89331 Burgau Tel: 0180 500 64 35 info@sonnenkoenig.ch www.sonnenkoenig.ch Landline 14 Cent/Minute Mobile network to 42 Cent/Minute