
AFL3 - Deep fryer Duronic - Free user manual and instructions
Find the device manual for free AFL3 Duronic in PDF.
| Product type | Oil-free air fryer |
| Brand | Duronic |
| Model | AFL3 |
| Total capacity | 9 L (2 x 4.5 L) or 10 L (1 x 10 L) depending on configuration |
| Dimensions (L x D x H) | 39 x 37.7 x 32.5 cm |
| Power | 2400 W |
| Input voltage | 220-240 V ~ 50-60 Hz |
| Power cable length | 105 cm |
| Number of cooking zones | 2 independent zones (dual drawers or one large drawer) |
| Temperature range | 50 °C to 200 °C (in 10 °C increments) |
| Timer | 1 to 60 minutes (up to 24 hours in dehydration mode) |
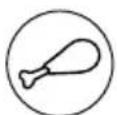
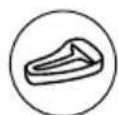
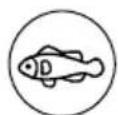
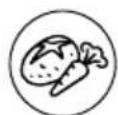
| Number of preset modes | 10: preheat, reheat, quick cooking, fries, chicken, meat, fish, vegetables, baking, dehydration |
| Special functions | Sync Cook, Sync Finish, interior light, automatic shut-off |
| Non-stick coating | Yes (inner trays, drawers, and interior of the appliance) |
| Drawer material | Steel with non-stick coating |
| Maintenance and cleaning | Drawers and inner trays dishwasher safe (remove silicone corners); main unit wipe with a damp cloth |
| Safety | Automatic shut-off at end of timer, hot exterior surface, do not immerse, do not use without inner tray |
| Available spare parts | Large drawer (AFD1), two small drawers (AF2SET), inner trays, silicone molds (AFL1, AFL2, AFL3) |
| Repairability | Repairs only by Duronic with original parts |
| Weight | Approximately 8 kg (estimate) |
| Warranty | Manufacturer's warranty (not specified in the manual, subscribe with the seller) |
Frequently Asked Questions - AFL3 Duronic
User questions about AFL3 Duronic
0 question about this device. Answer the ones you know or ask your own.
Ask a new question about this device
Download the instructions for your Deep fryer in PDF format for free! Find your manual AFL3 - Duronic and take your electronic device back in hand. On this page are published all the documents necessary for the use of your device. AFL3 by Duronic.
USER MANUAL AFL3 Duronic
Features and Specifications
| Cable Length | Capacity Dimensions | Power Voltage | ||
| 105cm | 9L (2 x 4.5L) | 39x37.7x32.5cm | 2400W | 220-240V |
| 41.3in | 10L (1x10L) | 15x14.8x9.1in | 50-60Hz | |
Components
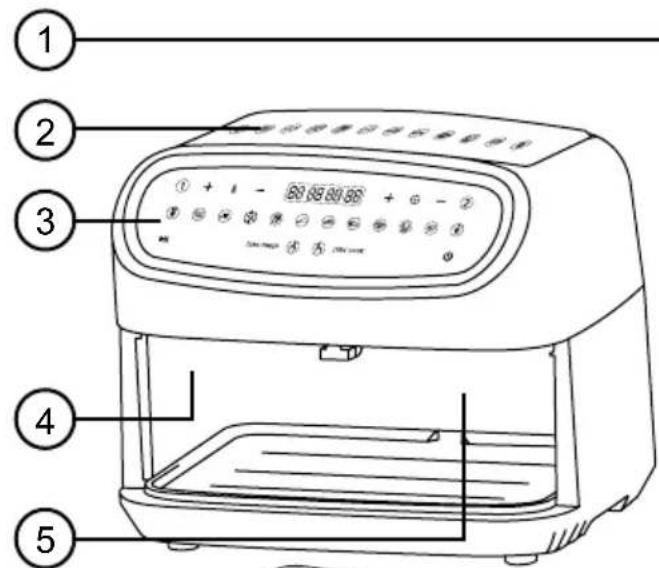
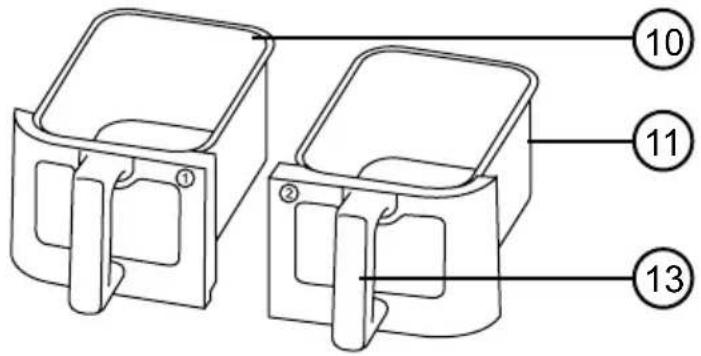
- Air inlet
- Cooking mode guide
- Control panel
- Cooking zone 1
- Cooking zone 2
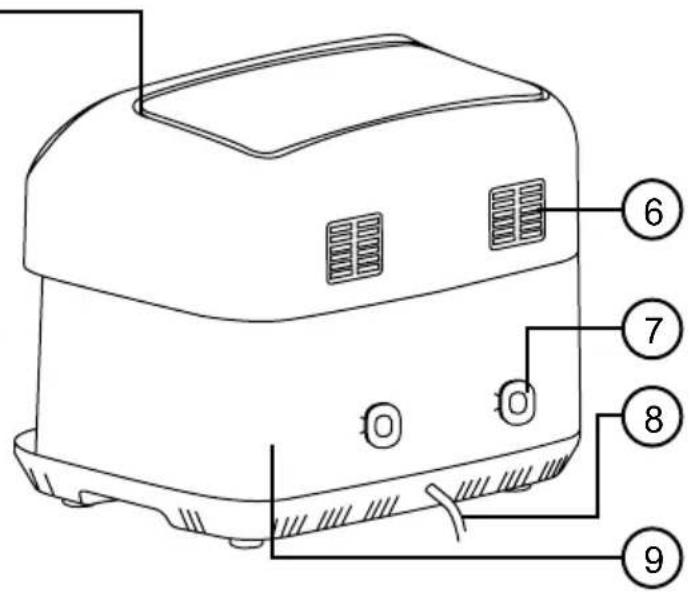
- Air outlet vents
-
Cable storage
-
Power cable
- Main unit
- Small Printer 1 (left)
- Small Printer 2 (right)
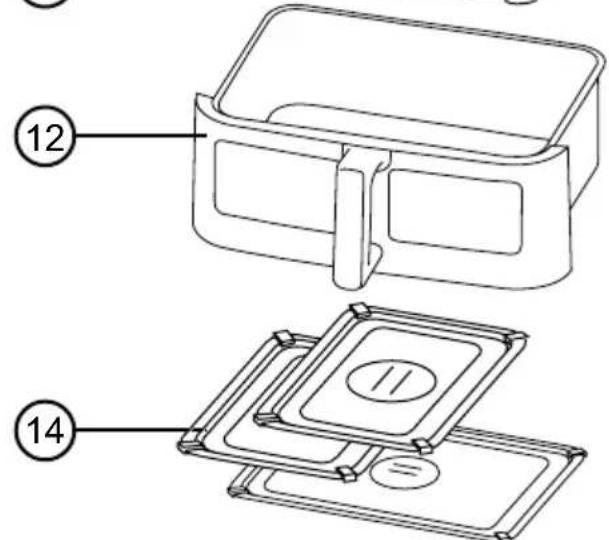
- Large Drawer
- Drawer handle
- Inner cooking trays
Product Variations and Spare Parts
| Model Name Com | ponents |
| AF14 AIR FRYER with large drawer | + |
| AF24 AIR FRYER with twin small drawers (1 & 2) | + |
| AF34 BUNDLE SET with large drawer and twin small drawers (1 & 2) | + + + + |
| AFD1 LARGE DRAWER with inner tray | + |
| AF2SET TWIN SMALL DRAWERS (1 & 2) together with inner trays | + |
| AF2LEFT SMALL DRAWER 1 (LEFT) | + |
| AF2RIGHT SMALL DRAWER 2 (RIGHT) | + |
Product Variations and Spare Parts
| Model Name Components | |
| AF2SMALLT INNER TRAY FOR SMALL DRAWER | |
| AF2LRGT INNER TRAY FOR LARGE DRAWER | |
DURONIC
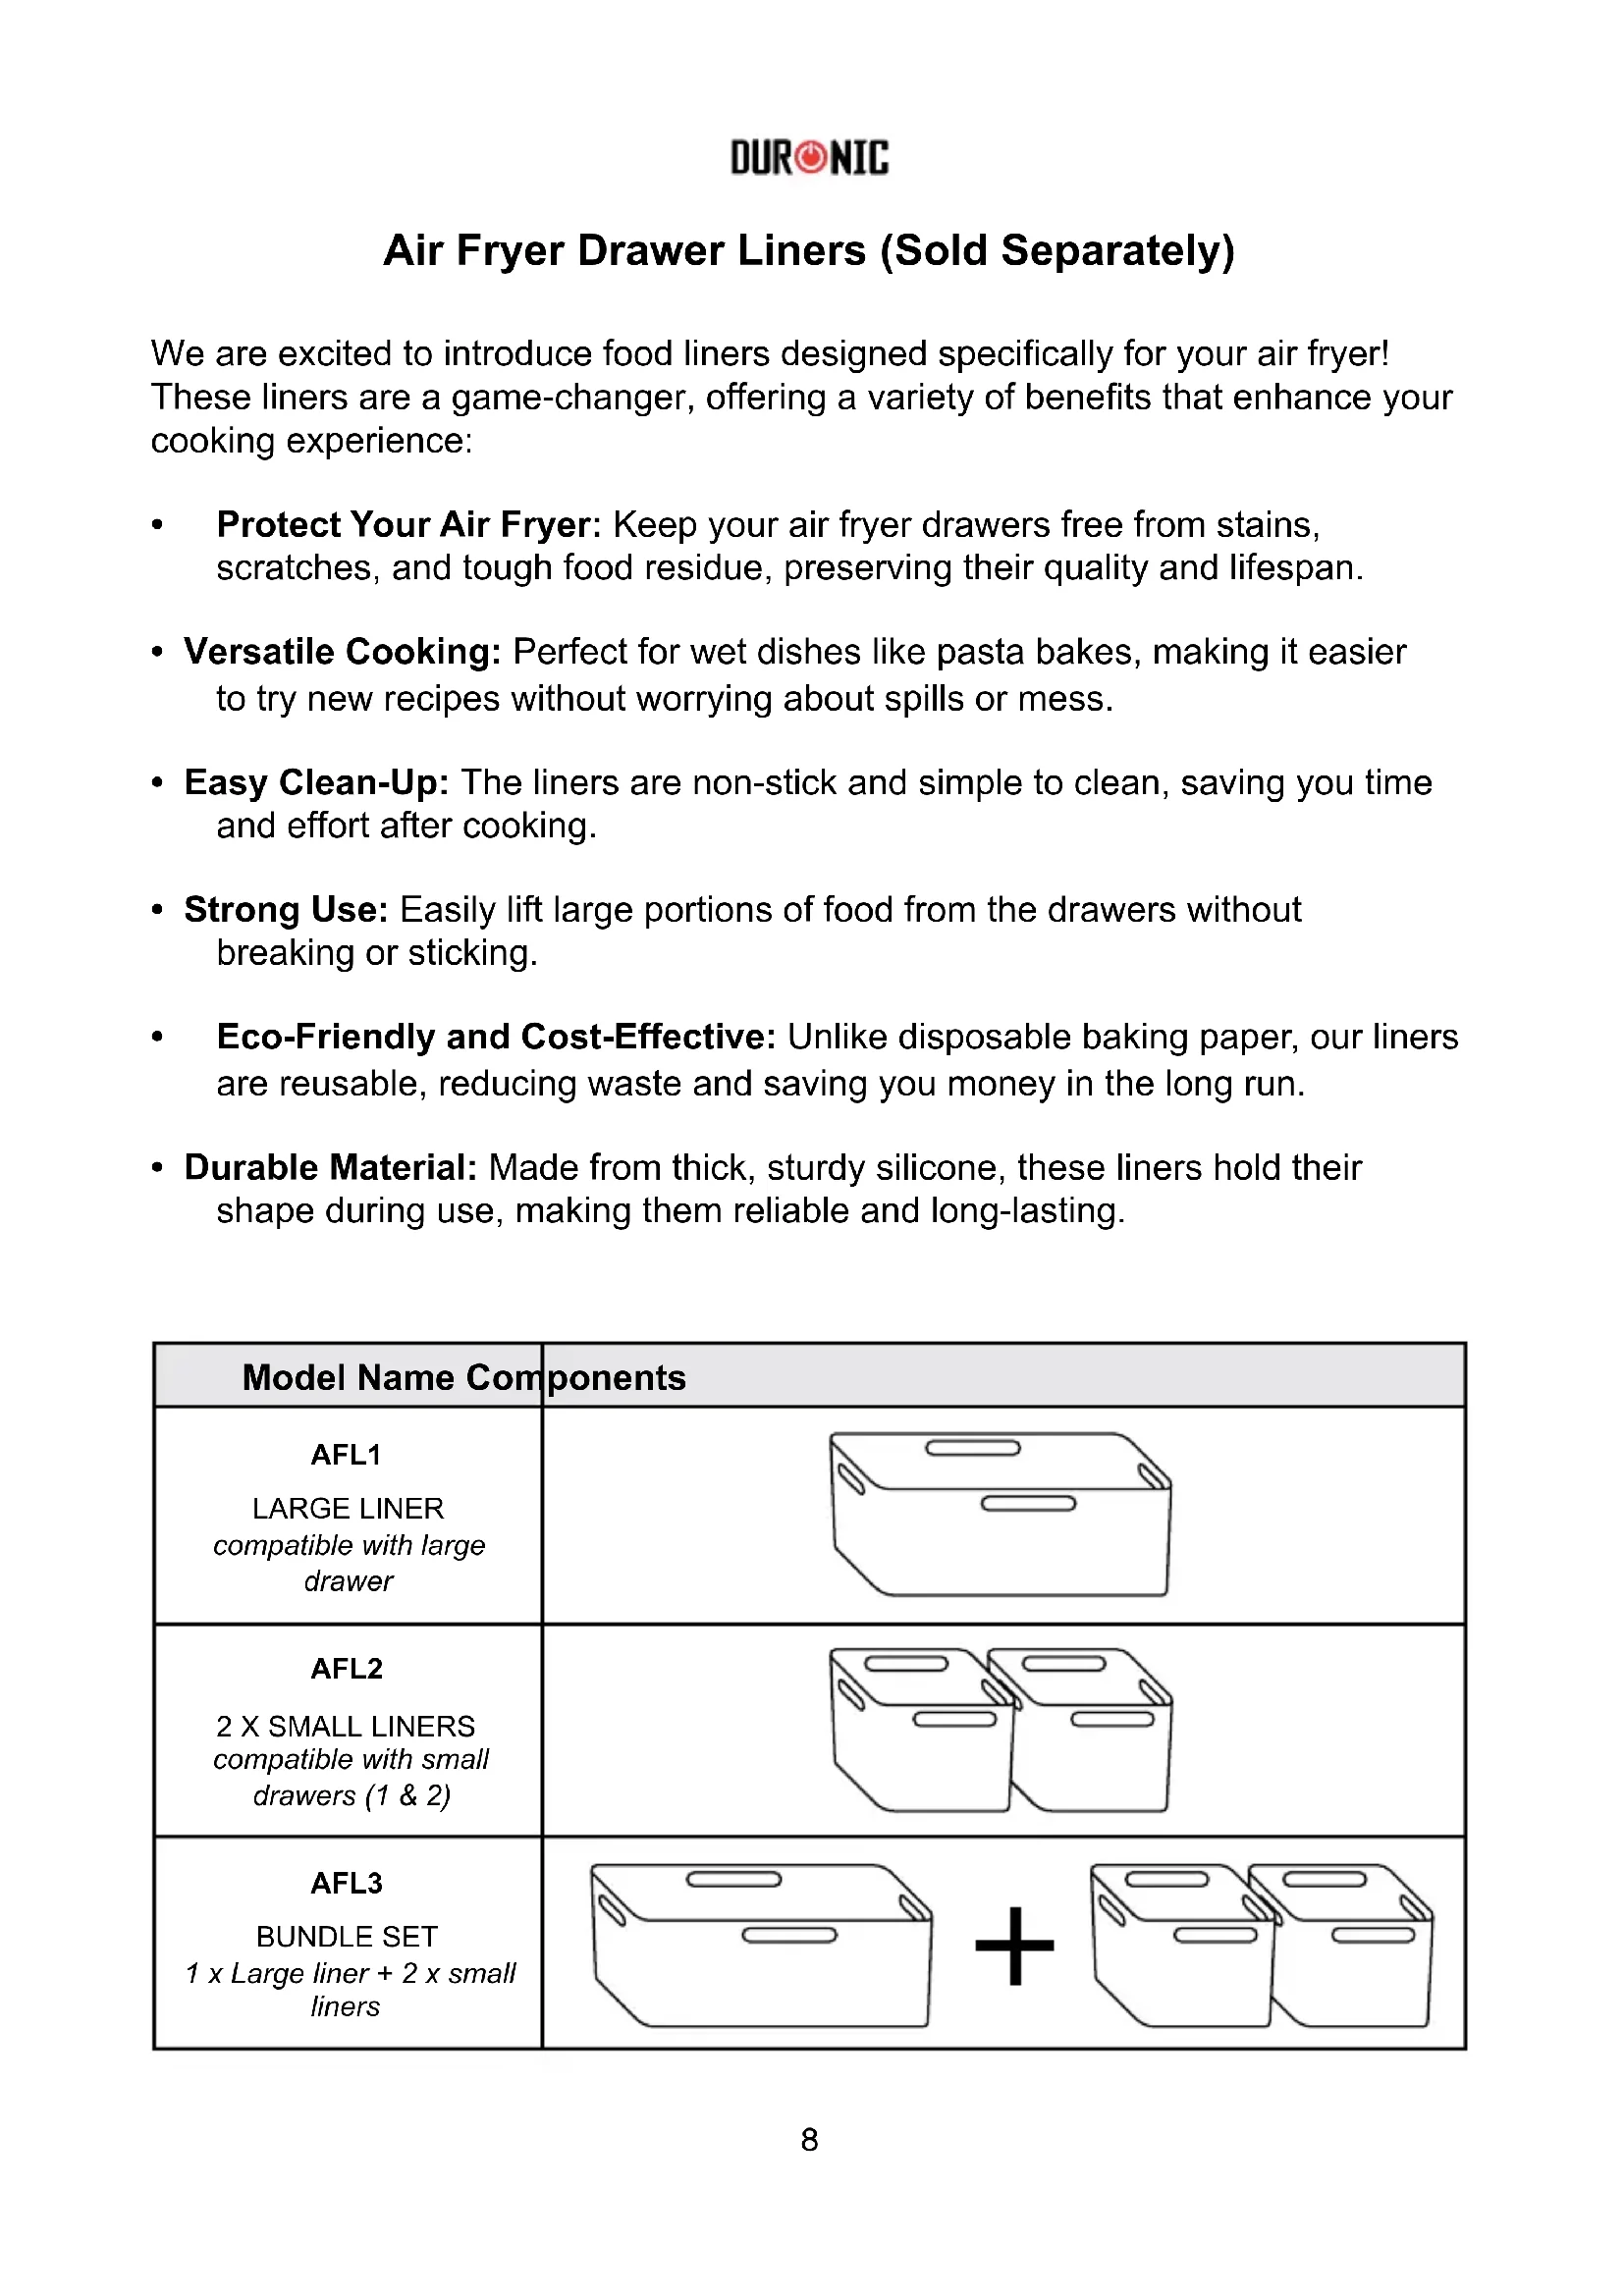
Air Fryer Drawer Liners (Sold Separately)
We are excited to introduce food liners designed specifically for your air fryer! These liners are a game-changer, offering a variety of benefits that enhance your cooking experience:
- Protect Your Air Fryer: Keep your air fryer drawers free from stains, scratches, and tough food residue, preserving their quality and lifespan.
- Versatile Cooking: Perfect for wet dishes like pasta bakes, making it easier to try new recipes without worrying about spills or mess.
- Easy Clean-Up: The liners are non-stick and simple to clean, saving you time and effort after cooking.
- Strong Use: Easily lift large portions of food from the drawers without breaking or sticking.
- Eco-Friendly and Cost-Effective: Unlike disposable baking paper, our liners are reusable, reducing waste and saving you money in the long run.
- Durable Material: Made from thick, sturdy silicone, these liners hold their shape during use, making them reliable and long-lasting.
| Model Name Components | |
| AFL1 LARGE LINER compatible with large drawer | |
| AFL2 2 X SMALL LINERS compatible with small drawers (1 & 2) | |
| AFL3 BUNDLE SET 1 x Large liner + 2 x small liners | |
Control Panel Buttons

A. Zone 1
B. Temperature plus/minus
C. Digital display
D. Timer plus/minus
E. Zone 2
F. Lamp 1
G. Start/Pause
H. Sync Finish
I. Sync Cook
J. Pre-set Modes
K. Power button
L. Lamp 2
Pre-set Modes
3 MIN
180°C
15 MIN
150℃

5 MIN
200°C
18 MIN
200°C
20 MIN
200°C
12 MIN
180℃
10 MIN
180°C
10 MIN
160°C

25 MIN
160°C
0.5-24HR
60°C
DURONIC
Safety Information
PLEASE READ THIS MANUAL CAREFULLY AND RETAIN FOR FUTURE REFERENCE
- This appliance is for indoor/household use only. Do not use outdoors.
- This appliance is not designed for commercial or industrial use; it is for household use only.
- This appliance is not intended for use by persons (including children) with reduced physical, sensory or mental capabilities, or lack of experience and knowledge unless they have been given supervision or instruction concerning the use of the appliance by a person responsible for their safety.
- Children should be closely supervised at all times to ensure that they do not play with the appliance.
- Only use the appliance out of the reach of children because it gets very hot and will contain hot food.
- Do not operate this appliance if the power cable or plug is damaged. If either is damaged, return it to Duronic for service or repair by a professional technician.
- Never try to replace the parts and repair the unit by yourself. Do not modify the appliance in any way that is not described in the instructions for use. The appliance contains live parts. Repairs may only be carried out by Duronic, using original spare parts and accessories.
-
If an extension lead/cable is needed to reach the appliance to a mains power socket that is too far away out of reach of the appliance's accompanying cable, please ensure that:
-
the marked electrical rating of the extension lead is at least as great as the electrical rating of the appliance.
- the extension lead is of the grounded type.
- no other appliance is plugged into the same extension lead.
- the extension cable is safely positioned to avoid it being pulled on by children or animals or being tripped over.
DURONIC
Safety Information (Continued)
- Always operate the appliance on a dry, smooth, even and stable surface. Do not place the air fryer on or next to a hot surface.
- Position the appliance and its power cable to the rear of the work surface, well out of reach of children.
- Do not cover the air inlet or the air outlet vent openings while the appliance is operating.
- Leave at least 10 cm free space at the back and sides and 10 cm free space above the appliance; do not place anything on top of the appliance.
- Disconnect the mains plug from the power socket if you are going to be absent for long periods.
- Never disconnect the plug by pulling on the power cable.
- Unplug from the mains plug outlet when not in use and before cleaning.
- This appliance is not intended to be operated using an external timer or separate remote-control system.
- Do not let the power cable hang over the edge of the table or counter, or touch hot surfaces.
- Do not use the appliance for anything other than cooking or warming up food.
- Do not operate the air fryer with wet hands.
- To clean, wipe the main unit with a well-wrung wet cloth. Do not submerge it in water or other liquids. Wash drawers with warm water and soap. Dry properly before placing the drawers back into the unit. The inner cooking trays can be cleaned by hand with warm water and soap, or alternatively, cleaned in the dishwasher.
- Do not fill the drawer or tray with oil as this may cause a fire hazard.
- Do not touch the inside of the appliance while it is operating or straight after use. If you need to touch somewhere inside the cooking zones, wait until the area is completely cool.
DURONIC
Safety Information (Continued)
- Before inserting the drawers into the main unit, ensure both the inside of the unit and drawers are clean and dry by wiping them with a soft cloth.
- Ensure the drawers are closed completely before operating the appliance.
- During hot air frying, hot steam is released through the air outlet openings. Keep your hands and face at a safe distance from the steam and the air outlet openings.
- Be careful of hot steam and hot air when you remove the drawers from the appliance.
- The surface below the appliance may become hot during use. Always use this appliance on a heatproof surface.
- The drawers and inner trays become extremely hot during the cooking process. Avoid physical contact with them while removing the drawer or plate from the appliance. Always use the drawer handles.
- After removing the drawers from the main unit, place them on a heat-resistant surface.
- If you see dark smoke coming out of the appliance unplug it immediately and wait for the smoke emission to stop before you remove the drawers from the appliance.
- Let the appliance cool down for about 30 minutes before you handle or clean it.
- After cooking, ensure that any burnt remnants are removed and the inner trays and inside the drawers are cleaned.
- Do not clean any part of this appliance with metal scouring pads. Pieces can break off the pad and touch electrical parts, creating the risk of electric shock. It can also scratch the surface of the appliance or drawers and cause damage.
DURONIC
Introduction
This product is a dual zone large capacity air fryer that can cook quick, healthy and delicious homemade meals. Harnessing improved hot air circulation technology this family-sized air fryer will cook food quickly and evenly to produce a tasty and healthy meal every time.
The two dual drawers (2 x 4.5L) allow you to cook in two different ways at the same time, as well as together on the same modes.
The larger drawer (10L)* can be used to cook a larger amount of food in the same single drawer.
*Large drawer included with AF34.
*AFD1 large drawer is sold separately.
Before First Use
- Remove all of the packaging materials. Check that there are no parts missing. Some stickers, such as the mode guide, are to be permanently kept on the unit.
- Clean the outside of the main unit by wiping it with a wet well-wrung sponge or cloth.
- Clean the drawers and inner trays with warm water and dishwashing liquid. Dry thoroughly, place the inner trays inside the drawers, then slide the drawers into the unit.
- Position the main unit on a dry level heatproof surface away from other sources of heat.
- Plug in the power cable into the nearest wall socket. DO NOT let the cable hang over the edges of worktops or touch hot surfaces.
- Do not put anything on top of the appliance or covering the air outlets or inlets; this will disrupt the airflow and can affect the air-frying result.
DURONIC
How to Use
1 2 Cooking Zones
Cooking Zones 1 and 2 can work individually or together at the same time. Using the different settings, you can also choose to cook both Zones on the same settings (Sync Cook) or to have them on different temperatures and programmed to finish cooking at the same time as each other (Sync Finish).
Cooking in One Zone
- Place the food you wish to cook inside the Printer (10/11) and close the printer.
- Press the Power Button(K) to switch on the air fryer. The Control Panel(3) will illuminate for a second and you will hear a beep sound.
- Select which Zone(A/E) you wish to cook in.
- Select a mode from the pre-set menu on the control panel.
- Press the Start/Pause button(G) to start cooking.
- If you want to check on the food whilst it is cooking simply press the Lamp button(F/L) for the corresponding Zone and you can view the food through the glass window.
- Depending on the type of food you are cooking, you may need to flip, turn, or shake the contents of the drawer to ensure the food is cooked evenly. Remove the drawer from the unit to do this.
- When the timer ends the air fryer will make a bleep sound and switch itself off automatically.
Pausing Cooking in One Zone
If you wish to pause cooking, simply press the Start/Pause button once and the cooking will stop. To un-pause, press the Start/Pause button again and cooking will recommence.
DURONIC
How to Use (Continued)
Cooking in Both Zones
- Place the food you wish to cook inside the Drawers and close the drawers.
- Press the Power Button to switch on the air fryer. The Control Panel will illuminate for a second and you will hear a brief bleep sound.
- Press the Zone 1 button.
- Select a mode from the pre-set menu on the control panel.
- Press the Zone 2 button.
- Select a mode from the pre-set menu on the control panel.
- Press the Start/Pause button to start cooking.
- If you want to check on the food whilst it is cooking simply press the Lamp button for the corresponding Zone and you can view the food through the glass window.
- Depending on the type of food you are cooking, you may need to flip, turn, or shake the contents of the drawer to ensure the food is cooked evenly. Remove the drawer from the unit to do this.
- When the timer ends the air fryer will make a bleep sound and switch itself off automatically.
#
Pausing Cooking in One Zone
If you wish to pause cooking in just one independent Zone and not the other, simply press the required Zone button and then press the Start/Pause button. The cooking will stop just in that specific Zone. To un-pause, press the Start/Pause button again and cooking will recommence.
#
Pausing Cooking in Both Zones Together
If you wish to pause cooking in both Zones together, simply press the Start/ Pause button once and the cooking will stop in both Zones at the same time. To un-pause, press the Start/Pause button again and cooking will recommence.
DURONIC
How to Use (Continued)

CAUTION:
- Do not use the drawer(s) without the inner trays.
- Do not fill the drawers or trays with oil.
- When filling the drawers with food, ensure that you do not overfill the inner tray and leave some clearance space above the food so that the hot air can circulate properly. In addition to this, overfilling may cause personal injury, property damage or affect the safe use of the appliance.
- Always ensure the drawer(s) are closed properly before operating.
- The drawers and inner plates become extremely hot during the cooking process. Avoid physical contact while removing the drawer or plate from the appliance.
- Always use the handle to remove drawers from the appliance. Do not touch the drawer body or inner tray during cooking. Leave to cool down for 30 minutes before attempting to touch or clean these parts.
- ALWAYS place drawer on a heat-resistant surface after removing it from the unit.
- Use utensils to touch or move the hot food. Ensure to use silicone or wooden utensils that will not scratch the drawer or inner tray.
DURONIC
How to Use (Continued)
SYNC FINISH

Sync Finish
(Zone 1 and Zone 2 Finishing at the Same Time)
The Sync Finish mode allows you to cook different foods in each Zone compartment which may require different time or temperature to each other and to finish cooking at the same time as each other. For instance, you may wish to dehydrate fruit in one drawer and cook some fries in the other. With the Sync Finish mode, you are able to achieve this so that you can use both foods at the same time.
To activate Sync Finish mode:
-
Press the Power button.
-
Press the Sync Finish button
-
Press the Zone 1 button.
-
Select a pre-set cooking mode (ie fish, meat etc) -even if you do not want to use it, you will need to select one of them in order to then set your own custom time/temperature.
-
Adjust the temperature and time using Temperature +/- buttons and Time +/- buttons according to what you require.
-
Press the Zone 2 button
-
Select a pre-set cooking mode (ie fish, meat etc) -even if you do not want to use it, you will need to select one of them in order to then set your own custom time/temperature.
-
Adjust the temperature and time using Temperature +/- buttons and Time +/- buttons according to what you require.
-
Press the Start/Pause button.
-
The Zone with the longest time will begin to heat up and cook the food inside. When the cooking time comes to an end, it will make a beeping noise, both Zones will stop cooking and the unit will switch itself off.
DURONIC
How to Use (Continued)

SYNC COOK
Sync Cook
(Zone 1 and Zone 2 Working at the Same Time / Dual Zone Cooking )
Sync Cook mode uses both cooking Zones to either cook both drawers of food on the same temperature and time, or allows you to use the larger AFD1 drawer to cook food in.
- Press the Power Button.
- Press the Sync Cook button.
- Press the Zone 1 button.
- Select a pre-set cooking mode (ie fish, meat etc) -even if you do not want to use it, you will need to select one of them in order to then set your own custom time/temperature.
- Adjust the temperature and time using Temperature +/- buttons and Time +/- buttons according to what you require.
- Press the Start/Pause button.
- Both cooking zones will begin to heat up and start cooking the food inside. When the cooking time comes to an end, it will make a beeping noise, both Zones will stop cooking and the unit will switch itself off.


Using the Lamps
To check on the progress of your food at any time, press the button for Lamp 1 or Lamp 2. The light will stay on for a few seconds before switching off again.

Adjusting the Temperature
The temperature range is 50 - 200^ . Each time you press the +/- buttons the temperature will increase or decrease in 10^ increments. If you are on 200^ and press the + button it will loop back around and adjust to 50^ . Whilst setting the temperature, the digits will flash on and off. Once you have set the temperature you like and have stopped pressing the +/- buttons, the digits will flash 3 times and then stay on continuously – this means the temperature has been set successfully.
How to Use (Continued)

Adjusting the Time
The time range is 1-60 minutes. Each time you press the +/- buttons the time will increase or decrease in 1-minute increments. If you are on 1 minute and press the - button it will loop back around and adjust to 60 minutes. Whilst setting the time, the digits will flash on and off. Once you have set the time you like and have stopped pressing the +/- buttons, the digits will flash 3 times and then stay on continuously – this means the time has been set successfully.
Note: on Dehydration mode the timer can be set up to 16.5 hours.
Pre-Set Modes
| Icon Setting Time Temperature | |||
| Pre-heat 3 minutes | 180°C | ||
| Re-heat 15 minutes | 150°C | ||
| Quick cook 5 minutes | 200°C | ||
| Fries 18 minutes | 200°C | ||
| Chicken 20 minutes | 200°C | ||
| Meat 12 minutes | 180°C | ||
| Fish 10 minutes | 180°C | ||
| Vegetables 10 minutes | 160°C | ||
| Baking 25 minutes | 160°C | ||
| Dehydrate | 8 hours (can be adjusted up to 24 hours) | 60°C | |
DURONIC
Helpful Tips
For best results we recommend to:
- preheat the Zone you intend to use for 3 minutes before starting to cook. This helps to achieve the best crisping result.
- use the inner tray to get the best crispiness outcome.
- pat dry any food with marinades before cooking.
- make cakes, hand-pies, or any foods with a filling or batter in heat-proof container or dish on top of the inner tray.
- check on the progress of your food throughout cooking. If the food is not cooking as quickly as you hoped, adjust the timer to add some extra minutes onto the cooking time.
- remove food immediately to prevent it from overcooking once the cooking has finished.
DID YOU KNOW?
You can convert recipes that require a conventional oven simply by reducing the temperature of the air fryer by 10^ . The air fryer will cook food quicker than an oven, so check food frequently to avoid overcooking it.
Cleaning and Maintenance
Clean the appliance after every use.
The inner trays, drawers and the inside of the unit have a non-stick coating. Do not use metal kitchen utensils or abrasive cleaning materials to clean them, as this may damage the non-stick coating.
- Unplug the appliance from the wall socket and let the appliance cool down. Remove the drawers to let the air fryer cool down more quickly.
- Wipe the outside of the appliance with a moist cloth. Then wipe again with a dry cloth.
DURONIC
Cleaning and Maintenance (Continued)
- Clean the drawers and inner trays with hot water, washing-up liquid and a non-abrasive sponge. Alternatively, the drawer and the inner tray are both dishwasher-safe.
Note: If using a dishwasher, remove the silicone tray corners from the inner trays. The silicone corners are not dishwasher safe.
If there is stubborn dirt stuck to the drawer or on the inner tray, fill the drawer with hot water and with some washing up liquid. Put the inner tray into the drawer and leave them to soak for approximately 10 minutes.

CAUTION:
DO NOT immerse the main unit in water or any other liquid. Do not clean the main unit in a dishwasher. The main unit is to be wiped clean only according to the above instructions.
- If needed, clean the heating element with a cleaning brush to remove any food residues.
- Ensure that every part is dried completely before re-assembling and using the air fryer.
Cooking Charts
Note: these settings are a general guide. Ingredients differ in size, shape and brand, so you may need to adjust cooking times and temperatures accordingly. Always check food is cooked through thoroughly before consuming.
FROZENFOODS
Ingredient Quantity Oil Temperature
Time (mins)
Breaded chicken steaks 3 steaks None 200^ 18-21
Chicken nuggets 340g None 200^ 10-13
Breaded fish fillets 6 fillets None 200^ 14-16
Fish fingers 6-8 fish fingers None 200^ 10-13
French fries 450g None 200^ 18-22
Gyoza dumplings 300g
1 tbsp
200^ 12-14
Hash browns
450g None 180^
8-10
Mozzarella sticks
300g None 190^
8-10
Mini pizzas 2 pizzas None 200^ 12-15
Scampi
390-450g
None
200^ C
9-11
Sweet potato fries
450g None 200^ 20-22
Croquet potatoes 450g None 190^ 18-22
Onion Rings
285g None 190^ 13-16
| VEGETABLES | |||||
| Ingredient Quantity Preparation | Oil Temperature | Time (mins) | |||
| Asparagus 1 bunch | Whole, stems trimmed | 2 tsp 200°C | C 8-12 | ||
| Beets 6-7 small Whole None 200°C 30-35 | |||||
| Bell peppers | 3 small or 2 large | Whole None | 200°C 10-15 | ||
| Broccoli 1 head | Cut in 1-inch florets | 1 tbsp 200°C | C 8-10 | ||
| Brussels sprouts | 450g | Cut in half, stem removed | 1 tbsp 200°C | C 15-20 | |
| Butternut squash | 680g | Cut in 1-2-inch pieces | 1 tbsp 200°C | C 20-25 | |
| Carrots | 450g | Peeled, cut in 1/2-inch pieces | 1 tbsp 200°C | C 13-16 | |
| Cauliflower | 1 head | Cut in 1-inch florets | 2 tbsp 200°C | C 17-20 | |
| Corn on the cob | 2 ears, cut in half | Husks removed | 1 tbsp 200°C | C 12-15 | |
| Green beans | 1 bag (12oz) | Trimmed 1 tbsp | 200°C 8-10 | ||
| Kale (for chips) | 680g | Torn in pieces, stem removed | None 200°C | 7-9 | |
| Mushrooms | 25g | Cut in quarters | 1 tbsp 200°C | 7-9 | |
| Ingredient Quantity | Quantity Preparation | Oil Temperature | Time (mins) | ||
| White Potatoes | 680g | Cut in 1-inch wedges | 1 tbsp 200°C | 20-22 | |
| 450g | Hand-cut fries*, thin | 20-24 | |||
| 450g | Hand-cut chips*, thick | 19-24 | |||
| 3 whole (170-225g) | Pierced with fork 3 times | 30-35 | |||
| Sweet Potatoes | 680g | Cut in 1-inch chunks | 1 tbsp | 200°C | 15-20 |
| 3 whole (170-225g) | Pierced with fork 3 times | None | 36-42 | ||
| Courgette 450g | Cut in 1-inch chunks | 1 tbsp 200°C 15-18 | |||
| FISH AND SEAFOOD | |||||
| Ingredient Quantity Preparation | Oil Temperature | Time (mins) | |||
| Crab cakes | 2 cakes (170-225g each) | None | Brushed with oil | 200°C 5-10 | |
| Lobster tails | 4 tails (85-115g each) | Whole None | 200°C 5-8 | ||
| Salmon fillets | 3 fillets (115g each) | None | Brushed with oil | 200°C 7-12 | |
| Prawns 450g | Whole, peeled, tails on | 1 tbsp 200°C 7-10 | |||
| PORK | |||||
| Ingredient Quantity Preparation | Oil Temperature | Time (mins) | |||
| Pork chops | 2 chops (280-340g each) | Bone in or boneless | None 170°C 7-10 | ||
| Pork tenderloins | 50g None | Brushed with oil | 200°C 15-17 | ||
| Sausages | 6 sausages None | Brushed with oil | 190°C 15-20 | ||
| POULTRY | |||||
| Ingredient Quantity Preparation | Oil Temperature | Time (mins) | |||
| Chicken breasts | 2 breasts Bone in | Brushed with oil | 200°C | 25-30 | |
| 4 breasts Boneless 22-24 | |||||
| Chicken thighs | 2 thighs Bone in | Brushed with oil | 200°C | 22-28 | |
| 4 thighs Boneless 18-22 | |||||
| Chicken wings/ drumsticks | 900g None | tbsp 200°C 18-22 | |||
| BEEF | |||||
| Ingredient Quantity Preparation | Oil Temperature | Time (mins) | |||
| Burgers | 2 quarter-pound patties, 80% lean | 1/2 inch thick | Brushed with oil | 200°C 8-10 | |
| Steaks | 2 steaks (225g each) | Whole | Brushed with oil | 200°C 8-10 | |
Dehydration Charts
| FRUIT AND VEGETABLES | |||
| Ingredient Preparation Temperature | Time (hours) | ||
| Apples | Cored, cut in 1/8-inch slices, rinsed in lemon water, patted dry | 60°C 7-8 | |
| Asparagus Cut in 1-inch pieces, blanched 60°C 6-8 | |||
| Aubergine | Peeled, cut in 1/4-inch slices, blanched | 60°C 6-8 | |
| Bananas Peeled, cut in 3/8-inch slices 60°C 8-10 | |||
| Beetroot Peeled, cut in 1/8-inch slices 60°C 6-8 | |||
| Fresh herbs Rinsed, patted dry, stems removed 60°C 4 | |||
| Ginger root Peeled, cut in 3/8-inch slices 60°C 6 | |||
| Mangoes Peeled, cut in 3/8-inch slices, pit removed 60°C 6-8 | |||
| Mushrooms | Cleaned with soft brush (do not wash) | 60°C 6-8 | |
| Pineapple Peeled, cut in 3/8-1/2-inch slices | 60°C 6-8 | ||
| Strawberries | Cut in half or in 1/2-inch slices 60°C 6-8 | ||
| Tomatoes | Cut in 3/8-inch slices or grated; steam if planning to rehydrate | 60°C 6-8 | |
| MEAT, POULTRY | |||
| Ingredient Preparation Temperature | Time (hours) | ||
| Beef jerky | Cut in 1/4-inch slices, marinated overnight | 70°C 5-7 | |
| Chicken jerky | Cut in 1/4-inch slices, marinated overnight | 70°C 5-7 | |
| Turkey jerky | Cut in 1/4-inch slices, marinated overnight | 70°C 5-7 | |
Troubleshooting
| Problem | Probable Cause Solution | |
| The air fryer does not work | The appliance is not plugged into the mains. | Put the mains plug in an earthed wall socket. |
| You have not set the timer. | Press the Timer button and the +/- buttons to the required preparation time, then press the Start/Pause button to switch on the appliance. | |
| Food is not fully cooked | The amount of the ingredients in the Inner Tray is too much. | Put smaller batches of ingredients in the Inner Tray. Smaller batches are fried more evenly. |
| The set temperature is too low. | Press the Temperature button and the +/- buttons to adjust the temperature. | |
| The preparation/cooking time is too short. | Press the Timer button and the +/- buttons to adjust the length of cooking time. | |
| The ingredients are fried unevenly in the air fryer | Certain types of food needs to be shaken or turned halfway through the cooking time. | Ingredients that lie on the top of or across each other (e.g. fries) need to be shaken halfway through the cooking time. Other foods such as sausages may require turning or flipping. |
| Fried foods are not crispy when they come out of the air fryer | You use a type of food meant to be prepared in a traditional deep fryer, for example chips, chicken wings, nuggets etc. | Use oven-ready foods or lightly brush some oil onto the freshly prepared food for a crispier result. |
| Cannot slide the drawers into the appliance properly | There is too much food in the drawers. | Do not fill the drawers beyond the maximum amount indicated in the table on the earlier page. |
| White smoke comes out of the appliance | You are preparing greasy ingredients. | When frying greasy ingredients ensure that you do not cook on temperatures over 180°C. |
| The pan still contains greasy residues from the previous use. | White smoke can be caused by grease heating up in the inner tray and drawer. Make sure you clean the tray and drawer properly after each use. | |
| Fresh potato fries are fried unevenly in the air fryer. | You did not soak the potato fries properly before you fried them. | Soak the fries in a bowl of water for at least 30 minutes; take them out and dry them with kitchen paper. |
| You did not use the right potato type. | Use fresh potatoes to ensure that the fries stay firm during frying. | |
| Fresh potato fries are not crispy when they come out of the air fryer. | The crispiness of the fries depends on the amount of oil and water in the fries. | Make sure you dry the potato sticks properly before you toss them in a light coat of oil. |
| Cut the potato into thinner sticks for a crispier result. | ||
| Add slightly more oil for a crispier result. | ||
| Why do some ingredients move or blow around when air frying? | Occasionally, the fan from the air fryer will blow lightweight foods around. | Use toothpicks to secure loose lightweight food, like the top slice on a sandwich. |
Pour activer le mode Sync Finish:
Characteristicay specifications
*Large drawer included with AF34.
*AFD1 large drawer is sold separately.
Koken in beside zones
Information for consumers on the disposal of Waste Electrical & Electronic Equipment (WEEE).
This mark on a product and/or accompanying documents indicates that when it is to be disposed of, it must be treated as Waste Electrical & Electronic Equipment, (WEEE).
Any WEEE marked products must not be mixed with general household waste, but kept separate for the treatment, recovery and recycling of the materials used. For proper treatment, recovery and recycling; please take all WEEE marked waste to your Local Authority Civic waste site, where it will be accepted free of charge.
If customers dispose of Waste Electrical & Electronic Equipment correctly, they will be helping to save valuable resources and preventing any potential negative effects upon human health and the environment, of any hazardous materials that the waste may contain.

Information for consumers on the disposal of Waste Electrical & Electronic Equipment (WEEE).


- Features and Specifications
- Components
- Product Variations and Spare Parts
- DURONIC
- Air Fryer Drawer Liners (Sold Separately)
- Control Panel Buttons
- Pre-set Modes
- Safety Information
- PLEASE READ THIS MANUAL CAREFULLY AND RETAIN FOR FUTURE REFERENCE
- Safety Information (Continued)
- Introduction
- Before First Use
- How to Use
- 2 Cooking Zones
- Cooking in One Zone
- Pausing Cooking in One Zone
- How to Use (Continued)
- Cooking in Both Zones
- #
- Pausing Cooking in Both Zones Together
- CAUTION:
- SYNC FINISH
- Using the Lamps
- Adjusting the Temperature
- Adjusting the Time
- Helpful Tips
- DID YOU KNOW?
- Cleaning and Maintenance
- Cleaning and Maintenance (Continued)
- Cooking Charts
- FROZENFOODS
- Dehydration Charts
- Troubleshooting
- Characteristicay specifications
- Koken in beside zones
- Information for consumers on the disposal of Waste Electrical & Electronic Equipment (WEEE).
Brand : Duronic
Model : AFL3
Category : Deep fryer