
BG200 - Deep fryer Duronic - Free user manual and instructions
Find the device manual for free BG200 Duronic in PDF.
| Product type | Electric burr coffee grinder |
| Brand | Duronic |
| Model | BG200 |
| Dimensions | 26 x 13 x 18 cm |
| Weight (approx.) | 1.5 kg |
| Power supply | 220-240 V, 50-60 Hz, 200 W |
| Rotation speed | 750 rpm |
| Bean hopper capacity | 200 g |
| Grounds container capacity | 120 g |
| Grind setting | 6 levels: extra coarse to extra fine (from cold brew to Turkish coffee) |
| Timer | From 10 to 60 seconds (corresponds to 2 to 12 cups) |
| Material | Plastic and metal (burrs) |
| Use | Domestic, for roasted coffee beans only |
| Maintenance and cleaning | Clean removable parts by hand with soapy water; wipe motor block with a damp cloth; do not put in dishwasher |
| Safety | Automatic shut-off after cycle; do not use more than 60 s continuously; let cool for 30 min after 3 cycles |
| Spare parts | Bean hopper, grounds container, burrs, dosing spoon/brush |
| Warranty | 1 year (Shine-Mart Ltd) |
Frequently Asked Questions - BG200 Duronic
User questions about BG200 Duronic
0 question about this device. Answer the ones you know or ask your own.
Ask a new question about this device
Download the instructions for your Deep fryer in PDF format for free! Find your manual BG200 - Duronic and take your electronic device back in hand. On this page are published all the documents necessary for the use of your device. BG200 by Duronic.
USER MANUAL BG200 Duronic
Creative Consumer Products
natural_image
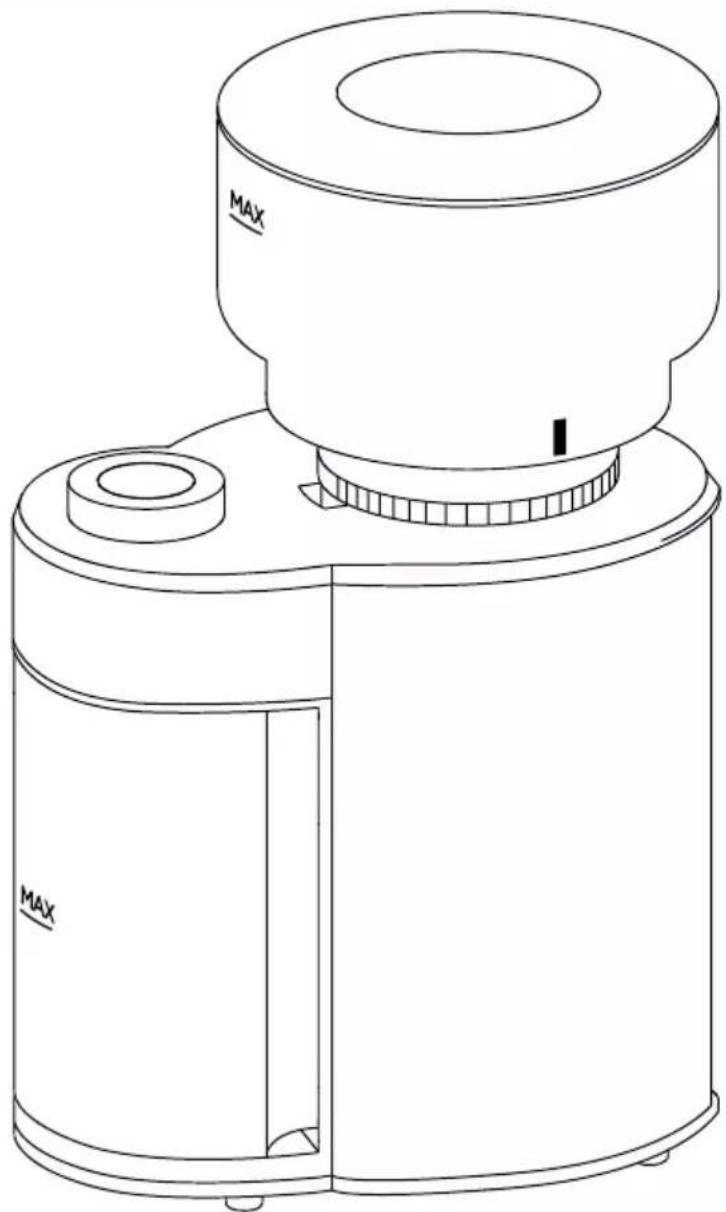
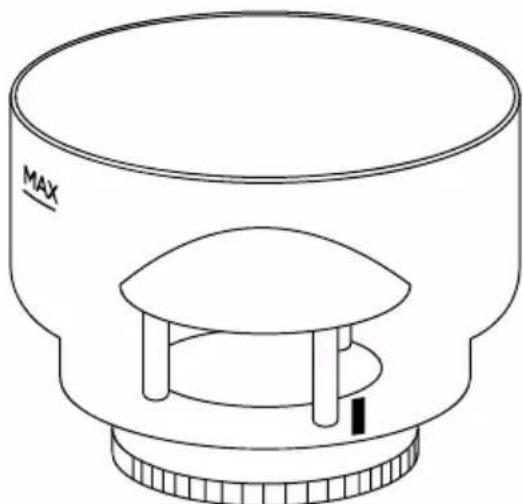
Line drawing of a cylindrical device with a top and side ports, labeled 'MAX' (no text or symbols beyond labels)BG200
Burr Coffee Grinder
PLEASE READ ALL THE INSTRUCTIONS BEFORE USE

duronic.com

duronic

@duronicmedia

Duronic

@duronicmedia
DURONIC
Contents
English Manual 5
Features and Specifications
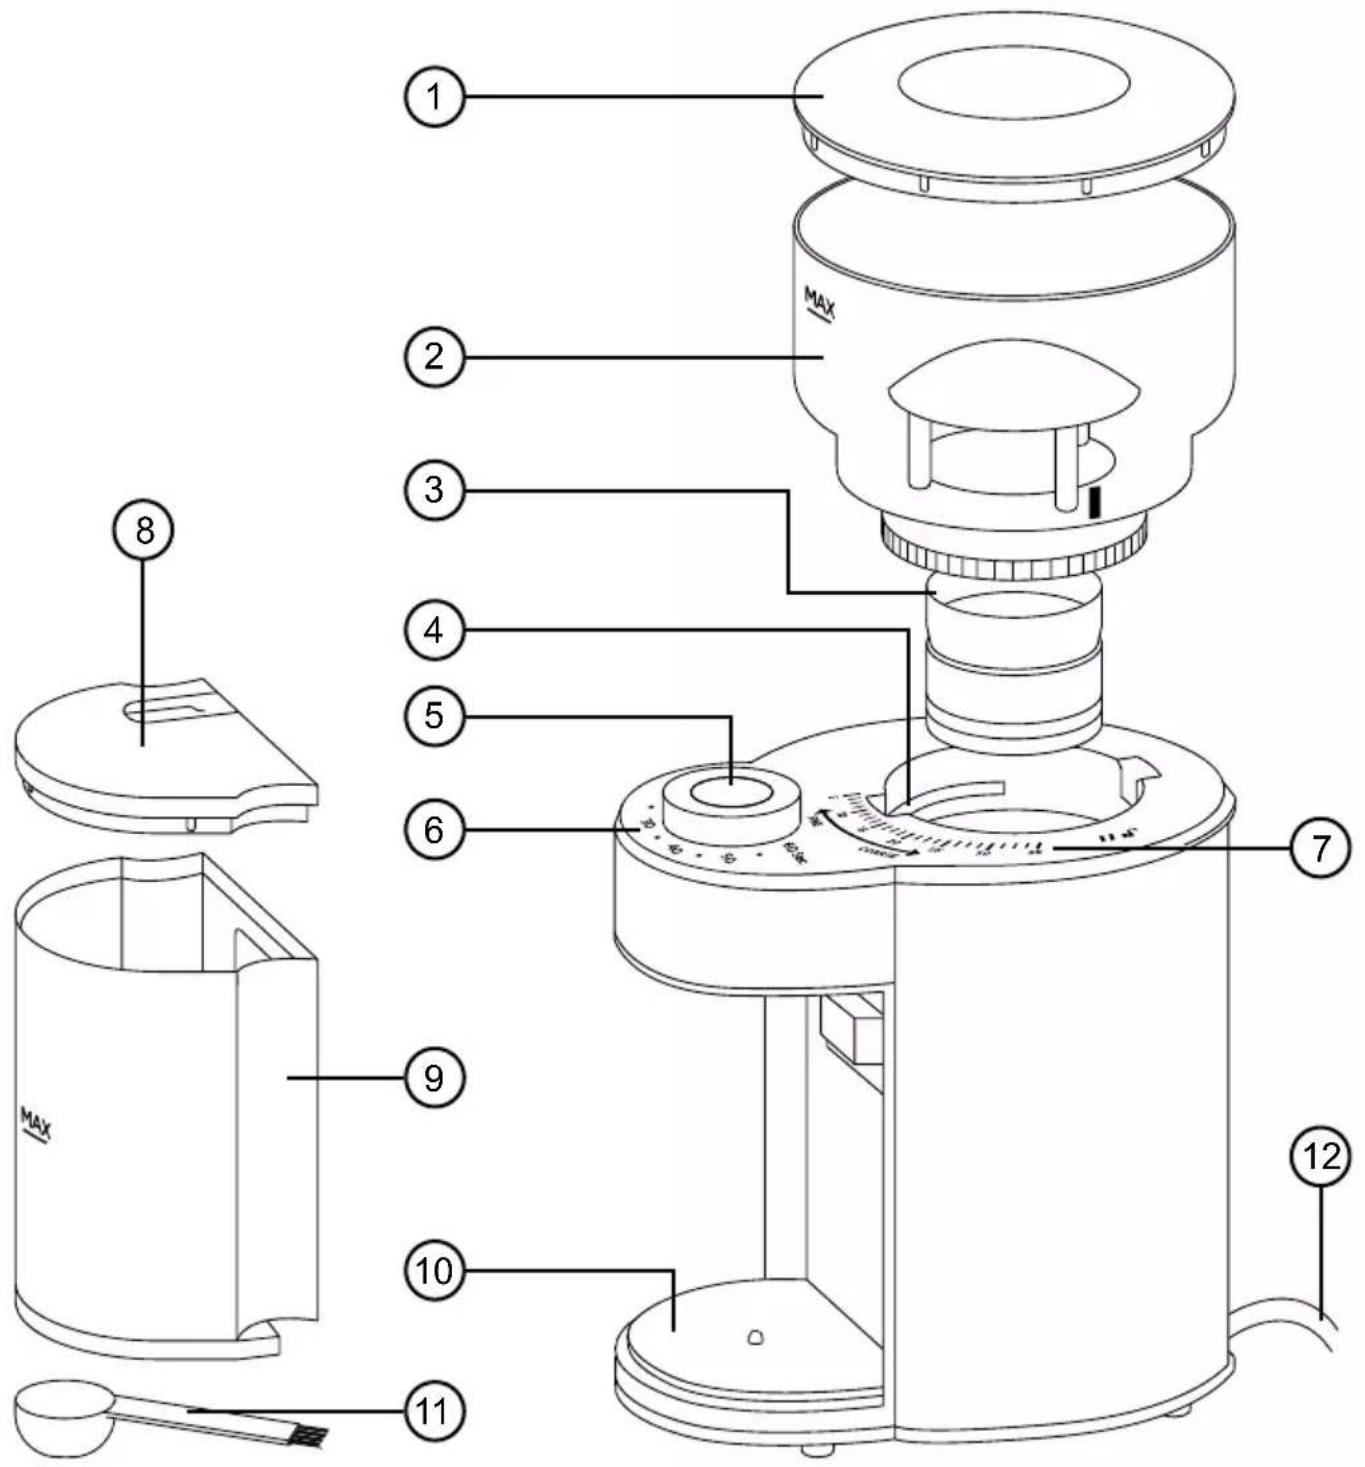
- Bean cup lid
- Bean cup
- Upper burr
- Lower burr
- Grind button (ON and OFF)
-
Timer dial
-
Coarseness dial
- Ground container lid
- Ground container cup
- Grinder base
- Scoop with brush
- Power cable
| Capacity Dimensions RPM | Power Voltage | |||
| Bean cup: 200g | 26x13x18cm | 750 RPM (+/- 15%) | 200W | 220-240V 50-60Hz |
| Grounds container: 120g | ||||
Container Capacities
natural_image
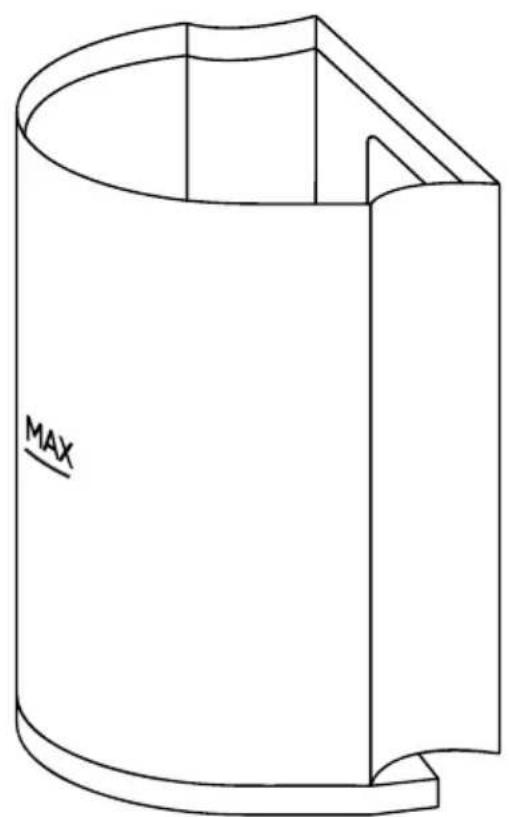
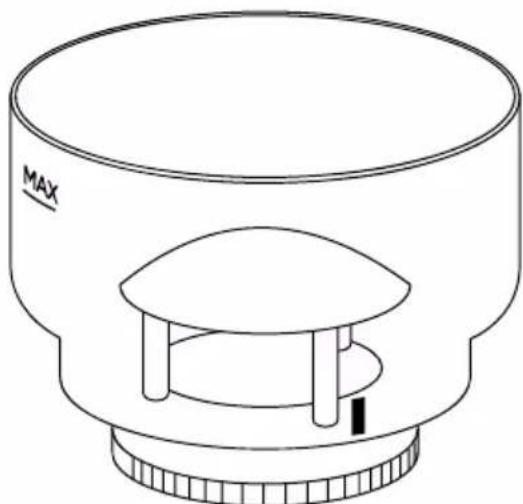
Line drawing of a cylindrical container with a curved top and side gap, labeled 'MAX' (no other text or symbols)Ground Container 120g
natural_image
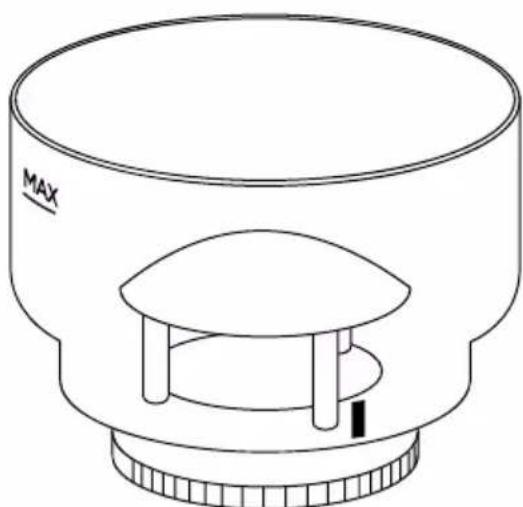
Line drawing of a camera lens with a central dome and side supports (no text or symbols)Bean Cup 200g
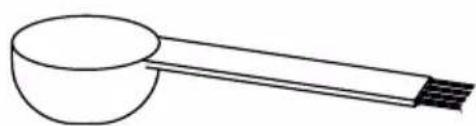
natural_image
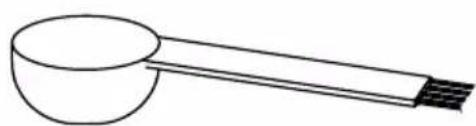
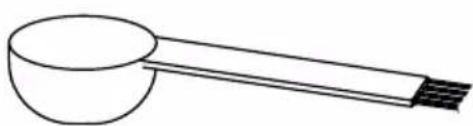
Simple line drawing of a spoon with a handle and bulb (no text or symbols)Scoop 7g
DURONIC
Safety Information
PLEASE READ THIS MANUAL CAREFULLY AND RETAIN FOR FUTURE REFERENCE
- This appliance is for indoor/household use only. Do not use outdoors.
- This appliance is not designed for commercial or industrial use; it is for household use only.
- This appliance is not intended for use by persons (including children) with reduced physical, sensory or mental capabilities, or lack of experience and knowledge unless they have been given supervision or instruction concerning the use of the appliance by a person responsible for their safety.
- Children should be closely supervised at all times to ensure that they do not play with the appliance.
- Do not operate this appliance if the power cable or plug is damaged. If either is damaged, return it to Duronic for service or repair by a professional technician.
- Never try to replace the parts and repair the unit by yourself. Do not modify the appliance in any way that is not described in the instructions for use. The machine contains live parts. Repairs may only be carried out by Duronic, using original spare parts and accessories.
- If an extension lead/cable is needed to reach the appliance to a mains power socket that is too far away out of reach of the machine's accompanying cable, please ensure that:
- the marked electrical rating of the extension lead is at least as great as the electrical rating of the appliance.
- the extension lead is of the grounded type.
- no other appliance is plugged into the same extension lead.
- the extension cable is safely positioned to avoid it being pulled on by children or animals or being tripped over.
DURONIC
Safety Information (continued)
• Always operate the appliance on a dry, smooth, even and stable surface. Do not place the grinder on or next to a hot surface.
- Position the grinder and its power cable to the rear of the work surface, well out of reach of children.
- Disconnect the mains plug from the power socket if you are going to be absent for long periods.
- Never disconnect the plug by pulling on the power cable.
- Unplug from the mains plug outlet when not in use and before cleaning.
- This appliance is not intended to be operated using an external timer or separate remote-control system.
- Do not let the power cable hang over the edge of the table or counter, or touch hot surfaces.
- Do not use the appliance for anything other than grinding coffee beans.
- Do not operate the grinder with wet hands.
- Do not operate the grinder if any of the parts or components are wet or damp. Ensure every part is dry before using the grinder.
• To clean, wipe the machine body with a well-wrung wet cloth. Do not submerge it in water or other liquids. Wash the cups and lids with warm water and soap. Dry properly before placing the cups back into the machine.
- Do not switch the grinder on if the bean cup is empty or use the grinder for more than 60 seconds at a time as this will overheat the motor.
- This grinder is only suitable for grinding roasted coffee beans. Grinding other things such as spices, nuts or unroasted coffee beans can blunt or damage the blades and reduce the effectiveness of the grinder.
DURONIC
Introduction
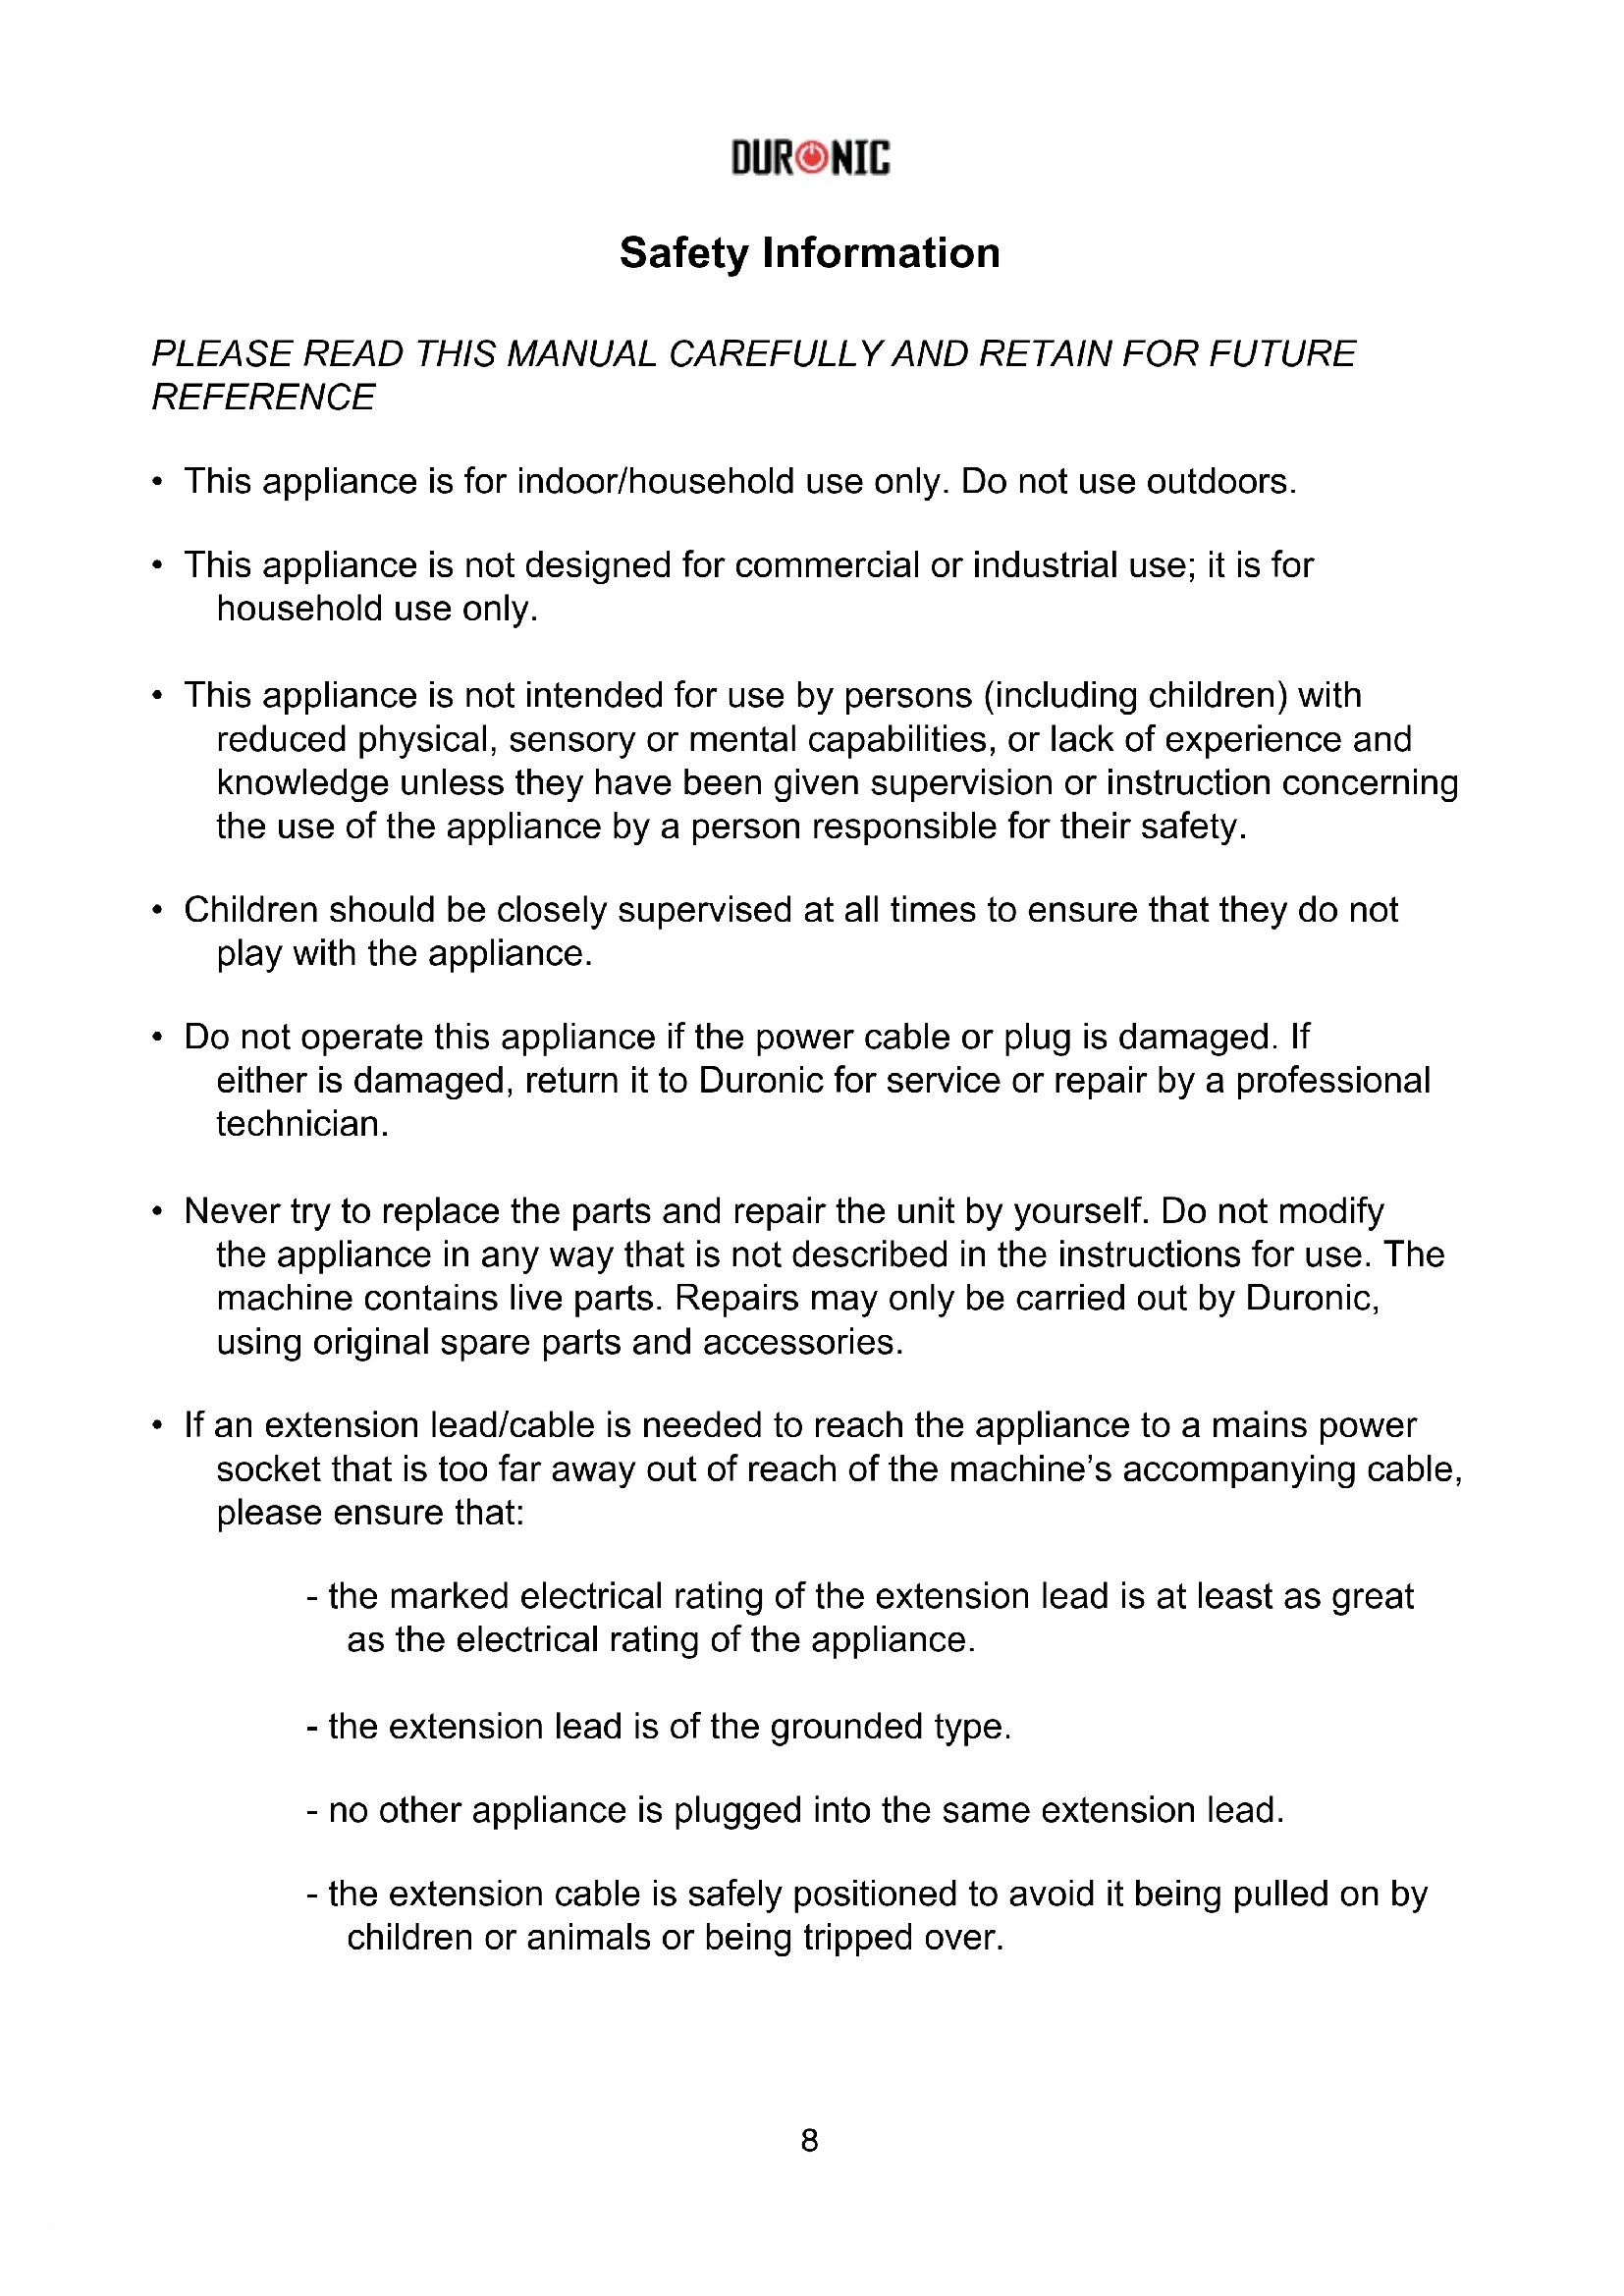
The BG200 is an electric coffee grinder that can transform your coffee beans into ground coffee powder ready to use in your coffee machine or filter jug.
It works by passing the whole roasted coffee beans between two mechanical burrs which then crush the coffee into small pieces. The ground coffee then gets passed through into the grounds container ready for you to use.
You can adjust the coarseness of your ground beans from coarse to fine, and you can set the timer dial to grind the right amount every time.
Before First Use
- Remove all of the packaging materials. Check that there are no parts missing.
- Clean the outside of the grinder body by wiping it with a wet well-wrung sponge or cloth.
- Wash the bean cup, grounds container and lids with warm soapy water and dry thoroughly.
DURONIC
Operating Instructions
-
Place your grinder base(10) onto your kitchen countertop positioned to the rear of the worktop surface. Plug the power cable(12) into the closest mains plug socket. Do not switch it on yet.
-
Place the bean cup(2) onto the machine base and twist it into place to secure it.
-
Rotate the bean cup to any position on the coarseness dial(7) to select your chosen coarseness.
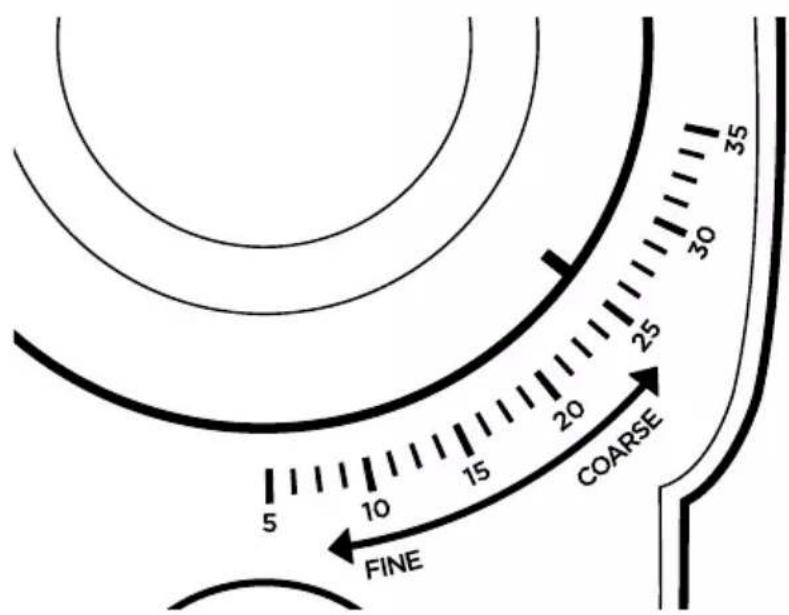
| Grind Use | ||
| 35 | Extra coarse Cold brew | |
| 30 | Coarse French press | |
| 25 | Medium/Coarse French press | |
| 20 | Medium Pour-over, automatic machines | |
| 15 | Fine/Medium Drip machines, Aeropress | |
| 10 | Fine Espresso machines, Moka pot | |
| 5 | Extra fine | Turkish coffee |
-
Fill the bean cup with coffee beans and place the lid(1) on top.
-
Put the ground container cup(9) into place in the grinder base.
-
Switch the machine on at the plug.
-
Rotate the timer dial(6) to select how much ground coffee you want to make, this can be from 2 to 12 cups.
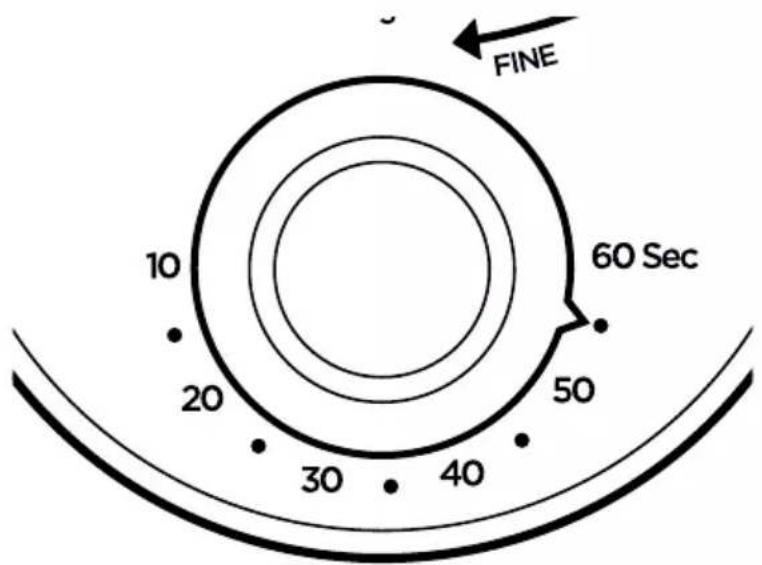
| Cup Number(Number of cups of coffee you wish to make) | Grinding Time(Seconds) |
| 2 | 10 |
| 4 | 20 |
| 6 | 30 |
| 8 | 40 |
| 10 50 | |
| 12 60 |
- To start grinding, press down the grind button(5) the machine will start working. The grinder will grind for as long as the timer is set for and will stop automatically once it has finished.
Note:
- If during grinding the coffee beans do not drop properly into the lower burr(4), turn the grinder off and use a spoon to stir the beans. Then turn on the machine again.
- The grinder should stop grinding automatically after the timer dial returns back to the '0' mark.
- If the coffee beans run out whilst mid-grinding, switch off the grinder and refill before continuing.
- Do not use the grinder continuously for more than 60 seconds at a time. The recommended run time is no more than 60 seconds at a time. After 3 cycles of this, leave the grinder to cool down for 30 minutes to avoid the motor overheating.

CAUTION:
- Do not add coffee beans to the cup while the grinder is switched on at the plug.
- Do not insert fingers inside the bean cup at any time. If the beans do not drop properly into the burr, switch the machine off and use a spoon to dislodge the beans.
DURONIC
Cleaning and Maintenance
It is essential to keep your grinder clean so that you can enjoy the best results every time you use it.
Coffee beans contain oils that will naturally collect in the grinder, particularly around the blade, and these can quickly become stale. The stale oils and residue can taint the taste of anything else you grind in the grinder, so it is important to clean the removable parts regularly.
Switch off and unplug the grinder before cleaning.
- To clean the motor unit, wipe the machine body with a well-wrun wet cloth. Dry with a dry cloth or leave to air dry.
- To clean the removable parts (the bean cup, ground container cup and lids), remove them from the grinder base and wash by hand with warm soapy water and a soft cloth.
- Dry all parts properly before placing them back into the machine or before storing away.
Periodically you may wish to clean the burr blades. Remove them from the grinder base and wash by hand with warm soapy water and a soft cloth. It is very important to ensure that they are completely dry before placing them back into the grinder base.

CAUTION:
- Be careful when cleaning the burr blades as they are sharp and can cause injury!
- None of the parts should be washed in a dishwasher OR submerged in very hot water.
- Do not reassemble the grinder when parts are wet as this may create a fire hazard. Ensure each part is dry before reassembling or storing away.
DURONIC
Troubleshooting
| Problem Possible Reason Solution | ||
| Grinder doesn’t work | The voltage in the local area may not be the same as the product. | Check and ensure that the voltage is correct. |
| A bad smell comes out after using it for the first time | When using the grinder for the first time it is normal that a smell is emitted, this is from the first use of the motor. | The smell should fade after the first few uses. If the smell persists, check that the voltage is correct. |
| The body of the grinder feels hot to touch | The device has been working for too long. | Stop using the grinder to allow it to rest and cool down. |
DURONIC
Warranty
1 Year Guarantee from Shine-Mart Ltd, Trademark owners of Duronic Products. NOTE: THESE STATEMENTS DO NOT AFFECT YOUR STATUTORY RIGHTS AS A CONSUMER
This product has been manufactured under the strictest or quality control procedures, and using the highest quality of materials, to ensure excellent performance and reliability. It will give very good and long lasting service, provided it is properly used and maintained. The product is guaranteed for 1 years from the date of original purchase. If any defect arises due to a faulty materials or poor workmanship, the faulty product must be returned to the original place of purchase. Refund or replacement is at the discretion of that company.
Duronic Products are offered with a 1 year guarantee under the following conditions:
- The product must be returned to the retailer with original proof of purchase.
- The product must be installed and used in accordance with the instructions contained in this operating manual.
- It must be used only for domestic purposes.
- It does not cover wear and tear, malicious damage, misuse, neglect, inexpert repairs or consumable parts.
- Shine-Mart Ltd has no responsibilities for accidental or consequential loss or damage.
- Shine-Mart Ltd are not liable to carry out any type of servicing work, under the guarantee
- Valid in the UK only
This product is fitted with CE:1363 plug and fuse Imported by Shine-Mart Ltd, RM3 8SB

Information on waste Disposal for Consumers of Electrical & Electronic Equipment.
This mark on a product and/or accompanying documents indicates that when it is to be disposed of, it must be treated as Waste Electrical & Electronic Equipment, (WEEE).
Any WEEE marked products must not be mixed with general household waste, but kept separate for the treatment, recovery and recycling of the materials used.
For proper treatment, recovery and recycling; please take all WEEE marked waste to your Local Authority Civic waste site, where it will be accepted free of charge.
If customers dispose of Waste Electrical & Electronic Equipment correctly, they will be helping to save valuable resources and preventing any potential negative effects upon human health and the environment, of any hazardous materials that the waste may contain.
Follow Us


natural_image
Line drawing of a cylindrical container with a curved top and side gap, labeled 'MAX' (no other text or symbols)Bac à marcs 120g
natural_image
Line drawing of a camera lens with a central dome and side legs (no text or symbols)natural_image
Simple line drawing of a spoon with a handle and bulb (no text or symbols)Cuillère doseuse 7g
natural_image
Line drawing of a cylindrical container with a curved top and side gap, labeled 'MAX' (no other text or symbols)Recipiente molido: 120g
natural_image
Line drawing of a cylindrical optical lens with a central support and top base (no text or symbols)Taza para granos: 200g
natural_image
Simple line drawing of a spoon with a handle and bulb (no text or symbols)Cuchara: 7g
DURONIC
natural_image
Line drawing of a cylindrical container with a curved top and side gap, labeled 'MAX' (no other text or symbols)natural_image
Line drawing of a cylindrical optical lens with a central dome and side legs, labeled 'MAX' (no text or symbols on the diagram itself)natural_image
Simple line drawing of a spoon with a handle and bulb (no text or symbols)Cucchiaio 7g
DURONIC
Periodically you may wish to clean the burr blades. Remove them from the grinder base and wash by hand with warm soapy water and a soft cloth. It is very important to ensure that they are completely dry before placing them back into the grinder base.

ATTENZIONE:
natural_image
Line drawing of a cylindrical container with a curved top and side gap, labeled 'MAX' (no other text or symbols)natural_image
Line drawing of a camera lens with a central dome and side legs (no text or symbols)Pojemnik na ziarna:
200 g
natural_image
Simple line drawing of a spoon with a handle and bulb (no text or symbols)


- Creative Consumer Products
- BG200
- Burr Coffee Grinder
- Contents
- Features and Specifications
- DURONIC
- Safety Information
- PLEASE READ THIS MANUAL CAREFULLY AND RETAIN FOR FUTURE REFERENCE
- Safety Information (continued)
- Introduction
- Before First Use
- Operating Instructions
- Note:
- CAUTION:
- Cleaning and Maintenance
- Switch off and unplug the grinder before cleaning.
- Troubleshooting
- Warranty
- Follow Us
- ATTENZIONE:
Brand : Duronic
Model : BG200
Category : Deep fryer