TMC2501S - Microwave Oven Tomado - Free user manual and instructions
Find the device manual for free TMC2501S Tomado in PDF.
| Product type | Combination microwave (microwave, grill, hot air) |
| Brand | Tomado |
| Model | TMC2501S |
| Capacity | 25 litres |
| Microwave power | 900 watts (P100) |
| Grill power | 1150 watts |
| Convection power (hot air) | 2150 watts |
| Supply voltage | 230-240 V ~ 50 Hz |
| Total connected power | 2150 watts |
| External dimensions (H x W x D) | 28.1 x 48.3 x 44.0 cm |
| Internal dimensions (H x W x D) | 22.0 x 34.0 x 34.4 cm |
| Net weight | 18.6 kg |
| Turntable diameter | 27 cm |
| Minimum installation height | 85 cm (30 cm above, 20 cm on sides) |
| Cooking functions | Microwave (5 levels), Grill, Hot air (110-200 °C), Microwave+grill combo, Microwave+hot air combo (4 temperatures), Auto defrost (100-1800 g), 8 preset menus |
| Child lock | Yes (automatic after 1 minute of inactivity) |
| Compatible materials | Glass, heat-resistant ceramic, microwave-safe plastic, plastic wrap, paper (no metal) |
| Maintenance and cleaning | Interior: damp cloth; accessories (turntable, grill rack, ring): dishwasher safe; exterior: soft cloth |
| Safety | Thermal protection (error codes E01, E02, E03), auto shut-off, door lock |
| Spare parts and repairability | Parts available at tomado.com/support; repair by qualified personnel only |
| Warranty | 24 months (conditions at tomado.com/support) |
Frequently Asked Questions - TMC2501S Tomado
User questions about TMC2501S Tomado
0 question about this device. Answer the ones you know or ask your own.
Ask a new question about this device
Download the instructions for your Microwave Oven in PDF format for free! Find your manual TMC2501S - Tomado and take your electronic device back in hand. On this page are published all the documents necessary for the use of your device. TMC2501S by Tomado.
USER MANUAL TMC2501S Tomado
natural_image
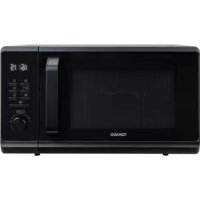
Exterior view of a TiDARO microwave oven with control panel and digital display (no visible text or symbols on main body)EN Instruction manual page 16-26
KOKEN MET MEERDERE FUNCTIONS
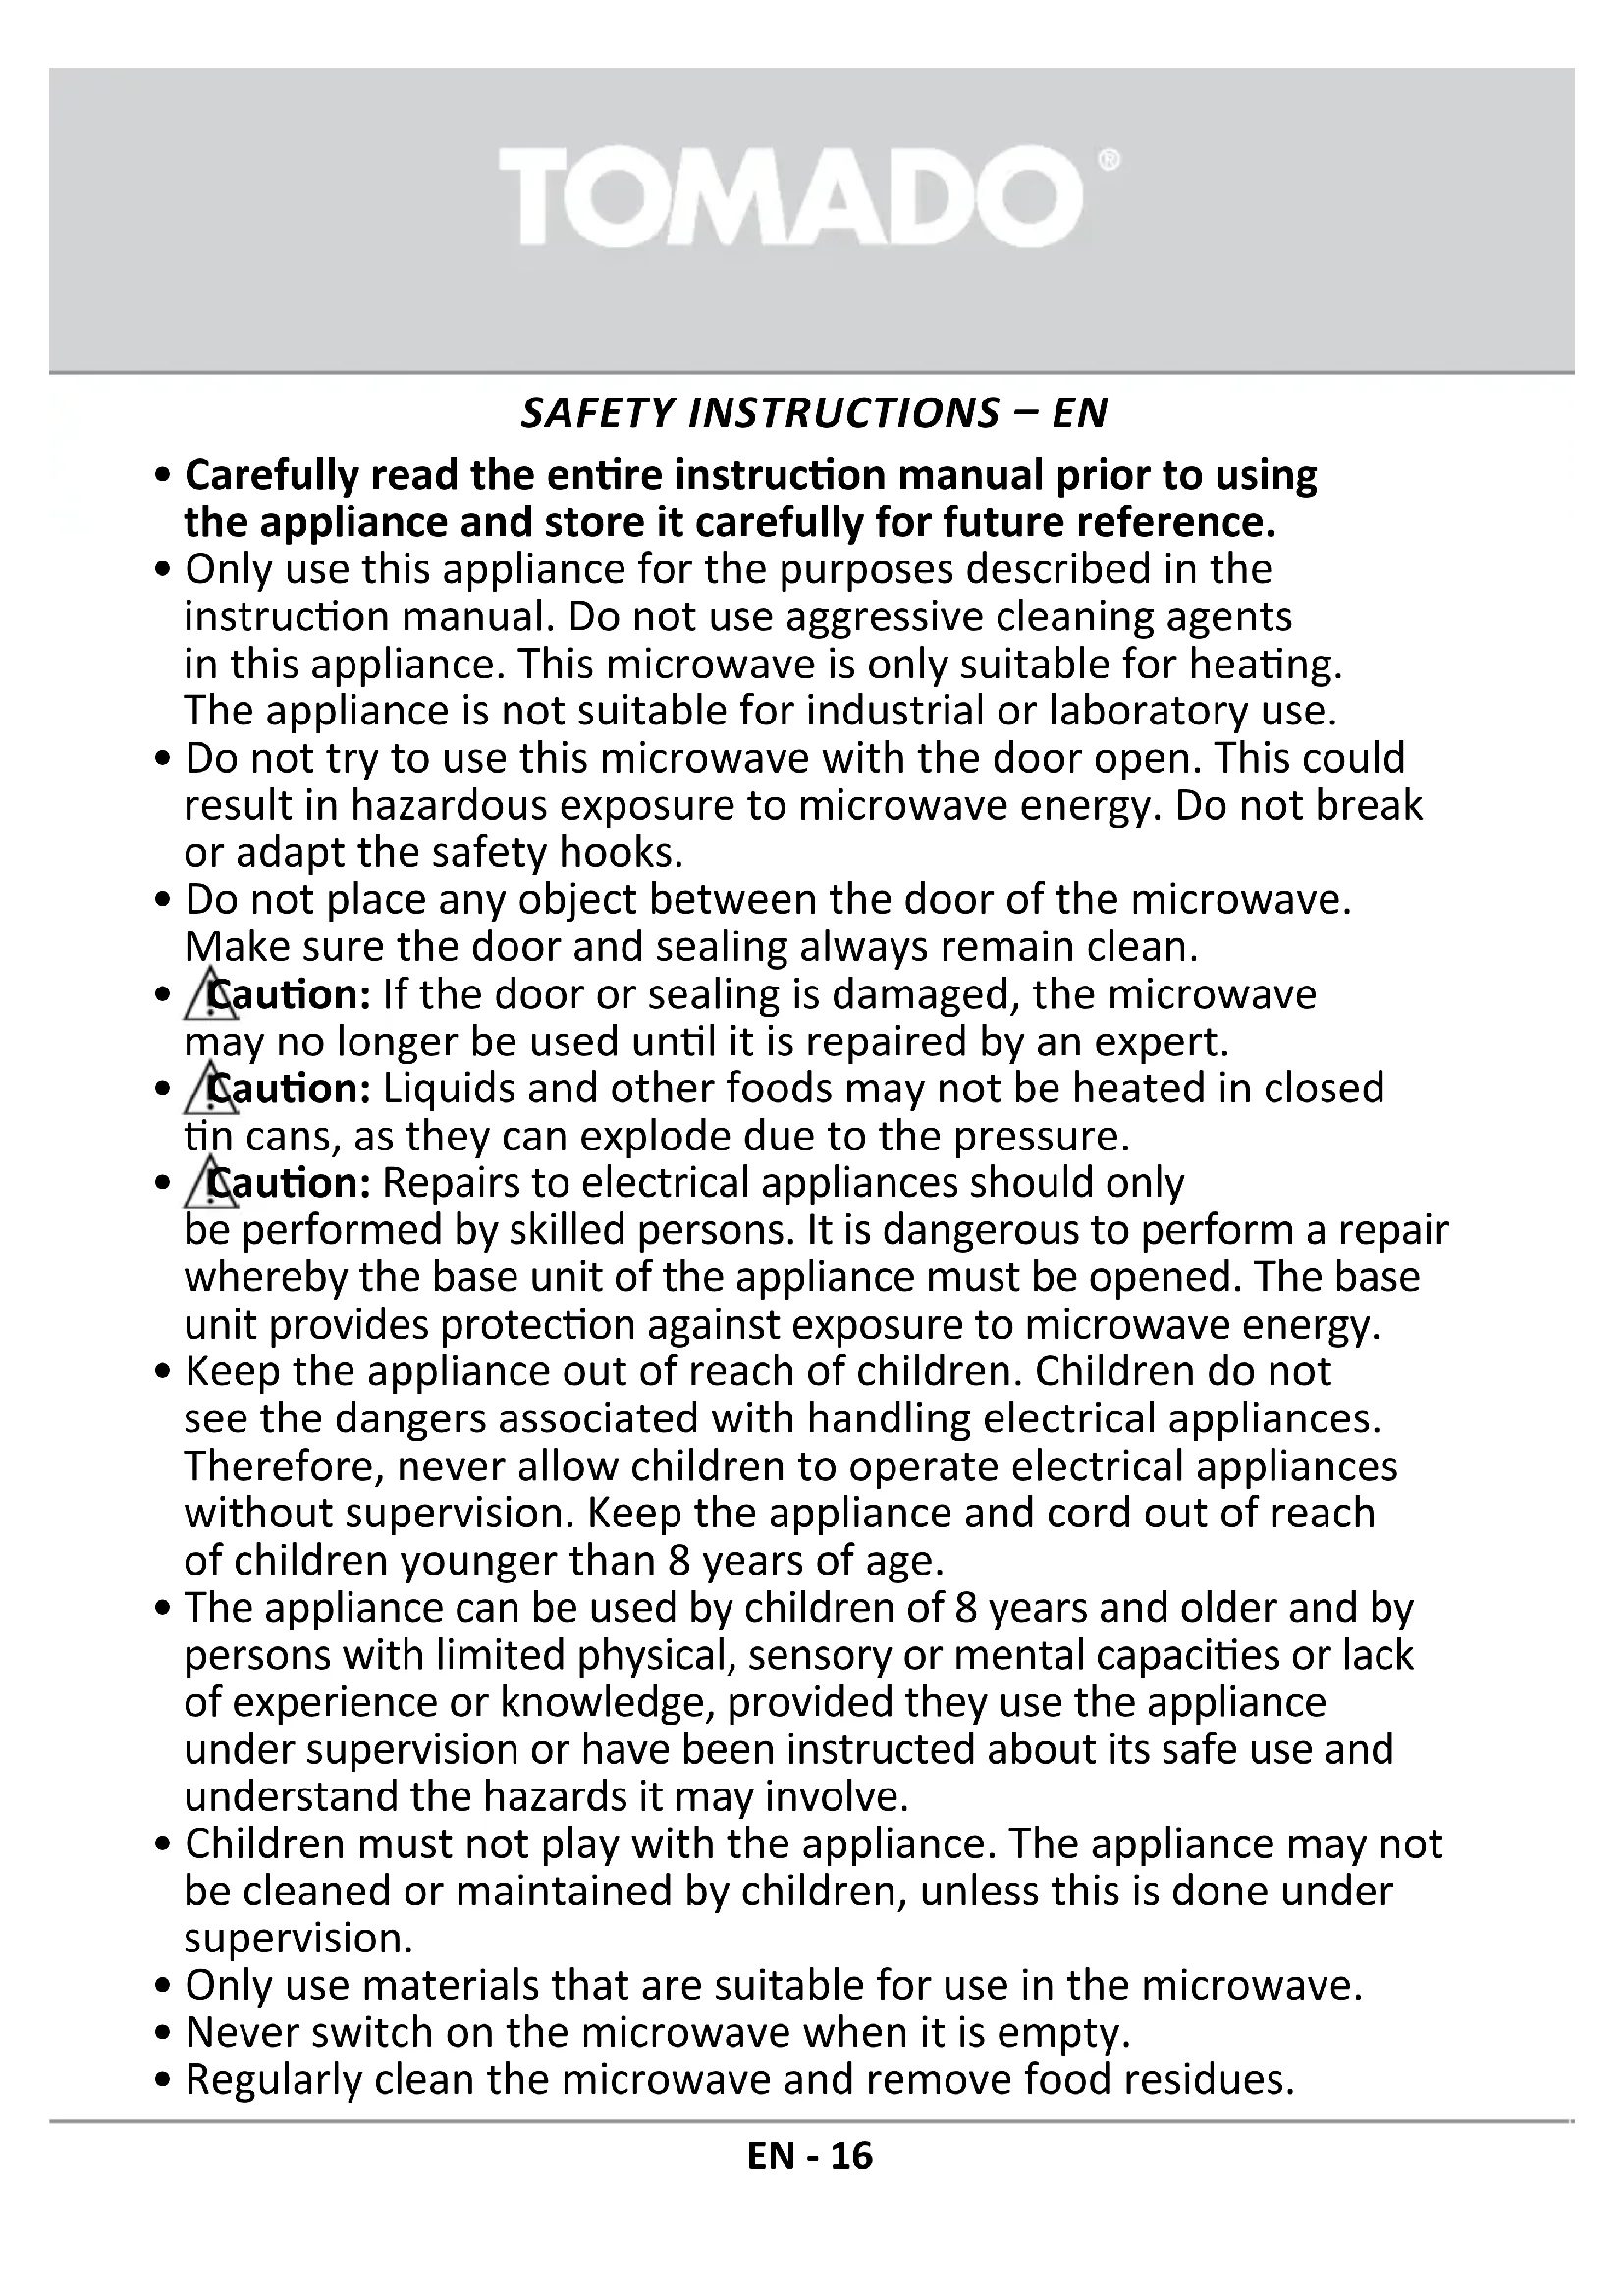
- Carefully read the entire instruction manual prior to using the appliance and store it carefully for future reference.
- Only use this appliance for the purposes described in the instruction manual. Do not use aggressive cleaning agents in this appliance. This microwave is only suitable for heating. The appliance is not suitable for industrial or laboratory use.
- Do not try to use this microwave with the door open. This could result in hazardous exposure to microwave energy. Do not break or adapt the safety hooks.
- Do not place any object between the door of the microwave. Make sure the door and sealing always remain clean.
- Caution: If the door or sealing is damaged, the microwave may no longer be used until it is repaired by an expert.
- Caution: Liquids and other foods may not be heated in closed tin cans, as they can explode due to the pressure.
- Caution: Repairs to electrical appliances should only be performed by skilled persons. It is dangerous to perform a repair whereby the base unit of the appliance must be opened. The base unit provides protection against exposure to microwave energy.
- Keep the appliance out of reach of children. Children do not see the dangers associated with handling electrical appliances. Therefore, never allow children to operate electrical appliances without supervision. Keep the appliance and cord out of reach of children younger than 8 years of age.
- The appliance can be used by children of 8 years and older and by persons with limited physical, sensory or mental capacities or lack of experience or knowledge, provided they use the appliance under supervision or have been instructed about its safe use and understand the hazards it may involve.
- Children must not play with the appliance. The appliance may not be cleaned or maintained by children, unless this is done under supervision.
- Only use materials that are suitable for use in the microwave.
- Never switch on the microwave when it is empty.
- Regularly clean the microwave and remove food residues.
TOMADO®
- Keep an eye on the microwave when heating food in a plastic or paper container. It could combust spontaneously.
- In case of smoke, switch off the microwave and remove the plug from the socket. Keep the door closed to smother the flames.
- Do not overcook the food.
- Do not use the interior of the microwave as storage space. Do not store any biscuits, bread, etc. in the appliance.
- Remove metal closing strips and metal grips of paper or plastic containers/bags before placing them in the microwave.
- Always install the microwave in accordance with the instructions.
- Eggs in their shells and hard-boiled eggs should not be heated in the microwave, as they could explode; even after the microwave has been switched off.
- Do not use the appliance if the plug, cord or appliance are damaged, or if the appliance no longer functions properly or if it is damaged in any other way. If this is the case, consult the retailer or our maintenance service. Never replace the plug or cord yourself.
- Only use and store the appliance indoors.
- Do not use the microwave near water, a damp basement/garage or near a swimming pool.
- Avoid contact with hot surfaces when the appliance is switched on. The inside becomes hot!
- Use oven gloves when removing hot dishes, etc. from the microwave.
- Never cover the ventilation holes.
- Never bend the power cord sharply or allow it to run across hot parts.
- Not keeping the microwave clean could result in wear and tear which, in its turn, will have an effect on the life span and could result in dangerous situations.
- The contents of baby bottles and jars of baby food should be stirred or shaken prior to consumption. Check the temperature to prevent burns.
- Caution: Heating liquids could result in explosive boiling over of the liquid. Also after the microwave has been switched off. Be careful when removing the cup or container from the microwave. Therefore, always place a plastic or ceramic spoon in the cup when heating.
TOMADO®
- The microwave cannot be used with a timer or a separate remote control.
• Always make sure the appliance is placed on an sturdy, flat surface. - Only connect the appliance to alternate current, to an earthed wall socket, with a mains voltage that corresponds with the information provided on the information plate of the appliance.
- Do not leave the appliance unsupervised if the appliance is operational.
- If you want to move the appliance, make sure the appliance is switched off. Use both hands when moving the appliance.
- Never use the appliance with parts that are not recommended or supplied by the manufacturer.
- Do not pull the cord and/or appliance to remove the plug from the wall socket. Never touch the appliance with wet or damp hands.
- If the appliance does not function after it has been switched on, it is possible that the fuse or earth leakage circuit breaker has been activated in the electrical distribution box. The group may be overloaded or an earth leakage current may have occurred.
- In case of a breakdown, never make repairs yourself; a tripped safety device in the appliance could indicate a defect that cannot be remedied by removing or replacing this safety device. Only original parts should be used.
- Never submerge the appliance, cord or plug in water.
- This appliance is only suitable for household use. If the appliance is not used as intended, no compensation can be claimed in case of defects or accidents and the warranty will be invalidated.
- This appliance is intended for household and similar use, such as: - in staff kitchens, shops, offices and other work environments; - by guests in hotels, motels and other residential environments; - in Bed&Breakfast type environments; - farms.
- The microwave is only suitable for heating food and drink. Drying of food or clothes and heating heat pads, slippers, sponges, damp cloths etc. could pose a hazard and cause personal injury or fire.
- Never clean the microwave with a high pressure cleaner or steam cleaner.
TOMADO®
- Be careful with the following materials and make sure that they may be used in the microwave:
- aluminium foil yes*
- paper yes**
- cling film yes
- aluminium container no
- microwave crockery yes
- heat-resistant plastic yes
- unglazed pottery no
- metal cookware no
- ovenproof glass and ceramics yes
- normal glass yes
- metal closing strip no
- plate with metal decorative rim no
- mercury thermometer no
- closed jar no***
- bottle with narrow neck no
- oven bag yes
* Use small pieces to prevent thinner sections of chicken, for example, from getting cooked too quickly.
** Use non-decorated kitchen paper to cover food and absorb fat.
*** Remove the cover and make sure the jar is not heated too long. The glass may burst.
TOMADO®
PRODUCT DESCRIPTION
text_image
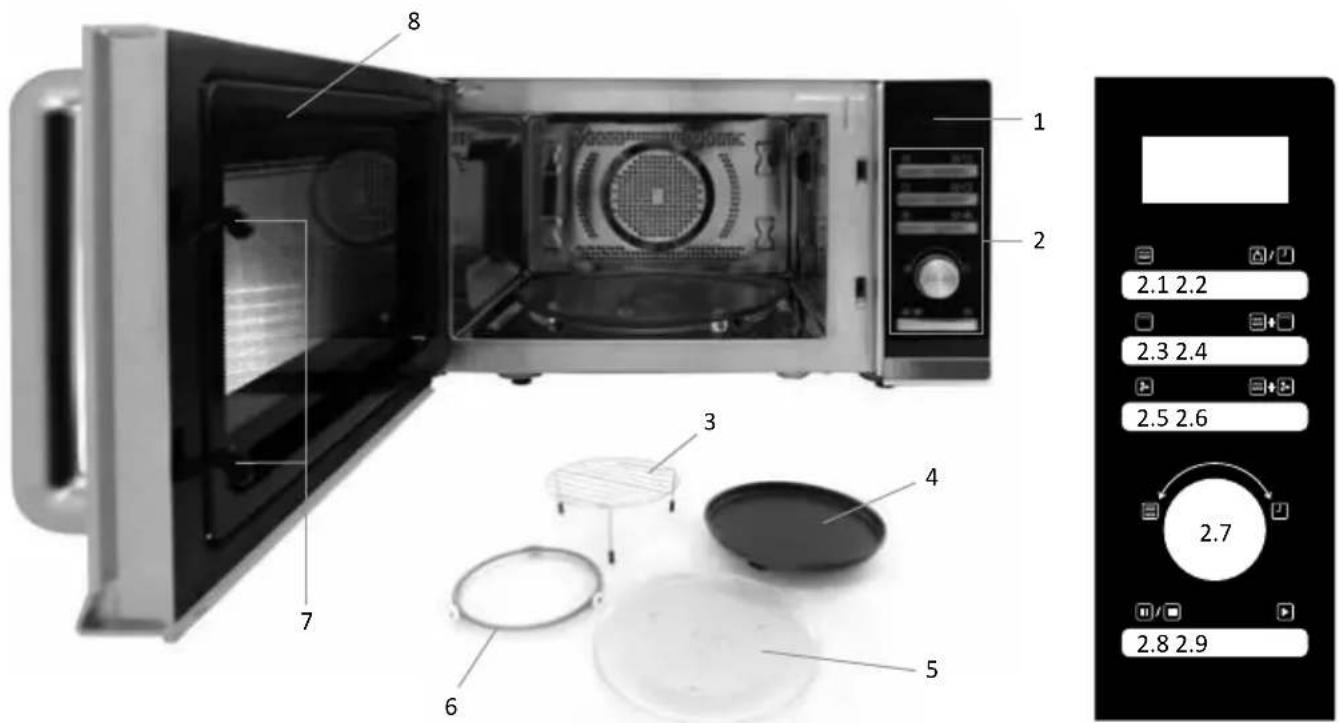
1 2 8 7 3 4 6 5 2.1 2.2 2.3 2.4 2.5 2.6 2.7 2.8 2.9- Display
- Operating panel
- Grille (only use with grill/hot air mode)
- Baking tray
- Rotating platform
- Ring for rotating platform
- Door with handle and safety hooks
- Window
2.1 Button for microwave mode
2.2 Button for weight/clock mode
2.3 Button for grill mode
2.4 Button for microwave+grill mode
2.5 Button for hot air mode
2.6 Button for microwave+hot air mode
2.7 Rotary knob for settings such as time and menu
2.8 Pause/stop button
2.9 Start button/+ 30 SEC. button
USING THE APPLIANCE FOR THE FIRST TIME
Before using the appliance for the first time, proceed as follows: carefully unpack the microwave oven and remove all packaging material. Keep the packaging (plastic bags and cardboard) out of reach of children. After unpacking the appliance, carefully check it for external damage that may have occurred during transport. Place the appliance on a sturdy, flat surface and make sure there is enough space all around for sufficient ventilation.
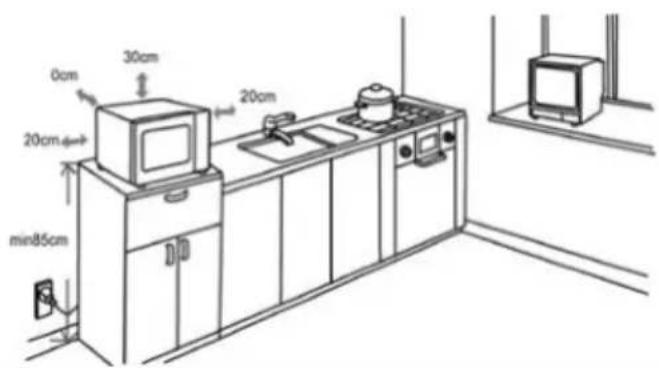
The minimum installation height is 85 cm. There should be a free space of 30 cm on the top side and a minimum of 20 cm between the microwave oven and any adjacent walls. Do not remove the adjustable feet of the microwave oven. Do not cover the ventilation holes.
Use of the microwave oven could cause interference of your television or radio signal. Therefore, do not place the microwave oven near such equipment. Do not place the microwave oven near heat sources such as heating or cooker.
text_image
0cm 30cm 20cm 20cm min85cm 20cmClean the microwave oven and accessories with a slightly damp cloth. The machine is now ready for use. It is possible that the microwave oven smells "new" when used for the first time. This is entirely normal, will do no harm and the smell will disappear automatically. Check that the voltage corresponds with what is stated on the information plate and insert the plug in the socket.
Attention! The white plate on the right side in the microwave ensures the distribution of microwaves within the microwave. This should never be removed.
SETTING THE CLOCK
When inserting the plug of the microwave oven in the socket, 1:01 appears on the display and you will hear a beep sound.
- Press the △/□ button once or twice to select a 12 or 24 hour clock. The hours start to flash.
- Turn the rotary knob 📋 to set the correct hour.
- Press the △/ button once more, the minutes start to flash.
- Turn the rotary knob 📋 to set the correct minutes.
- Press the △/ J button once more to confirm the correct time.
Extra: When pressing the △/□ button while cooking, the current time is displayed.
GENERAL INSTRUCTIONS
- If, while making settings, nothing happens for a period of 25 seconds, the microwave will return to the standby position.
- Press the 📄/ button once while cooking, to pause the programme. Press the 📄 button twice to stop the programme.
- When the cooking process is completed, "End" is shown in the display and a beep sounds every two minutes until the 📄/Button is pressed or the door is opened.
- The electronic control system of the microwave has a cooling function. For each two minutes of cooking time used, the fan continuous to run for another three minutes after opening the door or stopping the microwave. This function extends the life span of the microwave.
QUICK START
- Press the ▶ button to heat food quickly at full power (900 watts) for 30 seconds.
- When the same button is pressed repeatedly, the time is extended by 30 seconds each time. The maximum is 10 minutes.
PREPARING FOOD IN THE MICROWAVE
- Press the 📋 button and P100 is shown on the display. Repeatedly press the 📋 button to change the cooking power to P100-P80-P60-P40-P20-P0.
- Turn the rotary knob 📋 to set the correct cooking time. The longest cooking time is 95 minutes.
- Press the ▶ button to confirm the cooking time and start the microwave mode.
| Microwave power Application |
| P100 = 900 watts Heating, milk, boiling water, vegetables, heating drinks |
| P80 = 720 watts Rice, fish, chicken, minced meat |
| P60 = 540 watts Mash pot, fish |
| P40 = 360 watts Soup, mash pot or defrosting |
| P20 = 180 watts Softening butter or ice cream |
| P0 = 0 watts Cooking alarm mode, the microwave does not cook |
GRILLING
- Press the ☐ button.
- Turn the rotary knob 📋 to set the correct cooking time. The longest cooking time is 95 minutes.
- Press the ▶ button to confirm the cooking time and start the grill mode.
Extra: If the grill is set to 10 minutes, for example, two beeps sound halfway the grilling time to indicate that the dish must be turned over. Close the door after turning over the dish and press the ▶ button to continue grilling the dish.
COMBINATION OF MICROWAVE AND GRILL
- Press the 📄+ button once or twice to select Co-1 or Co-2.
| Number of button presses+☐ | Combination | Cooking time distribution | |
| Microwave Grill | |||
| Once Co-1 30% 70% | |||
| Twice Co-2 55% 45% | |||
- Turn the rotary knob 📋 to set the correct cooking time. The longest cooking time is 95 minutes.
- Press the ▶ button to confirm the cooking time and start the cook mode.
HOT AIR WITH PREHEATING MODE
Preparing food with hot air is the same as with a traditional oven. The microwave mode is not used. Before placing the dish in the oven, we recommend preheating the oven.
- Press the 📋 button and 200 °C begins to flash in the display.
- Repeatedly press the 📋 button to change the temperature. The temperature can be set between 200 °C and 110 °C.
- Press the ▶ button to confirm the temperature and start preheating. When the set temperature has been reached, a beep will sound regularly to remind you to place the dish in the oven. The set temperature will flash.
- Place the dish in the microwave oven, close the door and set the required time using the rotary knob. The maximum is 95 minutes.
- Press the ▶ button to start baking.
Extra: - No baking time can be set until the set preheating temperature has been reached. Once the oven has been preheated, open the door to set the baking time.
- If no time has been set after thirty minutes, the oven will stop the preheating process. The microwave oven will return to the standby mode.
HOT AIR WITHOUT PREHEATING
- In standby mode, open the door of the microwave oven and place the food in the oven. Close the door.
- Press the 📋 button and 200 °C begins to flash in the display.
- Repeatedly press the button to change the temperature. The temperature can be set between 200 °C and 110 °C.
- Use the rotary knob to set the required baking time. The maximum is 95 minutes.
- Press the ▶ button to start baking.
Extra: During the baking process, you can press the ➕ button to check the set temperature.
COMBINATION OF MICROWAVE AND HOT AIR
This microwave oven has four pre-programmed combinations of hot air and microwave mode, for temperatures of 200, 170, 140 and 110 °C
• In standby mode, open the door of the microwave oven and place the food in the oven. Close the door.
- Repeatedly press the 📋+ ➕ button to set one of the four temperatures. The temperature can be set to 200 °C, 170 °C, 140 °C or 110 °C.
- Use the rotary knob to set the required baking time.
- Press the ▶ button to start baking.
Extra: During the baking process, you can press the ☐ + ✗ button to check the set powers and the temperature.
PREPARING FOOD WITH SEVERAL MODES
This microwave oven often is able to programme a maximum of three consecutive cooking modes.
Example: You first want to heat food with the microwave mode, then grill it and finally bake it with hot air. Do this as follows:
- In standby mode, open the door of the microwave oven and place the food. Close the door.
- Repeatedly press the 📋 button and set the required microwave power. Turn the rotary knob to set the correct cooking time. Do not yet press the ▶ button.
- Press the □ button and turn the rotary knob 🔔 to set the correct grilling time. Do not yet press the ▶ button.
• Repeatedly press the 📋 button to set the required baking temperature and turn the rotary knob 🔒 to set the correct baking time. - Press the button to start the programmed cooking sequence.
Caution: Preprogrammed menus, defrosting and quick start are not available for cooking with several modes. You can only use the microwave, grill and hot air mode.
DEFROSTING
Set the weight of the food to determine the defrosting time and power automatically. You can defrost 100 g to 1800 g of food at the same time.
- In standby mode, turn the rotary knob 📋 to the lift, until "AUTO" and "A-9" are shown in the display.
- Repeatedly press the 📄/按钮 to select the weight of the food.
- Press the ▶ button to start defrosting.
Caution: During defrosting, the microwave oven pauses regularly and generates a beep signal to remind you to turn the food over. Open the door, turn over the food, close the door and press the button to resume the defrosting programme.
PREPROGRAMMED MENUS
Use the grill or baking tray for preparing pizza, chicken or cake.
- Turn the rotary knob to the left to select the required menu, A-1, A-2, A-3 .... A-8 appears in the display. (Or A-9 for Defrosting.)
- Repeatedly press the △/□ button to select the weight of the food or the number of portions.
- Press the ▶ button to start the preprogrammed menu.
Overview of preprogrammed menus
| Code Type of food |
| A-1 Potatoes (230 g/portion,1-3 portions) |
| A-2 Drinks (200 ml/cup, 1-3 cups) |
| A-3 Popcorn (99 g) |
| A-4 Automatic heating (200 - 800 g) |
| A-5 Spaghetti (100 - 300 g) |
| A-6 Pizza (150 - 450 g) |
| A-7 Chicken (800 - 1400 g) |
| A-8 Cake (475 g) |
Caution: The result of the preprogrammed menus depends on different factors, such as the shape and dimensions of the food, your preference concerning the degree of cooking and even the position of the food in the microwave oven. If the result is not to your liking, you should adjust the cooking times.
Extra:
- Do not immediately place the cake in the oven when selecting the A-8 - cake menu. The oven must first be preheated to 180 °C. After a number of minutes, two beeps will sound to indicate that the cake can be placed in the oven.
When the cake is placed in the oven, press the ▶ button once more to start baking the cake. The time will count down and the cake will be baked beautifully. - When preparing chicken with menu A-7, the beep signal will sound twice. This is normal. In order to get a good result during grilling, you must turn over the chicken. Close the door and press the button once more to continue with the grilling process. If you do not take any action, the oven will continue to grill normally.
CHILD LOCK
The microwave oven is equipped with a child lock. It is used to block all operating elements and prevents your child from accidentally switching on the appliance.
Activating the child lock:
After one minute with no activity in standby mode, the child lock is activated automatically. The display shows the key symbol.
When the child lock is activated, none of the buttons are working.
Deactivating the child lock:
Open the door of the microwave oven to deactivate the child lock. The key symbols disappears from the display and the buttons are working again.
GENERAL EXTRAS
- When using the microwave oven, you can see the current time for 2-3 seconds by pressing the △/□ button.
- When using one of the microwave oven modes, you can see the selected position by pressing the accompanying mode button ☐, ☐. The power or temperature is shown in the display for 2-3 seconds.
- The beep signal sounds once each time you turn the knob during a new setting.
- The ▶ button must be pressed again, when the door of the microwave oven has been opened during preparation.
- When a programme has been set, but is not started within five minutes, the setting will disappear and the display will show the current time (if set).
- The beep signal only sounds when you properly press the buttons. If you do not press the buttons properly, the signal will not sound and the mode will not be activated.
- The beep signal sounds five times to indicate that the preparation time has ended.
TOMADO®
CLEANING AND MAINTENANCE
Before cleaning your microwave oven, switch off the appliance, remove the plug from the socket and allow the appliance to cool down fully.
Caution: Never use a steam cleaner!
Interior
Clean the interior of the appliance after each use. Use a damp cloth. For thorough cleaning, use warm water with washing-up liquid or a stainless steel cleaning agent and properly wipe the interior dry with a cloth.
Accessories
Loose accessories such as the baking plate, rotating platform, the ring for the rotating platform and the grille must be cleaned with warm water and washing-up liquid. These accessories may also be cleaned in the dishwasher. Properly dry everything before using it again.
Exterior
Clean the exterior of the appliance with a damp cloth or sponge. If necessary, you can clean the exterior of the appliance by means of a mild washing-up liquid. Also properly clean the door and door rubber.
PROBLEMS AND SOLUTIONS
First check the following before submitting the microwave oven for repair.
| Problem Solution | |
| The microwave oven does not work Is the plug inserted in the socket?Is the fuse in the meter cupboard defective? | |
| The microwave oven does not heat up Is the door properly closed? Open the door and close it again properly. | |
| The rotating platform makes noise Clean the ring for the rotating platform and the bottom of the microwave oven. | |
| The food is not properly defrosted | Were power and time set correctly? Did you stir the food during defrosting or turn it over? |
| “E01” is shown in the display, and the appliance continuous to make beep sounds. | The temperature safeguard for very high temperature has been activated. Press the || / ■ button to return to the standby mode. |
| “E02” is shown in the display, and the appliance continuous to make beep sounds. | The temperature safeguard for very low temperature has been activated. Press the || / ■ button to return to the standby mode. |
| “E03” is shown in the display, and the appliance continuous to make beep sounds. | The system sensor is short-circuited. Press the || / ■ button to return to the standby mode. |
TECHNICAL SPECIFICATIONS
Type number TMC2501S
Voltage 230-240 volts
Connected load 2150 watts
Connected load - microwave 1400 watts
Microwave power 900 watts
Connected load - grill 1150 watts
Connected load - convection 2150 watts
Capacity 25 litres
Rotating platform ∅ 27 cm
Dimensions exterior (hxwxd) 28.1 x 48.3 x 44.0 cm
Dimensions interior (hxwxd) 22.0 x 34.0 x 34.4 cm
Nett weight 18.6 kg
\~ 50 Hz
RECYCLING

This symbol means that this product should not be disposed of with regular household waste (2012/19/EU). Observe the rules that apply in your country for the separated collection of electric and electronic products. Correct disposal of the product prevents negative consequences for the environment and for public health. The packaging material of this product can be recycled 100%, return packaging material separately.
TOMADO®
Abmessungen innen (HxBxT) 22,0 x 34,0 x 34,4 cm
Dimensiones interiores (hxaxl) 22,0 x 34,0 x 34,4 cm
Peso neto 18,6 kg
RECICLAJE
Dimensioni interne (A x L x P) 22,0 x 34,0 x 34,4 cm
Peso netto 18,6 kg
SMALTIMENTO
PROBLEMY I ROZWIĄZANIA
Go to www.tomado.com/support to purchase accessories or spare parts.
WARRANTY CONDITIONS
This product comes with a 24 month warranty. Your warranty is valid if the product has been used in accordance with the user instructions and for the purpose for which it was made. Also the original proof of purchase must be submitted, stating the date of purchase, the name of the retailer and the item number of the product. For extensive warranty information you are referred to our website: www.tomado.com/support