MyGate 46701 - Child safety gate Reer - Free user manual and instructions
Find the device manual for free MyGate 46701 Reer in PDF.

| Product Type | Child Safety Gate |
| Brand | Reer |
| Model | MyGate 46701 |
| Article Number | 46701 |
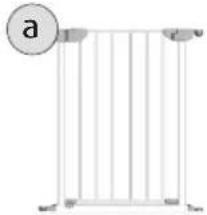
| Gate Height | Approximately 60 cm (door element only) |
| Adjustable Opening Width | Up to 100 cm with extensions (20 cm and 60 cm available) |
| Approximate Weight | Approximately 2.5 kg (door element) |
| Main Material | Metal and plastic |
| Color | White (standard) |
| Locking System | Automatic locking with Night-Safe function |
| Opening | Double-action door (opens inward or outward) |
| Installation | Wall mounting with screws and wall plugs (supplied) |
| Angle Adjustment | 9 possible angle positions |
| Safety Standard | EN 1930:2011 |
| Minimum Safety Distance | 40 cm from stairs, 80 cm from heat sources |
| Care and Cleaning | Clean with a damp cloth, without aggressive or abrasive products |
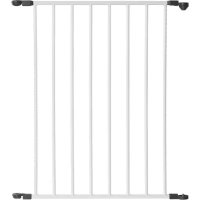
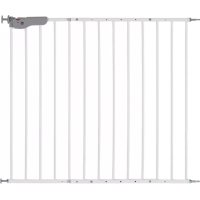
| Spare Parts Available | Extension 20 cm (46720), extension 60 cm (46760), connection bars, hinges, caps |
| Required Tools | Allen key supplied |
| Package Contents | 1 door element, 2 connection bars, 4 wall hinges, 4 wall fixings, caps, screws, night-safe, Allen key |
| Warranty | 2 years (subject to seller's conditions) |
Frequently Asked Questions - MyGate 46701 Reer
User questions about MyGate 46701 Reer
0 question about this device. Answer the ones you know or ask your own.
Ask a new question about this device
Download the instructions for your Child safety gate in PDF format for free! Find your manual MyGate 46701 - Reer and take your electronic device back in hand. On this page are published all the documents necessary for the use of your device. MyGate 46701 by Reer.
USER MANUAL MyGate 46701 Reer
1x Lower hinge cap with screw
1x Lower hinge cap
2x Upper hinge cap
8x Wooden mounting screw
1x Night-Safe
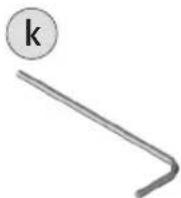
1x Allen key
Art.No46760
1x Extension 60 cm

1x Connecting bar
Art.No46720
1x Extension 20 cm

1x Connecting bar
Necessary tools
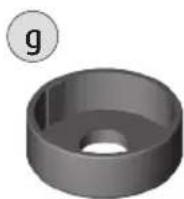
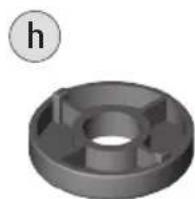
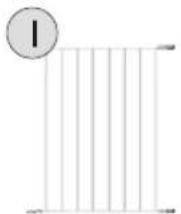
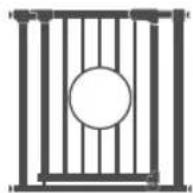
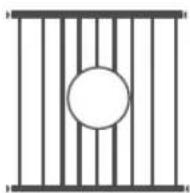
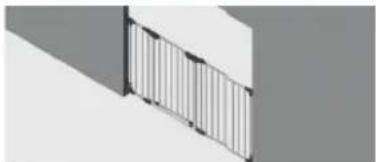
Product information Art.No.46701 door element
(according to angle position)
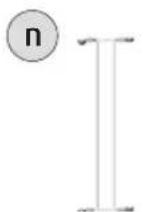
Product information Art.No.46720 extension 20 cm
Product information Art.No.46760 extension 60 cm
When assembled according to the user manual the safety gate complies with EN 1930:2011
WARNING! Incorrect assembly can be dangerous!
WARNING! The safety gate may not be used if it is damaged or if individual parts are lost!
WARNING! The child safety gate may not be used on windows!
child development), the gate should no longer be used
mounted properly
indications in the instructions subsequently
The safety gate is not a toy. It does not replace the proper supervision of an adult!
Cleaning: Do not use any harsh cleaning agents or abrasive materials. Clean the safety gate on a regular basis with a damp cloth and a little dishwashing liquid.
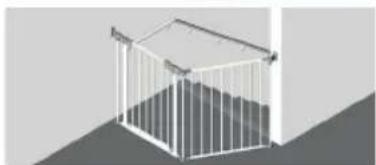
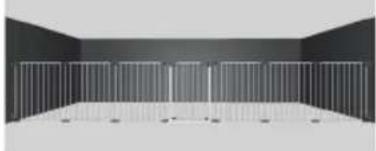
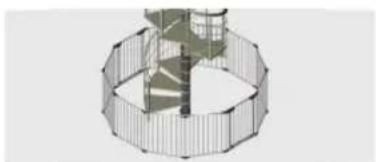
Assembly options
(N3) 45164U3
personalise your individual safety gate


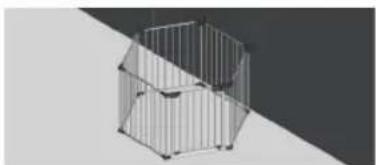


Assembly
Preparation
Determine the width, in which the gate should be installed.
too small the child can use this as a climbing aid.
CAUTION! Pay attention to keep the gate a sufficient distance away from sources of danger! so that your child may be able to reach through the gate bars!
CAUTION! Please keep the gate at least 80cm away from heat source!
Step 1
Connect elements
Put together door element (a) + extension (l) or (n), fig. 1 to fig. 4.
The joints grip together like gears, fig. 8 and 9.
Insert connecting bar (b), upper metal cap though the connected hinges, gently screw in a clockwise direction, fig. 5, 6 and 7.
Set angle
Hinge connections of the individual elements allow 9 angle positions.
Gently lift bar section with the above lying hinge part. Choose the desired angle setting, lock the upper hinge part into the lower, fig. 8 and 9.
Turn the connecting bar clockwise until both bar sections are securely connected to each other and can not move any more, fig. 10.
Warning!
The rails can only be tightened using the accompanying Allen key once the safety gate is completely assembled!
other elements
To add additional bar elements, repeat step 1.
Step 2
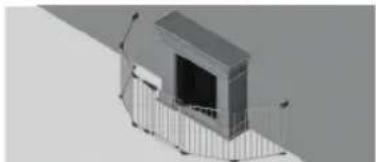
Wall mount
CAUTION: the external bar elements must be securely connected to the wall in order to ensure that the safety gate is safe.
left side /
locking side
The locking side of the door element is labelled as left side for easier understanding. The bars can also be constructed the other way round.
upper wall bracket
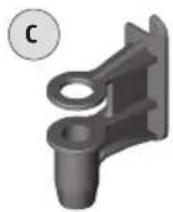
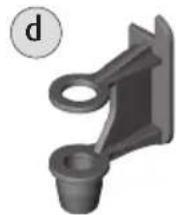
Attach hinge cap (g) to the upper left hinge from below, fig. 11.
Slide the wall hinge (c) on the hinge so that it surrounds the hinge above and below, fig. 12.
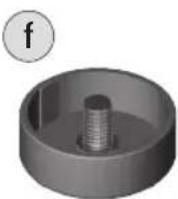
Attach the lower hinge cap with the screw (f) to the other hinge from below, fig.13.
Insert connecting bar (b), upper metal cap through the connected hinges, fig. 14 to 16, tighten in a clockwise direction, fig. 14
CAUTION: when constructing in a straight line without angle, the lower wall brackets must also be mounted in order to guarantee stability!
When constructing with angles the upper wall brackets are sufficient.
Lower Put the wall hinge (c) on the connecting bar (b) before this is screwed together with the lower hinge, fig. 17.
wall bracket Always mount the wall hinge from below, fig. 18 and 19.
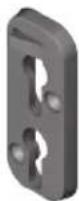
Insert the wall bracket (e) with the flat side on the back of the wall hinge until it clicks into place, fig. 20. Mark the position of the wall bracket on the wall, fig. 21.
Remove the wall bracket (e) from the wall hinge again. To do so press the small button on the top of the wall bracket, push the wall bracket downwards, Abb. 22.
Put the wall bracket (e) on the position marked on the wall, draw in drill holes, fig. 23.
Secure the wall bracket (e) to the wall using the accompanying wooden screw (i), fig. 24. (use suitable screws, 4mm , and wall plugs on other mounting surfaces)
Wall click system Hook the wall hinge (c) in the wall bracket (e). CAUTION: ensure that the wall hinge is correctly locked into the Click in wall bracket, fig. 25.
Click out
fig.26
right side / hinge side
Repeat stage 2 on the right side.
Using the accompanying Allen key (k), tighten all inserted connecting bars (b) in a clockwise direction, fig. 27.
To open door Gently push the button on the handle backwards, simultaneously lift the gate and swing to the side, fig. 28.
To shut door
Swing the door back, lift, position and push down. The door latches automatically, fig. 29.

Make sure that the door is correctly latched in place and locked!
Note
Regularly check the safety gate for secure mounting, stability and locking function. If necessary, amend the positions according to the instructions listed in the user manual.
Please keep the sales receipt, operating manual and article number in a safe place. All claims based on warranty or guarantee are to be directed solely towards the retailer.

//art.n°.46701,46720,46760
istruzioni d'uso

Listedelpe parti artn.46701
1x Elemento porta

(alt after vinkelindstilling)
Produktinformation Art.Nr.46720 Forlaengelsen 20 cm
Produktinformation Art.Nr.46760 Forlaengelsen 60 cm
//art.nr.46701,46720,46760
Instrukcja obslugi

czesci
art.nr.46701
1x Element drzwi


2xDrazeklaczycy
(maly)
duzy)

4x Mocowanie nascienne


gorna


2x Nastenny pant vlevo (maly)
Nastenny klik system
zaklapnout
obr.25
uvolnit
obr.26
pravá strana/ strana s pantem
The extensions can only be used with the MyGate safety gate door element, item number 46701!