WSSMM1 - Speaker stands SANUS - Free user manual and instructions
Find the device manual for free WSSMM1 SANUS in PDF.
| Product Type | Wall mount for speaker |
| Brand | SANUS |
| Model | WSSMM1 |
| Compatibility | Sonos Move |
| Use | Indoor and outdoor (outdoor use guaranteed) |
| Material | UV-resistant plastic, stainless steel, galvanized plating |
| Finish | Outdoor paint compliant with AAMA 2604-05 |
| Weather Resistance | Yes, corrosion and UV resistant |
| Installation Type | Wall mount |
| Compatible Walls | Wood studs or drywall |
| Max Surface Thickness | 12.7 mm (1/2 in) |
| Minimum Support Thickness | 44 mm (1 3/4 in) for wood stud |
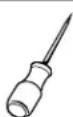
| Required Tools | Pencil, level, screwdriver, drill, stud finder, awl, drill bit |
| Contents | Wall plate, screws, hardware (references on page 4) |
| Safety | Small parts: choking hazard; do not exceed weight capacity |
| Maintenance | Clean with a soft dry cloth; avoid abrasive products |
Frequently Asked Questions - WSSMM1 SANUS
User questions about WSSMM1 SANUS
0 question about this device. Answer the ones you know or ask your own.
Ask a new question about this device
Download the instructions for your Speaker stands in PDF format for free! Find your manual WSSMM1 - SANUS and take your electronic device back in hand. On this page are published all the documents necessary for the use of your device. WSSMM1 by SANUS.
USER MANUAL WSSMM1 SANUS
natural_image
Technical line drawing of a handheld device with a circular base and vertical support (no text or symbols)We'll Make It Stress-Free
If you have any questions along the way, just give us a call.
P: 800-359-5520 • UK: (0) 800 056 2853 • EMEA: +31 (0) 495 580 852
We're ready to help!

CAUTION: IMPORTANT SAFETY INSTRUCTIONS — PLEASE READ ENTIRE MANUAL PRIOR TO USE — SAVE THESE INSTRUCTIONS
Before getting started, let's make sure this product is perfect for you!
This mount is designed to support the Sonos ^® Move ^TM speaker.
CAUTION: Avoid potential personal injuries and property damage!
- Check your speaker owner's manual to see if there are any special requirements for mounting your speaker.
- Please read through these instructions completely to be sure you're comfortable with this easy install process.
- Do not use this product for any purpose not explicitly specified by manufacturer.
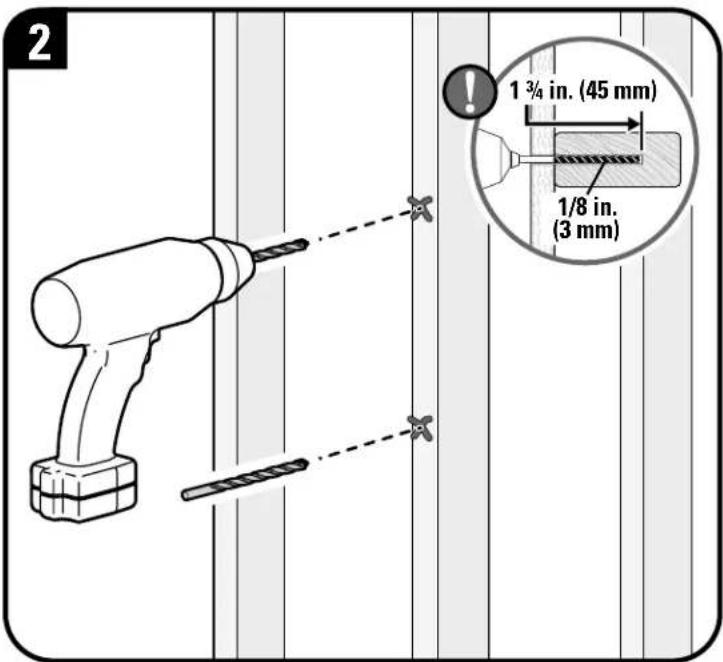
• Manufacturer is not responsible for damage or injury caused by incorrect assembly or use. - The wood stud or drywall must have a minimum thickness of 1 ^3/4 inch (44 mm) and must be capable of supporting five times the weight of the speaker and mount combined.
- Outdoor primer protects against rusting and provides better paint adhesion; outdoor-rated paint meets AAMA 2604-05 Standard for 5-year color retention and chalk resistance.
- If you do not understand these instructions or have doubts about the safety of the installation, assembly or use of this product, contact Customer Service.
- Warrantied for outdoor use; UV-resistant plastics fight against sun damage; Galvanized plating and stainless steel hardware prevents against corrosion and leads to longer life of the mount.
Speaker Weight Limit DO NOT EXCEED
Sonos ^® Move ^TM
6.7 lbs. (3.0 kg)
Tools Needed
Pencil
Level
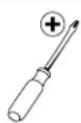
Screwdriver

Electric Drill

Stud Finder
Awl
Wood Drill Bit
Drywall Install

Hammer

Drill Bit
Dimensions
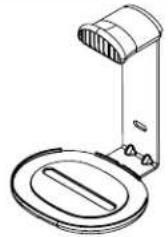
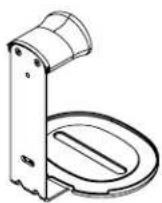
3D VIEW FRONT
natural_image
Line drawing of a desk lamp with lid and stand (no text or symbols)3D VIEW REAR
FIXED MOUNT - FRONT VIEW
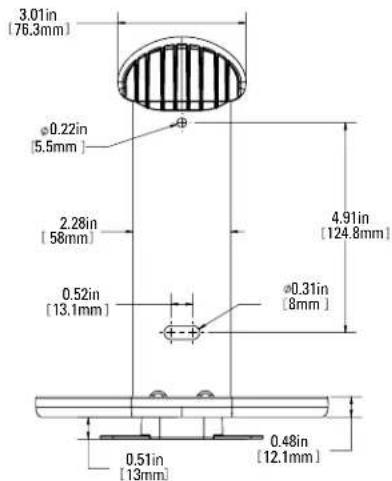
FIXED MOUNT - SIDE VIEW
![3.01in [76.5mm] 0.12in [3mm] 9.42in [239.2mm] 7.04in [178.8mm] 3.59in [91.2mm] 0.63in [16.1mm]](/content/2026/03/520242/images/ecceaae7109b3df7b416320931282d862c195720c299f0ce43fde6065ef65d37.jpg)
FIXED MOUNT - TOP VIEW
![6.89in [175mm] 6.85in [174mm]](/content/2026/03/520242/images/fb2dd1977ab54d9d128dc5f0d078df36d4caa6ef46c9fb1fba091a3e6aa74ea4.jpg)
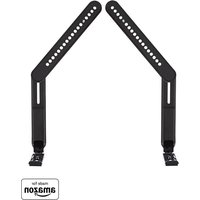
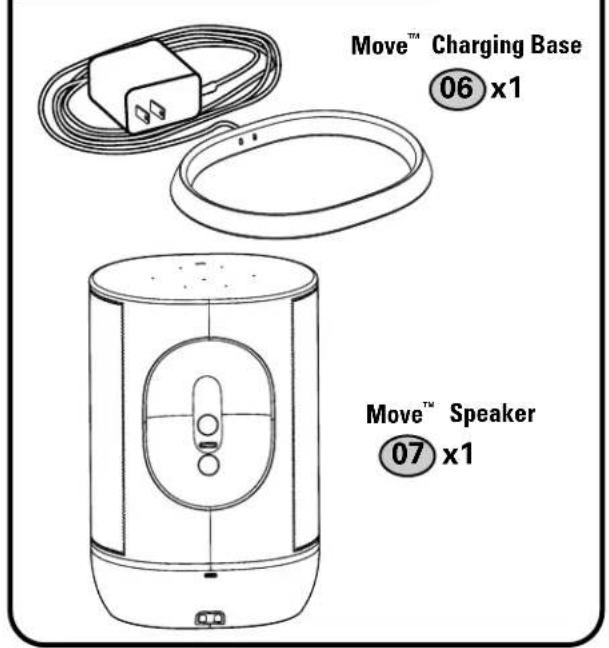
Supplied Parts and Hardware
⚠ WARNING: This product contains small items that could be a choking hazard if swallowed.
Before starting assembly, verify all parts are included and undamaged. If any parts are missing or damaged, do not return the damaged item to your dealer; contact Customer Service. Never use damaged parts!

NOTE: Not all hardware included will be used.
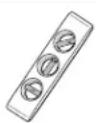
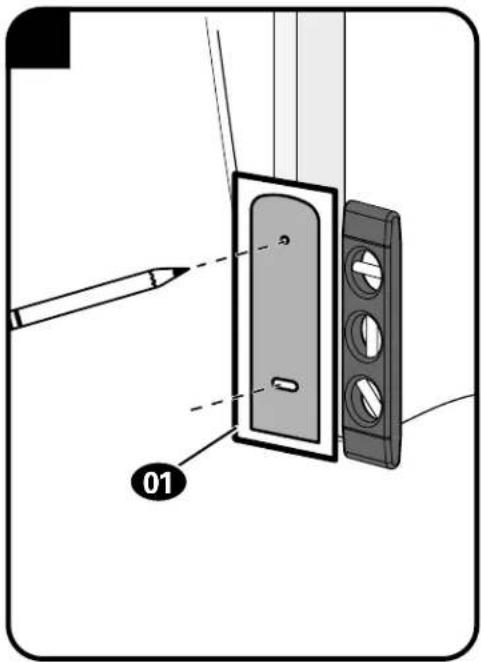
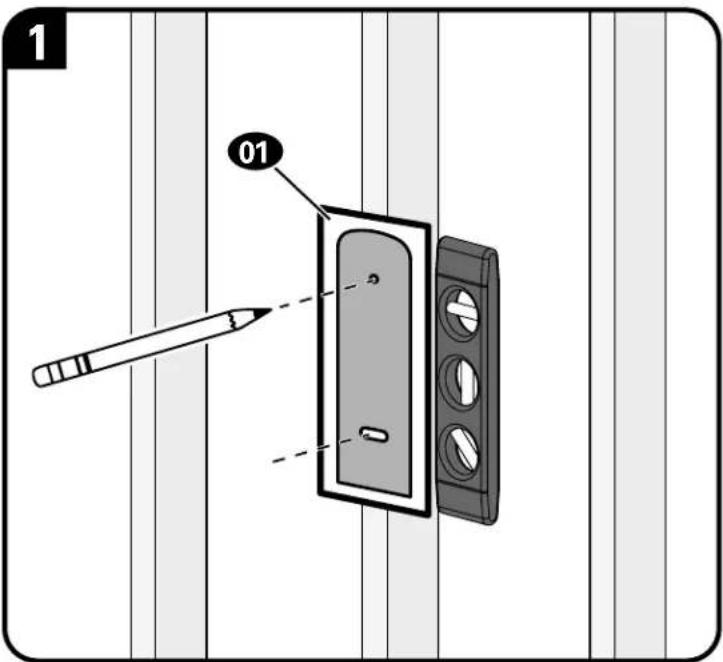
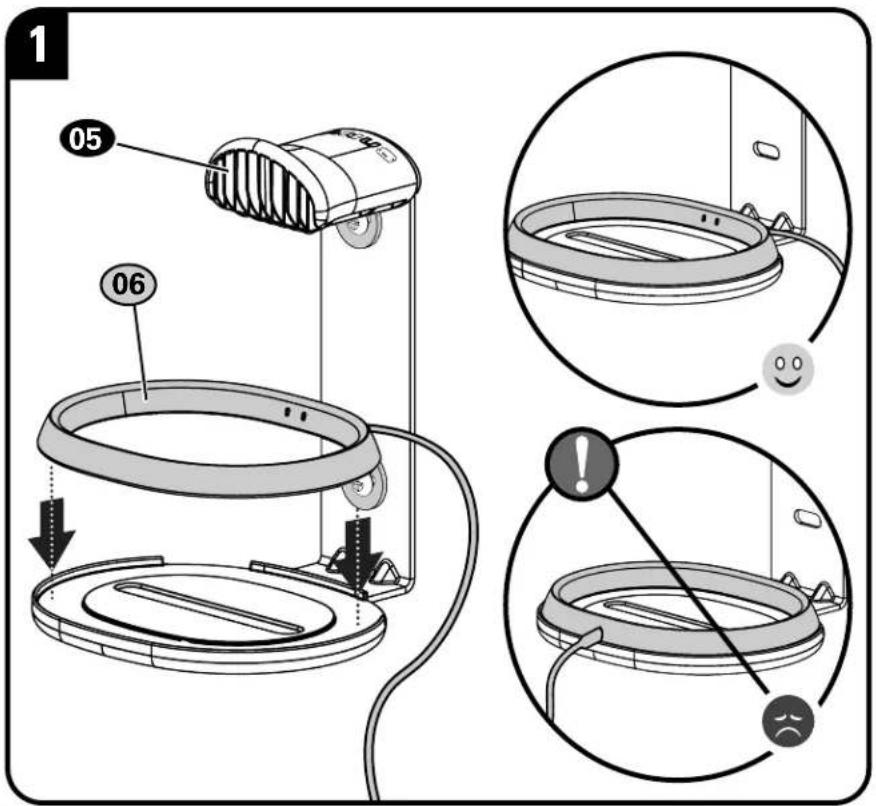
STEP 1 Parts and Hardware
natural_image
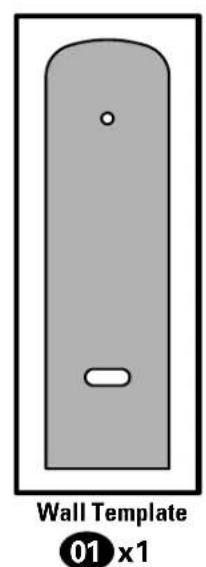
Diagram of a wall template with a slot and label (01 x1), no readable text or symbols beyond the label.
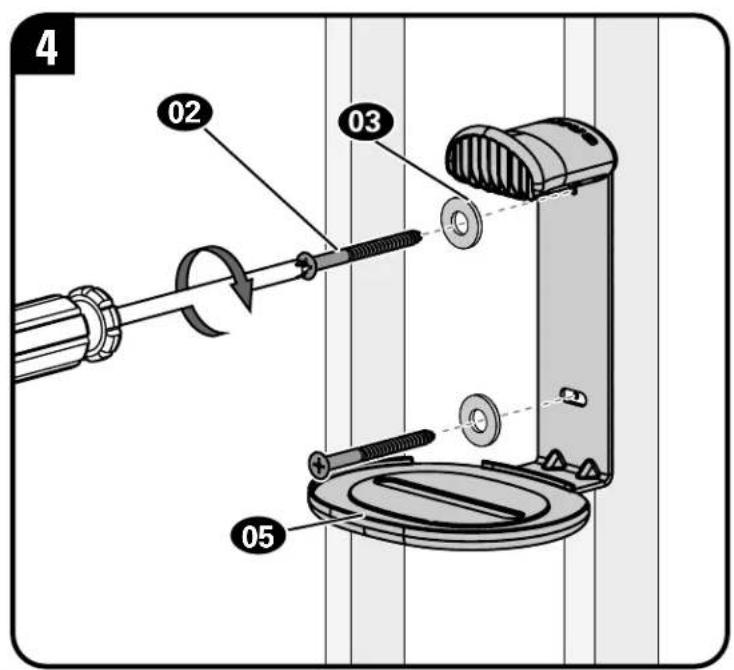
Wall Plate Screw
10 x 1 ^3/4 in.
02 x2

Washer
03 x2
natural_image
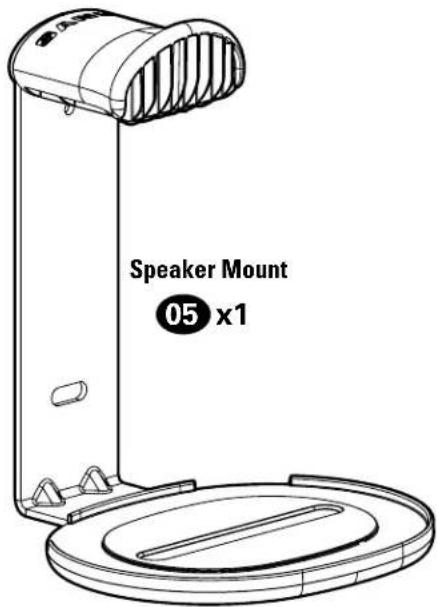
Pure technical line drawing of a symmetrical mechanical or architectural component (no text or symbols)Anchor
04 x2
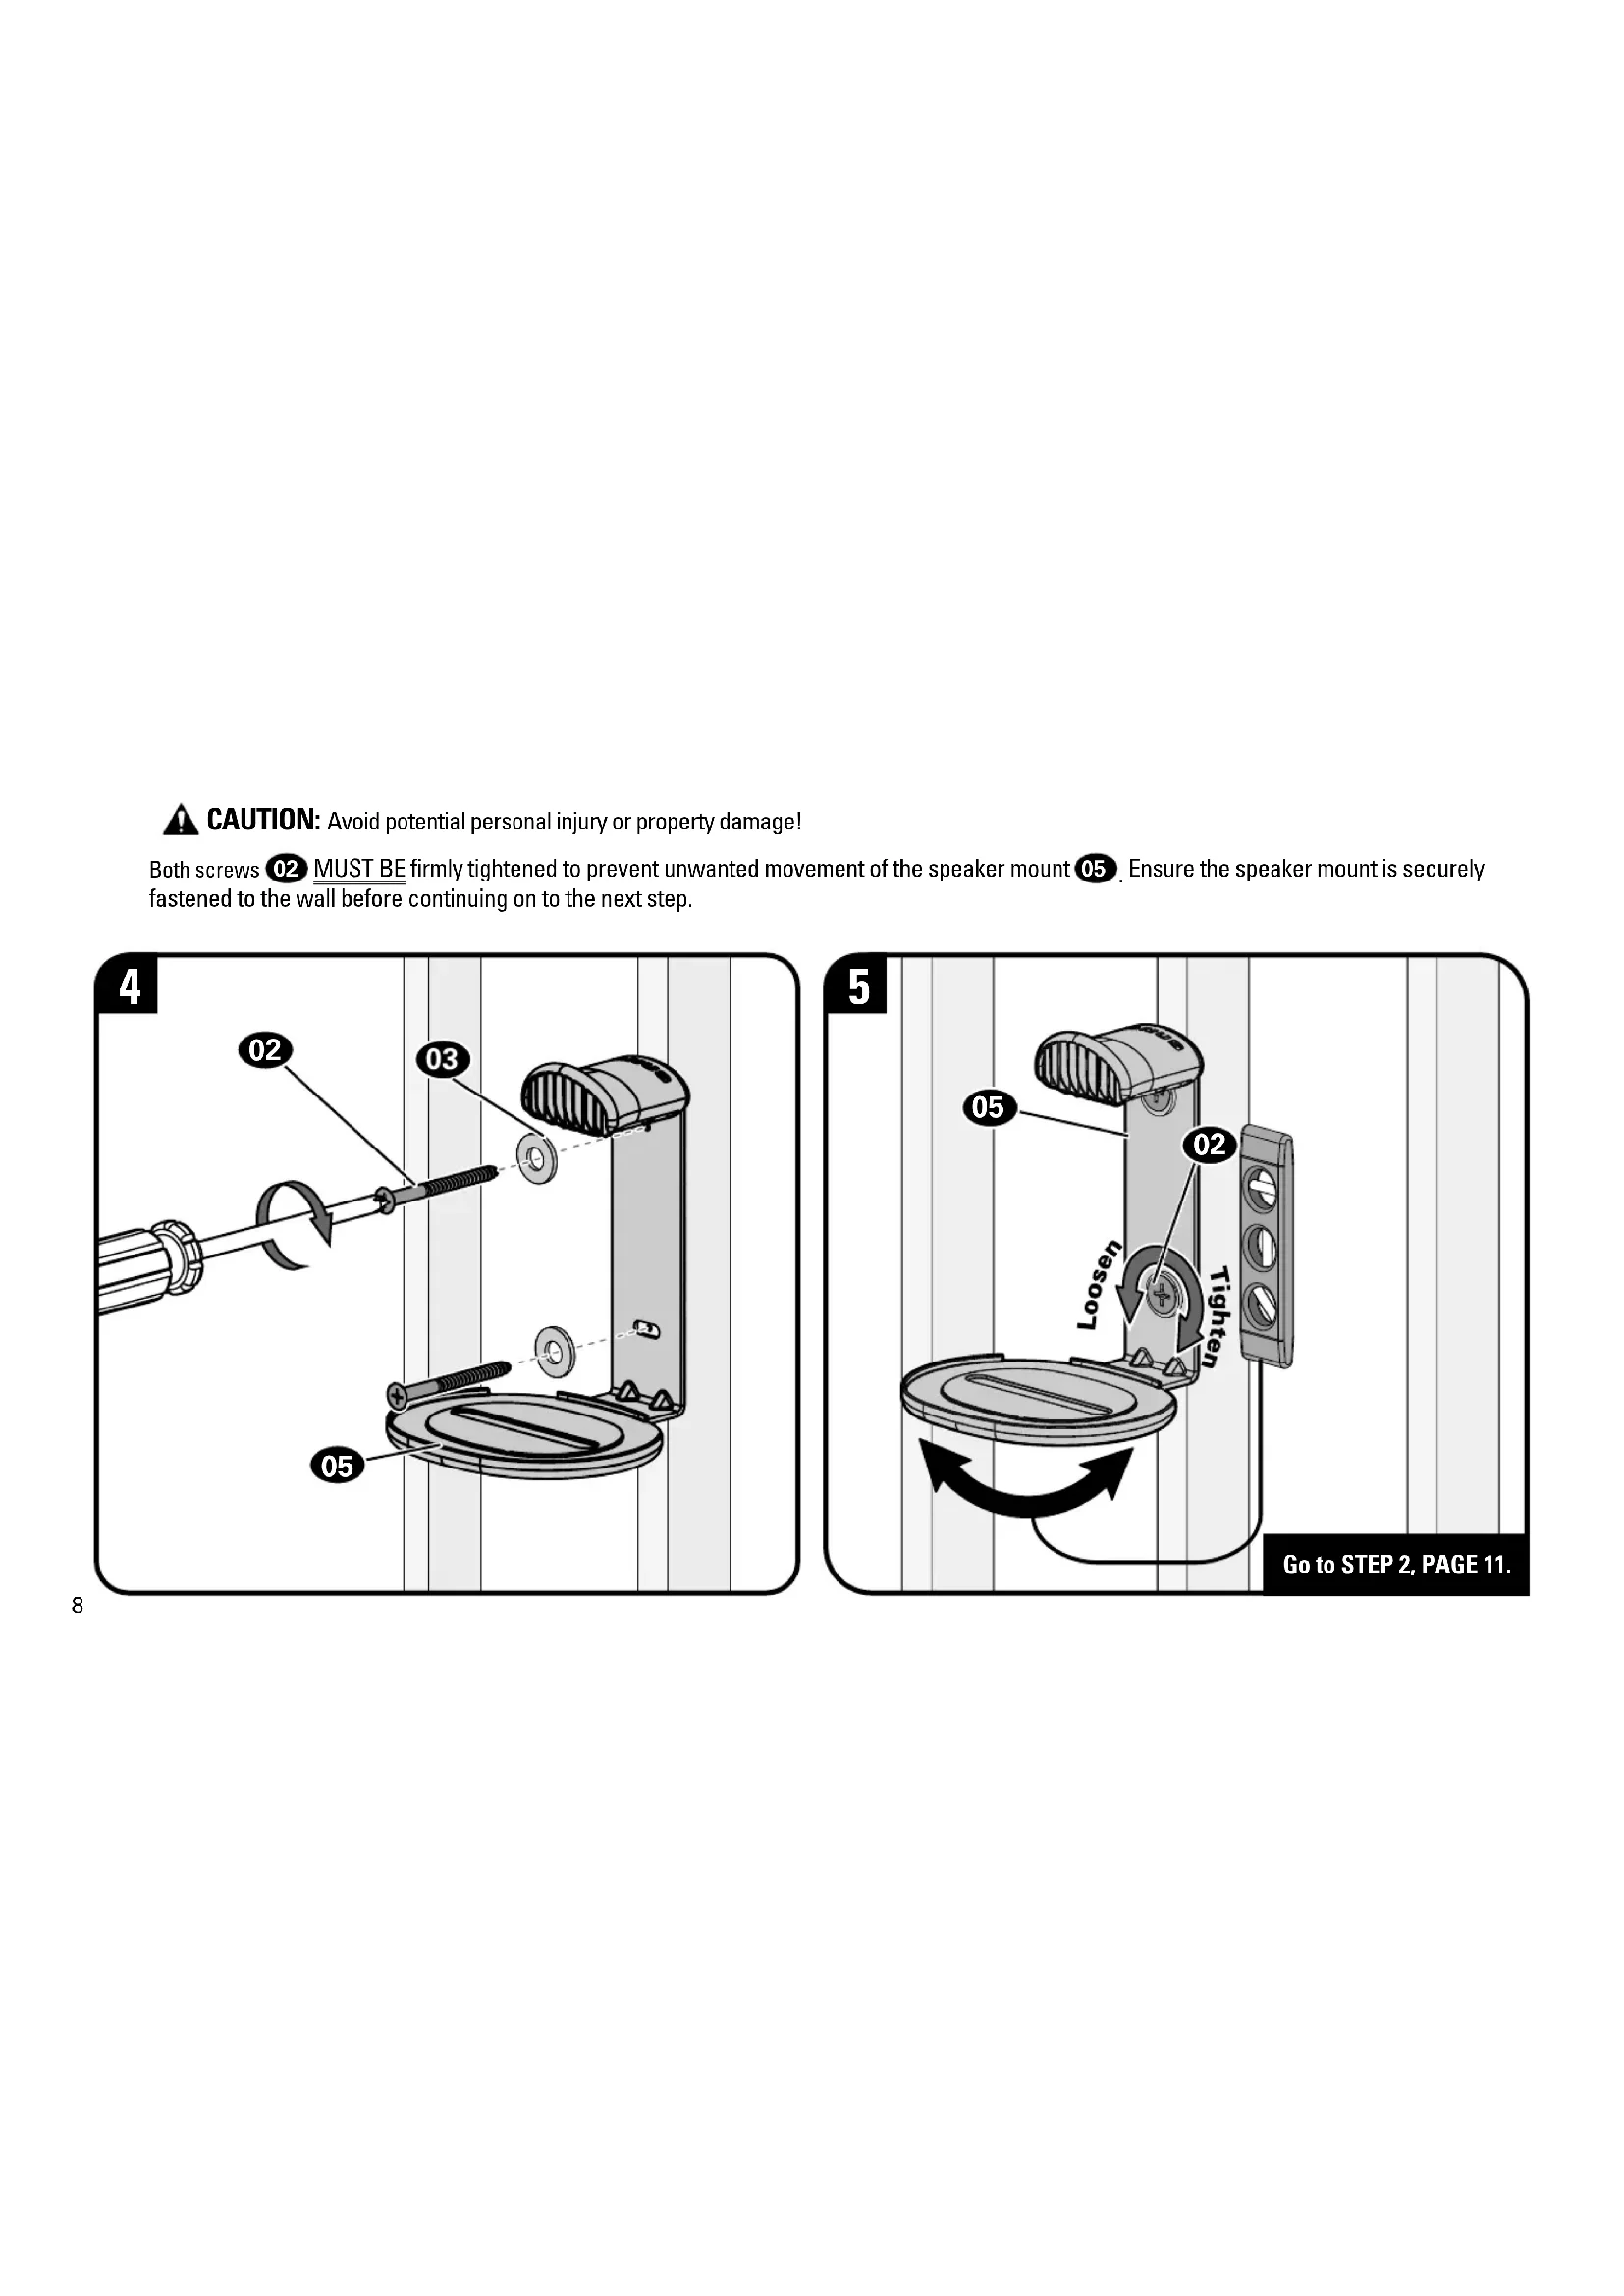
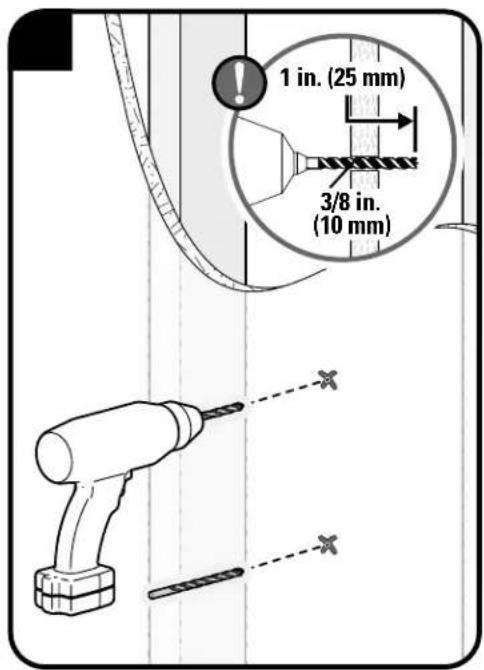
STEP 1A
Wood Stud & Drywall InstallationA

CAUTION: Avoid potential personal injury or property damage!
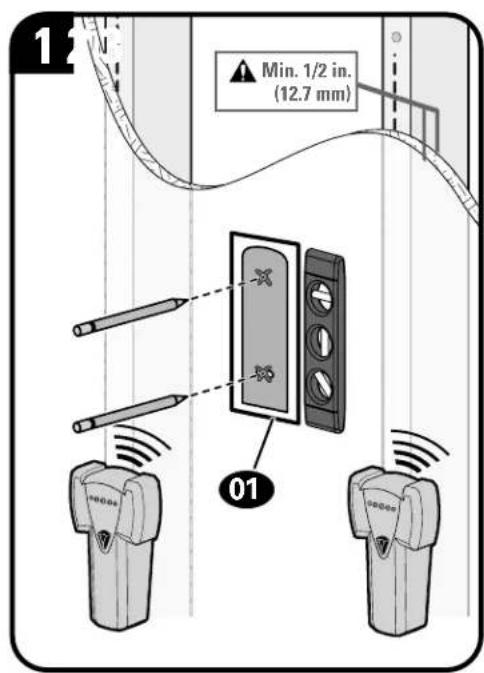
- Drywall covering the wall must not be less than 1/2 in. (12.7 mm)
Minimum wood stud size: nominal 2 x 4 in. (51 x 102 mm) actual 1½ x 3½ in. (38 x 89 mm)
• Stud center must be verified
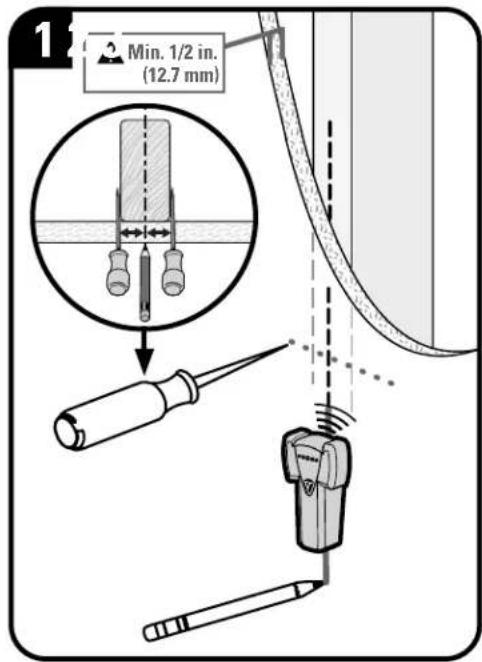
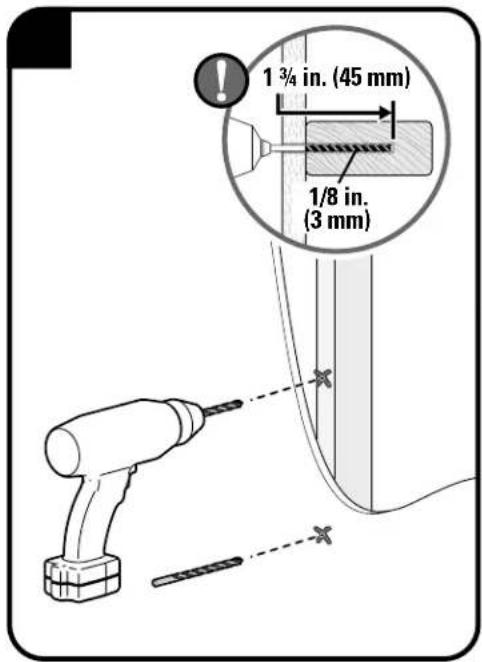
CAUTION: Avoid potential personal injury or property damage!
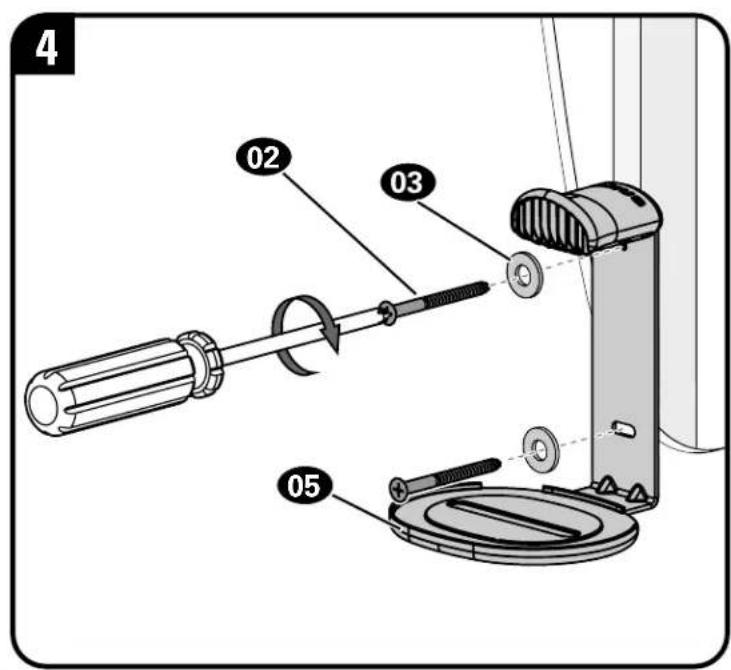
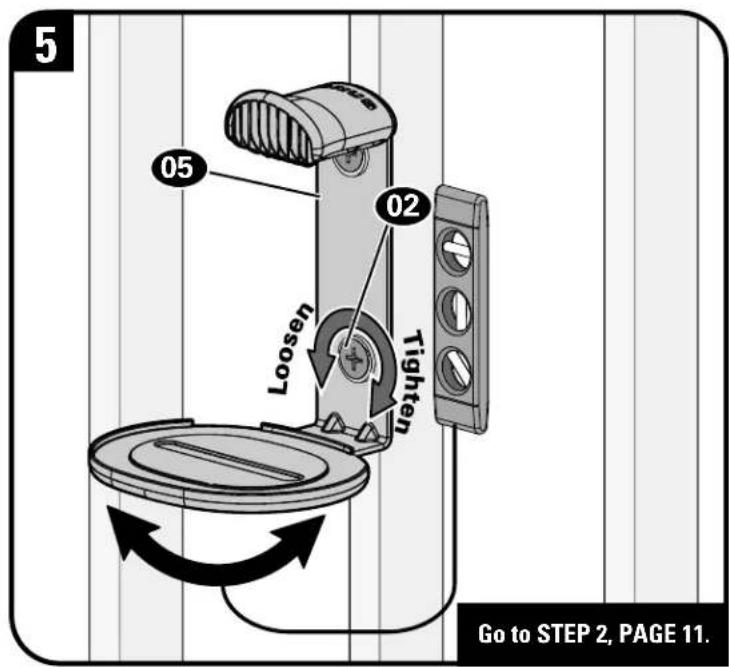
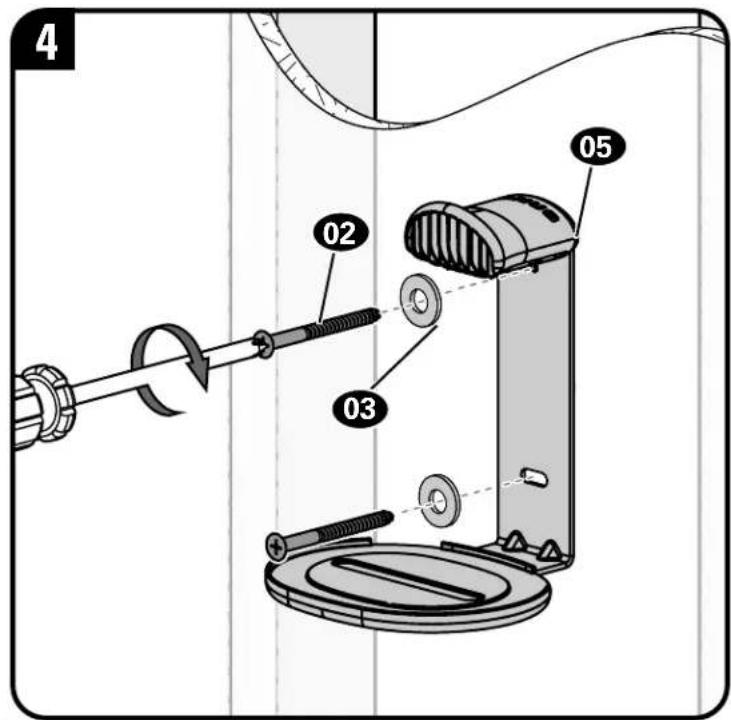
Both screws 02 MUST BE firmly tightened to prevent unwanted movement of the speaker mount 05. Ensure the speaker mount is securely fastened to the wall before continuing on to the next step.

STEP 1B
Wood Stud Only InstallationAttach

CAUTION: Avoid potential personal injury or property damage!
● Minimum wood stud size: nominal 2 x 4 in. (51 x 102 mm) actual 1½ x 3½ in. (38 x 89 mm)
• Stud center must be verified
CAUTION: Avoid potential personal injury or property damage!
Both screws 02 MUST BE firmly tightened to prevent unwanted movement of the speaker mount 05. Ensure the speaker mount is securely fastened to the wall before continuing on to the next step.
STEP 1C
Drywall Only InstallationAttach Me
CAUTION: Avoid potential personal injury or property damage!
- Drywall covering the wall must not be less than 1/2 in. (12.7 mm)
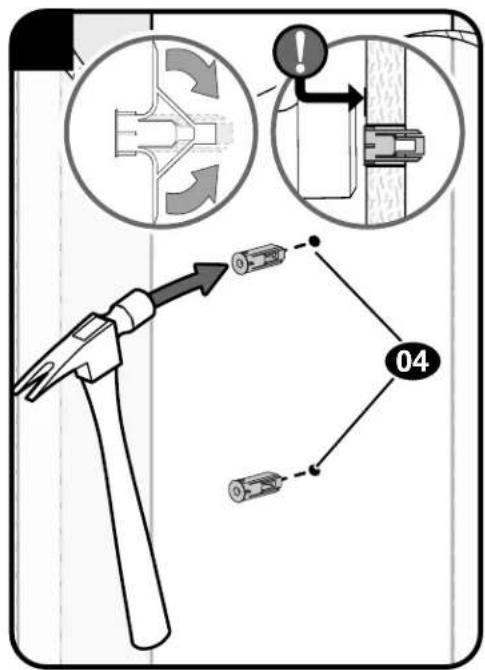
CAUTION: Avoid potential personal injury or property damage!
Both screws 02 MUST BE firmly tightened to prevent unwanted movement of the speaker mount 05. Ensure the speaker mount is securely fastened to the wall before continuing on to the next step.
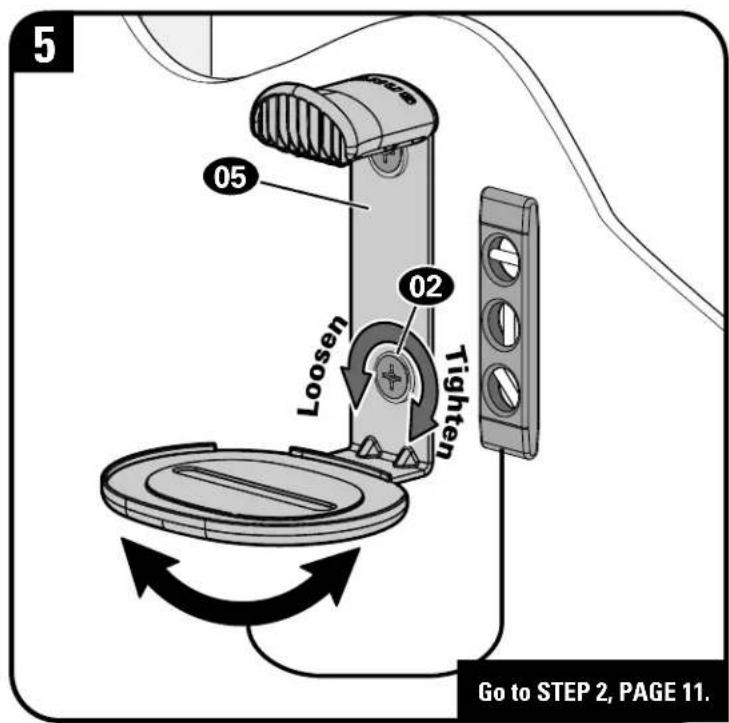
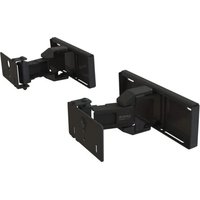
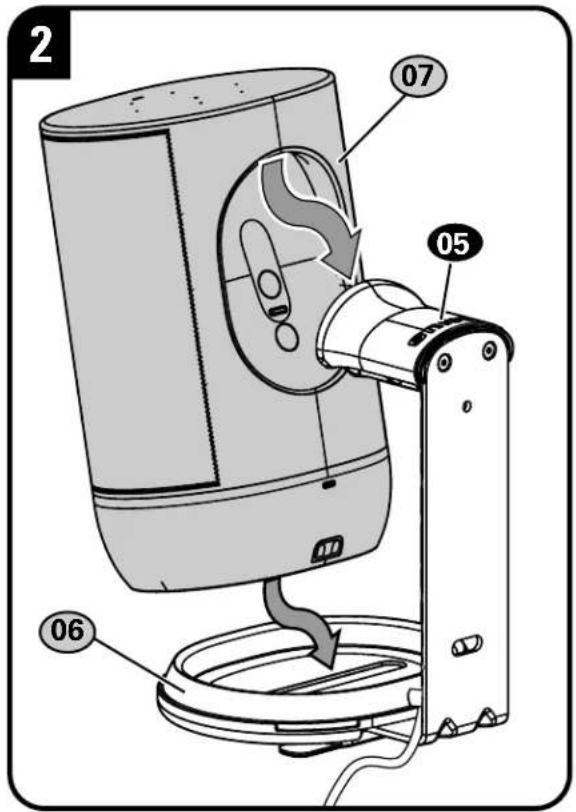
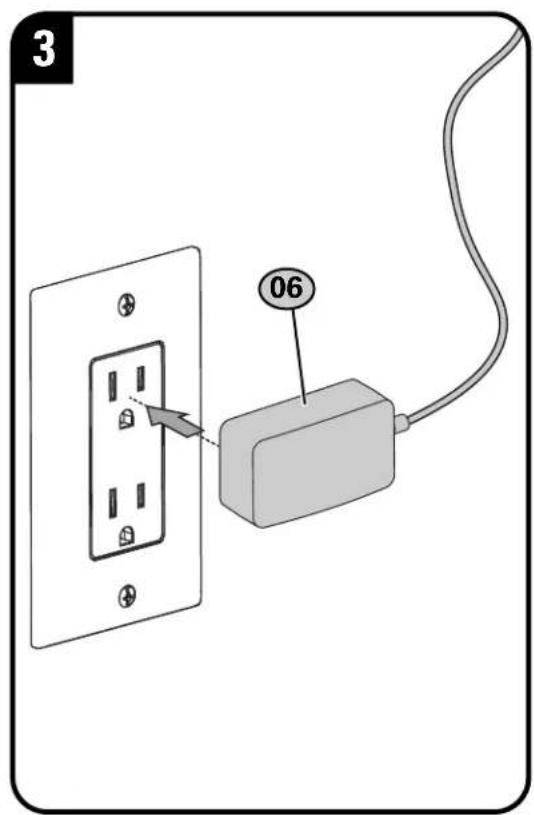
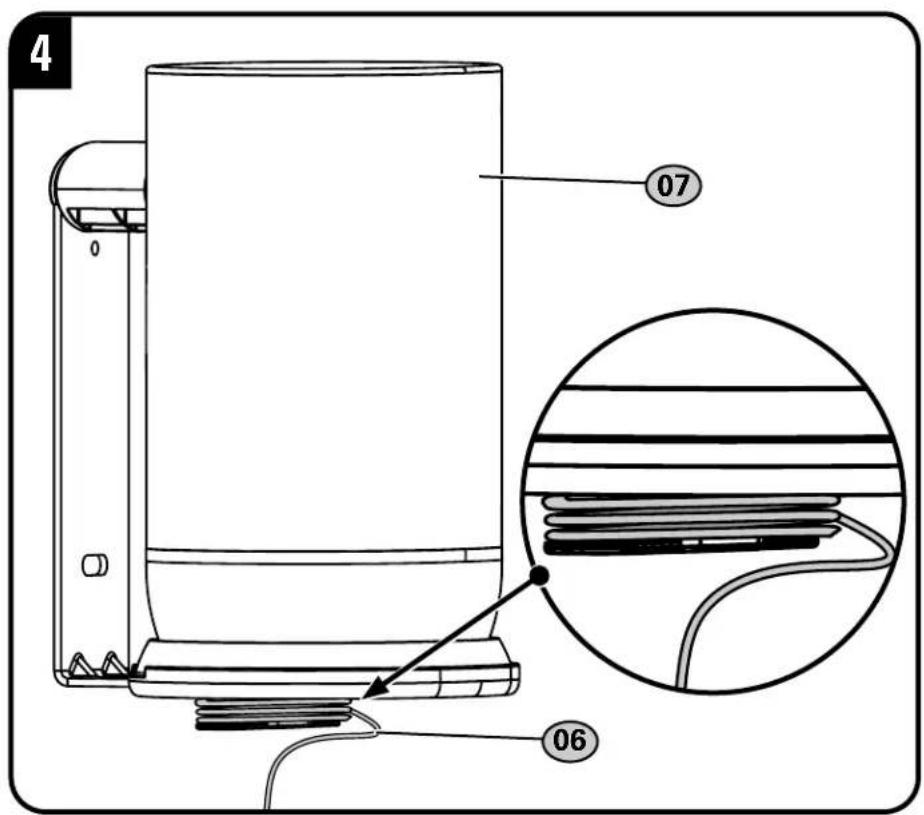
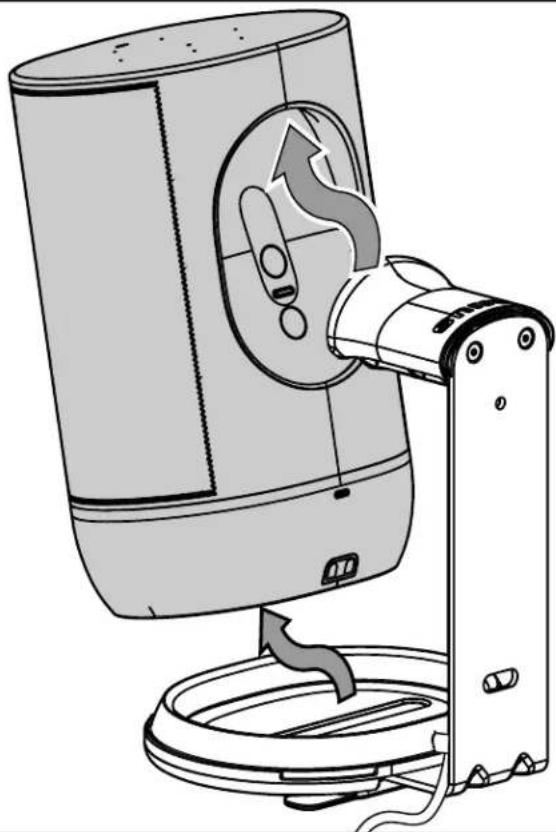
STEP 2
Attach Speaker to Mount

For a helpful install video, visit SANUS.com/2910.

NOTE: Sonos® Move™ Speaker and Sonos® Move™ Charging Base are NOT INCLUDED.

NOTE: Sonos® Move™ Charging Base is OPTIONAL and ONLY recommended for indoor mounting applications.
STEP 2 Parts

TIP: Set up your Sonos® speaker prior to mounting.
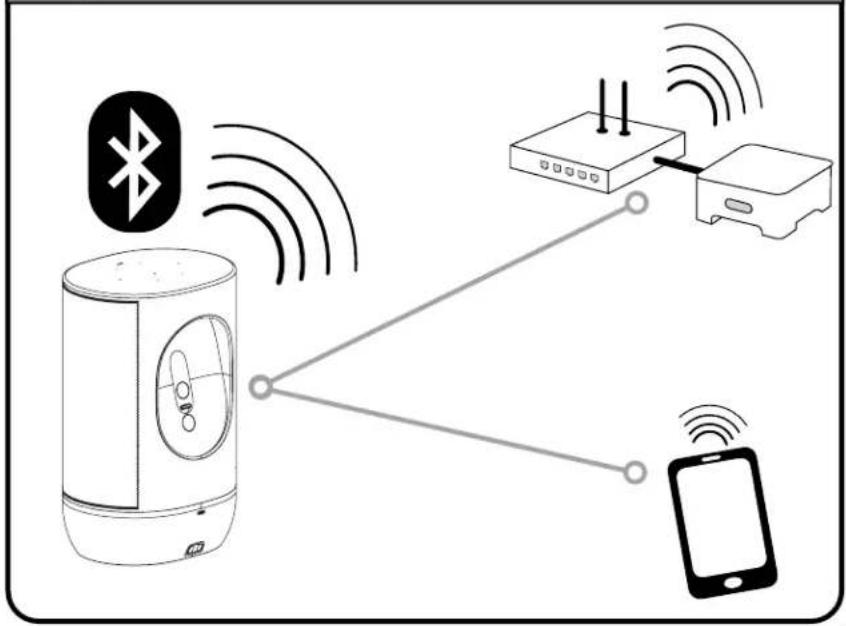
flowchart
graph TD
    A["Bluetooth"] -->|Wireless Signal| B["Device"]
    C["Mobile Phone"] -->|Wireless Signal| B
    B --> D["Device"]
    style A fill:#f9f,stroke:#333
    style C fill:#f9f,stroke:#333
    style B fill:#ccf,stroke:#333
    style D fill:#cff,stroke:#333
STEP 2
Attach Speaker to Mount
Remove
natural_image
Diagram of a portable air conditioner unit with a rotating arm and base mount (no text or symbols)ESPAÑOL
Thank you for choosing SANUS!
Please take a moment to let us know how we did:
Legrand AV
Global Headquarters
6436 City West Parkway
Eden Prairie, MN 55344, USA
P: 800-359-5520
info@legrand.com
SANUS.com
Legrand AV
EMEA Headquarters
Legrand AV Inc. and its affiliated corporations and subsidiaries (collectively, "Legrand"), intend to make this manual accurate and complete. However, Legrand makes no claim that the information contained herein covers all details, conditions, or variations. Nor does it provide for every possible contingency in connection with the installation or use of this product. The information contained in this document is subject to change without notice or obligation of any kind. Legrand makes no representation of warranty, expressed or implied, regarding the information contained herein. Legrand assumes no responsibility for accuracy, completeness or sufficiency of the information contained in this document.
©2020 Legrand AV Inc. All rights reserved. SANUS is a division of Legrand. SANUS and the SANUS logo are registered trademarks.
Legrand AV Inc. • 6436 City West Parkway • Eden Prairie, MN 55344 USA
6901-602664 00