WSSATM1 - Speaker stands SANUS - Free user manual and instructions
Find the device manual for free WSSATM1 SANUS in PDF.
User questions about WSSATM1 SANUS
0 question about this device. Answer the ones you know or ask your own.
Ask a new question about this device
Download the instructions for your Speaker stands in PDF format for free! Find your manual WSSATM1 - SANUS and take your electronic device back in hand. On this page are published all the documents necessary for the use of your device. WSSATM1 by SANUS.
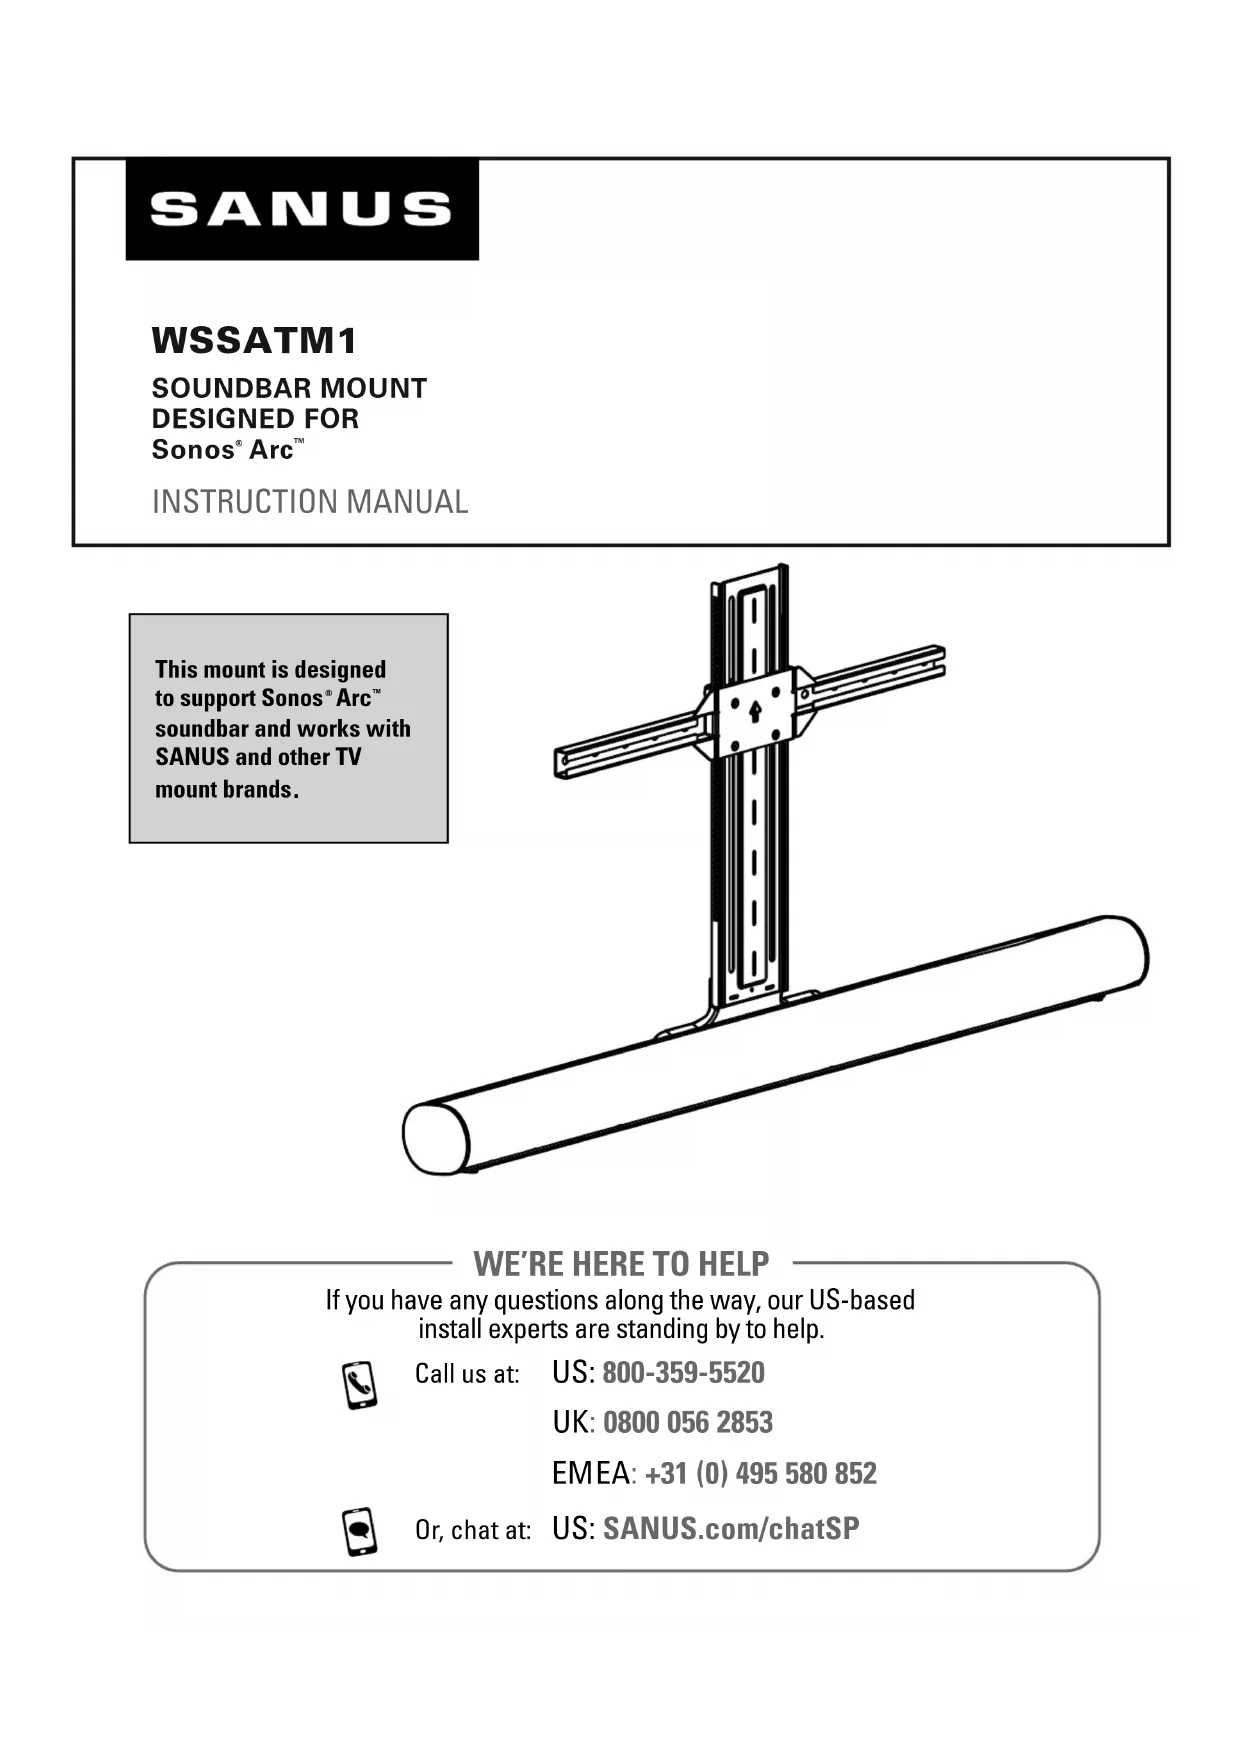
USER MANUAL WSSATM1 SANUS
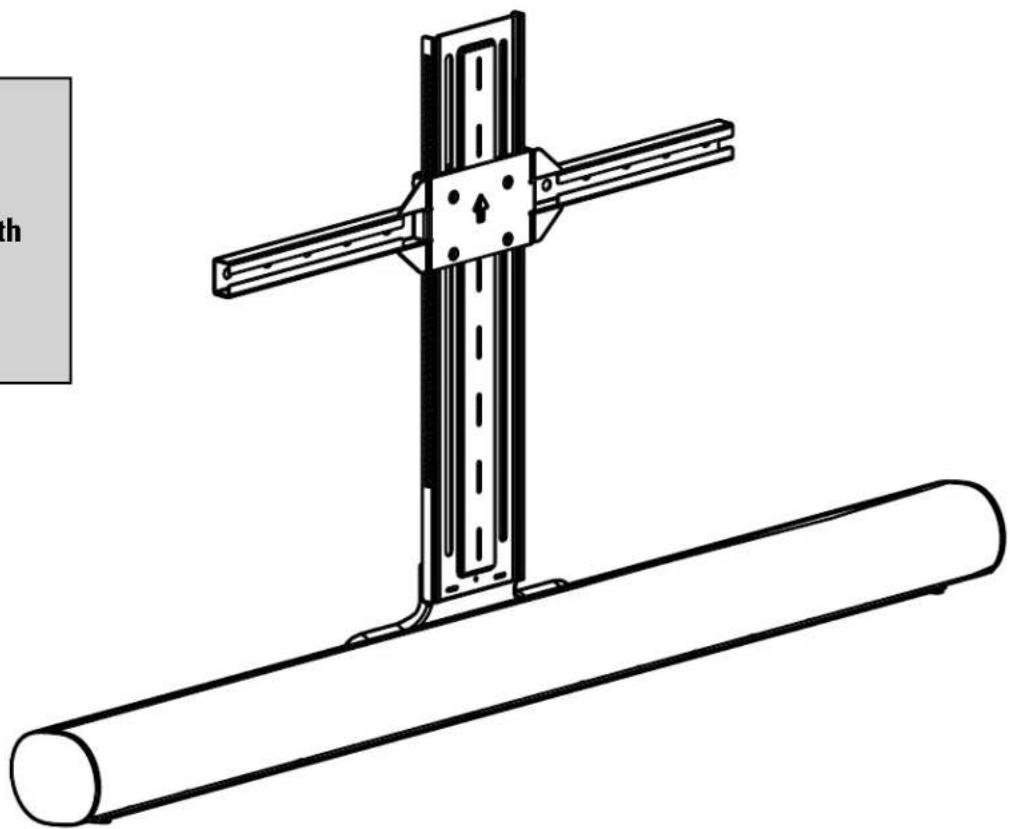
This mount is designed to support Sonos® Arc™ soundbar and works with SANUS and other TV mount brands.
natural_image
Technical line drawing of a mechanical assembly with a cross-shaped component and a cylindrical shaft (no text or symbols)WE'RE HERE TO HELP
If you have any questions along the way, our US-based install experts are standing by to help.

Call us at: US: 800-359-5520
UK: 0800 056 2853
EMEA: +31 (0) 495 580 852

Or, chat at: US: SANUS.com/chatSP
IMPORTANT SAFETY INSTRUCTIONS. READ ENTIRE MANUAL PRIOR TO USE. SAVE THESE INSTRUCTIONS
Before getting started, let's make sure this product is perfect for you!
CAUTION: To avoid potential personal injuries and property damage:
- This soundbar mount is only designed for use with the Sonos® Arc™ speaker.
- This soundbar mount is only designed for use with TV wall mounts that meet third party safety certifications (UL).
- This soundbar mount is ONLY designed to mount below the television.
- The weight of the soundbar mount and Sonos ^® Arc ^™ speaker is 21 pounds; The weight of the TV, soundbar mount, and soundbar should not exceed the weight rating of the TV mount.
- Please read through these instructions completely to be sure you're comfortable with this easy install process.
- Do not use this product for any purpose not explicitly specified by manufacturer.
● Manufacturer is not responsible for damage or injury caused by incorrect assembly or use.
- If you do not understand these instructions or have doubts about the safety of the installation, assembly or use of this product, contact Customer Service.
Weight Limit DO NOT EXCEED

Tools Needed

DIMENSIONS IN. [MM]
TV INTERFACE
![SANUS WSSATM1 - DIMENSIONS IN. [MM] - 1](/content/2026/04/694388/images/29c94472a1d033f7a2db7208efd175583d3a10cae51ea17d3568cbddbd3bb699.jpg)
text_image
23.6 MAX [600] 7.9 MIN [200]3-D
![SANUS WSSATM1 - DIMENSIONS IN. [MM] - 2](/content/2026/04/694388/images/6806318b2226210902ee362350cf4f35b16f5194ede6eed066c7dca6fb42f9ad.jpg)
natural_image
Technical line drawing of a mechanical assembly with a cylindrical rod and a vertical support (no text or symbols)LOWEST POSITION
![SANUS WSSATM1 - DIMENSIONS IN. [MM] - 3](/content/2026/04/694388/images/b91dbcea82e33066de3a08aee943f3658fbaf929ddca80316287b1ade242f7e0.jpg)
text_image
24.9 [631] 18.5 [469]TOP VIEW - EXTENDED
WALL IS ON TOP
![SANUS WSSATM1 - DIMENSIONS IN. [MM] - 4](/content/2026/04/694388/images/b1609b715930af8393b5028ea98e70aacc6e8d8054cf01fd0089d4e7363df5fa.jpg)
SIDE VIEW - EXTENDED
![SANUS WSSATM1 - DIMENSIONS IN. [MM] - 5](/content/2026/04/694388/images/f9e07ffd5326bbb261d3c4c587d908619e518874f5a9b326bc3eb428b6540bcf.jpg)
text_image
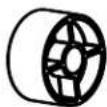
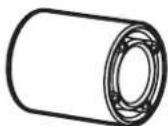
0.7 [19] 24.0 [610.2] 5.1 [128.5]SUPPLIED PARTS AND HARDWARE

WARNING: This product contains small items that could be a choking hazard if swallowed.
Before starting assembly, verify all parts are included and undamaged. If any parts are missing or damaged, DO NOT return the damaged item to your dealer; contact Sanus (see back page). Never use damaged parts!

NOTE: Not all hardware included in this kit will be used.

text_image
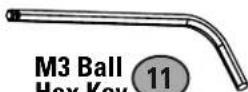
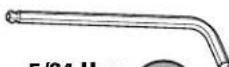
Not all hardware included in this kit will be used. Soundbar Mount 3 (qty. 1) Mount Spacer 7 (qty. 2) M5 x 8 mm Screw 4 (qty. 4) 22mm Spacer 8 (qty. 4) M5 x 25 mm Screw 5 (qty. 2) M3 Ball Hex Key 11 (qty. 1) 5/64 Hex Key 12 (qty. 1) Vertical Assembly 1 (qty. 1) Extension Arm 2 (qty. 2)

M6/M8 Washer
(qty. 4)
M6 x 30mm

M6 x 40mm

M6 x 55mm

M8 x 35mm
M8 x 45mm

M8 x 55mm

M8 x 70mm

TV Screws
(qty. 4) each


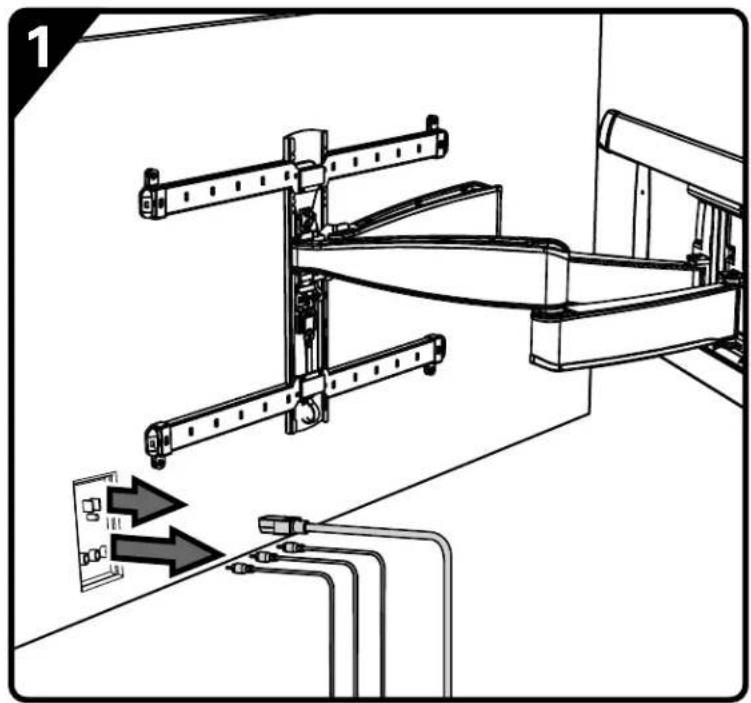
PREPARE YOUR TV (IF MOUNTED)


CAUTION: Follow your TV mount's manual for instructions on how to safely remove your TV and TV bracket.

NOTE: Your TV wall mount may vary from the illustrations throughout this manual — the procedure to install the adbar is the same.
natural_image
Technical diagram of a mechanical assembly with two parts, showing structural components and directional arrows (no text or symbols)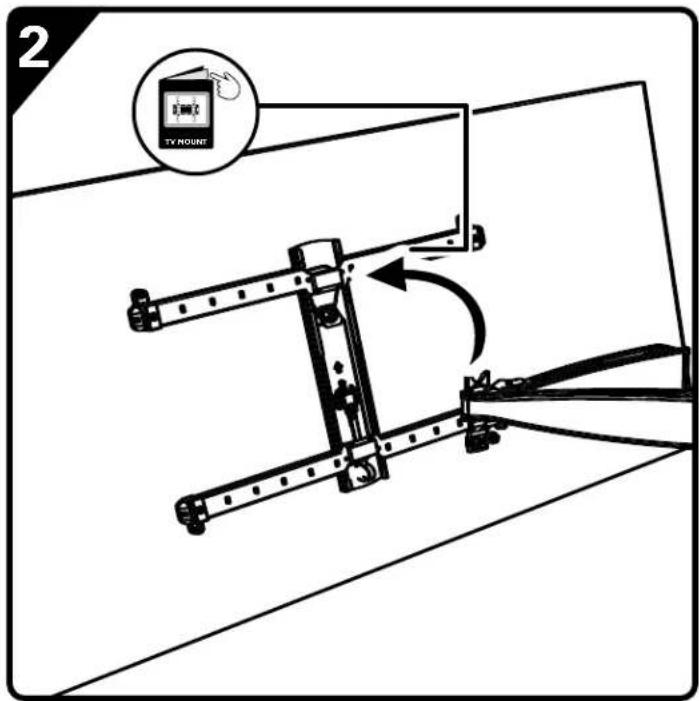
text_image
2 TV MOUNT
text_image
3 TV MOUNT TOSS (Old TV mount hardware) REUSE (if needed) NOTE: TV mount hardware will be replaced.ATTACH SOUNDBAR MOUNT TO YOUR TV
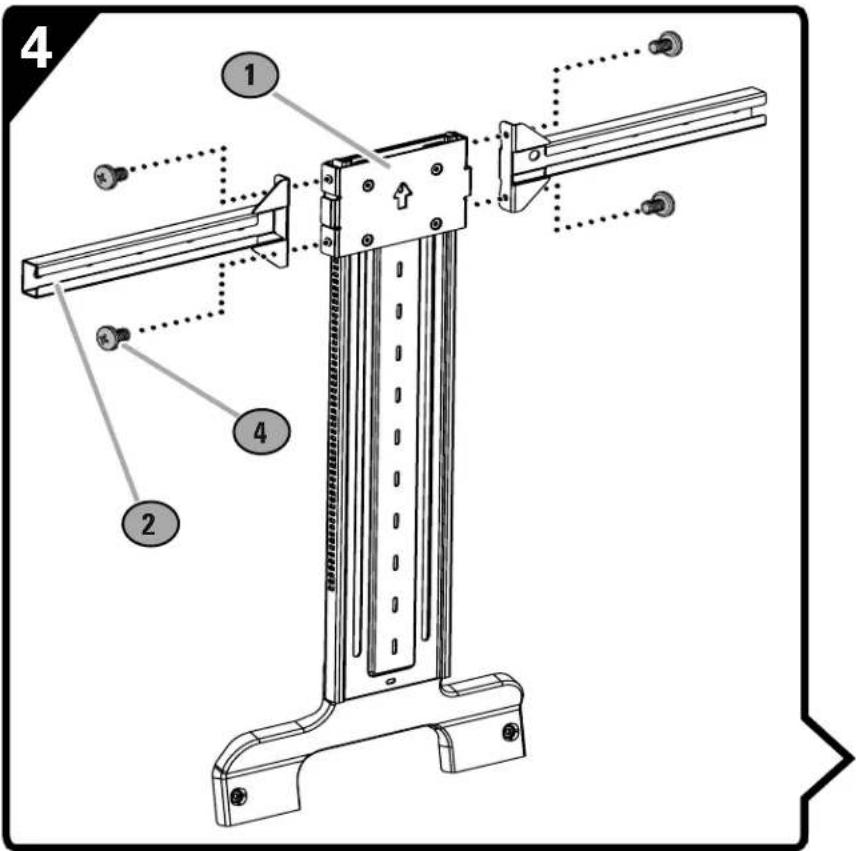
ASSEMBLE TV INTERFACE MOUNT
text_image
4 1 2 4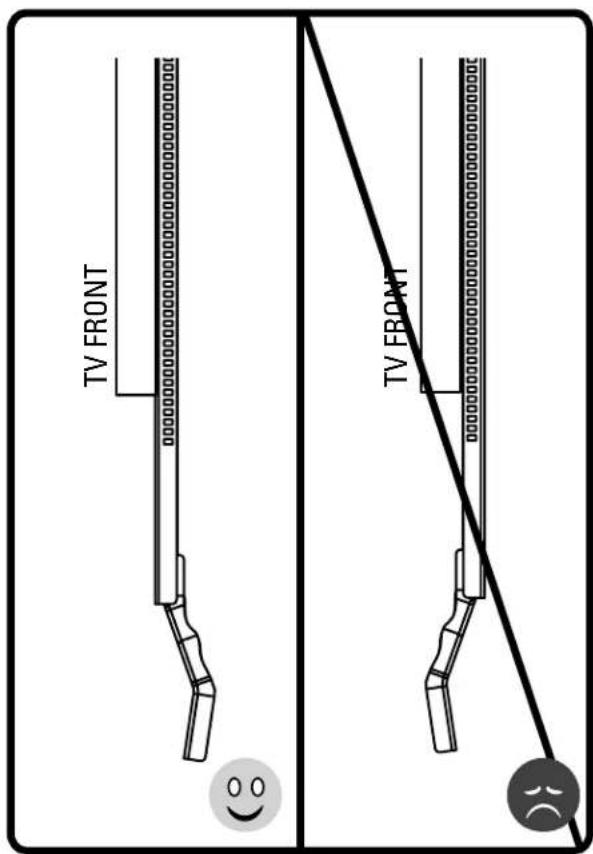
text_image
TV FRONT TV FRONT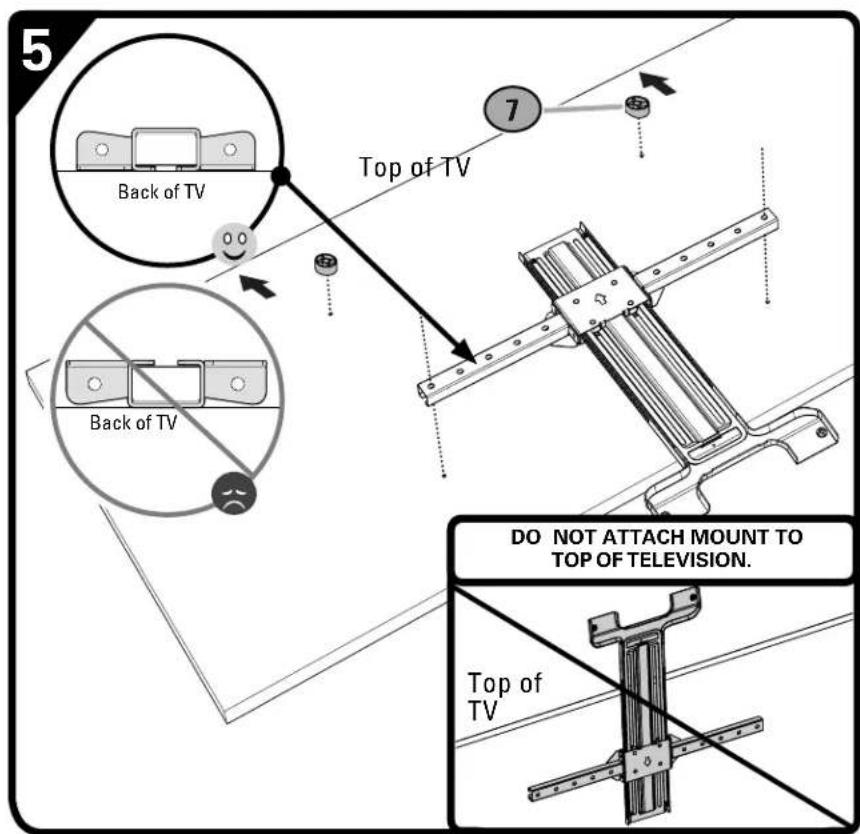
text_image
5 Back of TV Top of TV 7 Back of TV DO NOT ATTACH MOUNT TO TOP OF TELEVISION. Top of TV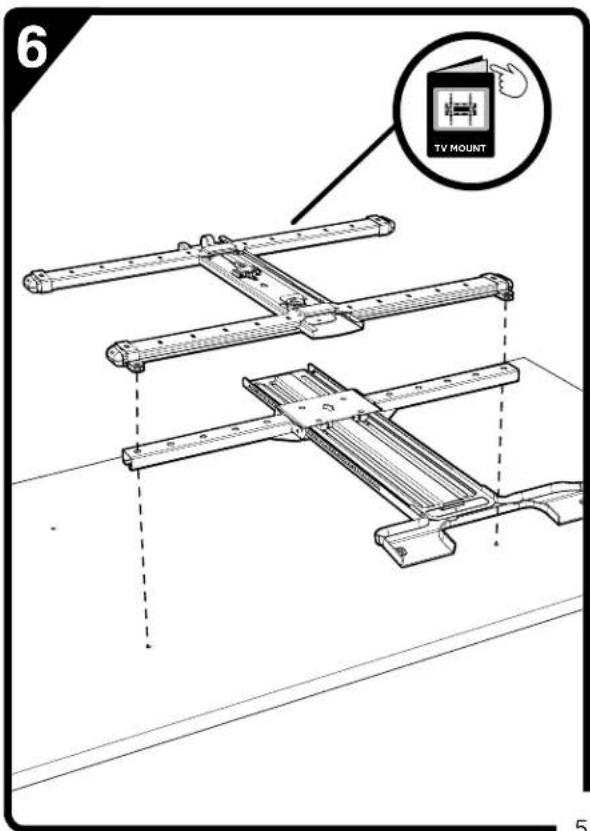
text_image
6 TV MOUNT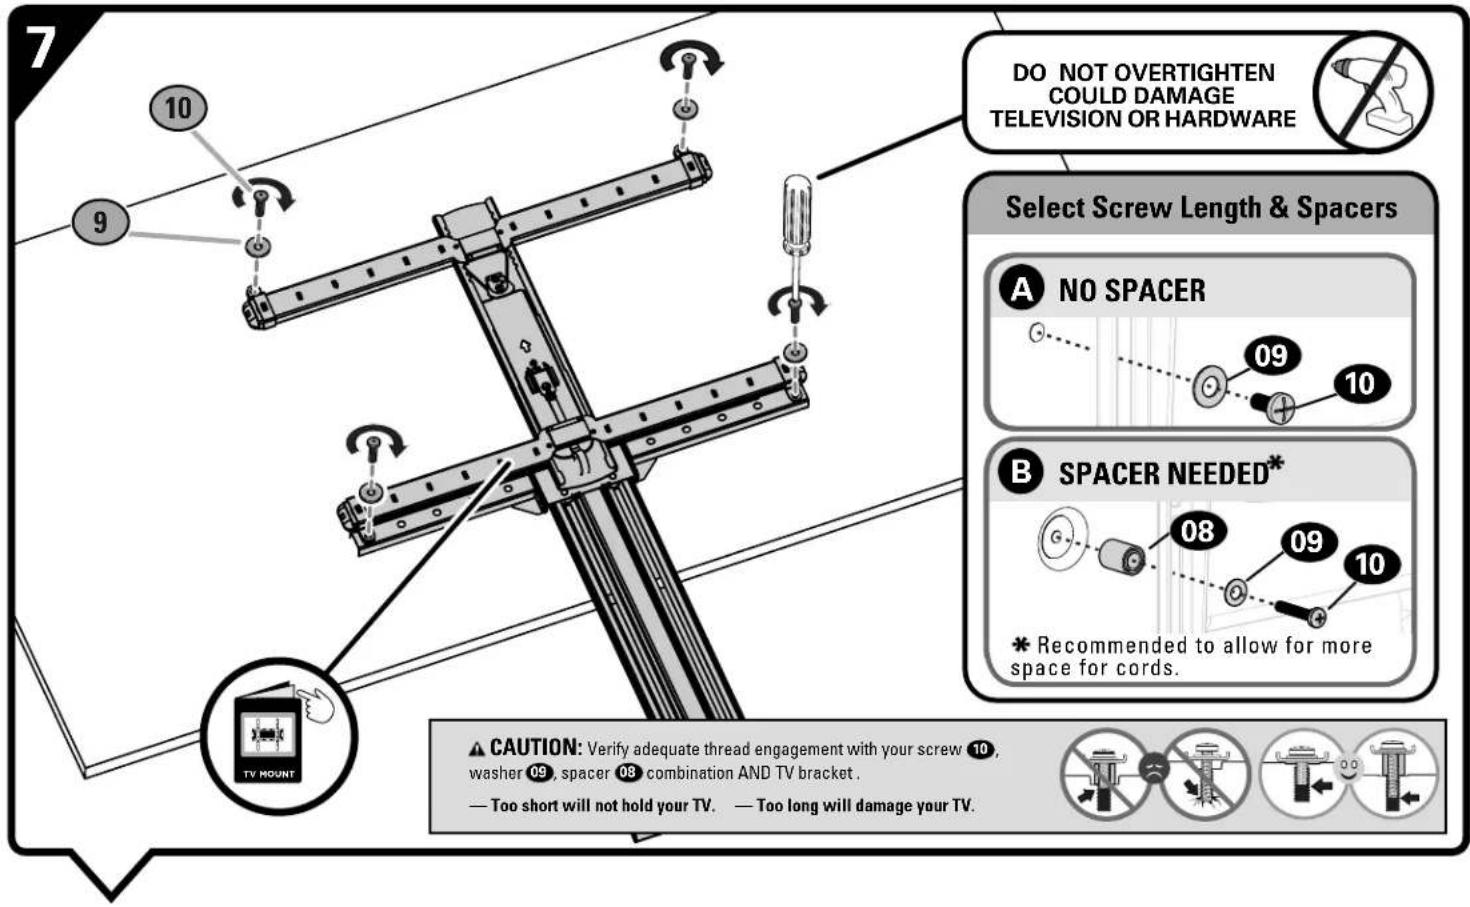
text_image
DO NOT OVERTIGHTEN COULD DAMAGE TELEVISION OR HARDWARE Select Screw Length & Spacers A NO SPACER 09 10 B SPACER NEEDED* 08 09 10 * Recommended to allow for more space for cords. ▲ CAUTION: Verify adequate thread engagement with your screw 10, washer 09, spacer 08 combination AND TV bracket . — Too short will not hold your TV. — Too long will damage your TV.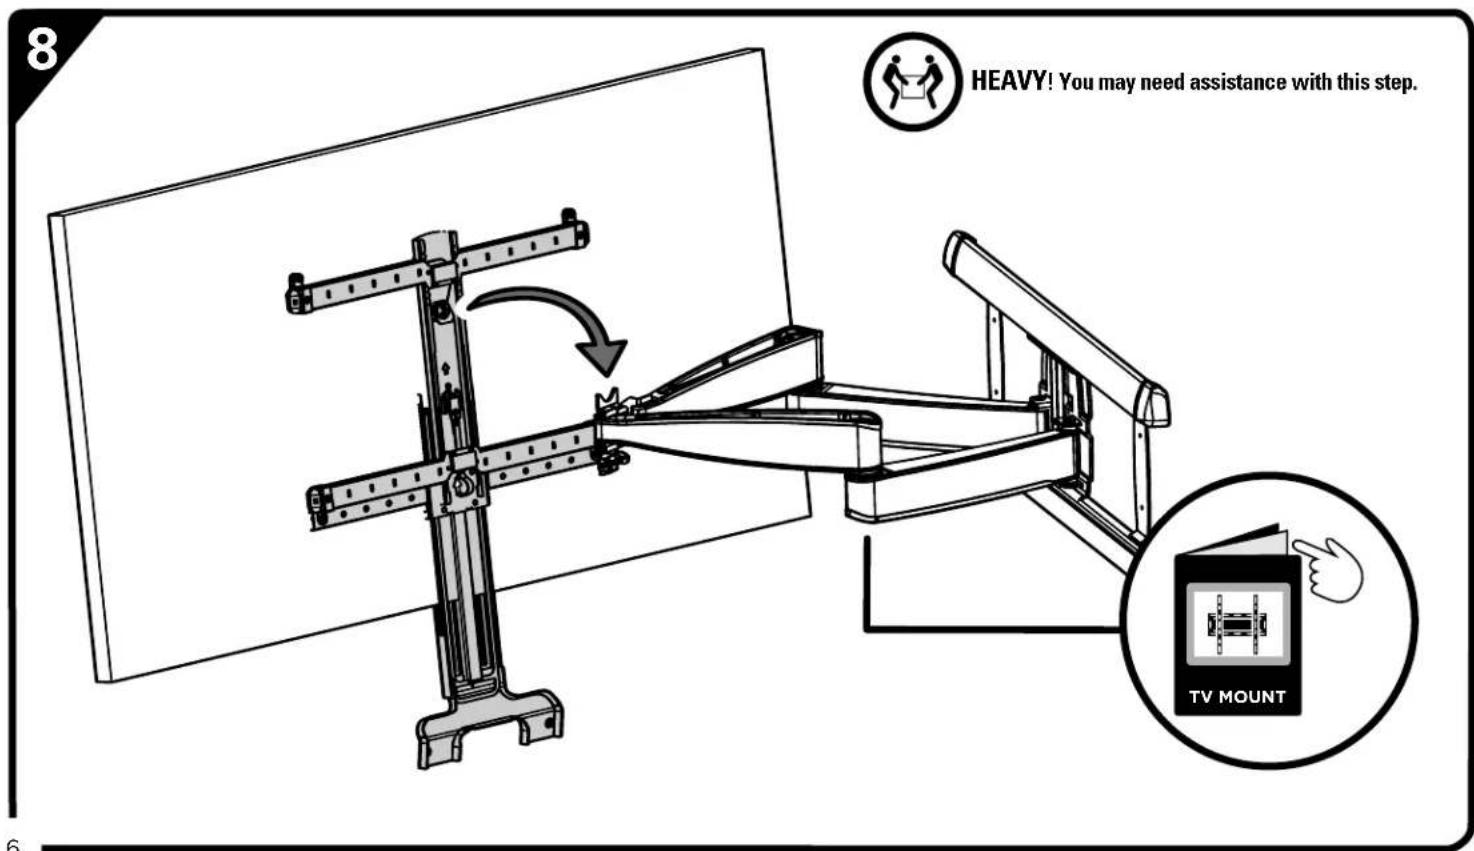
text_image
8 HEAVY! You may need assistance with this step. TV MOUNTATTACH SONOS® ARC™ MOUNT TO TV INTERFACE MOUNT
text_image
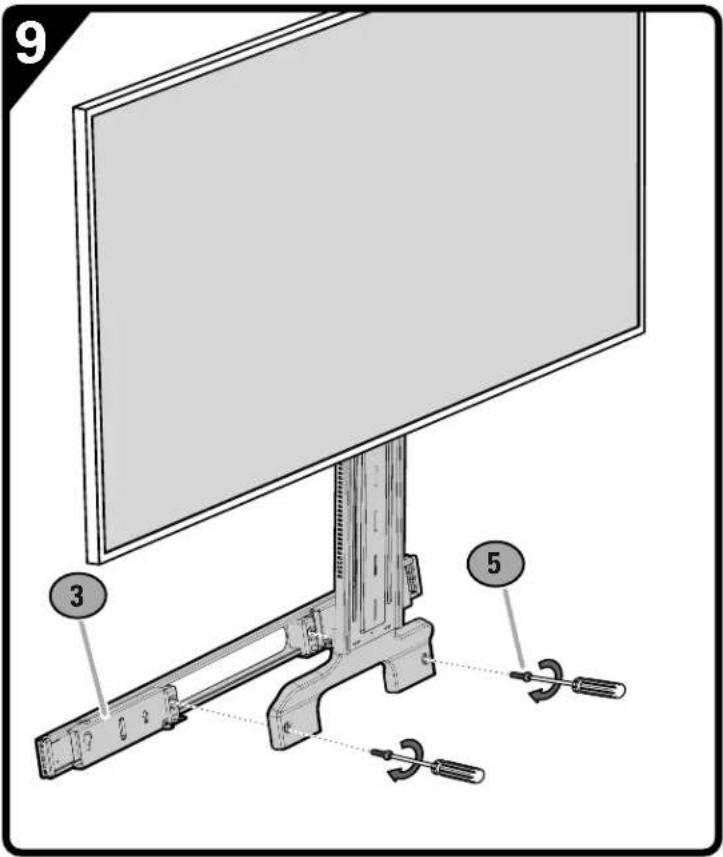
9 3 5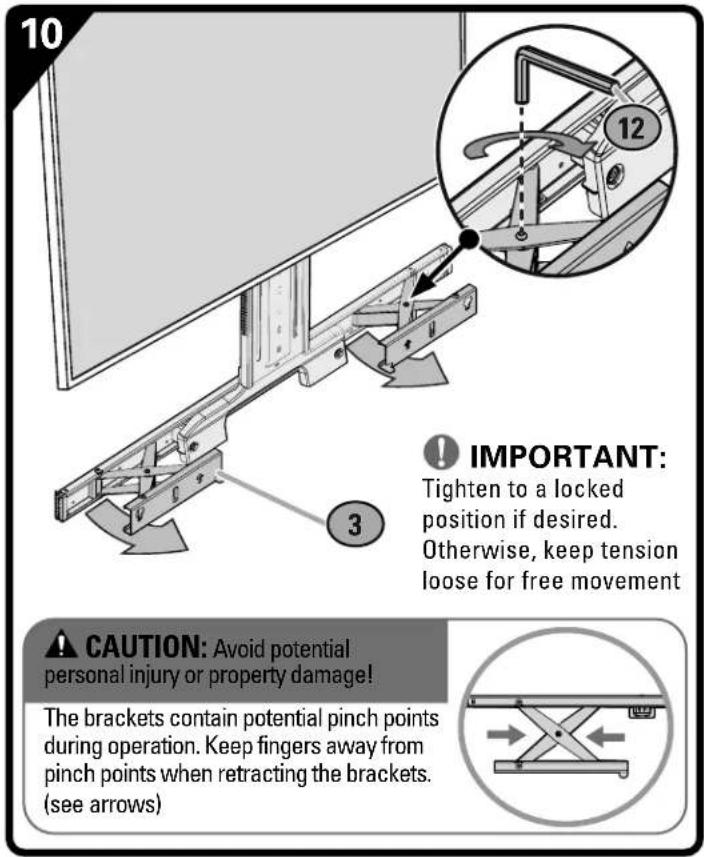
text_image
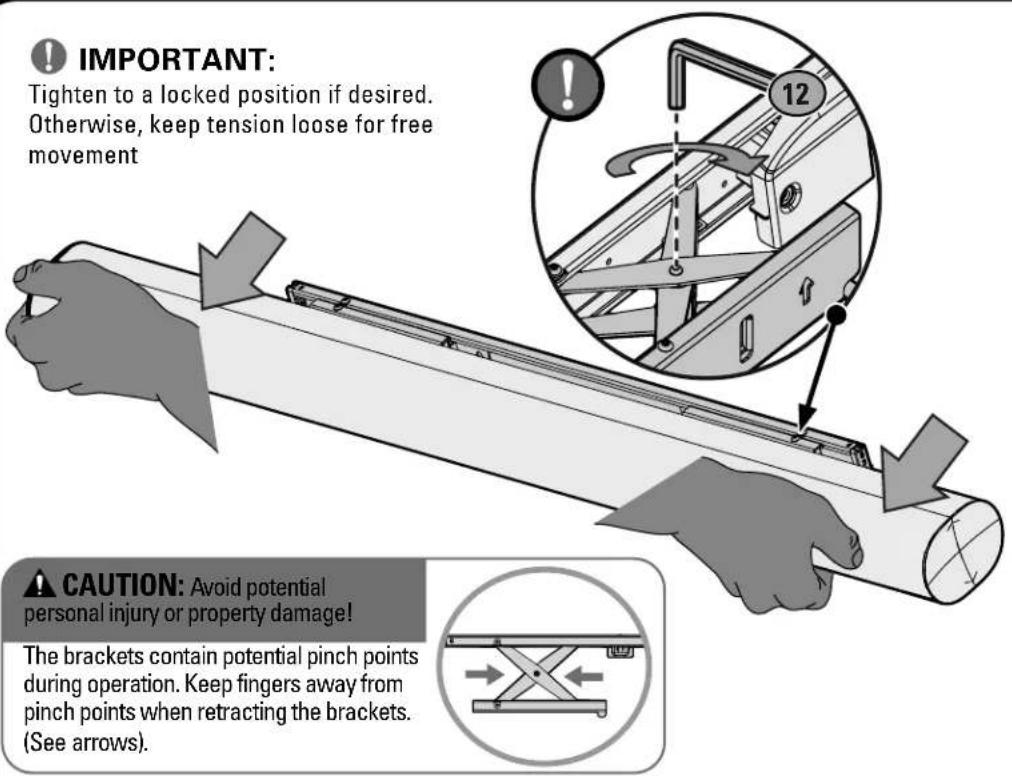
10 IMPORTANT: Tighten to a locked position if desired. Otherwise, keep tension loose for free movement 3 CAUTION: Avoid potential personal injury or property damage! The brackets contain potential pinch points during operation. Keep fingers away from pinch points when retracting the brackets. (see arrows)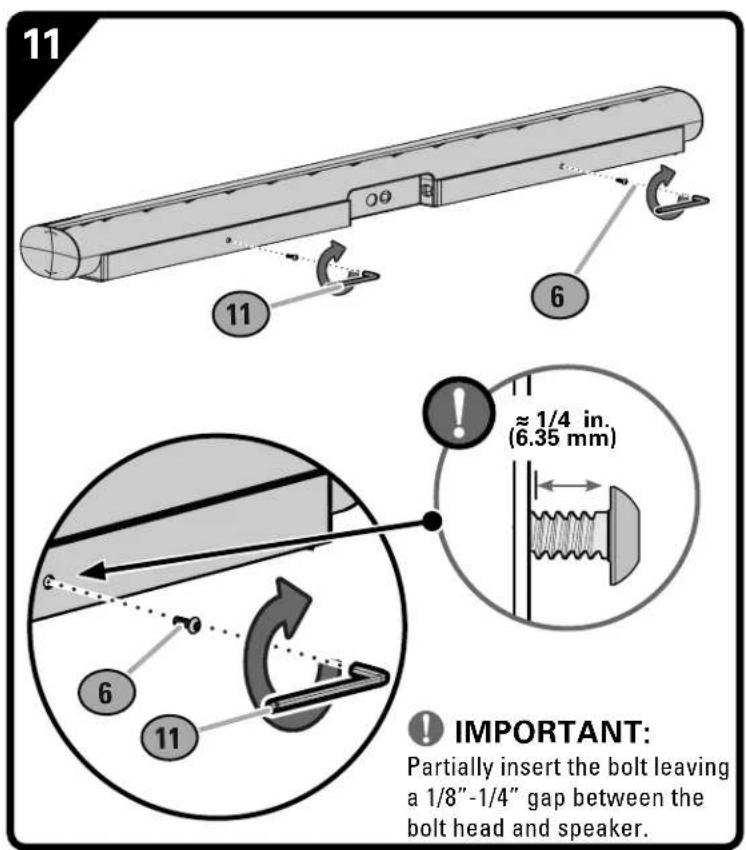
text_image
11 11 6 ≈ 1/4 in. (6.35 mm) 6 11 IMPORTANT: Partially insert the bolt leaving a 1/8" - 1/4" gap between the bolt head and speaker.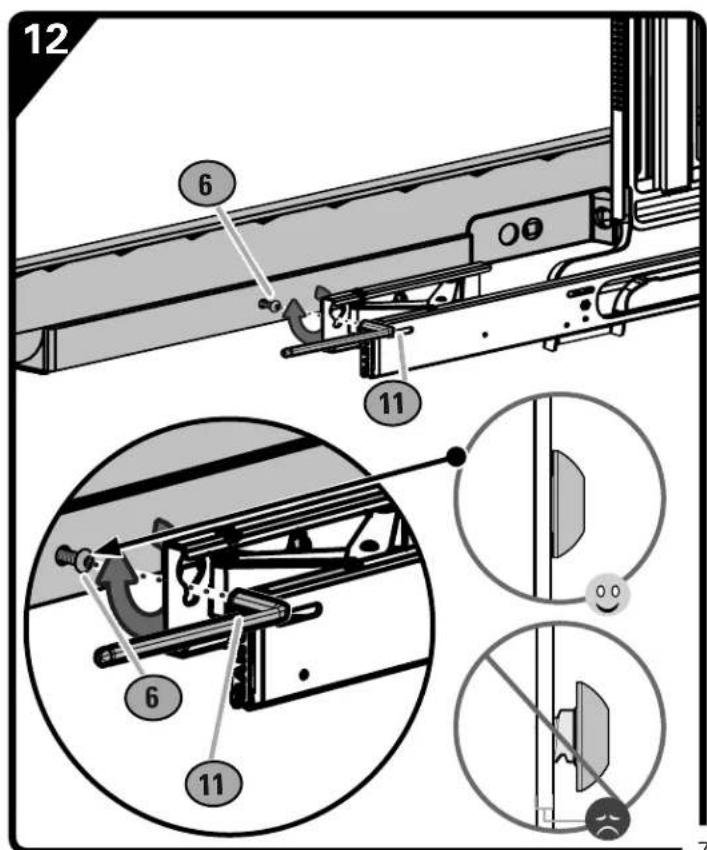
text_image
12 6 11 6 11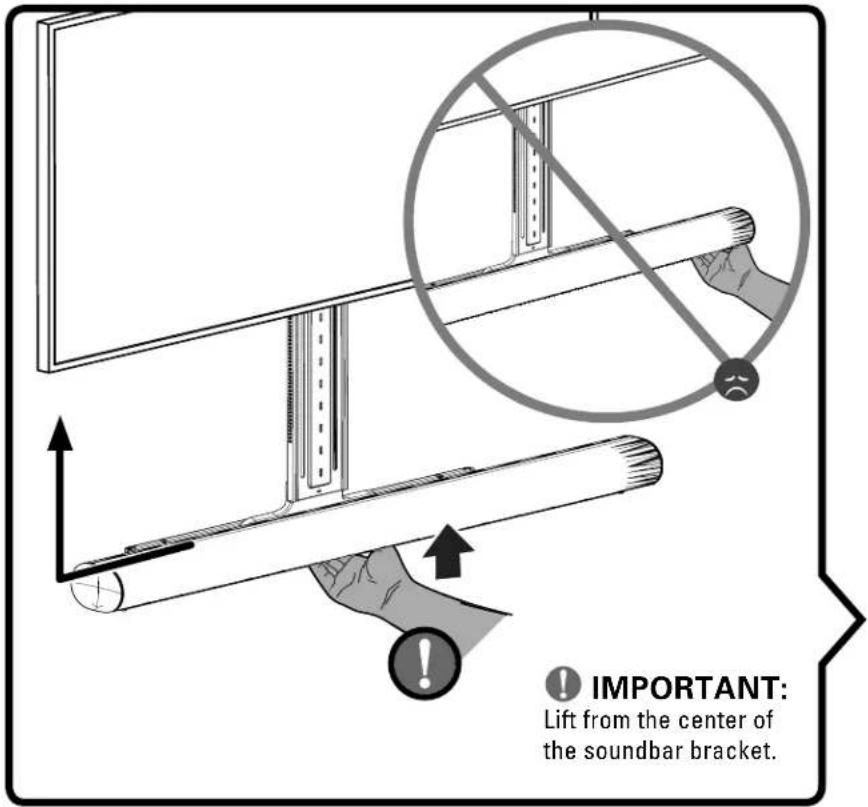
text_image
IMPORTANT: Lift from the center of the soundbar bracket.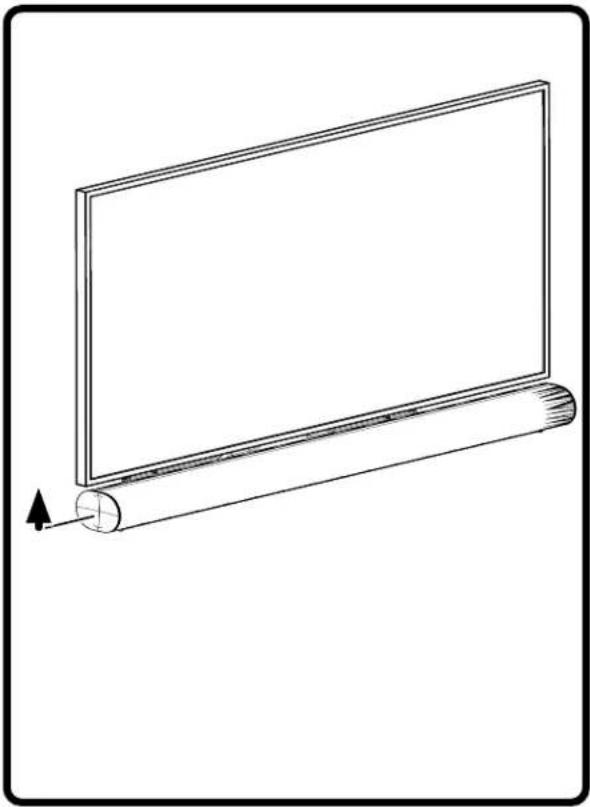
natural_image
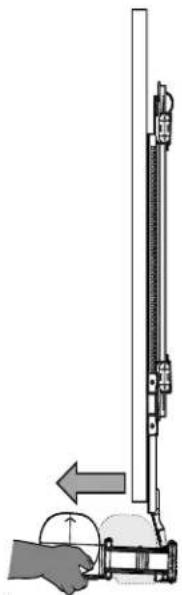
Line drawing of a flat-screen monitor with a cylindrical roller, showing no text or symbolsDOWNWARD ADJUSTMENT

HEAVY! You may need assistance with this step.
text_image
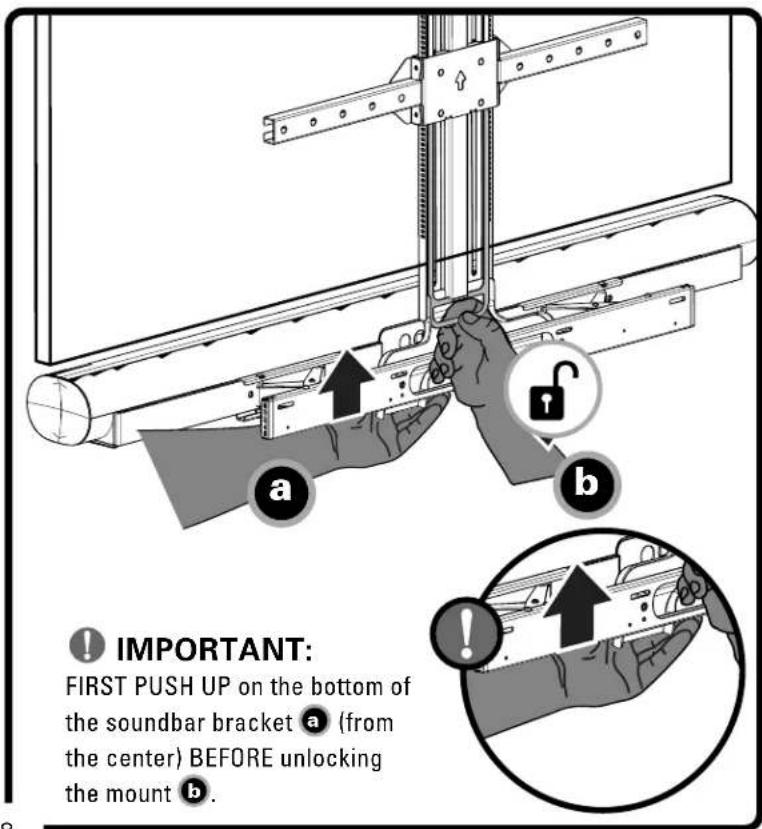
IMPORTANT: FIRST PUSH UP on the bottom of the soundbar bracket a (from the center) BEFORE unlocking the mount b.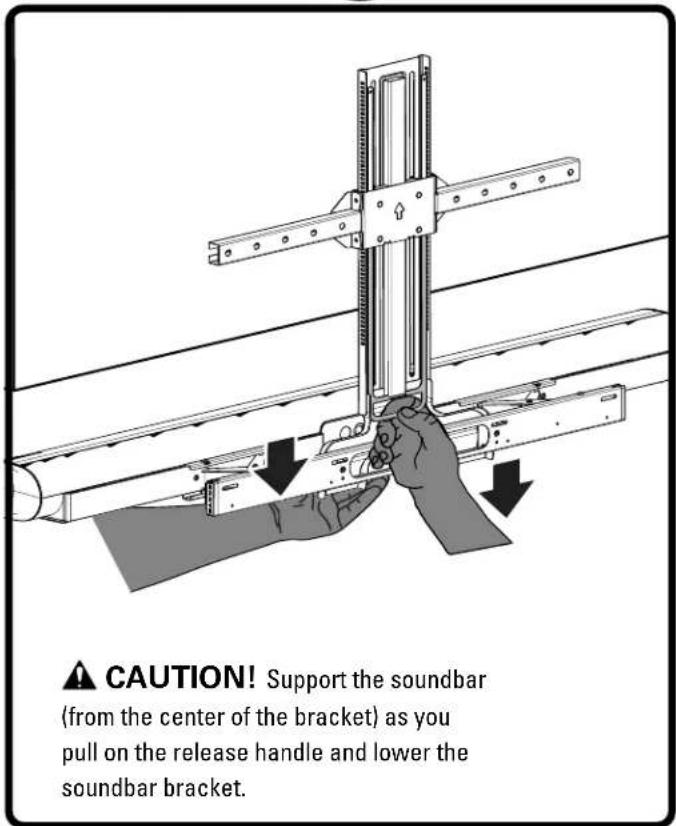
text_image
CAUTION! Support the soundbar (from the center of the bracket) as you pull on the release handle and lower the soundbar bracket.
IMPORTANT:
Tighten to a locked position if desired. Otherwise, keep tension loose for free movement
text_image
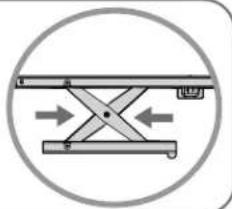
IMPORTANT: Tighten to a locked position if desired. Otherwise, keep tension loose for free movement CAUTION: Avoid potential personal injury or property damage! The brackets contain potential pinch points during operation. Keep fingers away from pinch points when retracting the brackets. (See arrows).SIDE VIEW
natural_image
Diagram of a hand operating a vertical tool with a circular base, showing mechanical components and an arrow indicating motion (no text or symbols present)
NOTE: Extending the speaker
helps with better microphone performance and Atmos ^® up-firing driver usage.

The brackets contain potential pinch points during operation. Keep fingers away from pinch points when retracting the brackets. (See arrows).
natural_image
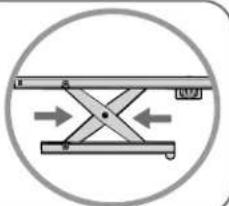
Diagram of a mechanical device with bidirectional arrows indicating movement or force (no text or symbols)RETRACT

HEAVY! You may need assistance with this step.

IMPORTANT:
Tighten to a locked position if desired. Otherwise, keep tension loose for free movement

text_image
IMPORTANT: on to a locked position if desired. wise, keep tension loose for free nent 12 OPTION: Avoid potential jury or property damage! ts contain potential pinch points ration. Keep fingers away from s when retracting the brackets. s).
CAUTION: Avoid potential
sonal injury or property damage!
The brackets contain potential pinch points during operation. Keep fingers away from pinch points when retracting the brackets. (See arrows).
natural_image
Diagram of a mechanical or electrical device with directional arrows indicating movement (no text or symbols)ZET DE SOUNDBARPLAAT OMHOOG
PAGINA 8
Legrand AV Inc. and its affiliated corporations and subsidiaries (collectively, "Legrand"), intend to make this manual accurate and complete. However, Legrand makes no claim that the information contained herein covers all details, conditions, or variations. Nor does it provide for every possible contingency in connection with the installation or use of this product. The information contained in this document is subject to change without notice or obligation of any kind. Legrand makes no representation of warranty, expressed or implied, regarding the information contained herein. Legrand assumes no responsibility for accuracy, completeness or sufficiency of the information contained in this document.
©2020 Legrand AV Technologies. All rights reserved. Sanus is a division of Legrand. All other brand names or marks are used for identification purposes and are trademarks of their respective owners.
Legrand AV Inc. • 6436 City West Parkway • Eden Prairie, MN 55344 USA
6901-602519-00