
Evidence EA8931 - Coffee machine KRUPS - Free user manual and instructions
Find the device manual for free Evidence EA8931 KRUPS in PDF.
| Brand | Krups |
| Model | Evidence EA8931 |
| Product type | Automatic coffee machine with built-in grinder |
| Number of drinks | More than 14 hot drinks (espresso, double espresso, coffee, double coffee, ristretto, doppio, americano, cappuccino, double cappuccino, latte, double latte, frothed milk, green tea, black tea, herbal tea) |
| Pump pressure | 15 bar |
| Coffee bean container capacity | 250 g |
| Water tank capacity | 2.3 L |
| Power consumption in operation | 1450 W |
| Standby consumption | 0.72 W |
| Dimensions (H x W x D) | 367 x 240 x 380 mm |
| Weight | 8.4 kg |
| Bluetooth | Yes, BLE Bluetooth module (frequency 2.40 MHz, power 7.7 dBm) |
| Main features | Compact Thermoblock System, adjustable metal burr grinder, touch keys, display, Dark function, Extra Shot function, double cup preparation, One Touch Cappuccino for milk-based drinks |
| Customization | Adjustment of volume, intensity (Dark), temperature, grind fineness, and frothing time |
| Maintenance | Automatic cleaning programs for coffee and milk circuit, automatic descaling, milk rinse after each milk-based drink, emptying of grounds drawer and drip tray |
| Safety | Programmable auto shut-off, safety instructions included, disconnection in case of problem |
| Spare parts and repairability | Supplied parts: milk duct, disassembly key, Claris Aqua Filter System cartridge, cleaning tablets, descaling agent. After-sales service available via hotline and authorized centers |
| General information | Power supply 220-240 V~ / 50 Hz, Bluetooth frequency 2.40 MHz, transmitted power 7.7 dBm. Compatible with Krups app |
Frequently Asked Questions - Evidence EA8931 KRUPS
User questions about Evidence EA8931 KRUPS
0 question about this device. Answer the ones you know or ask your own.
Ask a new question about this device
Download the instructions for your Coffee machine in PDF format for free! Find your manual Evidence EA8931 - KRUPS and take your electronic device back in hand. On this page are published all the documents necessary for the use of your device. Evidence EA8931 by KRUPS.
USER MANUAL Evidence EA8931 KRUPS
natural_image
Five grayscale product photos: coffee cups, beer mug, glass tube, and clear tube (no text or symbols)APPLICATION KRUPS ESPRESSO p. 6
MISE EN SERVICE INSTALLATION DE L'APPAREIL.... p. 7
AVANT LA PREPARATION DES BOISSONS INDICATIONS IMPORTANTES ...... p. 8
PREPARATION DES BOISSONS CAFE EN ACCES DIRECT.... p. 9
PREPARATION DES BOISSONS LACTEES EN ACCES DIRECT.... p. 9
PREPARATIONS THES.... p.10
PREPARATION DES AUTRES BOISSONS ...... p.11
AUTRES FONCTIONS.... p.11
ENTRETIEN GENERAL ...... p. 13
PROBLEMES ET ACTIONS CORRECTIVES.... p.14
INFORMATIONS IMPORTANTES SUR LE PRODUIT ET LE MODE D'EMPLOI
Congratulations! You are now the proud owner of your Espresso Automatic EA89 Series.
This new product offers more than 14 hot drinks: espresso, double espresso, coffee, double coffee, ristretto, doppio, Americano, cappuccino, double cappuccino, latte, double latte, frothy milk, green tea, black tea, herbal tea.
In addition to this very large choice, the machine offers many opportunities for customising drinks, for example, you can use a function that will increase the intensity of your coffee, if you appreciate more full-bodied preparations. You can set the amount, strength and temperature of your drinks.
The most frequently consumed drinks are accessible with one simple touch on the main interface. As for the screen, it allows you to follow the progress of your coffees and provides easy access to the different menus.
Most drinks can be prepared in batches of two, which saves time and is more convivial.
Thanks to its KRUPS Quattro force technology, including a Compact Thermoblock System with built-in percolation chamber, its 15 bar pump, and because it uses coffee beans which have been freshly ground just before making the coffee, your machine will serve you hot ristrettos, espressos and coffees from the first cup with maximum aroma and a creamy golden-brown froth.
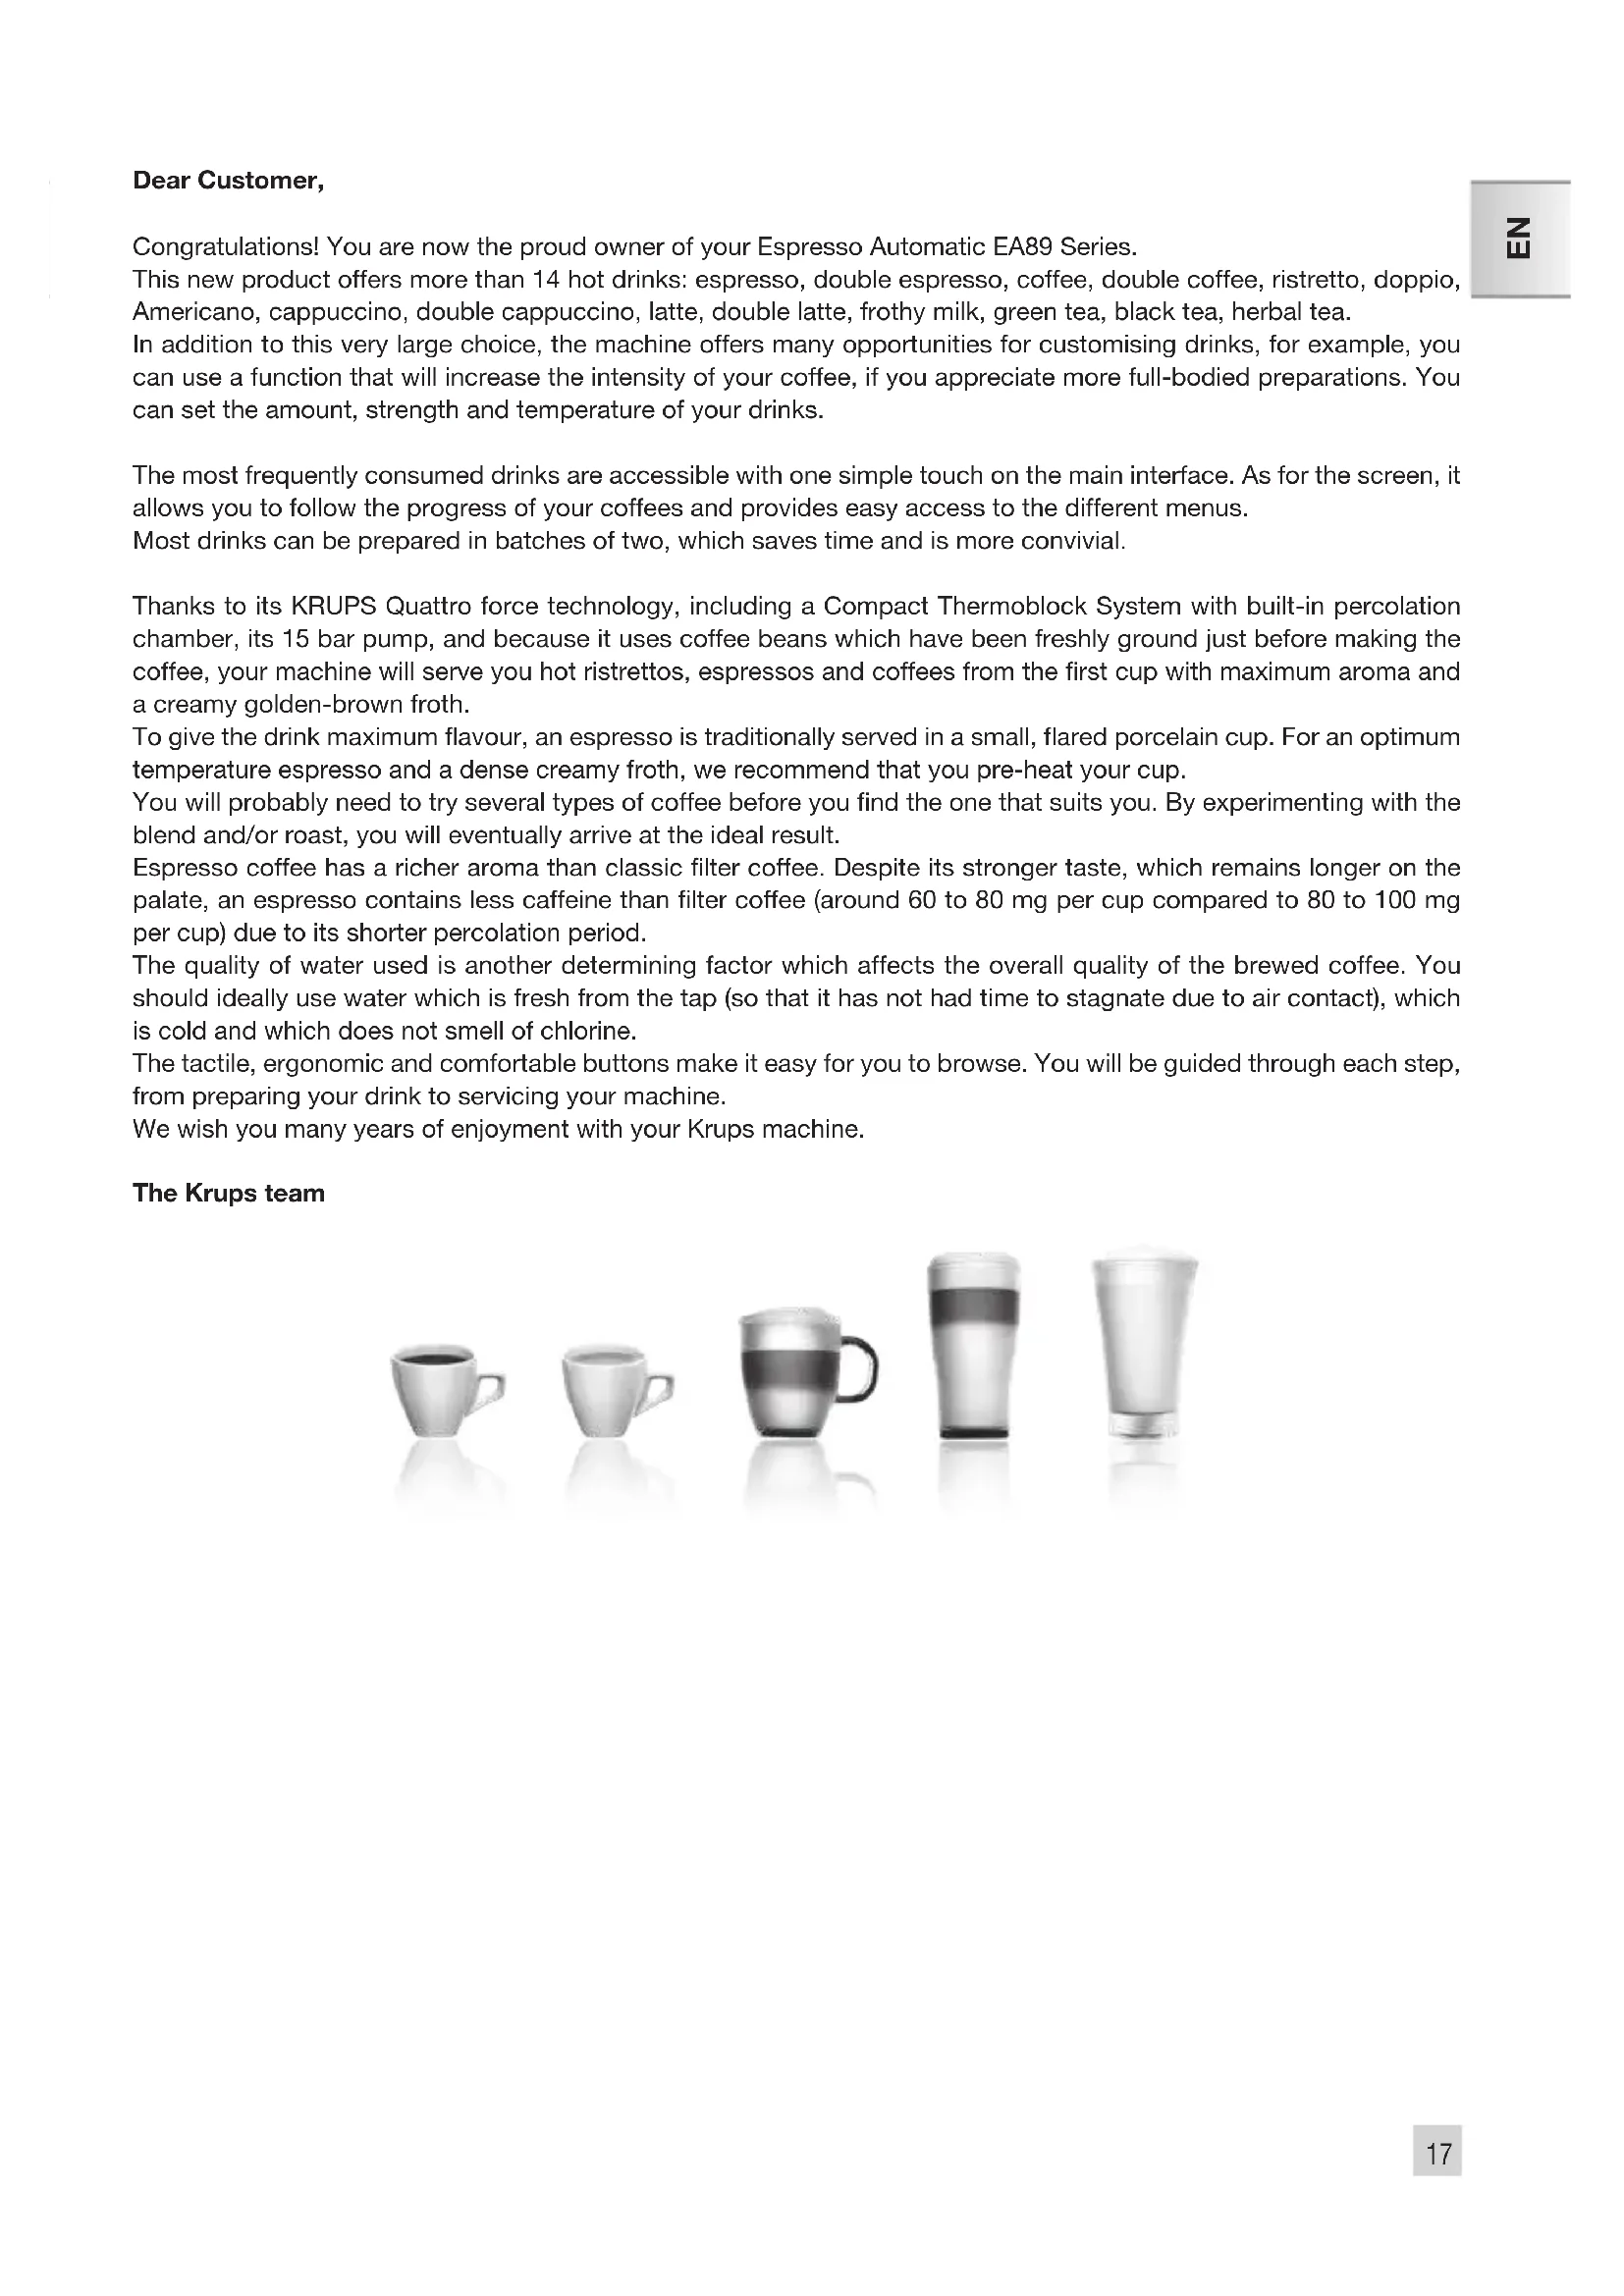
To give the drink maximum flavour, an espresso is traditionally served in a small, flared porcelain cup. For an optimum temperature espresso and a dense creamy froth, we recommend that you pre-heat your cup.
You will probably need to try several types of coffee before you find the one that suits you. By experimenting with the blend and/or roast, you will eventually arrive at the ideal result.
Espresso coffee has a richer aroma than classic filter coffee. Despite its stronger taste, which remains longer on the palate, an espresso contains less caffeine than filter coffee (around 60 to 80 mg per cup compared to 80 to 100 mg per cup) due to its shorter percolation period.
The quality of water used is another determining factor which affects the overall quality of the brewed coffee. You should ideally use water which is fresh from the tap (so that it has not had time to stagnate due to air contact), which is cold and which does not smell of chlorine.
The tactile, ergonomic and comfortable buttons make it easy for you to browse. You will be guided through each step, from preparing your drink to servicing your machine.
We wish you many years of enjoyment with your Krups machine.
The Krups team

natural_image
Five grayscale product photos: a cup, a mug, a glass mug, and a tall glass tube, all with no visible text or symbols.To get the most out of your machine and obtain good quality coffees, here is some advice:
- The quality of your water significantly influences the quality of the flavours. Limescale and chlorine can alter the taste of your coffee. We recommend that you use the Claris Aqua Filter System cartridge or low mineral-content water to preserve all of the flavours of your coffee.
- When preparing exclusively coffee recipes, we recommend that you use tulip-shaped porcelain cups, preheated beforehand (by running them under hot water, for instance), and of a size appropriate to the quantity you want to make. For your milk-based preparations, we recommend that you use thick glass cups for an appetising result.
- Roasted coffee beans can lose their flavour if they are not protected. We recommended that you use the amount of beans required for your consumption for the next 4-5 days. Although the quality of coffee beans is subjective and varied, we do recommend that you use arabica rather than robusta.
- Lastly, please remember that oily and caramelised coffee beans must be avoided, as they can damage your machine.
- The quality and fineness of the grinding determine the strength of the flavours and the quality of the cream. The finer the beans are ground, the richer the cream. Indeed, grinding should be adapted to the drink desired: fine for ristretto and espresso, coarser for coffee.
- You can use pasteurised or UHT, skimmed, semi-skimmed or whole milk, straight from the refrigerator (7°C). Using special milks (microfiltered, raw, fermented, enriched, etc.) or vegetable milks (rice, almond milk, etc.) can produce less satisfactory results especially when it comes to the quantity and quality of the froth.
CONTENTS
IMPORTANT INFORMATION CONCERNING THE APPLIANCE AND INSTRUCTIONS....p.20
USING YOUR APPLIANCE
INSTALLING THE APPLIANCE ...... p.23
BEFORE PREPARING DRINKS
IMPORTANT INFORMATION....p.24
PREPARING COFFEE DRINKS VIA DIRECT ACCESS ...... p.25
PREPARING MILKY DRINKS VIA DIRECT ACCESS p.25
PREPARING TEAS.... p.26
PREPARING OTHER DRINKS: RISTRETTO, DOPPIO, AMERICANO OR FROTHY MILK .....p.26
OTHER FUNCTIONS....p.27
GENERAL MAINTENANCE.... p.28
TROUBLESHOOTING....p.30
IMPORTANT INFORMATION CONCERNING THE APPLIANCE AND INSTRUCTIONS
In this manual you will find all of the important information concerning the preparation, use and maintenance of your machine.
Read the instructions carefully before using your appliance for the first time and keep them for future reference: KRUPS may not be held liable in the event of any use that does not comply with the instructions.
GUIDE TO THE SYMBOLS USED IN THE INSTRUCTIONS

Warning: Risk of serious injury or death. The lightning bolt symbol warns against electrical dangers.

Warning: Risk of possible malfunction, damage, or destruction of the appliance.

Warning: General or important note concerning the operation of the appliance.
Products supplied with your machine
Check the products supplied with your machine. If any parts are missing, contact your hotline (see p. 22: Initial settings).
Parts supplied:
- Espresso Automatic Series EA89
- 2 cleaning tablets
- 1 descaling sachet
- Milk conduit adaptable to the "One Touch Cappuccino" block
- Dismantling key for cleaning the steam circuit
- Safety instructions booklet
- Claris – Aqua Filter System cartridge with fitting accessory
- 1 stick for testing water hardness
- Instructions
- List of approved Krups service centres
- Guarantee documents
TECHNICAL DATA
| Appliance Espresso Automatic Series EA89 | |
| Power supply 220-240V-/50 Hz | |
| Pump pressure 15 bars | |
| Coffee bean container 250 g | |
| Power consumption During operation: | 1,450 W |
| Standby power consumption Connected mode: | 0,72 W |
| Water tank 2.3 l | |
| First use and storage Indoors, in a dry place (protected from frost). | |
| Dimensions (mm) H x L x D 367 x 240 x 380 | |
| Weight EA89 (kg) B.4 | |
| Frequency of the Bluetooth module 2.40 MHz | |
| Output produced by the Bluetooth module 7.7dBm | |
Subject to technical adaptations.
APPLIANCE DESCRIPTION
A. Water tank handle/lid
B. Water tank
C Coffee grounds collector
D Height-adjustable coffee outlets
E Grid and removable drip tray
E. Coffee bean container lid
G One Touch Cappuccino removable block
G1 Dismantling key for cleaning the steam
circuit
G2 One touch cappuccino block
H Milk tube and connector
Water level float.

Coffee bean container
J Grinding fineness adjustment dial
K Cleaning tablet funnel
L Metal grinding mill

The Ground Truth image displays a single, solid horizontal line. According to Rule 2 (UNDERSCORE & LINE RULES), this is a stylistic or background line, not a placeholder underscore. Therefore, the OCR result must ignore it and output nothing.
(no text)

Display
M Display N "On off"
N On-off button
0 tactile buttons
Specific information about:
The drip tray: it allows you to collect water or coffee that might flow out of the appliance during and after preparation. It is important to always leave it in place and to empty it regularly.

Important : Read these instructions carefully and keep them for future reference. Please follow the safety guidelines.
Manufacturer:
SAS GSM
OVERALL VIEW
Presentation of the different buttons
| Button | Description / General functions |
| Switching the machine on and off.It is necessary to press and hold the button to start the machine. | |
| Allows you to return to the previous screen or stop a recipe in progress. | |
| Browse upwards in the menu / increment the parameter selected | |
| Browse downwards in the menu / decrement the parameter selected | |
| Confirmation of selection. | |
| Function for increasing the strength of the coffee. | |
| Function for adding a strong espresso to the recipe selected.Accessible with the main recipes (espresso, long coffee, cappuccino, Macchiato, tea) according to model. | |
| Starts preparing an espresso. | |
| Starts preparing a Coffee. | |
| CAPPUCCINOMACCELANO TERA MORE SETTINGS | Starts preparing a Cappuccino |
| Starts preparing a Macchiato (a large measure of milk, a shot of Espresso, topped with frothy milk foam). | |
| Provides access to the menu for preparing a tea or a herbal tea. | |
| Provides access to additional preparations: Ristretto, Frothy milk, Doppio, Americano, (according to model). | |
| Provides access to the general menu (machine settings, cleaning and product information). |

: Bluetooth light:
When the symbol is not lit up, the machine is not connected or the function is deactivated.
When the symbol is lit up, the machine is connected.
Bluetooth is always activated. You can deactivate it in menu and then "settings".
Specific information about the buttons' lighting
When a button is not illuminated, the corresponding function is inaccessible.
When it is slightly illuminated, the function is available and can be selected.
While the function requested is in progress, the light becomes very bright.
KRUPS APP
You can check if your smartphone is compatible on www.krups.com
Downloading the app
In order to be able to download the app, you must have a smartphone equipped with a Bluetooth® BLE (blue tooth Low energy) module and an Android > version "4.3" or IOS > "9". If your smartphone does not have this, you will not be able to use the app.
The KRUPS app is available on playstore for the Android version and on App store for the IOS version.
Configuring the account
In order to be able to take advantage of all the opportunities offered by the app, you must start by creating an account.
Complete the fields required and confirm the conditions of use in order to complete the creation of your account.
You will be required to enter a password to guarantee the confidentiality of your data.
Bluetooth® activation
To connect your telephone to the machine, you must activate your phone's Bluetooth® BLE module and ensure that the machine's Bluetooth® module is also activated. Go to the settings menu, select the connectivity function and activate the Bluetooth® module if it has been deactivated (the Bluetooth® module is activated by default).
Pairing with the machine
Follow the instructions provided on your telephone to pair your smartphone with the machine. Pairing is only possible when the BLE logo is on.
When the machine detects a pairing request from the smartphone, a screen on the machine asks you to accept the pairing. Accept by pressing OK, a screen appears on your smartphone asking you to confirm pairing: press to pair.
If pairing fails, it is possible for you to try again several times and it is advised to check that the machine's Bluetooth® BLE module is correctly activated.
If the problem persists, contact the after-sales service for help installing your app. In the home menu on your smartphone, the "Contact Krups" option allows you to access the contact details for the after-sales service.
When the machine is paired, the Bluetooth ^® symbol should be brightly lit, a sign that is correctly activated.
Machine settings
Once paired, you can modify the machine's settings via the app (the date and time of the smartphone will be updated automatically on the machine which means that you do not have to do it).
The mobile app facilitates the initial installation of the machine and the initial settings.
Using the app
Many functions are offered via the app:
• Running remote preparations,
• Management of a favourites library and a cellar book,
- Access to the account and information on the machine.
- Access to news and information about the world of coffee.
- Access to a user guide with tutorials and videos in order to take advantage of all the machine's potential,
- Quick access to the after-sales service in the event of a query or a problem concerning your appliance or the app.
You will be able to discover all these functions by browsing the app (whether you are connected to your machine or
not).
Do not hesitate to connect to the app as often as possible in order to view news and regularly monitor your machine.
USING YOUR APPLIANCE INSTALLING THE APPLIANCE

Warning: Connect the appliance to an earthed 230 V mains socket. Failure to do so means that you run the risk of fatal injury due to electricity!
Respect the safety guidelines indicated in the "Safety guidelines" booklet.
Switching ON the appliance
Switch on the appliance by pressing the ON/OFF button ( ) until "Hello" appears on the screen Fig. 1. Follow the instructions provided by your appliance.
Initial settings
When using the machine for the first time, you will be prompted to configure various settings. Follow the indications
displayed on the screen. The aim of the following paragraphs is to give you a few visual cues.
Here are the first settings required:
Language
Select a display language by pressing the arrows until the language of your choice appears. Press "OK" to confirm.
Measuring unit
You can set the unit of measurement for volume to ml or oz.
Date and time
To set the time, press the desired time format (24 hours or AM/PM).
Auto-off
It is possible to program the time at which you want your machine to switch on automatically. This setting can be adapted as you wish: daily, weekly or weekend. Select the time at which you want it to start automatically following the time format selected earlier.
You can also select the length of time after which your appliance will switch off automatically in order to optimise your energy consumption.
Rinsing the coffee circuit
You can choose to activate it or not when switching on the machine. This allows you to ensure the quality of the coffee in the cup in order to avoid the presence of residue.
Filter installation
When switching on for the first time, the appliance asks if you want to install the filter. If you wish to do so, and if the hardness of your water requires it, select "YES" and follow the instructions on the screen.
Installing the cartridge in the appliance: Screw the filter cartridge into the bottom of the water tank using the accessory supplied with the cartridge. Fig. 4
Set the month when the cartridge is fitted (position 1 on the illustration, left side figure in the opening) by turning the grey ring located on the upper end of the filter. The month when the cartridge should be replaced is indicated in position 2 on the illustration. Fig. 5.
Put a container of 0.6 l under the steam exit. Fig. 6.
The machine must be primed whether the filter has been installed or not. This means that the water circuits have to
be filled. To do this, follow the instructions provided on the screen. The machine will begin by filling the water circuits, preheating the circuits and then will complete an automatic rinse. The screen will inform you when installation is complete.
Water hardness
You must set your machine depending on the hardness of your water, from 0 to 4. To do this, follow these instructions: Before using the appliance for the first time, check the hardness of your water so that you can set the appliance accordingly. This operation should also be carried out when you use your machine in a place where the hardness of the water is different or if you notice a difference in the hardness of the water. To check the water hardness, use the test strip supplied with your machine or contact your local water authority. The details of the classes are given in the table below:
| Degree of hardness | Class 0 Very soft | Class 1 Soft | Class 2 Average hardness | Class 3 Hard | Class 4 Very hard |
| ^ dH < 3^ > 4 | >7^ >14^ >21^ | ||||
| ^ e < 3.75^ > | 5^ >8.75^ >17.5^ >26.25^ | ||||
| ^ f | <5,4° | >7,2° | >12,6° | >25,2° | >37,8° |
| Appliance setting | 0 | 1 | 2 | 3 | 4 |
Fill a glass of water and insert a strip. Fig. 2
After 1 minute read the level of water hardness. Fig. 3
Indicate the number of red zones when configuring the appliance.
Preparing the appliance
Remove and fill the water tank. Fig. 7.
Replace the water tank. Fig. 8.
Remove the lid of the coffee bean container and add coffee beans (max. 250 g). Fig. 9.
Replace the lid of the coffee bean container. Fig. 10.
BEFORE PREPARING DRINKS IMPORTANT INFORMATION
Depending on the drinks chosen, your Espresso Automatic EA89 will automatically adjust the quantity of ground coffee.
Preparing the grinder
You can adjust the strength of your coffee by adjusting how finely the coffee beans are ground. In general, the finer the coffee is ground, the stronger and creamier the coffee will be. It may also vary according to the type of coffee used. We recommend a fine setting for espressos and a coarser setting for coffees. Adjust the fineness of grinding by turning the coffee grounds fineness adjustment knob (J) which is located in the coffee bean container. This setting should be applied during grinding notch by notch. After 3 rounds, you will notice a pronounced difference in taste. Setting the fineness of grinding is useful when you change the type of coffee or if you want to make coffee that is more or less strong. However, it is not advised to use this setting systematically.
Adjusting the coffee outlet
For all the drinks available, you can lower or raise the coffee outlets according to the size of your cup or glass. Fig.11
Stopping a drink during preparation
You can stop the preparation at any time by pressing the return button. Caution, pressing this button causes the machine to update which may last up to 30 seconds. This phase is normal. When a cycle is interrupted, it does not stop immediately. The machine will finish its cycle and the preparation will be cancelled.
"Double" preparation function
You can prepare two cups simultaneously with your appliance. The double preparation function can be accessed simply by pressing the selection twice and is valid for all drinks (except ∅ and ≡).
DARK function
The "DARK" function allows you to increase the intensity of the coffee (its strength).
You can activate or deactivate it in various ways:
- Before selecting the chosen drink just press DARK.
- While preparing the drink, and until the end of grinding: you can press DARK.
- By choosing the "DARK" parameter in the Settings menu. To do this, access the Settings menu with the button
, then Settings → drink settings → Dark. The function will be activated for all "coffee" drinks: 📄, 📅, 📞, 📊
You can do the same to deactivate it.
EXTRA SHOT function
The "extra shot" function allows you to add an espresso at the end of the selected drink.
You can activate or deactivate it in various ways:
- Before selecting the chosen drink: just press EXTRA SHOT.
- While making the drink,
- By choosing the "EXTRA SHOT" parameter in the Settings menu. To do this, access the Settings menu with the button 📋, then Settings → drink settings → EXTRA SHOT. Therefore, the function will be activated for all preparations 🐎
. □ . □ □ □
You can do the same to deactivate it.
PREPARING COFFEE DRINKS VIA DIRECT ACCESS
N.B.: Every time the drink is launched, the machine will remember the last drink prepared, including the settings that were selected.
Preparation
Place the cup(s) under the coffee nozzles. Fig.12
Press the button for the desired drink.
If the machine detects a lack of water when you request this preparation, it will ask you to fill the tank.
Possible settings
It is possible to increase the strength of the coffee by pressing 📄 and/or adding a coffee preparation by pressing 🌐. You can prepare one or two cups with your appliance.
The machine starts by grinding the beans, tamping the ground coffee and finally brewing the coffee. It is possible to adjust the volume of the coffee being prepared by using the buttons: and. You can stop the preparation at any time by pressing.
▲ Important: Automatic rinsing of the coffee outlets: according to the type of preparation, the machine may complete an automatic rinse program when it switches off. The cycle lasts only a few seconds and stops automatically.
PREPARING MILKY DRINKS VIA DIRECT ACCESS
Possible settings
It is possible to increase the strength of the coffee by pressing ☐ and/or adding a coffee preparation by pressing ☐. The steam is used to froth the milk. As a higher temperature is required when producing steam, the appliance will run an additional pre-heating phase.
Connect the straight side of the milk tube to the "One Touch Cappuccino" block Fig. 13.
Immerse the other end (bevelled side) in a receptacle filled with milk or directly in your bottle of milk Fig. 14.
Place the cup(s) under the coffee/milk nozzles. Fig.15
Press the "Cappuccino" button ☑ Fig. 16 or press the "Macchiato" button ☑ Fig. 18. All of the settings can be modified.
The preparation starts by frothing the milk (possible to set the time), and then the coffee flow (possible to adjust the volume). Adjusting the frothing time allows you to vary the quantity of milk and froth.
The next steps follow automatically and your drink is ready to taste Fig.17.
Every time "Cappuccino" or "Macchiato" is run, the machine will remember the last drink prepared, including the settings that were selected.
Cleaning after preparing milky drinks
Milk rinsing
The screen indicates "Rinse milk?" at the end of each preparation.
It is advised to rinse after using the milk function in order to ensure the cleanliness of the frothing accessories and the frothiness of the milk.
During milk rinsing, you are required to systematically dismantle and clean the milk tube and connector with hot water. Fig. 21 and 25.
For the best results, it is advised to clean the "One Touch Cappuccino" removable block regularly (see general maintenance chapter).
If you note a change in the quality of your milk froth, do not hesitate to repeat the rinsing and cleaning process: indeed a milk system that is not well maintained may cause this type of problem.
PREPARING TEAS
Possible settings
Your appliance allows you to prepare three types of tea (green tea, black tea, herbal tea). You can adjust the volume of the drink to taste.
The hot water temperature is adapted to the drink selected.
You can program an extra shot 📋 in your tea which will allow you to prepare "tea/coffee" drinks that are very fashionable.
Preparing a tea
Select on the screen. Place the cup(s) under the coffee nozzles. Fig.12
Then select the chosen drink and press OK
If the machine detects no water when you submit your request, it will ask you to fill the tank.
You can modify the volume by using buttons √ or ▲ during preparation.
PREPARING OTHER DRINKS: RISTRETTO, DOPPIO, AMERICANO OR FROTHY MILK
Preparation
Place the cup(s) under the coffee nozzles. Fig.12
If the machine detects no water when you submit your request, it will ask you to fill the tank.
Press button =: with buttons and, select the desired drink: Ristretto, Doppio, Americano, Frothy milk.
Making a Ristretto
Select Ristretto and press OK
The machine starts by grinding the beans, tamping the ground coffee and finally brewing the coffee. It is possible to adjust the volume of the coffee being prepared by using the buttons: √ and √. You can stop the preparation at any time by pressing √.
Making a Doppio
Select DOPPIO and press OK
The preparation is identical to the RISTRETTO but with a double coffee cycle.
Making an Americano
Select AMERICANO and press OK
The preparation is identical to the DOPPIO, but is followed by hot water.
Making a Frothy milk
Connect the straight side of the milk tube to the "One Touch Cappuccino" removable block Fig. 13. Immerse the other end (bevelled side) in a receptacle filled with milk. Fig.14
The steam is used to froth the milk. As a higher temperature is required when producing steam, the appliance will
launch an additional pre-heating phase.
A menu will allow you to customise the frothing time. You can modify it by pressing buttons √ or ↗ then press OK. The last frothing time used will be memorised for the next preparation.
You can download the preparation at any time by pressing
Rinsing the "One Touch Cappuccino" block
Please refer to the paragraph "Milk rinsing" in the section PREPARING ONE TOUCH MILK DRINKS.
OTHER FUNCTIONS
The Settings menu can be accessed via button which leads to the general menu (machine settings maintenance and product information).
Settings
By selecting the Settings menu, you can make the changes you want in order to optimise your ease of use and suit your preferences.
Below are the main settings available.
| Date You must set the date, particularly when you are using an anti-limescale cartridge. | |
| Clock You can select to display a 12 or 24-hour clock. | |
| Language You can select the language of your choice from those offered. | |
| Measuring unit You can set the unit of measurement to be ml or oz. | |
| Screen brightness You can adjust the screen brightness according to your preferences. | |
| Coffee temperature You can adjust the temperature of your coffee drinks to three different levels | |
| Tea temperature You can adjust the temperature of your teas to three different levels | |
| Water hardness You can set your water hardness from 0 to 4. See chapter "Measuring water hardness". | |
| Auto-on You can automatically start pre-heating of the appliance at a selected time. | |
| Auto-off You can choose the duration after which your appliance will switch off automatically (duration of non use). | |
| Automatic rinsing You can choose to activate automatic rinsing of the coffee outlet or not when starting the machine. | |
| Drinks settings You can restore the default settings. You can also permanently activate the Dark and Extra Shot function for all your drinks (except ≡). |
To quit the settings menu, press ↻ or the Settings button.
The settings will be stored in the memory if you unplug your machine, with the exception of the date and time.
To quit the Cleaning menu, press ↩ or the Settings button.
Maintenance
| All of these options allow you to run the selected programs. You should then follow the on-screen instructions. | |
| Cleaning milk | Provides access to cleaning the machine's one touch cappuccino block, which is essential for ensuring good quality milk frothing. |
| Milk rinsing | Provides access to rinsing the machine's one touch cappuccino block, which is essential for ensuring good quality milk frothing. |
| Coffee rinsing | Provides access to rinsing the machine's coffee circuit, which ensures the optimum taste of coffee. |
| Coffee cleaning | Provides access to cleaning the machine's coffee circuit (using a cleaning tablet), which ensures the optimum taste of coffee. |
| Descaling | Provides access to descaling which is essential for the durability of your machine. When the number of drinks is not high enough for descaling to be necessary, the function is not active. |
| Filter | Provides access to the filter mode, useful if the water is very hard, in order to ensure the best taste and the health of your machine. |
Info
The "Info" menu provides access to information about your use and about certain stages in the life of your machine. It also informs you about its upkeep. Below are the main details available.
| Drinks prepared Displays | the number of drinks prepared |
| Coffee circuit cleaning Indicates that is needs to be completed within x number of cycles. | |
| Descaling Indicates that is needs to be completed within x number of cycles. | |
| Filter Indicates that it will need to be changed in x days or x litres. | |
To quit the Info menu, press → of the Settings button.
GENERAL MAINTENANCE
Emptying the coffee grounds collector and the drip tray
After a certain number of coffees, the machine will ask you to empty the coffee grounds collector and the drip tray. Not to make correctly these operations can damage your machine.
The drip tray collects used water and the coffee grounds collector collects used ground coffee.
If the message "Please empty the two trays" is displayed, remove, empty and clean the drip collector tray. Remove, empty and clean the coffee grounds collector (C). Fig. 19.
Replace the coffee grounds collector. Fig. 20
The drip tray is equipped with a float to indicate when it needs emptying. However, the machine is also programmed to ask for the drip collector tray to be emptied after a certain number of coffees, in addition to any intermediate emptying operations that you may complete.
Rinsing the circuits:
You can start rinsing at any time by pressing and selecting Maintenance.
According to the type of recipe prepared, the machine may complete an automatic rinsing when it is turned off. It is also possible to set an automatic rinse program when it is switched on (see "Settings" section p.22).
Automatic cleaning programs
Automatic cleaning program of the coffee circuit
A message on the screen will indicate when a cleaning program needs to be run for the appliance.
To run this cleaning program, you will need a container which holds at least 0.6 l, and which should be placed beneath the coffee outlets and the steam nozzle, and a KRUPS cleaning tablet. Fig. 37. Carefully follow the instructions given on the screen. It is also possible to run a cleaning cycle via the Maintenance menu.
Important: You do not have to run the cleaning program as soon as the appliance requests it, but it must be done reasonably soon after. If cleaning is postponed, the alert message will remain illuminated until the process is completed.
The automatic cleaning program comprises two phases: a cleaning cycle and a rinsing cycle, and lasts about 13 minutes.

Important: If you unplug your machine during the cleaning cycle, or if there is a power failure, the cleaning program will continue from the current phase when the power is returned. It is not possible to postpone this process. This is essential to ensure that the water circuit has been correctly rinsed. In this case, a new cleaning tablet may be necessary. Complete the full cleaning program in order to remove all of the cleaning product which is harmful to health.
Cleaning the "One Touch Cappuccino" block
To complete a cleaning program, you will require two containers (minimum 0.6 L) and KRUPS cleaning liquid. You can start the cleaning cycle by pressing button ☐.
Then selecting "Maintenance" → "Milk Cleaning". Follow the instructions on the screen.
Dismantling the "One Touch Cappuccino" block
In addition to rinsing, it is necessary to clean the different elements of the block every time after using. To dismantle the block, follow the following instructions:
Remove the milk tube, Fig. 21.
Remove the front lid of the coffee milk nozzles. Slide it downwards and pull it towards you. Fig. 22.
Remove the "One Touch Cappuccino" block by pulling the upper part of the block and pull the orange cleaning tool.
Fig. 23.
Completely dismantle the block. Fig. 24.
Remove the milk tube connector Fig. 27
Clean all of the dismantled parts (block, connector and milk tube) with soapy water. Then rinse them in hot water. Fig. 28.
Once the elements are clean and dry, assemble the block and return them to their original position. Fig. 33.
Replace the font lid of the block. Fig. 34. Replace the connector in the milk tube Fig 35 (opposite side of the bevelled side) and plug in the block. Fig. 36.
Automatic descaling program of the steam circuit

Warning: if your appliance is fitted with our Claris - Aqua Filter System cartridge, remove the cartridge before descaling.
A message on the screen will indicate when a descaling program needs to be run for the appliance. The frequency of this program depends on the quality of the water used and on whether a Claris Aqua Filter System filter is used or not (the harder the water, the more often the appliance has to be descaled).

Important: You are not obliged to carry out this program immediately the appliance requests it, but it must be carried out reasonably soon afterwards. If descaling is postponed, the alert message will continue to be displayed until the process is completed.
When the descaling alert level is reached and displayed, press OK to run the descaling program. To delay it, press
Once the procedure has been launched, follow the instructions provided on the screen. It is also possible to run a descaling cycle via the "Maintenance" menu "Descaling".
To carry out a descaling program, you will require a container with a capacity of at least 0.6 L which should be placed beneath the One Touch Cappuccino block and a KRUPS descaling sachet (40 g). Fig. 37
Fill the water tank up to the CALC mark then pour in the contents of one sachet of descaler.
The descaling program comprises three phases: a descaling cycle and two rinsing cycles. The program lasts approximately 20 minutes.

Important: If there is a power failure or if you unplug your machine, the cycle will continue from the current phase when the power is returned. It will not be possible to cancel this operation. Complete the full cycle in order to remove all of the descaling product which is harmful to health.
TROUBLESHOOTING
If one of the problems described in the table persists, contact KRUPS customer service.
| PROBLEM CORRECTIVE ACTION | |
| The machine displays a failure, the software hangs or your machine has a malfunction. | Switch off and unplug the appliance, remove the filter cartridge, wait for one minute and start the appliance again.Press and hold the on/off button for at least 3 seconds for starting. |
| The appliance does not switch on when the ON/OFF button is pressed (for at least 3 seconds). | Check your fuses and plug sockets.Check that the two power plugs are correctly inserted into the socket. |
| The coffee grinder makes a strange noise. | There is a foreign body in the grinder.Contact the KRUPS Customer Service team. |
| The One Touch Cappuccino block does not suck the milk.The One Touch Cappuccino blocks produces little or no froth. | Check that the block is assembled correctly (in particular the connector in the milk tube).Ensure that the steam nozzle is not blocked. If this is the case, see below "The steam nozzle on your machine seems to be partially or completely blocked".Check that the connector is not blocked or dirty; soak it in a mixture of hot water and washing-up liquid, then rinse and dry before reassembling.Ensure that the flexible pipe is not blocked or twisted and that it is properly inserted into the One Touch Cappuccino block in order to avoid any air leaks. Check that it is fully immersed in the milk.Rinse and clean the block (see chapters concerning rinsing and cleaning the One Touch Cappuccino block).For milk drinks, we recommend that you use fresh, pasteurised or UHT milk which has been recently opened. It is also advisable to use a cold container. |
| The steam nozzle on your machine seems to be partially or completely blocked. | Dismantle the nozzle from its support using the dismantling key. Fig. 25.Start the rinse cycle for the One Touch Cappuccino block to remove any remaining deposits.Clean the steam nozzle and ensure that the opening of the nozzle is not obstructed by the remains of milk or limescale. Use the cleaning needle if necessary. Fig. 26 |
| No steam comes out of the steam nozzle. | Ensure that the steam nozzle is not blocked. See "The steam nozzle on your machine seems to be partially or completely blocked." belowIf this does not work, empty the water tank and remove the Claris cartridge temporarily. Fill the water tank with mineral water with high calcium content (>100 mg/l) and run steam cycles (5 to 10) consecutively into a container until you obtain a continuous jet of steam.Put the cartridge back in the tank. |
| Steam is leaking from the drip tray grid. | Depending on the type of preparation, steam may escape from the drip tray grid. |
| The machine asks for the drip tray to be emptied although it is not full. | The machine is programmed to ask for the drip tray to be emptied after a certain number of coffees despite any intermediate emptying operations that you may complete. |
| The appliance asks to be unplugged and plugged back in again. | Unplug the appliance for 20 seconds, remove the Claris Aqua Filter System cartridge if necessary, then plug it back in again.If the error continues, contact the KRUPS Customer Service team. |
| The machine does not request descaling. | The descaling cycle is requested after the steam circuit has been used a significant number of times. |
| Some ground coffee has found its way into the drip tray. | A small amount of ground coffee may settle in the drip tray. The machine is designed to evacuate any excess ground coffee so that the percolation zone remains clean. |
| The milk or water is not flowing correctly into the cup(s). | Check that the One Touch Cappuccino block is correctly positioned. |
| There are traces of milk in an Americano or a Hot water. | Complete a milk rinsing cycle or dismantle and clean the one touch cappuccino accessory before running the preparation. |
| There is water underneath the appliance. | Before removing the water tank, wait for 15 seconds after the coffee has finished flowing so that the appliance finishes its cycle properly. Check that the drip tray is correctly positioned on the machine; it should always be in place, even when the appliance is not in use. Check that the drip tray is not full.The drip tray should not be removed during a cycle. |
| When you turn off the appliance, warm water flows out of the coffee outlets and the One Touch Cappuccino block. | According to the type of recipe prepared, the machine may run an automatic rinsing cycle when it is turned off. This cycle lasts only a few seconds and stops automatically. |
| After emptying the coffee grounds collector, the warning message is still displayed on the screen. | Correctly replace the coffee grounds collector and follow the instructions on the screen.Wait at least 5 seconds before replacing them. |
| The coffee dispenses too slowly. | Turn the 'fineness of grind' adjustment dial to the right to make the ground coffee coarser (according to the type of coffee used).Run one or several rinsing cycles.Run a machine clean (see *Automatic machine cleaning programs p.28).Change the Claris Aqua Filter System cartridge (see "Installing the filter") p. 23). |
| The water tank has been filled, but the warning message is still displayed on the screen. | Check that the tank is installed correctly on the device.The float at the bottom of the tank should move freely. Check and unblock the float if necessary. |
| The coffee fineness knob is difficult to turn. | Only change the grinder setting when it is running. |
| The espresso or coffee is not hot enough. | Run a coffee circuit rinsing cycle before preparing your coffee.Increase the coffee temperature in the Settings menu. Warm the cup by rinsing it with hot water before making the drink. |
| The coffee is too lightly coloured or too weak. | Avoid using oily, caramelised or flavoured coffee beans. Check that the coffee bean container has coffee in it and that is it dispensing correctly.Decrease the volume of the preparation and increase the strength of your drink by using the Dark function.Turn the grinding fineness adjustment dial to the left to make the grounds finer.Make the drink in two cycles by using the 2 cups function. |
| The appliance is not producing coffee. | A problem has been detected during preparation of the drink.The appliance has restarted automatically and is ready for a new cycle. |
| A power failure occurs during a cycle. | The appliance will automatically restart when the power is switched back on. |
| Your tea is not hot enough or too hot. | Increase or reduce the hot water temperature in the Settings menu. |
| You have used ground coffee instead of coffee beans. | Use your vacuum cleaner to remove the ground coffee from the coffee bean container. |
| The app is unable to connect or disconnects too often. | Check that the machine's Bluetooth is not deactivated.Stand as close as possible to the machine as possible when using the app. |
| The app does not detect the machine. | Switch the app off and on. |
| Appearance of steam under the lid of the grain tray. | Close the cleaning tablet chute beneath the cover. |
| After preparing a drink, if you ask for an extra shot the machine tells you that this is not possible. | The coffee grounds collector is full and the extra shot function is not available.Once your drink has been made, you can prepare an espresso after emptying the coffee grounds collector. |

Danger : Only a qualified technician is authorised to carry out repairs on electrical wiring and carry out work on the electrical grid. If you do not follow these instructions, you risk death by electrocution. Do not use an appliance that is visibly damaged!
natural_image
Five grayscale product photos: a cup, a mug, a glass mug, and two glasses (no text or symbols)natural_image
Five grayscale product photos: coffee cups, glass mug, beer mug, and clear drink (no text or symbols)BESCHRIJVING VAN HET APPARAAT
natural_image
Five grayscale product photos: a cup, a mug, a glass mug, and two glasses (no text or symbols)ANDRE FUNKTIONER....s. 75
ALMINDELIG VEDLIGEHOLDELSE......s. 76
PROBLEMER OG UDBEDRING....s. 77
VIGTIGE OPLYSNINGER OM PRODUKTET OG BRUGSVEJLEDNINGEN
natural_image
Five grayscale product photos: coffee cups, glass with liquid, and clear drink (no text or symbols)GENERELT VEDLIKEHOLD......s.92
PROBLEMER OG KORRIGERENDE HANDLINGER....s.93
VIKTIG PRODUKTINFORMASJÖN OG BRUKSANVISNING
holder for kaffebonner
J Innstillingsknapp for finhetsgrad for maling
GENERELT VEDLIKEHOLD
natural_image
Five grayscale product photos: a cup, a mug, a glass mug, and two glasses (no text or symbols)KRUPS-APPLIKATIONEN p. 102
FÖRSTA ANVÄNDNINGEN
INSTALLATION AV MASKINEN p. 103
FÖRBEREDELSER INNAN DU TILLAGAR DRYCKERNA
VIKTIGA INSTRUKTIONER.... p. 104
BRYGGNING AV KAFFEDRYCKER FRÅN MASKINEN p. 105
BRYGGNING AV MJÖLKDRYCKER FRÅN MASKINEN ...... p. 105
TILLAGNING TE.... p. 106
TILLREDNING AV ANDRA DRYCKER: RISTRETTO, DOPPIO,
AMERICANO OCH SKUMMAD MJÖLK p. 106
ANDRA FUNKTIONER p. 107
ALLMÄNT UNDERHÅLL. p. 108
PROBLEM OCH LÖSNINGAR.... p. 110
VIKTIG INFORMATION OM PRODUKTEN OCH BRUKSANVISNINGEN
natural_image
Five grayscale product photos: a cup, a mug, a glass mug, and a tall glass tube, all with no visible text or symbols.MUUT TOIMINNOT p.123
YLEISHUOLTO p.124
ONGELMAT JA RATKAISUT p.125
TÄRKEÄÄ TIETOA TUOTTEESTA JA KÄYTTÖOHJEESTA
natural_image
Black-and-white image showing five different types of beverage items: a cup, a mug, a glass with liquid, and a clear glass (no text or symbols visible)natural_image
Five grayscale product photos: two small teacups, a glass mug, a tall glass with liquid, and a clear tube (no text or symbols)natural_image
Five grayscale product photos: a cup, a mug, a glass mug, and a tube of tea (no text or symbols)PROBLEMAS E AÇÕES CORRECTIVAS
natural_image
Black-and-white image showing five different types of coffee cups and glasses, arranged in a row (no text or symbols visible)G2 Minlok One touch cappuccino
natural_image
Five grayscale product photos: coffee cups, glass mug, tall glass with liquid, and tall glass with clear liquid (no text or symbols)APLIKACE KRUPS p. 198
UVEDENÍ DO CHODU INSTALACE PŘÍSTROJE ...... p. 199
PŘED PŘÍPRAVOU NÁPOJŮ DŮLEŽITÁ UPOZORNĚNÍ p. 200
PŘÍMÁ PŘÍPRAVA KÁVOVÝCH NÁPOJŮ p. 201
PŘÍMÁ PŘÍPRAVA MLÉČNÝCH NÁPOJŮ......p. 201
PŘÍPRAVA ČAJE......p. 202
PŘÍPRAVA DALŠÍCH NÁPOJŮ: RISTRETTO, DOPPIO, AMERICANO NEBO MLÉČNÁ PĚNA p. 202
DALŠÍ FUNKCE....p. 203
CELKOVÁ ÚDRŽBA....p. 204
PROBLÉMY A NÁPRAVNÉ AKCE....p. 206
DÜLEŽITÉ INFORMACE O VÝROBKU A ZPŮSOBU POUŽITÍ
natural_image
Five grayscale product photos: coffee cups, beer mug, glass with liquid, and clear drink (no text or symbols)APLIKÁCIA KRUPS ESPRESSO
natural_image
Five grayscale product photos: coffee cups, glass mug, beer mug, and tall glass (no text or symbols)natural_image
Black and white image showing five different beverage items: a cup, a mug, a glass with liquid, a tall glass, and a bottle (no text or symbols visible)APLIKACJA KRUPS P. 246
PROBLEMY I ICH ROZWIAZANIA
natural_image
Black and white image showing five different beverage items: a cup, a mug, a glass with liquid, a tall glass, and a bottle (no text or symbols visible)natural_image
Five grayscale product photos: coffee cups, glass mug, beer mug, and tall glass (no text or symbols)natural_image
Five grayscale product photos: coffee cups, glass mug, beer mug, and tall glass (no text or symbols)
- INFORMATIONS IMPORTANTES SUR LE PRODUIT ET LE MODE D'EMPLOI
- The Krups team
- To get the most out of your machine and obtain good quality coffees, here is some advice:
- CONTENTS
- IMPORTANT INFORMATION CONCERNING THE APPLIANCE AND INSTRUCTIONS
- GUIDE TO THE SYMBOLS USED IN THE INSTRUCTIONS
- Products supplied with your machine
- Parts supplied:
- APPLIANCE DESCRIPTION
- Specific information about:
- : Bluetooth light:
- Specific information about the buttons' lighting
- KRUPS APP
- Downloading the app
- Configuring the account
- Bluetooth® activation
- Pairing with the machine
- Machine settings
- Using the app
- USING YOUR APPLIANCE INSTALLING THE APPLIANCE
- Switching ON the appliance
- Initial settings
- Language
- Measuring unit
- Date and time
- Auto-off
- Rinsing the coffee circuit
- Filter installation
- Water hardness
- Preparing the appliance
- BEFORE PREPARING DRINKS IMPORTANT INFORMATION
- Preparing the grinder
- Adjusting the coffee outlet
- Stopping a drink during preparation
- DARK function
- EXTRA SHOT function
- PREPARING COFFEE DRINKS VIA DIRECT ACCESS
- Preparation
- Possible settings
- PREPARING MILKY DRINKS VIA DIRECT ACCESS
- Cleaning after preparing milky drinks
- Milk rinsing
- PREPARING TEAS
- Preparing a tea
- PREPARING OTHER DRINKS: RISTRETTO, DOPPIO, AMERICANO OR FROTHY MILK
- Making a Ristretto
- Making a Doppio
- Making an Americano
- Making a Frothy milk
- Rinsing the "One Touch Cappuccino" block
- OTHER FUNCTIONS
- Settings
- Info
- GENERAL MAINTENANCE
- Emptying the coffee grounds collector and the drip tray
- Rinsing the circuits:
- Automatic cleaning programs
- Automatic cleaning program of the coffee circuit
- Cleaning the "One Touch Cappuccino" block
- Dismantling the "One Touch Cappuccino" block
- Fig. 23.
- Automatic descaling program of the steam circuit
- TROUBLESHOOTING
- BESCHRIJVING VAN HET APPARAAT
- VIGTIGE OPLYSNINGER OM PRODUKTET OG BRUGSVEJLEDNINGEN
- VIKTIG PRODUKTINFORMASJÖN OG BRUKSANVISNING
- holder for kaffebonner
- GENERELT VEDLIKEHOLD
- VIKTIG INFORMATION OM PRODUKTEN OCH BRUKSANVISNINGEN
- TÄRKEÄÄ TIETOA TUOTTEESTA JA KÄYTTÖOHJEESTA
- DÜLEŽITÉ INFORMACE O VÝROBKU A ZPŮSOBU POUŽITÍ
- APLIKÁCIA KRUPS ESPRESSO
Brand : KRUPS
Model : Evidence EA8931
Category : Coffee machine