
AX31201 - Air purifier AEG - Free user manual and instructions
Find the device manual for free AX31201 AEG in PDF.
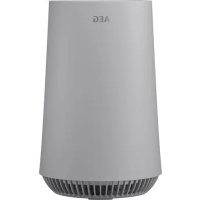



| Product type | Air purifier |
| Brand | AEG |
| Model | AX31201 |
| Power supply | 50 Hz or 60 Hz, grounded plug |
| Operating modes | Auto, Sleep, Manual (3 speeds) |
| Air quality indicator | Yes, colors (Green, Yellow, Orange, Red) based on PM2.5 |
| Filter change indicator | Yes, red flashing then solid |
| Filter type | Composite multi-layer filter (not washable) |
| Pre-filter | Wipeable (dry cleaning or damp cloth) |
| Air quality sensor | Built-in PM2.5 sensor |
| Airflow | 3 adjustable speeds |
| Noise level | Low in Sleep mode |
| Filter installation | Open the base, remove packaging, insert filter, close |
| Cleaning | Unplug, use a damp cloth, no harsh cleaners |
| Filter replacement | When the indicator flashes or stays red, replace and reset |
| Filter indicator reset | Press the mode icon for 3 seconds |
| Error codes | Fan fault (screen off) or sensor fault (quality indicator off) |
| Child safety | Use possible from 8 years under supervision |
| Grounding | Required, do not use extension cord or adapter |
| Storage | Cover or put back in box if prolonged non-use |
| Included accessories | Pre-installed multi-layer filter, user manual |
Frequently Asked Questions - AX31201 AEG
User questions about AX31201 AEG
0 question about this device. Answer the ones you know or ask your own.
Ask a new question about this device
Download the instructions for your Air purifier in PDF format for free! Find your manual AX31201 - AEG and take your electronic device back in hand. On this page are published all the documents necessary for the use of your device. AX31201 by AEG.
USER MANUAL AX31201 AEG
A. Air outlet B. UI panel C. Main body D. Base E. Sensor window & Adapter jack
Control panel:
F. Fan speed indicator G. Power on/off H. Fan speed control I. Air quality indicator J. Filter change indicator
K. Toggle mode & Filter reset L. Auto mode indicator M. Sleep mode indicator
DESCRIPTION OF YOUR AIR PURIFIER AX3
Unit:
A. Michous 3a yvbevch B. Panel on consumer needs C. Main body D. Base E. Sensor window and antenna jack
Control panel:
F. Fan speed indicator G. On/off for heating H. Fan speed control I. Air quality indicator
J. Filter change indicator K. Mode toggle and filter reset L. Auto mode indicator M. Sleep mode indicator
DESCRIPTION OF YOUR AIR PURIFIER AX3
Unit:
This USER MANUAL provides specific operating instructions for your model. Use the unit only as instructed in this USER MANUAL. These instructions are not meant to cover every possible condition and situation that may occur. Common sense and caution must be practiced when installing, operating, and maintaining any appliance.
WARNING! Avoid fire hazard or electric shock. Do not use an extension cord or an adaptor plug. Do not remove any prong from the power cord. This appliance can be used in 50Hz or 60Hz power supply without any change.
Do not under any circumstances, cut, remove or bypass the grounding prong.
Do not store or use gasoline or other flammable vapors and liquids in the vicinity of this or any other appliance. Read product labels for flammability and other warnings.
Do not let water or any other liquid or flammable detergent enter the appliance to avoid electric shock and/or a fire hazard.
Do not touch the fan blade when removing the filter.
Children and Vulnerable People Safety
WARNING! Risk of suffocation, injury or permanent disability.
This appliance can be used by children aged from 8 years and above and persons with reduced physical, sensory or mental capabilities or lack of experience and knowledge if they have been given supervision or instruction concerning use of the appliance in a safe way and understand the hazards involved.
Children shall not play with the appliance.
Cleaning and user maintenance shall not be made by children without supervision.
Children under 3 years of age should be kept away from the appliance unless continuously supervised.
Keep all packaging away from children.
If the appliance has a child safety device, we recommend you activate it.
Electrical Information
WARNING! Avoid fire hazard or electric shock.
If you are not sure the outlet is adequately grounded or protected by a time delay fuse or circuit breaker, have a qualified electrician install the proper outlet according to the National Electrical Code and applicable local codes and ordinances.
Do not use an extension cord or an adapter plug.
Never unplug the unit by pulling on the power cord.
Always grip the plug firmly and pull straight out from the receptacle.
Do not pinch, bend, or knot the power cord.
Do not cut or damage the power cord. If the power cord is damaged, it should only be replaced by an authorized AEG servicer. This unit contains no user-serviceable parts. Always call an authorized AEG servicer for repairs.
If the supply cord is damaged, it must be replaced by the manufacturer, its service agent or similarly qualified persons in order to avoid a hazard.
Be sure to unplug the unit before cleaning to prevent shock or fire hazards.
Safety Precautions
CAUTION! Avoid Serious Injury or Death.
Do not insert or place fingers or objects into the air discharge area or front grille of the unit.
Do not start or stop the unit by unplugging the power cord or turning off the power at the electrical box.
In the event of a malfunction (sparks, burning smell, etc.), immediately stop the operation, disconnect the power cord, and call an authorized AEG servicer. Do not operate the unit with wet hands.
Do not pull on the power cord.
CAUTION! Avoid Injury or damage to the unit or other property.
Do not direct airflow at fireplaces or other heat related sources as this could cause flare ups.
Do not climb on or place objects on the unit.
Do not hang objects off the unit.
Do not place containers with liquids on the unit.
Turn off the unit at the power source when it will not be used for an extended period of time.
Operate the unit with air filter in place.
Do not block or cover the intake grille, discharge area and outlet ports.
Ensure that any electrical/electronic equipment is 30 cm away from the unit.
DISPOSAL

This symbol on the product indicates that this product contains a battery which shall not be disposed with normal household waste.

This symbol on the product or on its packaging indicates that the product may not be treated as household waste.
To recycle your product, please take it to an official collection point or to an AEG service center that can remove and recycle the battery and electric parts in a safe and professional way. Follow your country's rules for the separate collection of electrical products and rechargeable batteries.
ENGLISH
Thank you for choosing the AEG air purifier AX3. Always use original accessories and spare parts to get the best results. This product is designed with the environment in mind. All plastic parts are marked for recycling purposes.
BEFORE STARTING
- Read this manual carefully.
- Check that all parts described are included.
- Pay special attention to the safety precautions!
SETUP
The filters have to be installed before use. Caution: Switch off the device before installing filters.
1 Open the base of the filter
Open the product by rotating the base in anticlockwise direction with the handle provided at the bottom till it comes loose (ref. picture 1).
2 Take out the filter and remove the filter bag
Carefully remove the filter including plastic packaging from the unit and break open the plastic bag and discard appropriately (ref. picture 2).
3 Install the filter
Carefully insert the filter back into the product without the plastic packaging (either end of the filter works). Take care that the filter is placed in the center of the cavity (ref. picture 3).
4 Close the base
Close the product by rotating the base in clockwise direction with the handle provided at the bottom till it is securely in place. (ref. picture 4).
OPERATION
Caution: Please ensure the filters are correctly inserted in the filter compartment, the equipment is installed on a level surface and the power plug is firmly connected.
5 Connect the power plug. 6 Power on Power on the product by gently touching the ON/OFF icon on the center of the product (ref. picture 6). 7 Fan speed control
Change the fan speed by gently touching fan icon on the product. If the product is in AUTO mode, it will switch to manual mode on touching the fan icon. (ref. picture 7).
8 Auto mode and sleep mode
Change between AUTO and SLEEP mode by gently touching the icon labeled with two leaves.
In AUTO mode the unit will adjust operation according to latest air quality (PM2.5 level). In SLEEP mode unit will operate at the low noise level and all indicators except for SLEEP icon will go off.
9 Power off
Power down the product by gently touching the ON/OFF icon on the center of the product (ref. picture 9).
AIR QUALITY INDICATOR
10 The appliance has an air quality sensor that analyzes the air quality.
The air quality light will show the real-time air quality through different colors of light. As shown below:
| LIGHT'S COLOR PM 2.5 (μg/m3) AIR QUALITY | |
| Green 0-12 Very Good | |
| Yellow 13-35 Good | |
| Orange 36-55 Poor | |
| Red >56 Bad | |
FILTER CHANGE INDICATOR
11 The filter change indicator will light up to remind you to change the filter (Ref. # AFFBRZ2).
- When filter change indicator flicker with red light, please replace the filter and reset the filter change indicator.
- When filter change indicator stop flicker and the red light fix, please replace the filter immediately and reset the filter change indicator.
12 Filter change indicator reset operation
Press the mode icon labeled " " for 3s and filter change indicator will reset, then red light will go off.
CARE AND CLEANING
13 Unplug the appliance before cleaning to prevent shock or fire hazards. Use a damp cloth or a vacuum cleaner with a soft brush to clean your air purifier. 14 The plastic part of the cabinet and top may be cleaned with an oil-free cloth or washed with a cloth dampened in a solution of warm water and mild liquid dishwashing detergent. Be sure to wring excess water from the cloth before wiping around the controls. Excess water in or around the controls may cause damage to the appliance. 15 Never use harsh cleaners, wax or polish when cleaning the unit.
STORAGE
16 If you are not planning to use the appliance for a long time, cover it with plastic or return it to its carton.
NOTE: The multi-layer filter cannot be washed; it can only be replaced.
CAUTION!
Do not touch the fan blade when removing the multi-layer filter.
ERROR CODE
17 Fan failure error code, when fan failure occurs, the light of screen will all go off and the unit can't be operated then. Air quality sensor failure error code, when sensor failure occurs, the light of air quality indicator will go off and the unit can't be set on auto mode.
TROUBLESHOOTING
When fault indicators show that the system is not operating properly, perform the following check.
Commonly Asked Questions & Topics
Carry out the operations below for commonly-occurring questions or faults.
| Questions or Faults Possible | Diagnosis Corrective Steps / Reasoning | |
| Can the filters be washed? | NO | Replace the compound filter instead of wash, the pre-filter can be wiped. |
| The control panel does not seem to work. | • Power cord issue • Filter compartment issue • Fan Motor Failure | 1. Please ensure power cord is firmly attached to the unit as well as socket on the wall and then retry pressing the ON/OFF icon. 2. Please reopen bottom of the unit, readjust the filter so it is centrally placed in cavity and close the bottom. Ensure bottom is firmly in place & locked and then retry operating the unit. 3. If above two steps do not resolve this issue, then the unit has experienced a fan motor failure and will not operate. Please contact AEG authorized servicer for further troubleshooting or repairs. |
| The equipment emits a lot of noise. | The installation location is not at even level or the filter is not properly inserted. | Install the equipment on a level surface and re-verify filter installation position and order. |
| The equipment operates normally but the outgoing air volume is significantly reduced. | The outlet might be blocked by a foreign object or the filter has not been replaced in a timely manner. | Please re-adjust the equipment installation position to ensure enough space is reserved, and confirm that filter have been replaced according to filter replacement indicator status. |
| If the fault encountered is not listed above, please call the Customer Service Hotline. | ||
This user manual contains instructions for working with your device. Use the device only in accordance with the instructions in this user manual. These instructions do not cover all possible conditions and situations that may arise. Use common sense and be careful when installing, operating, and maintaining all equipment.
WARNING! Avoid the risk of fire or electric shock. Do not use damaged cables or plugs. Do not remove the plug from the socket by pulling the cable. This device can be used with a socket of 50Hz or 60Hz without modification.
If the device is not working properly, remove or repair the grounding wire.
Do not use or store gasoline or other flammable liquids near the device or other equipment. Read the product labels for flammability and other warnings.
Do not allow water or other liquids or flammable substances to enter the device, to avoid electric shock and/or fire hazard.
Do not touch the fan blade when removing the filter.
WARNING! Risk of suffocation, entanglement, and strangulation.
This device can be used by children aged 8 and above and by persons with reduced physical, sensory, or mental capabilities or lack of experience and knowledge, if they have been given supervision or instruction concerning safe use of the device and understand the hazards involved.
Children must not play with the device.
Cleaning and maintenance must not be performed by children without supervision.
Children under 3 years old must be kept away from the device unless they are constantly supervised.
Keep all packaging materials away from children.
If the device has a child protection mechanism, it is recommended to activate it.
Normal for electricity
DANGER! Risk of fire or electric shock.
If you do not follow the instructions, the contact may not be properly grounded or protected. Before filling or emptying, contact a qualified electrician to install the appropriate contact according to
the national electrical codes and local codes.
Do not use extension cords or adapters. Never disconnect the device by pulling the power cord. Always grasp the plug and remove it from the outlet.
Do not bend, pull, or strain the power cord.
Do not cut or damage the power cord. If the power cord is damaged, it must be repaired only by the manufacturer or its service agent. This device contains no user-serviceable parts. Contact the manufacturer's service technician for repair.
If the power cord is damaged, it must be replaced by the manufacturer, its service agent, or similarly qualified persons to avoid a hazard. Unplug the device before cleaning to prevent the risk of electric shock or fire.
Safety instructions
WARNING! Risk of serious injury or death.
Do not insert fingers or objects into the air outlet or the top grille of the device.
Do not connect or disconnect the device by pulling the power cord or by switching the electricity off at the socket.
In case of malfunction (sparks, smell of burning, etc.), immediately turn off the device, unplug the power cord from the outlet, and contact the manufacturer's service technician. Do not operate the device with wet hands.
Do not unplug the power cord by pulling it.
WARNING! Risk of injury or damage to the device or other property.
Do not direct the air flow at fireplaces or other heating devices, as this could cause a fire.
Never place or put items on top of the device. Do not place items on the device.
Do not place anything hot on top of the device.
Disconnect the device from the power source when not in use for an extended period of time.
Use the device with the filter installed.
Do not close or cover the air intake grille, the air outlet, and the exhaust openings.
Make sure that all electrical/electronic equipment is at least 30 cm away from the device.
Disposal

This symbol on the product indicates that this product contains a battery that must not be disposed of with ordinary household waste.
This symbol on the product or its packaging indicates that the product cannot be treated as household waste.
To recycle this product, take it to a communal collection point for waste or an AEG service center, which can accept and recycle batteries and electrical parts in a safe and professional manner. Follow your country's regulations for the separate collection of electrical products and rechargeable batteries.
BULGARIAN
Thank you for choosing an AEG appliance.
Always use original spare parts to achieve the best results. This product is designed with the environment in mind.
All packaging parts are marked for recycling.
WARNING
Read the instructions carefully. - Check that all described parts are included. - Pay special attention to Chapter 3 on safety measures.
SETUP
The filter is intended for installation and use.
Warning: Disconnect the device before installing the filters.
1 Open the base of the sieve
Open the product by turning the base counterclockwise, with the lid on the bottom, until it loosens (see Figure 1).
2 Remove the filter and remove the filter bag
Remove the filter, including the new packaging, from the device, open the new filter bag and pour it into the container (see Figure 2).
3 Install the filter.
Remove and insert the filter back into the product without the new packaging (the filter tap position matters). Remove the filter to place it in the center of the kitchen (see Figure 3).
4 Close the base
Close the product by turning the base clockwise, with the lid on the bottom, until it is securely fastened. (see Figure 4).
OPERATION
Warning: Make sure the filters are correctly placed in the filter compartment, the equipment is mounted on a flat surface, and the device is properly connected.
5 Connect the power cable.
Turn on the product by lightly touching the ON/OFF button (on/off) on the front of the product (see figure 6).
7 Fan speed control
Change the fan speed by lightly touching the fan button on the product. If the product is in timer mode (automatic), it will prioritize the timer setting when the fan button is touched (see figure 7).
8 Automatic mode and sleep mode
Press the MODE button to switch between AUTO (automatic) and SLEEP (sleep) modes by lightly touching the button with the symbol.
In AUTO (automatic) mode, the device will regulate the fan speed according to the current air quality (PM 2.5 level). In SLEEP (sleep) mode, the device will operate at a low fan speed and all indicators, except the SLEEP (sleep) button, will turn off.
9 Turning off
Turn off the device by lightly touching the ON/OFF button (on/off) on the front of the product (see figure 9).
AIR QUALITY INDICATOR
10 The device has an air quality sensor that analyzes the air quality.
The air quality indicator will show the air quality in real time through different colors. Reference guide:
| ЦВЯТ HA ЛAMПИЧКATA | PM 2,5 (μg/m3) KАЧECTBO HA ВьЗДУХА | |
| Зелен 0-12 Много д | бро | |
| Жыт 13-35 Добро | ||
| Оразожев 36-55 Нд | бро | |
| Червен >56 Пошо |
FILTER REPLACEMENT INDICATOR
11 The filter replacement indicator will light up to remind you to replace the filter (see figure 11).
When the filter replacement indicator lights up in red, replace the filter and reset the filter replacement indicator. When the filter replacement indicator starts to blink and the red light blinks continuously, replace the filter immediately and reset the filter replacement indicator.
12. Replace the filter indicator
Press the mode button with the sign , for 3 seconds and the filter replacement indicator will be reset.
The red light will go out.
CLEANING
13. Unplug the device before cleaning, to avoid the risk of electric shock or fire. Use a dry cloth or vacuum cleaner with a brush to clean the device. 14. The housing and the filter can be cleaned with a dry cloth. Do not use water or liquid cleaning agents. Clean the air inlet and outlet zones around the control. The water that has entered the device around the control can damage the device. 15. Never use abrasive cleaning agents, wax or polish when cleaning the device.
STORAGE
16. If you do not plan to use the device for a long time, cover it with a cloth and put it back in its cardboard packaging.
NOTE: The multi-layer filter cannot be washed, it can only be replaced.
WARNING!
Do not touch the fan blade when removing the multi-layer filter.
ERROR CODE
17. Error code for fan damage: when fan damage occurs, the indicator light will go out and the device cannot be operated. 18. Error code for air quality sensor damage: when sensor damage occurs, the air quality indicator will light up and the device cannot be set to automatic mode.
TROUBLESHOOTING
When the error indicators show that the system is not working properly, perform the following check.
Frequently asked questions
| Въпrosи ялни гравши Възможнда сиза Коригираши сиза / почни | ||
| Може лу phигпITE да се измват? | HE | Вмесо ИЗМИВАЕ, Смени КOMбИнраПИйФИьр, РрфИльТьрТ Може дa се избьршe. |
| Конtrолноя панел не работи. | · П robем сбс зхранваши кавел · П robем с отдениcope эд phигп · П robем с мотора на Вентулаторa | 1. Уberete сe, чe зхранвашит кабел e здраво рпигрени Кьм ураза, кakто и Кьм Контакт ha стени и сlement Това натиchede отною Иковая ON/OFF (BКЛ./ИЗКЛ.).2. OTворete отною дOLнота част ha ураза, пенистрие phильт рaka, чe за e постavenь в Кухина и за Затаря дьното. Уberete сe, чe дьното e zdраво поставен ha зakлочenho, сlement Това погате отною дa рабочite с ураза. 3. Ако no-горнITE дve сизи не рeshат TOЗI phoblam, Toraba моторьт ha Вентулаторa ha ураза e поvere徳 и Нама дa работи. Свьржete сe с оториран сервиц ha AEG за погидуншо отстдану ван нензправноctи пли ремонтп. |
| ОБорudванeto e m Horo ш汞но. | ЯстOTO Ha монтajх He e paBNO илу phильтьрт He e постaven правллно. | МontURAITE oboprudbaheTo ha paBna nobbyrxnoct Иnotвьрдete OTHOBO позицят ha phinlbpa 3a мOLTж и Komahandata. |
| ОБорudванeto pa60tNi нормално, Ho обemьт На изхоряшя Вьздух e 3начтелно hamален. | Изхов т може дe e 6лokиран OTЧУДобекллу phильтьрт He e 6лл сбоевримно сmedен. | Помение OTHOBO позицят ha мOLTж ha оборudванeto, за за сcentур; Достаычно м greatly ha уberete, чe фильтьрт e сmeden с鞘ед статуca н inhдikatopar 3a сма на chiltpьа. |
| Ако вьзнокhalata grewska He e b cspcsbka lo-rope, обадete се на ropeцata Линя за облужванe на клиенти. | ||
WARNING! THIS APPLIANCE MUST BE EARTHED.
If the supply cord is damaged, it must be replaced by the manufacturer, its service agent or similarly qualified persons in order to avoid a hazard.
Do not use the appliance if the cord or plug is damaged. Do not pull the cord to disconnect the plug from the socket. Always hold the plug and pull it out of the socket.
Operate the product by pressing the ON/OFF button on the center of the product (see Figure 6).
7 Speed control
Adjust the speed of the fan by pressing the fan button located on the top of the product.
If the product is in AUTO mode, it will switch to manual mode when you press the fan button. (See Figure 7).
8 Automatic operation and sleep mode


- CONTROL PANEL
- DESCRIPTION OF YOUR AIR PURIFIER AX
- UNIT
- CHILDREN AND VULNERABLE PEOPLE SAFETY
- ELECTRICAL INFORMATION
- SAFETY PRECAUTIONS
- DISPOSAL
- ENGLISH
- BEFORE STARTING
- SETUP
- OPERATION
- AUTO MODE AND SLEEP MODE
- POWER OFF
- AIR QUALITY INDICATOR
- THE APPLIANCE HAS AN AIR QUALITY SENSOR THAT ANALYZES THE AIR QUALITY
- FILTER CHANGE INDICATOR
- THE FILTER CHANGE INDICATOR WILL LIGHT UP TO REMIND YOU TO CHANGE THE FILTER (REF. # AFFBRZ2)
- FILTER CHANGE INDICATOR RESET OPERATION
- CARE AND CLEANING
- STORAGE
- CAUTION
- ERROR CODE
- TROUBLESHOOTING
- NORMAL FOR ELECTRICITY
- SAFETY INSTRUCTIONS
- BULGARIAN
- WARNING
- FAN SPEED CONTROL
- AUTOMATIC MODE AND SLEEP MODE
- TURNING OFF
- FILTER REPLACEMENT INDICATOR
- CLEANING
- AUTOMATIC OPERATION AND SLEEP MODE
Brand : AEG
Model : AX31201
Category : Air purifier