
T805 - GPS device MOTOROLA - Free user manual and instructions
Find the device manual for free T805 MOTOROLA in PDF.
| Product Type | Bluetooth GPS Receiver |
| Brand | Motorola |
| Model | T805 |
| Weight | Approximately 50 g |
| Dimensions | Approximately 70 x 40 x 15 mm |
| Power Supply | Rechargeable lithium-ion battery |
| Charger | 12V vehicle charger included |
| Battery Life | Up to 8 hours (estimated) |
| Connectivity | Bluetooth |
| Application | MOTONAV |
| Main Functions | GPS navigation, POI search, radar alerts (depending on country), pedestrian mode |
| Included Accessories | Dashboard mount, belt clip, vehicle charger, phone holder, activation form |
| Compatibility | Bluetooth phones with data subscription |
| Maintenance | Clean with a soft, dry cloth |
| Safety | Do not use while driving; obey traffic laws |
| Recycling | Do not dispose of with household waste; return to collection point |
| Compliance | CE, FCC |
Frequently Asked Questions - T805 MOTOROLA
User questions about T805 MOTOROLA
0 question about this device. Answer the ones you know or ask your own.
Ask a new question about this device
Download the instructions for your GPS device in PDF format for free! Find your manual T805 - MOTOROLA and take your electronic device back in hand. On this page are published all the documents necessary for the use of your device. T805 by MOTOROLA.
USER MANUAL T805 MOTOROLA
MOTOROLA and the Stylized M Logo are registered in the US Patent & Trademark Office. The use of wireless devices and their accessories may be prohibited or restricted in certain areas. Always obey the laws and regulations on the use of these products. The Bluetooth trademarks are owned by their proprietor and used by Motorola, Inc. under license. VELCRO is a registered trademark of Velcro Industries B.V. Nokia is a trademark or registered trademark of Nokia Corporation. Sony is a trademark or registered trademark of Sony Corporation. Ericsson is a trademark or registered trademark of Telefonaktiebolaget LM Ericsson. All other product or service names are the property of their respective owners. © Motorola, Inc. 2007
PN: 6803578F04 - Printed in the EU

motorola
Phone-Based
Navigation System T805
featuring MOTONAV™
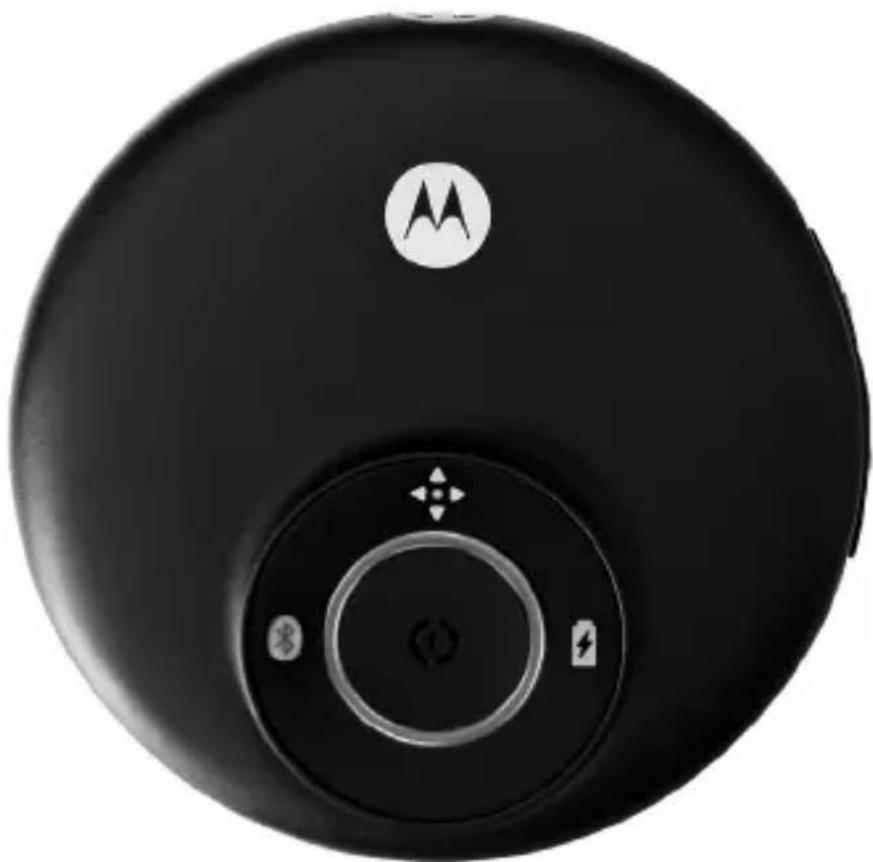
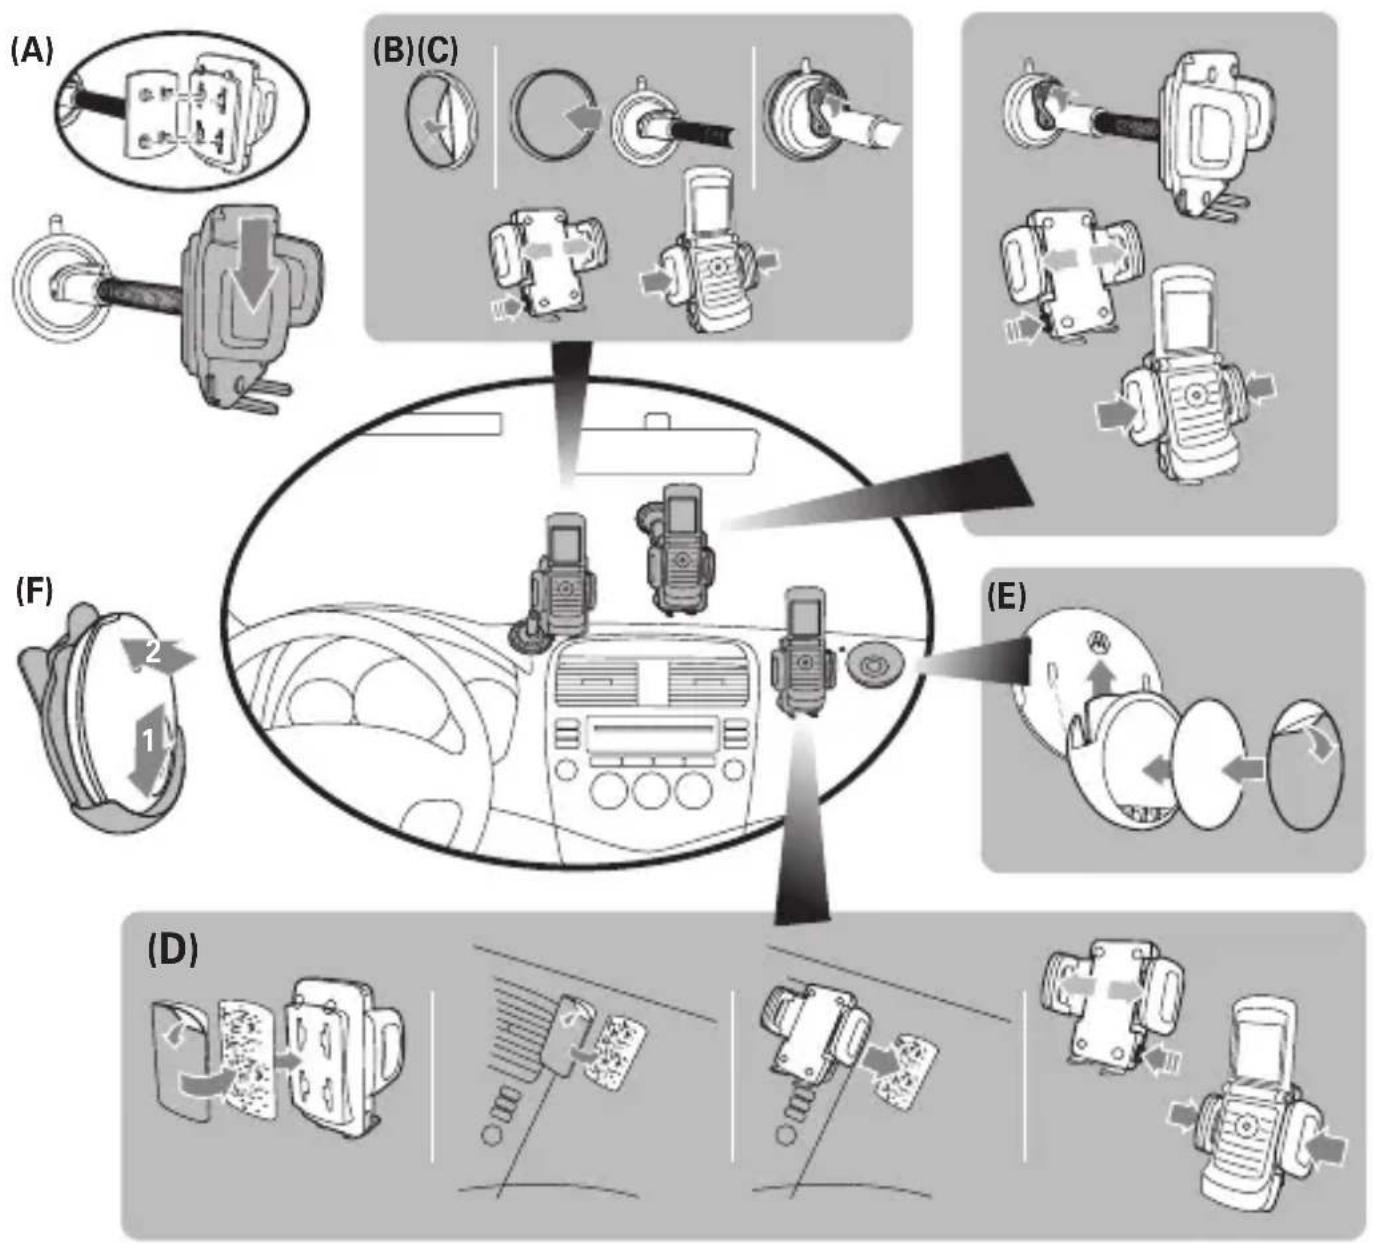
Figure 1
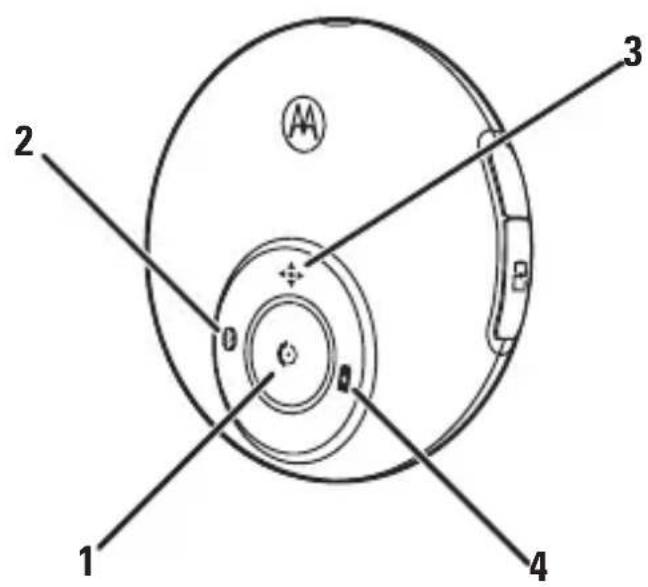
Figure 2

Figure 3
European Union Directives Conformance Statement

Hereby, Motorola Inc., declares that this T805 is in compliance with the essential requirements and other relevant provisions of Directive 1999/5/EC.
You can view your product's Declaration of Conformity (DoC) to Directive 1999/5/EC (the R&TTE Directive) at www.motorola.com/rtte.
Caring for the Environment by Recycling
When you see this symbol on a Motorola product, do not dispose the product with household waste.
Recycling Mobile Phones and Accessories
Do not dispose of mobile phones or electrical accessories, such as chargers or headsets, with your household waste. In some countries or regions, collection systems are set up to handle electrical and electronic waste items. Contact your regional authorities for more details. If collection systems aren't available, return unwanted mobile phones or electrical accessories to any Motorola Approved Service Centre in your region.
FCC Notice to Users
Users are not permitted to make changes or modify the device in any way. Changes or modifications not expressly approved by the party responsible for compliance could void the user's authority to operate the equipment. See 47-CFR-Sec.-15.21.
This device complies with part 15 of the FCC Rules. Operation is subject to the following two conditions: (1) This device may not cause harmful interference, and (2) this device must accept any interference received, including interference that may cause undesired operation. See-47-CFR-Sec.-15.19(3).
Before you begin
Before you get started, familiarize yourself with the components of your new Phone-Based Navigation System T805 featuring MOTONAV™.
The following items are provided in the box included with your system:
- Bluetooth ® GPS receiver
- Dash mounting hardware
- Belt mounting hardware*
- Car charger
Universal phone holder -
MOTONAV activation voucher
-
Belt holder not available in all regions.
The following item must be purchased separately to complete the full phone-based navigation system experience:
- Compatible Bluetooth phone with data service subscription from your service provider.
Warning
Traffic laws and current traffic conditions must always be observed and take precedence over the instructions issued by the navigation system.
The user should be aware of situations where current traffic conditions and the instructions from the navigation system may be in conflict.
The use of the navigation system does not relieve the user of his/her responsibilities. The user is ultimately responsible for the vehicle under his/her control and should be aware of the surroundings at all times. For traffic safety reasons, it is recommended that routes should be planned in a stationary vehicle before starting a trip.
Privacy: Operation of the navigation system requires that the user's position be sent to a central server for use in certain features of MOTONAV. The server is operated by Jentro Technologies GmbH, a Motorola-approved service provider (www.jentro.com). This information will only be used to provide the requested service and will not be shared with any additional third parties. Users who prefer not to permit such tracking and monitoring should avoid using the navigation system.
Responsibility: Certain features of MOTONAV require wireless network data access. The user is responsible for all data access charges.
MOTOROLA IS NOT RESPONSIBLE FOR ANY DIRECT, INDIRECT, INCIDENTAL, CONSEQUENTIAL, EXEMPLARY, SPECIAL, OR PUNITIVE DAMAGES, OR OTHER DAMAGE ARISING OUT OF THE USE OF, OR INABILITY TO USE, THIS PRODUCT. THIS INCLUDES DAMAGE TO PROPERTY AND, TO THE EXTENT PERMITTED BY LAW, DAMAGES FOR PERSONAL INJURY AND DEATH.
Laws in some areas prohibit the use of a cellular phone when driving a motor vehicle. Please use the utmost care in using your cellular phone safely under all circumstances. It is the responsibility of each cellular phone user to be aware of and abide by any and all local laws and ordinances, which may restrict the use of cellular phones.
MOTONAV website
This Quick Start Guide provides step-by-step instructions for installing, setting up and starting your navigation system.
For additional details, go to the MOTONAV website: www.hellomoto.com/motonav
The MOTONAV website has:
detailed, step-by-step guides by phone type and/or service provider on installing, setting up, and starting MOTONAV
troubleshooting assistance for problems with installing and setting up MOTONAV
- the latest MOTONAV news and updates
- destination entry tools for added convenience
- user profile management tools
- options for purchasing additional service
Secure phone and Bluetooth GPS receiver
See figure 1 on page 1.
Secure phone in car
You can safely secure your phone in your car using the universal phone holder included with your navigation system. With the universal phone holder, you have three options for securing your phone. Each option is described below along with detailed illustrations to the right.
- To secure your phone to the dashboard using the phone holder and extension arm, first place the four legs into the slots on the holder and slide down to lock into place as shown by (A). Then, affix the enclosed circular disc to your dash or center console and attach the suction cup on the extension arm to the disc (push down on lever) as shown by (B). Place your phone in the phone holder and squeeze the sides together. To release your phone from the holder, push button on the left side.
- To secure your phone to the windshield using the phone holder and extension arm, first place the four legs into the slots on the holder and slide down to lock into place as shown by (A). Then, attach the suction cup on the extension arm to the windshield (push down on lever) as shown by (C). Place your phone in the phone holder and squeeze the sides together. To release your phone from the holder, push button on the left side.
- To secure your phone to the front of the dashboard using only the phone holder, first affix the enclosed adhesive or VELCRO strips to both the phone holder and the desired location on the front of the dashboard as shown by (D). Then, firmly attach the phone holder to dashboard using the VELCRO strips. Place your phone in the phone holder and squeeze the sides together. To release your phone from the holder, push button on the left side.
Tips for using the universal phone holder to secure your phone in your car:
- If the sides of the phone holder block buttons on the side of your phone, remove the L-shaped legs and insert into the groove on the opposite side of the phone holder.
- To help keep the L-shaped legs in place, insert the enclosed rubber strip into the groove on either side of the feet.
- If your phone is wide, insert one side of the phone first, then gently press the other side into place so that the foam pads are not damaged.
- To minimize vibration when using the extension arm, rest the base of the phone holder on your dashboard.
- If needed, an extra set of foam pads are included for the phone holder.
Secure GPS receiver
You can safely secure your Bluetooth GPS receiver on the dashboard in your car or onto your belt*.
To secure your GPS receiver to the dashboard in your car, first affix adhesive, VELCRO, or rubber pad onto bottom of holder, then slide GPS receiver onto other side holder as shown by (E). Once assembled, secure the GPS receiver by affixing the adhesive or VELCRO on the bottom of the holder to your dashboard (or if you used the rubber pad, place on the dashboard).
To secure your GPS receiver onto your belt, insert the GPS receiver into the belt clip holder following numbered steps as shown by (F). Once the GPS receiver is inside the belt clip holder, use belt clip to place onto your belt.
* Belt holder not available in all regions.
Follow these steps to download and install the MOTONAV application on your phone.
Important:
You must be subscribed to a data service plan with your service provider for your phone. If not subscribed to a data plan, contact your service provider.
Verify that the correct date and time are set on your phone before you start this procedure.
If you have a memory card in your phone, remove it before installing MOTONAV. You can reinsert your card when MOTONAV installation is complete.
1 Locate the activation voucher in the box.
The voucher contains a 20-digit activation code used to activate and register your MOTONAV subscription.
2 On your phone, create a new Short Message Service (SMS) text message, type in the 20-digit code on the activation voucher, and send the SMS message to the phone number of your country as listed on the activation voucher.
You will be subscribed to 12 months of unlimited MOTONAV use in the selected country. After a few minutes, you should receive two text messages from MOTONAV.
3 Open the text message containing MOTONAV login data.
4 Write down the user name and password, then delete the text message (for security purposes).
5 Open the text message containing a download link.
Important:
If you did not receive a text message with download link, open your phone's web browser and go to get motonav.net to access the MOTONAV Download page. Proceed to step 7 to download the MOTONAV application to your phone. When prompted, enter your user name.
6 Select/open link in the text message to open web browser and view the MOTONAV Download page.
Use the following tips to open the download link:
To open link on Motorola phones, select Options > Go To or press center key and select Go To.
- To open link on Nokia phones, press center of Navigation key or use Options menu, then Use detail or Find.
To open link on Sony Ericsson phones, select Open.
Upon opening the link, a MOTONAV Download page is displayed in the web browser as shown below:
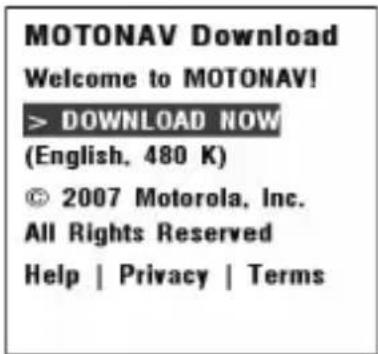
7 If prompted, select preferred language.
8 Select DOWNLOAD NOW and follow prompts to download and install MOTONAV application on your phone.
When installation completes, DO NOT start MOTONAV application if prompted.
9 Close web browser.
Set up navigation system
Start Bluetooth on phone
Before setting up MOTONAV, ensure the Bluetooth feature is turned on in your phone. To turn on Bluetooth on Motorola phones:
1 Press (Main Menu) > Settings > Connection (or Connectivity) > Bluetooth Link > Setup.
2 Scroll to Power
3 Select Change
4 Scroll to On
5 Press Select to turn on the Bluetooth feature. The Bluetooth feature remains on until you turn the feature off
Note: These steps are for most Motorola phones. For all other phones, see your phone's user guide.
Turn on GPS receiver
To begin setting up MOTONAV, you must first turn on the Bluetooth GPS receiver. To turn on your GPS receiver, press and hold the Power button until the Battery Status indicator is lit. After a few moments, both the GPS and Bluetooth indicator lights begin flashing.
See figure 2 on page 2.
1 Power button
2 Bluetooth indicator light
3 GPS indicator light
4 Battery status indicator light
Configure MOTONAV
Follow these steps to configure MOTONAV to operate with your navigation system.
1 If using a Nokia series 40 phone (5200, 5300, 6111, 6211, 6230i, 6233, 6234, 6280, and others), perform the following steps:
(For all other phones, go to step 2.)
a Go to Applications and highlight MOTONAV (but do not start it).
b Select Options > Application access > Communication > Network access > Always allowed.
c Select Options > Application access > Communication > Connectivity > Always allowed.
d Select Options > Data/Phone access > Read user data > Always allowed.
e Select Options > Data/Phone access > Add and edit data > Always allowed.
2 On your phone, launch the MOTONAV application.
Follow the applicable steps below to launch MOTONAV on your phone:
- On Motorola phones, press (Main Menu) > Games & Applications.
- On Nokia phones, try Menu > Applications, Menu > My Own, or take a look into one of the sub folders.
- On Sony Ericsson phones, go to location specified during installation.
3 Configure the MOTONAV application:
- I f a MOTONAV Setup Wizard screen is displayed, go to step 4 and follow prompts to launch and execute the MOTONAV Setup Wizard.
If a MOTONAV Setup Wizard screen is not displayed, skip to step 5 to manually configure settings.
4 Follow prompts to launch and perform the MOTONAV Setup Wizard. During the setup wizard, you will: Note: Ensure the Bluetooth GPS receiver is turned on while performing these steps.
- Enter/save MOTONAV user name and password (as defined in step 4 of "Install MOTONAV").
- Test/verify connectivity with the MOTONAV system.
- Pair/connect with the GPS receiver. (If prompted for Bluetooth passcode, enter 0000).
- Download and install voice announcements for guidance instructions.
- Set preferred measurement units.
A completion message is displayed when setup wizard is complete. Click Cancel to display MOTONAV main screen (or proceed to display MOTONAV tips).
5 Follow these steps to configure MOTONAV:
5 Follow these steps to configure MOTONAV: Note: These steps need to be performed only if the MOTONAV Setup Wizard was not displayed and
Note: Ensure the Bluetooth GPS receiver is turned on while performing these steps.
a Select Options > Settings > Login to enter user name and password (as specified in step 4 of "Install MOTONÁV").
b Select Options > Settings > GPS to pair/connect with GPS receiver.
c Select Options > Settings > Voice announcements > Available downloads > Standard to download and install voice announcements for guidance instructions.
Test and use
MOTONAV is now ready for use. To verify correct configuration:
1 Turn on GPS receiver and launch MOTONAV (if not already running on your phone).
2 Select Local search > Current Location (or Select Destination > Local search > Current Location).
3 Select a category to search and press Search.
MOTONAV should connect to your GPS receiver, obtain your current position, connect to the MOTONAV server to do the search, and then present a list of the nearest matches on your phone.
After you have successfully set up your navigation system, you don't need to repeat these steps.
For daily use, ensure that your GPS receiver is turned ON and MOTONAV is running on your phone.
For details on using the MOTONAV application, download the user guide at: www.hellomoto.com/motonav
Notes on navigation system operation
- The Bluetooth indicator light on the GPS receiver flashes until connected with your phone. A Bluetooth connection is established only when a service that requires position (such as a route, map, or local search) is requested by MOTONAV. During normal operation, because connection between your phone and GPS receiver is established only when needed (not continuous), the indicator light changes between flashing and steadily lit (or turns off as described below).
- The GPS indicator light flashes until the GPS receiver locks onto satellite signals and can determine your position. During normal operation, the indicator light remains steadily lit (or turns off as described below).
- To avoid distraction, once Bluetooth is connected and GPS is acquired, both status lights turn off after 10 seconds. Press the Power button to momentarily turn on indicator lights and confirm that the unit is on.
- To conserve battery charge, GPS circuitry in the GPS receiver turns off if there is no Bluetooth connection for over five minutes. A change in Bluetooth connection status turns the GPS circuitry back on.
- To further conserve battery charge, the GPS receiver turns off if there is no Bluetooth connection for over 60 minutes. A change in Bluetooth connection status or a press of the Power button resets the power off timer.
- To lock onto satellite signals and determine position, the GPS receiver should be outside buildings with a clear view of the sky.
- With most phones, you will not be able to use the GPS receiver and a Bluetooth hands-free device at the same time. You can use a wired headset or the speakerphone to take calls
-
In MOTONAV, use Local Search to find businesses and points of interest near your current location or your destination (or another location). Select the category (for example, Restaurant) and/or enter a keyword (for example, steak) to search for.
-
Some phone models support Pedestrian routing. To use while walking, select your destination, then select Options > Route Settings > Activate Pedestrian Mode.
- Login to the MOTONAV website (www.hellomoto.com/motonav) to enter locations and manage your MOTONAV account. Use your user name and password (as specified in step 4 of «Install MOTONAV»).
Some phone models support Travel Alerts. To use while driving, select Travel Companion on MOTONAV and you will be alerted if a speed camera is in your vicinity. Not available in all countries
Using your GPS receiver
Turning on & off
To turn your GPS receiver on, press and hold the Power button until the Battery Status indicator light is lit. When powering on, the three indicator lights are lit in succession.
To turn your GPS receiver off, press and hold the Power button until all three indicator lights are lit. When powering off, the three indicator lights are turned off in succession, then the GPS receiver is turned off.
Charging
See figure 3 on page 2.
1 Open flap covering the charge connector. Plug the Motorola car charger into the charge connector.
2 The indicator light turns red or amber when the battery is charging. If the battery charge is very low, it may take some time for the indicator light to turn on. When the GPS receiver battery is fully charged (up to 4 hours), the indicator light turns green.
3 Disconnect the charger. (Leaving the charger plugged in for an extended period may reduce the lifetime of the battery.)
Note: The GPS receiver will operate normally while charging; however, the battery status indicator light will not indicate full charge (green) when power is on.
Indicator Lights
Battery Status Indicator
| Indicator Status |
| Red (flashing) Charge very low |
| Red (steady) Charging (below 10% charge) |
| Amber Charging (above 10% charge) |
| Green Charging complete |
GPS Indicator
| Indicator Status |
| Amber (flashing) No GPS fix acquired |
| Amber (steady) GPS fix acquired |
Bluetooth Indicator
| Indicator Status |
| Blue (flashing) Not connected to phone |
| Blue (steady) Connected to phone |
Note: When GPS fix is acquired and Bluetooth is connected, both GPS and Bluetooth indicator lights turn off after 10 seconds to conserve power and avoid distraction.
If you have any additional questions, please call your hotline number (0870-9010-555) or visit us at www.hellomoto.com
Voir figure 3, page 2.
- European Union Directives Conformance Statement
- Caring for the Environment by Recycling
- Recycling Mobile Phones and Accessories
- FCC Notice to Users
- Before you begin
- Warning
- MOTONAV website
- Secure phone and Bluetooth GPS receiver
- See figure 1 on page 1.
- Secure phone in car
- Secure GPS receiver
- Important:
- Set up navigation system
- Start Bluetooth on phone
- Turn on GPS receiver
- See figure 2 on page 2.
- Configure MOTONAV
- Test and use
- Notes on navigation system operation
- Using your GPS receiver
- Turning on & off
- Charging
- See figure 3 on page 2.
- Indicator Lights
- Battery Status Indicator
- GPS Indicator
- Bluetooth Indicator
- Voir figure 3, page 2.
Brand : MOTOROLA
Model : T805
Category : GPS device