KE42MR1E - Projector SONY - Free user manual and instructions
Find the device manual for free KE42MR1E SONY in PDF.
User questions about KE42MR1E SONY
0 question about this device. Answer the ones you know or ask your own.
Ask a new question about this device
Download the instructions for your Projector in PDF format for free! Find your manual KE42MR1E - SONY and take your electronic device back in hand. On this page are published all the documents necessary for the use of your device. KE42MR1E by SONY.
USER MANUAL KE42MR1E SONY
natural_image
Abstract grayscale gradient background with radial light streaks and soft central light (no text or symbols)Flat Panel Colour TV
KE-42MR1
KE-50MR1
© 2002 Sony Corporation
Operating Instructions
Bedienungsanleitung
A moulded plug complying with BS1363 is fitted to this equipment for your safety and convenience.
Should the fuse in the plug supplied need to be replaced, a 5 AMP fuse approved by ASTA or BSI to BS 1362 (i.e. marked with or) must be used.
When an alternative type of plug is used it should be fitted with a 5 AMP FUSE, otherwise the circuit should be protected by a 5 AMP FUSE at the distribution board.
If the plug supplied with this equipment has a detachable fuse cover, be sure to attach the fuse cover after you change the fuse. Never use the plug without the fuse cover. If you should lose the fuse cover, please contact your nearest Sony service station.
text_image
FUSEHow to replace the fuse
Open the fuse compartment with a blade screwdriver, and replace the fuse.
IMPORTANT
If the plug supplied is not suitable for the socket outlets in your home, it should be cut off and an appropriate plug fitted in accordance with the following instructions:
The wires in this mains lead are coloured in accordance with the following code:
Blue Neutral
Brown Live
As the colours of the wires in the mains lead of this apparatus may not correspond with the coloured markings identifying the terminals in your plug, proceed as follows:
The wire which is coloured blue must be connected to the terminal which is marked with the letter N or coloured black. The wire which is coloured brown must be connected to the terminal which is marked with the letter L or coloured red. Do not connect either wire to the earth terminal in the plug which is marked by the letter E or by the safety earth symbol 12 or coloured green or green and yellow.
WARNING
- To prevent the risk of electric shock, do not insert the plug cut off from the mains lead into a socket outlet. This plug cannot be used and should be destroyed.
- To prevent the risk of fire or electric shock, do not expose the unit to rain or moisture.
- Dangerously high voltages are present inside the set. Do not open the cabinet. Refer servicing to qualified personnel only.
Introduction
Thank you for choosing this Sony Flat Panel Colour Television.
Before operating the TV, please read this manual thoroughly and retain it for future reference.
Symbols used in the manual

......Important information.

......Information on a feature.
1,2 ......Sequence of instructions.

....Shaded buttons on the remote control show you the buttons you have to press to follow the sequence of instructions.

......Informs you of the result of instructions followed.
Table of Contents
Safety Information ....5
Precautions 12
Checking the Accessories Supplied 14
Overview
Overview of the Display Unit ....15
Overview of the Media Receiver Unit Buttons and Indicators 16
Overview of the Remote Control Buttons ....17
Installation
Inserting Batteries into the Remote Control 19
Connecting the Display Unit to the Media Receiver Unit 20
Connecting the Aerial and VCR 22
First Time Operation
Switching On the TV and Tuning the TV Automatically 23
Menu System
Introducing and Using the Menu System 26
Picture Adjustment 26
Sound Adjustment 28
Screen Control 30
Features ....33
Set Up 37
Timer 41
Unit Status 44
GB
"Memory Stick"
About a "Memory Stick" 45
Inserting and Removing a "Memory Stick" 48
Using the "Memory Stick" (Memory Stick Home) 49
(continued)
Teletext
Teletext 57
NexTView
NexTView 58
Additional Information
Connecting Optional Equipment 61
Using Optional Equipment 65
Remote Control Configuration for VCR/DVD 66
Specifications 68
Troubleshooting 71
Television Channel Number Guide for United Kingdom 76
Safety Information
For Safety
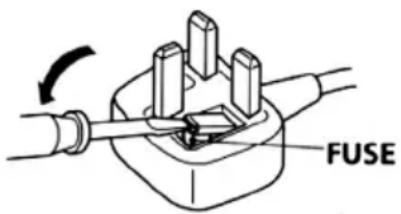
Mains lead and display cable
Unplug the mains lead and the display cable when moving the set. Do not move the set with the mains lead and the display cable plugged in. It may damage the mains lead and the display cable and result in fire or electric shock. If the set has been dropped or damaged, have it checked immediately by qualified service personal.
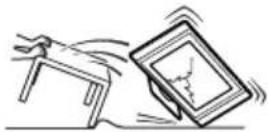
Medical
institution
Do not place this unit in a place where medical equipment is in use. It may cause malfunction of medical instrument
natural_image
Illustration of a person sleeping in bed watching a soccer game on a TV (no text or symbols present)For the display unit
Installation
Installation of the display unit on the wall should be carried out by qualified servicemen. Improper installation may render the unit unsafe in the event of an earthquake, etc
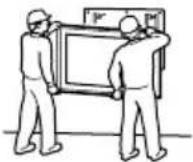

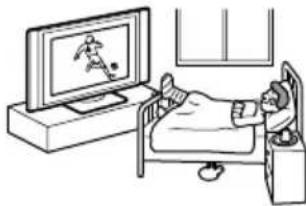
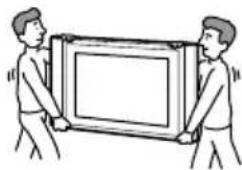
Carrying
Carrying the display unit requires two or more people. If you carry the display unit in a manner other than that specified, it may drop and a serious injury may be caused. Be sure two or more people carry the display unit. When transporting, do not subject the display unit to shocks or excessive vibration. The display unit may fall and be damaged or cause serious injury.
natural_image
Two people carrying a large rectangular frame (no text or symbols visible)(continued)
Installation and moving
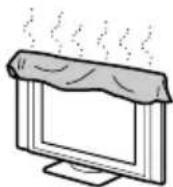
Ventilation
Never cover the ventilation holes in the cabinet. It may cause overheating and result in fire. Unless proper ventilation is provided, the unit may gather dust and get dirty. For proper ventilation, observe the following:
- Do not install the unit turned backward or sideways.
- Do not install the unit turned over or upside down.
- Do not install the unit on a shelf or in a closet.
- Do not place the unit on a rug or bed.
- Do not cover the unit with cloth, such as curtains, or items such as news papers, etc.
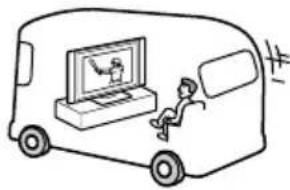
Vehicle or ceiling
Do not install this unit in a vehicle. Bumping of the vehicle may cause the set to fall down and cause injury. Do not hang this unit from the ceiling.
natural_image
Simple line drawing of a van with a person sitting on the side, watching a mounted computer (no text or symbols)Water and moisture
Do not use this unit near water - for example, near a bathtub or shower room. Also do not expose to rain. It may result in fire or electric shock.
For the display unit
Optional accessories
Observe the following when installing the display unit using a stand or wall-mount bracket. If not, the unit may fall and cause serious injury.
- Be sure to follow the operating instructions supplied with your stand when installing the unit.
- Be sure to attach the brackets supplied with your stand.
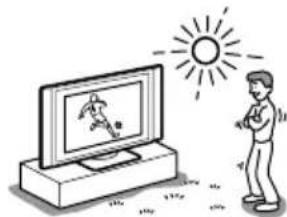
Outdoor use
Do not install this unit outdoors. If the unit is exposed to rain, it may result in fire or electric shock. If the unit is exposed to direct sunlight, the unit may heat up and it may damage the unit.
natural_image
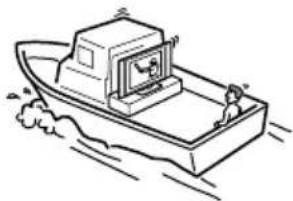
Illustration of a person watching a large television under a sun (no text or symbols present)Ships and other vessels
Do not install this unit in a ship or vessel. If the unit is exposed to seawater, it may cause fire or damage the unit.
natural_image
Line drawing of a boat with a mounted device on water, no text or symbols presentTo prevent the unit from falling
Place the display unit on a secure, stable stand. Do not hang anything on the display unit. The unit may fall from the stand or wall-hanging rack unit, causing damage or serious injury.

(continued)
Ventilation
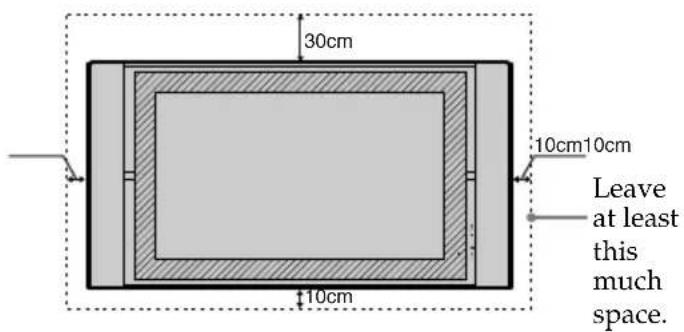
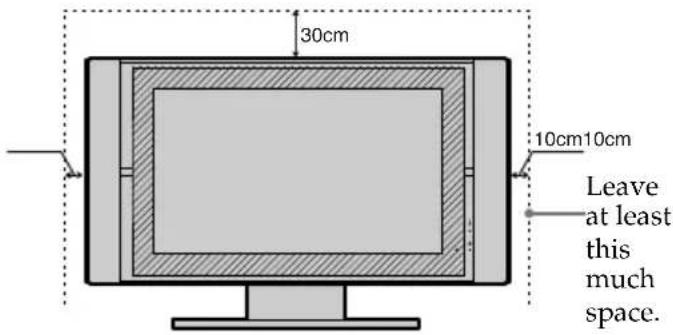
Leave space around the unit. Otherwise, adequate air-circulation may be blocked causing overheating which may cause fire or damage the unit.
For the display unit
When installing the display unit on the wall
text_image
30cm 10cm10cm 10cm Leave at least this much space.When installing the display unit on the wall
text_image
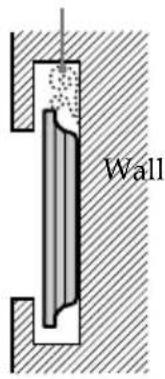
30cm 10cm 10cm Leave at least this much space.Never install the unit as follows:
Air circulation is blocked.
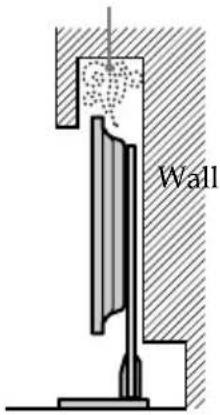
text_image
WallAir circulation is blocked.
text_image
WallFor the media receiver unit
Media receiver box: Front view

text_image
1cm 2cm 1cm 1cm Leave at least this much space.Place the media receiver unit on a stable level surface so as not to block the inlets at the bottom of the media receiver unit.
Media receiver box: Top view
Never place the media receiver unit in a confined space. It may cause overheating and result in fire or damage the unit.
To ensure reliable operation of the unit leave enough space for ventilation by the exhaust fan.
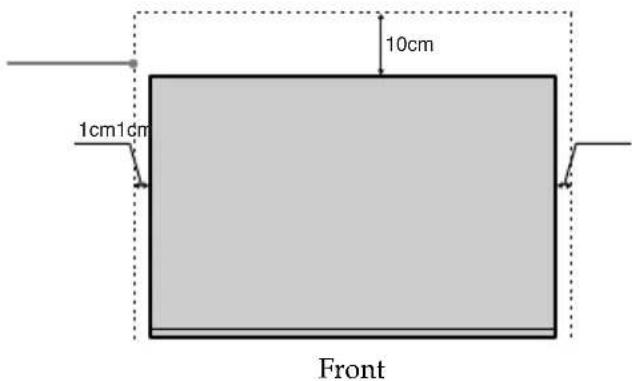
text_image
10cm 1cm1cm Front(continued)
Power Sources
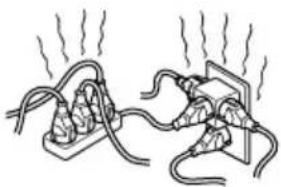
Overloading
This set is designed to operate on a 220-240V AC supply only. Take care not to connect too many appliances to the same mains socket as this could result in fire or electric sh
natural_image
Diagram of two electrical plug connections with wires and heating elements (no text or symbols)Mains lead
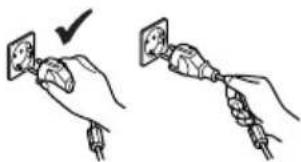
protection
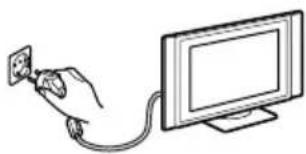
Pull out the mains lead by the plug. Do not pull on the mains lead itself.
text_image
Diagram showing two hands connecting electrical socket to plug wires, with a checkmark indicating the correct direction of installation.Mains
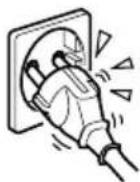
Do not use a poor fitting mains socket. Insert the plug fully into the mains. If it is loose, it may cause arcing and result in fire. Contact your electrician to have the mains socket changed.
Wiring
Unplug the mains lead when wiring cables. Be sure to unplug the mains lead for your safety, when hooking up.
Moisture
Do not touch the mains lead with a wet hand. If you plug/unplug the mains lead with a wet hand, it may cause electric shock.

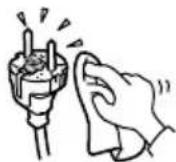
Cleaning
Clean the mains plug regularly. If the plug is covered with dust and it picks up moisture, its insulation may deteriorate and result in fire. Unplug the mains plug are regularly.
Lightning storms
For your own safety, do not touch any part of the set, mains lead or aerial lead during lightning storms.
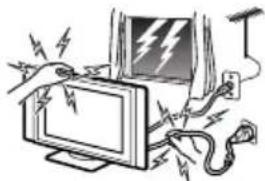
natural_image
Illustration of a computer monitor with lightning bolts and a power plug, no text or symbols present(continued)
Use
Damage requiring service
If the surface of the display unit cracks, do not touch it until you have unplugged the mains lead. Otherwise electric shock may result.
Servicing
Do not open the cabinet or remove the rear cover of the set. Refer to qualified service personnel only.
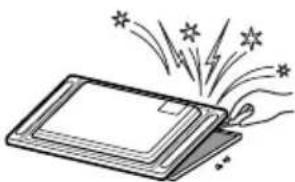
natural_image
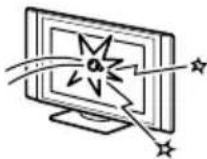
Illustration of a tablet with stars and fireworks, no text or symbols presentVentilation holes
Do not insert anything in the ventilation holes. If metal or something flammable enters, it may result in fire or electric shock.
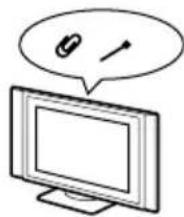
natural_image
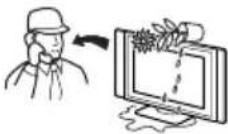
Illustration of a computer monitor with a speech bubble containing a magnifying glass and an arrow (no text or symbols)Moisture and
flammable objects
- Do not let this set get wet. Never spill liquid of any kind on the set. If any liquid or solid
object does fall through, do not operate the set. It may result in electric shock or damage to the set. Have it checked immediately by qualified personnel. - To prevent fire, keep inflammable objects or naked lights (e.g. candles) away from the set.
For the media receiver unit
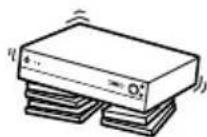
Object placement
Do not place anything heavy on the media receiver unit. It may damage the unit.
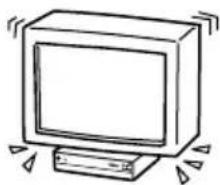
natural_image
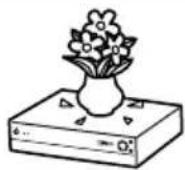
Simple line drawing of a retro television with monitor and tower (no text or symbols)Liquid
Do not place objects containing liquid on the media receiver unit. It may result in electric shock or damage the unit.
GB
(continued)
Additional Safety Information
Electric shock
Do not touch the unit with wet hands. Doing so may cause electric shock or damage the unit.
Protruding location
Do not install the display unit in protruding locations. If you install the unit in the following locations, it may result in injury.
- Do not install the unit in a location where the unit protrudes, such as on or behind pillar.
- Do not install the unit in a location where you might bump your head on it.
Placement
Never place the set in hot, humid or excessively dusty places. Do not install the set where it may be exposed to mechanical vibrations.
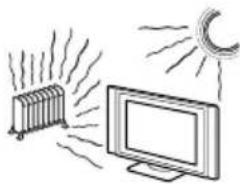
natural_image
Illustration of a radiator emitting heat and a monitor with a sun in the background (no text or symbols)Accessories
Secure the display unit properly.
If the display unit is not secured properly, it may fall and cause injury. Take measures to prevent this by using a stand or other apparatus on the floor or wall in the specified manner, referring to the operating instructions supplied with your stand.
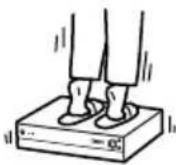
Weight
Do not stand on the media receiver unit. The unit may fall or be broken, causing injury. Pay special attention when little children are likely to come near the set.
Broken glass
Do not throw anything at the unit. The screen glass may explode by the impact and cause serious injury.
Oils
Do not install this unit in restaurants that use oil. Dust absorbing oil may enter into the unit and damage the unit.
Corrosion
If you use this set near the seashore, salt may corrode metal parts of the unit and cause internal damage or fire. It may also shorten the life of the unit. Steps should be taken to reduce the humidity and temperature of the area where the set is located.
Recommended place for the media receiver unit
Place the media receiver unit on a stable, level surface. Otherwise, the
media receiver unit may fall and cause injury. Use an optional Sony stand, which has adequate strength.
Cleaning
Unplug the mains lead when cleaning this unit. If not, it may result in electric shock.
(continued)
Mains lead and display cable
If you damage the mains lead or display cable, it may result in fire or electric shock.
- Do not pinch, bend, or twist the cable excessively. The core lines may be bared or cut, causing a short - circuit which may in fire or electric shock.
- Do not convert or damage the mains lead or display cable.
- Do not put anything heavy on the mains lead or display cable. Do not pull the mains lead or display cable.
- Keep the mains lead or display cable away from heat sources.
- Be sure to grasp the plug when disconnecting the mains lead.
Refer to the operating instructions when disconnecting the display cable. If the mains lead or display cable is damaged, stop using it and ask your dealer or Sony service centre to exchange it.

natural_image
Simple line drawing of a hand holding a small object next to a computer monitor (no text or symbols)When not in use
For environmental and safety reasons, it is recommended that the set is switched off when not in use - not left in standby mode. D
natural_image
Line drawing of a hand inserting a power outlet into a computer monitor (no text or symbols)Cable wiring
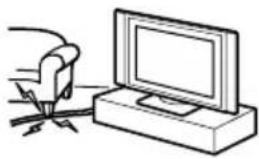
Take care not to catch your feet on the cables. It may damage the unit.
Installation
Do not install optional components too close to the display unit. Keep optional components at least 30 cm away from the display unit. If a VCR is installed in front or at the right side of the display unit, the picture may distort.
Heat
Do not touch the surface of the display unit. It remains hot, even after the display unit has been turned off for some time.
Precautions
On viewing the TV comfortably
- To view the TV comfortably, the recommended viewing position is from four to seven times of the screen's vertical length away from the TV set.
- View the TV in a moderate light room, as viewing the TV in poor light taxes your eyes. Watching the screen continuously for long periods of time can also tax your eyes.
On installing the TV set
Installing the display unit
Use the specified wall-mount bracket or stands.
Installing the media receiver unit
Leave enough space for ventilation between the exhaust fan in the rear of unit and the wall.
- Do not install the display unit in places subject to extreme temperature, for example in direct sunlight, or near a radiator, or heating vent. If the unit is exposed to extreme temperature, the unit may heat up and it may cause deformations of the casing or cause the unit to malfunction.
- After transporting the display unit directly from a cold to a warm location, or if the room temperature has changed suddenly, pictures may be blurred or show poor colour over portions of the picture. This is because moisture has condensed on the mirrors or lenses inside the unit. In this case let the moisture evaporate before using the unit.
- To obtain a clear picture, do not expose the screen to direct illumination or direct sunlight. If possible, use spot lighting directed down from the ceiling.
- The TV set is not disconnected from the mains when the switch is in Off position. To disconnect the set completely, pull the plug from the mains.
On volume adjustment
- Adjust the volume so as not to trouble neighbours. Sound carries very easily at night time. Therefore, closing the windows or using headphones is suggested.
- When using headphones, adjust the volume so as to avoid excessive levels, as hearing damage may result.
On image retention
- If the following images are displayed for an extended period time, image retention (afterimage) in areas of the screen may result due to the characteristics of the Plasma Display Panel.
- Black bars at the top and bottom that appear with a wide video source (Letterbox picture).
- Black bars to the left and right that appear with a 4:3 video source (conventional TV broadcasts).
- Video game sources
- PC images
- DVD on-screen menu displays
- On-screen menus, channel numbers, etc., of connected equipment such as Set top box, Cable modem, VCR, etc.
The risk of this is higher if the set is in “Live” mode or has a high contrast setting. This image cannot be removed once burnt onto the screen. To avoid the risk of image retention do not leave the TV set operating on such a picture, or programme for a long time, use the “Screen Saver” function or lower the contrast setting. Repeated extended daily usage of the same image, or programme can also result in this occurrence. IMAGE RETENTION IS NOT COVERED BY THE SONY WARRANTY.
- To reduce image retention, this TV set has the "Screen Saver" function. The default setting of the "Orbit" function in "Screen Saver" is "On."
- The "Screen Saver" function prevents and reduces image retention.
On image
With extensive use of this TV set in 4:3 mode, the 4:3 screen area might become darker within a 16:9 panel. To avoid this problem, the "Smart" picture mode should be used.
(continued)
On the PDP (Plasma Display Panel)
Please note that the PDP screen is made with high-precision technology. However, black points or bright points of light (red, blue, or green) may appear constantly on the PDP screen, and irregular coloured stripes or brightness may appear on the PDP screen. This is not a malfunction.
On handling the remote control
- Handle the remote control with care. Do not drop or step on it, or spill liquid of any kind onto it.
- Do not place the remote control in a location near a heat source, or in a place subject to direct sunlight, or in a damp room.
On handling and cleaning the screen surface of the display unit
The screen of this display unit has an anti-reflection screen coating. To avoid screen degradation, follow the points mentioned below. Do not push on or scratch with hard objects, or throw anything at the screen. The screen may be damaged.
- Be sure to unplug the mains lead connected to the media receiver unit from the mains before cleaning.
- Do not touch the display panel after operating continuously for along period as the display panel becomes hot.
- The screen of this display unit has an anti-reflection screen coating. We recommend that the screen surface is touched as little as possible.
- Clean the screen with the supplied cleaning cloth or a soft cloth lightly moistened with a mild detergent solution.
- Never use any type of abrasive pad, scouring powder, or solvent, such as alcohol or benzine. This type of contact may result in damage to the screen surface.
On cleaning the cabinet
- Be sure to unplug the mains lead connected to the media receiver unit from the mains before cleaning.
- Clean the cabinet with the supplied cleaning cloth or a soft cloth lightly moistened with a mild detergent solution.
- Note that material deterioration or screen coating degradation may occur if the display unit is exposed to a volatile solvent, such as alcohol, thinner, benzine or insecticide, or if prolonged contact is maintained with rubber or vinyl materials.
- The ventilation holes can accumulate dust over a period of time and the accumulated dust may make the cooling function of the built-in fan less effective. To prevent this, we recommend removing the dust periodically (once a month) using a vacuum cleaner.
Important Notice
When used at an altitude of greater than 2400m or 7891 feet (air pressure less than 750hPa), this Plasma Display Panel may generate a low buzzing sound as a result of the difference between the interior and exterior air pressure of the panels. This is not considered a defect and is not covered under by the Sony Warranty. This buzzing sound is an inherent characteristic of any Plasma Display Panel.
GB
Checking the Accessories Supplied
One Remote Control (RM-972):
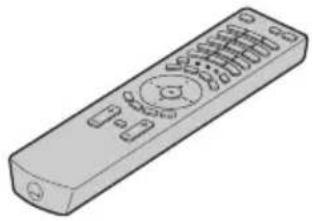
natural_image
Line drawing of a remote control device with buttons and ports (no text or symbols)Two size AAA batteries (R03 Type):

One Display Interface Cable:
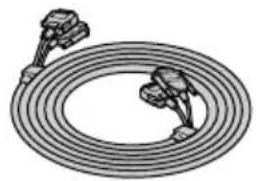
natural_image
Illustration of a coiled cable with connectors (no text or symbols)One Coaxial Cable: One Cleaning Cloth: One AV Mouse:
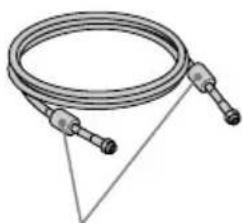
natural_image
Coiled cable with two connectors and a triangular support (no text or symbols)Do not remove ferrite cores.


natural_image
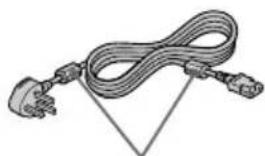
Illustration of a coiled cable or wire connector with a terminal connector (no text or symbols)Two Mains Leads (Type C-4):

natural_image
Line drawing of a cable with two connectors and a triangular connector (no text or symbols)Do not remove ferrite cores.

Use these mains leads (with safety earth) if you use the set outside the United Kingdom.
Two Mains Leads (Type BF):
natural_image
Illustration of a coiled cable with two connectors and a triangular connector (no text or symbols)Do not remove ferrite cores.

- Use these mains leads (with safety earth) if you use the set in the United Kingdom.
• See "NOTICE FOR CUSTOMERS IN THE UNITED KINGDOM" on page 2 when using the mains leads.
• These mains leads may not be supplied depending on the country.
Two Mains Leads (Type C-5):

natural_image
Illustration of a coiled cable with two terminal plugs, no text or symbols presentDo not remove ferrite cores.

- Use these mains leads (with safety earth) if you use the set in the Swiss Confederation.
• These mains leads may not be supplied depending on the country.
One Mains Plug holder:
Overview of the Display Unit
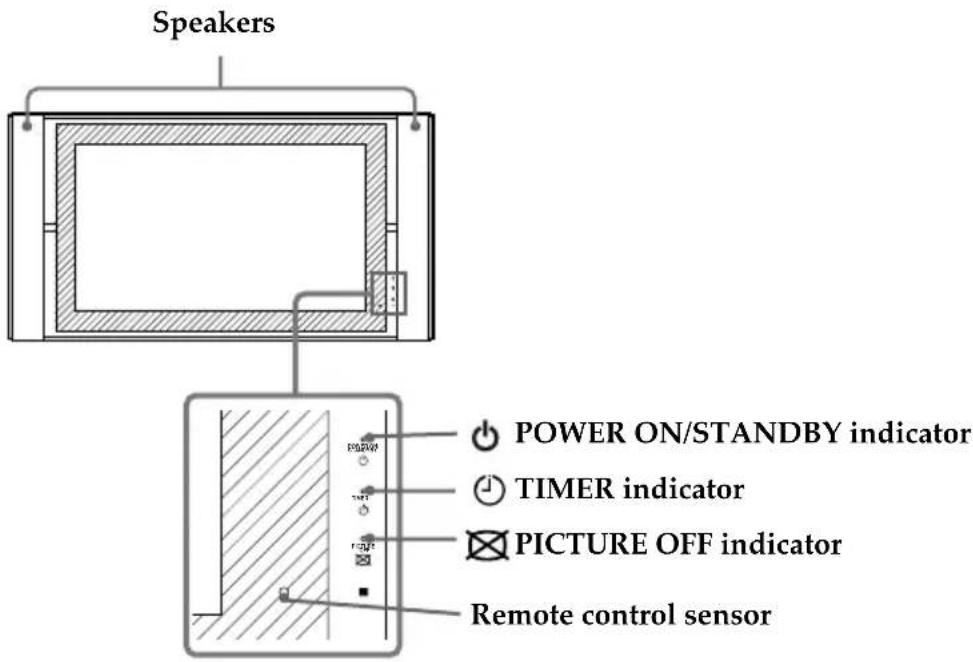
text_image
Speakers POWER ON/STANDBY indicator TIMER indicator PICTURE OFF indicator Remote control sensorAbout the indicators
The following indicators are on the display unit and the media receiver unit.
POWER ON/STANDBY indicator
Lights up in green when the TV is switched on. When in standby mode, the indicator lights up in red. When in PC power saving* mode, the indicator lights up in yellow.
TIMER indicator
When lit, indicates that one of the timers is set. When the on timer is set and the TV is in standby mode, this indicator lights up in yellow. When one of the off timers is set, this indicator lights up in red. For more details regarding the timers, refer to “Timer” on page 41.
☒ PICTURE OFF indicator
Lights up in blue when you press ☒ (picture off) on the remote control to switch off the picture. Only the picture is switched off (the sound remains unchanged).
* If the TV is connected to a personal computer or video graphic board that is DPMS (Display Power Management System) compliant, the TV will automatically reduce power consumption (PC power saving mode).
If you connect a personal computer to the PC connector, the "Auto Shutoff" function cannot work. After a certain period without a signal from a personal computer, the TV switches into PC power saving mode, not standby mode.
GB
Overview of the Media Receiver Unit Buttons and Indicators
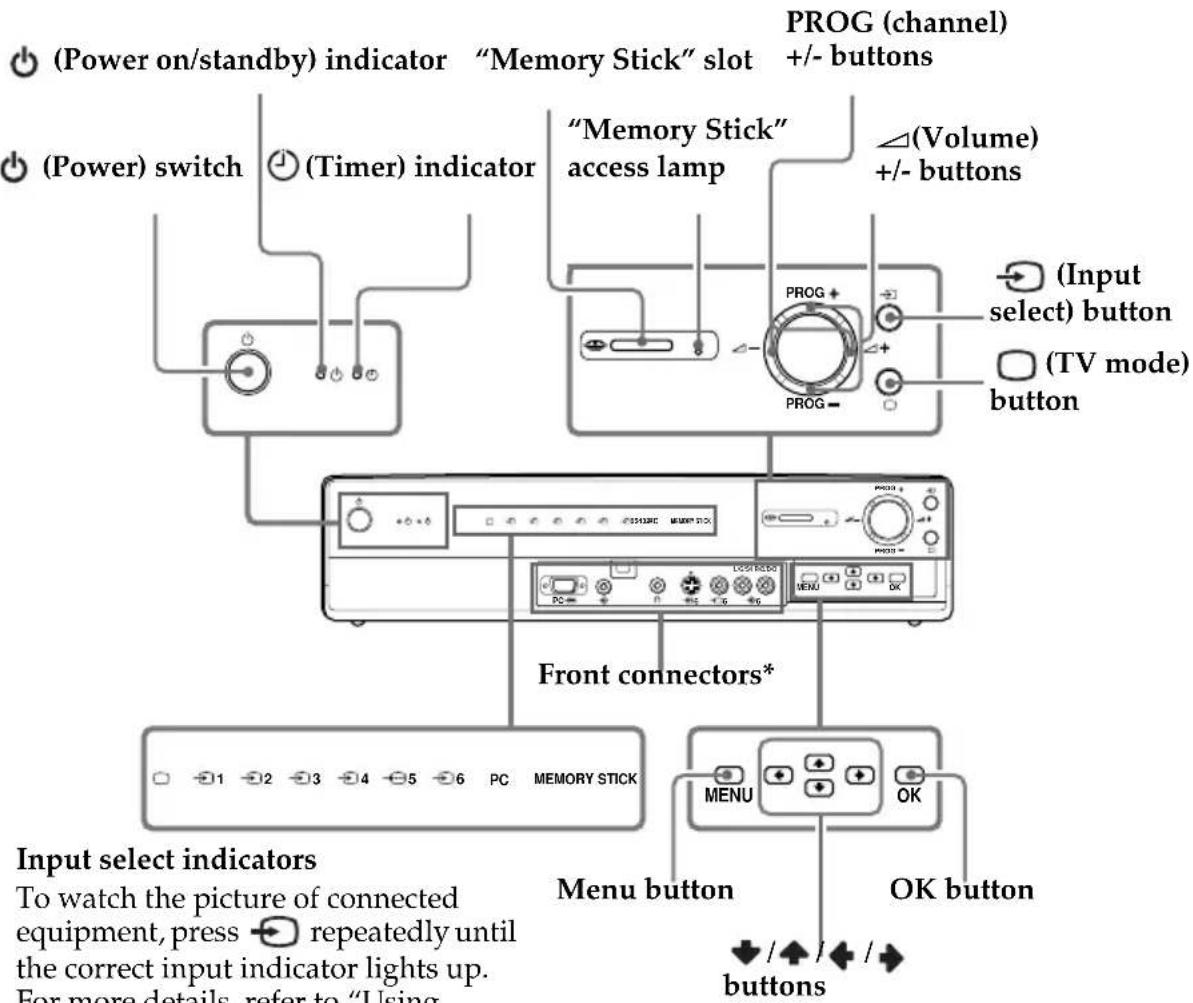
text_image
(Power on/standby) indicator "Memory Stick" slot PROG (channel) +/- buttons (Power) switch (Timer) indicator "Memory Stick" access lamp ∠(Volume) +/- buttons PROG + (Input select) button (TV mode) button Front connectors* PC MEMORY STICK MENU OK Input select indicators To watch the picture of connected equipment, press → repeatedly until the correct input indicator lights up. For more details, refer to "Using buttonsInput select indicators
To watch the picture of connected equipment, press repeatedly until the correct input indicator lights up. For more details, refer to "Using Optional Equipment" on page 65.

TV indicator

Input 1 indicator

Input 2 indicator

Input 3 indicator

Input 4 indicator

Input 5 indicator

Input 6 indicator
PC
PC indicator
MEMORY Memory Stick indicator STICK

* For more details of the front connectors, refer to "Connecting Optional Equipment" on page 61.
Overview of the Remote Control Buttons
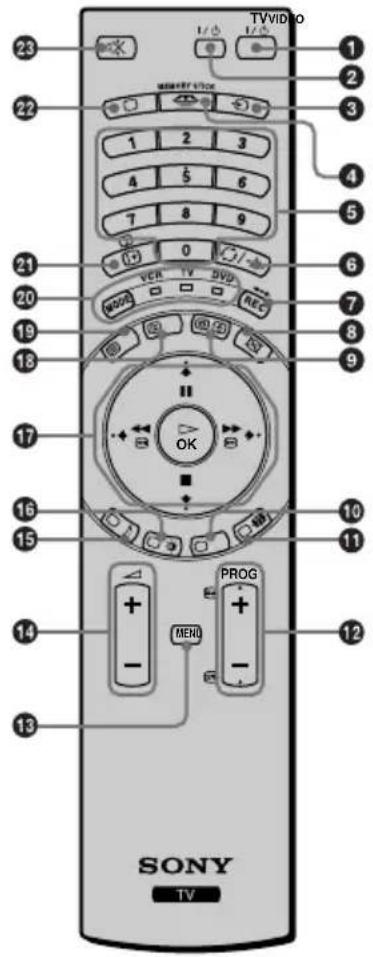
text_image
23 TVVIDEO 1/0 1/0 22 1 2 3 4 5 6 7 8 9 21 (+) 0 VER TV DVD MOS REC 20 19 18 17 OK 16 15 PROG - MENS 14 12 13 SONY TV| Buttons | Description |
| 1 To Temporarily Switch Off TV: | Press this button to temporarily switch off the TV (the power on/standby) indicators on the display unit and the media receiver unit light up in red). Press again to switch on the TV from standby mode.To save energy we recommend switching the TV off completely when the TV is not in use. [IMAGE] After a certain period without a signal and without any button being pressed, the TV automatically switches into standby mode (Auto Shutoff, page 43). |
| 2 VCR or DVD on/off: | Press this button to switch your VCR or DVD on or off. |
| 3 Selecting input source: | Press this button repeatedly until the desired input symbol of the source appears on the TV screen. |
| 4 Displaying the Memory Stick Home (“Memory Stick” picture viewer): | Press this button to display the Memory Stick Home (“Memory Stick” picture viewer). For more details, refer to “Using the Memory Stick Home” on page 52. |
| 5 Selecting channels: | Press this button to select channels.For double-digit programme numbers, enter the second digit within 2.5 seconds. |
| Buttons | Description |
| 6 a) If the Media Selector is switched to TV: | Press this button to watch the last channel selected (the last channel watched for at least 5 seconds). |
| b) If the Media Selector is switched to VCR: | For Sony's VCR double-digit programme numbers, e.g. 23, press -/ - - first and then the buttons 2 and 3. |
| 7 a) If the Media Selector is switched to VCR or DVD: | Press this button to record programmes. |
| b) If the Media Selector is switched to TV: | Press this button to return the picture and sound to the factory preset levels. This will also return the set to the install condition. |
| 8 Switching off the picture: | Press this button to switch off the picture. Only the picture is switched off; the sound remains on. Press again to cancel. |
| 9 Displaying the clock: | Press this button to display the clock on the TV screen. Press again to turns the clock display off. The clock display turns off automatically 5 minutes after it is turned on. |
| 10 This button works in Teletext mode and is also used for programming the remote control to operate the VCR and DVD. | |
GB
(continued)
| Buttons | Description |
| 1 Selecting screen format: | Press this button repeatedly to change the format of the screen. For more details, refer to “Screen Control” on page 30. |
| 2 Selecting channels: Press these buttons to select the next or previous channel. | |
| 3 Displaying the menu system: | Press this button to display the menu on the TV screen. Press again to remove the menu display from the TV screen. |
| 4 Adjusting the TV volume: Press these buttons to adjust the volume of the TV. | |
| 5 Selecting Sound effect: Press this button repeatedly to change the sound effect. | |
| 6 Selecting Picture mode: Press this button repeatedly to change the picture mode. | |
| 7 Joysticka) If the Media Selector is set to TV: | When MENU is selected, use these buttons to operate the menu system. For more details, refer to “Introducing and Using the Menu System” on page 26.When MENU is switched off, press OK to show an overview of all TV channels. Then press ↘ or ↗ to select the channel and then press ↘ to watch the selected channel. |
| b) If the Media Selector is set to VCR or DVD: | Using these buttons, you can control the main functions of your VCR or DVD. |
| 13 NexTView: For more details, refer to “NexTView*” on page 58. | |
| 13 Selecting Teletext: Press this button to switch on Teletext. | |
| 20 Media Selector: With this remote control you can operate not only this TV but also the main functions of your VCR or DVD.Switch on the equipment you want to operate and then press this button repeatedly to select VCR, TV or DVD. A green light will light up momentarily.An initial set up is required to synchronise this remote control to your VCR or DVD. This setup depends on the manufacturer. For more details, refer to “Remote Control Configuration for VCR/DVD” on page 66. | |
| 21 Displaying On Screen information: | Press this button to display all on-screen indications. Press again to cancel. |
| 22 Selecting TV mode: Press this button to switch off teletext or video input. | |
| 23 Muting the Sound: Press this button to mute the TV sound. Press again to restore the sound. | |

In addition to the TV functions, all coloured buttons as well as green symbols are also used for Teletext operations. For more details, refer to “Teletext” on page 57.
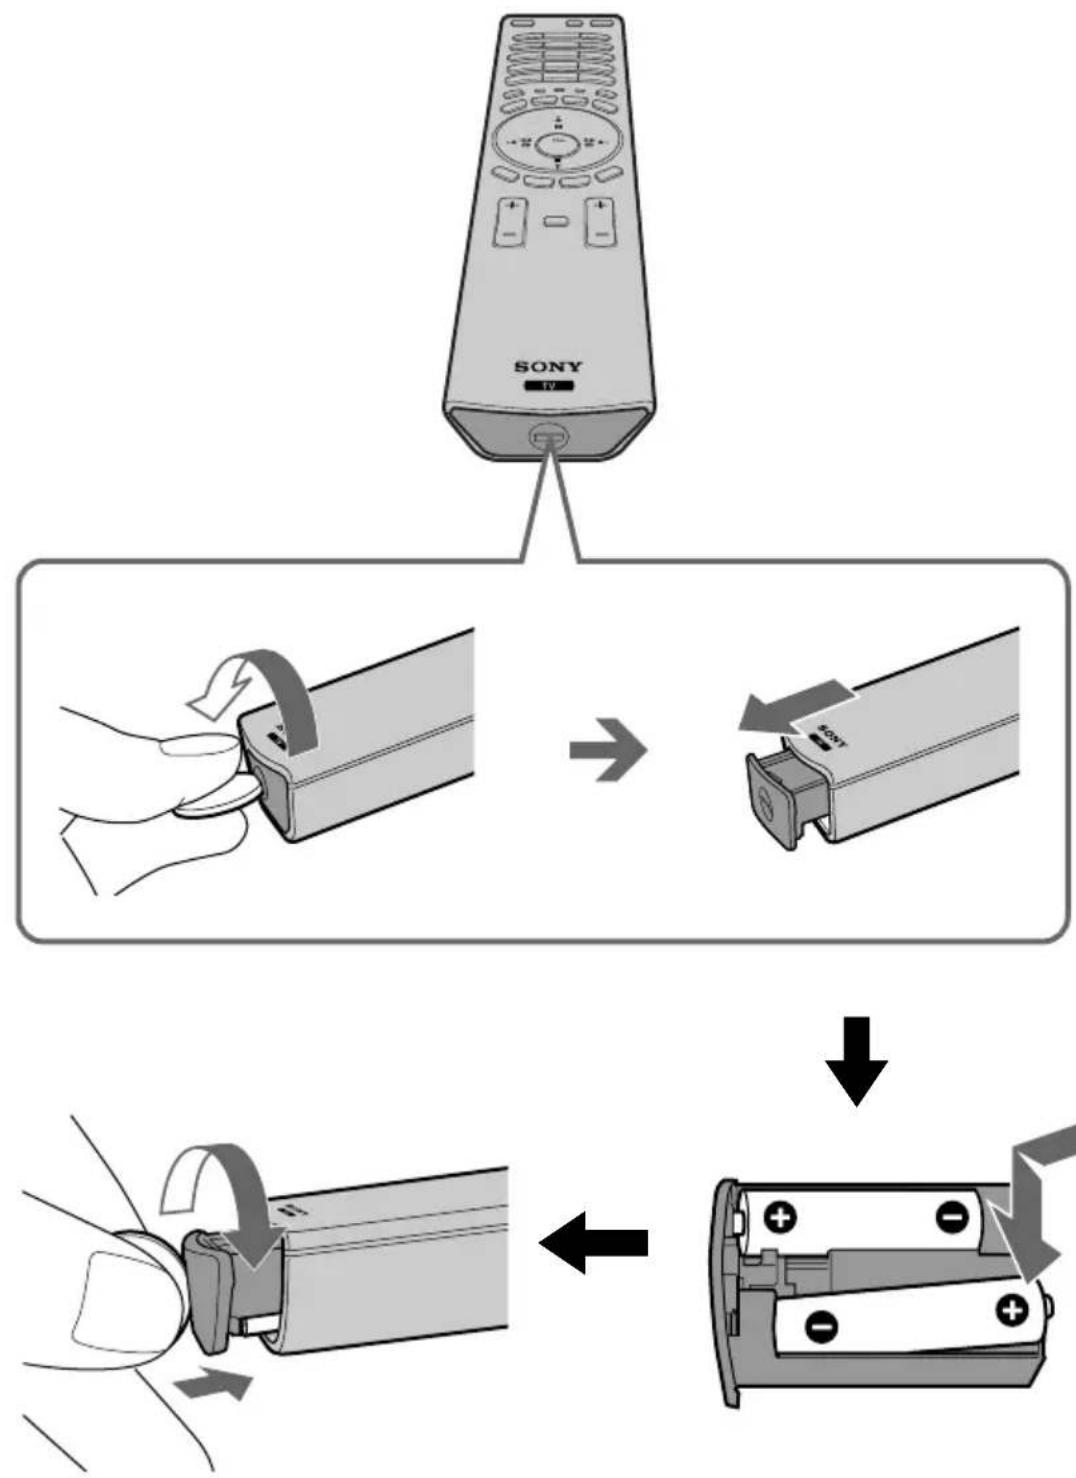
Inserting Batteries into the Remote Control

Make sure you insert the supplied batteries observing the correct polarity.
Always remember to dispose of used batteries in an environmentally friendly way.
flowchart
graph TD
    A["SONY"] --> B["USB Cable Switch"]
    B --> C["Device with USB cable"]
    C --> D["Battery with battery"]
    D --> E["Back panel with battery"]
GB
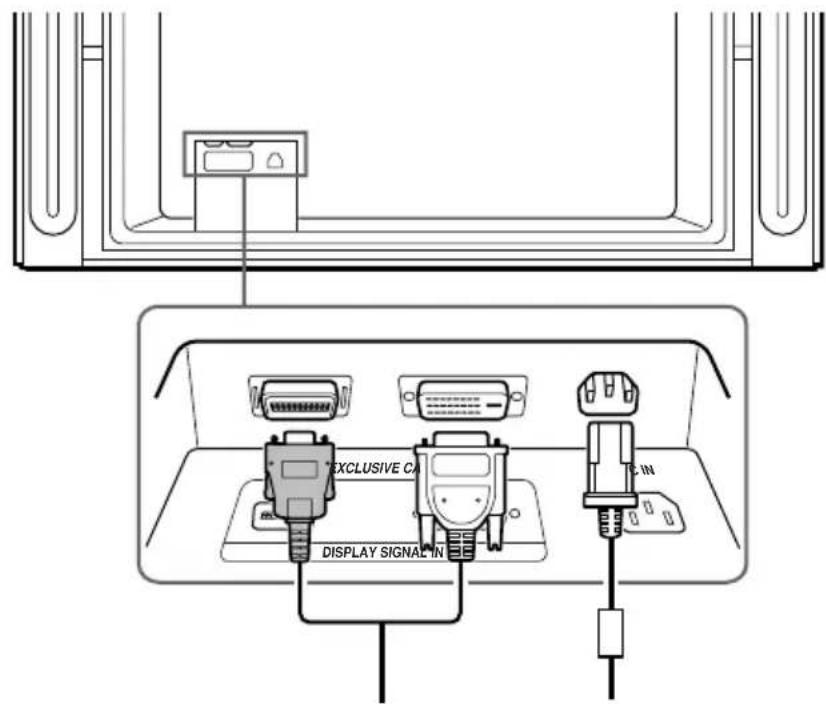
Connecting the Display Unit to the Media Receiver Unit

- Use the supplied display interface cable.
- Use the supplied mains lead for the display unit (Type C-4, Type BF or Type C-5, see page 14).
1 Connect the supplied display interface cable and the supplied mains lead for the display unit to the display unit.
text_image
EXCLUSIVE CAN DISPLAY SIGNAL IN CIN
Do not connect to the mains before all connections are completed.
(continued)
2 Secure the mains plug to the display's AC IN jack.
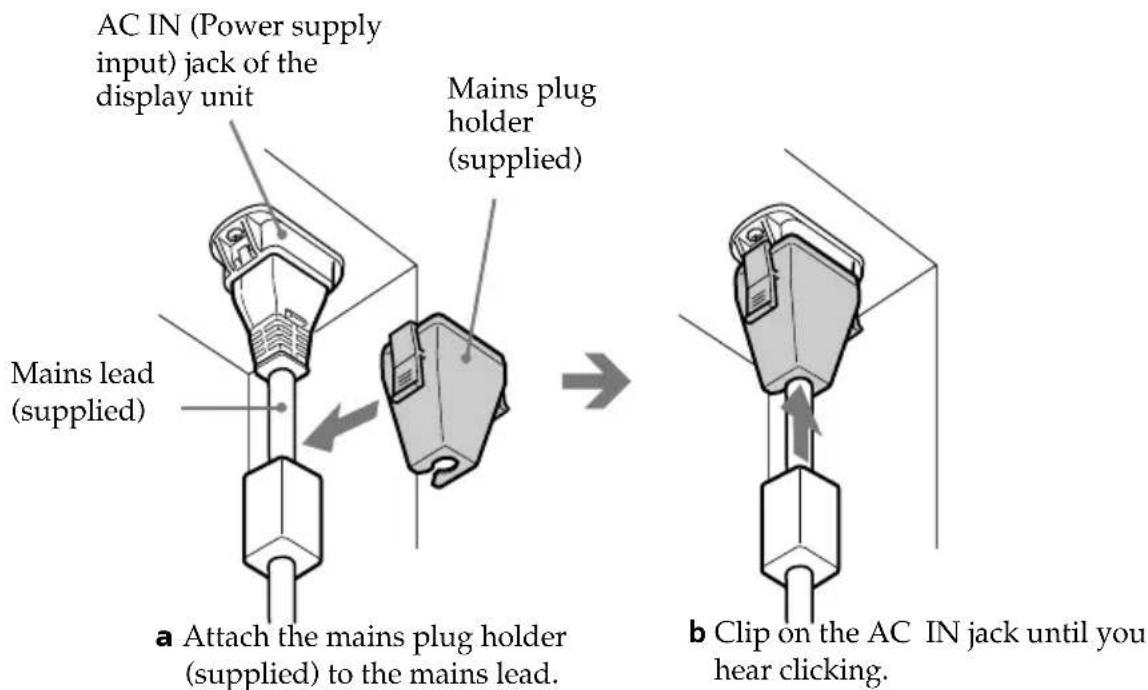
text_image
AC IN (Power supply input) jack of the display unit Mains lead (supplied) a Attach the mains plug holder (supplied) to the mains lead. Mains plug holder (supplied) b Clip on the AC IN jack until you hear clicking.
To unplug the mains lead pull down the mains plug holder by pushing in both sides of the holder, then pull out the plug.
3 Install the display unit using the specified wall-mount bracket or stand.

Before installing the display unit, check the installation instructions of your wall-mount bracket or stand.
4 Connect the supplied display interface cable to the media receiver unit.
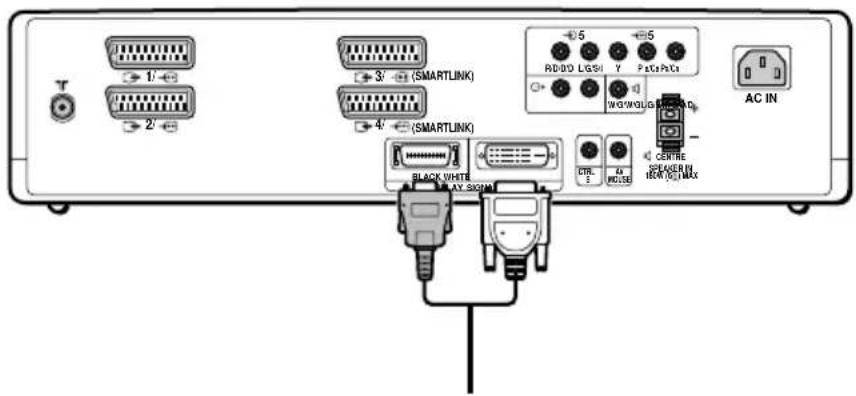
text_image
T 1/- 2/ 3/- 4/- (SMARTLINK) 5 ADD/0 LGSI Y Pct/Cp/Ct W/O/W/Q/G AC IN BLACK WHITE AT SOUM CTR. A1 HOSSE CENTER IEM/IC MAXGB
Connecting the Aerial and VCR

- Use the supplied mains lead for the media receiver unit (Type C-4, Type BF or Type C-5, see page 14).
- Use the supplied coaxial cable for aerial connection.
Connecting an aerial
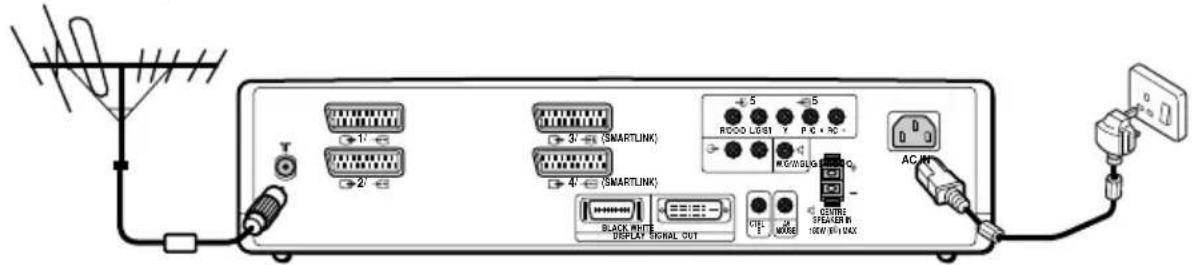
text_image
T 2' 3' (SMARTLINK) 4' (SMARTLINK) 5 6 7 8 9 10 11 12 13 14 15 16 17 18 19 20 AC/HT SLACK WHITE DISPLAY SIGNAL OUT CUT MODE CUSTOMER STICKER IN (LOW/INT) MAXConnect the supplied coaxial cable.
Connect the supplied mains lead (Type C-4, Type BF or Type C-5, with safety earth).
Connecting a VCR with an aerial

text_image
VCR OUT IN SMARTLINK 5 5 RABB/DSI T PCC P C1 WAGWOL/DSI AC IN SMARTLINK 4 4 BLACK WRITE DISPLAY SIGNAL OUT TYPE 3 GND CRETE BREAKER IN INNO ON Connect the supplied mains lead (Type C-4, Type BF or Type C-5, with safety earth)Scart lead is optional.
Connect the supplied mains lead (Type C-4, Type BF or Type C-5, with safety earth).

For more details regarding VCR connection, refer to "Connecting Optional Equipment" on page 61.

Do not connect to the mains before all connections are complete.
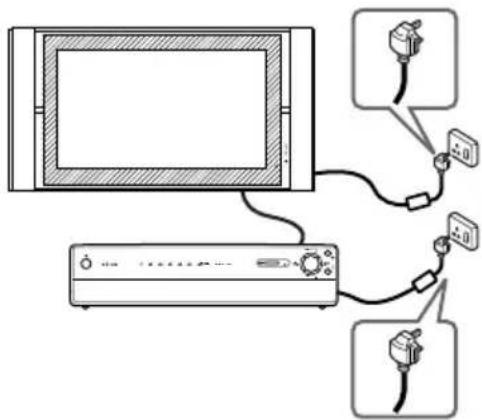
Switching On the TV and Tuning the TV Automatically

The first time you switch on your TV, a sequence of menu screens appear on the TV enabling you to: 1) choose the language of the menu screen, 2) choose the country in which you wish to operate the TV, 3) set the clock, 4) search and store all available channels (TV Broadcast) and 5) change the order in which the channels (TV Broadcast) appear on the screen.
However, if you need to change any of these settings at a later date, you can do so by selecting the appropriate option in the (Set Up) menu.
1 Connect the display unit and media receiver unit to the mains (100 - 240V AC; 50/60Hz for the display unit, 220 - 240V AC; 50/60Hz for the media receiver unit).
text_image
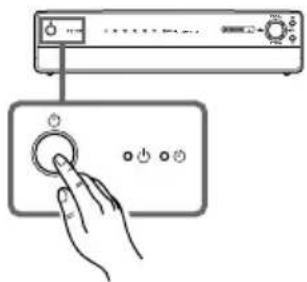
Diagram showing connections between a monitor and an air conditioner with cable connectors and labeled ports2 The first time that the TV set is connected, it is usually turned on. If the TV is off, press the Power switch on the media receiver unit to turn on the TV.
The first time you switch on the TV, a Language menu appears automatically on the TV screen.
text_image
Diagram showing a hand pressing a button on a device panel with control buttons and indicator lights.3 Press ✦/ or on the remote control to select the language, then press OK to confirm your selection.
From now on, all menus will appear in the selected language.
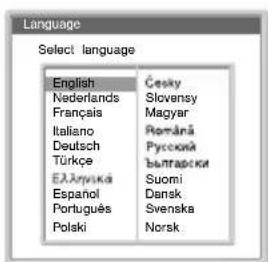
text_image
Language Select language English Česky Nederlands Slovensy Français Magyar Italiano Románá Deutsch Русский Türkce Ёльярски Елларике Suomi Espanol Dansk Português Svenska Polski Norsk
(continued)
GB
4 The Country menu appears automatically on the TV screen.
Press ☑ to select the country in which you will operate the TV set, then press OK to confirm your selection.

- If the country in which you want to use the TVset does not appear in the list, select "off" instead of a country.
- If you change the country selection, Clock Set should always be performed next.

text_image
Country Select country Off United Kingdom Ireland Nederland Belgïe/Belgique Luxembourg France Italia Schweiz/Suisse/Svizzera Deutschland Österreich
5 The Clock Set menu appears on the TV screen.
a) Press of to set the hour, then press.
b) Press or to set the minutes, then press.
c) Press ⬆ to set the day of a week, then press OK at the time signal.
The clock starts.

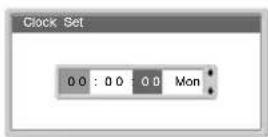

If you adjust the clock, Auto Tuning should always be performed next.
6 The Auto Tuning menu appears on the screen. Press OK to select Yes.

7 The TV automatically starts searching and storing all available broadcast channels for you.

This procedure could take some minutes. Please be patient and do not press any buttons, otherwise automatic tuning will not be completed.
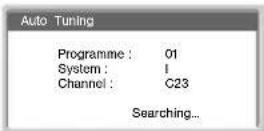

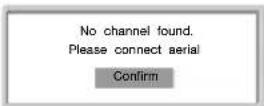
If no channels are found during the auto tuning process, a new menu appears automatically on the screen asking you to connect the aerial. Please connect the aerial (see page 22) and press OK. The auto tuning process will start again.

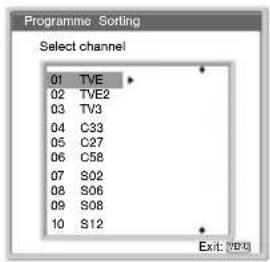
After all available channels are captured and stored, the Programme Sorting menu appears automatically on the screen enabling you to change the order in which the channels appear on the screen.
(continued)
8 The Programme sorting menu appears automatically on the TV screen.
A) If you wish to keep the broadcast channels in the tuned order, go to step 9.
text_image
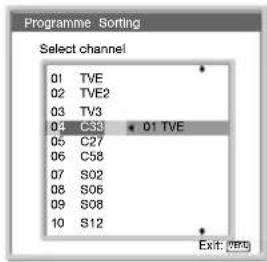
Programme Sorting Select channel 01 TVE 02 TVE2 03 TV3 04 C33 05 C27 06 C58 07 S02 08 S06 09 S08 10 S12 Exit: [VPI]B) If you wish to store the channels in a different order:
a) Press or to select the programme number with the channel (TV Broadcast) you wish to rearrange, then press
b) Press or to select the new programme number position for your selected channel (TV Broadcast), then press
c) Repeat steps B) a and B) b if you wish to change the order of the other channels.
text_image
Programme: Sorting Select channel 01 TVE 02 TVE2 03 TV3 04 C33 01 TVE 05 C27 06 C58 07 S02 08 S06 09 S08 10 S12 Exit: 080
9 Press MENU to turn off the menu.


Your TV is now ready for use.
GB
Introducing and Using the Menu System

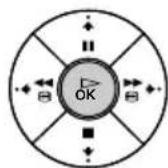
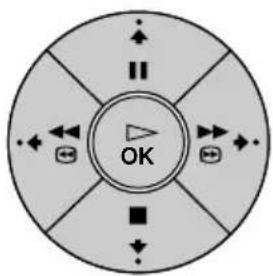
Your TV uses an on-screen menu system to guide you through the operations. Use the following buttons on the Remote Control to operate the menu system:
1 Press MENU to switch the first level menu on.

2 Do the following to operate the menu.
• To highlight the desired menu or option, press
• To enter to the selected menu or option, press
• To return to the last menu or option, press
• To alter settings of your selected option, press


text_image
OK3 Press MENU to turn off the menu.


Picture Adjustment
text_image
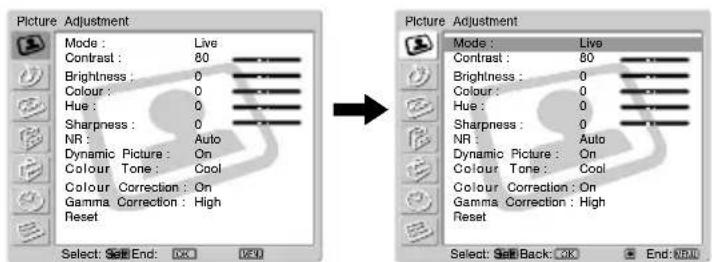
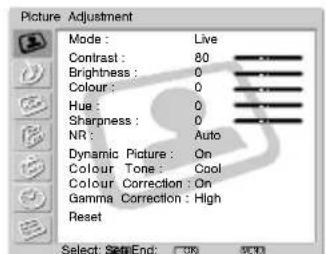
Picture Adjustment Mode : Live Contrast : 80 Brightness : 0 Colour : 0 Hue : 0 Sharpness : 0 NR : Auto Dynamic Picture : On Colour Tone : Cool Colour Correction : On Gamma Correction : High Reset Select: Select End: OK End: OK Picture Adjustment Mode : Live Contrast : 80 Brightness : 0 Colour : 0 Hue : 0 Sharpness : 0 NR : Auto Dynamic Picture : On Colour Tone : Cool Colour Correction : On Gamma Correction : High Reset Select: Select Back: OK End: OKThe "Picture Adjustment" menu allows you to alter the picture adjustments.
To do this:
After selecting the item you want to alter, press , then press / /↓ ↑
or repeatedly to adjust it. This menu also allows you to customise the picture quality for the "PC/GAME" and "Personal" modes based on the programme you are watching.
Mode Live (for enhanced picture contrast and sharpness).
Standard (for a picture with contrast to suit your room's lighting conditions).
Movie (for a finely detailed picture).
PC/GAME (for a picture from a personal computer or game).
Personal (for your own custom settings).
(continued)
Contrast Press or to reduce picture contrast. Press or to enhance picture contrast.
Brightness Press or to darken the picture. Press of to brighten the picture.
Colour Press or to decrease colour intensity. Press o to increase colour intensity.

Colour cannot be adjusted for an RGB input signal connected to the PC connector.
Hue Press or to decrease the green tones. Press or to increase the green tones.

Hue can only be adjusted for NTSC colour signal (e.g. USA video tapes).
Sharpness Press or to soften the picture. Press or to sharpen the picture.
NR (Noise Reduction) Auto/Off/Low/Middle/High Select to reduce the noise level.

NR (Noise Reduction) cannot be adjusted for an RGB input signal connected to the PC - connector, a DTV* signal connected to the Y, P B/CB, PR/CR jacks of 5, and the "Memory Stick" input.
* DTV is the digital broadcast format in the United States (e.g. digital tuner with RGB signal).
Dynamic Picture On/Off Select to enhance the picture contrast.
Colour Tone Cool/Normal/Warm Select to give bright colours a red tint (Setting is variable from Cool to Warm).
Colour Correction On/Off Select to emphasise reds and blues.

Colour Correction cannot be adjusted for an RGB input signal connected to the PC connector.
Gamma Correction High/Middle/Low Select to adjust the balance between bright and dark areas of the picture.
Reset Cancel/OK Select OK to reset the picture to the factory preset levels.
GB

- No option can be adjusted when Mode is set to Live.
- Only Contrast can be adjusted when Mode is set to Standard or Movie.
text_image
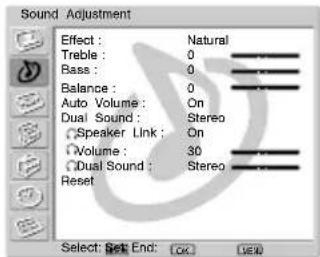
Picture Adjustment Mode : Live Contrast : 80 Brightness : 0 Colour : 0 Hue : 0 Sharpness : 0 NR : Auto Dynamic Picture : On Colour Tone : Cool Colour Correction : On Gamma Correction : High Reset Select: Set End: ON OKThe "Sound Adjustment" menu allows you to alter the sound adjustments.
To do this:
After selecting the item you want to alter, press ▼hen press / /▼ ▲ or ▶peatedly to adjust it.
text_image
Sound Adjustment Effect : Natural Treble : 0 Bass : 0 Balance : 0 Auto Volume : On Dual Sound : Stereo Speaker Link : On Volume : 30 Dual Sound : Stereo Reset Select: Set End: OK Cancel

text_image
Sound Adjustment Effect : Natural Treble : 0 Bass : 0 Balance : 0 Auto Volume : On Dual Sound : Stereo Speaker Link : On Volume : 30 Dual Sound : Stereo Reset Select: Back Back EndEffect Off (no effect).
Natural (enhances clarity, detail and presence of sound by using "BBE High Definition Sound system" *).
Dynamic ("BBE High Definition Sound system"* intensifies clarity and presence of sound for better intelligibility and musical realism).
Dolby Virtual** (uses the TV speakers to simulate the surround effect produced by a multi channel system). This is a simulation of "Dolby Surround Pro Logic."

If you set "Auto Volume" to "On," the "Natural" effect is selected automatically.
* The "BBE High Definition Sound system" is manufactured by Sony Corporation under licence from BBE Sound, Inc. It is covered by U.S. Patent No. 4,638,258 and No. 4,482,866. The word "BBE" and BBE Symbol are trademarks of BBE sound.
** Manufactured under licence from Dolby Laboratories. "Dolby," "Pro Logic" and the double-D symbol are trademarks of Dolby Laboratories. Confidential unpublished works. © 1992-1997 Dolby Laboratories. All rights reserved.
Treble Press or to decrease higher-frequency sounds.
Press or to increase higher-frequency sounds.
Bass Press or to decrease lower-frequency sounds.
Press or to increase lower-frequency sounds.
Balance Press or to emphasise the left speaker.
Press or to emphasise the right speaker.
Auto Volume On/Off
Volume level of the channels will stay the same, independent of the broadcast signal (e.g. in the case of advertisements).

If you set "Effect" to "Virtual Dolby," Off is selected automatically
(continued)
Dual Sound Mono/Stereo
For a stereo broadcast, select Stereo or Mono.
Mono/A/B
For a bilingual broadcast, select A for sound channel 1, B for sound channel 2 or Mono for a mono channel if available.
Speaker Link On/Off
Select to control the sound output of the TV's speakers when headphones are connected. If you want both the sound of the headphones and the TV's speakers, select Off.
Volume Press or to turn the volume of headphones down.
Press or to turn the volume from headphones up.

If you set “○ Speaker Link” to “On,” ○ Volume cannot be adjusted.
Dual Sound Select Dual Sound option of the headphones.
Mono/Stereo
For a stereo broadcast, select Stereo or Mono.
Mono/A/B
For a bilingual broadcast, select A for sound channel 1, B for sound channel 2 or Mono for mono channel if available.

If you set “○ Speaker Link” to “On,” ○ Dual Sound cannot be adjusted.
Reset Cancel/OK
Select OK to reset the sound to the factory preset.
GB

text_image
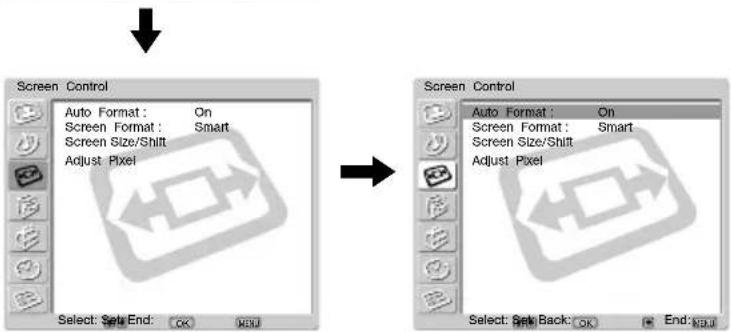
Picture Adjustment Mode : Live Contrast : 80 Brightness : 0 Colour : 0 Hue : 0 Sharpness : 0 NR : Auto Dynamic Picture : On Colour Tone : Cool Colour Correction : On Gamma Correction : High Reset Select: Set End: OK OKThe "Screen Control" menu allows you to alter the screen adjustments.
text_image
Screen Control Auto Format: On Screen Format: Smart Screen Size/Shift Adjust Pixel Select: Set End: OK Next Screen Control Auto Format: On Screen Format: Smart Screen Size/Shift Adjust Pixel Select: Set Back: OK Next End: No.0Auto Format The "Auto Format" option allows you to automatically change the aspect ratio of the screen.
To do this:
1 After selecting the option, press .
2 Press on to select On (if you wish the TV set to automatically switch the screen format according to the broadcast signal) or Off (if you wish to keep your preference).

Even if you have selected On or Off in the "Auto Format" option, you can always modify the format of the screen by pressing repeatedly on the remote control.
(continued)
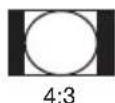
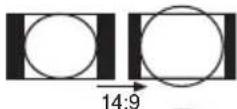
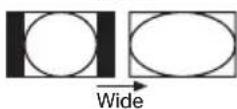
Screen Format The "Screen Format" option allows you to modify the format of the screen.
To do this:
1 After selecting the option, press.
2 Press or to select the desired screen format.
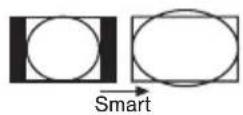
Smart: Imitation of wide screen effect for 4:3 broadcast.
4:3: Conventional 4:3 picture size, full picture information.
14:9: Compromise between 4:3 and 16:9 picture size.
Zoom: Wide screen format for letterbox movies.
Wide: For 16:9 broadcast.


- If parts of the top and bottom of the screen are cut off, press the position of the image on the screen (e.g. to read subtitles).
- Screen Format cannot be adjusted for a HD signal connected to the Y, P_B / C_B , Pr / Cr jacks of 5 and the "Memory Stick" input.
- Only 4:3 or Wide can be selected for an RGB signal connected to the PC connector.
(continued)
GB
Screen Size/Shift The "Screen Size/Shift" option allows you to adjust the size and position of the picture for each screen format.
To do this:
1 After selecting the option, press .
2 Press or to select the option and press. Then Press
/ / or to adjust the size and position of the picture.
V Size (Vertical Size):
Press ♦ to enlarge the Screen Size vertically.
Press ⬆ to shrink the Screen Size vertically.
Screen Shift
H Shift (Horizontal Shift):
Press ♦ to move the screen to the left.
Press to move the screen to the right.
V Shift (Vertical Shift):
Press ♠ to move the screen up.
Press ↓ to move the screen down.
Reset:
Select OK to reset to the factory settings.

- Screen Size/Shift cannot be adjusted for a HD signal connected to the Y, P_B / C_B , P_R / C_R jacks of 5 and the "Memory Stick" input.
- H Shift (Horizontal Shift) can only be adjusted for an RGB input signal connected to the Scart Connector 1/2, 2/6 or 4/→
- When "Screen Format" is set to "4:3" or "Wide," V Size (Vertical Size) and V Shift (Vertical Shift) cannot be adjusted for the video input signal from connected equipment.
Adjust Pixel The "Adjust Pixel" option allows you to adjust the picture from RGB equipment.
To do this:
1 After selecting the option, press
2 Press ↓ or ↑ to select the following option.
Auto Adjust:
Select OK to automatically make the best picture for the input signal. Note that it may not be adjusted perfectly depending on the input signal condition or picture pattern. In this case, perform Auto Adjust again.
Dot phase:
Adjust between 00-100 when part of a displayed text or image is not clear.
Total H Pixel (Total Horizontal Pixel):
Adjust when the general picture is not completely clear.
Reset:
Reset to the factory settings.

Adjust Pixel is only available for an RGB input signal connected to the PC connector.
flowchart
graph TD
    A["Picture Adjustment"] --> B["Mode: Live"]
    A --> C["Contrast: 80"]
    A --> D["Brightness: 0"]
    A --> E["Colour: 0"]
    A --> F["Hue: 0"]
    A --> G["Sharpness: 0"]
    A --> H["NR: Auto"]
    A --> I["Dynamic Picture: On"]
    A --> J["Colour Tone: Cool"]
    A --> K["Colour Correction: On"]
    A --> L["Gamma Correction: High"]
    A --> M["Reset"]
    N["Features"] --> O["Power Saving: Standard"]
    N --> P["Speaker: Main"]
    N --> Q["Phase: Reverse"]
    N --> R["Audio Output: Variable"]
    N --> S["Screen Saver"]
    N --> T["AV3 Output: Auto"]
    N --> U["AV4 Output: Auto"]
    N --> V["SmartLink: AV3"]
    N --> W["AV4 Input Select: Auto"]
    N --> X["Menu Colour: White"]
    N --> Y["Logo Illumination: Yes"]
    Z["Features"] --> AA["Power Saving: Standard"]
    Z --> AB["Speaker: Main"]
    Z --> AC["Phase: Reverse"]
    Z --> AD["Audio Output: Variable"]
    Z --> AE["Screen Saver"]
    Z --> AF["AV3 Output: Auto"]
    Z --> AG["AV4 Output: Auto"]
    Z --> AH["SmartLink: AV3"]
    Z --> AI["AV4 Input Select: Auto"]
    Z --> AJ["Menu Colour: White"]
    Z --> AK["Logo Illumination: Yes"]
    AL["Select: Set End: OK"] --> AM["OK"]
    AN["End: OK"] --> AO["OK"]
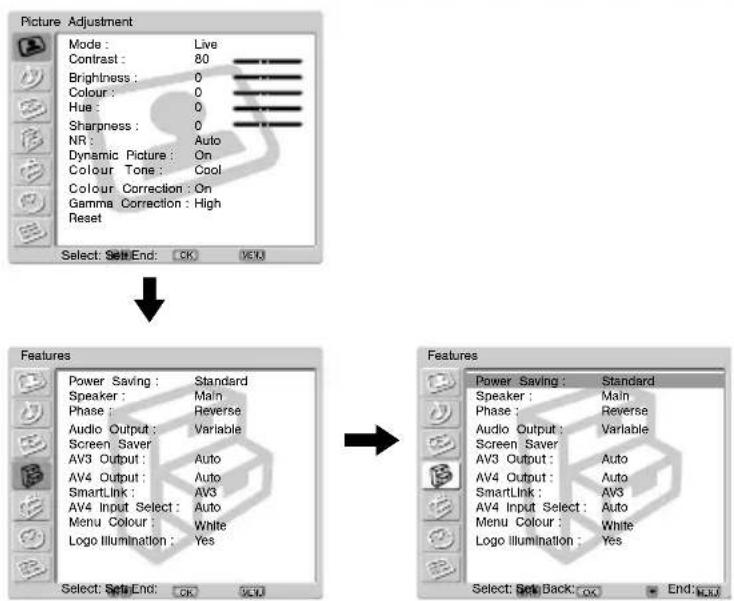
The "Features" menu allows you to alter various adjustments of the TV.
Power Saving The "Power Saving" option allows you to reduce the power consumption of this TV.
To do this:
1 After selecting the option, press
2 Press or to select Reduce.

- If you turn off the TV whilst the Power Saving mode is on, the mode stays on next time you turn on the TV.
- If you select the "PC/GAME" or "Personal" mode on the "Picture Adjustment" menu (page 26), you can adjust the picture option even if the Power Saving mode is set to On. Note that power consumption will increase if you increase Contrast or Brightness.
Speaker The "Speaker" option allows you to control the sound of the TV's speakers when external audio equipment is connected.
To do this:
1 After selecting the option, press
2 Press or to select the desired output.

Main:
Sound of the TV is output through the TV's speakers.
Centre in:
When an external amplifier is connected to the TV's CENTRE SPEAKER IN terminals, the centre speaker sound from the external amplifier is output through the TV's speakers.

The audio level can be modified by pressing the volume buttons + / - on the remote control.
Off:
Sound of the TV is not output through the TV's speakers.
(continued)
Phase The “Phase” option adjusts the phase of sound when using the TV’s speakers as the centre speaker. If sound from the TV’s speaker (as centre speaker) sound unnatural, adjust the “Phase” option.
To do this:
1 After selecting the option, press .
2 Press ↓ or ↑ to select Reverse. Sound from the TV's speakers is phase-reversed.

Phase can be adjusted only when the "Speaker" option, "Centre in", is selected.
Audio Output The “Audio Output” option allows you to select either the TV’s remote control or the external amplifiers remote control to control the volume of the TV’s speakers when an external amplifier is connected to the TV’s audio output sockets.
To do this:
1 After selecting the option, press
2 Press or to select Variable (if you wish to use the TV's remote control) or Fix (if you wish to use the external amplifier's remote control).

- When you connect the AV mouse and install it on the external amplifier, you can use the external amplifier's remote control, pointed toward the TV, for controlling the external amplifier's volume level. For more details on AV mouse installation, refer to "Connecting Optional Equipment" on page 61.
- Audio Output cannot be adjusted when "Centre in" is selected in the "Speaker" option.
(continued)
Screen Saver The "Screen Saver" option allows you to reduce image retention.

If the following images are displayed for an extended period time, image retention (afterimage) in areas of the screen may result due to the characteristics of the Plasma Display Panel.
- Black bars at the top and bottom that appear with a wide video source (Letterbox picture).
- Black bars to the left and right that appear with a 4:3 video source (conventional TV broadcasts).
• Video game sources - PC images
• DVD on-screen menu displays - On-screen menus, channel numbers, etc., of connected equipment such as Set top box, Cable modem, VCR, etc.
To do this:
1 After selecting the option, press .
2 Press or to select the following option and press.
Then press ♣ to move the picture position (Orbit), or turn the screen to white (All White) to reduce image retention.
Orbit: Select On to move the position.
All White: Select On to turn the screen to white.

- All White function finishes automatically after 30 minutes. If image retention is still present, repeat the above.
- To cancel halfway, press any buttons (except the sound-related buttons) on the remote.
AV3 Output/ AV4 Output
The "AV3 Output" and "AV4 Output" options allow you to select the source to be output from the Scart connectors 3A and S
4/ You can record from these Scarts any signal coming from the TV or from external equipment connected to the other Scart connectors.

If your VCR supports SmartLink, this procedure is not necessary.
To do this:
1 After selecting the option, press .
2 Press ↓ or ↑ to select the desired output signal: Auto, TV, AV1, AV2, AV3 (only for AV4 Output), AV4 (only for AV3 Output) or AV6.

- If you select Auto, the output signal will always be the same one that is displayed on the screen.
- If you have connected a decoder to the Scart connectors 3/4/, or to a VGR connected to this Scart, please remember to change back to AV3 Output or AV4 Output to Auto for correct unscrambling.
- When AV3 Output or AV4 Output is set to Auto, the signals input through the AV5 input, PC input and "Memory Stick" input are not output from Scart connectors 3/ S or -4/.
| SmartLink The “SmartLink” option allows you to select a Scart connector that supports SmartLink. Both Scart connectors 3A and 4S cannot support SmartLink at the same time.To do this:1 After selecting the option, press .2 Press or to select AV3 or AV4. | |
| AV4 Input Select Select the “AV4 Input Select” option if a DVD recorder is connected to both the Scart connector 4/ and Y, P_B/C_B , P_R/C_R jacks of 5.i Some DVD recorders may have 576p signal format. The Scart connector does not accept 576p signal format on its own. If you wish to input the signal just as it is, connect the DVD recorder to both the Scart connector 4 and Y P_B/C_B , P_R/C_R jacks of 5To do this:1 After selecting the option, press .2 Press or to select Auto or Manual.Auto: The signal from the DVD recorder is input via the Scart 4/.Manual: The signal from the DVD recorder is input via the Y, P_B/C_B , P_R/C_R jacks of 5. If the input signal from the DVD recorder is 576p signal format, select this. | |
| Menu Colour The “Menu Colour” option allows you to alter the background colour of the menus.To do this:1 After selecting the option, press .2 Press or to select White or Black. | |
| Logo Illumination | The “Logo Illumination” option allows you to illuminate the SONY logo on the front panel of display unit in blue.To do this:1 After selecting the option, press .2 Press or to select Yes. |

text_image
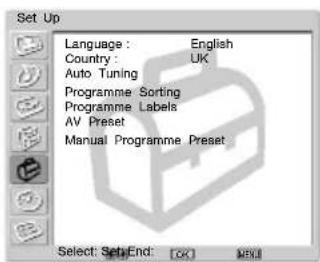
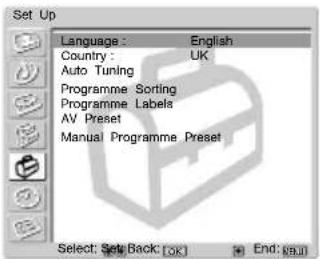
Picture Adjustment Mode : Live Contrast : 80 Brightness : 0 Colour : 0 Hue : 0 Sharpness : 0 NR : Auto Dynamic Picture : On Colour Tone : Cool Colour Correction : On Gamma Correction : High Reset Select: SetEnd: [OK] [OK]The "Set Up" menu allows you to alter various options on this TV.

text_image
Set Up Language : English Country : UK Auto Tuning Programme Sorting Programme Labels AV Preset Manual Programme Preset Select Setup End: [OK] [OK]
text_image
Set Up Language : English Country : UK Auto Tuning Programme Sorting Programme Labels AV Preset Manual Programme Preset Select: Set Back: [OK] End: [OK]Language/ Country
The "Language/Country" option allows you to select the language that the menus are displayed in. It also allows you to select the country in which you wish to operate the TV set.
To do this:
1 After selecting the option, press
2 Follow steps 3 and 4 of the section "Switching On the TV and Tuning the TV Automatically" on page 23.
Auto Tuning The "Auto Tuning" option allows you to automatically search and store all available TV channels.
To do this:
1 After selecting the option, press
2 Follow steps 6 and 7 of the section "Switching On the TV and Tuning the TV Automatically" on page 23.
Programme Sorting
The "Programme Sorting" option allows you to change the order in which the channels (TV Broadcast) appear on the screen.
To do this:
1 After selecting the option, press
2 Follow step 8 B) of the section "Switching On the TV and Tuning the TV Automatically" on page 23.
(continued)
GB
| Programme Labels | The “Programme Labels” option allows you to name a channel using up to five characters (letter or numbers).To do this:1 After selecting the option, press . ➔2 Press ♥ or ♠ to select the programme number with the channel you wish to name, then press OK.3 Press / ♥/ to select the letter, then press OK.4 When you have finished, press / ♥/ or ♠ to select the word “End” on the screen and press OK to turn off the menu from the screen.To correct the letter, select ∈ the screen to go back and press OK.For a blank, select □ the screen and press OK. |
| AV Preset The “AV Preset” option allows you to designate a name to the external equipment you have connected to this TV.To do this:1 After selecting the option, press . ➔2 Press or♥ to select the input source you wish to name.Then press ➔3 A label automatically appears in the label column:a) If you want to use one of the predefined labels (CABLE, GAME, CAM, DVD, VIDEO, or SAT), press ♥ or ♠ to select the desired label.b) If you want to set a different label, select Edit and press ♥Then with the first element highlighted, press ♥ / ♠/ □ to select the letter, then press OK.When you have finished, press ♥/ o♠ to selectthe word “End” on the screen and press OK to turn off the menu from the screen.To correct the letter, select ⊖ on the screen to go back and press OK.For a blank, select □ on the screen and press OK. | |
(continued)
Manual
Programme Preset
The "Manual Programme Preset" option (A-E) allows you to:
A) Preset Channels, one by one, in the programme order of your choice.
To do this:
1 After selecting the "Manual Programme Preset" option, press →.
2 Highlight the Programme option and press.
3 Press on to select a programme number on which you want to preset the channel. Then press OK.
4 After selecting the System option, press .

The availability of this option depends on the country you have selected in the “Language/Country” menu.
5 Press on to select the TV Broadcast system (B/G for western European countries, D/K for eastern European countries, I for United Kingdom or L for France), then press OK.
6 After selecting the Channel option, press .
7 Press or to select the type of channel to be tuned (S for cable channels or C for terrestrial channels), then press After that, press the number buttons to directly enter the channel number of the TV Broadcast. If you do not know the channel number, press or to search for it. When you tune the desired channel, press OK.
8 Highlight the Confirm option and press OK. Then press ↓ to select OK and finally press OK to store. Repeat all the above steps to tune and store other channels.
B) Label a channel using up to five characters.
To do this:
1 Highlighting the Programme option, press PROG +/- to select the programme number with the channel you wish to name.
2 When the programme you want to name appears on the screen, select the Label option and press
3 Press / / or to select the letter, then press OK.
4 When you have finished, press / / or to select the word "End" on the screen and press OK to turn off the menu from the screen.
- To correct the letter, select on the screen to go back and press OK.
- For a blank, select on the screen and press OK.
GB
(continued)
C) Normally the automatic fine tuning (AFT) will give the best possible picture, however you can manually fine tune the TV to obtain a better picture if the picture is distorted.
To do this:
1 Whilst watching the channel (TV Broadcast) you wish to fine-tune, select the AFT option and press
2 Press or to adjust the fine tuning between -15 and +15 and press OK.
3 Highlight the Confirm option and press OK. Then press ↓ to select OK and finally press OK to store.
D) Skip any unwanted programme numbers when they are selected with the PROG +/-.
To do this:
1 Highlight the Programme option, press PROG +/- to select the programme number you want to skip.
2 When the programme you want to skip appears on the screen, select the Skip option and press
3 Press or to select Yes and press OK.
4 Highlight the Confirm option and press OK. Then press ↓ to select OK and finally press OK to store.
To cancel this function afterwards, select No instead of Yes in the step above.
E) View and record scrambled channels when using a decoder connected to the Scart connectors 3/4 or 4/5 either directly or via a VCR.
This option is only available depending on the country you have selected in the “Language/Country” menu.
To do this:
1 After selecting the Decoder option and press .
2 Press or to select On and press OK.
3 Highlight the Confirm option and press OK. Then press ↓ to select OK and finally press OK to store.
To cancel this function afterwards, select Off instead of On in above.
flowchart
graph TD
    A["Picture Adjustment"] --> B["Mode: Live"]
    A --> C["Contrast: 80"]
    A --> D["Brightness: 0"]
    A --> E["Colour: 0"]
    A --> F["Hue: 0"]
    A --> G["Sharpness: 0"]
    A --> H["NR: Auto"]
    A --> I["Dynamic Picture: On"]
    A --> J["Colour Tone: Cool"]
    A --> K["Colour Correction: On"]
    A --> L["Gamma Correction: High"]
    A --> M["Reset"]
    B --> N["Select: Set End: [CK"] [OK]]
    C --> O["Select: Set End: [CK"] [OK]]
    D --> P["Select: Set End: [CK"] [OK]]
    E --> Q["Select: Set End: [CK"] [OK]]
    F --> R["Select: Set End: [CK"] [OK]]
    G --> S["Select: Set End: [CK"] [OK]]
    H --> T["Select: Set End: [CK"] [OK]]
    I --> U["Select: Set End: [CK"] [OK]]
    J --> V["Select: Set End: [CK"] [OK]]
    K --> W["Select: Set End: [CK"] [OK]]
    L --> X["Select: Set End: [CK"] [OK]]
    M --> Y["Select: Set End: [CK"] [OK]]
    N --> Z["Timer"]
    O --> AA["Timer"]
    P --> AB["Timer"]
    Q --> AC["Timer"]
    R --> AD["Timer"]
    S --> AE["Timer"]
    T --> AF["Timer"]
    U --> AG["Timer"]
    V --> AH["Timer"]
    W --> AI["Timer"]
    X --> AJ["Timer"]
    Y --> AK["Timer"]
    Z --> AL["Sleep Timer: Off"]
    AA --> AM["Clock Set: 00:00:00 (Mon)"]
    AB --> AN["Clock Display: Off"]
    AC --> AO["On/Off Timer"]
    AD --> AP["Auto Shutoff: On"]
    AE --> AQ["Sleep Timer: Off"]
    AF --> AR["Clock Set: 00:00:00 (Mon)"]
    AG --> AS["Clock Display: Off"]
    AH --> AT["On/Off Timer"]
    AI --> AU["Auto Shutoff: On"]
    AJ --> AV["Sleep Timer: Off"]
    AK --> AW["Clock Set: 00:00:00 (Mon)"]
    AL --> AX["Clock Display: Off"]
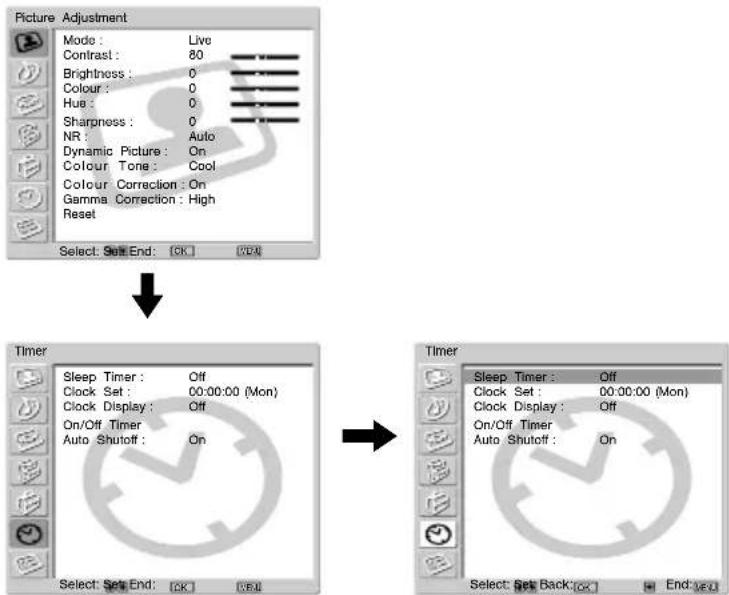
The "Timer" menu allows you to alter the timer adjustments.
Sleep Timer The "Sleep Timer" option allows you to select a time period for the TV to switch itself automatically into the standby mode.
To do this:
1 After selecting the option, press .
2 Press or to set the time period delay (max. of 2 hours).

Whilst the “All White” function in the “Screen Saver” option (page 35) is activated (set to “On”), the off timer functions are suspended and the TV does not switch into the standby mode automatically at a specified time. After the “All White” function finishes, the off timer functions are resumed, and the TV automatically enters the standby mode.

Whilst watching the TV, you can press the button on the remote control to display the time remaining.
Clock Set The "Clock Set" option allows you to set the current time. The error range of the built-in clock is ±30 seconds a month.
To do this:
1 After selecting the option, press .
2 Press or to set the hour, then press.
3 Press or to set the minute, then press.
4 Press or to set the day of a week.
5 Press OK at the time signal. The clock starts.
(continued)
GB
Clock Display The "Clock Display" option allows you to display the clock on the screen.
To do this:
1 After selecting the option, press .
2 Press ↓ or ↑ to select On and then press OK.

- The clock display turns off automatically 5 minutes after it is turned on.
- The clock display also turns on or off by pressing ☑ the remote.
On/Off Timer The "On/Off Timer" option allows you to turn the TV on and off automatically at a specified time automatically. To use this function, set the clock in advance (page 41).

- If you change the following settings, Off is selected automatically in the Timer option. In this case, select On in the Timer option.
- Unplugging the mains lead of the media receiver unit
- On Time, Holding Time, Weekly Setting, Repeat, Programme option settings
- Whilst the "All White" function in the "Screen Saver" option (page 35) is activated (set to "On"), the off timer functions are suspended and the TV does not switch into the standby mode automatically at a specified time. After the "All White" function finishes, the off timer functions are resumed, and the TV automatically enters the standby mode.
To do this:
1 After selecting the option, press .
2 Highlight Timer and press ↓ or ↑ to select On, then press →.
3 Press ↓ or ↑ to select On Time, then press →.
4 Set the time for the TV to turn on itself automatically. Press ↓ or ↑ to set the hour, then press ↗. Next press ↓ or ↑ to set the minutes, then press
5 Press ↓ or ↑ to select Holding Time, then press ↗.
6 Press ↓ or ↑ to select the desired Holding Time. Select the holding time (max. of 5 hours) for the TV to switch itself automatically into the standby mode.
7 Press ↓ or ↑ to select Weekly Setting, then press ↗.
8 Press ↓ or ↑ to select the day of the week you wish to set for On/Off Timer, then press
9 Press ↓ or ↑ to select On, then press ↗.
10 Repeat steps 8 and 9 to set any other days of a week.
11 Press ↓ or ↑ to select Programme, then press ↗.
12 Press ↓ or ↑ to select the channels (TV Broadcast) that you want to watch at the time of turning on the TV, then press

To turn the TV on and off at a specified time everyday, set Repeat to On after step 2, then go to step 3.
To cancel this function afterwards, select Off instead of On in step 2 above.
(continued)
Auto Shutoff The "Auto Shutoff" option allows you to set the TV to change to the standby mode automatically if there is no input signal through the connected equipment.
To do this:
1 After selecting the option, press .
2 Press or to select On.

Auto Shutoff cannot be set when the TV receives the TV Broadcast signal.
GB
text_image
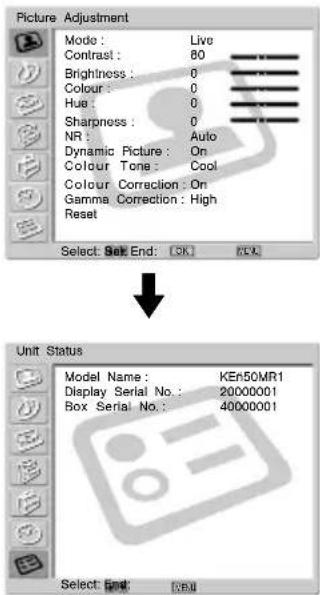
Picture Adjustment Mode: Live Contrast: 80 Brightness: 0 Colour: 0 Hue: 0 Sharpness: 0 NR: Auto Dynamic Picture: On Colour Tone: Cool Colour Correction: On Gamma Correction: High Reset Select: Set End: [OK] [OK] Unit Status Model Name: KEh50MR1 Display Serial No.: 20000001 Box Serial No.: 40000001 Select: End: [OK]The "Unit Status" menu allows you to check the Model Name and Serial Number of this TV.
Model Name Model name of this TV.
Display Serial No.: Serial number allocated for each display unit.
Box Serial No.: Serial number allocated for each media receiver unit.
About "Memory Stick"

The "Memory Stick" feature allows you to view digital images that are stored on "Memory Stick" media on your TV screen.
Picture viewer
This TV's "Memory Stick" picture viewer can display still image data (JPEG) and moving image data (MPEG1) stored in the "Memory Stick." You can also run a slideshow of those images, and customise the features of the slideshow by selecting automatic or manual slide show.
Digital Camera Mode
This TV's Digital Camera Mode can display only images using JPEG or MPEG1 format, and recorded on a DCF compliant digital camera.
Supported image types
Recorded images must meet the following specifications:
- Still images: JPEG* compression format and DCF** compliant folder and file names.
- Moving images must be recorded on a Sony digital camera and use one of the following MPEG1*** compression formats: MPEG MOVIE, MPEG MOVIE AD, MPEG MOVIE EX, MPEG MOVIE HQ, MPEG MOVIE CV, MPEG MOVIE HQX, MPEG1 (corresponding to VIDEO CD) of VAIO Giga pocket
* JPEG is a standard technology format for compressing a still image (extension. jpg). JPEG stands for “Joint Photographic Experts Group,” which is the organization that implemented this format.
** DCF stands for “Design Rules for Camera file Systems,” which has specifications established by the Japan Electronic Industry Development Association (JEIDA).
*** MPEG is one of the technology formats for compressing a moving image (extension. mpg).
Unsupported image types
- Still images stored in TIFF or any other non-JPEG compression format
- Still images recorded using products that are not DCF compliant, including the following Sony products.
— Digital still cameras DSC-D700, DSC-D770
— Digital video cameras DCR-TRV900/DSR-PD100A
- The following still images stored in JPEG compression format
— Images that were processed on a computer
— Images in folders that were modified or renamed on a computer
— Images stored in a "Memory Stick" that were formatted on a computer
Notes on use
- We recommend that you backup important data on the hard disk of your computer. Sony cannot be responsible for any lost or damaged data.
- Use of some pre-recorded image data except for personal use may be an infringement of copyright.
- The “Memory Stick” application software may be modified or changed by Sony without prior notice.
(continued)
GB
What is a "Memory Stick"?
"Memory Stick" is a compact, portable and versatile Integrated Circuit recording medium with a data capacity that exceeds a floppy disk. "Memory Stick" is specially designed for exchanging and sharing digital data among "Memory Stick" compatible products. Because it is removable, the "Memory Stick" can also be used for external data storage.
"Memory Stick" is available in two sizes: standard size and compact "Memory Stick Duo" size. Once attached to a Memory Stick Duo adapter, "Memory Stick Duo" is physically the same size as standard "Memory Stick" and thus can be used with products compliant with standard "Memory Stick."
Types of "Memory Stick"
"Memory Stick" is available in the following three types to meet various requirements in functions.
- "Memory Stick"
Stores any type of data except copyright-protected data that requires the MagicGate copyright protection technology. - "MagicGate Memory Stick"
Equipped with the MagicGate copyright protection technology. - "Memory Stick-ROM"
Stores pre-recorded, read-only data. You cannot record on “Memory Stick-ROM” or erase the pre-recorded data.
Types of "Memory Stick" compatible with the device
You can use three types of “Memory Stick”: general “Memory Stick,” “MagicGate Memory Stick” and “Memory Stick-ROM” with your TV. However, because your TV does not support the MagicGate standards, data displayed with your TV is not subjected to MagicGate copy protection.
Notes on Memory Stick Duo
To use "Memory Stick Duo" with this unit, attach it to the Memory Stick Duo adapter before inserting it into the unit.
Make sure that you attach "Memory Stick Duo" to the adapter correctly.
Make sure that you insert the Memory Stick Duo adapter correctly, otherwise the unit may be damaged.
Do not insert the Memory Stick Duo adapter without “Memory Stick Duo” attached. Doing so may result in malfunction of the unit.
On handling the "Memory Stick"
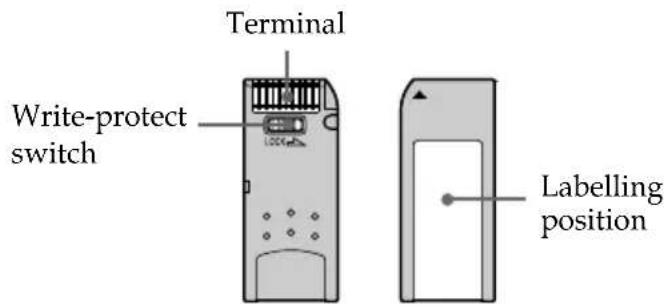
text_image
Terminal Write-protect switch 100mm Labelling position- You cannot record or erase images when the write-protect switch on the "Memory Stick" is set to LOCK.
-
Use a sharp object, such as a ballpoint pen, to move the "Memory Stick Duo" erasure prevention switch.
• We recommend that you backup important data on the hard disk of your computer.
• Image data may be damaged in the following cases: -
If you remove the "Memory Stick," or turn the power off whilst the access lamp is lit or flashing.
- If you use "Memory Stick" near magnets or magnetic fields, such as speakers.
-
If you unplug the mains lead whilst the access lamp is lit or flashing.
-
Prevent metallic objects or your finger from coming into contact with the metal parts of the connecting section.
- Do not attach any material other than the supplied label on the labelling position.
- Do not attach the label so that it sticks out from the proper labelling position.
- Do not write forcefully on the "Memory Stick Duo" memo area.
- Do not bend, drop or apply strong shock to "Memory Stick."
- Do not disassemble or modify "Memory Stick."
- Do not allow the "Memory Stick" get wet.
- Do not use or keep the "Memory Stick" in a location that is subject to
- extremely high temperature, such as in a car parked in the sun or on a radiator
- under direct sunlight
- high humidity or places with corrosive substance present
- When you carry or store a "Memory Stick," put it in its supplied case.
On formatting the "Memory Stick"
The "Memory Stick" is shipped with an exclusive standard format.
N.B.
A "Memory Stick" formatted by computer does not have a guaranteed compatibility with this TV.
When the access lamp is lit or flashing
When the access lamp is lit or flashing, the "Memory Stick" is reading or writing data. In this do not shake or strike the TV, turn the power off or eject the "Memory Stick" otherwise, image data breakdown may occur.
- "MagicGate Memory Stick," "Memory Stick" and are trademarks of Sony Corporation.
- "MagicGate" and are trademarks of Sony Corporation.
- "Memory Stick-ROM" and are trademarks of Slony Corporation.
- "Memory Stick Duo" and are trademarks of Sony Corporation.
GB
Inserting and Removing a "Memory Stick"
Inserting a "Memory Stick"
Insert a "Memory Stick" in the "Memory Stick" slot as far as it can go with the ◀ mark facing up as illustrated. The "Memory Stick" access lamp flashes.
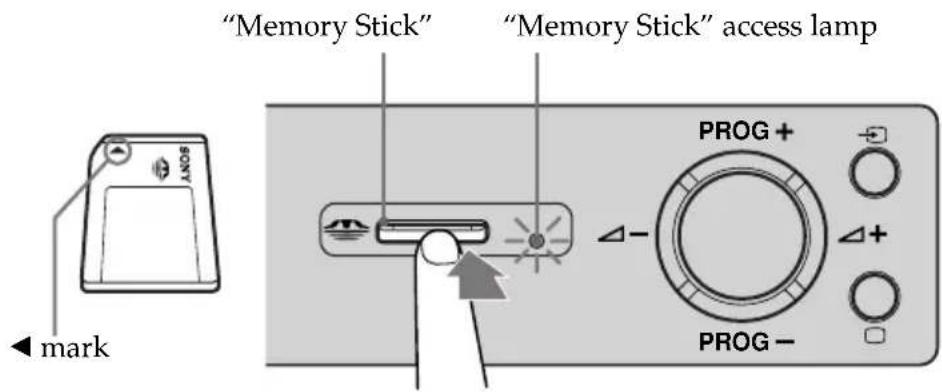
text_image
"Memory Stick" "Memory Stick" access lamp mark PROG + Δ- Δ+ PROG -
- Be sure to insert the "Memory Stick" correctly. If the "Memory Stick" is forced in the wrong way, the "Memory Stick" or the slot may become damaged.
- Insert only "Memory Stick" into the "Memory Stick" slot. Attempting to insert other objects into the slot may damage the TV.
Removing a "Memory Stick"
1 Check that the "Memory Stick" access lamp is off, then push the "Memory Stick" gently into the "Memory Stick" slot. The "Memory Stick" is ejected.
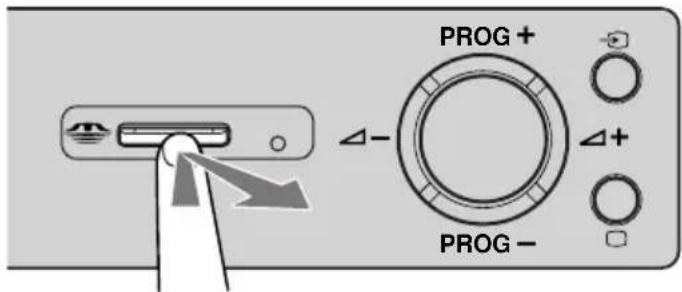
text_image
PROG+ Δ- Δ+ PROG-2 Pull the "Memory Stick" completely out of the "Memory Stick" slot.

- Do not turn the power off whilst the "Memory Stick" access lamp is flashing in red. If you do so, the "Memory Stick" may become damaged.
- When removing the "Memory Stick," do not attempt to just pull it from the "Memory Stick" slot. If you do so, the "Memory Stick" or the slot may become damaged.
- If, when removing the "Memory Stick", you release it immediately after pushing it into the "Memory Stick" slot, the "Memory Stick" may jump out.
Using the "Memory Stick" (Memory Stick Home)
The "Memory Stick" feature allows you to display an index of thumbnail images that are on the "Memory Stick." You can select an image from those to display on the full screen, playback a moving image or run a slideshow of those images.
Displaying the Memory Stick Home
The default setting for "Digi. Camera Mode" is "On".
1 Insert a "Memory Stick" that contains the images you want to view.
2 Press "Memory Stick.". The Memory Stick Home appears on the screen.
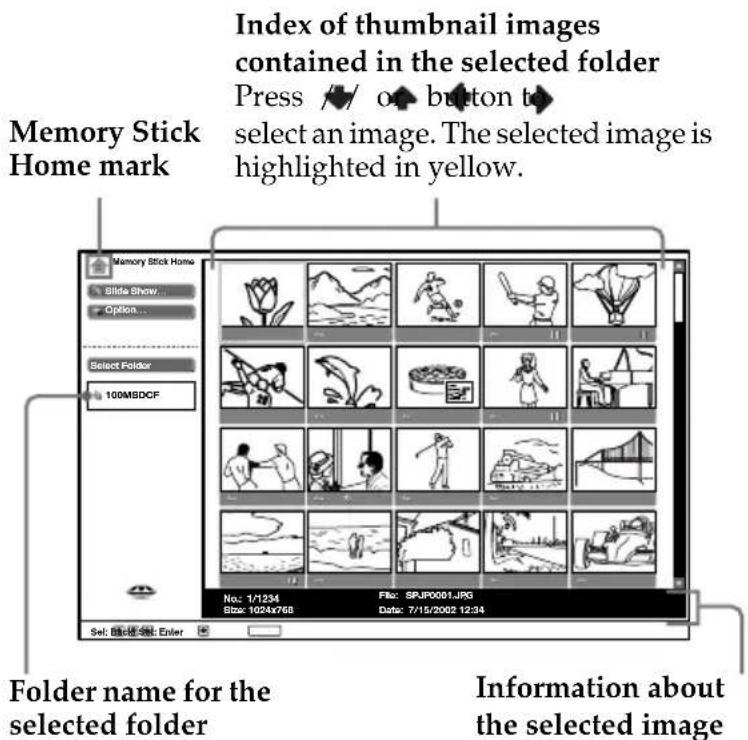
text_image
Index of thumbnail images contained in the selected folder Press // o♠ button to select an image. The selected image is highlighted in yellow. Memory Stick Home mark Slide Show... Option... Select Folder 100MSDCF No: 1/1234 File: SPJP0001.JPG Size: 1024x768 Date: 7/15/2002 12:34 Folder name for the selected folder Information about the selected imageMark indicated in the lower part of image
On: Protected image icon
: Moving image icon
+☐: Related file icon (displayed only when "Digi. Camera Mode" is set to "On").

text_image
TVVIDEO "Memory Stick" "Memory Stick" VCR TV DVD MODE OK PROG MENU SONY TV
- To close the Memory Stick Home, press "Memory Stick" again.
- To switch the "Memory Stick" input, you also press repeatedly until Memory Stick indicator on the media receiver unit lights up (see page 16).
(continued)
Selecting the index menu of the Memory Stick Home
Press 🔔 to highlight the menu item, and then press OK. The selected option is highlighted in yellow.
| Option | Description |
| Slide Show Displays a slideshow of images that are on the “Memory Stick.” For more details, refer to “Using the “Memory Stick” Slide Show” on page 55. | |
| Option | Displays the Option menu. You can select any of the following options.File: displays the following options:Sort: Sorts the image file according to the file name or the renewal date in the ascending/descending order.Filter: Filters only the still images (Still) or the moving images (Movie) out from the content.The Sort/Filter functions can be activated only when Digital Camera Mode is set to Off. Filter setting information is displayed in Memory Stick Home.Memory Stick: Displays the type, the used capacity and the capacity of the “Memory Stick” in use. |
| Select Folder Allows you to select a specific folder on the “Memory Stick.” For more details, refer to “Selecting a folder that you want to view on the “Memory Stick”” on page 51. | |
(continued)
Selecting a folder that you want to view on the "Memory Stick"
1 Insert a "Memory Stick" that contains the images you want to view.
2 Press "Memory Stick.". The Memory Stick Home appears on the screen.
3 Press ↓ or ↑ to highlight Select Folder, and then press OK. The Select Folder menu appears.
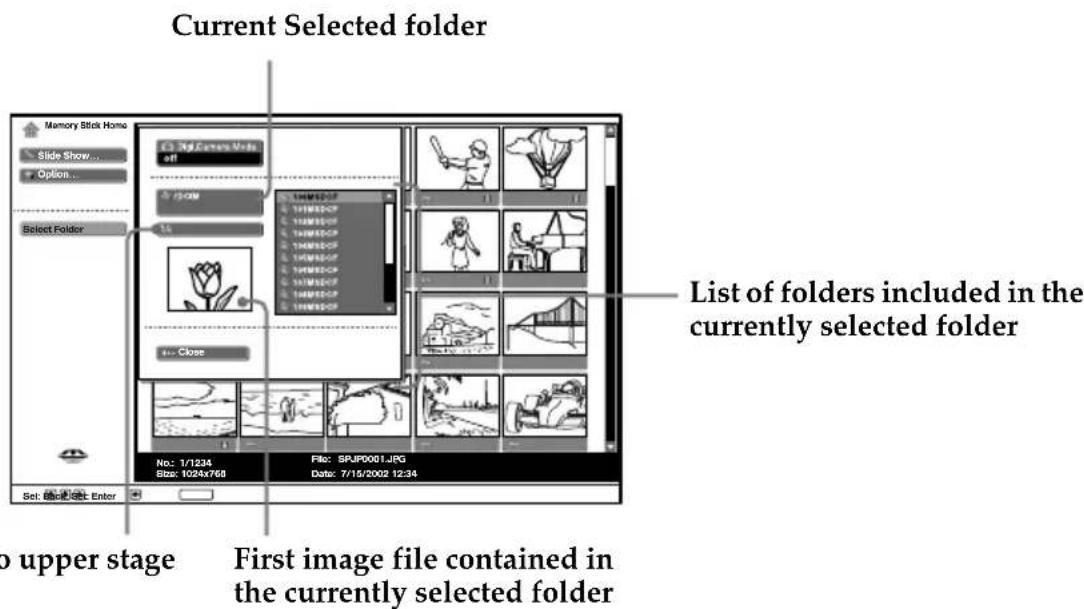
text_image
Current Selected folder Memory Stick Home Slide Show... Option... Select Folder List of folders included in the currently selected folder No: 1/1234 File: SPJR0001.JPG Size: 1024x765 Date: 7/15/2002 12:34 Set: 8.0.9.9.9.9.9.9.9.9.9.9.9.9.9.9.9.9.9.9.9.9.9.9.9.9.9.9.9.9.9.9.9.9.9.9.9.9.9.9.9.9.9.9.9.9.9 Top upper stage First image file contained in the currently selected folder4 Press ➤ to select the list of folders, and press ➤ or ➤ to select one that you want to view. Then press OK. An index of thumbnail images of selected folder appears.
To select the folders which are not displayed Press → to select the slider and press or ▼The next or previous 10 folders appear.
Sorting out image files (Digital Camera Mode)
"Digi. Camera Mode" allows you to sort out image files that are JPEG and MPEG compression format recorded on digital still cameras and digital video cameras which are DCF compliant. In step 4 above, select Digi. Camera Mode. Then press ↓ or ↑ to select On, and press OK.

- You cannot select Digi. Camera Mode if the image files recorded on the "Memory Stick" using a digital still camera or digital video camera are more than 2000 files.
- For an image file recorded with the Voice Memo function of a Sony digital camera, the still image file is displayed.
(continued)
Using the Memory Stick Home
Memory Stick Home allows you to display selected images on the full screen and playback a moving image using the index screen. You can also protect, rotate and delete the images using the index menu.
1 Insert a "Memory Stick" that contains the images you want to view.
2 Press "Memory Stick." The Memory Stick Home appears on the screen.
3 Press ↓ or ↑ to highlight Select Folder, then press OK. The Select Folder menu appears.
4 Press → to select the list of contents, and press ↓ or ↑ to select a folder that you want to view. Then press OK. An index of thumbnail images of the selected folder appears.
5 Press ➤, then press ➤ / ♠ / ♦ or ➤ to select an image that you want to display on the full screen or playback a moving image. Then press OK.

To display other image files when more than image files are contained in the current selected folder
Press until the next images display, or press to select the slider and press.
An index of thumbnail images appears for every page.
The index menu of a thumbnail appears. You can select any of the following options. Press or ♠ select the options, and press OK.
Index menu of a thumbnail
| Option | Description |
| Full Screen(for a still image only) | Displays the still image on the full screen. For more details, refer to “Displaying a still image on the full screen” on page 53. |
| Movie player(for a moving image only) | Displays “Movie Player.” For more details, refer to “Playing back the moving image (Movie Player)” on page 54. |
| Slide Show Displays a slideshow of images that are on the “Memory Stick.” For more details, refer to “Using the “Memory Stick” Slide Show” on page 55. | |
| Protect | Protects the image file against being erased. All On or All Off for all files in the folder contained the selected image file, On or Off for the selected image file only. Dismarked on the protected image. |
| Rotate(for a still image only) | Rotates only a still image 90 degrees clockwise or anticlockwise. Whenever you press OK, the image rotates 90 degrees. |
| Delete | Deletes the image file. Select All. Img. for all files in the folder containing the selected image file, select Sel. Img. for the selected image file only. |
| Close | Closes the index menu. |

- You cannot rotate or delete a protected image ( )
- You cannot rotate or delete the images on the "Memory Stick" if the write -protect is set to LOCK.
- If an image has been rotated, it remains on the “Memory Stick,” and is displayed this way again the next time.
(continued)
Displaying a still image on the full screen
Select Full Screen in the index menu of thumbnail images.

- The time that the still image is displayed on the full screen varies according to the image size.
- The TV automatically displays the appropriate image size for each image on the full screen.
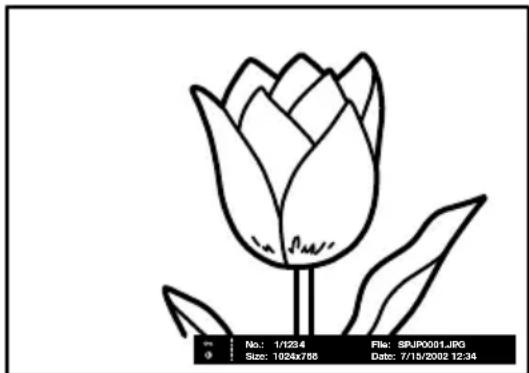
natural_image
Line drawing of a tulip flower with stem and leaves, no text or symbols presentTo display the next image
Press .
To display the previous image
Press ← .
Full screen index menu image
Press OK, whilst the image is displayed on the full screen.
The full screen index menu image appears. You can select any of the following options. Press
or to select the options, and press OK.
| Option | Description |
| Return | Returns to Memory Stick Home |
| Information | Displays the information of the selected image file. |
| Protect | Protects the selected image file against being erased. Dsmarked on the protected image. |
| Rotate (for a still image only) | Rotates only a still image 90 degrees clockwise or anticlockwise. Whenever you press OK, the image rotates 90 degrees. |
| Delete | Deletes the selected image file. |
| Close | Closes the index screen. |

- You cannot rotate or delete the protected image ( )
- You cannot rotate or delete the images on the "Memory Stick" if the write -protect is set to LOCK.
- If an image has been rotated, it remains on the “Memory Stick,” and is displayed this way again the next time.
(continued)
Playing back the moving image (Movie Player)
Select Movie Player in the index menu of thumbnail images, the "Movie Player" appears on the screen. You can operate the "Movie Player" as follows. Press 🔔 to select the button or the option, and press OK.
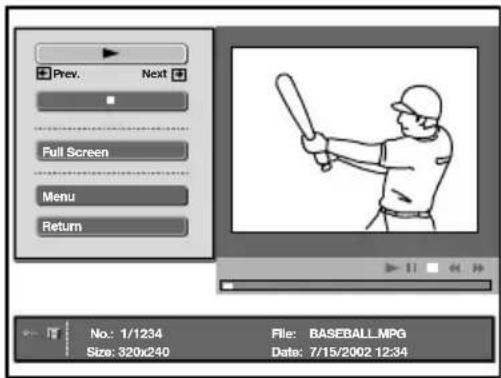
text_image
Prev. Next Full Screen Menu Return No.: 1/1234 File: BASEBALL.MPG Size: 320x240 Date: 7/15/2002.12:34| Button/Option | Description |
| ►(Play/pause) | Plays back a moving image. During playback, the button display is changed to the ❶ (pause) button. When the playback is finished, playback stops with the first image of the moving image displayed. |
| ■(Stop) | Stops playback. |
| Full Screen | Displays a moving image on the full screen and starts playback automatically. To return to the “Movie Player,” press ↓ / ↑ / ↓ / ↓ or OK. The TV automatically displays the appropriate image size for each moving image on the full screen. The TV automatically displays the appropriate image size for each moving image on the full screen. |
| Menu | Displays the Menu. You can select any of the following options.Information: Displays the information of the selected image.Protect: Protects the selected image file against be erased.Delete: Deletes the selected image file.Close: Closes the Menu. You cannot delete a protected image (øn You cannot delete a protected image (øn |
| Return | Returns to Memory Stick Home |
Guide Display
The guide display guides the function of and on the remote control when the "Movie Player" is displayed.
Rew: Rewinds the moving image.
FF: Fast forwards the moving image.
If you are starting the slideshow and stop or pause the moving image, the guide display is changed to ➕ Prev and ➕ Next. For more details of the slideshow, refer to “Using the “Memory Stick” Slide Show” on page 55.
Prev: Displays the previous image.
→ Next: Displays the next image.
(continued)
Using the "Memory Stick" Slide Show
"Slide Show" allows you to watch a slideshow of the images on the "Memory Stick."
1 Insert a "Memory Stick" that contains the images you want to view.
2 Press "Memory Stick." The Memory Stick Home appears on the screen.
3 Press ↓ or ↑ to highlight Select Folder, then press OK. The Select Folder menu appears.
4 Press → to select the list of contents, and press ↓ or ↑ to select a folder that you want to view. Then press OK. An index of thumbnail images of selected folder appears.
5 Press ↓ or ↑ to highlight Slide Show, then press OK. The index menu of Slide Show appears. You can select any of the following options. Press ↓ or ↑ to select the options, and press OK.
Advan. Slds.: Sets the slide show to automatic or manual advance.
Interval: Selects the period for which one image is displayed from 5sec, 10sec, 30sec, 1min, 5min, or 10min. The time is about right. When Advan. Slds. is set to Manual, the interval option is not variable.
6 Press ↓ or ↑ to select Start, and press OK.
To Start the Slide Show
When you set "Advan. Slds." to "Auto"
The images change automatically. When a moving image file is selected, it plays back automatically, and after playback the next image is displayed automatically.
i "Movie Player" is not displayed when you set Advan. Slds. to Auto.
When you set "Advan. Slds." to "Manual"
Press or to slide the images.
→: Displays the next image.
← : Displays the previous image.
When you display a still image on the full screen, you can slide the images in the same way as described above.
When a moving image file is selected
The moving image does not playback and "Movie Player" is displayed. For more details about using "Movie Player," refer to "Playing back the moving image (Movie Player)" on page 54.
Press → display the next image.
To stop the Slide Show
If you want to the stop Slide Show, do the following to return to Memory Stick Home.
When you set "Advan. Slds." to "Auto"
Press OK.
When you set "Advan. Slds." to "Manual"
Press OK to display the index menu, then press ↓ or ↑ to select Return.
(continued)
Caution displays while you are using the "Memory Stick"
If an image file has a problem, the following indicators may appear on the screen. Use the list below to check the meaning of the caution display.


The picture file is in the JPEG or MPEG1 format and is not-compatible.
There is a thumbnail but it is not DCF-compatible.
There is no selected picture file.
There is a picture file but the thumbnail is broken.
The picture file is broken.
Caution messages while using the "Memory Stick"
Use the list below to check the meaning of the messages.
No Memory Stick Insert the "Memory Stick" into the "Memory Stick" slot correctly.
No file No picture files are contained in the currently selected folder.
No movie file No movie picture files are contained in the currently selected folder although "Filter" is set to "Movie" in the "Option" menu.
No still file No still picture files are contained in the currently selected folder although "Filter" is set to "Still" in the "Option" menu.
Cannot play Image data of a movie picture file is broken.
Memory Stick locked The erasure prevention switch on a "Memory Stick" is set to "LOCK." Release the lock.
Memory Stick error • The "Memory Stick" is broken.
- Clean the terminal on the "Memory Stick."
Memory Stick type error A "Memory Stick" that is not compatible or cannot be used with the TV has been inserted.
Format error The "Memory Stick" has not been formatted correctly.
File error The selected folder has not been named correctly. Re-enter the name with less than 66 characters including “/” by displaying the “Select Folder” menu.
Read Only Memory • A read-only "Memory Stick" in which picture files are recorded has been inserted. You cannot record or delete the data with a read-only "Memory Stick."
Teletext

Teletext is an information service transmitted by most TV stations. The index page of the teletext service (usually page 100) gives you information on how to use the service. To operate teletext, use the remote control buttons as indicated below.

Make sure you use a channel (TV Broadcast) with a strong signal, otherwise teletext errors may occur.
To Switch On Teletext:
After selecting the TV channel which carries the teletext service you wish to view, press 📊
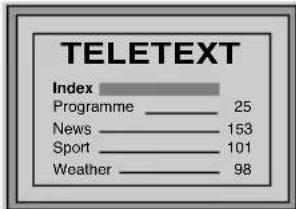
text_image
TELETEXT Index Programme 25 News 153 Sport 101 Weather 98To Select a Teletext page:
Input 3 digits for the page number, using the numbered buttons.
- If you have made a mistake, retype the correct page number.
- If the counter on the screen continues searching, it is because this page is not available. In this case, input another page number.
To access the next or preceding page:
Press PROG + (☑ or PROG - ( ☑▼ ).
To superimpose teletext on to the TV:
Whilst you are viewing teletext, press .Press it again to cancel teletext mode.
To freeze a teletext page:
Some teletext pages have sub-pages which follow on automatically. To stop them, press / ☑ Press it again to cancel the freeze.
To reveal concealed information (e.g., answers to a quiz)
Press 7. Press it again to conceal the information.
To Switch Off Teletext:
Press □.
Fastext

Fastext service lets you access pages with one push of a button.
Whilst you are in Teletext mode and Fastext is broadcast, a colour coded menu appears at the bottom of the teletext page. Press the colour button (red, green, yellow or blue) to access the corresponding page.
GB
NexTView\*
* (depending on availability of service).

NexTView is an on-screen electronic programme guide, providing you with programme information for different broadcasters.
When looking for information you can search by theme (sports, art, etc.) or date.

If wrong characters appear when viewing NexTView, using the menu system enter the "Language/Country" menu (see page 37) and select the same language as the NexTView is broadcast.
Displaying NexTView
1 Select a broadcast channel providing a NexTView service. In this case the indication "NexTView" is displayed as soon as data is available.
2 To see NexTView service, you have two different NexTView interface types, depending on the % of available data:
a)"Programme List" interface:
Whilst you are watching TV, and after the indication "NexTView" in white is displayed on the screen, press ☐ on the remote control to see the "Programme List" interface (see fig. 1 on next page).
b)"Overview" interface:
Whilst you are watching TV, and after more than 50% of NexTView data is available (100% data may not be available depending on your area) the indication "NexTView" in black is displayed on the screen. Then press the ☑ the remote control to watch the "Overview" interface (see fig. 2 on next page).

As soon as you enter the NexTView service, the lower left corner of the screen will show the % of NexView data available. Once you have entered this service, the % of data will not increase.
3 To navigate through NexTView:
- Moving right or left, press
- Moving up or down, press
- Confirming a selection, press OK.


4 To switch the NexTView off, press ☐ on the remote control.
(continued)
"Programme List" interface (fig. 1):
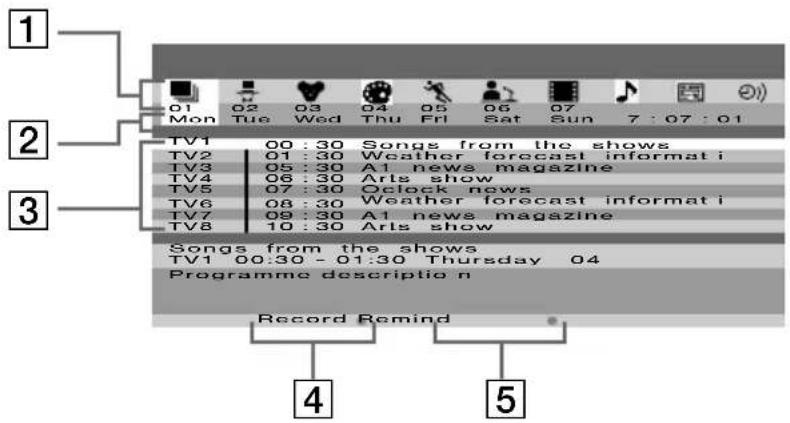
text_image
1 2 3 TV1 00:30 Songs from the shows TV2 01:30 Weather forecast informat i TV3 05:30 A1 news magazine TV4 06:30 Arts show TV5 07:30 Oclock news TV6 08:30 Weather forecast informat i TV7 09:30 A1 news magazine TV8 10:30 Arts show Songs from the shows TV1 00:30 - 01:30 Thursday 04 Programme description Record Remind 4 5"Overview" interface (fig. 2):
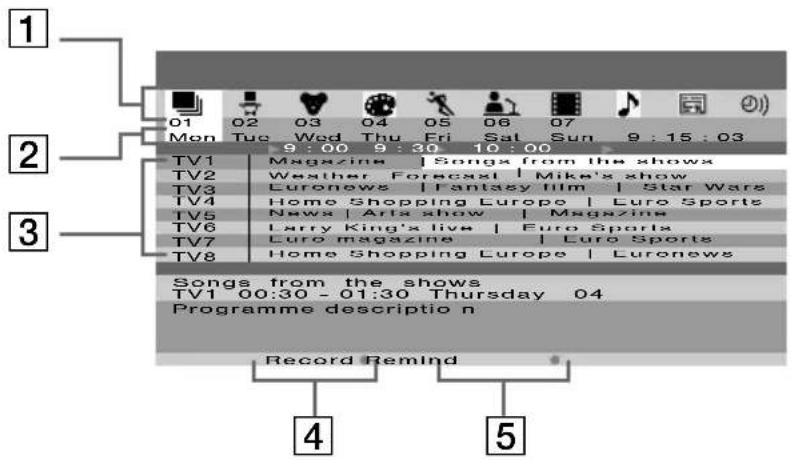
text_image
1 01 02 03 04 05 06 07 Mon Tue Wed Thu Fri Sat Sun 9:15:03 9:00 9:30 10:00 TV1 Magazine | Songs from the shows TV2 Weather Forecast | Mike's show TV3 Euronews | Fantasy film | Star Wars TV4 Home Shopping Europe | Euro Sports TV5 News | Arts show | Magazine TV6 Larry King's live | Euro Sports TV7 Euro magazine | Euro Sports TV8 Home Shopping Europe | Euronews Songs from the shows TV1 00:30 - 01:30 Thursday 04 Programme description Record Remind 4 51 Icons for different themes (see the "Icons' key" on next page)
2Date
3 Programme list
4 Record
This function only works if you have connected a VCR which supports SmartLink and Timer Programming feature.
If you wish to record the selected programme, press the red button on the remote control.
5 Remind
If you wish to be reminded when the selected programme is broadcast, press the green button on the remote control. At the time that programme should be broadcast a reminder message is displayed on the TV.

- "Record" and "Remind" options will be shown on the screen as soon as a programme have been selected, but they will not be shown if you are watching the NexTView service on a TV channel which is not a NexTView provider.
- "Record" and "Remind" will not be available if the programme that you have selected has already started.
(continued)
Icons' key:

full selection list:
All the programme information is listed by time and broadcast channels order.

channel selection:
If the NexTView provider sends information of more than 8 broadcast channels, you can select 8 of them to create a personal list.
After you have created your personal list, the default list can be restored.
To restore it, select "Auto ▶" by pressing button on the remote control.

entertainment

children

remind list:
Shows you the list with all the programmes (maximum 5 programmes) that you have selected to be reminded about.

arts

sports

news

movies

music
Connecting Optional Equipment
Using the following instructions, you can connect a wide range of optional equipment to your TV set. (Connecting cables are not supplied.)
Connecting to the front of the Media Receiver Unit
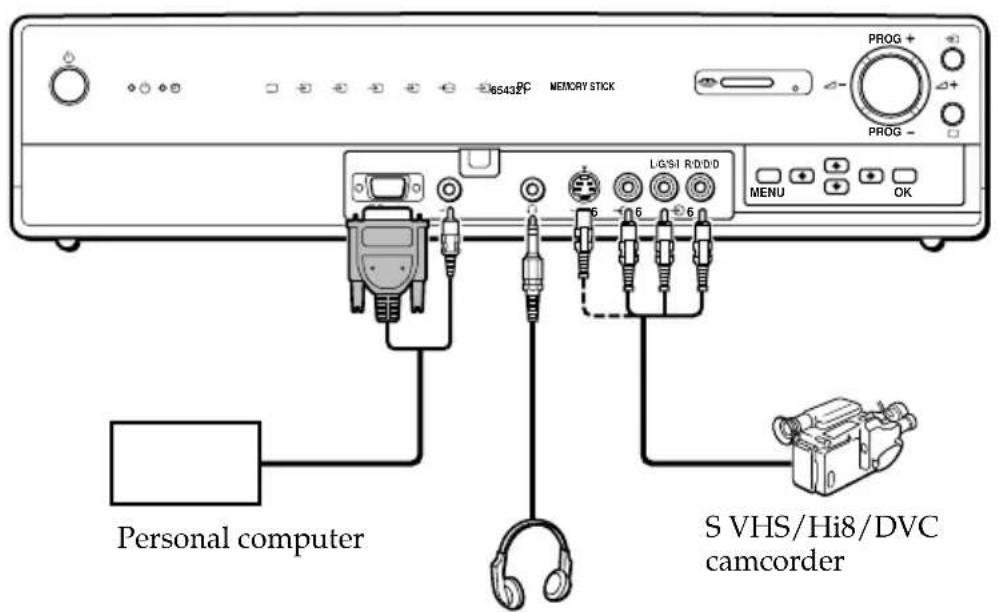
text_image
65432F MEMORY STICK PROG + PROG - L/G/SI R/D/D MENU OK Personal computer S VHS/Hi8/DVC camcorderHeadphones
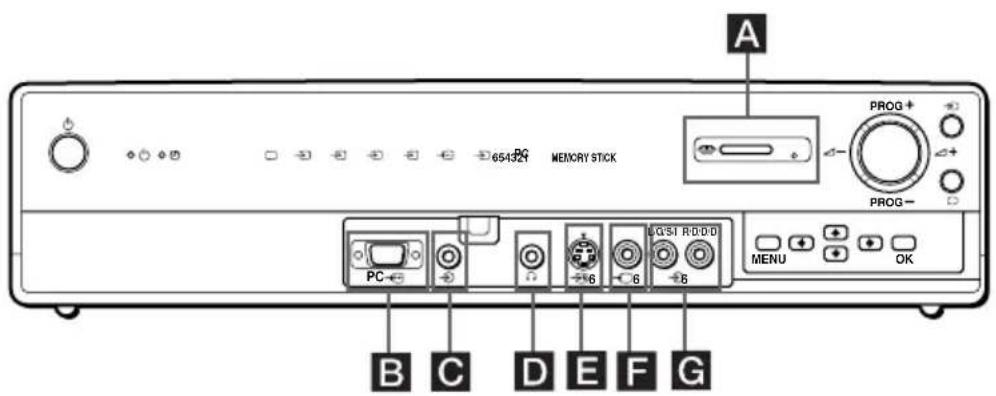
text_image
654321 MEMORY STICK A PROG + PROG - MENU OK PC B C D E F G
To avoid a noisy picture, do not connect external equipment to connectors E and F at the same time.
(continued)
GB
Connecting to the Rear of Media Receiver Unit
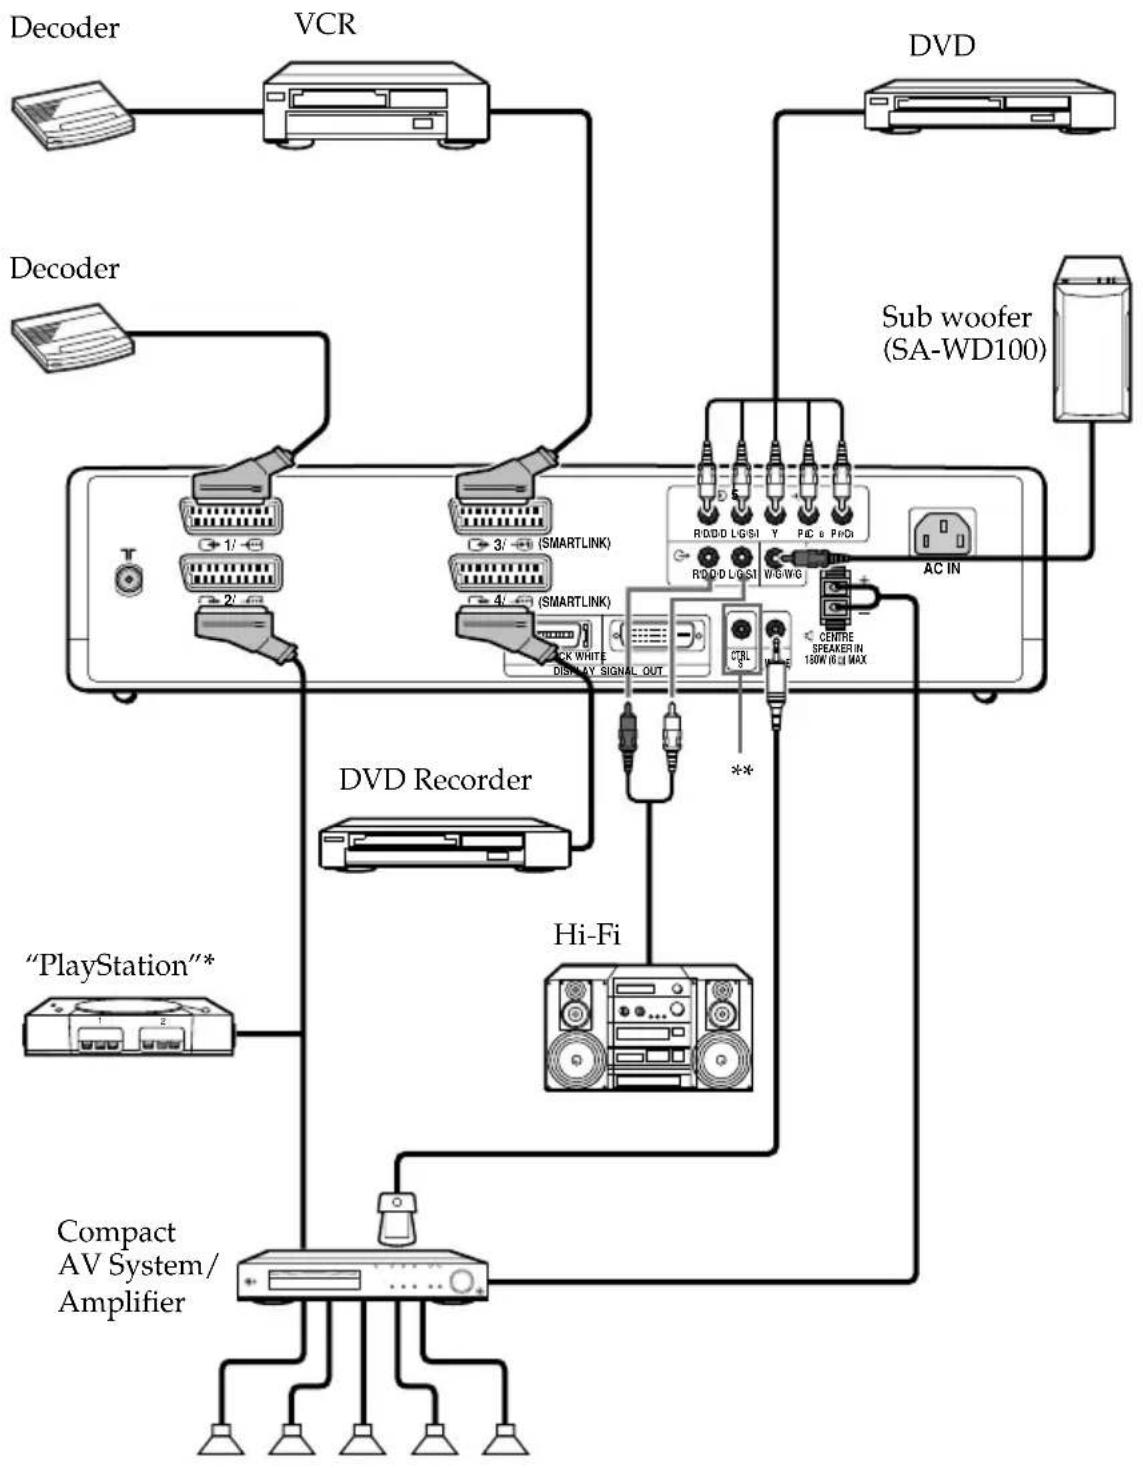
flowchart
graph TD
    A["Decoder"] --> B["VCR"]
    C["Decoder"] --> D["3/ (SMARTLINK)"]
    E["Sub woofer (SA-WD100)"] --> F["AC IN"]
    G["Hi-Fi"] --> H["DISM-AY SIGNAL_OUT"]
    I[""PlayStation"*"] --> J["Compact AV System/Amplifier"]
    K["DV Record"] --> L["3/ (SMARTLINK)"]
    M["DVD"] --> N["3/ (SMARTLINK)"]
    O["DV"] --> P["3/ (SMARTLINK)"]
    Q["Sub woofer"] --> R["3/ (SMARTLINK)"]
    S["Hi-Fi"] --> T["3/ (SMARTLINK)"]
    U["DV"] --> V["3/ (SMARTLINK)"]
    W["DV"] --> X["3/ (SMARTLINK)"]
    Y["DV"] --> Z["3/ (SMARTLINK)"]
    AA["DV"] --> AB["3/ (SMARTLINK)"]
    AC["DV"] --> AD["3/ (SMARTLINK)"]
    AE["DV"] --> AF["3/ (SMARTLINK)"]
    AG["DV"] --> AH["3/ (SMARTLINK)"]
    AI["DV"] --> AJ["3/ (SMARTLINK)"]
    AK["DV"] --> AL["3/ (SMARTLINK)"]
    AM["DV"] --> AN["3/ (SMARTLINK)"]
    AO["DV"] --> AP["3/ (SMARTLINK)"]
    AQ["DV"] --> AR["3/ (SMARTLINK)"]
    AS["DV"] --> AT["3/ (SMARTLINK)"]
    AU["DV"] --> AV["3/ (SMARTLINK)"]
    AW["DV"] --> AX["3/ (SMARTLINK)"]
    AY["Decoder"] --> AZ["VCR"]
    BA["Sub woofer"] --> BB["DVD"]
* "PlayStation" is a product of Sony Computer Entertainment, Inc.
* "PlayStation" is a trademark of Sony Computer Entertainment, Inc.
** To control other Sony equipment with the TV's remote control, connect the CONTROL S IN jack of the equipment to the CONTROL S OUT jack of the TV with the CONTROL S cable.
(continued)
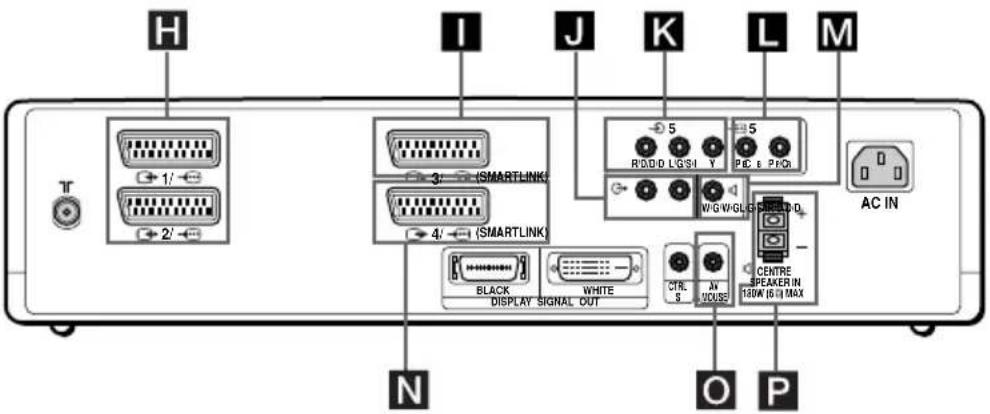
text_image
H I J K L M 1' 2' 3' 4' (SMARTLINK) 5 R/D/D L/G/S Y PIC 6 P/C W/G W/GL S AC IN BLACK DISPLAY SIGNAL OUT WHITE CTR. S AV DOUSE CENTRE SPEAKER IN 140K (6.0) MAX N O PConnecting a VCR:
To connect a VCR, refer to “Connecting the Aerial and VCR” on page 22. We recommend you connect your VCR using a Scart lead. If you do not have a Scart lead, tune in the VCR test signal to the TV programme number “0” by using the “Manual Programme Preset” option. (For details on how to manually programme these presets, see page 39, step A.)
Refer to your VCR instruction manual to find out how to find the output channel of your VCR.
Connecting a VCR or a DVD recorder that supports SmartLink:

SmartLink is a direct link between the TV set and a VCR or a DVD recorder. For more information on SmartLink, refer to the instruction manual of your VCR or DVD recorder. If you use a VCR or a DVD recorder that supports SmartLink, please connect the VCR or the DVD recorder by using a Scart lead to the Scart connectors 37 or 45

Both Scart connectors 37 and 4/ cannot support SmartLink at the same time. If you connect a VCR or a DVD recorder to both Scart connectors 37 and 4/ select which Scart supports SmartLink by using "Smart Link" option in the "Features" menu (page 36).
If you have connected a decoder to the Scart connector 3/, or through a VCR connected to this Scart:
Select the "Manual Programme Preset" option in the "Set Up" menu and after entering in the "Decoder*" option, select "On" (by using ▼r). Repeat this option for each scrambled signal.
* This option is only available depending on the country you have selected in the "Language/ Country" menu.
If you connect a DVD recorder to the Scart connector 4A→
Some DVD recorders may have 576p signal format. If you wish to input the 576p signal connect the DVD recorder to both the Scart connector 4/ and Y, PB/CB, PR/CR jacks of 5. Select the "Features" menu and set "AV4 Input Select" to "Manual" (page 36).
Connecting to external Audio Equipment:
To listen to the sound from TV on Hi-Fi equipment:
Connect your Hi-Fi equipment to the audio output sockets J if you wish to amplify the audio output from TV. Next, using the menu system, select the "Features" menu and set "TV Speakers" to "Off."
For a sub woofer
Connect your sub woofer to the ⬆ W/G/W/G output jack M using a monaural audio cable.
(continued)
To listen to Dolby Prologic system sound on the TV speakers:
Connect your Dolby Prologic system decoder amplifier to the CENTRE SPEAKER IN terminals P if you wish to listen to the audio output from your equipment on the TV speakers. If you have a Dolby amplifier, connect the centre output from your amplifier to the CENTRE SPEAKER IN terminals P to use the TV speakers as a centre speaker. Next, using the menu system, select the "Features" menu and set "TV Speakers" to "Centre in."

You can select either the TV's remote control or the external amplifier's remote control for controlling the volume output from TV's speakers. Select the remote control by using "Audio Output" option in the "Feature" menu (page 34).
When connecting the AV mouse
When you connect the AV mouse and install it in an external amplifier, you can use the external amplifier's remote control toward the TV for controlling the volume level of the external amplifier. Connect the AV mouse to the AV MOUSE IN jack ☐, and install it right above the external amplifier's remote control sensor.
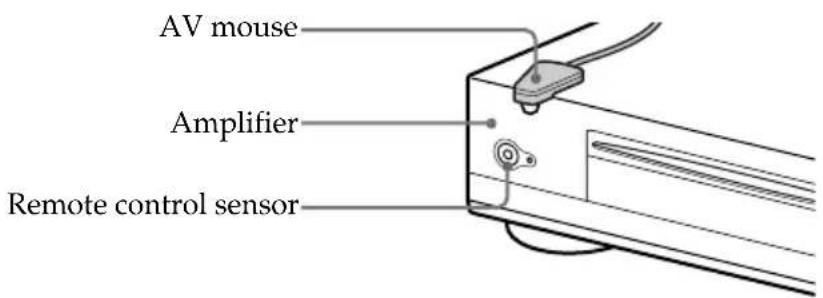
text_image
AV mouse Amplifier Remote control sensorUsing Optional Equipment
1 Connect your equipment to the designated TV socket, as indicated on pages 61, 62 and 63.
2 Switch on the connected equipment.
3 To watch the picture of the connected equipment, press repeatedly until the correct input symbol appears on the screen. Also as you press repeatedly, the corresponding input select indicator on the media receiver unit lights up.
| Symbol Input select indicator | Input Signals | |
| 1 or 2 or 3 or 4 or 5 or 6 or 7 or 8 or 9 or 10 or 11 or 12 or 13 or 14 or 15 or 16 or 17 or 18 or 19 or 20 or 21 or 22 or 23 or 24 or 25 or 26 or 27 or 28 or 29 or 30 or 31 or 32 or 33 or 34 or 35 or 36 or 37 or 38 or 39 or 40 or 41 or 42 or 43 or 44 or 45 or 46 or 47 or 48 or 49 or 50 or 51 or 52 or 53 or 54 or 55 or 56 or 57 or 58 or 59 or 60 or 61 or 62 or 63 or 64 or 65 or 66 or 67 or 68 or 69 or 70 or 71 or 72 or 73 or 74 or 75 or 76 or 77 or 78 or 79 or 80 or 81 or 82 or 83 or 84 or 85 or 86 or 87 or 88 or 89 or 90 or 91 or 92 or 93 or 94 or 95 or 96 or 97 or 98 or 99 or 100 or 101 or 102 or 103 or 104 or 105 or 106 or 107 or 108 or 109 or 110 or 111 or 112 or 113 or 114 or 115 or 116 or 117 or 118 or 119 or 120 or 121 or 122 or 123 or 124 or 125 or 126 or 127 or 128 or 129 or 130 or 131 or 132 or 133 or 134 or 135 or 136 or 137 or 138 or 139 or 140 or 141 or 142 or 143 or 144 or 145 or 146 or 147 or 148 or 149 or 150 or 151 or 152 or 153 or 154 or 155 or 156 or 157 or 158 or 159 or 160 or 161 or 162 or 163 or 164 or 165 or 166 or 167 or 168 or 169 or 170 or 171 or 172 or 173 or 174 or 175 or 176 or 177 or 178 or 179 or 180 or 181 or 182 or 183 or 184 or 185 or 186 or 187 or 188 or 189 or 190 or 191 or 192 or 193 or 194 or 195 or 196 or 197 or 198 or 199 or 200 or 201 or 202 or 203 or 204 or 205 or 206 or 207 or 208 or 209 or 210 or 211 or 212 or 213 or 214 or 215 or 216 or 217 or 218 or 219 or 220 or 221 or 222 or 223 or 224 or 225 or 226 or 227 or 228 or 229 or 230 or 231 or 232 or 233 or 234 or 235 or 236 or 237 or 238 or 239 or 240 or 241 or 242 or 243 or 244 or 245 or 246 or 247 or 248 or 249 or 250 or 251 or 252 or 253 or 254 or 255 or 256 or 257 or 258 or 259 or 260 or 261 or 262 or 263 or 264 or 265 or 266 or 267 or 268 or 269 or 270 or 271 or 272 or 273 or 274 or 275 or 276 or 277 or 278 or 279 or 280 or 281 or 282 or 283 or 284 or 285 or 286 or 287 or 288 or 289 or 290 or 291 or 292 or 293 or 294 or 295 or 296 or 297 or 298 or 299 or 300 or 301 or 302 or 303 or 304 or 305 or 306 or 307 or 308 or 309 or 310 or 311 or 312 or 313 or 314 or 315 or 316 or 317 or 318 or 319 or 320 or 321 or 322 or 323 or 324 or 325 or 326 or 327 or 328 or 329 or 330 or 331 or 332 or 333 or 334 or 335 or 336 or 337 or 338 or 339 or 340 or 341 or 342 or 343 or 344 or 345 or 346 or 347 or 348 or 349 or 350 or 351 or 352 or 353 or 354 or 355 or 356 or 357 or 358 or 359 or 360 or 361 or 362 or 363 or 364 or 365 or 366 or 367 or 368 or 369 or 370 or 371 or 372 or 373 or 374 or 375 or 376 or 377 or 378 or 379 or 380 or 381 or 382 or 383 or 384 or 385 or 386 or 387 or 388 or 389 or 390 or 391 or 392 or 393 or 394 or 395 or 396 or 397 or 398 or 399 or 400 or 401 or 402 or 403 or 404 or 405 or 406 or 407 or 408 or 409 or 410 or 411 or 412 or 413 or 414 or 415 or 416 or 417 or 418 or 419 or 420 or 421 or 422 or 423 or 424 or 425 or 426 or 427 or 428 or 429 or 430 or 431 or 432 or 433 or 434 or 435 or 436 or 437 or 438 or 439 or 440 or 441 or 442 or 443 or 444 or 445 or 446 or 447 or 448 or 449 or 450 or 451 or 452 or 453 or 454 or 455 or 456 or 457 or 458 or 459 or 460 or 461 or 462 or 463 or 464 or 465 or 466 or 467 or 468 or 469 or 470 or 471 or 472 or 473 or 474 or 475 or 476 or 477 or 478 or 479 or 480 or 481 or 482 or 483 or 484 or 485 or 486 or 487 or 488 or 489 or 490 or 491 or 492 or 493 or 494 or 495 or 496 or 497 or 498 or 499 or 500 or 501 or 502 or 503 or 504 or 505 or 506 or 507 or 508 or 509 or 510 or 511 or 512 or 513 or 514 or 515 or 516 or 517 or 518 or 519 or 520 or 521 or 522 or 523 or 524 or 525 or 526 or 527 or 528 or 529 or 530 or 531 or 532 or 533 or 534 or 535 or 536 or 537 or 538 or 539 or 540 or 541 or 542 or 543 or 544 or 545 or 546 or 547 or 548 or 549 or 550 or 551 or 552 or 553 or 554 or 555 or 556 or 557 or 558 or 559 or 560 or 561 or 562 or 563 or 564 or 565 or 566 or 567 or 568 or 569 or 570 or 571 or 572 or 573 or 574 or 575 or 576 or 577 or 578 or 579 or 580 or 581 or 582 or 583 or 584 or 585 or 586 or 587 or 588 or 589 or 590 or 591 or 592 or 593 or 594 or 595 or 596 or 597 or 598 or 599 or 600 or 601 or 602 or 603 or 604 or 605 or 606 or 607 or 608 or 609 or 610 or 611 or 612 or 613 or 614 or 615 or 616 or 617 or 618 or 619 or 620 or 621 or 622 or 623 or 624 or 625 or 626 or 627 or 628 or 629 or 630 or 631 or 632 or 633 or 634 or 635 or 636 or 637 or 638 or 639 or 640 or 641 or 642 or 643 or 644 or 645 or 646 or 647 or 648 or 649 or 650 or 651 or 652 or 653 or 654 or 655 or 656 or 657 or 658 or 659 or 660 or 661 or 662 or 663 or 664 or 665 or 666 or 667 or 668 or 669 or 670 or 671 or 672 or 673 or 674 or 675 or 676 or 677 or 678 or 679 or 680 or 681 or 682 or 683 or 684 or 685 or 686 or 687 or 688 or 689 or 690 or 691 or 692 or 693 or 694 or 695 or 696 or 697 or 698 or 699 or 700 or 701 or 702 or 703 or 704 or 705 or 706 or 707 or 708 or 709 or 710 or 711 or 712 or 713 or 714 or 715 or 716 or 717 or 718 or 719 or 720 or 721 or 722 or 723 or 724 or 725 or 726 or 727 or 728 or 729 or 730 or 731 or 732 or 733 or 734 or 735 or 736 or 737 or 738 or 739 or 740 or 741 or 742 or 743 or 744 or 745 or 746 or 747 or 748 or 749 or 750 or 751 or 752 or 753 or 754 or 755 or 756 or 757 or 758 or 759 or 760 or 761 or 762 or 763 or 764 or 765 or 766 or 767 or 768 or 769 or 770 or 771 or 772 or 773 or 774 or 775 or 776 or 777 or 778 or 779 or 780 or 781 or 782 or 783 or 784 or 785 or 786 or 787 or 788 or 789 or 790 or 791 or 792 or 793 or 794 or 795 or 796 or 797 or 798 or 799 or 800 or 801 or 802 or 803 or 804 or 805 or 806 or 807 or 808 or 809 or 810 or 811 or 812 or 813 or 814 or 815 or 816 or 817 or 818 or 819 or 820 or 821 or 822 or 823 or 824 or 825 or 826 or 827 or 828 or 829 or 830 or 831 or 832 or 833 or 834 or 835 or 836 or 837 or 838 or 839 or 840 or 841 or 842 or 843 or 844 or 845 or 846 or 847 or 848 or 849 or 850 or 851 or 852 or 853 or 854 or 855 or 856 or 857 or 858 or 859 or 860 or 861 or 862 or 863 or 864 or 865 or 866 or 867 or 868 or 869 or 870 or 871 or 872 or 873 or 874 or 875 or 876 or 877 or 878 or 879 or 880 or 881 or 882 or 883 or 884 or 885 or 886 or 887 or 888 or 889 or 890 or 891 or 892 or 893 or 894 or 895 or 896 or 897 or 898 or 899 or 900 or 901 or 902 or 903 or 904 or 905 or 906 or 907 or 908 or 909 or 910 or 911 or 912 or 913 or 914 or 915 or 916 or 917 or 918 or 919 or 920 or 921 or 922 or 923 or 924 or 925 or 926 or 927 or 928 or 929 or 930 or 931 or 932 or 933 or 934 or 935 or 936 or 937 or 938 or 939 or 940 or 941 or 942 or 943 or 944 or 945 or 946 or 947 or 948 or 949 or 950 or 951 or 952 or 953 or 954 or 955 or 956 or 957 or 958 or 959 or 960 or 961 or 962 or 963 or 964 or 965 or 966 or 967 or 968 or 969 or 970 or 971 or 972 or 973 or 974 or 975 or 976 or 977 or 978 or 979 or 980 or 981 or 982 or 983 or 984 or 985 or 986 or 987 or 988 or 989 or 990 or 991 or 992 or 993 or 994 or 995 or 996 or 997 or 998 or 999 or 1000 or 1001 or 1002 or 1003 or 1004 or 1005 or 1006 or 1007 or 1008 or 1009 or 1010 or 1011 or 1012 or 1013 or 1014 or 1015 or 1016 or 1017 or 1018 or 1019 or 1020 or 1021 or 1022 or 1023 or 1024 or 1025 or 1026 or 1027 or 1028 or 1029 or 1030 or 1031 or 1032 or 1033 or 1034 or 1035 or 1036 or 1037 or 1038 or 1039 or 1040 or 1041 or 1042 or 1043 or 1044 or 1045 or 1046 or 1047 or 1048 or 1049 or 1050 or 1051 or 1052 or 1053 or 1054 or 1055 or 1056 or 1057 or 1058 or 1059 or 1060 or 1061 or 1062 or 1063 or 1064 or 1065 or 1066 or 1067 or 1068 or 1069 or 1070 or 1071 or 1072 or 1073 or 1074 or 1075 or 1076 or 1077 or 1078 or 1079 or 1080 or 1081 or 1082 or 1083 or 1084 or 1085 or 1086 or 1087 or 1088 or 1089 or 1090 or 1091 or 1092 or 1093 or 1094 or 1095 or 1096 or 1097 or 1098 or 1099 or 1100 or 1101 or 1102 or 1103 or 1104 or 1105 or 1106 or 1107 or 1108 or 1109 or 1110 or 1111 or 1112 or 1113 or 1114 or 1115 or 1116 or 1117 or 1118 or 1119 or 1120 or 1121 or 1122 or 1123 or 1124 or 1125 or 1126 or 1127 or 1128 or 1129 or 1130 or 1131 or 1132 or 1133 or 1134 or 1135 or 1136 or 1137 or 1138 or 1139 or 1140 or 1141 or 1142 or 1143 or 1144 or 1145 or 1146 or 1147 or 1148 or 1149 or 1150 or 1151 or 1152 or 1153 or 1154 or 1155 or 1156 or 1157 or 1158 or 1159 or 1160 or 1161 or 1162 or 1163 or 1164 or 1165 or 1166 or 1167 or 1168 or 1169 or 1170 or 1171 or 1172 or 1173 or 1174 or 1175 or 1176 or 1177 or 1178 or 1179 or 1180 or 1181 or 1182 or 1183 or 1184 or 1185 or 1186 or 1187 or 1188 or 1189 or 1190 or 1191 or 1192 or 1193 or 1194 or 1195 or 1196 or 1197 or 1198 or 1199 or 1200 or 1201 or 1202 or 1203 or 1204 or 1205 or 1206 or 1207 or 1208 or 1209 or 1210 or 1211 or 1212 or 1213 or 1214 or 1215 or 1216 or 1217 or 1218 or 1219 or 1220 or 1221 or 1222 or 1223 or 1224 or 1225 or 1226 or 1227 or 1228 or 1229 or 1230 or 1231 or 1232 or 1233 or 1234 or 1235 or 1236 or 1237 or 1238 or 1239 or 1240 or 1241 or 1242 or 1243 or 1244 or 1245 or 1246 or 1247 or 1248 or 1249 or 1250 or 1251 or 1252 or 1253 or 1254 or 1255 or 1256 or 1257 or 1258 or 1259 or 1260 or 1261 or 1262 or 1263 or 1264 or 1265 or 1266 or 1267 or 1268 or 1269 or 1270 or 1271 or 1272 or 1273 or 1274 or 1275 or 1276 or 1277 or 1278 or 1279 or 1280 | ||

If your DVD recorder is connected to both the Scart connector 4 and the Y, P_B / C_B , P_R / C_R jacks of -5, select the input connector by using "AV4 Input Select" option in the "Feature" menu (page 36).
4 Press the ☐ button on the remote control to return to the normal TV picture.
The ○ indicator on the media receiver unit lights up.
GB
For Mono Equipment
Connect the phono plug to the L/G/S/I socket and select 5 input signal using the instructions above. Refer to "Sound Adjustment" and select "Dual Sound" "A" on the sound menu screen (page 29).
Remote Control Configuration for VCR/DVD
This remote control is set by default to operate the basic functions of this Sony TV, Sony DVD and most Sony VCRs when batteries are initially installed. To control VCRs and DVDs of other major brands and certain Sony VCR models, please complete the following steps:

- Before you start, look up the 3 digit code for your brand of DVD or VCR from the list on next page. On those brands that have more than one code, enter the first code number.
- Sony will endeavour to update the software according to market changes. Therefore, please refer to the code table included with the remote control for the latest code set.
1 Press the Media Selector button on the remote control repeatedly until the required VCR or DVD green light lights up.

If Media Selector is in the TV position, code numbers will not be stored.
2 Before the green light goes out, press and hold the yellow button for approximately 6 seconds until the green light starts flashing.
3 Whilst the green light is flashing, enter all three digits of the code for your brand (see next page) using the number buttons on the remote control.

If your selected code is entered correctly, all three green lights will be lit momentarily.
4 Turn on your VCR or DVD and check that the main functions work.

- If your equipment is not working or some of the functions do not work, please check you entered the correct code set or try the next code listed against the brand (see next page).
- Your brand codes may be lost if weak batteries are not replaced within a few minutes. To reset your DVD or VCR code number please repeat the above steps. A small label is attached inside the battery door to allow you to record your brand codes.
- Not all brands are covered and not all models of every brand may be covered.
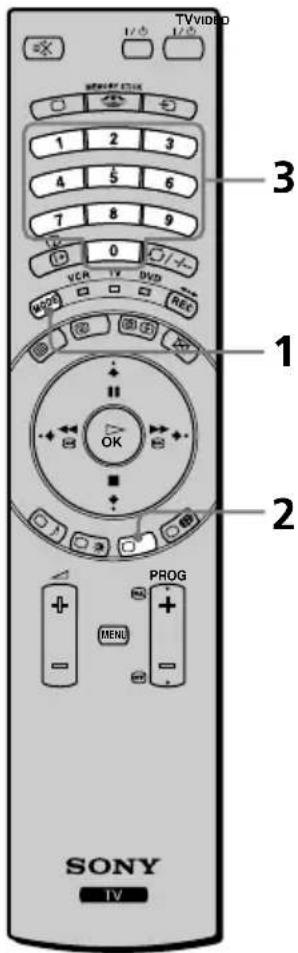
text_image
TVVIDEO 1/2 1/2 3 1 2 3 4 5 6 7 8 9 0 VCR TV DVD REC PROG MENI SONY TV(continued)
| VCR Brand List DVD | Brand List | ||
| Brand Code Brand Code | |||
| SONY (VHS) 301, 302, 303, 308, 309 SONY 007 | |||
| SONY (BETA) 303, 307, 310 AIWA 021 | |||
| SONY (DV) 304, 305, 306 DENON 018, 027, 020, 002 | |||
| AIWA 325, 331, 351 GRUNDIG 009, 028, 023, 024, 016, 003 | |||
| AKAI 326, 329, 330 HITACHI 025, 026, 015, 004 | |||
| DAEWOO 342, 343 | JVC 006, 017 | ||
| GRUNDIG 358, 355, 360, 361, 320, 351 | KENWOOD 008 | ||
| HITACHI 327, 333, 334 LG | 015, 014 | ||
| JVC 314, 315, 322, 344, 352, 353, 354, 348, 349 MATSUI | LOEWE 009, 028, 023, 024, 016, 003 | ||
| 013, 016 | |||
| LG 332, 338 | ONKYO 022 | ||
| LOEWE 358, 355, 360, 361, 320, 351 PANASONIC 018, 027, 020, 002 | |||
| MATSUI 356, 357 | PHILIPS 009, 028, 023, 024, 016, 003 | ||
| ORION 328 | PIONEER 004 | ||
| PANASONIC 321, 323 | SAMSUNG 011, 014 | ||
| PHILIPS 311, 312, 313, 316, 317, 318, 358, 359 | SANYO 007 | ||
| SHARP 019, 027 | |||
| SAMSUNG 339, 340, 341, 345 | THOMSON 012 | ||
| SANYO 335, 336 | TOSHIBA 003 | ||
| SHARP 324 | TOSHIBA 337 | ||
| THOMSON 319, 350 | YAMAHA 018, 027, 020, 002 | ||
GB
Specifications
KE-50MR1/KE-42MR1 (Common Items)
Media Receiver Unit (MBT-MR1)
Power Requirement: 220-240V AC; 50/60 Hz
Power Consumption: 27 W
Standby Power Consumption: 0.6 W
Dimensions (w x h x d):
Approx. 430 x 105 x 360 mm
Weight: Approx. 6 kg
KE-50MR1 only
Display Unit (PDM-5000)
Power Requirement: 100-240V AC; 50/60 Hz
Screen Size: 50inches
Approx. 127 cm measured diagonally
Display Resolution:
1365 dots (horizontal) x 768 lines (vertical)
Power Consumption: 540W
Standby Power Consumption: 0.6W
Dimensions (w x h x d):
Approx. 1,573 x 856 x 108 mm
Weight: Approx. 53 kg
KE-42MR1 only
Display Unit (PDM-4200)
Power Requirement: 100-240V AC; 50/60 Hz
Screen Size: 42inches
Approx. 107 cm measured diagonally
Display Resolution:
1024 dots (horizontal) x 768 lines (vertical)
Power Consumption: 460 W
Standby Power Consumption: 0.6W
Dimensions (w x h x d):
Approx. 1,352 x 720 x 102 mm
Weight: Approx. 39 kg
Panel System:
Plasma Display Panel
TV system:
Depending on your country selection:
B/G/H, D/K, L, I
Colour system:
PAL, SECAM
NTSC 3.58, 4.43 (only Video In)
Aerial:
75 ohm external terminal for VHF/UHF
Channel Coverage:
VHF: E2-E12
UHF: E21-E69
CATV: S1-S20
HYPER: S21-S41
D/K: R1-R12, R21-R69
21-pin Scart connector (CENELEC standard) including audio/video input, S video input, selectable audio/video output and Smartlink interface.
4/ (SMARTLINK; selectable)
21-pin Scart connector (CENELEC standard) including audio/video input, RGB input, selectable audio/video output, and Smartlink interface.

Y: 1 Vp-p, 75 ohms, 0.3V negative sync P_B : 0.7 Vp-p, 75 ohms P_R : 0.7 Vp-p, 75 ohms

audio input (phono jacks) 500 m Vrms (100% modulation), Impedance: 47 kilo ohms
SUB WOOFER: phono jack
G : audio outputs (Left/Right) - phono jacks
CENTRE SPEAKER IN:
Max. 180W (6-ohms)
CTRL S: minijack
AV MOUSE: minijack
Front Terminals:

audio input (phono jacks):
500 m Vrms (100% modulation), Impedance: 47 kilo ohms
headphones jack

PC Input (15-Dsub)
G: 0.7 Vp-p, 75 ohms, non Sync on Green
B: 0.7 Vp-p, 75 ohms, non Sync on Green
R: 0.7 Vp-p, 75 ohms, non Sync on Green
HD:1-5 Vp-p
VD: 1-5 Vp-p

PC audio input: minijack

Memory Stick Slot
Sound Output:
15W x 2
Accessories supplied:
• One Remote Control (RM-972)
- Two size AAA batteries (R03 type)
• One Display Interface Cable
• One Coaxial Cable
- One AV Mouse
- Two Mains Leads (Type C-4)
- Two Mains Leads (Type BF)
- Two Mains Leads (Type C-5)

Main leads Type BF and Type C-5 may not be supplied depending on the country.
• One Cleaning cloth
• One Mains plug holder
Other features:
- Teletext, Fastext, TOPtext
- Sleep Timer
- Smartlink (direct link between your TV set and a compatible VCR. For more information on Smartlink, please refer to the Instruction Manual of your VCR).
It's available either 3 or 4. (Selectable)

• TV system Autodetection
- Auto Format
PC Input Timing:
Input signal frequency
Horizontal: 15.6 - 90 kHz
Vertical: 48 - 85 Hz
Maximum Resolution: 1600 dots x 1200 lines
(continued)
Preset mode timing table for PC
| No. Resolution (dots x lines) | Graphic mode Horizontal frequency (kHz) | Vertical frequency (Hz) |
| 1 640x350 VGA-1 (VGA350) 31.469 70.086 | ||
| 2 640x350 VESA 85 (VGA350) 37.861 85.080 | ||
| 3 640x400 NEC PC98 24.82 56.42 | ||
| 4 640x400 VGA-2(TEXT) / VESA70 31.469 70.086 | ||
| 5 640x400 VESA 85 (VGA400) 37.861 85.080 | ||
| 6 640x480 VESA 60 31.469 59.940 | ||
| 7 640x480 Mac 13 35.000 66.667 | ||
| 8 640x480 VESA 72 37.861 72.809 | ||
| 9 640x480 VESA 75 (IBM M3) 37.500 75.000 | ||
| 10 640x480 VESA 85 (IBM M4) 43.269 85.008 | ||
| 11 800x600 VESA 56 35.156 56.250 | ||
| 12 800x600 VESA 60 37.879 60.317 | ||
| 13 800x600 VESA 72 48.077 72.188 | ||
| 14 800x600 VESA 75 (IBM M5) 46.875 75.000 | ||
| 15 800x600 VESA 85 53.674 85.061 | ||
| 16 832x624 Mac 16 49.724 74.550 | ||
| 17 852x480 IO_DATA 60 32.000 60.000 | ||
| 18 1024x768 VESA 60 48.363 60.004 | ||
| 19 1024x768 VESA 70 56.476 70.069 | ||
| 20 1024x768 VESA 75 60.023 75.029 | ||
| 21 1024x768 VESA 85 68.677 84.997 | ||
| 22 1152x864 VESA 70 63.99 70.02 | ||
| 23 1152x864 VESA 75 67.500 75.000 | ||
| 24 1152x864 VESA 85 77.49 85.06 | ||
| 25 1152x864 MAC21 68.681 75.061 | ||
| 26 1152x900 SUN LO | 61.80 65.95 | |
| 27 1152x900 SUN HI | 71.72 76.05 | |
| 28 1280x960 VESA 60 60.000 60.000 | ||
| 29 1280x960 VESA 75 75.00 75.00 | ||
| 30 1280x960 VESA 85 85.938 85.002 | ||
| 31 1280x1024 | VESA 60 63.981 60.020 | |
| 32 1280x1024 | SUN 67 | 71.691 67.189 |
| 33 1280x1024 | VESA75 | 79.976 75.025 |
| 34 1280x1024 | SUN 76 | 81.130 76.107 |
| 35 1280x1024 | VESA85 | 91.146 85.024 |
| 36 1600x1200 | UXGA VESA60 | 75.000 60.000 |
| 37 1400x1050 | SXGA+ | 63.981 60.020 |
| 38 848x480 VESA (W-VGA) | 31.020 60.000 | |
| 39 1280x768 VESA (W-SVGA) | 47.986 59.833 | |
| 40 1360x768 VESA (W-XGA) | 47.712 60.015 | |
Troubleshooting

Here are some simple solutions to problems which may affect the picture and sound.
Problem Possible remedies
| No picture | |
| No picture (screen is dark) and no sound. | Check the aerial connection.Connect the display unit and media receiver unit to the mains, and press thepower switch on the front of media receiver unit.Connect the display unit to the media receiver unit using the supplied display interface cable.If thepower on/standby) indicator is on, press TV1/2on the remote control. |
| The TV turns off automatically. (The TV enters the standby mode.) | Check if the Sleep Timer is activated (page 41).Check if the On/Off Timer is activated (page 42).Check if Auto Shutoff is activated (page 43). |
| No picture or no menu information from equipment connected to the Scart connector. | Check that the optional equipment is on and press thebutton repeatedly on the remote control until the correct input symbol is displayed on the screen.Check the connection between the optional equipment and the TV. |
| Poor picture/Unstable picture. | |
| Double images or ghosting. Check aerial/cable connections. Check the aerial location and direction. | |
| Only snow and noise appears on the screen. | Check if the aerial is broken or bent.Check if the aerial has reached the end of its serviceable life. (3-5 years in normal use, 1-2 years at the seaside) |
| Dotted lines or stripes. Keep the TV away from electrical noise sources such as cars, motorcycles, or hair-dryers. | |
| No colour on colour programmes. Using the menu system, select the “Picture Adjustment” menu and select “Reset” to return to the factory settings (page 27).If you set the Power Saving function to “Reduce,” picture colours may become dimmer (page 33). | |
| Some tiny black points and/or bright points on the screen. | The picture of a display unit is composed of pixels. Tiny black points and/or bright points (pixels) on the screen, do not indicate a malfunction. |
| The screen flickers when turning on the TV. | This is inherent in the Plasma Display Panel, and does not indicate a malfunction. |
| The picture is too bright. | Using the menu system, select the “Picture Adjustment” menu and select “mode.” Then select the desired picture mode (page 26). |
| Picture (stripe) noise. | Make sure that the aerial is connected using the supplied coaxial cable.Keep the aerial cable away from other connecting cords.Do not use 300-ohm twin lead cables as interference may occur. |
| Poor picture (white saturation) when viewing a signal from Scart connector3/8. | Make sure that the output signal of the equipment connected to the Scart connector3/8 is not an RGB signal. If it is an RGB signal, please connect the equipment to Scart4/8, 2/8. |
(continued)
Problem Possible remedies
| Distorted picture and noisy sound. • Check if any connected optional equipment is installed in front of the TV or at the side of the TV. When installing optional equipment, leave some space between the optional equipment and TV. | |
| Stripe noise during playback/ recording of a VCR. | Video head interference. Keep your VCR away from the TV.Leave a space of 30 cm between your VCR and the display unit to avoid noise.Avoid installing your VCR in front of the display unit or at the side of the display unit. |
| Poor or no picture (screen is dark), but good sound. | Using the menu system, select the “Picture Adjustment” menu and select “Reset” to return to the factory settings (page 27).If the PICTURE OFF indicator lights up in blue, press Xpicture off) on the remote control. |
| Noisy picture when viewing a TV channel. | Using the menu system, select the “Manual Programme Preset” option in the “Set Up” menu and adjust Fine Tuning (AFT) to obtain better picture reception (page 40).Using the menu system, set the “NR” (Noise Reduction) option in the “Picture Adjustment” menu to reduce the noise in the picture (page 27). |
| Distorted picture when changing programmes or selecting teletext. | Turn off any equipment connected to the Scart connector on the rear of the media receiver unit. |
| Wrong characters appear when viewing teletext. | Using the menu system, enter the “Language/ Country” option in the “Set Up” menu and select the country in which you operate the TV set (page 37). For Cyrillic languages, we recommend that you select Russia in case your own country does not appear in the list. |
| Wrong characters appear when viewing NexTView. | Using the menu system, enter the “Language/ Country” option in the “Setup” menu and select the country as the NexTView is broadcasted (page 37). |
| No sound/Noisy sound.Good picture, no sound. | Press the △+/- or ☑(mute) on the remote control.Check that “Speaker” option is set to “Main” in the “Features” menu (page 33).If headphones are connected, select the “○ Speaker Link” option in the “Sound adjustment” menu to “Off,” or disconnect the headphones. |
| Audio noise. | Make sure that the aerial is connected using the supplied coaxial cable.Keep the aerial cable away from other connecting cords.Do not use 300-ohm twin lead cables as interference may occur.Communication problems may occur if the infrared communication equipment (e.g. infrared cordless headphones) is used near the TV. Please use headphones other than infrared cordless headphones, move the infrared transceiver away from the TV until the noise is eliminated, or move the transmitter and receiver of the infrared communication equipment closer together. |
| The TV fan noise becomes bigger. | The ventilation holes can accumulate dust over a period of time. the accumulated dust may make the cooling function of the built-in fan less effective. To prevent this, we recommend removing the dust periodically (once a month) using a vacuum cleaner. |
| Cannot operate the menu. • If the item you want to select appears in a pale colour, you cannot select it. | |
Problem Possible remedies
Strange sound.
| The TV cabinet creaks. • Changes in room temperature sometimes causes the TV cabinet to expand or contract, which can make slight noises. This does not indicate a malfunction. | |
| The TV whirs. • The TV's fan setting is working. This does not indicate a malfunction. | |
| The TV ticks. • An electrical circuit inside the TV is activated when the TV is turned on. This does not indicate a malfunction. | |
| The TV buzzes. • There might be a surge sound when turning on the TV. This does not indicate a malfunction. | |
| Remote control does not function. • Check that the Media Selector on the remote control is set correctly for the device you are using (VCR, TV or DVD). • If the remote control does not operate the VCR or DVD even when the Media Selector has been set correctly, enter the necessary code set as explained in “Remote Control Configuration for VCR/DVD” on page 66. • Replace the batteries. | |
| The (power on/standby) indicator on the TV flashes. | • Contact your nearest Sony service centre. |
Personal Computer
Problem Possible remedies
No picture
| If the NO INPUT SIGNAL message appears on the screen or if the (power on/standby) indicator lights up in yellow | Check that the video signal cable is properly connected and all plugs are firmly seated in their sockets.Check that the 15-Dsub video input connector's pins are not bent or pushed in.Problems caused by the connected computerThe computer is in power saving mode. Try pressing any key on the computer keyboard.Check that the computer's power is "on.""Check that the graphic board is completely seated in the proper bus slot. |
| If the OUT OF SCAN RANGE message appears on the screen | Problems caused by the connected computerCheck that the video frequency range is within that specified for the monitor. If you replaced an old monitor with this TV, reconnect the old monitor and adjust the frequency range to the following:Horizontal: 15.6 – 90 kHzVertical: 48 – 85 Hz |
| If using Windows®• If you replaced an old monitor with this TV, reconnect the old monitor and do the following. Select 640 x 480 resolution at 60Hz for Windows using the Windows device selection screen. | |
| If using a Macintosh** system • When connecting a Macintosh computer, use an adapter (not supplied) if necessary. Connect the adapter to the computer before connecting the video signal cable. | |
(continued)
Problem Possible remedies
| Picture flickers, bounces, oscillates, or is scrambled. | · Using the menu system, select “Adjust Pixel” option in the “Screen Control” menu and adjust “Dot phase” or “Total H Pixel” (page 32). · Try connecting the TV to a different mains socket, preferably on a different circuit.Problems caused by the connected computer· Check your graphic board manual for the proper TV setting.· Confirm that the graphic mode and the frequency of the input signal are supported by this TV (page 70). Even if the frequency is within the proper range, some graphics boards may have a sync pulse that is too narrow for the TV to sync correctly.· Adjust the computer’s refresh rate (vertical frequency) to obtain the best possible picture. |
| Picture is fuzzy. | · Using the menu system, adjust “Brightness” and “Contrast” in the “Picture adjustment” menu (page 27).· Using the menu system, select “Adjust Pixel” option in the “Screen Control” menu and adjust “Dot phase” or “Total H Pixel”(page 32).Problems caused by the connected computer· If the resolution is more than the numerical value specified in “Specifications” on page 68, the picture is reduced in size and the picture quality may be less than the original. This is not a malfunction. |
| Picture is ghosting. | · Eliminate the use of video cable extensions and /or video switch boxes.· Check that all plugs are firmly seated in their sockets. |
| Picture is not centred or sized properly. | · Using the menu system, select the “Screen Size/Shift” option in the “Screen Control” menu and adjust “V Size” (page 32).· Using the menu system, select the “Screen Size/Shift” option in the “Screen Control” menu, and adjust “H Shift” or “V Shift” (page 32). Note that some graphic modes do not fill the screen to the edges. |
| Picture is too small. Problems caused by the connected computer· Set the resolution of the connected computer to the same as the TV. | |
| Wavy or elliptical pattern (moire) is visible. | · Using the menu system, select the “Adjust Pixel” option in the “Screen Control” menu and adjust “Dot phase” or “Total H Pixel”(page 32). |
| Colour is not uniform. | · Using the menu system, select the “Adjust Pixel” option in the “Screen Control” menu and adjust “Dot phase” or “Total H Pixel”(page 32). |
| The TV turns off after a while. Problems caused by the connected computer· Set the computer’s power saving setting to off. | |

* Windows® is a registered trademark of Microsoft corporation in the United States and other countries.
**Macintosh is a trademark licensed to Apple Computer, Inc., registered in the U.S.A. and other countries.
(continued)
"Memory Stick"
Problem Possible remedies
| Cannot insert the “Memory Stick” into the “Memory Stick” slot. | The “Memory Stick” is not facing in the correct direction. Insert the “Memory Stick” with the ▲ mark facing up into the “Memory Stick” slot (page 48). |
| Cannot delete a file or all materials. | The write-protect switch on the “Memory Stick” is set to LOCK. Release the lock.The image file is protected. Release the protection in the index Screen. |
| The still image files in the JPEG format stored in a “Memory Stick” cannot be displayed. | Select “Option” in the Memory Stick Home and select “File.” Then set “Filter” to “Still” or “Off” (page 50). |
| The moving image files in the MPEG1 format stored in a “Memory Stick” cannot be displayed. | Select “Option” in the Memory Stick Home and select “File.” Then set “Filter” to “Movie” or “Off” (page 50). |
| The image is not displayed and the ? or appears. | The image file is not DCF-compatible. |

If you continue to experience problems, have your TV serviced by qualified personnel.
Never open the casing yourself.
GB
Television Channel Number Guide for United Kingdom
Only the main transmitters are listed. Information regarding the regional sub-relay channel numbers can be obtained by contacting The BBC Engineering Information Dept., Telephone Number 020 7852 5040.
| MAIN TRANSMITTERS | BBC1 | BBC2 | ITV | CH4 | CH5 |
| London & South East | |||||
| 1Bluebell Hill | 40 | 46 | 43 | 65 | - |
| 2Crystal Palace | 26 | 33 | 23 | 30 | - |
| 3Dover | 50 | 56 | 66 | 53 | - |
| 4Heathfield | 49 | 52 | 64 | 67 | - |
| 5Oxford | 57 | 63 | 60 | 53 | 49 |
| South-West | |||||
| 6Beacon Hill | 57 | 63 | 60 | 53 | - |
| 7Caradon Hill | 22 | 28 | 25 | 32 | - |
| 8Huntshaw Cross | 55 | 62 | 59 | 65 | 67 |
| 9Redruth | 51 | 44 | 41 | 47 | 37 |
| 10Stockland Hill | 33 | 26 | 23 | 29 | - |
| Channel Islands | |||||
| 11Fremont Point | 51 | 44 | 41 | 47 | - |
| South | |||||
| 12Hannington | 39 | 45 | 42 | 66 | - |
| 13Midhurst | 61 | 55 | 58 | 68 | - |
| 14Rowridge | 31 | 24 | 27 | 21 | - |
| West | |||||
| 15Mendip | 58 | 64 | 61 | 54 | 37 |
| East | |||||
| 16Sandy Heath | 31 | 27 | 24 | 21 | 39 |
| 17Sudbury | 51 | 44 | 41 | 47 | - |
| 18Tacolneston | 62 | 55 | 59 | 65 | 52 |
| Midlands (West) | |||||
| 19Ridge Hill | 22 | 28 | 25 | 32 | - |
| 20Sutton Coldfield | 46 | 40 | 43 | 50 | - |
| 21The Wrekin | 26 | 33 | 23 | 29 | - |
| Midlands (East) | |||||
| 22Waltham | 58 | 64 | 61 | 54 | - |
| Northern Ireland | |||||
| 23Brougher Mountain | 22 | 28 | 25 | 32 | - |
| 24Divis | 31 | 27 | 24 | 21 | - |
| 25Limavady | 55 | 62 | 59 | 65 | - |
| North | |||||
| 26Belmont | 22 | 28 | 25 | 32 | 56 |
| 27Emley Moor | 44 | 51 | 47 | 41 | 37 |
| North-West | |||||
| 28Winter Hill | 55 | 62 | 59 | 65 | 48 |
| North-East | |||||
| 29Bilsdale West Moor | 33 | 26 | 29 | 23 | - |
| 30Caldbeck | 30 | 34 | 28 | 32 | 56 |
| 31Chatton | 39 | 45 | 49 | 42 | - |
| 32Pontop Pike | 58 | 64 | 61 | 54 | - |
| Scotland | |||||
| 33Angus | 57 | 63 | 60 | 53 | - |
| 34Black Hill | 40 | 46 | 43 | 50 | 37 |
| 35Sandale | 22 | 67 | - | - | - |
| 36Caldbeck | - | - | 28 | 32 | 56 |
| 37Craigkelly | 31 | 27 | 24 | 21 | 48 |
| 38Darvel | 33 | 26 | 23 | 29 | - |
| 39Durris | 22 | 28 | 25 | 32 | 67 |
| 40Eitshal (Lewis) | 33 | 26 | 23 | 29 | - |
| 41Keelylang Hill | 40 | 46 | 43 | 50 | - |
| 42Knock More | 33 | 26 | 23 | 29 | - |
| 43Rosemarkie | 39 | 45 | 49 | 42 | - |
| 44Rumster Forest | 31 | 27 | 24 | 21 | - |
| 45Selkirk | 55 | 62 | 59 | 65 | 52 |
| Wales | |||||
| 46Blaenplwyf | 31 | 27 | 24 | 21 | 56 |
| 47Carmel | 57 | 63 | 60 | 53 | - |
| 48Llanddona | 57 | 63 | 60 | 53 | - |
| 49Moel-y-Parc | 52 | 45 | 49 | 42 | - |
| 50Presely | 46 | 40 | 43 | 50 | 37 |
| 51Wenvoe | 44 | 51 | 41 | 47 | - |

text_image
Outline map of the United Kingdom with numbered regions and a legend, likely for educational or regional identification.Bedienungsanleitung
DE
Einführung
natural_image
Illustration of a person sleeping in bed watching a soccer game on a TV (no text or symbols present)natural_image
Two people carrying a large rectangular frame (no text or symbols visible)natural_image
Simple line drawing of a person sitting on a chair using a computer (no text or symbols)natural_image
Illustration of a person watching a television under a bright sun (no text or symbols)natural_image
Simple line drawing of a boat with a mounted device and a person standing on it, no text or symbols present.natural_image
Illustration of two electrical plugging devices connected via wires with steam rising (no text or symbols)text_image
Diagram showing two steps of connecting wires to a socket, with a checkmark indicating the correct direction.Stromzufuhr
natural_image
Illustration of a power cord with lightning bolts and a switch, no text or symbols presentReinigung
natural_image
Illustration of a device emitting stars with motion lines (no text or symbols)Lüftungsöffnungen
natural_image
Illustration of a computer monitor with a speech bubble containing a magnifying glass and an arrow (no text or symbols)natural_image
Simple line drawing of a retro television with monitor and tower (no text or symbols)natural_image
Illustration of a radiator emitting heat and a monitor with a sun in the background (no text or symbols)Zubehörteile
natural_image
Simple line drawing of a hand operating a computer monitor with cables (no text or symbols)natural_image
Line drawing of a hand connecting a power outlet to a computer monitor (no text or symbols)Kabel
natural_image
Illustration of a remote control device with scroll and keypad (no text or symbols)natural_image
Diagram of a coiled cable or hose with connectors, no text or symbols presentnatural_image
Illustration of a coiled cable with two connectors and a triangular support (no text or symbols)natural_image
Illustration of a coiled cable or wire with a connector (no text or symbols)natural_image
Line drawing of a coiled cable with two connectors and a triangular pointer (no text or symbols)natural_image
Line drawing of a cable with two connectors, no text or symbols presentnatural_image
Line drawing of a coiled cable with two terminal plugs, no text or symbols presenttext_image
Diagram illustrating battery charging process with labeled components and directional arrowsDE
text_image
Diagram showing connections between a monitor and an air conditioner via cable, with three connected devices labeled in Chinese.text_image
Diagram showing a hand pressing a button on a device panel with control buttons and indicator lights.text_image
PROG+ Δ- Δ+ PROG-natural_image
Line drawing of a tulip flower with visible petals and stem, no text or symbols presenttext_image
1 2 3 01 02 03 04 05 06 07 Mo DI MI Do Fr Sa So 9 : 00 9 : 30 10 : 00 TV1 | Magazine | Songs from the shows TV2 | Weather Forecast | Mike's show TV3 | Euronews | Fantasy Film | Star Wars TV4 | Home Shopping Europe | Euro Sports TV5 | News | Arts show | Magazine TV6 | Larry King's live | Euro Sports TV7 | Euro magazine | Euro Sports TV8 | Home Shopping Europe | Euronews Songs from the shows TV1 00:30 - 01:30 Thursday 04 Programme description Aufnahme Erinnern 4 5Horizontal: 15.6 - 90 kHz
Vertikal: 48 - 85 Hz
natural_image
Illustration of a person sleeping in bed watching a soccer game on a TV (no text or symbols present)natural_image
Two people carrying a large rectangular frame (no text or symbols visible)(continúa)
natural_image
Simple line drawing of a person sitting on a phone in front of a van (no text or symbols)Agua y humedad
natural_image
Illustration of a person standing beside a television displaying a cartoon character under a sun (no text or symbols)natural_image
Simple line drawing of a boat with a person standing on it, no text or symbols presentCaídas
text_image
10cm 1cm 1cm Frente(continúa)
natural_image
Illustration of two electric shock absorbers connected in a circuit with visible wires (no text or symbols)text_image
Diagram showing two hands connecting electrical socket to plug wires, with a checkmark indicating the correct connection.Toma de corriente
natural_image
Illustration of a hand using a power plug to switch a TV screen with lightning bolts (no text or symbols)Cableado
natural_image
Illustration of a tablet with stars and fireworks spilling out (no text or symbols)natural_image
Illustration of a computer monitor with a speech bubble containing a paperclip and an arrow (no text or symbols)natural_image
Simple line drawing of a retro television with a monitor and tower (no text or symbols)natural_image
Illustration of a heat sink emitting steam from a TV and sun, no text or symbols presentAccesorios
natural_image
Illustration of a plug being inserted into a cable and then placed on a monitor (no text or symbols present)natural_image
Line drawing of a hand inserting a power outlet into a computer monitor (no text or symbols)natural_image
Illustration of a remote control device with scroll and keypad (no text or symbols)natural_image
Coiled cable or hose with connectors, no text or symbols visiblenatural_image
Coiled cable with two connectors and a triangular pointer (no text or symbols)natural_image
Illustration of a coiled cable with a connector (no text or symbols)natural_image
Line drawing of a coiled cable with two connectors and a triangular pointer (no text or symbols)natural_image
Illustration of a coiled cable with two connectors and a triangular base (no text or symbols)natural_image
Illustration of a coiled electrical plug with two terminal leads, forming a triangular shape (no text or symbols)flowchart
graph TD
    A["SONY TV"] --> B["Switch cable being inserted"]
    B --> C["Switch cable being replaced with cable"]
    C --> D["Switch cable being open and closed"]
    D --> E["Switch cable being open and closed"]
ES
natural_image
Diagram of a mechanical device with a lever and shaft, showing internal components and directional arrows (no text or symbols)text_image
Diagram showing connections between a monitor, power supply, and three connected devices with labeled ports.text_image
Diagram showing a hand pressing a button on a device panel with icons for function or operation.text_image
PROG + Δ- Δ+ PROG -text_image
TVVIDEO "Memory Stick" "Memory Stick" VCR TV DVD MODE OK PROG MENU SONY TV(continúa)
natural_image
Line drawing of a tulip flower with stem and leaves, no text or symbols presentPulse PROG + (○ pulse PROG - ( □ ▼ ).
text_image
1 2 3 TV1 00:30 Songs from the shows TV2 01:30 Weather forecast informat i TV3 05:30 A1 news magazine TV4 06:30 Arts show TV5 07:30 Oclock news TV6 08:30 Weather forecast informat i TV7 09:30 A1 news magazine TV8 10:30 Arts show Songs from the shows TV1 00:30 - 01:30 Thursday 04 Programme description grabar recordar 4 5text_image
1 2 3 01 02 03 04 05 06 07 Lun Mar Mie Jue Vic Sab Dom 9 : 00 9 : 30 10 : 00 TV1 | Magazine | Songs from the shows TV2 | Weather Forecast | Mike's show TV3 | Euronews | Fantasy Film | Star Wars TV4 | Home Shopping Europe | Euro Sports TV5 | News | Arts show | Magazine TV6 | Larry King's live | Euro Sports TV7 | Euro magazine | Euro Sports TV8 | Home Shopping Europe | Euronews Songs from the shows TV1 00:30 - 01:30 Thursday 04 Programme description grabar recordar 4 5SUB WOOFER: conector RCA
G : salidas de audio (izq./ dcha.) - conectores RCA
CENTRE SPEAKER IN: Máx. 180 W (6 Ohmios)
CTRL S: miniconectores RCA.
natural_image
Illustration of a person sleeping in bed watching a soccer game on a TV (no text or symbols present)natural_image
Two people carrying a large rectangular frame (no text or symbols visible)natural_image
Simple line drawing of a person using a computer on a van (no text or symbols)Eau et humidité
natural_image
Illustration of a person watching a television under a bright sun (no text or symbols)Bateau ou voilier
natural_image
Simple line drawing of a boat with a person standing on it, emitting steam (no text or symbols)Chutes
text_image
10cm 1cm 1cm Facenatural_image
Illustration of two electrical plug connections with wires and heating elements (no text or symbols)text_image
Diagram showing two hands connecting electrical wires to a socket, with a checkmark indicating the correct connection.Prise de courant
natural_image
Illustration of a computer monitor with lightning bolts and a power plug, no text or symbols presentCâblage
natural_image
Illustration of a tablet with stars spilling out (no text or symbols)Orifices d'aération
natural_image
Illustration of a computer monitor with a speech bubble containing a magnifying glass and an arrow (no text or symbols)natural_image
Simple line drawing of a retro television with a monitor and tower (no text or symbols)Liquides
natural_image
Illustration of a heat sink emitting steam and a monitor with a sun in the background (no text or symbols)Accessoires
natural_image
Illustration of a plug being inserted into a cable and then placed on a monitor (no text or symbols present)natural_image
Line drawing of a hand inserting a power outlet into a computer monitor (no text or symbols)natural_image
Illustration of a remote control device with scroll and buttons (no text or symbols)natural_image
Diagram of a coiled cable or hose with connectors, no text or symbols presentnatural_image
Illustration of a coiled cable with two connectors and a triangular support (no text or symbols)natural_image
Illustration of a coiled cable or sensor with a connector (no text or symbols)natural_image
Line drawing of a coiled cable with two connectors and a triangular pointer (no text or symbols)natural_image
Line drawing of a cable with two connectors, no text or symbols presentnatural_image
Line drawing of a coiled cable with two terminal plugs, no text or symbols presentflowchart
graph TD
    A["SONY"] --> B["USB Cable with USB cable"]
    B --> C["Switch to USB Cable"]
    C --> D["Battery with battery"]
    D --> E["Device with battery"]
FR
text_image
Diagram showing connections between a monitor, power supply, and three connected devices with labeled ports.text_image
Diagram showing a hand pressing a button on an air conditioner panel with control buttonstext_image
PROG+ Δ- Δ+ PROG-text_image
TVVIDEO "Memory Stick" "Memory Stick" VCA TV DVD MODE REC OK PROG MENU SONY TVFR
natural_image
Line drawing of a tulip flower with stem and leaves (no text or symbols)text_image
1 2 3 TV1 00:30 Songs from the shows TV2 01:30 Weather forecast informat i TV3 05:30 A1 news magazine TV4 06:30 Arts show TV5 07:30 Oclock news TV6 08:30 Weather forecast informat i TV7 09:30 A1 news magazine TV8 10:30 Arts show Songs from the shows TV1 00:30 - 01:30 Thursday 04 Programme description Enregister Rappeler 4 5Ecran "Vision d'ensemble" (fig. 2):
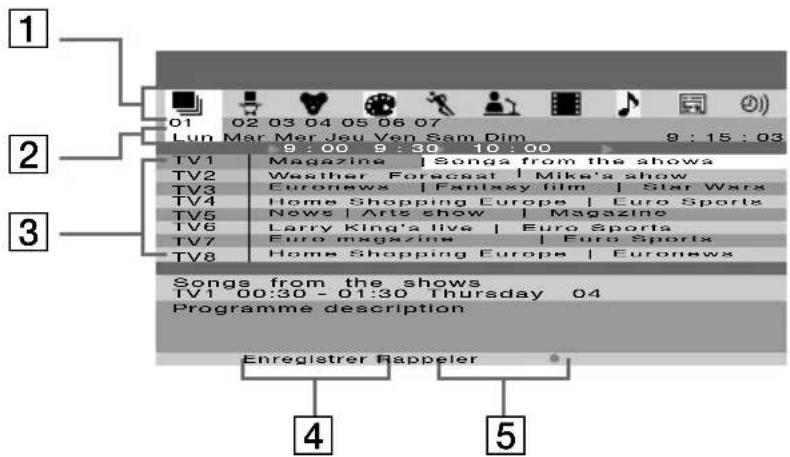
text_image
1 01 02 03 04 05 06 07 Lun Mar Mer Jeu Ven Sam Dim 9:15:03 9:00 9:30 10:00 2 TV1 Magazine | Songs from the shows TV2 Weather Forecast | Mike's show TV3 Euronews | Fantasy film | Star Wars TV4 Home Shopping Europe | Euro Sports TV5 News | Arts show | Magazine TV6 Larry King'a live | Euro Sports TV7 Euro magazine | Euro Sports TV8 Home Shopping Europe | Euronews Songs from the shows TV1 00:30 - 01:30 Thursday 04 Programme description Enregistrer Rappeler 4 5500 m Vrms (modulation 100%),
500 m Vrms (modulation 100%),
Horizontal: 15,6–90 kHz
Vertical: 48 - 85 Hz
text_image
PAL SECAM I PL I GD B B D E F G H I J K L M N O P Q R S T U V W X Y Z C D E F G H I J K L M N O P Q R S T U V W X Y Zhttp://www.sony.net/
Sony España, S.A.
Printed in Spain
IMPRESO EN ESPAÑA
Dep. Leg. B-42013-2002
BENGAR - Granollers