KH 3433 N - Electric heater CLATRONIC - Free user manual and instructions
Find the device manual for free KH 3433 N CLATRONIC in PDF.
User questions about KH 3433 N CLATRONIC
0 question about this device. Answer the ones you know or ask your own.
Ask a new question about this device
Download the instructions for your Electric heater in PDF format for free! Find your manual KH 3433 N - CLATRONIC and take your electronic device back in hand. On this page are published all the documents necessary for the use of your device. KH 3433 N by CLATRONIC.
USER MANUAL KH 3433 N CLATRONIC
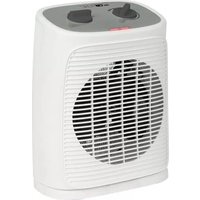
natural_image
Exterior view of a white CRT heat exchanger with a black vent and control panel (no visible text or symbols)Dieses Produkt ist nur für gut isolierte Räume oder für den gelegentlichen Gebrauch geeignet.
NL Dit product is alleen geschikt voor goed geïsoleerde ruimtes of voor incidenteel gebruik.
Ce produit est seulement adapté à une utilisation dans les pièces correctement isolées, ou pour les utilisations occasionnelles.
Este producto solo es adecuado para utilizarlo en habitaciones bien aisladas o para un uso ocasional.
① Questo prodotto è adatto solo per ambienti ben isolati o per l'uso occasionale.
GB This product is only suitable for well isolated rooms or for occasional use.
PL Ten produkt nadaje się tylko do dobrze izolowanych pomieszczeń lub do sporadycznego użytku.
H Ez a termék kizárólag jól szigetelt helyiségekben vagy alkalmanként használható.
Цей виріб призначений тільки для приміщень із якісною теплоізоляцією чи для нерегулярного використання.
Этот прибор пригоден только для хорошо изолированных комнат или для нечастого применения.
CE
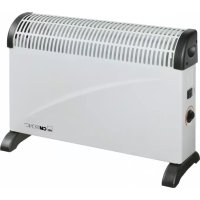
KONVEKTOR HEIZUNG
Switches......Page 3
Instruction Manual....Page 30
Technical Data Page 34
Disposal Page 34
NEDERLANDS
Inhoud
WAARSCHUWING: Niet afdekken!
Thank you for selecting our product. We hope that you will enjoy use of the appliance.
Symbols in this User Manual
Important notes for your safety are marked distinctively. Pay absolute attention to them to avoid accidents and damage to the device:

WARNING:
Warns of dangers for your health and indicates potential risks of injury.

CAUTION:
Indicates potential dangers for the device or other objects.

NOTE:
Highlights tips and information for you.
General Notes
Before using this device, carefully read this user manual and keep it together with the Warranty Certificate, cashier receipt and if possible, the original package inclusive its interior packing. If you hand on the device to any third person, include the user manual as well.
- Use the device for private and its intended purpose only. The device is not intended for commercial use.
- Do not use the device outdoors. Protect it from heat, direct sunlight, humidity (do not immerse into liquids under any circumstances) and sharp edges. Do not use the device with wet hands. If the device gets wet, unplug it immediately.
- Always switch off and unplug the device (pull the plug, not the cable) when you do not use the device, or when you attach accessories, during cleaning or malfunctioning.
- Do not leave the device unattended during operation. Always switch off the device when leaving the room. Unplug the device.
- Regularly check the device and cable for signs of damage. Do not continue to operate the device in case of damage.
- Do only use original parts.
- For the safety of your children, keep any packing parts (plastic bags, cartilage, Styrofoam etc.) out of their reach.

WARNING!
Don't let small children play with foils for danger of suffocation!
Special Safety Precautions for this Device
Symbols on the Product
You will find symbols with warning or information character on the product:
WARNING: Do not Cover!
To prevent overheating of the heating appliance, the heating appliance may not be covered.

WARNING:
Risk of Electrical Shock!
Do not use this heating appliance in close proximity to a bathtub, a shower, or a swimming pool. Do not operate the appliance from such a location. Maintain a safety distance of 1.25 m.

WARNING:
Risk of Burning
- Some parts of the product can become very hot and cause burns. Avoid contact with the skin.
- You must be particularly careful when children and vulnerable persons are present.
- The outflowing air reaches a temperature of up to 110°C! Do not allow children to play unattended in proximity to the appliance.
Risk of Explosion
The inside of the appliance contains glowing hot components. Do not use the appliance around flammable or explosive liquids or gases!

CAUTION:
- This is an auxiliary heating appliance. Do not leave the appliance unattended for several hours. Do not leave the house while it is in use.
Safety Distance
- The heating appliance may not be set up directly below a wall socket.
- Maintain a 1 m safety distance to readily flammable objects such as furniture, curtains, etc.
Choose a Suitable Operating Location!
- Use the device in the upright position only.
- Place the unit on a flat and heat-resistant surface.
- Always position the appliance in such a way that the air is able to flow freely in and out.
Risk of Overheating
Do not heat any rooms with a volume of less than 4 m^3 .
- In order to avoid a hazard due to inadvertent resetting of the thermal cutout, this appliance must not be supplied through an external switching device, such as a timer, or connected to a circuit that is regularly switched on and off by the utility.
- Make sure that the power cable is not lying on the appliance. Route it along the floor and towards the back away from the appliance.
- Allow the appliance to cool down before you put it away.
- Do not insert any objects into the appliance.
- This appliance can be used by children aged from 8 years and above and persons with reduced physical, sensory or mental capabilities or lack of experience and knowledge if they have been given supervision or instruction concerning use of the appliance in a safe way and understand the hazards involved.
• Children shall not play with the appliance. - Cleaning and user maintenance shall not be made by children without supervision.
- Children younger than 3 years of age should be kept away from the appliance, unless they are supervised at all times.
- Children from the age of 3 and younger than 8 years of age may only turn the appliance on and off if they are supervised, or have been instructed with regard to the safe use of the appliance, and if they have understood the risks resulting from it, provided that the appliance has been placed and installed in its normal position of use.
- Children from the age of 3 and younger than 8 years of age may not insert the plug into the socket, may not clean the appliance and / or may not perform the maintenance by the user.
- Do not repair the appliance by yourself. Always contact an authorized technician. If the supply cord is damaged, it must be replaced
by the manufacturer, its service agent or similarly qualified persons in order to avoid a hazard.
Supplied Parts
1 Heater appliance
2 Stands
8 Screws, 17 mm, for mounting the stands
Unpacking the Appliance
- Remove the appliance from its packaging.
- Remove all packaging materials such as films, filler material, cable clips and carton.
- Check the contents for completeness.
i NOTE:
Production residue or dust may have collected on the appliance. We recommend cleaning the appliance according to chapter "Cleaning".
Assembly of the stands
- Carefully place the appliance onto its flat side.
- Screw down the two stands with four 17 mm screws each onto the pedestal of the appliance.
WARNING:
Only use the enclosed screws that are 17 mm in length. Screws that have been screwed in too deeply (screws that are too long) can damage the appliance or could cause danger to life and health.
Electrical Connection
Power Requirements
The appliance can consume a total of 2000 W. With this connected load a separate supply line protected by a 16 A household circuit breaker is recommended.
CAUTION: Overload!
- If you use extension leads, these should have a cable cross-section of at least 1.5 ~mm^2 .
- Do not use any multiple sockets, as this device is too powerful.
Connection
- Make sure that the appliance is switched off. The temperature control must be set to "MIN". The control lights have to be off.
- Make sure that the iron voltage (see name plate) and the line voltage match.
- The mains plug should only be inserted into a correctly installed socket with earthing contact.
Instructions for Use (Page 3, fig.)
Thermostat
The thermostat (IV) is a temperature-dependent switch.
Function Switch
Heater
The heat output is determined by the power settings. Up to 3 settings can be selected to optimise the heat output:
Function switch I = 750 W
Function switch II = 1250 W
Function switch I + II = 2000 W
Fan
You can use the fan (III) independent from the heater.
Operation
You can use the appliance for the following applications:
a) Setting the heater appliance to three levels.
The thermostat must be turned on for that purpose.
b) Turning on the fan.
The thermostat must be turned on for that purpose.
c) Turning on the heater and the fan.
The thermostat must be turned on for that purpose.
d) Setting the room temperature.
e) Keeping a room above freezing.
NOTE:
The control lights of the function switch indicate the mode.
Getting the Room to the Desired Temperature
- Turn the control of the thermostat to the position "MAX".
- Turn on one or both function switches of the heater. The control lights in the switches will be lit.
- After the desired room temperature has been reached, slowly turn the control of the thermostat back until the appliance turns off. The control lights will go out.
i NOTE:
The thermostat will maintain the set room temperature. The heater appliance and possibly the fan will automatically be turned on and off in the process.
Frost Protection
i NOTE:
The frost protection is dependent on the size of the room.
- Turn the control of the thermostat as far as it will go to the position "MIN".
- Turn on both function switches of the heater.
In this position, the heater appliance will constantly maintain the temperature above freezing.
Turning Off
- Turn the function switch off. The control lights will go out.
- Turn the temperature regulator as far as it will go to the position "MIN".
- Disconnect the power supply from the socket.
Overheating Protection
The appliance is fitted with an overheating protection, which will automatically turn off the appliance in case of overheating. This thermal shutdown function will not automatically reset. In order for the device to be operated again, proceed as follows:
- Turn off the function switch. Turn the temperature regulator to the position "MIN". Unplug the power cord. Let the appliance cool down for approximately 15 minutes before you use it again.
- Has the appliance become overheated? Check whether the air intake or vent on the heater is blocked. If necessary, clear the blockage.
In the event that the overheating protection turns off the appliance after a brief period, then there is probably a defect.
- Turn the appliance off again and unplug it from the mains.
- Have the appliance checked by the dealer or by our service.
Cleaning

WARNING:
- Before cleaning, always remove the mains plug and wait until the device has cooled down.
- Do not immerse the device in water. Otherwise this might result in an electric shock or fire.

CAUTION:
- Do not use a wire brush or any abrasive items.
-
Do not use any acidic or abrasive detergents.
-
Wipe off the dust on the appliance with a dry cloth.
- A damp cloth (not wet) may be used for the removal of stains.
Technical Data
Model: KH 3433 N
Power supply: 230 V\~, 50 Hz
Power consumption: 2000 W
Protection class: ....I
Net weight: approx. 3.85 kg
The right to make technical and design modifications in the course of continuous product development remains reserved.
This device complies with all current CE directives, such as electromagnetic compatibility and low voltage directive and is manufactured according to the latest safety regulations.
Disposal
Meaning of the "Dustbin" Symbol
Take care of our environment, do not dispose of electrical appliances via the household waste.
Dispose of obsolete or defective electrical appliances via municipal collection points.
Please help to avoid potential environmental and acts through improper waste disposal.
You contribute to recycling and other forms of utilization of old electric and electronic appliances.
Your municipality provides you with information about collecting points.
Instrukcja obsługi
CTC Clatronic Sp. z o.o
Ul. Brzeska 1
45-960 Opole