
CDIC 30 - Cooker CANDY - Free user manual and instructions
Find the device manual for free CDIC 30 CANDY in PDF.

| Product type | Induction hob |
| Brand | Candy |
| Model | CDIC 30 |
| Category | Cooker (cooking hob) |
| Number of cooking zones | 2 zones |
| Power supply | 220-240 V ~ 50/60 Hz |
| Total installed power | 3500 W |
| Appliance dimensions (L x W x H) | 288 x 520 x 56 mm |
| Recess dimensions (A x B) | 268 x 500 mm |
| Weight (approx.) | 5 kg |
| Control type | Touch controls |
| Lock function | Yes |
| Timer | Up to 99 minutes |
| Automatic safety shut-off | Yes |
| Pan detection | Yes |
| High temperature protection | Yes |
| Cooling fan | Yes |
| Surface material | Ceramic glass |
| Maintenance and cleaning | Special hob cleaner, scraper for burnt residues, soft sponge |
| Safety | Mandatory grounding, automatic shut-off, child lock, small object detection |
| General information | Household use only, installation by a qualified professional |
Frequently Asked Questions - CDIC 30 CANDY
User questions about CDIC 30 CANDY
0 question about this device. Answer the ones you know or ask your own.
Ask a new question about this device
Download the instructions for your Cooker in PDF format for free! Find your manual CDIC 30 - CANDY and take your electronic device back in hand. On this page are published all the documents necessary for the use of your device. CDIC 30 by CANDY.
USER MANUAL CDIC 30 CANDY
Instruction Manual For Induction Hob
ENGLISH
By placing the CE C E marking on this product, we declare, on our own responsibility, compliance to all the European safety, health and environmental requirements stated in the legislation for this product.
SafetyWarnings
Your safety is important to us. Please read this information before using your hob.
Installation
Electrical Shock Hazard
- Disconnect the appliance from the mains electricity supply before carrying out any work or maintenance on it.
- Connection to a good earth wiring system is essential and mandatory.
- Alterations to the domestic wiring system must only be made by a qualified electrician.
- Failure to follow this advice may result in electrical shock or death.
Cut Hazard
- Take care - panel edges are sharp.
- Failure to use caution could result in injury or cuts.
Important safety instructions
- Read these instructions carefully before installing or using this appliance.
- No combustible material or products should be placed on this appliance at any time.
- Please make this information available to the person responsible for installing the appliance as it could reduce your installation costs.
- In order to avoid a hazard, this appliance must be installed according to these instructions for installation.
- This appliance is to be properly installed and earthed only by a suitably qualified person.
- This appliance should be connected to a circuit which incorporates an isolating switch providing full disconnection from the power supply.
- Failure to install the appliance correctly could invalidate any warranty or liability claims.
Operation and maintenance
Electrical Shock Hazard
-
Do not cook on a broken or cracked hob surface. If the hob should break or crack, switch the appliance off immediately at the mains power supply (wall switch) and contact a qualified technician.
-
Switch the hob off at the wall before cleaning or maintenance.
- Failure to follow this advice may result in electrical shock or death.
Health Hazard
- This appliance complies with electromagnetic safety standards.
- However, persons with cardiac pacemakers or other electrical implants (such as insulin pumps) must consult with their doctor or implant manufacturer before using this appliance to make sure that their implants will not be affected by the electromagnetic field.
- Failure to follow this advice may result in death.
Hot Surface Hazard
- During use, accessible parts of this appliance will become hot enough to cause burns.
- Do not let your body, clothing or any item other than suitable cookware contact the Induction glass until the surface is cool.
- Beware: magnetisable metal objects worn on the body may become hot in the vicinity of the cooktop. Gold or silver jewellery will not be affected.
- Keep children away.
- Handles of saucepans may be hot to touch. Check saucepan handles do not overhang other cooking zones that are on. Keep handles out of reach of children.
- Failure to follow this advice could result in burns and scalds.
Cut Hazard
- The razor-sharp blade of a hob surface scraper is exposed when the safety cover is retracted. Use with extreme care and always store safely and out of reach of children.
- Failure to use caution could result in injury or cuts.
Important safety instructions
- Never leave the appliance unattended when in use. Boilover causes smoking and greasy spillovers that may ignite.
- Never use your appliance as a work or storage surface.
- Never leave any objects or utensils on the appliance.
- Do not place or leave any magnetisable objects (e.g. credit cards, memory cards) or electronic devices (e.g. computers, MP3 players) near the appliance, as they may be affected by its electromagnetic field.
- Never use your appliance for warming or heating the room.
-
After use, always turn off the cooking zones and the hob as described in this manual (i.e. by using the touch controls). Do not rely on the pan detection feature to turn off the cooking zones when you remove the pans.
-
Do not allow children to play with the appliance or sit, stand, or climb on it.
-
Do not store items of interest to children in cabinets above the appliance. Children climbing on the cooktop could be seriously injured.
-
Do not leave children alone or unattended in the area where the appliance is in use.
-
Children or persons with a disability which limits their ability to use the appliance should have a responsible and competent person to instruct them in its use. The instructor should be satisfied that they can use the appliance without danger to themselves or their surroundings.
-
Do not repair or replace any part of the appliance unless specifically recommended in the manual. All other servicing should be done by a qualified technician.
-
Do not use a steam cleaner to clean your hob.
-
Do not place or drop heavy objects on your hob.
-
Do not stand on your hob top.
-
Do not use pans with jagged edges or drag pans across the Induction glass surface as this can scratch the glass.
-
Do not use scourers or any other harsh abrasive cleaning agents to clean your cooktop, as these can scratch the Induction glass.
-
If the power supply cable is damaged, it must only be replaced by a qualified technician.
-
This appliance is designed for domestic use only.
-
This appliance can be used by children aged from 8 years and above and persons with reduced physical, sensory or mental capabilities or lack of experience and knowledge if they have been given supervision or instruction concerning use of the appliance in a safe way and understand the hazards involved. Children shall not play with the appliance. Cleaning and user maintenance shall not be made by children without supervision.
-
WARNING: Unattended cooking on a hob with fat or oil can be dangerous and may result in fire. NEVER try to extinguish a fire with water, but switch off the appliance and then cover flame e.g. with a lid or a fire blanket.
-
Metallic objects such as knives, forks, spoons and lids should not be placed on the hob surface since they can get hot.
-
After use, switch off the hob element by its control and do not rely on the pan detector.
-
The appliance is not intended to be operated by means of an external timer or separate remote-control system.
Congratulations on the purchase of your new Induction Hob. We recommend that you spend some time to read this Instruction / Installation Manual in order to fully understand how to install correctly and operate it.
For installation, please read the installation section.
Read all the safety instructions carefully before use and keep this Instruction / Installation Manual for future reference.
Product Overview
Top View
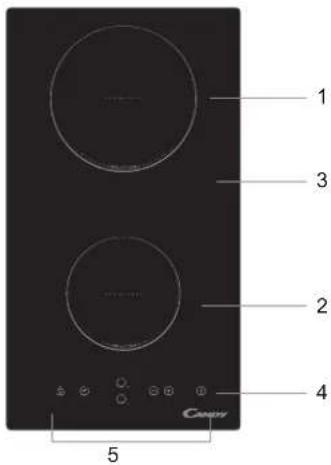
- max. 2000 W zone
- max. 1500 W zone
- Glass plate
- ON/OFF control
- Control panel
Control Panel
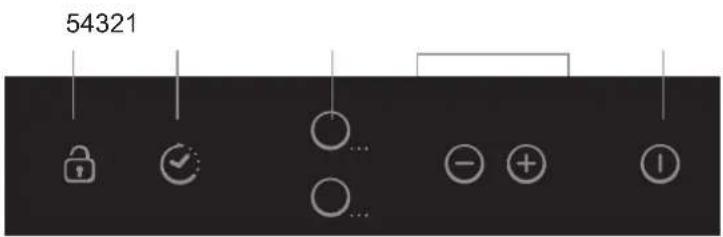
- ON/OFF control
- Power / Timer regulating controls
- Heating zone selection controls
- Timer control
- keylock control
A Word on Induction Cooking
Induction cooking is a safe, advanced, efficient, and economical cooking technology. It works by electromagnetic vibrations generating heat directly in the pan, rather than indirectly through heating the glass surface. The glass becomes hot only because the pan eventually warms it up.
iron pot
magnetic circuit ceramic glass plate induction coil induced currents
Before using your New Induction Hob
- Read this guide, taking special note of the "SafetyWarnings" section.
- Remove any protective film that may still be on your Induction hob.
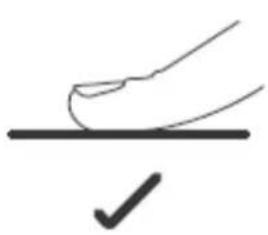
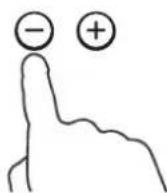
Using the Touch Controls
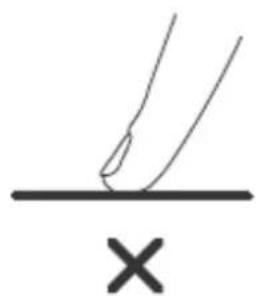
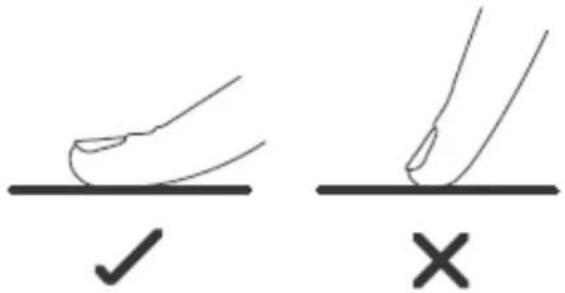
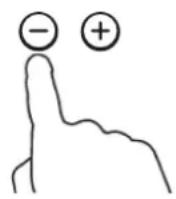
- The controls respond to touch, so you don't need to apply any pressure.
- Use the ball of your finger, not its tip.
- You will hear a beep each time a touch is registered.
- Make sure the controls are always clean, dry, and that there is no object (e.g. a utensil or a cloth) covering them. Even a thin film of water may make the controls difficult to operate.
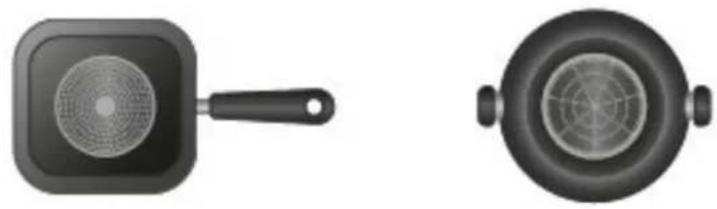
Choosing the right Cookware

-
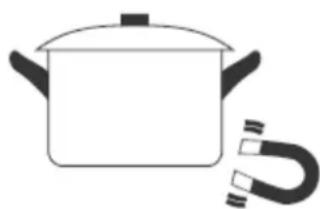
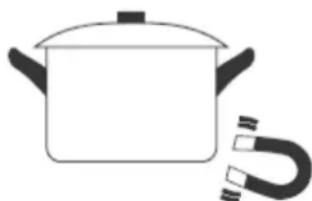
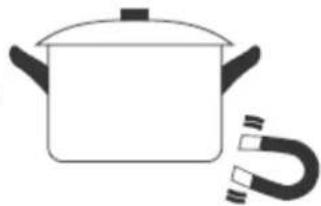
Only use cookware with a base suitable for induction cooking. Look for the induction symbol on the packaging or on the bottom of the pan.
-
You can check whether your cookware is suitable by carrying out a magnet test. Move a magnet towards the base of the pan. If it is attracted, the pan is suitable for induction.
-
If you do not have a magnet:
-
Put some water in the pan you want to check.
- If does not flash in the display and the water is heating, the pan is suitable.
- Cookware made from the following materials is not suitable: pure stainless steel, aluminium or copper without a magnetic base, glass, wood, porcelain, ceramic, and earthenware.
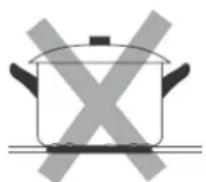
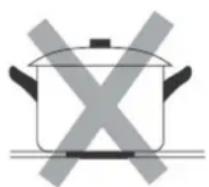
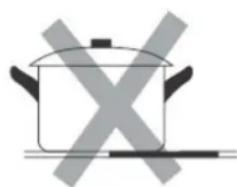
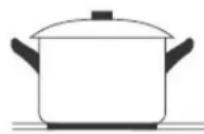
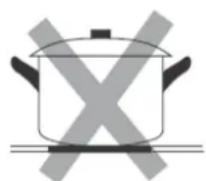
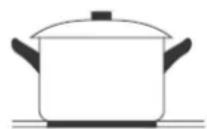
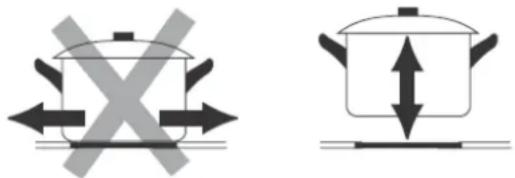
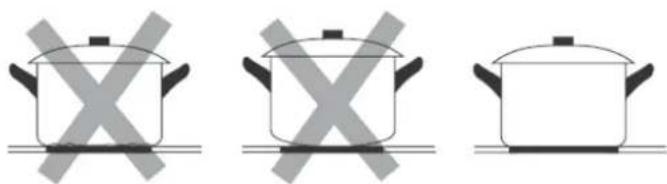
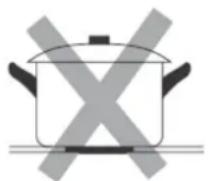
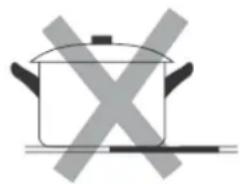
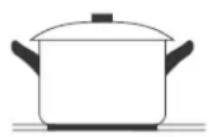
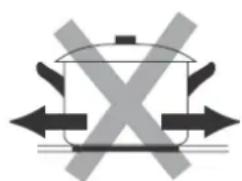
Do not use cookware with jagged edges or a curved base.
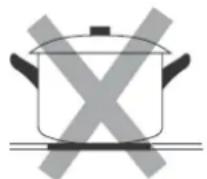
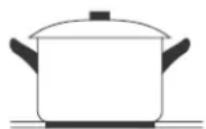
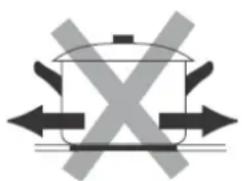
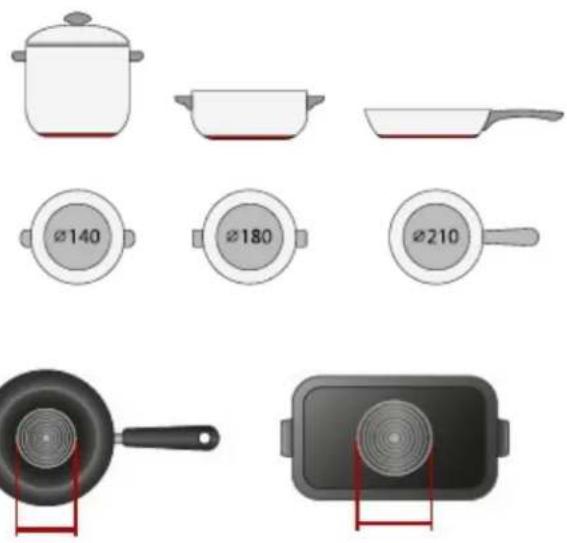
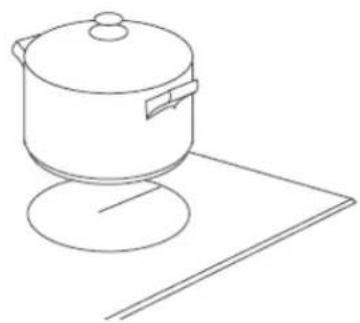
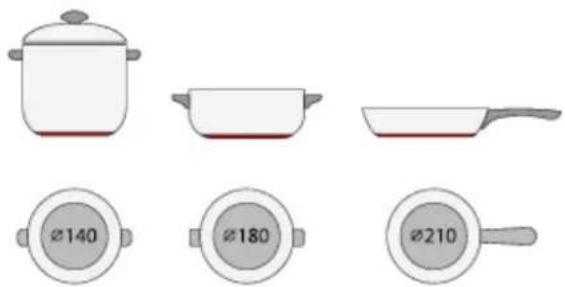
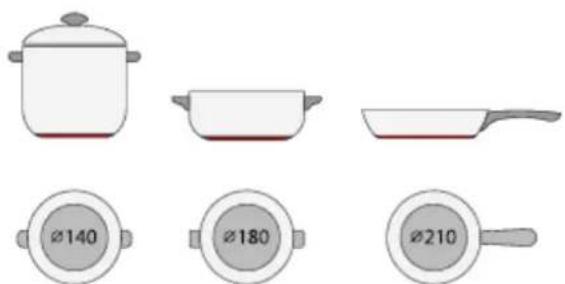
Make sure that the base of your pan is smooth, sits flat against the glass, and is the same size as the cooking zone. Use pans whose diameter is as large as the graphic of the zone selected. Using a pot a slightly wider energy will be used at its maximum efficiency. If you use smaller pot efficiency could be less than expected. Pot less than 140mm could be undetected by the hob. Always centre your pan on the cooking zone.

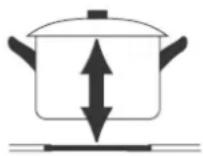
Always lift pans off the Induction hob - do not slide, or they may scratch the glass.
Using your Induction Hob
To start cooking
- Touch the ON/OFF control.
After power on, the buzzer beeps once, all displays show " - " or " - - ", indicating that the induction hob has entered the state of standby mode.

-
Place a suitable pan on the cooking zone that you wish to use.
-
Make sure the bottom of the pan and the surface of the cooking zone are clean and dry.

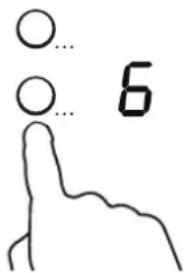
- Touching the heating zone selection control and a indicator upon the key will flash.

-
Select a heat setting by touching the - or + control.
-
If you don't choose a heat setting within 1 minute, the Induction hob will automatically switch off. You will need to start again at step 1.
- You can modify the heat setting at any time during cooking.
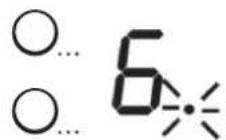
If the display flashes alternately with the heat setting
This means that:
- you have not placed a pan on the correct cooking zone or,
- the pan you're using is not suitable for induction cooking or,
- the pan is too small or not properly centered on the cooking zone.
No heating takes place unless there is a suitable pan on the cooking zone. The display will automatically turn off after 2 minutes if no suitable pan is placed on it.
When you have finished cooking
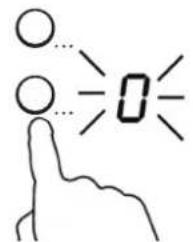
- Touching the heating zone selection control that you wish to switch off.
- Turn the cooking zone off by scrolling down to "0" or touching "-" and "+" control together. Make sure the display shows "0".

- Turn the whole cooktop off by touching the ON/OFF control.

4. Beware of hot surfaces
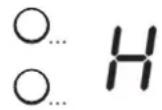
H will show which cooking zone is hot to touch. It will disappear when the surface has cooled down to a safe temperature. It can also be used as an energy saving function if you want to heat further pans, use the hotplate that is still hot.
Locking the Controls
- You can lock the controls to prevent unintended use (for example children accidentally turning the cooking zones on).
- When the controls are locked, all the controls except the ON/OFF control are disabled.
To lock the controls
Touch the keylock control. The timer indicator will show " Lo "
To unlock the controls
- Touch and hold the keylock control for a while.
- You can now start using your Induction hob.

When the hob is in the lock mode, all the controls are disable except the ON/OFF, you can always turn the induction hob off with the ON/OFF control in an emergency, but you shall unlock the hob first in the next operation.
Over-Temperature Protection
A temperature sensor equipped can monitor the temperature inside the Induction hob. When an excessive temperature is monitored, the Induction hob stops operation automatically.
Detection of Small Articles
When an unsuitable size or non-magnetic pan (e.g. aluminium), or some other small item (e.g. knife, fork, key) has been left on the hob, the zone automatically goes on to standby in 1 minute. The fan will keep cooling down the induction hob for a further 1 minute.
Auto Shutdown Protection
Auto shut down is a safety protection function for your induction hob. It shuts down automatically if ever you forget to turn off your cooking. The default working times for various power levels are shown in the below table:
| Power level | 1 | 2 | 3 | 4 | 5 | 6 | 7 | 8 | 9 |
| Default working timer (hour) | 8 | 8 | 8 | 4 | 4 | 4 | 2 | 2 | 2 |
When the pot is removed, the induction hob stops heating immediately and the hob automatically switch off after 2 minutes.

People with a heart pace maker should consult with their doctor before using this unit.
Using the Timer
You can use the timer in two different ways:
- You can use it as a minute minder. In this case, the timer will not turn any cooking zone off when the set time is up.
- You can set it to turn one cooking zone off after the set time is up.
- You can set the timer up to 99 minutes.
Using the Timer as a Minute Minder
If you are not selecting any cooking zone
- Make sure the cooktop is turned on. Note: you can use the minute minder even if you're not selecting any cooking zone.
- Touch timer control, the minder indicator starts flashing and "10" is shown on the timer display.

- Set the time by touching the - or + control of the timer.
Hint: Touch the - or +^ control of the timer once to decrease or increase by 1 minute.

Hold the “-” or “+” control of the timer to decrease or increase by 10 minutes.
If the setting time exceeds 99 minutes, the timer will automatically return to 00 minute.
- Touching the "-" and "+" together, the timer is cancelled, and the "00" will be shown on the minute display.

- When the time is set, it starts to count down immediately. The display shows the remaining time and the timer indicator flashes for 5 seconds.

- Buzzer beeps for 30 seconds and the timer indicator shows "- - " when the setting time will be finished.

Setting the timer to turn one cooking zone off
- Touch the heating zone selection control that you want to set the timer for.

- Touch timer control, the minder indicator starts flashing and "10" is shown in the timer display.

- Set the time by touching the " - " or "+" control of the timer.
Hint: Touch either the "-" or "+" control of the timer once, time decreases or increases by 1 minute. Touch and hold either the "-" or "+" control of the timer, time decreases or increases by 10 minutes.

If the setting time exceeds 99 minutes, the timer will automatically return to 00 minute.
- Touching the "-" and "+" together, the timer is cancelled, and the "00" will be shown on the minute display.

- When the time is set, it will begin to count down immediately. The display will show the remaining time and the timer indicator will flash for 5 seconds.

NOTE: The red dot next to power level indicator lights up indicating that zone is selected.
- When cooking timer expires, the corresponding cooking zone will be switched off automatically.


Other cooking zone will keep operating if they are turned on previously.
Cooking Guidelines

Take care when frying as the oil and fat heat up very quickly, particularly if you're using PowerBoost. At extremely high temperatures oil and fat will ignite spontaneously and this presents a serious fire risk.
Cooking Tips
- When food comes to the boil, reduce the temperature setting.
- Using a lid will reduce cooking times and save energy by retaining the heat.
- Minimise the amount of liquid or fat to reduce cooking times.
- Start cooking on a high setting and reduce the setting when the food has heated through.
Simmering, cooking rice
- Simmering occurs below boiling point, at around 85^ , when bubbles are just rising occasionally to the surface of the cooking liquid. It is the key to delicious soups and tender stews because the flavours develop without overcooking the food. You should also cook egg-based and flourthickened sauces below boiling point.
- Some tasks, including cooking rice by the absorption method, may require a setting higher than the lowest setting to ensure the food is co properly in the time recommended.
Searing steak
To cook juicy flavor some steaks:
- Stand the meat at room temperature for about 20 minutes before cooking.
- Heat up a heavy-based frying pan.
-
Brush both sides of the steak with oil. Drizzle a small amount of oil into the hot pan and then lower the meat onto the hot pan.
-
Turn the steak only once during cooking. The exact cooking time will depend on the thickness of the steak and how cooked you want it. Times may vary from about 2 - 8 minutes per side. Press the steak to gauge how cooked it is - the firmer it feels the more "well done" it will be.
- Leave the steak to rest on a warm plate for a few minutes to allow it to relax and become tender before serving.
For stir-frying
- Choose an induction compatible flat-based wok or a large frying pan.
- Have all the ingredients and equipment ready. Stir-frying should be quick. If cooking large quantities, cook the food in several smaller batches.
- Preheat the pan briefly and add two tablespoons of oil.
- Cook any meat first, put it aside and keep warm.
- Stir-fry the vegetables. When they are hot but still crisp, turn the cooking zone to a lower setting, return the meat to the pan and add your sauce.
- Stir the ingredients gently to make sure they are heated through.
- Serve immediately.
Heat Settings
The settings below are guidelines only. The exact setting will depend on several factors, including your cookware and the amount you are cooking. Experiment with the induction hob to find the settings that best suit you.
| Heat setting | Suitability |
| 1 - 2 | · delicate warming for small amounts of food · melting chocolate, butter, and foods that burn quickly · gentle simmering · slow warming |
| 3 - 4 | · reheating · rapid simmering · cooking rice |
| 5 - 6 | · pancakes |
| 7 - 8 | · sautéing · cooking pasta |
| 9 | · stir-frying · searing · bringing soup to the boil · boiling water |
Care and Cleaning
The settings below are guidelines only. The exact setting will depend on several factors, including your cookware and the amount you are cooking. Experiment with the hob to find the settings that best suit you.
| What? | How? | Important! |
| Everyday soiling on glass (fingerprints, marks, stains left by food or non-sugary spillovers on the glass) | 1. Switch the power to the hob off. 2. Apply a cooktop cleaner while the glass is still warm (but not hot)! 3. Rinse and wipe dry with a clean cloth or paper towel. 4. Switch the power to the cooktop back on. | ·When the power to the hob is switched off, there will be no “hot surface” indication but the cooking zone may still be hot! Take extreme care. ·Heavy-duty scourers, some nylon scourers and harsh/abrasive cleaning agents may scratch the glass. Always read the label to check if your cleaner or scourer is suitable. ·Never leave cleaning residue on the cooktop: the glass may become stained. |
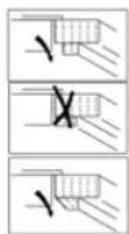
| Boilovers, melts, and hot sugary spills on the glass | Remove these immediately with a fish slice, palette knife or razor blade scraper suitable for Induction glass cooktops, but beware of hot cooking zone surfaces: 1. Switch the power to the cooktop off at the wall. 2. Hold the blade or utensil at a 30° angle and scrape the soiling or spill to a cool area of the cooktop. 3. Clean the soiling or spill up with a dish cloth or paper towel. 4. Follow steps 2 to 4 for “Everyday soiling on glass” above. | ·Remove stains left by melts and sugary food or spillovers as soon as possible. If left to cool on the glass, they may be difficult to remove or even permanently damage the glass surface. ·Cut hazard: when the safety cover is retracted, the blade in a scraper is razor-sharp. Use with extreme care and always store safely and out of reach of children. |
| Spillovers on the touch controls | 1. hob the power to the cooktop off. 2. Soak up the spill 3. Wipe the touch control area with a clean damp sponge or cloth. 4. Wipe the area completely dry with a paper towel. 5. Switch the power to the cooktop back on. | ·The hob may beep and turn itself off, and the touch controls may not function while there is liquid on them. Make sure you wipe the touch control area dry before turning the hob back on. |
Hints and Tips
| Problem | Possible causes | What to do |
| The induction hob cannot be turned on. | No power. | Make sure the induction hob is connected to the power supply and that it is switched on. Check whether there is a power outage in your home or area. If you've checked everything and the problem persists, call a qualified technician. |
| The touch controls are unresponsive. | The controls are locked. Unlock | the controls. See section “Using your induction cooktop” for instructions. |
| The touch controls are difficult to operate. | There may be a slight film of water over the controls or you may be using the tip of your finger when touching the controls. | Make sure the touch control area is dry and use the ball of your finger when touching the controls. |
| The glass is being scratched. | Rough-edged cookware. Unsuitable, abrasive scouser or cleaning products being used. | Use cookware with flat and smooth bases. See “Choosing the right cookware”. See “Care and cleaning”. |
| Some pans make crackling or clicking noises. | This may be caused by the construction of your cookware (layers of different metals vibrating differently). | This is normal for cookware and does not indicate a fault. |
| The induction hob makes a low humming noise when used on a high heat setting. | This is caused by the technology of induction cooking. | This is normal, but the noise should quieten down or disappear completely when you decrease the heat setting. |
| Fan noise coming from the induction hob. | A cooling fan built into your induction hob has come on to prevent the electronics from overheating. It may continue to run even after you've turned the induction hob off. | This is normal and needs no action. Do not switch the power to the induction hob off at the wall while the fan is running. |
| Pans do not become hot and U appears in the display. | The induction hob cannot detect the pan because it is not suitable for induction cooking. The induction hob cannot detect the pan because it is too small for the cooking zone or not properly centred on it. | Use cookware suitable for induction cooking. See section „Choosing the right cookware". Centre the pan and make sure that its base matches the size of the cooking zone. |
| The induction hob or a cooking zone has turned itself off unexpectedly, a tone sounds and an error code is displayed (typically alternating with one or two digits in the cooking timer display). | Technical fault. | Please note down the error letters and numbers, switch the power to the induction hob off at the wall, and contact a qualified technician. |
Never attempt to disassemble the unit by yourself.
Failure Display and Inspection
If an abnormality comes up, the induction hob will enter the protective state automatically and display corresponding protective codes:
| Problem Possible causes What to do | ||
| F3-F8 Temperature sensor failure | Please contact the supplier. | |
| F9-FE | Temperature sensor of the IGBT failure. | Please contact the supplier. |
| E1/E2 | Abnormal supply voltage Please | inspect whether power supply is normal. Power on after the power supply is normal. |
| E3/E4 Abnormal temperature | Please inspect the pot. | |
| E5/E6 Bad induction hob heat radiation | Please restart after the induction hob cools down. | |
The above are the judgment and inspection of common failures. Please do not disassemble the unit by yourself to avoid any danger and damages to the induction hob.
Technical Specification
| Cooking Hob | CDIC 30 |
| Cooking Zones | 2 Zones |
| Supply Voltage | 220-240V~ 50/60Hz |
| Installed Electric Power | 3500 W |
| Product Size L×W×H(mm) | 288X520X56 |
| Building-in Dimensions A×B (mm) | 268X500 |
Weight and Dimensions are approximate. Because we continually strive to improve our products we may change specifications and designs without prior notice.
Installation
Selection of installation equipment
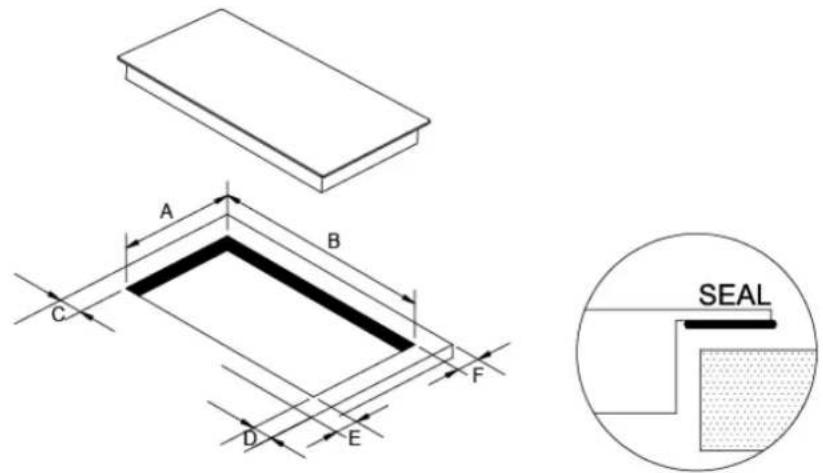
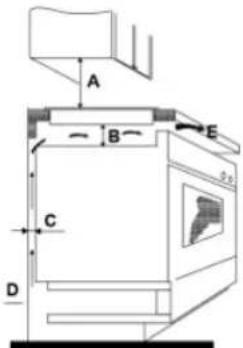
Cut out the work surface according to the sizes shown in the drawing.
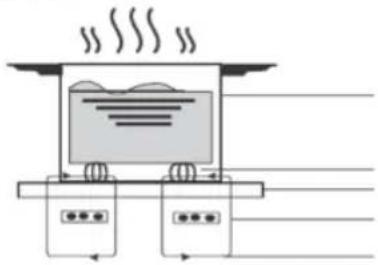
For the purpose of installation and use, a minimum of 5cm space shall be preserved around the hole.
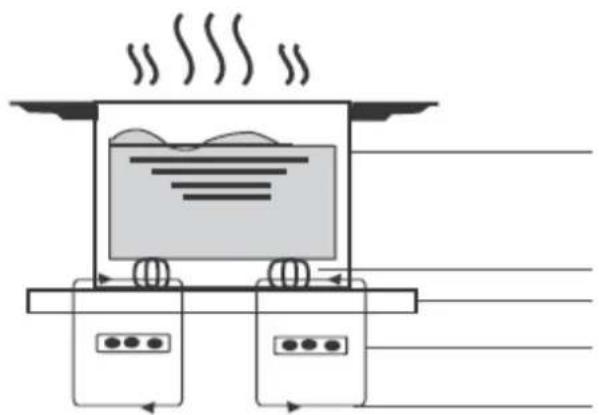
Be sure the thickness of the work surface is at least 30mm . Please select heat-resistant work surface material to avoid larger deformation caused by the heat radiation from the hotplate. As shown below:
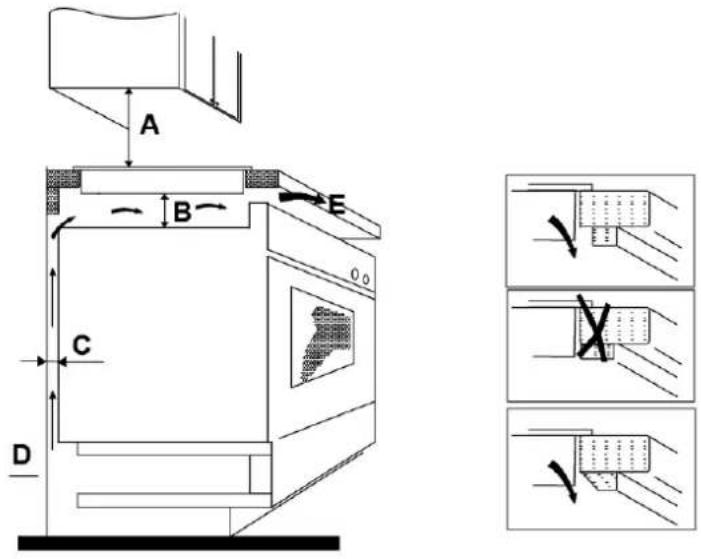
Under any circumstances, make sure the Induction cooker hob is well ventilated and the air inlet and outlet are not blocked. Ensure the Induction cooker hob is in good work state. As shown below

Note: The safety distance between the hotplate and the cupboard above the hotplate should be at least 760mm.
Before you install the hob, make sure that
- the work surface is square and level, and no structural members interfere with space requirements
- the work surface is made of a heat-resistant material
- if the hob is installed above an oven, the oven has a built-in cooling fan
- the installation will comply with all clearance requirements and applicable standards and regulations
-
a suitable isolating switch providing full disconnection from the mains power supply is incorporated in the permanent wiring, mounted and positioned to comply with the local wiring rules and regulations The isolating switch must be of an approved type and provide a 3mm air gap contact separation in all poles (or in all active [phase] conductors if the local wiring rules allow for this variation of the requirements).
-
the isolating switch will be easily accessible to the customer with the hob installed
- you consult local building authorities and by-laws if in doubt regarding installation
- you use heat-resistant and easy-to-clean finishes (such as ceramic tiles) for the wall surfaces surrounding the hob.
When you have installed the hob, make sure that
- the power supply cable is not accessible through cupboard doors or drawers
- there is adequate flow of fresh air from outside the cabinetry to the base of the hob
- if the hob is installed above a drawer or cupboard space, a thermal protection barrier is installed below the base of the hob
- the isolating switch is easily accessible by the customer.
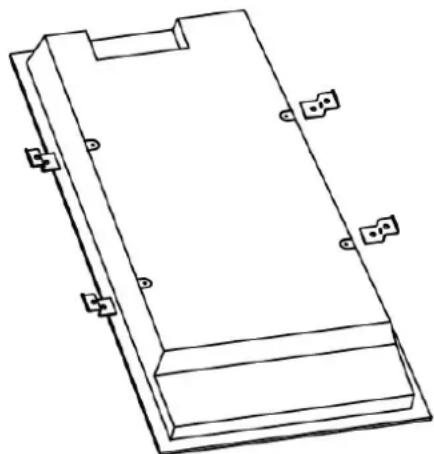
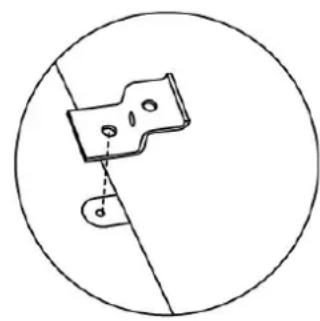
Before locating the fixing brackets
The unit should be placed on a stable, smooth surface (use the packaging). Do not apply force onto the controls protruding from the hob.
Adjusting the bracket position
Fix the hob on the work surface by screw 4 brackets on the bottom of hob (see picture) after installation.
Adjust the bracket position to suit for different table top thickness.
Cautions
-
The induction hotplate must be installed by qualified personnel or technicians. We have professionals at your service. Please never conduct the operation by yourself.
-
The hob will not be installed directly above a dishwasher, fridge, freezer, washing machine or clothes dryer, as the humidity may damage the hob electronics.
- The induction hotplate shall be installed such that better heat radiation can be ensured to enhance its reliability.
- The wall and induced heating zone above the table surface shall withstand heat.
- To avoid any damage, the sandwich layer and adhesive must be resistant to heat.
Connecting the hob to the mains power supply

This hob must be connected to the mains power supply only by a suitably qualified person.
Before connecting the hob to the mains power supply, check that:
- the domestic wiring system is suitable for the power drawn by the hob
- the voltage corresponds to the value given in the rating plate
- the power supply cable sections can withstand the load specified on the rating plate. To connect the hob to the mains power supply, do not use adapters, reducers, or branching devices, as they can cause overheating and fire.
The power supply cable must not touch any hot parts and must be positioned so that its temperature will not exceed 75^ at any point.

Check with an electrician whether the domestic wiring system is suitable without alterations. Any alterations must only be made by a qualified electrician.
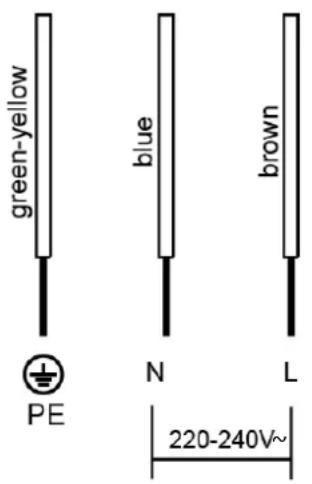
The power supply should be connected in compliance with the relevant standard or a single-pole circuit breaker. The method of connection is shown below.
EN-22
- If the cable is damaged or to be replaced, the operation must be carried out the by after-sale agent with dedicated tools to avoid any accidents.
- If the appliance is being connected directly to the mains an omnipolar circuit-breaker must be installed with a minimum opening of 3mm between contacts.
- The installer must ensure that the correct electrical connection has been made and that it is compliant with safety regulations.
- The cable must not be bent or compressed.
- The cable must be checked regularly and replaced by authorised technicians only.
- The yellow/green wire of the power supply cable must be connected to the earth of both power supply and appliance terminals.
- The manufacturer cannot be held responsible for any accidents resulting from the use of an appliance which is not connected to earth, or with faulty earth connection continuity.
- If the appliance has a socket outlet, it must be installed so that the socket outlet is accessible.
Selection of cooking vessels

Iron oil frying

Stainless steel

Iron pan Iron kettle


Enamel inless steel kettle

Enamel cooking utesil

Iron plate
You may have a number of different cooking vessels
- This induction hob can identify a variety of cooking vessels, which you can test by one of the following methods:
Place the vessel on the cooking zone. If the corresponding cooking zone displays a power level, then the vessel is suitable. If "U" flashes, then the vessel is not suitable for use with the induction hob.
- Hold a magnet to the vessel. If the magnet is attracted to the vessel is suitable for use with the induction hob.
NB: The base of the vessel must contain magnetic material.
It must have flat bottom with a diameter according to the table 1 below.
-
Use only ferromagnetic cookwares made from enameled steel, cast iron or stainless steel but compatible with induction
-
Use pans whose diameter of the ferromagnetic area (base of the pan) is in the range of dimensions in the table below. (Table 1)
-
If you use smaller pots, performance could be affected
- If you use pot with a diameter smaller than the one indicated in the table 1, pots may not be detected
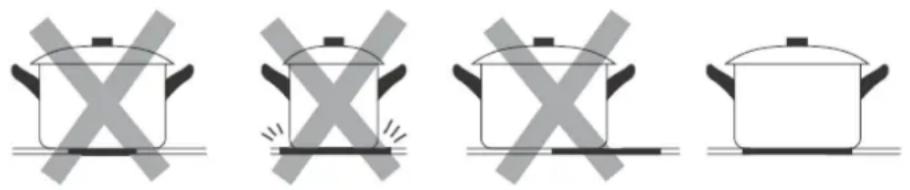
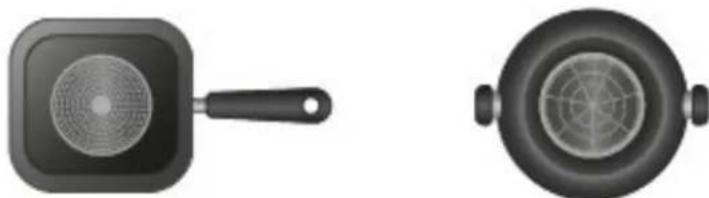
According to the dimension of the zone you can use pots of different diameters as picture below:
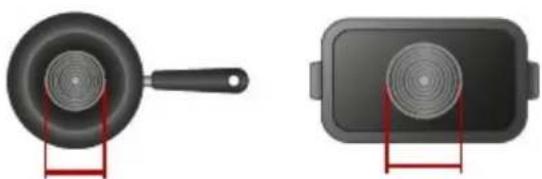
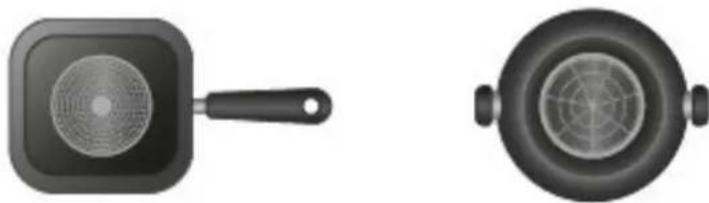
-
If the ferromagnetic part covers only partially the base of the pan, only the ferromagnetic area will heat up, the rest of the base may not heat up a sufficient temperature for cooking.
-
If the ferromagnetic area is not homogeneous, but presents others material such as aluminum this may affect the heating up and the pan detection.
If the base of the pan is similar to the pictures below the pan could be not detected.
| The base diameter of induction cookware | ||
| Cooking zone | Minimum Maximum | |
| 1 140 | 180 | |
| 2 | 120 | 140 |
The above may vary according to the size of the pan and the material it is made from.

DISPOSAL: Do not dispose this product as unsorted municipal waste. Collection of such waste separately for special treatment is necessary.
This appliance is labeled in compliance with European directive 2012/19/EC for Waste Electrical and Electronic Equipment (WEEE). By ensuring that this appliance is disposed of correctly, you will help prevent any possible damage to the environment and to human health, which might otherwise be caused if it were disposed of in the wrong way.
The symbol on the product indicates that it may not be treated as normal household waste. It should be taken to a collection point for the recycling of electrical and electronic goods.
This appliance requires specialist waste disposal. For further information regarding the treatment, recover and recycling of this product please contact your local council, your household waste disposal service, or the shop where you purchased it.
For more detailed information about treatment, recovery and recycling of this product, please contact your local city office, your household waste disposal service or the shop where you purchased the product.
| The base diameter of induction cookware | ||
| Cooking zone | Minimum Maximum | |
| 1 140 | 180 | |
| 2 | 120 | 140 |
The above may vary according to the size of the pan and the material it is made from.
| The base diameter of induction cookware | ||
| Cooking zone | Minimum Maximum | |
| 1 140 | 180 | |
| 2 | 120 | 140 |
The above may vary according to the size of the pan and the material it is made from.

| The base diameter of induction cookware | ||
| Cooking zone | Minimum Maximum | |
| 1 140 | 180 | |
| 2 | 120 | 140 |
The above may vary according to the size of the pan and the material it is made from.

Selecionar as panelas corretas

| The base diameter of induction cookware | ||
| Cooking zone | Minimum Maximum | |
| 1 140 | 180 | |
| 2 | 120 | 140 |
The above may vary according to the size of the pan and the material it is made from.

Ooyniec yia to Mayipepa

PooEeKataToTnyaviaqa,EniOnToAaiKaiToLinocthetapaivovtai noLu ypnyopa,
| The base diameter of induction cookware | ||
| Cooking zone | Minimum Maximum | |
| 1 140 | 180 | |
| 2 | 120 | 140 |
The above may vary according to the size of the pan and the material it is made from.
Autn n ouokeu n epe i onuavon o uqwva u Tnv EupwnaiK Odyia 2012/19/EK yia ta AnoBAnTa Hktpko Kai Hktpovikou Egonlaou (AHHE). Me Tnv eaoaipalon otui autn n ouokun th a anoppiOei owoT, oumuAaLTe OTNv anotponn evdxoeVnc Baaoc oTO npiAalov kai Tnv avpwniv uyia, oi onoic th a mnpouovdeltaopetiká va npoknOuv av ixvivian ooppiu nE AooC TPO.
To oμβoλo εnaw ΘO npoiov onμaivei OTI δev μnpεi va avtμετωπιοτε i onw, ta koivα oikiaka anoppiμata. Θa npénει va μεtaφερθει σε onμεio ouλloync γia Tnv avakukλωση Tωv ηεκτρικων kai nεκτρονικων npoiovTωv.
H oukeun autn npenei va anoppiqthetai ano nTaipia dia0eoc anoBtov. Ia nepiootepc nInpoopoe c nou apopouv Tnv enEepyaia, npiauAloykai avakukwon auou Tou npoiovtoc,napakaoue ENIKOIVWVOTe e To oac, Tny unnpesia anokoiOic oikiaKw anoppmuatow nTo kataoTma ano to onoio ayopaatae to npoiov.
ANOPPIH: To npoiov auto npenei va anoppiqei a i ta aotiká anoβλnta. H oulloyn Twv anoβλntwv autow p i o t a yia eidikn eneEepyacia ivai anapaittn.
Tia nepioootepc, aeIoupeiec oxetik a Tnv
eEepyaia, nepiauAloyn kai avakukw an autou
tou npoiovtoc,napakaouue nikoivwnote e To
ypaeio tou dnou oac, tnv unnpoeia anokoiohc
oikiaow anoppimuatw v n To kataoTma an to
onoio ayopaaTe to npoiov.
| The base diameter of induction cookware | ||
| Cooking zone | Minimum Maximum | |
| 1 140 | 180 | |
| 2 | 120 | 140 |
The above may vary according to the size of the pan and the material it is made from.
Green-yellow = Zielony- zoIty
Blue = Niebieski
Brown = Brazowy
| The base diameter of induction cookware | ||
| Cooking zone | Minimum Maximum | |
| 1 140 | 180 | |
| 2 | 120 | 140 |
The above may vary according to the size of the pan and the material it is made from.

| The base diameter of induction cookware | ||
| Cooking zone | Minimum Maximum | |
| 1 140 | 180 | |
| 2 | 120 | 140 |
The above may vary according to the size of the pan and the material it is made from.


Onachoct OT TOKOB yap
- Праздддддддддддддддддддддддддддддддддддддддддддддддддддддддддддддддддддддддддддддддддддддддддддддддддддд徳а рбота пл поорьжka по урда, Го ИЗКЛючete OT eLEKТрпческata Мржka.
- Cbbp3BaHeTo KbM n3npaBHa 3a3eMaBaXHo n 3aDbJxKtEnHO.
- Помень Домашнае[elektpruceka Мржа, Тразва на се ИЗвpbwBaTcamoOT KBaHnФицпан elektpoTeXнК.
- Hecna3BaHe Ha Te3n yka3aHnma MoKe Da DoBeDe Do TOKOB ydap nIcMbpt.
BaxHn HNcTpkyKznn 3a 6e3oNaCHOCT
- Празд моHTирATE nIи n3ПОЛЗВaTe T03n уpeД пpoчeTeTe Te3n INHCTpyKcNn BHNMaTeJHo.
- ПО BCЯКо Врeme Вьрху KOTLOHa MORaT Da ce NOCTaBrt CaMo HeropIMMaTePnaJIи ИИnpOdyKТИ.
- MoЯ, npeioctaBeTe Ta3n INHΦopMaця Na pa3noJoxeHne Ha liuTeO, OTROBOPHO 3a INHCTaIIpaHe Ha ypeDa, Tb' KaTO TOBa MoKe Da HAmaIb BaWnte pa3XoDn 3a MOHTaK.
C ceI n36yRbAHe Ha onaCHOCT, To3n ypeI Tp8Ba Da 6bJe MOHTnpAH B CbOTBcTCTBne C Te3N INHcTpPyKcIIN 3a MOHTaJ.
To3n ypeI Tp86Ba Da 6bJe npaBnH0 MOHTnpaH n 3a3eMeH cAmO OT IInCe C NOxDyua KBaJIuΦnKaun.
To3n ypei Tp86Ba Da 6bJe CBbp3aH No CXeMa BkIIOUyBaua
PpeKbcBau, KOITo N03BOJRA HaNbIHO OTdEJIHe Ha ypeHa ot en.
3axpaHbaHe. - HenpaBnIHO MOHTnpaHe Ha ypeDa BODaT Do aHyIpaHe Ha rapaHcNraTa Ha ypeDa N ICKObe 3a OTROBOPHOCT.
EkCnI OaTaHn H IOJnpbKka
OnachocOT TOKOB yIap
He roBeTe Ha cUyEn IIn IOBpeDeH rOtBapcKn IIOr. Ako NOBbPxHOCTTa Ha IILOTa ce cUyN IIn HanyKa, BeDHaRa n3KJIuOye TyePa OTeI. 3axpaHbAHe (OT KOHTaKTa) n Ce CBbPjXeTe C KBaIInΦnCupaH TexHnK.
- Изключete урEDA ot KOHTakata npn NOuchTbaHe nIIN NOДдрьжka.
- HecnzaBaHe Ha Te3n yka3aHnA MoKe Da DoBeDe Do TOKOB ydap nIcMbpt.
Onachoc3a 3paBeTo
To3n ypei OTROBaprHa cTaHdApTnte 3a eJekTpomarHeTuHa 6e30napocT.
Bbnpekn TOBa, Xopa c KapdnoIolrHuHn nec MeKbpn nIeKtpnueckn mPnlaHTn (KaTO nHCylnHOBn nOMnn) Tp6Ba da ce KOHCyItnpaT C TexHna JnueH Jekap nn C npOn3BOAnTeJHa CboTBETnraHmPnAHT, PpeN Da n3NoJ3BaT To3n UpeJ. 3a da ca cnryphn, Ye mPnlaHTnTe nM Hma Da 6bDaT NOBInHn OT eJeKtpomarHHTHOTo nOle Ha UpeJa.
He cna3BaHe Ha Te3n CbBETN MOKe Da IOBeDe DO CmbpT.
OnacHOCT OT rpeuia NOBbpxHOCT
- ПО Врeme на ИЗПОЛЗВане OTКрпTNЧаСТи OT урEDA ce HARРЯВaTdoCTaTbUHо, Уд.a ПpeДИЗВИКaТ ИЗrapЯHe.
He nO3B0JIaBaIte yactn OT BaIeTo TЯNo, oBleKIO nII npyI npEiMeTn, OCBeH IOxOJaUcNbOBe 3a rOTBeHe, Da ce dOnnpaT Do INHdYKcUHOHHOTo CTbKlO, DoaTO He ce e OxlaIINO.
BHHMaHHe: HAmarHHTBaEM MeTaHN IpeDMeTn NO Bac, OKe Da Ce HarpeT, aKO Ca B 6JIIN3OCT Do NIOta 3a rOTBeHe. 3NaTHN INIcpe6bprHn 6JxKUyTa He ce NOBInraBaT. - Пазete.DeцаТаHaДалЧOTуpeДa.
- Дрьжки на тенджери може за се harpeят пекално за могат за бдат дokocbaан. Проветe, далл дрьжкite He ca habдругвКлюецни зони за rotbehe. He поЗволяваite Ha decaда ппат дрькite.
- Hecna3BaHe Ha Te3n yka3aHnma MoKe Da DoBeDe Do n3rapaHnna onapBaHnna.
OnachocT OT Nopra3BaHe
Korato e cBaIeH npedna3HnKa nak Ha cTbprAJa 3a nIoT, octpneTo I e OTkPnto. N3noJ3BaITe Jn3KJIuHTeJHo BHNMaTeJHo n CNeD TOBa JcBxpaHaBaIte Ha HeIOCTbNHO n 6e3ONaCHO 3a Deua.
- HeBnMaTeJIHo n3NoJ3BaHe MoKe Da IOBeJe Do HapaHЯBaHe n nopra3BaHn.
Baxhni nHctpyKznn 3a 6e3oNaCHOCT
- Прп работа На плota, НИКОТа He ro octabrayte 6e3 NaДзор.
ИЗвирая На Teчноct BODЯТ Do образувае На дим И Ma3ни NeTHa, KОNTO MORAT Дa ce 3anajT. - Hkora He n3noJ3BaIte ypeJa 3a pa6oTHa NOBbpxHocT nIIMyCTO 3a cbxpaHeHne.
- HnKora He octabraye npedmetn nIIN nocyda Bbpxy nloTa.
He nocTabaIte nn octabTne HamaHHTBaemn npedMeTN (HaNP. KpeiHTn KaTn, Kaptn NaMeT) nn eJeKtpoHHu yCTpoiCTBa (HaNP. KOMNtprn, MP3 ycTPOiCTBa) B 6n30cT do ypeDa, Tb' KaTo Te MoarTa Da 6bDat NOBnAHH OT HeROBOTO eJeKTpomarHHTHO NOIe. - HnKora He n3noJ3BaIte ypeDa 3a 3aToJnHe nJn 3aRpaBHe Ha NOMEuEHNeto.
CleE ekCnoJataaBnHaRn n3KJIuOyBaIte pIoTa, KaKTo e OnilcaHo B Te3n INCTpyKcun (Hanp. Upe3 n3NoJ3BaHe Ha ceH3OpHIne 6yToH). He pa3uHTaTHe Ha ceH3Opa 3a HaniUne Ha cBd BbPxy 3oHIne 3a RotBeHe Da n3KJIuOuN 30HInTe CJeD KaTO OTCTpaHIne CbDa OT pIoTa.
He nO3B0JbAaTe Ha deca Da cn ngpaT cypeDa nn da cyaT, CToT nn KaUBaT Bbpxy Hero.
He cbxpaHraBaIte npedMeTn npedCTaBlaBaUu INHTepec 3a Deua, B ShkaΦOBeTe HAD rotBapcKn PLOT. Deua nokaTePbAkn Ce Bbpxy PLOTa MoKe Da cepNo3Ho Da ce HapaHrT.
He octabraye decaTa camn nnn 6e3 na3Op B paOnHa Ha pa6oTeu nnOT. - Deça илхopa c yBpeJdHnЯ KOnTO orpaHnUaBaT texHnTe cnoc6noCTn Da n3NoJ3BaT nIoTa Tpr6Ba Da 6bDaT nHCTpyKtnpaHn OT OTROBOpEN i KOMNeTeHTeH YOBek, KoITo Da rN HAnbCTBa N obuchABA B n3NoJ3BaHeTNO Ha ypeDa. INcTpyKTopbT Tpr6Ba Da ce yBepi, Ye Te MoRaT Da n3NoJ3BaT ypeDa 6e3 onaChOcT 3a ce6e cn iIIN OKoJHnTe.
He pemontpaTe nIIN noJeHnTe yactn OT ypeDa ocBeH aKO n3pnuHo He e OnncAo B HnCTpyKunTe. Bcnukn cepBn3Hn DeHocTn Tp86Ba Da ce n3BbPWBaT OT KBaJInΦnCupan CneuNaJInCT.
He n3noJ3BaIte napoctpyka 3a nouNCtBaHe Ha ypeJa.
He nocTabaIte nn n3nyckaIte TeKKn npedMeTn Bbpxy nloTa.
He cToIe Bbpxy Baunia nIoT 3a rotBeHe.
He n3no3BaIte cBdoBe C octpn,Ha3b6eHn pb6OBe nIi He Ipb3raIte cbIOBE NO INdYKcNOHHaTa CTbKJIeHa NOBbpXHOCT,TbN KaTO TOBa MoKe Da HaDpaCKa CTbKlOTO. - Ako 3axpaBauJnKa6eHa ypea e nobpeJe, TOn Tp8Ba Da 6bDe 3ameHeN caMo OT nOxDxOJaIoo KBaJIuΦnIupaH CneUaJIInCT.
- YpeDbTe npedHa3HaueH 3a n3noJ3BaHe B 6ntOBn ycIOBn I noO6Hn npiloxeHn, KaTO: -paOHn 3a KyxHeHcKn nepcoHaJ B
MaRa3HH, OΦnCn I Dpyrpa6oHn Cpei; -ΦepMn; -OT KIneHTn Ha XOTeJI, MToJI N Dpyr BnOBe JxJINuHn Cpei; -NOMeUeHn 3a cnaHe n 3aKycKa.
To3n ypeJ moKe Da ce n3noJ3Ba OT Deca Ha n no-roJemn ot 8
TODHHN IOT Xopa C NCNXUHN, CEH3NTNBH N YMCTBENH
YbpeJdaHnna NN C Lnnca Ha ONIT N 3HaHnra 3a H3noJ3BaHe Ha
ypeDa, aKO ca NOd Ha6JIoJeHne nn Ca NHCTpyKTIpaHn 3a pa6Ota c
ypeDa n ca B cbCToJHne da pa36epaT Bb3MOxHnTe ONaCHOCTn npi
NoJ3BaHeTO My. Deata He Tp8Ba Da cn ngparT C ypeDa.
IOnuCTBaHe n PoJdpBjKka Ha ypeDa He Tp8Ba Da ce n3BbPswBa OT
Deca, 6e3 Da 6bDat Ha6JIODaBAHN.
- ПЕДУПЕЖDEHNE:ГOTBEHe Ha KuxHeNcKnЯ ПLOT C OJINo IIn Ma3HnHa, 6e3 NaI3Op MOnKe Da 6bIe OnaCHO n Da DOBeDe Do Bb3HnKBaHe Ha NoXap. HNKOΓA He ce OINTBaITe Da n3rAcnte NoXap C BODa, a N3KJIIOUte UpeDa n POKPnIte PnAmbCITe HAnp. C KaNaK IIN ODeaLo pOToN B NOxap.
- MetaJIHn npEIMeTn, KaTo HOXOBe, BUNuN, NbJxUuN iKaNaU, He TpI6Ba Da ce NoCTaBrt BbPxy PLOTa, TbN KaTo MoKe Da ce HArpeT.
CleE ekCnIooatau, n3KJIIOUBAIte pIoTa OT 6yToHa, He pa3uHTaIe He ceH3Opa 3a HAnuYe Ha CbD.
- YpeiT He e npEHa3HaueH 3a IOn3BaHe C BbHseH TaMep Nn OTdJIHa CNCTema 3a DnCTaHcIOHHO ynpaBJeHne.
No3dpabHeHna 3a 3aKnyBaHeTo Ha Baunr HOB NHyKcnoHeH pIOT.
IpenopbUbme Bn Da OTdeJIte MaMKo BpeMe, 3a Da npOyeTe Te3N HnCTpyKcnn 3a ekCnloatau/ MoNTax C ceI HanbJHo da HayuHr, KaK npabInHO da rO MOHTnpaTe n N3NoJ3BaTe.
3a MOHTaxa, MoIa 06bPheTe ce KbM yacTTa ONNCBaUa MOHTaX.
IpoyeTe BnMaTeJIHO BCnUKN HnCTpyKcN 3a 6e30nacHocT, npeNi ekCnloatauHa ypeDa N 3ana3eTe Te3N HnCTpNKcN 3a ekCnloatau/MoHTax 3a cnpabKn B 6bndeJe.
I36op Ha npabniln CbdoBe 3a roTbeHe

-
I3noJ3BaIte cAmO cbIOBe C OCHOBa NODXODJa 3a INHdyKcNHO ROTBeHe. IotbpcTe CmBOJbT 3a INHdyKcNHa ONAKOBKaTa NII Ha OCHOBAta Ha cbda.
-
Moxete Da npOBepHe, daJIu daJeH cbIe eoXoJaU, KaTo n3BbPwHTe TcT c MaHHT. Do6nKTe MaHHT do OCHOBaTa Ha cbJa. Ako ro npuBnua, 3Nau cbDbTe eoXoJaU 3a NHdyKun.
- Ako HЯMate HaJIuYeH MaRHT:
- NocabeTe MaNo KOInueCTBO BODa B Cbda, KOInTo ncaTe da npo6BaTe.
- Ako He Mira Ha duCnpeu BODaTa ce 3aTOnJI, TOBa O3Haayaba, Ye CbDbTe noDxOJaI.
He ca nOxOaIcBIOBe n3pa6oTeHn OT cIeHNTE MaTePnaJI: YIcTa HepBXJaema CTOMaHa, anymHH nn Mei 6e3 MaHHTHa OCHOBa, CTbKIO, IbpBO, NOpueHa, Kepamika n KepamuHn n3dJIIn.
He n3noJ3BaIte cBdBe c Ha3b6eHn pb6OBe nn n3BnTo IbHO.

YBepTe ce, ye ochOBaTa Ha BaShn CbD e rJaKa, CTOn paBHomepHo Bbpy CTbKlOTo I e CbC CbSInpa3Mep, KaTO 30HaTa 3a roTBeHe. N3NoJ3BaIe TcBIOBe ChIto dNaMeTbp Ha OCHOBaTa e rJAM KOJIKOTo rpaΦnHnK KpbI Ha 30HaTa 3a roTBeHe. N3NoJ3BaHe Ha MaJIKO No-WhPOK CbD Ie Ce N3NoJ3Ba MaKcImaJIHata eΦeKTINBHOCT Ha eHeprna. Ako N3NoJ3BaTe NO-MaJIbK CbD eΦeKTINBHOCT Ta MoKe Da 6bDe IIO-MaJIka OT OuaKbaHata. CbD c DnAmEtbp NO-MaJIbK 140 mm MoKe Da He 6bDe 3aceuH ONIota. BnHaRn ZeHTpnpaIte BaShn CbD Bbpxy 3OHATA 3a roTBeHe.
BnHaR BnIraTe cBIOBeTe OT nIoTa - He rN nIb3raIe, Taka ige HaIpaKaTe NOBbpxHocTtHa ypeDa.
EksploatazaHa BaShna HndyKcnoHnPLOT
3a da 3anoyheTe rotbeHe
1.Дokochete 6yToH ON/OFF/BKJ/N3KJ.
CneB KJIIOUbaHe, CyBa ce eINHnueH 3ByKOB CnHaJ, BcNcKn DnCpIe NOKa3BaT " - " nII " - - ",
NOKa3BaKn, Ye INHdYKcUHOHHnA PLOT e BpeXm "B rOTOBHOCT".

-
NocTaBete noxOJaS CbI 3a roTBeHe Bbpxy 30HaTa, KOrTo JeJaTe Da n3nOJ3BaTe.
-
YBepTe ce, Ye OCHOBaa Ha Cbda N NOBbpXHOCTTa Ha 30HaTa 3a ROBeHe ca YnCTn N CyXn.
3.ДOKOCBAйКи 6уToHa 3a упраВлени Ha 30Hata 3a roTBeHe И ИнДИКaTOрьТdo 6уToHa 3aNoчБа DA MИra.
4.Изберете habстpoикиЗа награванe урз 6утон "-"inn"+"".
- Ako do 1 MInHyTa He n36epete cTepeH Ha HarpBaHe, INdYKUHOHHa PLOT aBtOMaTnHc Ce n3KJIouBa. Ue Tp86Ba Da 3aNouHeTe OTHOBO OT CTbNka 1.

- ПО BCЯКО Врeme Ha rotbeHeto MoXeTe Da npOMeHrTe CTeNTa Ha HarpBaHe.
Ako Ha dincnpie Mna, peyuBaikn ce c hactpoKaTa 3a HarpBaHe
Toba 03haqaba, ye:
He cTe nOCTaBnIIN CbD Bbpxy 30HaTa 3a rotBeHe nn,
- CbIbT, KOnTO n3NoJ3BaTe He e NOxOJaU 3a INHdyKcIOHHO FOTBeHe IJI,
- CbIbT e TBbpDe MaJIbK IIN He e cIeHTpnpaH npaBnIHHO Ha 3OHaTa 3a rotBeHe.
He 3aNoUba HarpBaHe,doKaTo He NoCTaBnTe NODXODAa CbD BbXY 30HaTa 3a roTBeHe. Ako He Cte NOCTaBnI INoXODAa CbD, CneI 2 MNHyTN DnCnJIeT aBTOMaTuHc Ce N3KJIIOuBA.
Korato 3aBbPnTe rOTBeHe
1.До KOCHeTe 3OHaTa Ha HarpЯBaHe, KOrTo NCKaTe Da N3KJIIOUHTe.

- Изклоче зона за говке, като hamалпесенпес do " 0 " и Като дokochete ednoBpeMeHHO 6yToHn "-"и "+". YbepTe ce, чсдпгя поka3Ba "0".

Ako He n36epeTe 3oHa 3a rotBeHe
- YbepeTe ce, ye nIota 3a roTBeHe e BkJIoueH.
3a6eJexka: MoKTe Da n3noJI3BaTe 6pOJa, dprn da He cTe n36paIi 30Ha 3a rotBeHe.
- До кочete 6уToHa 3a упаВлелие Ha taMepa, ИндikatopbT 3a BpeMe 3anOuBa da mira n "10" ce noka3Ba Ha dinCnIe 3a BpeMe.
- H actpoIte TaMepa Upe3 DOKOCBaHe Ha 6yToH NIN "
CbBET:ДOKOCHTe 6yToH"-"ил"+"Ha TaIMepa


BéHbK, 3a dHaMaJInte nIyBéJIuNTe c 1 MInHyTa.
3aApbXTe 6yToH "-" nIn "+ Ha TaMepa, 3a da HamaIte nn yBEnnUte c 10 MNHyTN.
Ako Hactpoehoto BpeMe npebuun 99 MnHyTu, TaMepbT abTomatuHc Ce Bpbua Ha 00 MnHyTu.
- ДOKOCBAй К endHOBpeMeHNO "-" n "+"", BODиdo OTmЯHa Ha TaMepa И HaДиСпля ce noka3Ba "00".

- Ko rato BpeMeTo e 3aJaDeHo, To 3aNoUBa Da oT6pOraBa BeHara. NcPnIe Ioka3Ba OCTaBaIoTO BpeMe n HdNKaTopbT Ha TaMepa Mira 3a 5 CeKuHn.

- 3yMpBT pa60Tu 3a 30 cekynn n HndkaTopa Ha TaHepa NOKa3Ba "- - ", KOrato 3aJaAeHOTo BpeMe n3Teue.

HactpoBaHe Ha TaMepa Da n3KlOuN 30Ha 3a rotBeHe
30Hn 3a roTbeHe HacTpoEHH 3a Ta3n FyHKU:
- ДOKOCBaHe Na 6yToHa 3a n36Op Ha 30HaTa 3a HarpaBaHe.

2.ДК OCHete 6yToHa 3a TaMep, INHdNKaTOpbT 3anoYBa Da Mra N Ha DnCpIe Ce NoRBA "10".

- H actpoTe taMepa, KaTo DOKOCBaTe 6yToH "-" nn " +".

CbBET:ДOKOCHte 6yToH"-"ил"+"Ha TaIMepa BeHbK,3a Da HamaNITe nll yBeIuNtTe c1 MnHyTa.
3aApbXTe 6yToH "nll "+ Ha TaMepa, 3a da HamaJIte nll yBelenuHTe c 10 MNHyTN.
Ako Hactpoehoto BpeMe npebuHn 99 MmHyTu, TaMepbT aBTOMaTHUHO ce Bpbua Ha 00 MmHyTu.
- ДOKOCBAй К eДнOBрЕмно "-" и "+" , BODиdo OTmЯHa Ha TaIMepa И HaДиСпля ce noka3Ba "00".

- Korato BpeMeTo e 3aJaDeHo, To 3aNoUBa da ot6pOra Ba BeHara. NcPJIe noka3Ba OCTaBaIoTO BpeMe I INdIkaTOpbT Ha TaMepa Mnra 3a 5 ceKHyDn.

3a6eJekka: YepBeHaTa TocKa Do INHnKaTopa CBETBa 3a Da NOKaKe, Ye 30HaTa e n36paHa.
- Kr aTO n3Teue 3aJaDeHOTo BpeMe 3a rOTBeHe CbOTBeHaTa 3OHa 3a rOTBeHe Ce N3KJIIOUyBa ABTOMATNUHO.


Дугп Te 30н 3a roTbeH, aKo ca BkIIOUeH npoIbJxKaBaT da pa6OЯT.
Hacokn 3a rotbeHe

BnmaBaTe npn nbpxeHe, TbN KaTO OJNOTo n Ma3HnHaTa ce HaqrBaT MHOro 6bP3O, oc06eHo aKO n3NoJ3BaTe yHKcIa PowerBoost. PpN N3KJIuHTeJIHO BnCOKn TempepaTyPi OJNOTo n Ma3HnHaTa ce Bb3PJIaMeHЯBaT CnoHTaHNo n TOBa ppeCTaBlaBa MHOrO rOJaMa ONaCHOCT.
CbBETn 3a rOTBeHe
Korato xpaHaTa 3aBpi, HamaIeTe 3aIaIeHaTa TempeatypHa hAcTpoIka.
- Използвано наkanak ще hamали Врет氧л STOTBEн ще спесгсячpe3 зааЗане на ТОПЛИнота.
- HamaJIeTe KOJInueCTBOTo TeUHOCT IIN Ma3HnHa, 3a Da HamaJIte BpeMeTO 3a FOrTBeHe.
- 3aNoUHeTe rOtBeHTo Ha BnCoka HacTpoiKa i CneI TOBa J HAmaJIeTe, KOraTo XpaHaTa ce e 3aToPnIIa n3quJIo.
BapeHe Ha Tnx OrBn/KbKpeHe, roTBeHe Ha opn3
BapeHe Ha Tnx OByH/KbKpeHe, ce OcbIeCTBBA npEi NToykata Ha 3aBnpaHe, Ha OKoNo 85^, KOrato TbKMO 3anOuBaT da ce nOraBbaT mexypueTa B TeuHOCTTa, KOrTO rotBnte. ToBa e KInOua KbM npiroTbRe He Ha BKcHn CyNn IyxHn, Tb' KaTO BkyCa ce o6pa3yBa 6e3 Da npecroTBTe xpaHaTa. CbIo Tp6Ba Da npiroTbTe COCoBe C Rua a nn C rbcTBAHN C 6paHNO NOd Toykata Ha 3aBnpaHe.
- Hяков DeинocTи, Bключтелно roTbeHe Ha opn3Чpe3 MeToDa Ha ab6copbupaHe, може дa ИЗСКВа Habc troйka NO-BИСОКa OT HaN-HИСКATA, 3a da ce ocngурпnpabuHInHO croTBЯнь В npenopbuaHOTo BpeMe.
3aneuATBaHe Ha nbpXoJa
3a npiroTBHe Ha couHn BkyChn npjkoJi:
- Ппени Готвае octаразе мecOTO за песто на станна Temпера за оконо 20 минуту.
- 3arpeTe TnraH 3a NpXKeHe C De6eNa OchoBa.
- HamaxkeTe DBeTe CtpaHn Ha NpKoJtA t c OJNo. HanpbckaiTe JekO C OJNo DbHOTo Ha HAropeuEHHaH, CJeD KoETo NoCTaBete MeCOTO B RopeuNraTnRaH.
- ПО ВЕME на говке обър overhe пьжола тамо ведньх. В��ею за Говке за висот TOBA, колк e дебеля пьжола т и колк побpe Искатуда e сготва. В��ею варupa OT 2 - 8 минутни стуна. Натсинete пьжола та, за на опрешип, колк e сготва - колково e NO-ТВьрда, ТOLКOBА по-dобpe e n3neueha/ 'well done'.
- Octabete nbpkoIaTa da OTNOUHe Ha TOnlO MxCTo 3a HraKoJIKO MNHyTu, 3a Da N03BOJInTe Ha MeCTo Da ce OTNycHe n Da CTAHe PbPkoJaTa NO-MeKa npedn da a cepBvipate.
Pn npkxeHe 6bpkaHe
- Изберете поховаши за полизове върух керамунец пот тиган тп уок с плockо дьно пли гогам тиган за пьржени.
- Подговете BCИЧКи CBCTаВКи И Heo6xOДIMо оБоруДBaHe. ПьржЕнTo C 6ьрkaHе ТябВа Дa 6ьдe 6ьрЗ. Ako ппгOTЯ Te rOlEMn KOLIчEcTBA, pa3delenTe xpaHaTа Ha NO-MaIKN nOpZIN.
- 3aqrpaBte TuraHa 3a KpaTko I do6aBeTe DBe cypeHn JbXuO nOIO.
- Пьрвприговете мсOTO, след тoba го OCTавете настара и подьржайтToПLO.
- Изпьржete зеленчуцITE. Korato ca ropeши, Ho BCE oоe xpynkabn, Habале Настpoикata Ha 30HATA 3a rotBeHe, Bbphete O6paTHO MecOTOВ.Tига и добавete сoc.
- BhimataHno pa36bPKaIte cbcTakKITE, 3a da cTe cnryphn ye BCNUKn ca 3arpytn paBHomepHo.
- CepBupaIte BeDHa rCneI roTBeHe.
HactpoynHa TOnnHaTa
Ioka3aHNTe no-dony HacTPOkN ca camo HacoUBaun. TOnHaTa HAcTpoKa 3aBnCt OTH JAKoKo foA kTOpa, BKNIOHTeJHO OT BaUNTe CbDOBe 3a rOTBeHe IN KOJIueCTBOTo XpHa, KOrTo 1e npiroTBaTe. EKcnepePImeHTnpaIte C INdYKcNoHHn KOTLOH, 3a Da ONpeJeNITE KOn HAcTPOkN ca Ha-NOxOJaUN 3a Bac.
BHHMaHHe: OCHOBaTa Ha Cbda Tp86Ba Da CbDbpxKa MaHHTeH MaTePnaJ.
TЯ trябва да e nlockaис диametbp cnopeД tabиua 1 no-dony.
-
Ⅲποι3BaIte cAmO φερΟMaΓHΠTHN CbДОBE 3a ΓΟΤΒΕHe OT eMaJΙnpaHa CTOMaHa, ηγγινινη ἡνβχλdαεΜα, HO CbBMeCTɪMæ C ηΗΝΥΚΙΟΗΝΗ KOTΙΟΗ NTOMaHa.
-
ⅢποЛЗВаΙte TɪraHи, ἀναΜΕΤβρΤ Ḥa ΚΥΑΤΟ φερΟΜΑΝΗΤΗ ΘΟΗ (OCHOΒΑΤa H a TɪrɑHa) e c pa3мери с nanopетд tabица то-Дoly. (Tаблιца 1)
-Ako n3noJI3BaTe NO-MaIKN TeHJKePn, TOBa MoXe da NOBJIRe Ha pa6OtaTa Ha ypeDa
-Ako n3noI3BaTe TeHdxepa, uHTo dnaMeTbp e NO-MaIbK OT NocOueHnB Ta6nla 1,e Bb3MOxHO Ta He 6bpe pa3No3HaTa
Cnopepa3Mepnte Ha 30HaTa, MoXeTe Da n3nOJ3BaTe TeHxKePc pa3JIuHn dJaMaTpncnopei n3o6paXeHneTo no-dolv:
- Ako fepormaHTnTHata qact cmo quCTnH O6Xbaa oCHObata Ha TnraHa, ige ce 3arpee camo fepormaHTnTHata 3OHa, a octaHajata qact OT OCHObata MOKe da He DOCTNRHe NOxODAa 3a rotBeHe TemNepaTypa.
- Ako φεροMaHHTHaT a 3oHa He e XOMOREHHa, a cBdBypa N dpyr MaTepeNaI, KaTo HapnpMeP aIyMHN, TOBa MoKe Da IIOBJIRe 3aRpaBaHeTo n pa3nO3HaBaHeTo Ha TeHJKePaTa.
Ako oCHOBaTa Ha TeHJKePaTa e IIOO6Ha Ha Te3N OT CHIMKIne NO-DOJy, e Bb3MOXHO TeHJKePaTa Da He 6bIe pa3No3HaTa.
| The base diameter of induction cookware | ||
| Cooking zone | Minimum Maximum | |
| 1 140 | 180 | |
| 2 | 120 | 140 |
The above may vary according to the size of the pan and the material it is made from.

N3XBbPJIaHE:He
N3XBbPJIaTe TO3n
npoayKT, KaTo He
copTnpan 06ueCTBeH
OTnaBk. Heo6xOdImo
e OTdeJlHe Ha TO3n
OTnaBk 3a CneuHaHO
TpetnpaHe.
To3n npodukTe onpedelen cnpaMo Ebponecka depekTnBa 2012/19/EC 3a Waste Electrical and ElectronicEquipment (WEEE). Upe3 npablnHto n3xBpIaHe Ha To3n ypeI ce rapaHTnpa, ye DOpnpHaCATE KbM npedOTbPaTBAHe Ha eBeHTyalNn 7eTn Ha OKoJHaTa CpeDa n QOBewKOTo 3dpaBe, KoEt 6n MoIIO da 6bJe npuHHeO, aKO ypeDa He ce n3XBpIi No npabIne HauIN.
CnmbolbHaTo3n npOdyKT noka3Ba,Ye ToH He MoKe da 6bJe TpeTnpaH, KaTo 06nKHOBeH 6ntOB OTnaDbK. ToH Tp8Ba Da 6bJe 3aHeceH BnyHKT 3a Cb6npaH en peuKnnpaHe Ha eNeKtpnueckn I eNeKTPoHHN CTOKN.
UpeIbT n3nCKBa n3XbPJIaHe Ha cneuaJIIN3IpaHO MrcTo. 3a IIOBEe INΦOpMaunia KacaEua TpeIpaHe, Bb3CTaHOBraHe N peuKlnpaHe Ha To3n IpOdyKT, MoJr CBbpKeTe Ce C MeCTHaTa O6uHa, clyk6ata 3a n3XbPJIaHe Ha 6ntOBn OTnaDbuN nn MaRa3NuHa, ot KoITo CTe KynniYypeDa.
3a noBueye deTaJHa nHΦOpMaunia Kacaeua TpeTnpaHe, Bb3CTaHOBRAHe n peuKlnpaHe Ha To3n npOdyKT, MoJyCBpXeTe Ce C MeCTHaT a O6uHa, cIyX6aTa 3a n3xVbPJIHe Ha 6ntOBn OTnaDbuN IIN MaRa3NuHa, ot KoTo CTe Kynnn YupeDa.
Yka3aHnno TExHnke 6e30nacHoCTn
Mbl 3a6OTmC8 O BaWe 6e30nacHocTn. IpeE nauJOM 3KcPlyatauBnBaWe BapOuHOI NOBepXHOCTN BHIMaTeJIbHO npOHTte IpeDCTabHeHHyU HxKe INHΦOpMaunIO.
yctahOBka
Onachoctb nopaxeHnE 3JIeKtpnuecknM TOKOM
- Параьылн HeHem liobbix Oepaun, CBraHHbIX C o6cnyxnbHnem nI nppeMOHTOM 3JIeKtpponp6opa OTcoeHNHTe 3JIeKtpponp6op ot 3JIeKtpocetn.
- Θл ektpo np60рdoJxehnoKJIouaTbcraK3eKtpocetn, cha6xeHHo3aunTHbIM 3a3emJIeHHeM.
Pa60TbI, CB83aHHbIe C n3MeHeHnem 3JIeKTpOpPoBODKn B BaWeM DOME, OJXHbI BblIOJIHrTbcra TOnbKO KBaJIuΦnUcnpoBaHHbIM 3JIeKTPnKOM.
HeBbIIOJIHeHHe 3TOrO Tpe6oBaHnRA MoKeT npINBeCTN K nopAxeHIO 3JIeKTpUueCKnM TOKOM nI IN K JeTaIbHOMy IcXOdy.
OnachocTb,CB3aHHaC Nope3OM
- Co6JIIOJaIe octOpOxHocTb - KpaI paHeII IaJIaIOTcI OueHb OCTpbIMN.
- HecobioeHne COOTBeTCTByIOxNx Mep npedeocTopoXHOCTn MOKET npNBecTN K NOpe3aM INN K DpyrIM TpaBMam.
Baxkhble nHCTpyKcunn no Texhike 6e3onacHOCTN
PnroToBLeHne NnHa HNDyKcHHOH BapOCHNOBepxHOCTN
Pnirrotoblenne nHn HnDyKunHOH BapOHH NOBepxHocTH ABLAeTcOBpeMeHHo, 3ΦΦekTHBHO, n KOKOHmHoo TExHOIReN pnrrotobhenn nHs.3a texHOIOr npnrrotobhenn nHs 6a3npyETc Ha reHepauu Tenn a HENOCpeCTBeHHo B nOcyde, KOtopaa HONb3yETc dna pnrrotobhenn nHs, a He Ha Tnen, KOtopoae npoxoINT uepe3 CTekno BapOHH NOBepxHocTH. CTeKNo HArpeBaETc ToIbKO BCJeCTBHe nepeXoDa Tenla OT NOCdy.
Kene3HaKaCTpION
MaHHTHaY Zenb
CTeKNOKepaMnuecka
nahanb
KaTyuKa
INHADYKTHBHOCTN
Ipeed nCnoJb3ObaHnem BaWei HOBoi HNDyKcUNHOH BapOCHo NOBepxHOCTN
- PpoHTte daHHoe pykoOboCTBO, o6paTHB 0co6oe BHHMaHHe Ha pa3dien 'Yka3AHn no texHNke 6e3onacHOCTN'.
BbI6Op noxDxOJaSei KxOHNo NocyDbI

-Пользуntecb TOLьКУХОни NOcYDoN, KOTOPaЯВлЯETc npirodHOnДЯnpiroTOBJIeHnI NIIuHa HNDyKUHOHOn BapOuHOn NOBepxHocTn. HaДhe KaCTpIOnn IInn Ha ee yNaKOB
Dolxeh 6bItcNMBOL HNDyKUHOHORo HarpeBa.
BbIMoKTe npOBepntb npiroHOCTb NOcydbI C NOMOu MaHHTa. IOnHeCnTE MaHHT KO dHy KAcTpOJI INN cKOBOPOdbI.EcIn MaHHT
npTgHbAetc,TO nocya npiroHa dIy IcnoJb3OBaHn Ha HnyKcuHHOBapOuHoi NOBepxHoctn.
-
ECIN y Bac HeT MaHNTa:
-
Haneite B kactpioHIO nnCKOBOpOy, KOtopyo Bbl XOTnTe npOBepntb, He6oJIbwoe KOJInueCTBO BOdbl.
-
Ecnn Hndnkatop He mraet, a BOda HaraeTcra, TO nocya raBnaeTcra npirodnoi Ia NcnoIb3OBAHnHa HNDyKUnOHHO BapouHOn NobepxHoctn.
Kyxohna nocya, n3roTOBneHHa n3 nepeuNCHeHHbIX HnKe MaTePnaIOB, rBJIeTcHnepnroHOJ dIy nCNOJb3OBAHn Ha IHNyKcuOHHO BapOCHo NOBepxHOCTn.
Hepxabeoua cTalb nn MeB 6e3 OCHOBAHn, n3roTOBHeHHoro n3 fpeppomarHTHO mATEpnaIa, cTeKIO, dpeBO, fapOp, KepAMnka, nn faoHC.
He noIb3yIeTcB KxOHHo NocydoC HepOBHbIM IIN N30rHyTbIM dHOM.
IpOBepbTe, yTO OCHOBaHne KAcTpHJN HJN CKBOpOdbI YBJIeTcR TJaADKIM, XoPoWo npIneRaET K INdYkCUNOHNo BapOuHO NOBepXHOCTN, IyTO DnAmETp NOCyDbI COOTBcETbByET 30He HArpeBa. IcnoJb3yIte KxOHHyIO NocUdy, DnAmETp KOTopoP paBeH
ДиamETpy Bbl6paHNo 30HbI HArpeBa. Пpr ИспОьЗOBaHn NocSydbI,ДиamETp KOTOpOi HeMHOrO IpreBbIaet DniameTp Bbl6paHNo 30HbI HArpeBa,обecneuBaEtcMaKcMmaJIbHaJ EΦΦeKTINBHOCTbIscNoIb3OBaHnЯ 3JIeKTPo3HeprIn. Пpr ИспОьЗOBaHn NocSydbI C MeNbIIM DniameTpOM 3ΦΦeKTINBHOCTb IcNoIb3OBaHnЯ 3JIeKTPo3HeprIn 6yDeT ChNJaTbcra. KaCTPIOJIЯ DniameTpOM MeNbIe 140 MM MoKTe He obHapUxKIBaTbcra BapOChNo IOBepXHOCTbIO. O6raTeJIbHo yCTaHOBInTe KaCTPioIIO NO ueHTpy 30HbI HArpeBa.

Korda Bbl ChnmaTe KactpIOLc INdukzIOHNOBapOCHNoOBepxHOCTN, Bcerda NOHMaiTe ee, a He nepeDburaiTe nO BapOCHNoOBepxHOCTN, INaue Bbl MoKeTe IOuapaanatb BapOCHyIO NobepxHOCTb.
Ecnn Ha 30Hy HaraeHa He yctaHOBHeHa NoxoJaa Nocya, To uepe3 2 MInHyTbI INdkaTop aBtOMaTnueckn Norachet.
Iocne toro, kak Bbl 3aBepuHn npoceC npiroTOBHeHn nn
- Ппкочовене К Клавише Вьбopa 30ны HarpeBa ообсеньbaet Вькючени 30ны HarpeBa.

- BbIKIouHTe 30Hy HarpeBa C NOMOUsBIO npOKpyTKn BHN3 Ha " O", IIN C NOMOUsBIO ODNHOBpeMeHHOrO HaxKaTna KJIaBNs "-" n"+". IpoBepbTe, qTO Ha INdNKaTope oTo6paXaETcra "0".

- BbIKIouHTe BapOHyIO NOBepxHocTb C NOMoUbIO HaKaTnK KlaBnN BKn./BbIKn.

3aunTa OT npeBbIeHn IpeJeBHO TEmpepaTpybl
B INHyKUHOH BApOuHO NOBepxHOCTN IMeETcAaTtNK TeMnepaTpybI, C NOMOUBIO KOtOporo MoXeT KOHTpOJIuPObaTbcra TEmpepaTpya BApOuHO NOBepxHOCTN. Ecni peRnCTpnpyeTcra CInsKOM BbICOKa TEmpepaTpya, To INHyKUHOHHa BApOuHa IOBepxHOCTb ABTomATnueCKN BbIKJIOUaETcra.
06hapyxkeHne MaJIeHbKnx IpeMToB
Ecn Ha BapOuHoi NOBepxHOCTn HaxoDITcK KxOHNa IocUda HeNoDxoJSeero pa3Mepa nn KxOHNa IocUda, n3rTObIeHHa n3 HeNoDxoJSeero MaTePnaJa (HaNPmEp, n3 aIOMnHa), nIi He6OJIbWoI ppeMet (HaNPmEp, HOK, BILKa, KIOU), To uepe3 1 MInHyTb BapOuHai NOBepxHOCTb AToMaTtueCKN BbIKIIOuaETc. BeHTnlaTOp 6yDeT npOdoJXaTb OXJaXdA Tb INdYKcIOHHyU BapOuHyIO NOBepxHOCTb eIe ONDy MInHyTb.
ABTOMATNueckoe 3auntHoe OTKJIoueHne
A B T O M A T H C E C K O E 3 a u n t h o e O T K l u o c h e N e J B L a e T C a y H K c u e N e 3 a u n t b i B a w e i n H d y k c u o h h o B a p o u h o N O B e p x h o c t n. E c n B b i 3 a b i I N B b i k l i o u c h t b B a p o u h y u O B e p x h o c t b, T O O h a 6 y d e T B b i k l i o u c a T b c r a B A T O M a T H C E C K N. B P n e d c t a B a l e h h o N H j e T a b i n c e P n e d c t a B a l e h b i 3 h a u c h e N a B p e m e h n, P O N C t e u c h n K O T O p o r o 6 y d e T B b i n o l h a r T b c r a A B T O M a T H C E C K O E O T K l u o c h e N e B a p o u h o N O B e p x h o c t n (d l r pa z l i u n h b i x y p o b h e N H a r p e B a).
EcnBbI He Bbl6paIIOnpeJeHHy 30Hy HarpeBa
-
Поберъ,чToВарочня NOBepxHocTb BKIOUcHeHa.
Примechанe:БblMOжeteИспОьЗOBaТыТаймepобpaTHOrO OTCuTe,He BBi6Ipar
HnKaKoJ 30HbI HArpeBa. -
Пикочиесь К Клавишу управлия таймера. Начнait Могатунд ---

PONBJIaETcIuΦpa"10".
- YctaHOBHTe BpeMa C NOMOuI O npKOCHOHn K KlaBnAm ynpabHeHn TaMepa"-" nn " ^+ .
Cobet: YtO6bI yBelenuHTb IIny UMeHbUHTb yCTaHOBky TaMepa Ha 1 MNHyTu, npIKoCHNTecb K KJIaBnSe ynpabJeHnra "-" IIn "+" Ha OJHO MRHOBeHne.
YTo6bI yBEnHHTb IIn yMeHbHNTb yCTaHOBky TaMepa Ha 10 MInHyT, npNKoCHNTecb K KlaBnSe ynpabLeHnra "-" IIn "+" Ha 6Olee dInTeNbHoe Bpemr.
Ecni yctahOBJIeHHoe BpemI ppeBbIaet 99 MmHyT, TaMep aBTOMaTHueCKN BO3BpaauaeTcra Ha 00 MmHyT.
- Ondobpemehnoe npNKoCHOBHne K knaBnAm"-" n "+" npNBOJNT K OTMeHe fynKcnn TaMepa, n ha nnDKaTope taMepa o6paTHoro oTcyeTa oTO6paxKaetc 3HaK "00".

Hnkorda He nbitaTecb pa3o6paTb n OTPeMHtPOBaTb 3neKTPoPn6Op caMoCTOaTeJIbHO.
Bb6op MeCTa JIyCTaHOBKn
BbipexbTe OTBepCTne B pa6ooye nOBepXHOCTN B COOTBeTCTBUN C yka3aHHbIMN Ha pncyHke pa3mepamn.
PnmeHHe: PacToHHe MeXy BapOHyo nobepxHocbIO npacnoJokEHbbIM HAD He NoDBeCHbIM WkaFOM DoJNXHO 6bIb He MeHbWe 760 MM.
- YCTaHOBka DoJXHa BbIIOJIHrTbcR B COOTBeTCTBnC Tpe6OBAHnM N OTHOCHTeJbHO 3a3OpOB N B COOTBeTCTBnC Tpe6OBAHnM N DeIcTBUoIx npaBn I HOpM
- NOCTOHAHЯ npOBdka DoJxHa 6bITb Cha6KeHa pa3beHNHTeIeM, KOTOpBIOBecneuBaet noHoe oTcoeINHeHne 3JeKtpoPn6Opa OT nItaUoSei 3JeKTPocETN, yCTaHOBJIeHHbIM B COOTBeTCTBUN C Tpe6OBaHmN DeiCTByIoUx nPaBnI HOpM.
CteBoi uHyp He doJxhen 6bItb nepeKpyueh nn cKaT.
- Ceteboi shyp doJxhen peryIapno ocmatpnbatbcra. 3aMeHa ceteBoro shhpya doJXHa BbINOHNrTbCToJIbKO yTBepKdEHHbIM CneuAInCTOM.
- JeIto-3eIeHbI npOBOD shHpya nHTAHnA DOJXeH 6bITb NOcOeINHeN K KOHTaKTam 3a3eMJIeHnA, KaK Ha 3JIeKTpOpnp6ope, TaK H Na 3JIeKTpPueCKo BnIke.
- ПюиЗВоДиTeь He HeceT OTBETCTBeHHOCTn 3a HeecuaCTHbIe ClyuAn, BO3HnKUWe BCJIeIcTBnE IcNoIb3OBAHnЯ He3a3eMJIeHHOro 3JIeKTpOpnp6Opa, IINI 3JIeKTpOpnp6Opa, B KOTOpOM HApUSeHa HenpepbIBHOCTb IINI 3a3eMJIeHnY.
- Ecnn 3JIeKTPoPnp6Op nOdkIIOUaETcK 3JIeKTPoCeTn Upe3 3JIeKTPpuYeCKyU pO3eTKy, TO 3JIeKTPpuYeCKa PO3eTKa DOJXHa 6bITb yCTaHOBLeHa B DOCTYINHOM MeCTe.
B 3aBnCmOCTn OT pa3Mepa 3OHbl, MOxHNOJb3OBaTbcra Nocydoi pa3HOro dHaMeTpα, Ka kya3aHO Ha pncyHke HnKe:
- Ecln feppomarHHTa 3OHa He noJHOCTbIO NOKpbIBAeT OCHOBaHne KAcTpHJI, To 6yJeT HarpeBaTcToJbKO 3Ta 3OHa, a OCTaJIbHaa QACTb OCHOBaHna MOKeT He HarpeTbcrdo HyxHoi Ira nprirotOBLeHn 6JIoDa TemnepaTypbl.

- Ecln feppomarHHTa 30Ha YBJIeTc HEOdHOpOHO IN CODepXNT dpyrHe MaTePnaIbI, NaPIMep aJIOMHH, 3TO MOxET HeRaTINBHO OTPaXaTBcRA Ha 3ΦΦeKTHBHOCTN HarpeBa n paCNo3HaBaHm NocyDbI.
Ecn OCHOBaHne nocydbi aHaIoruHNO 3o6paXeHHIO Ha pncyHKe Hxke, NOBepxHOCTb MOKET He paCnO3HaTb ee.
| The base diameter of induction cookware | ||
| Cooking zone | Minimum Maximum | |
| 1 140 | 180 | |
| 2 | 120 | 140 |
The above may vary according to the size of the pan and the material it is made from.

NODOŠANA
ATKRITUMOS:
Nenovietojiet so iceri pie neshkirotiem sadzives atkritumiem.
Sadi ATKritumi
javac atseviski, lai
veiktu to specialu
apstradi.
Ši erice ir marketa atbilstosi Eiropas direktivai 2002/96/EK par elektrisko un elektronisko iekartu atkritumiem (EEIA).