SHLF 2000 B2 - Electric heater SILVERCREST - Free user manual and instructions
Find the device manual for free SHLF 2000 B2 SILVERCREST in PDF.
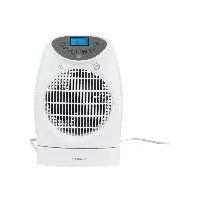
| Product type | Electric fan heater |
| Brand | SilverCrest |
| Model | SHLF 2000 B2 |
| Heating power | 1,000 W / 2,000 W (adjustable) |
| Mains voltage | 220 - 240 V ~ 50 Hz |
| Protection class | II |
| Remote control battery | CR2032, 3 V |
| Operating modes | Low power, High power, Auto, Frost protection |
| Temperature setting | From 6 °C to 38 °C |
| Timer | From 1 minute to 23 hours 59 minutes |
| Swivel function | Yes, left-right oscillation |
| Overheat protection | Yes, automatic shut-off |
| Safety switch | Yes, shut-off in case of tipping over |
| Controls | Control panel and infrared remote control |
| Display | Backlit LCD display |
| Use | Indoor, floor-standing |
| Maintenance | Clean with a damp cloth; vacuum the grilles |
| Warranty | 3 years |
| Customer service (France) | Tel. 0800 919270, email: hoyer@lidl.fr |
| IAN reference number | 271514 |
Frequently Asked Questions - SHLF 2000 B2 SILVERCREST
User questions about SHLF 2000 B2 SILVERCREST
0 question about this device. Answer the ones you know or ask your own.
Ask a new question about this device
Download the instructions for your Electric heater in PDF format for free! Find your manual SHLF 2000 B2 - SILVERCREST and take your electronic device back in hand. On this page are published all the documents necessary for the use of your device. SHLF 2000 B2 by SILVERCREST.
USER MANUAL SHLF 2000 B2 SILVERCREST
FAN HEATER WITH REMOTE CONTROL
Operating instructions
FR BE
RADIATEUR SOUFFLANT TELÉCOMMANDE INCLUSE
Mode d'emploi
GR CY
AEPOOEPMO ME THAEXEIPIHTPHIO
Osyia xponns
DK
VARMEBLASER MED FJERNBETJENING
- Overview 3
- Intended purpose 4
- Safety information 5
- Items supplied 8
5.How to use 8
5.1 Setting up the device 8
5.2 Inserting the battery.. 8
- Operation 9
6.1 Switching the device on and off.. 9
6.2 Setting the heat output 9
6.3 Selecting the temperature 9
6.4 Setting the running time 9
6.5 Swivel function 10
6.6 Overheating protection 10
6.7 Safety switch 10
6.8 Frost monitor 10
- Cleaning 11
8.Troubleshooting 11 - Disposal 12
- Technical specifications 12
- Warranty of the HOYER Handel GmbH 12

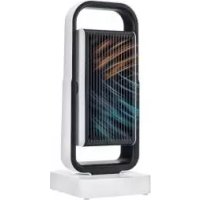
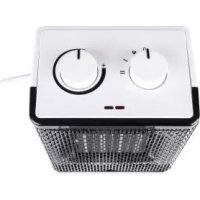
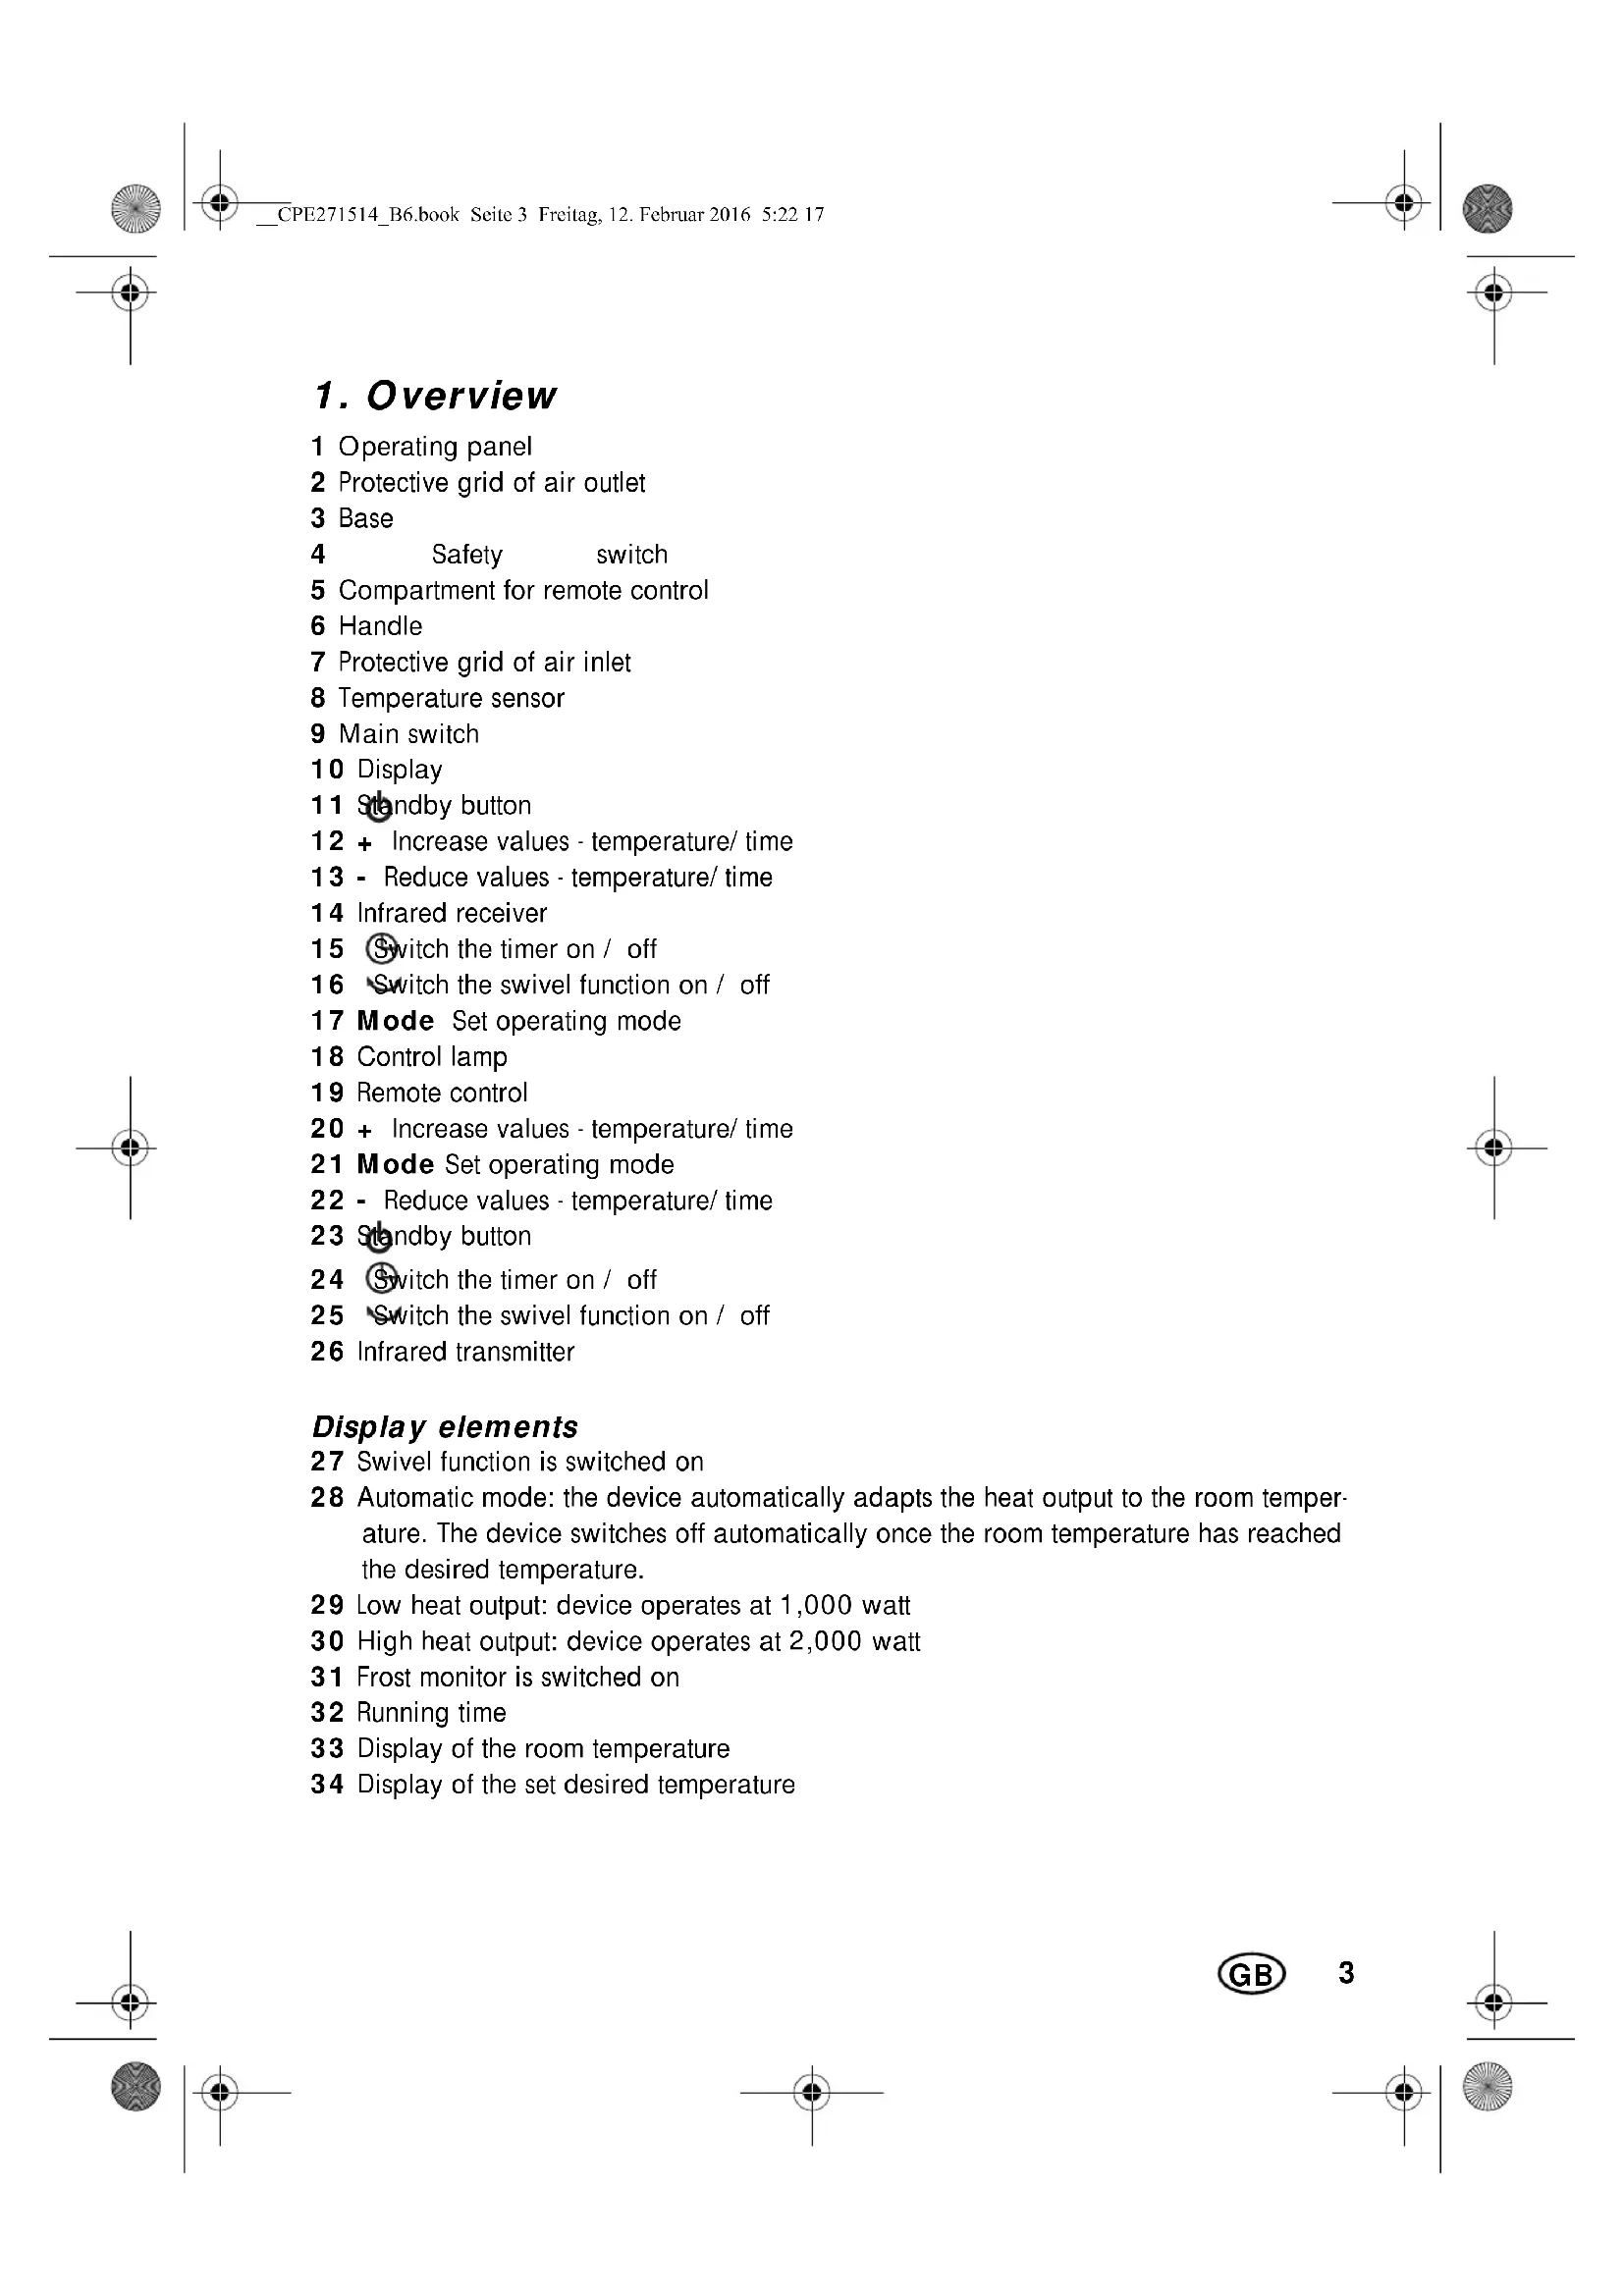
1. Overview
1 Operating panel
2 Protective grid of air outlet
3 Base
4 Safety switch
5 Compartment for remote control
6 Handle
7 Protective grid of air inlet
8 Temperature sensor
9 Main switch
10 Display
11 Standby button
12 + Increase values - temperature/ time
13 - Reduce values - temperature/ time
14 Infrared receiver
15 Switch the timer on / off
16 Switch the swivel function on / off
17 Mode Set operating mode
18 Control lamp
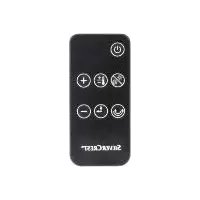
19 Remote control
20 + Increase values - temperature/ time
21 Mode Set operating mode
22 - Reduce values - temperature/ time
23 Sndby button
24 Switch the timer on / off
25 Switch the swivel function on / off
26 Infrared transmitter
Display elements
27 Swivel function is switched on
28 Automatic mode: the device automatically adapts the heat output to the room temperature. The device switches off automatically once the room temperature has reached the desired temperature.
29 Low heat output: device operates at 1,000 watt
30 High heat output: device operates at 2,000 watt
31 Frost monitor is switched on
32 Running time
33 Display of the room temperature
34 Display of the set desired temperature

Thank you for your trust!
Congratulations on your new fan heater.
For a safe handling of the device and in order to get to know the entire scope of features:
- Thoroughly read these operating instructions prior to initial commissioning.
- Above all, observe the safety instructions!
The device should only be used as described in these operating instructions. - Keep these operating instructions for reference, they are a part of the product.
- If you pass the device on to someone else, please include these operating instructions.
We hope you enjoy your new fan heater!
2. Intended purpose
The device is suitable as auxiliary heating for dry indoor spaces.
The device is designed for private home use and must not be used for commercial purposes. The device must only be used in doors.
The device must only be set up on the floor.
Foreseeable misuse

FIRE HAZARD!
- Never use the device to dry textile materials or other objects on, above or in front of the device.
The safety switch must not be disabled manually under any circumstances.
The device must not be used in vehicles of any kind.
Symbols on your device
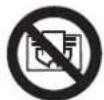
Do not cover up
The adjacent symbol warns against covering up the device, as the resulting heat accumulation could lead to damage and a fire hazard.
3. Safety information
Warnings
If necessary, the following warnings will be used in these operating instructions:

DANGER! High risk: failure to observe this warning may result in injury to life and limb.
WARNING! Moderate risk: failure to observe this warning may result in injury or serious material damage.
CAUTION: low risk: failure to observe this warning may result in minor injury or material damage.
NOTE: circumstances and specifics that must be observed when handling the device.
Instructions for safe operation
Children under the age of 3 must be kept away, unless they are constantly being supervised.
- This device can be used by children from the age of 8 and people with restricted physical, sensory or intellectual abilities or people without adequate experience and/ or understanding, if they are supervised or instructed on how to use this device safely and if they are aware of the resulting danger. Children must not play with the device. Cleaning and maintenance by the user must not be performed by children without supervision.
Children aged 3 and over, who are younger than 8 years old, may only switch the device on and off, if they are supervised or they have been instructed in the device's safe use and they have understood the resulting dangers, provided that the device is placed or installed in its normal operating position. Children aged 3 and over, who are younger than 8 years old, may not insert the plug into the wall socket, adjust the device, clean the device and/ or carry out any maintenance work, which the user is required to carry out.
- Some parts of the device may become very hot and may cause burns. Particular care is necessary, if children or vulnerable persons are present.
This device is equally intended for use in the home and in applications similar to the home, such as for example ...
... in kitchens for employees in shops, offices and other commercial areas;
... on agricultural estates;
... by customers in hotels, motels and other residential facilities;
... in bed-and-breakfast establishments.

In order to prevent overheating of the heating device, the heating device must not be covered.
The device must never be set up directly under a wall socket, as the forming heat may lead to damage to the electric system.
- Never use the device close to a sink, a bath tub, a shower or a swimming pool, as water splashes could enter the device.
- If the power cable of this device should become damaged, it must be replaced by the manufacturer, the manufacturer's customer service department or a similarly qualified specialist, in order to avoid any hazards.

DANGER for children
- Packing materials are not children's toys. Children should not be allowed to play with the plastic bags. There is a risk of suffocation!
- Keep the device out of the reach of children.

DANGER to and from pets and livestock
- Electrical devices can represent a hazard to pets and livestock. In addition, animals can also cause damage to the device. For this reason you should keep animals away from electrical devices at all times.

DANGER! Risk of electric shock due to moisture
The device, the power cable and the mains plug must not be immersed in water or any other liquids.
Protect the device from moisture, water drops and water splashes.
- If liquid gets into the device, remove the mains plug immediately. Have the device checked before reusing.
- Never touch the device with wet hands.
- If the device falls into water, disconnect the mains plug immediately. Only then is it safe to retrieve the device.

DANGER! Risk of electric shock
- Only connect the mains plug to a properly installed and easily accessible wall socket whose voltage corresponds to the specifications on the rating plate. The wall socket must continue to be easily accessible after the device is plugged in.
Ensure that the power cable cannot be damaged by sharp edges or hot points.
The device is not fully disconnected from the power supply, even after it is switched off. In order to fully disconnect it, pull out the mains plug. - When using the device, ensure that the power cable cannot be trapped or crushed.
- When removing the mains plug from the wall socket, always pull the plug and never the cable.
Disconnect the mains plug from the wall socket, ...
...if there is a fault,
...when you are not using the device,
...before you clean the device and
...during thunderstorms.
- Never attempt to reach into the device interior by sticking your fingers or objects through the protective grids.
To avoid any risk, do not make modifications to the device.

Do not use the device if there is visible damage to the device or the power cable.

FIRE HAZARD
- There must be no flammable objects (e.g. curtains, paper, etc.) in close proximity to the device during operation.
- Never use the device to dry textile materials or other objects on, above or in front of the device.
The device must only be set up on a solid, level, dry and non-flammable surface. - When setting up the device, keep a minimum distance of 0.5m all around to other devices and walls.
- Never operate the device in a potentially explosive environment or close to flammable gases or liquids.
- Ensure at all times that the air can enter and exit freely. Otherwise, heat may accumulate in the device.

DANGER! Risk of injury through burning
The surfaces of the device may become hot. For this reason, only touch the handle of the device.
The device remains very hot after it is switched off, and must not be touched.
- Prior to cleaning, let the device cool down until there is no longer a risk of burning.
- Only transport the device when it has cooled down, and when doing so only use the handle intended.

DANGER! Risk of injury
Ensure that the mains power cable never develops into a trip hazard, and that nobody can get caught in or stand on it.
- Keep an appropriate distance to the device, in order to prevent hair or clothing from being sucked into the device fan.

DANGER from batteries
DANGER OF EXPLOSION! Be sure to observe the correct polarity when inserting the battery. Replace only with the same or an equivalent type.
- Batteries can be life-threatening if swallowed. Therefore you should store batteries out of the reach of young children. If a battery has been swallowed, medical assistance must be sought immediately.
- Batteries must not be charged or reactivated by other means, nor must they be dismantled, thrown into a fire or short-circuited.
Always remove used batteries immediately, as these could leak and therefore cause damage.
Clean the battery and device terminals before you insert the batteries.
Take the battery out of the remote control if you intend not to use it for an extended period of time. A leaking battery could damage the remote control.
Do not subject batteries to extreme conditions, e.g. do not place the remote control on radiators or under direct sunlight. Otherwise, there is an increased danger of batteries leaking. - If battery acid has leaked, avoid contact with the skin, eyes and mucous membranes. In case of contact with the acid, rinse the affected area at once with plenty of clean water and seek medical assistance immediately.
WARNING! Risk of material damage
- Never try to use the swivel function manually, as this may damage the motor.
Do not use any astringent or abrasive cleaning agents.

4. Items supplied
1 Fan heater
1 Remote control 19
1 Button cell CR2032
1 Operating instructions
NOTE: the device requires up to 10 amps electricity (2,000 watt). If you have connected other consumers in the same electric circuit, ensure that the maximum capacity of the fuse is not exceeded, as the fuse will otherwise trigger.
5. How to use
5.1 Setting up the device
NOTE: some parts of the device might be slightly greased when delivered, which is why slight smoke and odour formation might develop. This is harmless and stops after a short amount of time. Ensure sufficient ventilation in the meantime.
- Remove the device from the packaging.
- Remove any transport packaging and any protective foil present.
NOTE: there is a piece of corrugated board between the device and base 3, which also needs to be removed.
- Check that the device shows no damage.

FIRE HAZARD!
-
Ensure that there is sufficient distance to the wall, furniture and fixtures or other devices. The distance should be at least 0.5m , in order to exclude the risk of a fire hazard.
-
Select a location which complies with the safety information.
- Select a location where people, animals or plants will not be suddenly hit by the hot air flow.
- Insert the mains plug into a wall socket corresponding to the technical data.
5.2 Inserting the battery
If the device is new or if the battery in the remote control 19 is empty, a new battery of the type CR2032 must be inserted.
- Figure A: press the closing flap towards the centre and pull the battery compartment out.
- Remove the old battery, if applicable.
- Insert a new battery.
NOTE: be sure to observe the correct polarity when inserting the battery (+ / - )
- Slide the battery compartment back in.
6. Operation
Identical symbols on the buttons mean identical functioning. These instructions describe the operation via the remote control 19. The selected function is shown on the display 10.
As soon as the device is in operation, the control lamp 18 lights up.
The device can be operated via the operating panel 1 or via the remote control 19.
6.1 Switching the device on and off
- Insert the mains plug into a wall socket corresponding to the technical data.
- Switch the device on by setting the main switch 9 to I. The main switch 9 and the display 10 are lit up. The device is in standby mode.
- Put the device into operating mode by pressing the standby button 23. The control lamp 18 lights up.
- In order to switch back to standby mode, press the standby button 23 again. After a few seconds stopping time, the device switches into standby mode.
NOTE: the device requires electricity in this state.
- In order to completely switch off the device, set the main switch 9 to 0.
6.2 Setting the heat output
Press Mode 21 repeatedly until the desired heat setting is shown on the display 10:
| Low heat output: device oper- ates at 1,000 watt | |
| High heat output: device oper- ates at 2,000 watt | |
| Auto | Automatic mode: the device au- tomatically adapts the heat out- put to the room temperature. |
| * | Frost protection: the device only switches on at 6 °C ambient temperature. |
6.3 Selecting the temperature
The button +20 allows you to increase the desired temperature up to 38^ while the button - 22 allows you to reduce the desired temperature down to 6^
The selected desired temperature is shown on the display 34.
The room temperature is measured by the temperature sensor 8 and shown on the display 33.
The device switches off automatically once the room temperature has reached the desired temperature. If the room temperature falls below the desired temperature, the device automatically switches back on again.
6.4 Setting the running time
The device has a timer 24, with which you can set the desired running time. The running time can be set at between 1 minute and 23 hours 59 minutes.
Upon reaching the end of the running time, the device switches off automatically and End appears on the display.

- Press the button 24 in order to adjust the timer setting. The hour indicator flashes.
- Press the button + 20/-22 in order to set the hours.
- Press the button 24.
- Press the button +20 / - 22 in order to set the minutes.
- Press the button 24 in order to start the timer.
NOTE: by keeping the buttons + 20 or - 22 pressed, the values toggle until you release the button.
The selected running time is shown on the display 10.
6.5 Swivel function
The device has a swivel function. It causes the device to swivel to and fro, thus distributing the escaping air more evenly in the room.
- By pressing button 25 , you can switch the swivel function on and off.
6.6 Overheating protection
This device possesses overheating protection for your safety.
If the temperature inside the device becomes too high, it automatically switches off:
- Switch the device off by setting the main switch 9 to 0.
- Check whether the air inlet or air outlet are obstructed and eliminate the cause. If the cause cannot be found and the fault occurs repeatedly, have the device repaired or take it out of operation.
- Wait for the device to cool down.
- Then you can continue to use it normally.
6.7 Safety switch
A safety switch 4 protects the device against damage caused from falling over.
The safety switch 4 is positioned on the underside of the device and switches it off immediately in the even of it falling over.
- Place the device back into upright position.
- Select the desired function again.
6.8 Frost monitor
The device has a so-called frost monitor function. If this function is activated, the device switches on automatically, as soon as the ambient temperature falls down to 6^ . The device remains switched on until an ambient temperature of 9^ has been reached.
- Press the button Mode 21 until the symbol 31 appears on the display. The frost monitor function is switched on.
Press the button Mode 21 once and the symbol 31 disappears. The frost monitor is switched off.
NOTE: high electricity costs when in continuous operation.
Please observe that a lot of electricity is consumed in continuous operation (24 hours) due to the high output of 2,000 watt. At a price of €0.25 per kilowatt hour, this would lead to costs of €12 per day or €360 per month.
7. Cleaning
In order to enjoy your device for a long time, you should regularly clean it.

DANGER! Risk of electric shock!
- Disconnect the mains plug before any cleaning.

DANGER! Risk of injury through burning!
Allow the device to cool down.
WARNING! Risk of material damage!
Do not use any astringent or abrasive cleaning agents.
- Carefully remove larger dust deposits from the protective grids 2 and 7 using a vacuum cleaner.
- Remove the residue with a soft brush. Ensure that no dust falls into the interior of the device. Therefore, hold the device, which you are cleaning, in such a way that the protective grid 2/7 shows downwards.
- Clean the outside of the device with a damp cloth. You can also use some detergent.
- Use a cloth dampened in clear water for wiping afterwards.
- Do not use the device until it is completely dry again.
8. Troubleshooting
If your device fails to function as required, please try this checklist first. Perhaps there is only a minor problem, and you can solve it yourself.

DANGER! Risk of electric shock!
Do not attempt to repair the device yourself under any circumstances.
| Fault | Possible causes / Action |
| The device cannot be switched on. | ·Fuse or wall socket faulty? Choose a different wall socket. ·Defective device? Take it to a specialist workshop for repair, or dispose of the device. |
| The device cannot be switched off. | ·Electronic component faulty? Take it to a specialist workshop for repair, or dispose of the device. |
| Device switches off automatically. | ·Safety switch has triggered: put the device into its upright position (see “Safety switch” on page 10) ·Overheating protection has triggered: let device cool down and then clean it (see “Overheating protection” on page 10) |


9. Disposal
The symbol showing a wheeie bin crossed through indicates that the product requires separate refuse collection in the European Union. This applies to the product and all accessories m symbol. Products identified w may not be discarded with no hold waste, but must be taken point for recycling electric and pliances. Recycling helps to r sumption of raw materials an environment.

Batteries must not be discarded with your household waste. Spent batteries must be disposed of properly. Special containers are available for this purpose in shops sellin and at municipal collection p (Rechargeable) batteries mark following letters contain harm such as: Cd (cadmium), Hg (r Pb (lead).
Packaging
When disposing of the packaging, make sure you comply with the environmental regulations applicable in your country.
10. Technical specifications
| Model: SHLF 200 B2 |
| Mains voltage: 20 - 240 V ~ 50 Hz |
| Protection class: II ☐ |
| Power rating: 1,000/ 2,000 W |
| Battery for the remote control: CR2032/ 3 V |
| Ambient conditions: 0 °C to +40 °C, max. 85 % relative humidity |
Subject to technical modification.

11. Warranty of the HOYER Handel GmbH
Dear Customer, your device is provided with a 3 year warranty starting with the purchase date. In the event of product defects, you are entitled to statutory rights against the vendor. These statutory rights are not restricted by our warranty presented in the following.
Warranty conditions
The warranty period starts with the purchase date. Please keep the original purchase receipt in a safe place. This document is required to verify the purchase. If within three years from the purchase date of this product a material or factory defect occurs, the product will be repaired or replaced by us - at our discretion - free of charge to you. This warranty implies that within the period of three years the defective device and the purchase receipt are presented, including a brief written description of the defect and the time it occurred.

If the defect is covered by our warranty, the repaired or a new product will be returned to you. No new warranty period starts with a repair or replacement of the product.
Warranty period and statutory claims for defects
The warranty period is not extended when the warranty has been claimed. This also applies to replaced and repaired parts. Any damages and defects already existing at the time of purchase must be reported immediately upon unpacking. Repairs arising after the expiration of the warranty period are subject to a charge.
Warranty coverage
The device was produced carefully according to strict quality guidelines and tested diligently prior to delivery.
The warranty applies to material or factory defects. This warranty does not include product parts that are subject to standard wear and therefore can be considered wear parts; the same applies to damages at fragile parts, e.g. switches, rechargeable batteries or parts made of glass.
This warranty expires if the product is damaged, not used as intended or not serviced. For the proper operation of the product, all instructions listed in the operating instructions must be observed carefully. Any form of use and handling that is advised against in the operating instructions or warned against must always be avoided.
The product is only intended for private and not for commercial use. In the case of incorrect and improper treatment, use of force and interventions not performed by our authorised Service Centre, the warranty shall cease.
Handling in case of a warranty claim
In order to ensure prompt processing of your matter, please observe the following notes:
Please keep the article number IAN:271514 and the purchase receipt as a purchase verification for all inquiries.
- If faulty operation or other defects occur, first contact the Service Centre listed in the following by telephone or email.
- Then, you are able to send a product reported as defective free of charge to the service address specified to you, including the purchase receipt and the information on the defect and when it occurred.

Please visit www.lidl-service.com to download this and many other manuals, product videos and software.

Service Centre
GB Service Great Britain Tel.:08715000720(£0.10/Min.) E-Mail: hoyer@lidl.co.uk
IE Service Ireland Tel.:1890 930 034 (0,08 EUR/Min.peak) (0,06 EUR/Min.,off peak E-Mail: hoyer@lidl.ie
CY Service Cyprus Tel.:80094409 E-Mail: hoyer@lidl.com.cy
IAN:271514
Supplier
Please note that the following address is no service address. First contact the aforementioned Service Centre.
Chere cliente, cher client,
KINADYNOE rpaumarpou
ToTIOtheTeTOKALWDIOuVDeoNcIKTUou EtoI Wote VA mnu UAPxEIKvDUVCVAOKovTae,VA TIAOTeOEaTO hVa To TnOeTE.
DiatnpEITE ETTAPKn aTIOaON aTIO TNOUKEUN, WOTe VA mV TpaBnXTOUV MAALIA n TMnata PouxIOou aTIO TOV AVEIOTnpa MEOa OTN OUKEUN.