
SIKP 2000 E3 - Cooker SILVERCREST - Free user manual and instructions
Find the device manual for free SIKP 2000 E3 SILVERCREST in PDF.

| Brand | SilverCrest |
| Model | SIKP 2000 E3 |
| Product type | Portable induction cooktop |
| Hob type | Induction |
| Number of cooking zones | 1 |
| Cooking zone diameter | 20 cm |
| Rated power | 2000 W |
| Voltage range | 220-240 V ~ 50/60 Hz |
| Protection class | II (double insulation) |
| Power levels | 10 (L01-L10, from 200 to 2000 W) |
| Temperature levels | 10 (60°C to 240°C) |
| Automatic programs | Boost (30 seconds at max power), Milk (keeps at 60°C for 20 min), Keep warm (2 hours at 60°C) |
| Timer | 1 to 180 minutes, automatic shut-off |
| Child safety | Yes, key lock |
| Safety shut-off | Pan detection, shut-off after 2 hours of inactivity |
| Power consumption | 192.6 Wh/kg |
| Cleaning | Damp cloth, scraper for ceramic glass |
| Warranty period | 3 years |
Frequently Asked Questions - SIKP 2000 E3 SILVERCREST
User questions about SIKP 2000 E3 SILVERCREST
0 question about this device. Answer the ones you know or ask your own.
Ask a new question about this device
Download the instructions for your Cooker in PDF format for free! Find your manual SIKP 2000 E3 - SILVERCREST and take your electronic device back in hand. On this page are published all the documents necessary for the use of your device. SIKP 2000 E3 by SILVERCREST.
USER MANUAL SIKP 2000 E3 SILVERCREST
Operating instructions
NL BE
INDUCTIEKOOKPLAAT
Gebruiksaanwijizing
CZ
INDUKČNÍ PLOTÍNKA
Návod k obsluze
IAN 310980
DE AT CH
Before reading, unfold the page containing the illustrations and familiarise yourself with all functions of the device.
FR BE
KOMPERNASS HANDELS GMBH
BURGSTRASSE 21
DE-44867 BOCHUM
DEUTSCHLAND
www.kompernass.com
Contents
Introduction 22
Intended use 22
Package contents 23
Disposal of the packaging 23
Appliance description 24
Technical data 24
Safety information 25
Function 28
Suitable cookware 28
Energy-efficient cooking 29
Setting up 29
Operation 30
The hob 30
Safety cut-off 30
Use. 30
Timer 32
Automatic programmes 33
Child lock 34
35
Storage 35
Troubleshooting 36
Disposal of the appliance 37
Notes concerning the EC Declaration of Conformity 37
Information on this hotplate 38
Congratulations on the purchase of your new appliance!
You have chosen a modern, high-quality product. These operating instructions are part of the product. They contain important information about safety, usage and disposal. Before using the product, please familiarise yourself with all operating and safety instructions. This appliance may only be used as described and for the purposes indicated. Please also pass these operating instructions on to any future owner.
Intended use
This appliance is intended exclusively for heating up foodstuffs and keeping them warm. This appliance is intended solely for use in private households. Do not use it for commercial purposes.
Use the appliance only in dry places and never use it outdoors.

WARNING
Danger if not used as intended!
The appliance may be hazardous if used for any other purpose and/or in any manner than the one intended.
Use the appliance only for its intended purpose.
Observe the procedures described in these operating instructions.
NOTE
- Failure to use the appliance for its intended purpose and/or for an alternative purpose can be dangerous. Use the appliance only for its intended purpose. Observe the procedures described in these operating instructions. Claims of any kind for damage resulting from misuse, incompetent repairs, unauthorised modification or the use of unauthorised spare parts will not be accepted. The risk shall be borne solely by the user.
Package contents
The appliance is supplied with the following components as standard:
induction hob
- operating instructions
1) Remove all parts of the appliance and the operating instructions from the box.
2) Remove all packaging material.
NOTE
- Check the package for completeness and signs of visible damage.
If the delivery is incomplete or damage has occurred as a result of defective packaging or during transport, contact the Service hotline (see section Service).
Disposal of the packaging
The packaging protects the appliance from transport damage. The packaging materials are selected from the point of view of their environmental friendliness and disposal technology and are therefore recyclable.
The recirculation of packaging into the material circuit saves on raw material and reduces the amount of waste generated. Dispos of packaging material that is no longer needed according to the regionally established regulations.
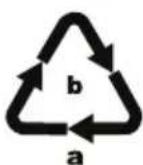
Dispose of the packaging in an environmentally friendly manner. Note the labelling on the packaging and separate the packaging material components for disposal if necessary. The packaging material is labelled with abbreviations (a) and numbers (b) with the following meanings:
1-7:Plastics,
20-22: Paper and cardboard,
80-98: Composites.
NOTE
If possible, preserve the appliance's original packaging during the warranty period so that, in the event of a warranty claim, you can repackage the appliance properly for return.
Appliance description
Illustrations see fold-out page
1 Hob
Indicator lamp "P"
Indicator lamp ^ C^
4 "Keep warm" indicator lamp
"On/Off indicator lamp
"On/Off" button
"Keep warm" button
Mode" button (Power (^ ^ ) / T e m p e r a t u r e (^ ^ ))
9 " ^+ button
10 Display
1 "-- button
"Milk" button
"Boost" buttoB
14 "Timer" button
15 "Timer"indicator lamp
16 "Boost" indicator lamp B
"Milk indicator lamp
"Child lock" indicator lamp
Technical data
Mains voltage 220 - 240V (alternating current), 50 / 60Hz
Rated power 2000 W
Protection class
II / [double insulation]
Noise emission level < 70 dB (A)
Safety information

RISK OF ELECTRIC SHOCK
- Ensure that the power cable never becomes wet or damp when the appliance is in use. Route the cable so that it cannot be trapped or damaged in any way.
- Ensure that the mains plug is connected exclusively to a properly installed, easily accessible mains socket that has a voltage corresponding to the specifications on the rating plate. The mains socket must remain easily accessible even following connection.
- After use, always disconnect the plug from the mains power socket. When doing so, always take hold of the plug, not the mains cable.
- Just switching off the appliance is not sufficient, as the appliance is subject to mains voltage as long as the plug is connected to the mains power socket.
- Protect the hob from damage: Do not load it unevenly and do not allow objects to fall onto it. Do not continue to use the appliance if either the hob or the housing is damaged. If this is the case, immediately remove the plug from the mains power socket and arrange for the appliance to be repaired.
- Arrange for defective power plugs and/or cables to be replaced as soon as possible by a qualified technician or by our Customer Service Department to avoid the risk of injury.
If the surface of the hob is cracked, disconnect the plug from the mains power socket to avoid receiving an electric shock.

Ensure that the appliance, the power cable and the power plug are never immersed in water or other fluids.

WARNING! RISK OF INJURY!
- Do not touch the area where a hot cooking pot has just been standing. Directly after cooking, this area can be very hot.
- This appliance may be used by children of the age of 8 years or more and by persons with reduced physical, sensory or mental capabilities or lack of experience and/or knowledge if they are being supervised or have been instructed with regard to the safe use of the appliance and have understood the potential risks.
Children must not play with the appliance. - Cleaning and user maintenance must not be performed by children unless they are older than 8 years of age and are supervised.
Children younger than 8 years must be kept away from the appliance and the power cable. - Do not heat sealed cans or other sealed containers.

Caution! Hot surface!

This symbol warns you not to touch the hob directly after use. Risk of burns!

HAZARD for and through livestock and pets
- Electrical appliances can cause hazards to livestock and pets. Furthermore, animals can also damage the appliance itself. You should therefore keep animals generally away from electrical appliances.
WARNING! RISK OF FIRE!
Overheated foodstuffs can start burning! Never leave the appliance unsupervised while it is in use.
- Additionally, never position the appliance below flammable objects, especially not below curtains.
- Never heat a securely closed container. Heat expansion can quickly cause an explosion.
- Never heat an empty container. This would overheat very quickly, leading to a risk of fire and serious damage to the hob.
- Do not place any metallic objects, such as kitchen utensils or cutlery, on the hob. They can become very hot in the induction field.
- Be careful when heating small amounts of oil! Do not use a high power or temperature level. Otherwise, the oil can burn and catch fire! Never use water to extinguish burning oil! Smother the flames by covering them with a suitable lid or plate.
- Never operate the appliance on a metal table or other metallic surface. This may heat up and thus cause a fire. Or the appliance could become irreparably damaged.
- Never operate the appliance on a textile surface such as a tablecloth.
- Do not operate the appliance using an external time switch or a separate remote control system.
The appliance is fitted with a ventilation fan on the bottom. Always ensure that a free air intake is guaranteed. Leave at least 10cm space free around the appliance and 60~cm above it.
To avoid hazards caused by electromagnetic fields:
- Maintain a minimum distance of 1m from appliances that are sensitive to electromagnetic fields (e.g. screens, clocks, magnetic storage media, electronic appliances, etc.).
Medical devices such as pacemakers, hearing aids and other devices may need to be kept at a greater distance. If in doubt, consult the manufacturer of the medical device!
Function
Whilst standard hotplates heat up themselves, in an induction hotplate the heat is created in the base of the cookware. The hob itself does not heat up - it becomes hot when food is heated up on it in a pan and the heat from the pan reflects onto the hob (reverse heating).
This is caused by an energy field that generates heat only in magnetically conductive materials, for example, pans made of iron. In other materials, such as porcelain, glass or ceramic, the energy field cannot generate any heating effect.
Suitable cookware
Only use cookware that is suitable for induction hobs:
Suitable cookware consists of pots and pans with a base made of steel or cast iron. You can identify these either by means of the markings on the pan or by ascertaining whether a magnet clings to the base of the pan.
■ Unsuitable cookware is made from any kind of non-magnetic metals, such as aluminium, copper and stainless steel, as well as non-metallic pots made of porcelain, glass, ceramic, plastics, etc. If unsuitable cookware is placed on the hob 1, "E0" is shown on the display 10.
Thin pan bases are better suited to induction cooking than thick sandwich bases. The very short response times to modifications in the settings (short preheating period, rapid and controllable browning) cannot be kept when pans with thick bases are used.
Only use cookware that is suitable for the size of the hob ①. This the only way to ensure the fault-free functioning of the induction hob. The base of the pan may not be uneven, rather, it must sit flat.
The diameter may not be less than 12cm to ensure that the energy field has an effect. Do not use pans with a diameter larger than 26cm .
Energy-efficient cooking
In order to use the energy that is needed for heating food in the most environmentally friendly way, we recommend using a pan with a wide diameter and low height instead of a deep pan with a small diameter. The food is heated more quickly since the surface area of the pan being heated is greater with a large diameter. Never use pans with a diameter greater than 26~cm .
If you want to heat food quickly, place a lid on the pan. This ensures that less heat escapes.
Setting up
The appliance requires unrestricted ventilation to prevent overheating.
Therefore, set up the appliance so that ...
- there is an all-round clearance of at least 10cm , e.g. to the nearest wall,
- at least 60~cm clearance above, e.g. to a suspended wall cabinet.
For cooling purposes, the appliance draws in air through openings on the base. Do not place it on textiles or fleecy surfaces, such as tablecloths. Operate it only on smooth surfaces.
Do not place it adjacent to curtains or other textiles which, due to the airflow, could cling to the appliance.
- Do not place it on surfaces which may contain ferric or steel materials. These may become very hot.
- Maintain a minimum distance of 1m from appliances that are sensitive to electromagnetic fields (e.g. screens, clocks, magnetic storage media, electronic appliances, etc.).
Wipe the hob ① with a damp cloth to remove any dust or dirt from transportation.
Operation
The hob
The hob 1 features 10 power levels:
| Power levels L01 L02 L03 L04 L05 L06 L07 L08 L09 L10 |
| in watts 200 400 600 800 1000 1200 1400 1600 1800 2000 |
The hob 1 features 10 temperature levels:
| Temperature levels in °C | 60 80 100 120 140 160 180 200 220 240 |
Safety cut-off
For safety reasons, the pan detection function automatically switches the appliance into standby mode if you remove the pan from the hob ① or fail to place a pan on it.
If you remove the pan from the hob 1, you will hear a beep after a few seconds which will repeat for approx. 2 minutes. The display 0 shows the error "EO". If you place the pan back on the hob 1 within 2 minutes, the previously defined settings will be retained. Otherwise, the "EO" message will disappear after 2 minutes and the appliance will switch to standby mode.
NOTE
As long as the temperature of the hob remains above 60^ , "H-" will be shown on the display.
Use
CAUTION! PROPERTY DAMAGE!
- Do not use any pan (including contents) weighing more than 10kg , as this could damage the hob ①.
- Do not pull the mains plug out of the mains socket until the fans have stopped working, as this could damage the appliance.
NOTE
The hob beeps every time you make an entry.
1) Place a suitable pan with contents in the middle of the hob 1.
2) Insert the plug into the mains power socket. All indicator lamps illuminate briefly. The appliance is now in standby mode.
If the temperature of the hob 1 is less than 60^ , the display 10 will read
If a cooking process has already taken place and the hob ① still has a temperature above 60^ C , the display ⑩ will read “-H-”.
3) Press the "On/Off" button. The display shows the power level "0" and the indicator lamps "P" and "On/Off" light up.
NOTES
If you do not place a suitable pan on the hob ① or make any settings within 30 seconds, the appliance will beep and switch to standby mode.
4) You can use the power level mode or the temperature stage mode to cook. To select, press the "Mode" button 8.
In power level mode, the preset power level "L05" appears on the display 10. The indicator lamp "P" 2 lights up.
In power level mode, the pan is heated at varying speeds. The higher the selected power level, the faster the pan is heated.
In the temperature stage mode, the preset temperature of "120"°C appears on the display ⑩. The indicator lamp "°C" lights up.
When you are cooking in temperature stage mode, the appliance heats the pan to the set temperature. As soon as the temperature falls below the set temperature, the appliance heats up again. The temperature is thus maintained at the desired level.
NOTES
If there is no suitable pan on the hob ①, you will hear a beep after a few seconds which will repeat for approx. 2 minutes. The display ⑩ shows the error "E0". Place a suitable pan with contents on the hob ① to continue cooking (see section Safety cut-off).
5) Press the "+" or "-" buttons repeatedly until the required power level or temperature is shown on the display 10.
6) To switch off the hob 1, press the "On/Off" button 6. All indicator lamps go out. The appliance is back in standby mode.
NOTE
If no button is pressed within a 2-hour period, the appliance will switch to standby mode even if the hob ① is still working. If you wish to cook a dish for more than 2 hours or keep food warm for more than 2 hours, adjust the desired time using the timer (see the section "Timer"). You can use this to set times of up to three hours.
After switching off into standby mode, the appliance's fans continue to run for a while to dissipate the heat. As long as the temperature of the hob ① remains above 60^ , "H-" will be shown on the display ⑩.
7) Pull the mains plug out of the mains socket if you no longer wish to use the appliance.
Timer
You can preselect a time period between 1 and 180 mins, after which the hob will switch off.
1) Start the cooking procedure (in power or temperature mode) as explained above.
2) Press the "Timer" button. The display reads "0". The "Timer" indicator lamp lights up.
3) Set the desired time: When you press the ^ 一 + " button 9, the time increases by 10 minutes. When you press the button - - ^ 一 11, the time decreases by 1 minute. The timer will start if no entries are made within 5 seconds.
NOTE
- Keep the "+" 9 or "-" 11 button pressed for faster increments.
The display 10 now alternately shows the set power level/temperature and the time remaining until switch-off.
After the time elapses, you will hear a beep and the hob ① will switch off automatically. The appliance switches back to standby mode.
Automatic programmes
Boost
Use the "Boost" programme to accelerate the cooking process.
Press the "Boost" B button 3 while the cooker is in operation. The appliance will switch to the highest output level for around 30 seconds. The display 10 will read "----" and the "Boost" indicator lamp B 6 will light up. To interrupt the programme, press the "Boost" button B 8 again.
If you do not interrupt the programme, the appliance will automatically revert to the previous power level or temperature after 30 seconds. The "Boost" indicator lamp B 16 will go out.
Milk
Use the "Milk" programme to heat milk without it boiling over. The milk is heated to around 60^ at a low power level and kept at that temperature for around 20 minutes.
Press the "Milk" button 12 during operation. The "Milk" indicator lamp 17 lights up. The display 10 now alternately shows "60" and the time remaining until the end of the programme, starting at "20".
NOTE
- You can activate the "Boost" programme at the same time. The "Milk" programme will be interrupted and restarted after the boost period.
If you activate the "Keep warm" programme at the same time, the "Milk" programme will be cancelled.
Press the "Mode" button to cancel the "Milk" programme and return to normal operation.
Keep warm
The "Keep warm" programme keeps the content of the pan at around 60^ for 2 hours. The appliance will switch off the hob 1 as soon as it reaches 60^ . If the temperature falls below 60^ , the appliance will heat up again.
Press the "Keep warm" button 7 during operation. The display 10 will read "---" and the "Keep warm" indicator lamp 4 will light up.
NOTE
- You can activate the "Boost" programme at the same time. The "Keep warm" programme will be interrupted and restarted after the boost period.
If you activate the "Milk" programme at the same time, the "Keep warm" programme will be cancelled.
Press the "Mode" button to cancel the "Keep warm" programme and return to normal operation.
Child lock
To prevent unauthorised switching on or changes to the settings, for instance by children, this appliance is fitted with a child lock.
NOTE
- You can also use the child lock as a wipe protect function: Before you wipe over the buttons with a damp cloth, activate the child lock. This helps avoid any inadvertent activation of the buttons.
To switch on the child lock, press the "+" 9 and "-" 1 button simultaneously. You will hear a beep, and the "Child lock" indicator lamp 18 will light up.
To switch off the child lock, press the "+" and "-" button simultaneously for around 3 seconds. You will hear a beep, and the "Child lock" indicator lamp will go out.
NOTE
If you activate the child lock while the appliance is working, the appliance can be switched off but not switched back on again.
Cleaning

WARNING! RISK OF ELECTROCUTION!
Always remove the plug from the mains power socket before cleaning the appliance.

Under no circumstances should the appliance or any parts thereof be immersed in liquids! This could result in a potentially fatal electric shock, and the appliance could be damaged.
- Never open the appliance housing! Otherwise there is a risk of an electric shock.

WARNING! RISK OF INJURY!
- Allow the appliance to cool down completely before cleaning it. Risk of burns!
CAUTION! PROPERTY DAMAGE!
-
Do not use solvents or abrasive cleaners. This could damage the hob ① of the appliance.
-
Do not use aggressive, chemical or abrasive cleaning agents! They could irreparably damage the surface!
Use only a lightly moistened cloth to clean all surfaces and the power cable.
Always dry the appliance properly before using it again.
- You can remove burnt-on soiling on the hob ① using a scraper specifically designed for ceramic hobs (available in most shops selling household equipment).
If there is any soiling in the area of the ventilation slots on the base of the appliance, you can attempt to remove this from the outside using a vacuum cleaner.
Storage
Store the cleaned and dried appliance in a dust-free and clean location.
Troubleshooting
| PROBLEM POSSIBLE CAUSE POSSIBLE SOLUTIONS | ||
| The appliance is not working. The "On/Off" indicator lamp ⑤ does not light up. | The plug is not connected. | Connect the appliance to a mains power socket. |
| The appliance is damaged. | Contact the Customer Service department. | |
| The appliance does not start the cooking process. | There is no pan on the hob ①. | Place a suitable pan on the hob ①. |
| The pan is not suitable for induction hobs. | Use a suitable pan (see section "Suitable cookware"). | |
| The child lock is activated. | Press the "+" ⑨ and "-" ⑩ button simultaneously for around 3 seconds. | |
| "E0" is shown on the display ⑩. | There is no pan on the hob ①. | Place a suitable pan on the hob ①. |
| The pan is not suitable for induction hobs. | ||
| "E2" is shown on the display ⑩. | The temperature sensor beneath the hob ① is defective or there is a short circuit. | Disconnect the plug from the mains power socket and contact the Customer Service department. |
| "E3" is shown on the display ⑩. | The appliance is being supplied with too much voltage (>270 V). | Ensure that the appliance is connected to a properly installed 220 - 240 V ~, 50/60 Hz mains power socket. |
| "E4" is shown on the display ⑩. | The appliance is not being supplied with enough voltage (<150 V). | Ensure that the appliance is connected to a properly installed 220 - 240 V ~, 50/60 Hz mains power socket. |
| "E5" is shown on the display ⑩. | The appliance has overheated. | Disconnect the plug from the mains power socket and wait until the appliance has cooled down. If the problem persists, contact the Customer Service department and specify the error code. |
| "E6" is shown on the display ⑩. | The electronics have overheated. | Check to see whether the fans on the bottom of the appliance are working correctly and whether they can take in a sufficient volume of air. |
Disposal of the appliance
Do not dispose of this appliance in your normal domestic waste. This product is subject to the provisions of European Directive 2012/19/EU.
Dispose of the appliance through an approved disposal centre or at your community waste facility. Pay heed to the currently applicable regulations. In case of doubt, please contact your waste disposal centre.
Your local community or municipal authorities can provide information on how to dispose of the worn-out product.
Notes concerning the EC Declaration of Conformity
This appliance complies with the essential requirements and other relevant provisions of the European Electromagnetic Compatibility Directive 2014/30/EU, the Low Voltage Directive 2014/35/EU as well as the ErP Directive 2009/125/EC, Regulation No. 66/2014 Annex I, Sections 2 and 2.2.
The complete original Declaration of Conformity is available from the importer.

Information on this hotplate
| SYMBOL VALUE UNIT | ||
| Model designation SIKP 2000 E3 | ||
| Hotplate type - Household hotplate - | ||
| Number of hobs and/or cooking areas - 1 | - | |
| Heating technology (induction hobs and areas, radiant heat hobs, cooking plates) | - Induction hob - | |
| In the case of circular cooking plates or areas: Diameter of effective area per hob, rounded up to the next 5 mm | Ø | 20 |
| In the case of non-circular hobs or cooking areas: Length and width of effective area per electrically-heated hob or cooking area rounded up to the next 5 mm | L | N/A |
| B | N/A | |
| Power consumption per hob or cooking area, calculated per kg | ECeletric cookers | 192,6 |
| Hob power consumption per kg | ECHob | 192,6 |
This appliance has a 3-year warranty valid from the date of purchase. If this product has any faults, you, the buyer, have certain statutory rights. Your statutory rights are not restricted in any way by the warranty described below.
Warranty conditions
The validity period of the warranty starts from the date of purchase. Please keep your original receipt in a safe place. This document will be required as proof of purchase.
If any material or production fault occurs within three years of the date of purchase of the product, we will either repair or replace the product for you at our discretion. This warranty service is dependent on you presenting the defective appliance and the proof of purchase (receipt) and a short written description of the fault and its time of occurrence.
If the defect is covered by the warranty, your product will either be repaired or replaced by us. The repair or replacement of a product does not signify the beginning of a new warranty period.
Warranty period and statutory claims for defects
The warranty period is not prolonged by repairs effected under the warranty. This also applies to replaced and repaired components. Any damage and defects present at the time of purchase must be reported immediately after unpacking. Repairs carried out after expiry of the warranty period shall be subject to a fee.
Scope of the warranty
This appliance has been manufactured in accordance with strict quality guidelines and inspected meticulously prior to delivery.
The warranty covers material faults or production faults. The warranty does not extend to product parts subject to normal wear and tear or fragile parts such as switches, batteries, baking moulds or parts made of glass.
The warranty does not apply if the product has been damaged, improperly used or improperly maintained. The directions in the operating instructions for the product regarding proper use of the product are to be strictly followed. Uses and actions that are discouraged in the operating instructions or which are warned against must be avoided.
This product is intended solely for private use and not for commercial purposes. The warranty shall be deemed void in cases of misuse or improper handling, use of force and modifications / repairs which have not been carried out by one of our authorised Service centres.
Warranty claim procedure
To ensure quick processing of your case, please observe the following instructions:
Please have the till receipt and the item number (e.g. IAN 12345) available as proof of purchase.
- You will find the item number on the type plate, an engraving on the front page of the instructions (bottom left), or as a sticker on the rear or bottom of the appliance.
If functional or other defects occur, please contact the service department listed either by telephone or by e-mail.
You can return a defective product to us free of charge to the service address that will be provided to you. Ensure that you enclose the proof of purchase (till receipt) and information about what the defect is and when it occurred.
You can download these instructions along with many other manuals, product videos and software on www.lidl-service.com.
Service
GB Service Great Britain
Tel.: 0800 404 7657
E-Mail: kompernass@lidl.co.uk
IE Service Ireland
Tel.: 1890 930 034
(0,08 EUR/Min., (peak))
(0,06 EUR/Min., (off peak))
E-Mail: kompernass@lidl.ie
IAN310980
Importer
Please note that the following address is not the service address. Please use the service address provided in the operating instructions.
KOMPERNASS HANDELS GMBH
BURGSTRASSE 21
DE-44867 BOCHUM
GERMANY
www.kompernass.com
Table des matieres
Introduction 42
Chere cliente, cher client,
KOMPERNASS HANDELS GMBH
BURGSTRASSE 21
DE-44867 BOCHUM
ALLEMAGNE
www.kompernass.com
Inhoud
Inleiding 62
WAARSCHUWING! LETSELGEVAAR!
WAARSCHUWING! BRANDGEVAAR!
WAARSCHUWING! LETSELGEVAAR!
KOMPERNASS HANDELS GMBH
BURGSTRASSE 21
DE-44867 BOCHUM
DUITSLAND
www.kompernass.com
Spis tresci
Wstep. 82
Pozomy temperature w °C
6080100120140160180200220240
Wyłuczenie awaryjne
KOMPERNASS HANDELS GMBH
BURGSTRASSE 21
DE-44867 BOCHUM
NIEMCY
www.kompernass.com
Obsah
Uvod. 102
POZORI HMOTNÉ SKODY!
KOMPERNASS HANDELS GMBH
BURGSTRASSE 21
DE-44867 BOCHUM
NEMECKO
www.kompernass.com
Obsah
Uvod. 122
KOMPERNASS HANDELS GMBH
BURGSTRASSE 21
DE-44867 BOCHUM
NEMECKO
www.kompernass.com
KOMPERNASS HANDELS GMBH
BURGSTRASSE 21
DE-44867 BOCHUM
GERMANY
www.kompermass.com
