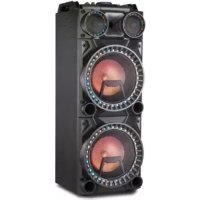
LIFE X64004 (MD 44050) - Cordless phone MEDION - Free user manual and instructions
Find the device manual for free LIFE X64004 (MD 44050) MEDION in PDF.



User questions about LIFE X64004 (MD 44050) MEDION
0 question about this device. Answer the ones you know or ask your own.
Ask a new question about this device
Download the instructions for your Cordless phone in PDF format for free! Find your manual LIFE X64004 (MD 44050) - MEDION and take your electronic device back in hand. On this page are published all the documents necessary for the use of your device. LIFE X64004 (MD 44050) by MEDION.
USER MANUAL LIFE X64004 (MD 44050) MEDION
1. Information about these operating instructions 33
1.1.Explanation of symbols 33
1.2. Proper use 35
2. Safety information
2.1. Restricted group of people 35
2.2. Always use the device in a safe place 36
2.3. Connecting the power cord 37
2.4.Ambient temperature 38
2.5. If there are defects 38
3. Package contents
4. Device overview
4.1. Top 40
4.2. Rear 42
5. Getting started
5.1. Setting up the device 43
5.2. Connecting the power cord 43
5.3. Switch the device on/off 43
6. Operation 44
6.1. Adjusting the volume 44
6.2. Starting/stopping playback 44
6.3. Track selection, fast rewind/forward 44
6.4. Equalizer 44
6.5. Set lighting effect 44
7. Drum effects
7.1.Recorddrum effects 45
8. Connecting the device via Bluetooth 46
9. Connecting an external playback device 47
- Inserting USB memory sticks 47
- Inserting SD memory card 47
- Connect guitar 48
- Connecting a microphone 48
- Connections on the back of the device 48
14.1.AUX IN 48
14.2. Line out 49
- Troubleshooting 49
- Declaration of Conformity 50
- Cleaning 51
- Storing the device when not in use 51
18.1. Trademark information 51
19. Technical specifications 52
EN
FR
ES
IT
NL
- Disposal 54
- Service information 55
- Legal Notice 56
1. Information about these operating instructions

Thank you for choosing our product. We hope you enjoy using this device.
Read the safety instructions carefully before using the device for the first time. Note the warnings on the device and in the operating instructions.
Always keep the operating instructions close to hand. If you sell
the device or give it away, please ensure that you also pass on these operating instructions. They are an essential component of the product.
1.1. Explanation of symbols
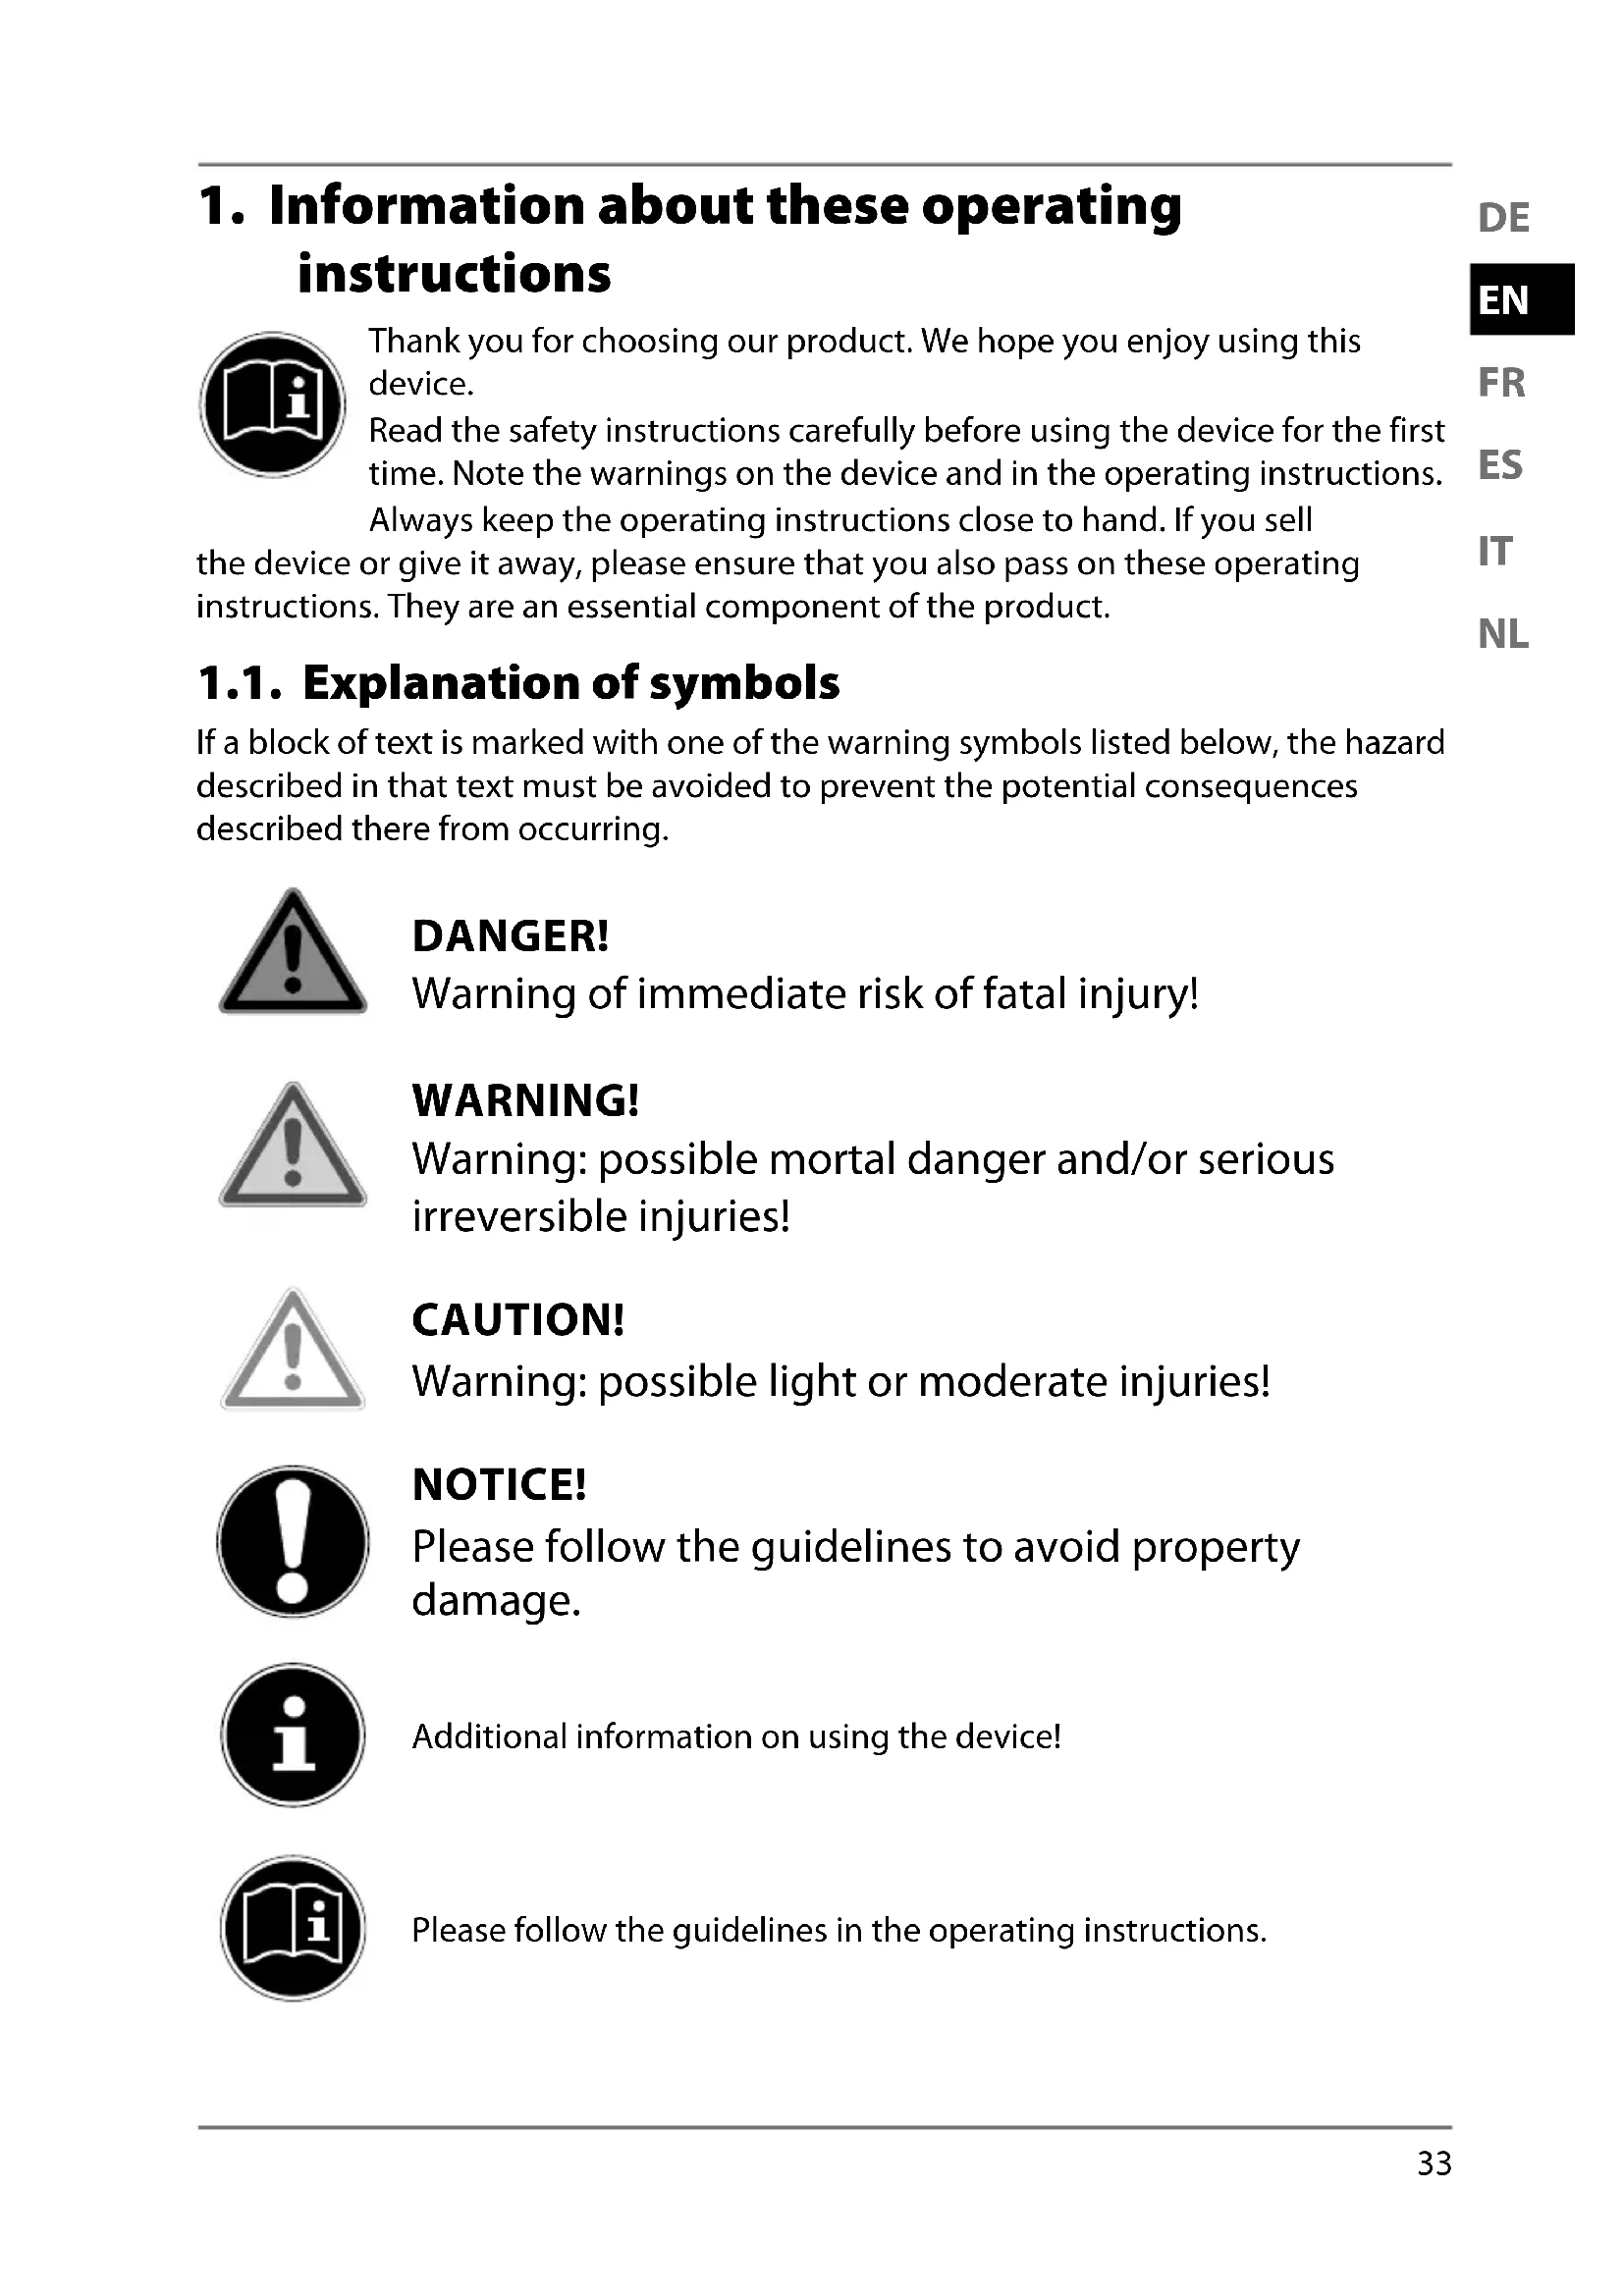
If a block of text is marked with one of the warning symbols listed below, the hazard described in that text must be avoided to prevent the potential consequences described there from occurring.

DANGER!
Warning of immediate risk of fatal injury!

WARNING!
Warning: possible mortal danger and/or serious irreversible injuries!

CAUTION!
Warning: possible light or moderate injuries!

NOTICE!
Please follow the guidelines to avoid property damage.

Additional information on using the device!

Please follow the guidelines in the operating instructions.

WARNING!
Warning: danger of electric shock!
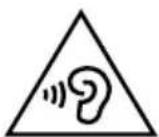
WARNING!
Warning: danger due to excessive volume!
- Bullet point/information on operating steps and results
Tasks to be performed

Declaration of conformity
Products that feature this symbol meet the requirements of the EC directives (see section 'Declaration of conformity')

Protection class II
Electrical appliances in protection class II are electrical appliances that permanently have double and/or reinforced insulation and do not have any connection options for a protective earth. The housing of an electrical appliance in protection class II that is enclosed in insulated material can partially or fully act as the additional or reinforced insulation.

Symbol for alternating current
Symbol for direct current
1.2. Proper use
This is an entertainment electronics device.
The party speaker is used to play back audio files from a mobile device via Bluetooth®, from a USB stick, SD memory card or an audio output device connected using AUX.
The device is only intended for private use and not for industrial/commercial use. Note that no liability will be accepted if the device is not used for its intended purpose:
Do not modify the device without our express agreement and do not use any accessories that have not been supplied or approved by us.
Only use replacement parts or accessories that we have supplied or approved.
Comply with all the information in these operating instructions, especially the safety information. Any other use is considered improper and can cause personal injury or property damage.
Do not expose the device to extreme conditions. Avoid:
-High humidity and wet conditions
-Extremely high and low temperatures
-Direct sunlight
-Naked flames
2. Safety information
2.1. Restricted group of people

WARNING!
Risk of injury!
Risk of injury to persons with limited physical, sensory or mental abilities (for example, partially disabled people or older people with limited physical or mental abilities) or to those without experience and knowledge (such as older children).
- Keep the device and its accessories out of the reach of children.
Before each use check the party speaker and accessories for damage. Defective devices or components should not be used.
This device may be used by children over the age of 8 and by persons with reduced physical, sensory or mental abilities or by those without experience and/or knowledge, if they are supervised or have been instructed in the safe use of the device and have understood the dangers that result from it.
Children must not be allowed to play with the device.
- Cleaning and maintenance must not be carried out by children.

DANGER!
Risk of choking and suffocation!
There is a risk of suffocation from breathing in or swallowing plastic film or small parts.
- Keep packaging away from children.
Do not allow children to play with the packaging material. The packaging material is not a toy!
2.2. Always use the device in a safe place

NOTICE!
Risk of damage to the device due to improper use
When used for the first time, new devices may give off a typical, unavoidable but completely harmless odour. This will fade over time.
We recommend you ventilate the room regularly to help dissipate this odour. When developing this product, every care was taken to ensure its emissions are significantly lower than the currently valid threshold values.
-
Do not place containers that are filled with liquid, e.g. vases, on or near the device or its power cord. Such containers could tip over and the liquid could impair the electrical safety of the device.
-
Protect the device and all other devices connected to it from dampness, water drops or water spray. To prevent malfunctions, keep the device dust-free, away from sources of
heat, and out of direct sunlight.
- Do not place open flames such as lit candles on or near the device.
- To prevent overheating, do not cover the device's mains plug (with newspapers, covers etc.).
- Never place any object directly on top of the cords, because this may damage the cords.
To prevent the device from falling, only install and operate it and its components on a sturdy, level, vibration-free surface. - Keep the device at a distance of at least one metre from sources of high-frequency or magnetic interference (televisions, other loudspeakers, mobile telephones, etc.) to avoid malfunctions.
2.3. Connecting the power cord
Only use the enclosed mains power cord.
The device must be close to the outlet, which must always be easily accessible. Position the cord so that no one can tread on it or trip over it.
To disconnect the device from the power supply, remove the plug from the outlet. Always hold the plug firmly when unplugging it. To prevent damage, never pull on the cord.
- Only operate the device from an earthed 100 - 240V 50 / 60 Hz outlet. Contact the local energy supplier if you have any questions about the power supply at the installation location.
- Stop using the device's plug if the housing or the cord connecting it to the device are damaged.
- Never open the device housing. Touching live parts or attempting to modify the device's electrical or mechanical functionality puts you at risk, and may also damage the device.

Unplug the device from the mains plug if it is not going to be used for a longer period of time or during a thunderstorm.
If the device is not in use, unplug the plug from the outlet or use a master/slave extension lead to prevent the device from using electricity when it is switched off.
2.4. Ambient temperature
- Only operate the party speaker at an ambient temperature of between -10^ to +35^ and relative air humidity of between 45% to 85% (non-condensing).
- When switched off, the device can be stored at temperatures of between 0^ and +60^ .
Never use the device anywhere that is damp or wet.

WARNING!
Risk of electric shock!
Major changes in temperature or fluctuations in humidity can cause moisture to build up within the device due to condensation – this can cause an electrical short circuit.
After transporting the device, wait until it has reached ambient temperature before switching it on.
2.5. If there are defects
- Do not use the party speaker or power cord if they are damaged, generate smoke or emit unusual operating noises. Immediately remove the cord from the power supply.
- Never, under any circumstances, attempt to open and/or repair the party speaker yourself. If there is a defect contact our customer service department.
Also contact customer services if:
-the power cord is burnt or damaged
-liquid has penetrated the device
-the device is not operating correctly
--the device has fallen or the housing is damaged.
Repairs to your device should only be carried out by qualified specialists.
3. Package contents

DANGER!
Risk of choking and suffocation!
There is a risk of suffocation from breathing in or swallowing plastic film or small parts.
- Keep packaging away from children.
Do not allow children to play with the packaging material.
The packaging material is not a toy!
Remove the product from the packaging and remove all packaging material.
Check your purchase to ensure that all items are included. If anything is missing, please contact our Service team within 14 days of purchase.
Before each use, check the party speaker for any damage.
Contact our Service Centre if you find any damage.
The following items are supplied with your product:
- Party speaker
Power cord - Microphone
- Operating instructions and warranty documents
4. Device overview
4.1. Top
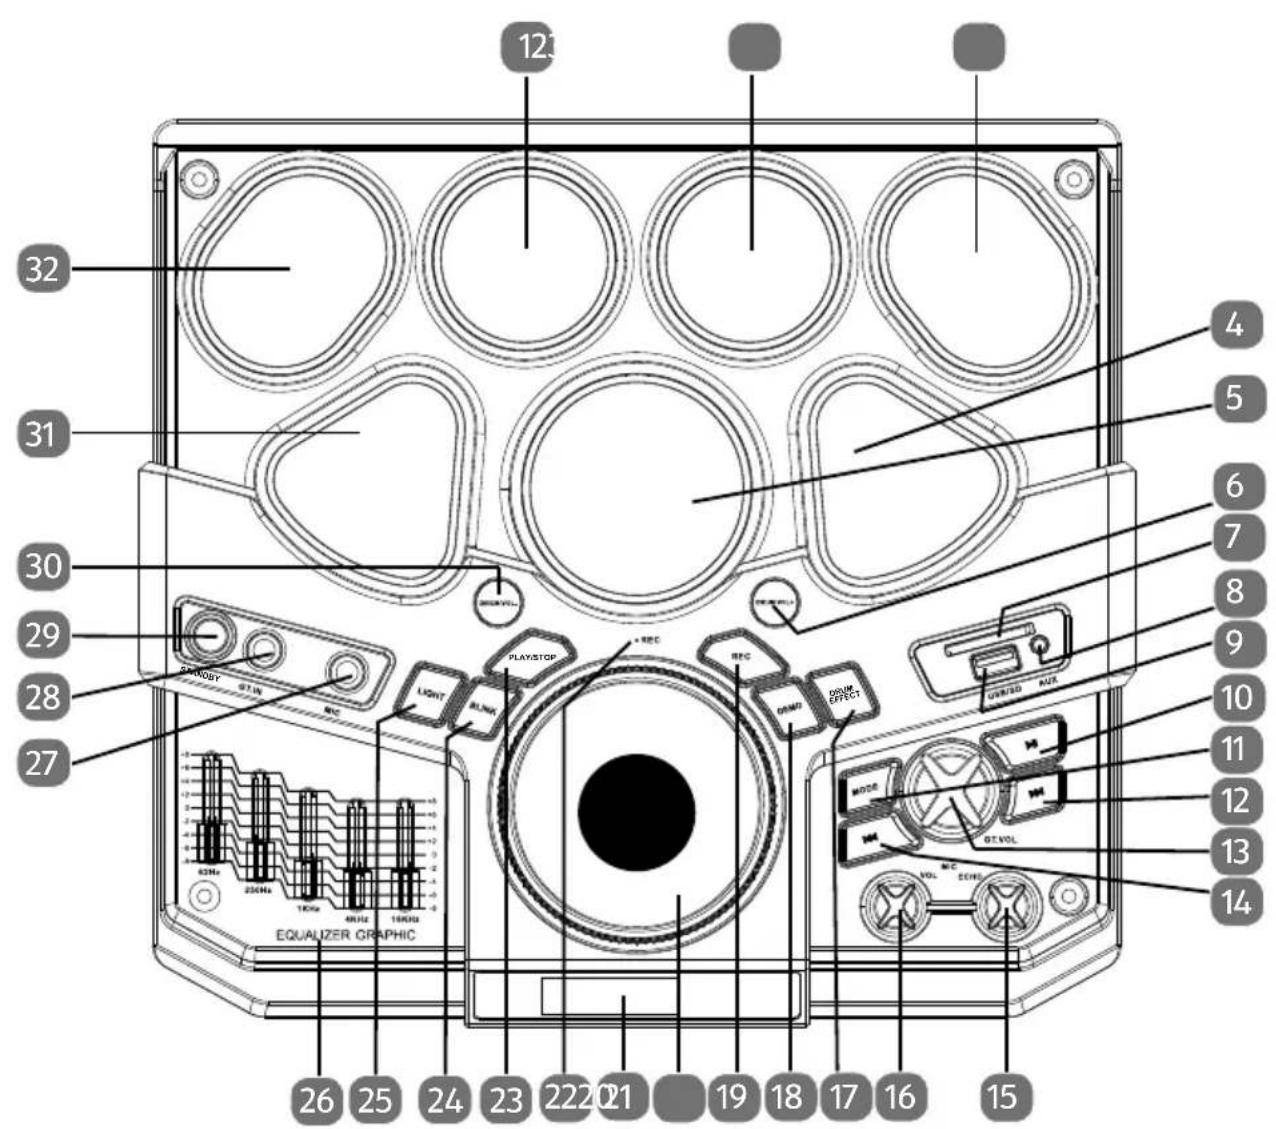
| 1 Drum pad (TOM2) |
| 2 Drum pad (TOM1) |
| 3 Crash cymbal |
| 4 Snare drum |
| 5 Bass drum |
| 6 DRUM VOL. Increase volume of drum effects |
| 7 SD | memory card slot |
| 8 AUX E input (3.5 mm cinch) | |
| 9 USB - connection | |
| 10 | ►IStart/stop playback |
| 11 | Select MODE playback made (AUX/bt (Bluetooth®)/USB/SD) |
| 12 | ►Play next track |
| 13 | ►GT. VOL Guitar volume control |
| 14 | ►Play previous track |
| 15 | ►ECHO Microphone echo effect controller |
| 16 | ►MIC VOL. Microphone volume controller |
| 17 DRUM EFFECT Modify drum effect pitch | |
| 18 DEMO Play pre-installed demo recordings; hold down to pause demo. | |
| 19 REC Record drum effects | |
| 20 | ►VOL Volume controller |
| 21 | Display Shows the playback mode selected when the appliance is in use (AUX/bt (Bluetooth®)/USB/SD). / Shows a colon in standby mode:. |
| 22 REC LED lights up red during recording | |
| 23 PLAY/STOP Play recorded drum effects | |
| 24 BLINK Select flash effect (light) | |
| 25 LIGHT Select light effect / switch light effect on/off | |
| 26 EQUALIZER GRAPHIC Make equalizer settings | |
| 27 MIC Microphone input (6.3 mm cinch) | |
| 28 GT. IN Guitar input (6.3 mm cinch) | |
| 29 STANDBY Switch device into / out of standby mode | |
| 30 | DRUM VOL. Reduce volume of drum effects |
| 31 Drum pad (Closed Hi-hat) | |
| 32 Drum pad (Ride) | |
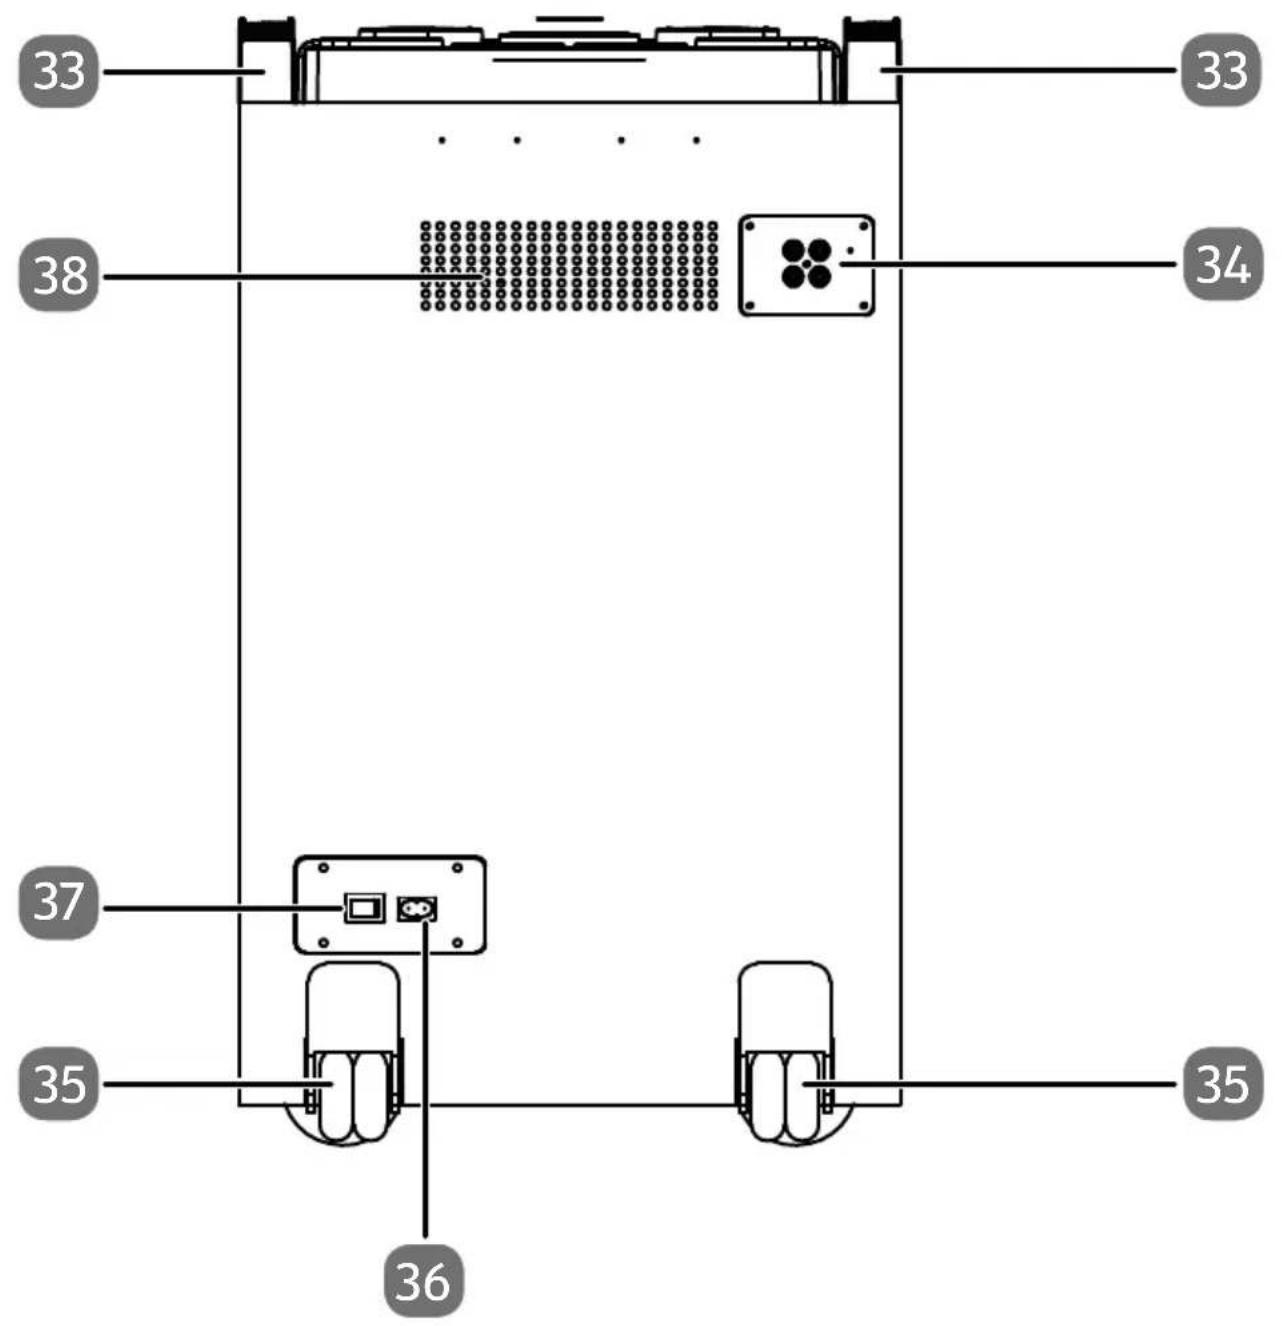
4.2. Rear
| 33 Handles |
| 34 LINE OUT / AUX IN Audio inputs/outputs |
| 35 Transport rollers |
| 36 Power supply 100-240 V ~ 50 / 60 Hz |
| 37 POWER Switch device on/off |
| 38 Fan openings |
5. Getting started
5.1. Setting up the device
- Place the device on a sturdy, level surface. Some aggressive varnishes can corrode the rubber feet on the device. If necessary, place the device on a suitable underlay.

Unplug the device's mains plug before connecting it to an external device.
5.2. Connecting the power cord
Plug the power cord supplied into the AC100 -240 ~ 50 / 60Hz power supply.
Connect the power cord to an outlet that is easily accessible from the device.
5.3. Switch the device on/off
- Move the POWER switch on the back of the party speaker to the ON position to switch the device on.
The drum lighting switches itself on and the screen shows the playback mode currently selected.
Move the POWER switch on the back of the party speaker to the OFF position to switch the device off.
The power supply is interrupted and all lights and displays on the device switch off.
5.3.1. Standby mode
Press the STANDBY button to switch the device back into standby mode.
The screen displays:

After 10 minutes the party speaker switches automatically to the standby mode.
Press the STANDBY button to switch the device back into standby mode.
6. Operation
6.1. Adjusting the volume
- Turn the volume control VOL towards to increase the volume, or towards to reduce the volume.

You can control how tracks are played and the volume on your external device and on the party speaker. The functions available when using an audio playback device on the party speaker depend on your external device and the software used.
6.2. Starting/stopping playback
Press the button to start playing tracks.
Press the button again to pause playback. Press the button again to resume playback.

You can control how tracks are played and the volume on your external device and on the party speaker. The functions available when using an audio playback device on the party speaker depend on your external device and the software used.
6.3. Track selection, fast rewind/forward
Press the button to go back to the start of the track that is currently being played. Press the button again to return to the previous track.
Press the button to skip to the next track.
Hold down the button to fast forward within a track. Hold down the button to fast rewind within a track.

You can control how tracks are played and the volume on your external device and on the party speaker. The functions available when using an audio playback device on the party speaker depend on your external device and the software used.
6.4. Equalizer
- Actuate the various sliders in the equalizer graphic to adjust the trebles and basses as you wish.
6.5. Set lighting effect
Press the LIGHT button once or several times to select one of the following light effect settings:
- Switch all effect lights on
- Switch external effect light on
- Switch internal effect light on
- Switch effect light off
6.5.1. Set blink effect
Press the BLINK button once or several times to select one of the light effect settings shown in the following table:
| Screen display Blink effect | |
| L-01 | Pulsing light with colour change blue/red/green (not in time with music rhythm) |
| L-02 | Light with colour change blue/red/green (in time with music rhythm) |
| L-03 Blue light (in time with music rhythm) | |
| L-04 Red light (in time with music rhythm) | |
| L-05 Green light (in time with music rhythm) | |
| L-06 Rapidly blinking white light (not in time with music rhythm) | |
| L-07 | Rapidly blinking light with colour change blue/red/green (not in time with music rhythm) |
7. Drum effects
There are seven drum effect pressure pads on the top of the party speaker that you can use to generate various drum effects. The device overview on page 40 shows the drum effect created by each pressure pad.
Press one or more of the seven drum effect pressure pads to generate various drum effects.
Press the DRUM EFFECT button to select various sound effects for the drum effect pressure pads.
Press the DRUM VOL button to increase the volume of the drum effects and the DRUM VOL button to decrease the volume of the drum effects.
7.1. Record drum effects
You can record the drum effects that you create or a drum effect sequence to play it back later from the party speaker.
Press the REC button to start recording.
The REC LED lights up red. Generate the desired drum effects that you want to record.
The recording is stored in the party speaker's internal memory.
Press the PLAY/STOP button to play and stop your recording.
The REC LED goes out.

The recording is available until the party speaker is either switched off or goes into standby mode or you make another recording and therefore overwrite the previous one.
8. Connecting the device via Bluetooth®
In Bluetooth mode, you can receive audio signals wirelessly from an external Bluetooth-enabled device. Make sure the two devices are not more than 10 metres apart.

You can only connect one Bluetooth device to the loudspeaker. You cannot connect it to a telephone and an audio output source at the same time.
8.1.1. Connect Bluetooth audio output device
To connect a Bluetooth audio output device (e.g. smartphone or tablet PC), proceed as follows:
Switch the party speaker on.
Press the MODE button once or repeatedly until the screen shows bt to switch to the Bluetooth mode.
The party speaker is now in search mode. During the search, bt flashes on the display.

The party speaker attempts to automatically connect itself to the last audio output device connected via Bluetooth. If this is not possible, the party speaker sends its device identification via Bluetooth and bt flashes on the screen.
- Switch on the Bluetooth function on your audio output device and enable search mode. On your audio output device select your party speaker MD 44030 from the list of available devices and link the devices.

You may find more information about the Bluetooth function of your playback device in its operating instructions.
If you are prompted to enter a password, enter 0000.
After successful Bluetooth coupling, a beep sounds and the party speaker's screen now permanently shows bt.

You can control how tracks are played and the volume on your external device and on the party speaker. The functions available when using an audio playback device on the party speaker depend on your external device and the software used.
9. Connecting an external playback device
You can use the AUX IN connection to connect an external playback device (for example a CD player or MP3 player).
Switch the party speaker off.
- Switch on your external device.
Plug the end of a 3.5mm cinch cord (not supplied with the device) into the AUX IN plug on the top of the party speaker.
Connect the other end of the cord to your external device.
- Switch on your external device.
Switch the party speaker on.
Press the MODE button several times until you see AUX in the display.
The audio signal from your external device will now be played back.

The track playback is controlled via the external device. The volume can be controlled both on your external device and the party speaker.
10. Inserting USB memory sticks
If necessary, remove the protection cover and insert the USB drive into the USB slot on the top of the party speaker.
Press the MODE button once or several times to select the operating mode you require.
USB will appear on the display.

Please note the following when connecting a USB stick:
- Due to the numerous different file systems and file formats, compatibility with the connected memory media cannot be guaranteed.
- Depending on the size of the data medium, it may take some time for the system to be detected.
- The FAT32 file system is supported; the supported file format is MP3.
- USB sticks up to 32 GB are supported.
- External hard disks are not supported.
11. Inserting SD memory card
Insert the SD memory card into the slot on the top of the party speaker. The card's contacts show towards the front of the device.
Sd will appear in the display.

Please note the following when connecting an SD memory card:
- Due to the numerous different memory cards on the market, compatibility with the connected memory media cannot be guaranteed.
- Depending on the size of the data medium, it may take some time for the system to be detected.
The MP3 file format is supported. - SD memory cards up to 32 GB are supported.
12. Connect guitar
The guitar can be used in any operating mode. To connect the guitar, proceed as follows:
Switch the party speaker off.
Insert the connection cord (6.3 mm cinch) for the guitar into the guitar plug GT in.
Connect the guitar with the connection cord.
Use the slider to select the desired guitar volume GT.VOL
13. Connecting a microphone
Insert the cord of the microphone supplied into the MIC plug on the top of the party speaker.
Use the MICVOL slider to select the desired microphone volume.
Use the ECHO controller to set any desired echo sound effect for the microphone.
Press the button on the microphone to mute it.

The microphone sound is played back independently of the selected playback mode.
14. Connections on the back of the device
The back of the device has an AUX IN input and a LINE OUT output to connect external devices.
14.1.AUXIN
Separately from the AUX connection on the top (3.5 mm cinch), the AUX IN connection (cinch) on the back of the device offers another option for connecting an external audio playback device to the party speaker.
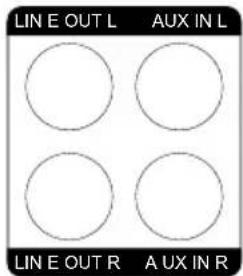
Insert the cinch connection cord to the AUX IN connections on the back of the device. Please note the colour markings and the L (left) and R (right) labels.
Press the MODE button several times until you see AUX in the display.
The audio signal from your external device will now be played back.

The track playback and volume settings are controlled via the external device.
14.2.Line out
You can connect an external amplifier (television, recording device, sound bar, active speaker etc.) to the party speaker via the LINE OUT connection.
Insert the cinch connection cord to the LINE OUT connections on the back of the device. Please note the colour markings and the L (left) and R (right) labels.

When connecting an external amplifier via the LINE OUT connection, you do not need to select a playback mode. The signal is output constantly.
15. Troubleshooting
| Problem Possible | cause Remedy | |
| The device cannot be switched on. | ·The power cord is not connected properly. ·The POWER switch is OFF. | ·Ensure that the power cord is properly connected. ·Ensure that the POWER switch on the back of the party speaker is switched to the ON position. If the party speaker still cannot be switched on, the appliance is defective. In this case, contact our service department. |
| No sound | ·The volume is set too low. ·The wrong playback mode has been selected. ·Unsupported file format. | ·Increase the volume as required. ·Check the volume set on the external audio playback device and, if necessary, increase it. ·Press the MODE button once or repeatedly until the correct playback mode is displayed on the screen of the connected device. ·Only use files of the MP3 format. |
| No sound from the microphone | ·The microphone volume is too low. ·The microphone is muted. | ·Increase the microphone volume as required. ·Switch off the mute setting via the microphone switch. |
| MP3 files are not played back. | The connection to the USB stick / SD card is broken. | ·Ensure that the USB stick / SD card is inserted correctly. |
16. Declaration of Conformity
CE MEDIUM AG hereby declares that this device complies with the fundamental requirements and the other relevant provisions of:
RE Directive 2014/53/EU
- Ecodesign Directive 2009/125/EC
RoHS Directive 2011/65/EU.
You can download the complete EU Declaration of Conformity at www.medion. com/conformity.
17. Cleaning
Always disconnect the device from the mains before cleaning it.
Only use a dry, soft cloth to clean the device.
- Do not use chemical solutions or cleaning products because these may damage the device's surface and/or inscriptions.
18. Storing the device when not in use
If you do not intend to use the device over a longer period of time, unplug it from the power supply and store in a cool, dry place.
Ensure that the device is protected from dust and extreme temperature variations.
18.1. Trademark information
The Bluetooth® word mark and logos are registered trademarks of Bluetooth SIG, Inc. and are used by MEDION under license.
The USB™ word mark and the logos are registered trademarks of the USB Implementers Forum, Inc. and are used by MEDION under licence.
Other trademarks are the property of their respective owners.
19. Technical specifications
Power supply
Input voltage/frequency AC 100-240 V ~ 60/50Hz
Power consumption operation Max. 103 W
Power consumption standby Max. 0.3 W
Connections for external functions
AUX input 3.5 mm jack
Microphone input 6.3 mm jack
Guitar input 6.3 mm jack
AUX IN input Cinch
LINE OUT output Cinch
Bluetooth
Bluetooth version 4.2
Bluetooth frequency band 2.4 GHz
Bluetooth frequency range 2402 MHz - 2480 MHz
Max. Bluetooth transmission power +2 dBm
Microphone
Frequency response 30Hz 15kHz
Sensitivity -73dB +/ -3dB
Impedance 600Ω
USB port
USB 2.0 Up to 32 GB, 5V = -200mA max.
Supported formats MP3
General data
Dimensions (W x H x D) 350 x 603 x 340 mm
Weight 16.7 kg
Output power 2 × 100 W RMS
Ambient conditions (operation)
- 10^ to +35^ at a relative air humidity of max. 85% (non-condensing)
Ambient conditions (storage)
0^ to +60^ at a relative air humidity of max. 85% (non-condensing)
Protection class
Protection class II
1 USB extension cord and card reader adapter not supported. Compatibility with all commonly available MP3 players, USB sticks or memory cards cannot be guaranteed.
20. Disposal

PACKAGING
Your device has been packaged to protect it from damage in transit. The packaging is made of materials that can be recycled in an environmentally friendly manner.
DEVICE
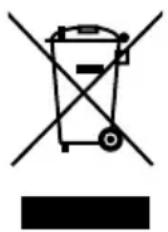
Do not dispose of old devices with normal household rubbish.
In accordance with Directive 2012/19/EU, the device must be properly disposed of at the end of its service life.
This involves separating the materials in the device for the purpose of recycling and minimising the environmental impact.
Take old devices to a collection point for electrical scrap or a recycling centre. Before doing so, remove the batteries from the wireless microphone and take them separated to a collection point for used batteries. Contact your local waste disposal company or your local authority for more information on this subject.
21. Service information
Please contact our Customer Service team if your device ever stops working the way you want or expect it to. There are several ways for you to contact us:
- In our Service Community, you can meet other users, as well as our staff, and you can exchange your experiences and pass on your knowledge there. You will find our Service Community at http://community.medion.com.
- Alternatively, use our contact form at www.medion.com/contact.
- You can also contact our Service team via our hotline or by post.
| Opening times Hotline number UK | |
| Mon – Fri: 08.00 – 20.00 Sat – Sun: 10.00 – 16.00 | 0333 3213106 |
| Hotline number Ireland | |
| 1 800 992508 | |
| Service address | |
| MEDION Electronics Ltd. 120 Faraday Park, Faraday Road, Dorcan Swindon SN3 5JF, Wiltshire United Kingdom | |

You can download this and many other sets of operating instructions from our service portal at www.medion.com/gb/service/start/.
You will also find drivers and other software for a wide range of devices there.
You can also scan the QR code on the side of the screen, to download the operating instructions onto your mobile device from the service portal.
22. Legal Notice
Copyright © 2018
Date: 16.10.2018
All rights reserved.
These operating instructions are protected by copyright.
Mechanical, electronic and any other forms of reproduction are prohibited without the written permission of the manufacturer.
Copyright is owned by the company:
MEDION AG
Am Zehnhof 77
45307 Essen
Germany
Please note that you cannot use the address above for returns. Please always contact our Customer Service team first.
Sommaire
A Anything's up to the right.