U220CH1 - Coffee machine ROTEL - Free user manual and instructions
Find the device manual for free U220CH1 ROTEL in PDF.

User questions about U220CH1 ROTEL
0 question about this device. Answer the ones you know or ask your own.
Ask a new question about this device
Download the instructions for your Coffee machine in PDF format for free! Find your manual U220CH1 - ROTEL and take your electronic device back in hand. On this page are published all the documents necessary for the use of your device. U220CH1 by ROTEL.
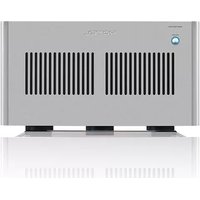
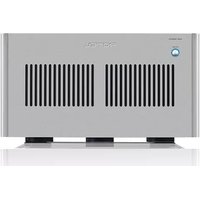
USER MANUAL U220CH1 ROTEL
5 Water tank
6 Water tank cover
7 Capsule collection tray
8 Drip tray cover
9 Cup holder grid
10 Drip tray
TECHNISCHE DATEN
- Caracteristiques techniques
- Specifiche tecniche
Technical specifications
| 220-240 V | Nennspannung Tension nominale Tensione nominale Rated voltage |
| 50 Hz | Nennfrequenz Fréquence nominale Frequenza nominale Rated frequency |
| 960-1145 W | Nenneingangsleistung Puisance d'entrée nominale Potenza nominale Rated input power |
Inhaltsverzeichnis / Table des matérières / Indice / Table of contents
Deutsch 6
- Safety instructions 30
Supplied items and packaging. 33 - Operating the appliance 33
Initial use 33
Preparing coffee 33
Programming coffee volume 34
Automatic standby mode 34
- Cleaning and maintenance. 35
Dscaling 35
Troubleshooting 36
Disposal 36
D/F/I/E 37
Garantie / Garantie / Garanzia / Warranty 37
Deutsch
SICHERHEITSHINWEISE
- SAFETY INSTRUCTIONS
Failure to follow the safety instructions may result in personal injury or material damage (electric shock, skin burns, fire). These safety instructions and hazard information are intended to protect your health, the health of others and to protect the product. For this reason, pay attention to these safety instructions and include these safety instructions when handing over the product to others.
This appliance may be used by persons with reduced physical, sensory or mental capabilities or lack of experience and knowledge only if they have received proper supervision or instruction in the safe use of the appliance and understand the hazards involved.
- This appliance must not be used by children. The appliance and its power cable must be kept out of the reach of children.
Children must not play with the appliance.
○ Cleaning and user maintenance must not be performed by children unless supervised.
- Close supervision is necessary when an electrical appliance is used near children.
-
The main supply must be disconnected from the appliance when the appliance is left unattended and prior to assembling, disassembling or cleaning.
This product is for household use only.
The appliance must not be used outdoors.
The appliance is intended for use in households and similar environments, such as: -
staff kitchen areas in shops, offices and other work environments,
in farmhouses, - hotel guest rooms, motels and other residential environments,
and bed and breakfast environments.
○ Do not use the product for any other purpose than expressly specified in this manual.
o Do not immerse the product or the mains power cable or plug in liquids.
The appliance must not be placed on or near a hot gas or electric burner.
The main power cable must not hang over the edge of a table, counter or touch hot surfaces.
Do not pull, twist or make sharp bends in the cable.
- Do not attempt to carry out a repair if the plug, power cable or appliance is damaged or defective. Repairs may only be carried out by our service department.
- Before plugging the appliance into a mains outlet socket, ensure that the mains voltage matches the voltage specified on the appliance rating plate.
- Unplug the appliance by holding and pulling the plug and never by pulling the cable
The appliance must not be left unattended when connected to the mains. The appliance must have completely cooled down before being placed in storage.
The use of any accessory attachment not recommended or sold by the manufacturer may cause fire, electric shock or personal injury. The manufacturer cannot be held liable for any damage or injury caused by erroneous use or misuse. - Only fill the tank with cold water. Never fill the tank with mineral water, milk or other liquids.
o Do not let the coffee machine operate without water. - Never insert your finger into the capsule gate to avoid it becoming trapped or inured.
○ There is extremely hot water in the capsule gate during the brewing process. To avoid risk of injury, do not lift the brew handle during the brewing process.
SUPPLIED ITEMS AND PACKAGING
Before using for the first time, please check that the appliance is complete and not damaged in any way. In case of doubt, do not use the appliance and contact your dealer or our service department.

Due to a risk of suffocation, the packaging must be kept out of the reach of children.
OPERATING THE APPLIANCE
Initial use
Place the coffee machine on a stable worktop that is not close to water.
- Keep the coffee machine well away from sources of high temperature.
Rinse the water tank before filling with drinking water.
- Close the capsule gate by pulling the handle down completely.
Plug the machine into the mains supply and switch on the machine by pressing the power button.
The indicator light around the coffee button flashes red while the appliance warms up. Wait until it lights green.
- Place a container under the coffee outlet and press the coffee button to rinse the machine. Repeat five times.
Then dispose of the water. Clean all detachable parts thoroughly with warm water.
Preparing coffee

- Never lift the handle during operation.
- We recommend that all detachable parts are cleaned thoroughly with warm water every day.
To ensure healthy and good-tasting coffee, please change the water in the tank every day. - Due to the small volume of an espresso cup, we suggest warming the cup before preparation.
Fill the detachable water tank with potable water.
Open the capsule gate by lifting the handle completely and insert a coffee capsule.
Close the capsule gate by pulling the handle down completely.
Plug the machine into the mains supply and switch on the machine by pressing the power button.
The indicator light around the coffee button flashes red while the appliance warms up. Wait until it lights green.
o Make sure the drip tray is correctly assembled, it will click into place by itself.
If you fold up the drip tray cover, you can place a big cup on the cup holder grid.
Position the cup on the drip tray cover or the cup holder grid.
Press the coffee button for an Espresso or press and hold the button for three seconds for a Lungo.
The preparation will stop automatically. To stop the coffee flow or top up your coffee, press the coffee button again.
Once the coffee is made, always expel the capsule afterwards. Capsules are automatically expelled into the capsule collection tray by lifting the handle.
If you want another coffee, insert a new capsule into the capsule gate.
Empty the capsule collection tray and rinse the unit and tank frequently.
Always turn off the coffee machine and disconnect it from the mains power supply when not in use.
Programming coffee volume
The coffee volume has been factory set at 30 ml for an Espresso and 60 ml for a Lungo.
If desired, the coffee volume can be adjusted.
Position the cup on the drip tray cover or the cup holder grid.
To enter the programming mode, press and hold the coffee button for more than 10 seconds, the indicator light around the coffee button lights red and green.
O Next, press the coffee button to program the volume for an Espresso or press and hold for three seconds to program the volume for a Lungo.
Once the desired volume has been reached, press the coffee button again.
Automatic standby mode
The appliance will automatically enter standby mode after nine minutes of non-use. To 'wake up' the appliance, press the coffee button.
- CLEANING AND MAINTENANCE
Ensure that the appliance is unplugged from the mains power supply before cleaning the appliance. To protect against electrical shock, do not immerse the mains power cable, plug or appliance in water or liquid.
We recommend that the following is carried out on a regular basis:
Rinse and clean all detachable parts thoroughly in warm water with detergent.
Clean the capsule gate using a dry cloth.
Clean the machine using a damp cloth, never submerge the machine in water or liquid.
Dscaling
To maintain your coffee machine in perfect condition, you should carry out this descaling procedure approximately three times a year, depending on the mineral content of your potable water:
Fill the water tank with water and a household descending agent in the ratio specified by the manufacturer.
Close the capsule gate by pulling the handle down completely.
Plug the machine into the mains supply and switch on the machine by pressing the power button.
The indicator light around the coffee button flashes red while the appliance warms up. Wait until it lights green.
Place a container under the coffee outlet and press the Espresso or Lungo button repeatedly until the water tank is empty.
Rinse the water tank thoroughly, fill it with fresh potable water and once again, press the Espresso or Lungo button repeatedly until the water tank is empty.
o NOTE: It is also possible to empty the water tank in one go using the programming mode for the coffee volume. But if you do this, after the de-scaling procedure is complete, you must then re-program the appliance for the desired coffee volume.
TROUBLESHOOTING
| Problem | Solution |
| No indication. | Check that the mains plug has been inserted correctly into the main power socket, that the power button has been pressed and that the corresponding red light is on. |
| The machine makes a strange noise. | Check that there is water in the tank. |
| The lights are on but no coffee comes out. | The inserted coffee capsule may be faulty. Wait for a few seconds, then try again with a new capsule. |
| There are signs of water at the bottom of machine. | Make sure that the tank has been correctly fitted into position. |
| A slight hiss can be heard after the coffee has been released. | This is not a fault. It is the normal settling of the pressure control valve. |
DISPOSAL
For proper disposal, please return device to a retailer, a service agent or Rotel AG.
European Directive 2012/19/EC concerning Waste Electrical and Electronic Equipment (WEEE) states that household appliances should not be disposed of using the normal solid urban waste cycle. Exhausted appliances should be collected separately in order to optimise the cost of re-using and recycling materials comprising the machine, while preventing potential damage to public health and the environment. The crossed-out wheeled bin symbol appears on all products to remind owners of the obligations regarding separate waste collection. Owners should contact their local authorities or appliance dealers for further information concerning the correct disposal of household appliances.
This appliance conforms to the following EU directives:

2014/35/EU (Low Voltage Directive)
2014/30/EU (Electromagnetic Compatibility Directive)
D/F/I/E
- GARANTIE / GARANTIE / GARANZIA / WARRANTY
3 JAHRE GARANTIE
3 ANS DE GARANTIE
3 ANNI DI GARANZIA
3 YEARS WARRANTY
We commit ourselves to repair this device free of charge, should a failure occur within the period of warranty despite proper handling. We repair all defects caused by material or manufacturing faults. The guarantee will be fulfilled either by repairing the device or replacing the defective parts, according to our judgement. A warranty does not cover damages due to wearing parts, damages and defects caused by improper handling or maintenance (such as limescale and commercial use). It will only be granted if either the warranty card stating date of purchase, dealer's stamp and signature, or the purchase receipt is sent with the device to the relevant after-sales service (see address below). Devices shall be returned in their original packaging. Transport costs are to be borne by the purchaser. Remember to specify your address to your sending, as well as a short declaration about the failure, shall the defect not be obvious.
Servicestation:
Service après-venture: Rotel AG