
U2763CH - Coffee machine ROTEL - Free user manual and instructions
Find the device manual for free U2763CH ROTEL in PDF.
| Product type | Automatic coffee machine with grinder |
| Brand | Rotel |
| Model | U2763CH |
| Electrical supply | 220-240 V, 50/60 Hz |
| Beverage types | Espresso, Coffee, Long coffee, Hot water, Steam (milk froth) |
| Double cup function | Yes, for espresso or coffee |
| Ground coffee function | Yes, with 7 to 14 g dose |
| Grind adjustment | Continuously adjustable grinder, adapted to the type of beans |
| Coffee strength adjustment | 3 levels (mild, normal, strong) available for each beverage |
| Temperature adjustment | 2 levels: high or normal |
| Pre-infusion | Adjustable (activation/deactivation) |
| Adjustable beverage volume | Espresso: 25-120 ml, Coffee: 25-240 ml, Hot water: 10-450 ml, Steam: 3-120 s |
| Automatic shut-off | Adjustable from 5 minutes to 4 hours |
| Adjustable water hardness | Yes, from 1 to >21 °dH, influences descaling cycle |
| Steam nozzle | Yes, for frothing milk |
| Display screen | Yes, with menus and indicators |
| Adjustable output nozzle height | 80-115 mm |
| Infuser cleaning | Automatic program, requires a cleaning tablet |
| Descaling | Automatic program, duration approx. 30 minutes |
| Safety | Burn protection, automatic shut-off, grounding |
Frequently Asked Questions - U2763CH ROTEL
User questions about U2763CH ROTEL
0 question about this device. Answer the ones you know or ask your own.
Ask a new question about this device
Download the instructions for your Coffee machine in PDF format for free! Find your manual U2763CH - ROTEL and take your electronic device back in hand. On this page are published all the documents necessary for the use of your device. U2763CH by ROTEL.
USER MANUAL U2763CH ROTEL
- Bean container lid
- Water tank cover
- Water tank decorative cover
- Water tank
- Front cover left
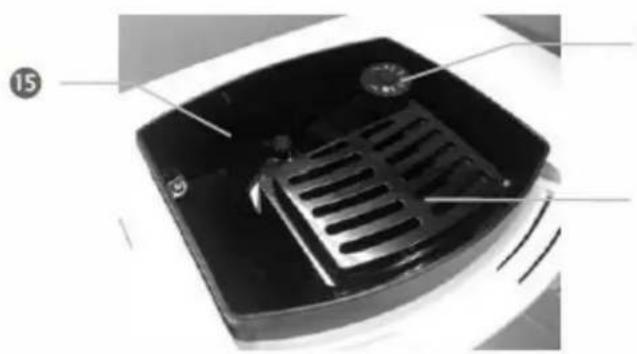
- Spout decorative cover
- Drip tray decorative cover
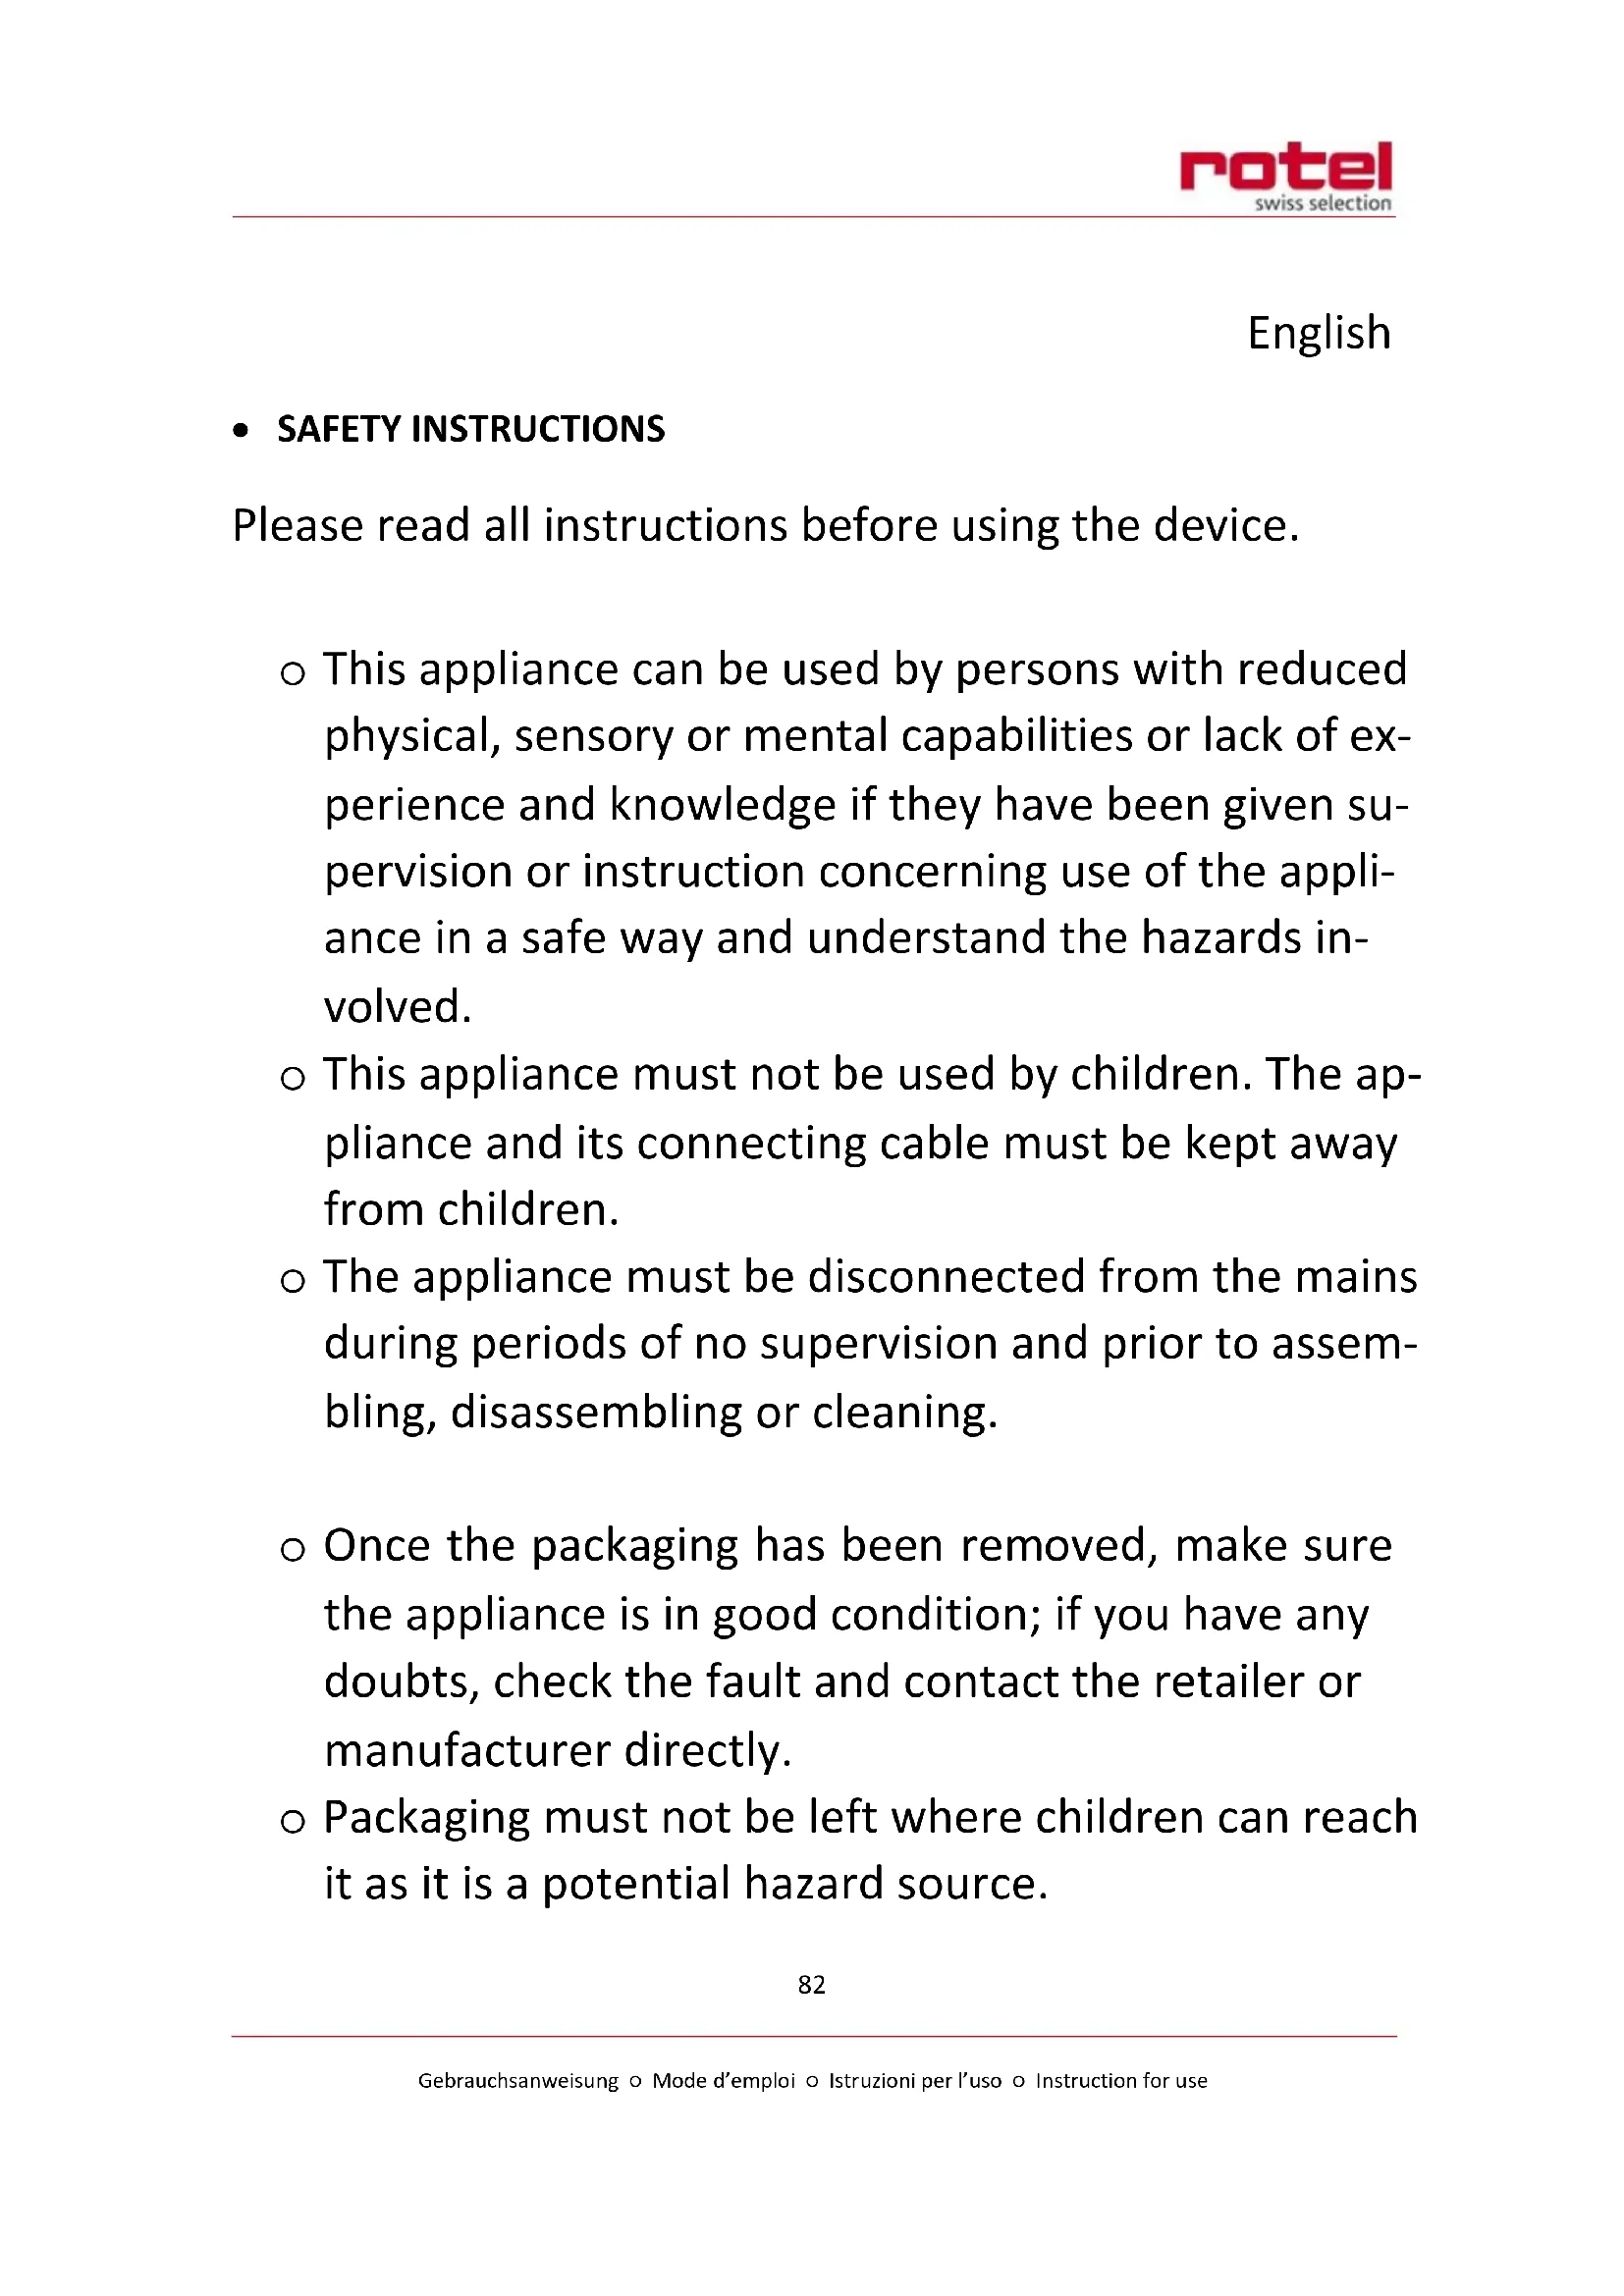
- Top cover
- Cup support
- Front cover right
- Froth unit
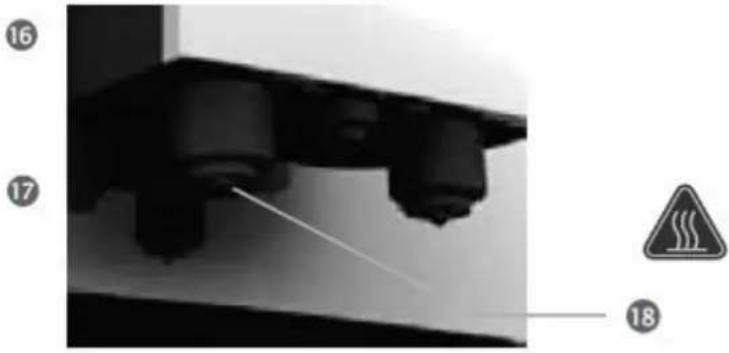
- Steam nozzle
- Drip tray cover
- Drip tray
Deutsch
- Safety instructions. 82
Symbol description 85
- Instructions for first-time use. 85
Power convection 85
Fill water tank. 85
Fill beans. 85
Grinding wheel 86
Power on 86
Power off. 86
- Making beverages 87
Making coffee 88
One-time setting of coffee parameters 89
Making coffee with coffee powder 90
Making double cups of coffee 91
91
How to use the steam nozzle 91
Program setting 92
Maintenance setting. 92
Beverage setting 92
Setting up beverage parameters and range 92
Pre-brew setting 93
Water hardness setting 93
Automatic switch-off 93
Reset. 93
Information 94
Language 94
Exit 94
- Cleaning and maintenance 95
Rinsing the coffee machine 95
Cleaning the brew unit 96
Dscaling the coffee machine 97
Cleaning the coffee grounds container and the drip tray 99
Cleaning the water tank 99
Cleaning the bean container 100
Cleaning the coffee machine 100
Display information 101
Failures handling 102
Transport 103
Disposal 104
D/F/I/E 105
Garantie / Garantie / Garanzia / Warranty 105
Deutsch
SICHERHEITSHINWEISE
INFORMATIONS A L'ECRAN
Please read all instructions before using the device.
This appliance can be used by persons with reduced physical, sensory or mental capabilities or lack of experience and knowledge if they have been given supervision or instruction concerning use of the appliance in a safe way and understand the hazards involved.
- This appliance must not be used by children. The appliance and its connecting cable must be kept away from children.
The appliance must be disconnected from the mains during periods of no supervision and prior to assembling, disassembling or cleaning.
- Once the packaging has been removed, make sure the appliance is in good condition; if you have any doubts, check the fault and contact the retailer or manufacturer directly.
- Packaging must not be left where children can reach it as it is a potential hazard source.
-
The appliance must be installed in compliance with the safety standards in force in the country of use.
-
This appliance is completely safe only when it is connected to an effective earthing system that complies with the safety standards. Make sure that the mains power is sufficient for the energy required for the machine.
-
It is unadvisable to use extension leads or electrical adaptors for multiple sockets. If it is essential to use them, use only single adaptors or leads that comply with the current safety standards. Never exceed the capacity indicated on the adaptor or leads, or the maximum power indicated on the adaptor.
-
This appliance should only be used for its intended purpose. Any other use is considered improper and consequently dangerous. The manufacturer cannot be held responsible for any damages caused due to an erroneous or irrational use. The technician must remind the user about the safety standards to ensure correct operation of the appliance.
-
The use of an electrical appliance is subject to the safety standards.
-
If the customer decides not to use the appliance for a long time, the power cable must be disconnected from the mains and the water container emptied.
To guarantee that the coffee-maker works properly and efficiently, it is essential to follow the manufacturer's instructions, and to carry out periodical maintenance and check all of the safety devices.
Always make sure that hands, or other parts of the body, never come within the range of the coffee dispensing spouts or those of steam and hot water, so as not to be scalded. - The maintenance technician must inform the retailer or manufacturer promptly of any problems when installing or using the appliance.
The coffee machine must be used at temperatures between 5^ C and 40^ C .
SYMBOL DESCRIPTION

Non-compliance with the operation may cause electric shock and threat to life.

Non-compliance with the operation may cause the coffee machine to be damaged, or personal injury.

Non-compliance with the operation may cause scalding or burn injuries.

This symbol, if present, means please read carefully.

This symbol, if present, means recycle.
- INSTRUCTIONS FOR FIRST-TIME USE
Power convection
Place the coffee machine on a stable worktop that is not close to water.
o Keep the coffee machine far away from high temperature heat sources.
Be sure to use a power supply that is in accordance with the regulations.
Put the power cable in a suitable place to prevent people tripping over it.
Fill water tank
○ Only purified water at room temperature should be used to fill the water tank, never fill it with any other liquid (e.g. warm water, hot water, milk), as this will damage the coffee machine.
To ensure healthy and good-tasting coffee, please change the water in the tank every day.
The amount of water in the water tank must not exceed the height of the MAX mark.
Fill beans
o Never put coffee beans that have been specially treated (e.g. sugar, cocoa) into the bean container.
Only roasted coffee beans should be put into the bean container, never use anything else, like rice, soybeans, chocolate beans, nuts, sugar, or spices.
o Never put hard objects into the bean container, otherwise it will damage the grinder.
The bean container cover acts as a seal. It preserves the maximum coffee bean aroma. Please do not lose the cover.
Don't put liquid in the bean container.
Grinding wheel
o Please adjust the fineness of the coffee bean powder according to the coffee beans.
Please adjust the grinding wheel when the grinder is running, or the grinder will be damaged.
If your coffee beans are dark in color, setting to rough mode is recommended.
If your coffee beans are light in color, setting to fine mode is recommended.
When making coffee, if the coffee pours very slowly or does not pour at all, please set it to rough mode.
If the coffee pours very quickly and the color of crema on the top is very light, please set it to fine mode.
○ Adjustment of the grinding wheel will be effective only after making two or more cups of coffee.
Power on
As the machine has been tested in a factory, there may be a little coffee powder left over. We promise the machine is brand new.
The coffee machine will start self-testing and cleaning the first time it is used. This helps the coffee machine to achieve the best working condition, and this process cannot be skipped.
Every time you switch on the coffee machine, it will automatically complete heating and cleaning once, and the process cannot be stopped. The coffee machine can only be used after the above cycle process is finished.
During the cleaning process, some hot water may flow out of the coffee spout into the drip tray. Please avoid coming into contact with the spilt hot water.
Please ensure the power is connected before pressing the power button.
Power off
Every time you switch off the coffee machine, it will automatically complete the cleaning process once, and the process cannot be stopped. This operation is to clean up the coffee pipelines and remove the coffee grounds.
During the cleaning process, some hot water will flow out of the coffee spout into the drip tray. Avoid touching spilt hot water, so as not to be burned.
- When you press the power button, the machine will power off after auto cleaning.
MAKING BEVERAGES
This chapter tells you how to make various kinds of coffee, hot water, hot milk and milk froth using this coffee machine. Please read the following instructions carefully to help you make high-quality beverages.
The temperature of the hot water is high, please do not touch it to avoid being scalded.
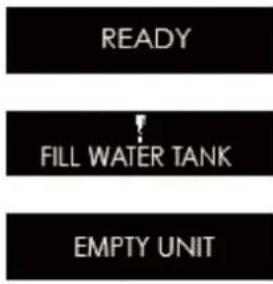
Before we make all kinds of coffee, please ensure "READY" is indicated on the display.
Never use dark roasted coffee beans.
The coffee beans should be stored in a dry place, out of sunlight.
To ensure the quality of coffee, please change the water in the water tank every day.
Please warm the coffee cup before making coffee, for a better taste.
Please adjust the height of the coffee spout according to the height of the cup, in order to avoid coffee splashing.
Adjustable height of coffee spout: 80-115mm.

Making coffee
○ You can make any kind of coffee using the touch icons, when the screen shows "READY"
Take espresso, for example, to explain how to make coffee.
The suggested volume of espresso is between 30 to 50ml . Because of the small volume of espresso, please warm the coffee cup before making coffee. When making coffee, press the espresso button twice to cancel.

When the screen shows "READY", press the es-
ppresso button for the espresso function.

The grinder will begin to grind. At this time, you can adjust the amount of coffee beans by pressing the left and right button. Default amount of coffee beans for espresso: 0 0

After grinding, the amount of coffee beans cannot be adjusted by pressing the left and right button.

While making coffee, you can adjust the volume of coffee by pressing the left and right button.

While making coffee, you can cancel making coffee by pressing the espresso button.

When the screen shows the picture on the left, it means the espresso is ready, please enjoy it.


One-time setting of coffee parameters
5 items as below can be set each time.
Set the amount of coffee beans when the screen shows "READY"
Set the amount of coffee beans during the grinding process
Set the volume of coffee when making coffee
Steam making time can be set
The volume of hot water can be set
Detailed instructions
- You can set the fineness of coffee and the volume of beverage before or during making the beverage every time, the setting will not be saved.

When the screen shows "READY", press the coffee strength button to set three levels: 0 0 0 0 0 0 the setting is only for making the next cup of coffee, and it will not be saved.

When grinding coffee beans, press the left or right button to adjust coffee strength. The default setting is normal 00 press the left button to choose mild 0 and press the right button to choose strong 00

When making "COFFEE", press the left or right button to adjust the amount of coffee beans, press the right button to increase, the left button to reduce.

When making "STEAM", press the left or right button to adjust the making time of the steam. Press the right button to increase or the left button to reduce.

When making "HOT WATER", press the left or right button to adjust the amounts of hot water. Press the right button to increase or the left button to reduce.


Making coffee with coffee powder
You can choose this function if you want to make coffee with coffee powder.
Do not put other mixtures such as instant coffee powder or cocoa powder in the powder container. Otherwise it will damage the machine.


o Do not put coffee powder into the coffee bean container. Otherwise it will damage the machine.


Do not rinse the powder container with water, or it will result in injury to the operator by electric shock.

Please use proper ground coffee powder for espresso.
- Only 7-14g coffee powder can be added. The machine will be damaged with more powder.
The process of using coffee powder to make coffee only skips the process of grinding coffee beans, other operations are the same as making espresso, Americano, and coffee. This chapter uses espresso as an illustration.
READY
CLEAN
FILL POWDER SELECT BEVERAGE
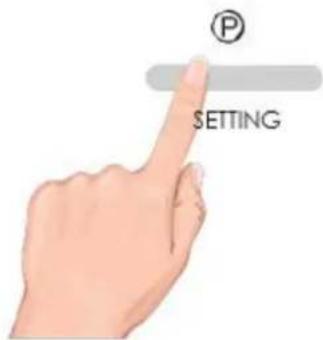
When the screen shows "READY", press the setting button to enter the setting.
Press the left and right button to choose the fuction you need.
When the screen shows "USE POWDER", press the setting button to enter into the coffee powder coffee-making fuction.
Add coffee powder, select your required coffee icon to start making coffee. Choose from espresso, americano or coffee.
Making double cups of coffee
You can make double cups of coffee with this machine.
Double cups of coffee includes double espresso and double coffee.
The process of making double cups of coffee is the same as the process of making espresso and normal coffee, the only difference is you need to choose the beverage for making double cups of coffee.
READY
When the screen shows "READY", press the double cup button to start the process.
SELECT BEVERAGE
Choose coffee beverage. Choose between espresso and coffee.
STRENGTH
The grinding amount is displayed.
<
The default setting is (strong).
How to use the steam nozzle
You can use the steam nozzle to make milk froth.
- Hot steam may spray from the steam nozzle, avoid burning.
READY
HEATING
STEAM READY
READY
When the screen shows "READY", press the "STEAM" button.
If the temperature is not ready to make steam, the boiler starts to work. Pressing the "STEAM" button stops the heating process.
Press the "Steam" button to make your beverage.
During the making process, you can adjust the volume of steam by pressing the left and right button. You can cancel the process by pressing the "STEAM" button.
When the screen shows "READY", you can return to making coffee.
PROGRAM SETTING
This chapter will give instructions on program setting.
Ensure the coffee machine shows "READY", press the setting button, then press the left or right button to select "MENU". You can then set the menu.

Maintenance setting
Please read the detailed instructions about rinsing the brew unit and decalcifying in the chapter "CLEANING AND MAINTENANCE".
Beverage setting
This chapter will instruct you on how to set beverages. The setting parameters include coffee taste strength, amount of coffee, amount of hot water and steam time.
The parameters accomplished by beverage setting will be the default values for each beverage.
1. Epresso setting 2. Coffee setting 3. Steam setting 4. Hot water setting
Setting up beverage parameters and range
Parameters such as strength and volume can be set for the beverages below.
The strength and volume of espresso can be set
The strength and volume of coffee can be set
Steam making time can be set
The volume of hot water can be set
Please read the following table for the detailed setting parameters and adjustment range:
| Drinks Strength Volume | ||
| Espresso | Mild: 0 Normal: 0 0 Strong: 0 0 0 | Coffee volume: 25 – 120 ml |
| Coffee | Coffee volume: 25 – 240 ml | |
| Steam | Steam time: 3 – 120 s | |
| Hot water | Hot water volume: 10 – 450 ml |
Temperature setting
o You can set the temperature of the coffee beverage.
Information
In this program you can view version information, numbers of each drink produced and maintenance times.

Total numbers of produced drinks
Numbers of produced espresso
Numbers of produced coffee
Numbers of produced steam
Numbers of produced hot water
Numbers of produced coffee using coffee powder
Numbers of rinsing operations
Numbers of decalcifying operations
Numbers of rinsing brew unit operations
Numbers of installing and replacing the water filter
- At first use, there is already a number of produced beverages, because each coffee machine has been tested before leaving factory.
Language
You can set your requested language on the coffee machine.
After entering the program setting "CHOOSE LANGUAGE", press the left or right button to choose the language, and press the setting button to confirm. Setting is complete.
Exit
- After entering the program setting, choose "EXIT". Then press the setting button to exit. After completing the setting, the machine will return to "READY".
- CLEANING AND MAINTENANCE
This chapter will instruct you on how to clean and maintain the coffee machine.
o Paying attention to daily maintenance of the coffee machine will not only ensure the taste of each cup of coffee, but also extend the life of the coffee machine.
Rinsing the coffee machine
This chapter will introduce to you how to clean and maintain the coffee machine.
Before making coffee, press the cleaning button. It will pre-heat the brew unit and inner pipeline, to improve the taste of the coffee next time.
The cleaning function must be processed in "READY" status.

When the coffee machine is in "READY" status, press the setting button to enter into the setting.

When the screen shows "CLEAN", press the setting button to enter into the cleaning fuction, then start to clean the brew unit and coffee spout.

The process of cleaning the coffee machine cannot be interrupted.

It will automatically return to "READY" status after cleaning.
Cleaning the brew unit
The screen will remind you "NEED BREW CLEAN". This is just a reminder, other functions can still be performed. The process of cleaning the brew unit takes about 10 minutes.

After a period of use, if the brew unit needs to be cleaned, the screen will remind you "NEED BREW CLEAN". Press the setting button to enter into the brew unit cleaning process.

Press the left and right button to choose "MENU", then press the setting button to enter into program setting menu.

Press the left and right button to choose "MAINTENANCE", then press the setting button to enter into maintenance setting.

Press the left and right button to choose "BREW CLEAN". Press setting button to enter the page.

Press the left and right button to choose "BREW CLEAN CONFIRM". Press the setting button to start cleaning the brew unit.

The drip tray should be cleaned before cleaning the brew unit, because waste water will be dripped into the tray.

Install the drip tray.

After installing the drip tray, the screen shows "PRESS SETTING" to start.

The brew unit is cleaning.

Open the coffee powder container lid and add the cleaning tablet, close the coffee powder container lid and press the cleaning button to clean the brew unit.

Brew unit is cleaning.

Empty the drip tray.

Install the drip tray.

After cleaning is finished, the machine enters into "READY" status.
Dscaling the coffee machine
Daily usage will cause calcareous deposits in the coffee machine. The depositing rate varies with local water hardness.
o Decalcifier contains acidic substances that would irritate your eyes and skin, so you must strictly comply with the security warnings noted by the manufacturer on the packaging. If it has accidentally come into contact with your eyes or skin, please rinse with clean water immediately.
The whole descending process takes about 30 minutes.
Liquid Rotel descaler is recommended, at a ratio of 1 to 1. The use of other decalcifiers may not show the desired result or may cause damage to your coffee machine.
Termination during the descending process will damage the coffee machine. Once you start the descending process, please do not terminate it midway.


| NEED DESCALE | After a certain period of use, the screen will display "NEED DE-SCALE" and "READY" alternately. Now, press the setting button to enter the descending program. |
| READY | |
| < MENU > | Press the left and right button to choose "MENU", then press the setting button to enter into the program setting menu. |
| < MAINTENANCE> | Press the left and right button to choose "MAINTENANCE", then press the setting button to enter into the maintenance page. |
| < DESCALE > | Press the left and right button to choose "DESCALE". |
| DESCALE CONFIRM > | Press the setting button to confirm. |
| 30 MINS PRESS SETTING | It will take around 30 minutes. Press setting to start descending. |
| EMPTY TRAY | Preparation for descending and cleaning. First of all, empty the drip tray, because some waste water will drain into the drip tray. |
| INSTALL TRAY | Install tray. |
| SOLVENT IN TANK PRESS SETTING | Fill the water tank with 0.5 litre of fresh water, add 0.5 litre descaling liquid and reinstall the water tank into the coffee machine. |


To start descending and cleaning for the first time, put a container, of which the capacity is more than 1L, under the coffee spout.
Empty tray.
Install tray.
After the first stage of descending and cleaning, take the water tanl out and clean it. Add fresh water again, and reinstall it into the coffee machine.
Press the setting button to enter the second stage of descending and cleaning.
To clean the residual decalcifier from the pipes, put a container, of which the capacity is more than 1L, under the coffee spout.
Empty tray.
Install tray.
When the screen shows "READY", it indicates the descending is complete; now, you can continue to make coffee.
Cleaning the coffee grounds container and the drip tray
Do not use chemical solvents or erosive cleaners or alcohol to clean the coffee grounds container and drip tray.
The drip tray and coffee grounds container cannot be cleaned in dishwasher.
Do not use metal objects to clean dirt or coffee precipitate, to avoid scraping the drip tray and coffee grounds container.
- When prompted to clean the coffee grounds, coffee grounds must be cleaned up, or this will cause the machine to be damaged.

When it amounts to 15 cups, it will automatically indicate "EMPTY GROUND".

Please remove coffee grounds from the drip tray and the coffee grounds container.

Reinstall the water drip tray into the machine. It returns to "READY" status.

If the drip tray is full, the machine will automatically prompt "EMPTY TRAY". Take out the water drip tray and pour away the waste water.
Reinstall the water drip tray into the machine. It returns to "READY" status.
○ Every time you clean coffee grounds and waste water in the drip tray, please clean the drip tray and coffee grounds container.
After cleaning the drip tray, please wipe dry the 2 pieces of sheet metal at the end of the drip tray, and then reinstall the drip tray into the coffee machine.

Cleaning the water tank
We suggest that, each time you add water, clean the tank thoroughly with running water first.
For cleaning the water tank regularly (about once per month, or every time you change the water filter), it would be better to use a wet cloth and some mild cleaning fluid.
Because the water tank is made from food-grade and environmentally-friendly materials, it might be liable to crack. Please gently pick it up and put it down, and never let it fall down. If the water tank is damaged, please contact the customer service center.


Cleaning the bean container
- Please do not use water to wash the bean container, as it would damage the grinder.
Please use a dry cloth or a paper towel to clean the residual grease in the bean container.
Because the bean container cover is made from food-grade and environmentally-friendly materials, it might be liable to crack. Please gently pick it up and put it down, and never let it fall down. If the bean container lid is damaged, please contact the customer sevice center.


Cleaning the coffee machine
Before cleaning the interior of the coffee machine, power it off, and pull out the plug. Never immerse the coffee machine in water. There will be a risk of electric shock.
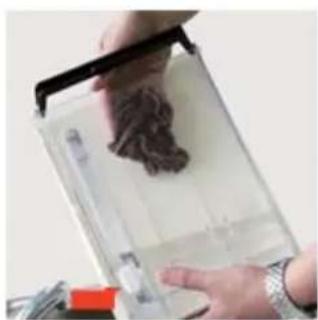
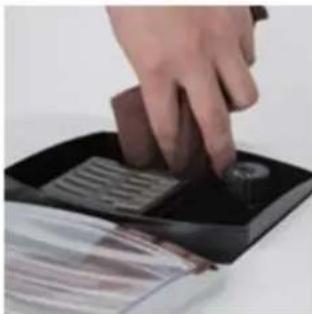
Regularly check whether there is excessive coffee powder precipitate inside the machine. You can use a brush to remove the coffee precipitate.
- Use a dry and soft cloth to wipe the touch panel of the machine. As the touch panel is made of glass, please do not hit it, to avoid the risk of electric shock once the glass broken.
Use a dry and soft cloth to wipe the surface of the machine, and never use hard objects to clean coffee leftovers on the surface, otherwise it would damage the surface.


DISPLAY INFORMATION
This chapter will instruct you on the information shown on the screen and the solutions.

| Causes | Solutions | |
| EMPTY TRAY | If the water drip tray is full, any beverage-making function will be out of service. | Take the drip tray out, empty the waste water out of the drip tray and reinstall it into the machine. |
| EMPTY GROUND | If the coffee grounds container is full, any beverage-making function will be out of service. | Take the coffee grounds container out, empty the coffee grounds container and reinstall it. |
| FILL WATER TANK | If water in the water tank is used up, any beverage-making function will be out of service. | Fill the water tank with water. |
| FILL BEANS | If coffee beans in the bean container are used up, the coffeemaking function will be out of service. | Add beans into bean container, and press any button to release. |
| LACK OF POWDER | There is not enough coffee powder in the powder container. | Next time when making coffee with coffee powder, please put in a full spoon of powder. |
| INSTALL TRAY | The drip tray is not installed correctly; any function is out of service. | Install the drip tray correctly. |
| UNIT EMPTY | There is not enough water in the pipe inside the machine; any function is out of service. | Press any button to release to run the water self-check system. |
| TEMPERATURE HIGH | Temperature of the machine is too high, the machine cannot be used. | Power off the main power, and use it 1 hour later. |
| TEMPERATURE LOW | Temperature of the machine is too low, the machine cannot be used. | Increase environmental temperature. |
| PRESSURE HIGH | 1. Line closing; 2. Using dark roasted coffee beans or over-fine coffee powder; 3. The filter of the brewer is clogged. | 1. Press any button to release to run the self-check system; 2. Ad-just grinder wheel to coarser; 3. Start brewer cleaning procedure. |
| BREW UNIT STUCK | Internal parts stuck. | Press any button to run the self-test system. |
- FAILURES HANDLING
This chapter will instruct you some errors that may encounter and the solutions.
If there are some failures cannot be resolved by the following methods, please contact with the customer sevice center.
| Problem | Cause | Solutions |
| The coffee temper- ature is too low. | The coffee cup was not pre- heated. | Wash the coffee cup with hot water before making coffee. |
| Several minutes have passed since the last time of coffee mak- ing, so the brewing unit and the internal pipes are already cold. | Make some more cups of coffee. | |
| Coffee only comes out from the cof- fee spout drop by drop. | Over fine coffee powder or coffee bean has been grounded too fine. | Adjust the grinding wheel to a rough state or use the suitable coffee powder. |
| Brewing unit filter was blocked. | Run the brewing unit washing program. | |
| Insufficient coffee oil. | Picked the wrong coffee bean type. | Use the suitable coffee beans. |
| The grinder arising noises. | There are foreign objects in the grinder. | Make coffee again, if it still fai- lures, please contact with the customer sevice center. |
| Screen always indi-cates "EMPTY TRAY". | The sheetmetals at the end of the drip tray are dirty or wet. | Wipe the sheetmetals to dry. |
| Screen always indi-cates "INSTALL TRAY". | Coffee grounds in the bottom of the machine are not cleaned. | Clean the coffee grounds in the bottom. |
| Screen always indi-cates "FILL WATER TANK", but the wa- ter tank is full. | The water tank inductor is trapped. | Clean the water tank. |
| Screen always indi-cates "FILL BEANS", but the bean con-tainer is full. | The bean container is too oily and sticky for coffee beans. | 1. Stir coffee beans in bean con- tainer.2. Observe if the coffee beans are over roasted or charcoal roasted.3. Clean the beans container |
| "Errors"is dis- played. | The coffee machine failures, can- not continue to be used. | Switch off the main power, and contact with the customer se- vice center. |
- TRANSPORT
Please save the packaging of the coffee machine for future transportation.
- Make sure to empty water inside the machine before transportation, otherwise, it will damage the machine.
o After emptying the waterway, please wipe the machine both inside and outside to dry.
Once the empty waterway program was executed, the system will rerun to the program of "first-time use", when the coffee machine is used again (refer to chapter "INSTRUCTION FOR FIRST-TIME USE).
While emptying the waterway, there will be a high-temperature steam sprays from coffee spout. Please pay special attention to avoid being scalded.

The machine is on the status of "READY".
Take out the water tank, and the machine indicates "FILL WATER TANK".
Hold on pressing the cleaning button until the screen shows "EMPTY UNIT", the machine begins to clean up the waterway automatically, and steam will spray from the coffee spout, please keep distance to avoid scalding.
After emptying the waterway, the machine will automatically power off. Take the drip tray out after the power is switched off, and clear the water in the drip tray.
DISPOSAL
For proper disposal, please return device to a retailer, a service agent or Rotel AG.
European Directive 2012/19/EC concerning Waste Electrical and Electronic Equipment (WEEE) states that household appliances should not be disposed of using the normal solid urban waste cycle. Exhausted appliances should be collected separately in order to optimise the cost of re-using and recycling materials comprising the machine, while preventing potential damage to public health and the environment. The crossed-out wheeled bin symbol appears on all products to remind owners of the obligations regarding separate waste collection. Owners should contact their local authorities or appliance dealers for further information concerning the correct disposal of household appliances.
This appliance conforms to the following EU directives:

2014/35/EU (Low Voltage Directive)
2014/30/EU (Electromagnetic Compatibility Directive)
D/F/I/E
- GARANTIE / GARANTIE / GARANZIA / WARRANTY
2JAHREGARANTIE
2 ANS DE GARANTIE
2 ANNI DI GARANZIA
2 YEARS WARRANTY
○ Warranty commitment
We commit ourselves to repair this device free of charge, should a failure occur within the period of warranty despite proper handling. We repair all defects caused by material or manufacturing faults. The guarantee will be fulfilled either by repairing the device or replacing the defective parts, according to our judgement. A warranty does not cover damages due to wearing parts, damages and defects caused by improper handling or maintenance (such as limescale and commercial use). It will only be granted if either the warranty card stating date of purchase, dealer's stamp and signature, or the purchase receipt is sent with the device to the relevant after-sales service (see address below). Devices shall be returned in their original packaging. Transport costs are to be borne by the purchaser. Remember to specify your address to your sending, as well as a short declaration about the failure, shall the defect not be obvious.
Servicestation:
Service après-venture:
Rotel AG
After-sales service:
5012 Schonenwerd
Telefon: 062 787 77 00
E-mail: office@rotel.ch


- Deutsch
- - Safety instructions. 82
- Symbol description 85
- - Instructions for first-time use. 85
- - Making beverages 87
- Program setting 92
- - Cleaning and maintenance 95
- SICHERHEITSHINWEISE
- INFORMATIONS A L'ECRAN
- SYMBOL DESCRIPTION
- - INSTRUCTIONS FOR FIRST-TIME USE
- Power convection
- Fill water tank
- Fill beans
- Grinding wheel
- Power on
- Power off
- MAKING BEVERAGES
- Making coffee
- One-time setting of coffee parameters
- Detailed instructions
- Making coffee with coffee powder
- READY
- CLEAN
- FILL POWDER SELECT BEVERAGE
- Making double cups of coffee
- SELECT BEVERAGE
- STRENGTH
- <
- How to use the steam nozzle
- HEATING
- STEAM READY
- PROGRAM SETTING
- Maintenance setting
- Beverage setting
- Setting up beverage parameters and range
- Temperature setting
- Information
- Language
- Exit
- - CLEANING AND MAINTENANCE
- Rinsing the coffee machine
- Cleaning the brew unit
- Dscaling the coffee machine
- Cleaning the coffee grounds container and the drip tray
- Cleaning the water tank
- Cleaning the bean container
- Cleaning the coffee machine
- DISPLAY INFORMATION
- - FAILURES HANDLING
- - TRANSPORT
- DISPOSAL
- - GARANTIE / GARANTIE / GARANZIA / WARRANTY
- ○ Warranty commitment
- Servicestation:
Brand : ROTEL
Model : U2763CH
Category : Coffee machine