
H 65SB - Rotary hammer HITACHI - Free user manual and instructions
Find the device manual for free H 65SB HITACHI in PDF.

| Product type | Rotary hammer (breaker) |
| Brand | Hitachi |
| Model | H 65SB |
| Power supply | Mains voltage (110-240 V depending on region), 1240 W |
| Impact rate | 1400 min⁻¹ |
| Weight | 16 kg (without cord and side handle) |
| Main applications | Concrete breaking, chiseling, grooving, bar cutting, pipe and cable installation |
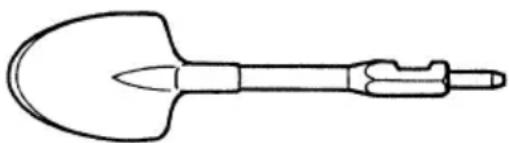
| Supplied accessories | Box (1), grinding point (1), hexagonal bar wrench for 8 mm bolt (1), hexagonal bar wrench for 4 mm bolt (1) |
| Optional accessories | Milling cutter (410 mm, width 75 mm), cold chisel (410 mm), tamping tool (diameter 200 mm), scoop (410 mm), grease 500 g or 30 g |
| Tool type | Demolition hammer with anti-surge safety mechanism |
| Maintenance and cleaning | Greasing every 6 months, checking and replacing carbon brushes, checking mounting screws, regular cleaning |
| Safety | Wear earplugs, goggles, mask, safety shoes; do not touch hot bit; check for cables before drilling |
| Spare parts and repairability | Carbon brushes, grease; repairs by authorized Hitachi after-sales service |
| General information | Compliant with standards 76/889/EEC and 82/499/EEC; typical weighted vibration acceleration value: 19.0 m/s² |
Frequently Asked Questions - H 65SB HITACHI
User questions about H 65SB HITACHI
0 question about this device. Answer the ones you know or ask your own.
Ask a new question about this device
Download the instructions for your Rotary hammer in PDF format for free! Find your manual H 65SB - HITACHI and take your electronic device back in hand. On this page are published all the documents necessary for the use of your device. H 65SB by HITACHI.
USER MANUAL H 65SB HITACHI
WARNING! When using electric tools, basic safety precautions should always be followed to reduce the risk of fire, electric shock and personal injury, including the following.
Read all these instructions before operating this product and save these instructions.
For safe operations:
- Keep work area clean. Cluttered areas and benches invite injuries.
- Consider work area environment. Do not expose power tools to rain. Do not use power tools in damp or wet locations. Keep work area well lit. Do not use power tools where there is risk to cause fire or explosion.
- Guard against electric shock. Avoid body contact with earthed or grounded surfaces. (e.g. pipes, radiators, ranges, refrigerators).
- Keep children away. Do not let visitors touch the tool or extension cord. All visitors should be kept away from work area.
- Store idle tools. When not in use, tools should be stored in a dry, high or locked up place, out of reach of children.
- Do not force the tool. It will do the job better and safer at the rate for which it was intended.
- Use the right tool. Do not force small tools or attachments to do the job of a heavy duty tool. Do not use tools for purposes not intended; for example, do not use circular saw to cut tree limbs or logs.
- Dress properly. Do not wear loose clothing or jewelry, they can be caught in moving parts. Rubber gloves and non-skid footwears are recommended when working outdoors. Wear protecting hair covering to contain long hair.
- Use eye protection. Also use face or dust mask if the cutting operation is dusty.
- Connect dust extraction equipment. If devices are provided for the connection of dust extraction and collection facilities ensure these are connected and properly used.
- Do not abuse the cord. Never carry the tool by the cord or yank it to disconnect it from the receptacle. Keep the cord away from heat, oil and sharp edges.
- Secure work. Use clamps or a vise to hold the work. It is safer than using your hand and it frees both hands to operate tool.
- Do not overreach. Keep proper footing and balance at all times.
- Maintain tools with care. Keep cutting tools sharp and clean for better and safer performance. Follow instructions for lubrication and changing accessories. Inspect tool cords periodically and if damaged, have it repaired by authorized service center. Inspect extension cords periodically and replace, if damaged. Keep handles dry, clean, and free from oil and grease.
-
Disconnect tools. When not in use, before servicing, and when changing accessories such as blades, bits and cutters.
-
Remove adjusting keys and wrenches. Form the habit of checking to see that keys and adjusting wrenches are removed from the tool before turning it on.
- Avoid unintentional starting. Do not carry a plugged-in tool with a finger on the switch. Ensure switch is off when plugging in.
- Use outdoor extension leads. When tool is used outdoors, use only extension cords intended for outdoor use.
- Stay alert. Watch what you are doing. Use common sense. Do not operate tool when you are tired.
- Check damaged parts. Before further use of the tool, a guard or other part that is damaged should be carefully checked to determine that it will operate properly and perform its intended function. Check for alignment of moving parts, free running of moving parts, breakage of parts, mounting and any other conditions that may affect its operation. A guard or other part that is damaged should be properly repaired or replaced by an authorized service center unless otherwise indicated in this handling instructions. Have defective switches replaced by an authorized service center. Do not use the tool if the switch does not turn it on and off.
- Warning
The use of any accessory or attachment, other than those recommended in this handling instructions, may present a risk of personal injury.
- Have your tool repaired by a qualified person. This electric tool is in accordance with the relevant safety requirements. Repairs should only be carried out by qualified persons using original spare parts. Otherwise this may result in considerable danger to the user.
PRECAUTIONS ON USING DEMOLITION HAMMER
- Wear earplugs to protect your ears during operation.
- Do not touch the bit during or immediately after operation. The bit becomes very hot during operation and could cause serious burns.
- Before starting to break, chip or drill into a wall, floor or ceiling, thoroughly confirm that such items as electric cables or conduits are not buried inside.
- Wear a mask when turning your head upward.
- Properly set the bit holder
- At the start of work, confirm screw tightening.
- When working at a highly elevated location, pay attention to articles and persons below.
- Wear protective shoes to protect your feet.
SPECIFICATIONS
| Voltage (by areas)* (110V, 115V, 120V, 127V, 220V, 230V, 240V) | |
| Power Input 1240W* | |
| Full-load Impact Rate 1400min | -1 |
| Weight (without cord, side handle) 16 kg | |
- Be sure to check the nameplate on product as it is subject to change by areas.
STANDARD ACCESSORIES
(1) Case 1
(2) Bull Point 1
(3) Hexagon Bar Wrench (for 8mm bolt) 1
(4) Hexagon Bar Wrench (for 4mm bolt) Standard accessories are subject to change without notice.
OPTIONAL ACCESSORIES (sold separately)
Asphalt Cutting

(1) Cutter
Overall Length: 410 mm
Width: 75 mm
Groove Digging and Edging

(1) Cold Chisel
Overall Length: 410~mm
Tamping

Outer diameter: 200 mm
(1) Rammer
Scooping Work
(1) Scoop
Overall Length: 410 mm
○Grease
500g (in a can)
30g (in a tube)
Optional accessories are subject to change without notice.
APPLICATIONS
Demolishing concrete, chiseling off concrete, grooving, bar cutting.
Application examples:
Installation of piping and wiring, sanitary facility installation, machinery installation, water supply and drainage work, interior jobs, harbor facilities and other civil engineering works.
PRIOR TO OPERATION
1. Power source
Ensure that the power source to be utilized conforms to the power requirements specified on the product nameplate.
2. Power switch
Ensure that the power switch is in the OFF position. If the plug is connected to a receptacle while the power switch is in the ON position, the power tool will start operating immediately, which could cause a serious accident.
3. Extension cord
When the work area is removed from the power source, use an extension cord of sufficient thickness and rated capacity. The extension cord should be kept as short as practicable.
4. Mounting a tool
NOTE:
For tools such as a bull point and a cold chisel, use only genuine HITACHI parts.
(1) Clean, then smear the tool shank with grease or machine oil. (Fig.1)
(2) Rotate the stop lever 180^ in a clockwise direction while pulling it toward you. Next, insert the tool shank into the hexagonal hole on the frontcover. (Fig.1)
(3) Clamp the tool by turning the stop lever by half a turn in the opposite direction. (Fig. 2)
HOW TO USE THE DEMOLITION HAMMER
- Squeeze the trigger switch after applying the tip of the bit to the crushing position. In some cases, it is necessary to punch the tip of the bit against the crushing position forcibly in order to begin the striking motion.
This is not due to malfunction of the tool. It means that the safe guard mechanism against no-load striking is working. - Operate the tool by utilizing its empty weight. The performance will not be better even if the tool is pressed or thrust forcibly against the work surface. Hold the tool with a force just sufficient to counteract the reaction. (Fig. 3)
GREASE REPLACEMENT
This machine is of full air-tight construction to protect against dust and to prevent lubricant leakage. Therefore, the machine can be used without lubrication for long periods. Replace the grease as described below.
Grease Replacement Period
After purchase, replace grease after every 6 months of usage. Ask for grease replacement at the nearest authorized HITACHI Service Center.
MAINTENANCE AND INSPECTION
CAUTION:
Be sure to swith OFF and disconnect the attachment plug from the receptacle to avoid a serious accident.
1. Inspecting the tool
Since use of a dull tool will degrade efficiency and cause possible motor malfunction, sharpen or replace the tool as soon as abrasion is noted.
2. Inspecting the mounting screws:
Regularly inspect all mounting screws and ensure that they are properly tightened. Should any of the screws be loose, retighten them immediately. Failure to do so could result in serious hazard.
3. Maintenance of the motor
The motor unit winding is the very "heart" of the power tool. Exercise due care to ensure the winding does not become damaged and/or wet with oil or water.
4. Inspecting the carbon brushes (Fig. 4)
The Motor employs carbon brushes which are consumable parts. When they become worn to or near the "wear limit", it could result in motor trouble. When an auto-stop carbon brush is equipped, the motor will stop automatically. At that time, replace both carbon brushes with new ones which have the same carbon brush Numbers shown in the figure. In addition, always keep carbon brushes clean and ensure that they slide freely within the brush holders.
5. Replacing carbon brushes:
Loosen the screws (Hexagon socket hd. bolt M4×12) of the cap covers, then remove the cap covers (Fig. 5). After removing the brush caps, the carbon brushes can be removed.
After replacing the carbon brushes, tighten the brush caps, then mount the cap covers securely.
6. Service parts list
A:Item No.
B:Code No.
C: No. Used
D:Remarks
CAUTION
Repair, modification and inspection of Hitachi Power Tools must be carried out by an Hitachi Authorized Service Center.
This Parts List will be helpful if presented with the tool to the Hitachi Authorized Service Center when requesting repair or other maintenance.
In the operation and maintenance of power tools, the safety regulations and standards prescribed in each country must be observed.
MODIFICATIONS
Hitachi Power Tools are constantly being improved and modified to incorporate the latest technological advancements.
Accordingly, some parts (i.e. code numbers and/or design) may be changed without prior notice.
NOTE
Due to HITACHI's continuing program of research and development, the specifications herein are subject to change without prior notice.
IMPORTANT
Correct connection of the plug
The wires of the main lead are coloured in accordance with the following code:
Blue: - Neutral
Brown: - Live
As the colours of the wires in the main lead of this tool may not correspond with the coloured markings identifying the terminals in your plug proceed as follows: The wire coloured blue must be connected to the terminal marked with the letter N or coloured black. The wire coloured brown must be connected to the terminal marked with the letter L or coloured red. Neither core must be connected to the each terminal.
NOTE
This requirement is provided according to BRITISH STANDARD 2769:1984.
Therefore, the letter code and colour code may not be applicable to other markets except The United Kingdom.
Information concerning vibration
The measured values were determined according to EN50144.
The typical weighted root mean square acceleration value: 19.0m / s^2
A: No. élément
B: No. code
C: No. utilise
D: Remarques
ATTENTION
Tia epyaia owns opupokepala, kai oiln konns ev yuxpaw, xpnoiopoinote movo auEvtika Eapntmuata HITACHI.
102 2 981-987Z 1 "SU"
103 1 940-778 1 D10.7
103 2 958-049Z 1 D8.2
104 996-4382
105 1 980-063 1
105 2 992-810 1
105 3 930-804 1 M4.0
106
107318-6561"1-5"
501A 998-4311
502 944-961 1 410MM
503 943-277 1 3MM
504872-42216MM
| English | Nederlandsl | ||
| GUARANTEE CERTIFICATE ①Model No. ②Serial No. ③Date of Purchase ④Customer Name and Address ⑤Dealer Name and Address (Please stamp dealer name and address) | GARANTIEBEWIJS ①Modelnummer ②Seriennummer ③Datum van aankoop ④Naam en adres van de gebruiker ⑤Naam en adres van de handelaar (Stempel a.u.b. naam en adres vandehandelaar) | ||
| Deutsch | Espanol | ||
| GARANTIESCHEIN ①Modell-Nr. ②Serien-Nr. ③Kaufdataburn ④Name und Anschrift des Kunden ⑤Name und Anschrift des Handlorders (Bitte mit Namen und Anschrift des Handlorders abstempeln) | CERTIFICADO DE GARANTIA ①Número de modelos ②Mùnero de series ③Fecha de requisión ④Nombre y direccion del cliente ⑤Nombre y direccion del distribuidor (Se ruega poner el sellú del distribuidor con su nombre y direccion) | ||
| François Português | |||
| CERTIFICAT DE GARANTIE ①No. de moda ②No de série ③Date d'achat ④Nom et adresse du client ⑤Nom et adresse du revendeur (Cachet portant le nom et l'adresse du revendeur) | CETTIFICADO DE GARANTIA ①Número do modelos ②Número do série ③Data de compra ④Nome e morada do cliente ⑤Nome e morada do distribuidor (Por favor, carímbe o nome e morada do distribuidor) | ||
| Italiano Eλληνικᾶ | |||
| CERTIFICATO DI GARANZIA ①Modello ②N° di serie ③Data di acquisto ④Nome e indirizzo dell'acquirente ⑤Nome e indirizzo del rivenditore (Si prega di apporre il timbro con quosti dati) | ΠΙΣΤΟΝΙHTΙΚΟ EΓΥΗΞΣ ①Ap. Movτέλου ②Aùξων Ap. ③Hμερομηνia αγοράς ④'Ovouma και διεύθυνη πελὰτη ⑤'Ovouma και διεύθυνη μεταπωλητή (Παρακαλόμενα χρησμοποιηθείσφραγίδα) | ||
Hitachi Koki
| ① | |
| ② | |
| ③ | |
| ④ | |
| ⑤ |


| English | EC DECLARATION OF CONFORMITY | Nederland | EC VERKLARING VAN CONFORMITEIT |
| We declare under our sole responsibility that this product is in conformity with standards or standardized documents EN50144, EN55014 and EN61000-3 in accordance with Council Directives 73/23/EEC, 89/336/EEC, 98/37/EC and 2000/14/EC. 2000/14/EC·Type of equipment: Hand-held concrete breaker·Type name: H65SB·Weight of equipment: 16.5 kg·C oniformity assessment procedure: ANNEX VI, Paragraph 5·Notified body: BSI Product Service, Maylands Avenue Hemel Hempstead Herts HP2 4SO UK·M measured sound power lever: 103 dB·Guaranteed sound power level: 105 dBThis declaration is applicable to the product affixed CE marking. | Wij verwälden onder eigen verantwoordelijkheid dat dit produit conform de richtlinen of gestandsscheerde documenten EN50144, EN55014 en EN61000-3 voldoot aan de eiser van EEG Bepalingen 73/23/EEG, 89/336/EEG, 98/37/EC en 2000/14/EC. 2000/14/EC·Type gereedschap: Handbetonbreekhamer·Typenaam: H65SB·G wicht gereedschap: 16.5 kg·C onformityeistingsprocedure: ANNEX VI Paragraaf 5·I n kennis gesteld instituut: BSI Product Services, Maylands Avenue, Hemel Hempstead, Herts, HP2 4SO UK·G emeten geluidsdruk: 103 dB·G agarandeerde geluidsdruk: 105 dBDeze verwärling is van toepassing op Produkten voorzien van de CE-marketeringen. | ||
| Deutsch | ERKLÄRUNG ZUR KONFORMITÄT MIT CE-REGELN | Espanol | DECLARACION DE CONFORMIDAD DE LA CE |
| Wir erklaren mit alleiniger Verantwortung, daß diese Produkte den Standarden oder standardisierten Dokumenten EN50144, EN55014 und EN61000-3 in Übereinstimmung mit den Direktiven des Europarats 73/23/EEG, 89/336/EEG, 98/37/CE und 2000/14/CE entspricht. 2000/14/CE·Är der Ausrüstung: Handgehaltener Betonbrecher·Typename: H65SB·G wicht der Ausrüstung: 16.5 kg·Übereinstimmungsbeurteilungsverfahren: ANNEX VI Paragraf 5·Informierte Körperschaft: BSI Product Services, Maylands Avenue Hemel Hempstead Herts HP2 4SO UK·G emessener Schalleistungspegel:103 dB·G arantieter Schalleistungspegel: 105 dBThese Erläufigung gilt für Produkte, die die CE-Markierung tragen. | Declaramos bajo esta unica responsabilitad que este produit está de acordo con las normas o con los documentos de normalização EN50144, EN55014 y EN61000-3, según indican las Directrices del Consejo 73/23/CEE, 89/336/CEE, 98/37/CE y 2000/14/CE. 2000/14/CE·Tipo de dispositivo: martillo manual para romper el hormigón·Nombre del modelo: H65SB·P eso del dispositivo: 16.5 kg·P rocedimiento de evaluación de conformidad: ANEXO VI Párrafo 5·E ntidad notifiedaca: BSI Product Services, Maylands Avenue Hemel Hempstead Herts HP2 4SO Reino Unido·N ivel de potencia acústica medida: 103 dB·N ivel de potencia acústica garantizada: 105 dBEsta declaración se aplica a los products con marcas de la CE. | ||
| Français | DECLARATION DE CONFORMITE CE Nous déclarons sous notre seule et entière responsabilité que ce produit est conforme aux normes ou documents normalisés EN50144, EN55014 et EN61000-3 en accord avec les Directives 73/23/CEE, 89/336/CEE, 98/37/CE et 2000/14/CE du Conseil. 2000/14/CE·Type de matériel: Outil de démolition à main·Nom du type: H65SB·P o i ds du matériel: 16.5 kg·P roducte évaluaité de conformité: ANNEXE VI Paragraphe 5·O rrganisme notice: BSI Product Services, Maylands Avenue Hemel Hempstead Herts HP2 4SO R-U·N iveau de puissance sonore mesure: 103 dB·N iveau de puissance sonore garanti: 105 dBCette déclaration s'applique aux produits designes CE. | Portugues | DECLARATION DE CONFORMIDADE CE Declaramos, sob esta unica e inteira responsabilitadde, que este produit está de acordo com as normas ou documentos normativos EN50144, EN55014 e EN61000-3, em conformidade com as Diretrizes 73/23/CEE, 89/336/CEE, 98/37/CE e 2000/14/CE do Conselho. 2000/14/CE·Tipeno de equipamento: Martelo de maior para demoluição de concreto·Nome do tipo: H65SB·Peso do equipamento: 16.5 kg·Procedimento de ativalação de conformidade: ANEXO VI Paragrafo 5·Orgão notificado: BSI Product Services, Maylands Avenue Hemel Hempstead Herts HP2 4SO, Reino Unido·Nivel medico de potência de som: 103 dB·Nivel garantido de potência de som: 105 dBEsta declaración se aplica aos produits designados CE. |
| Italiano | DICHIAZAIONE DI CONFORMITA CE Si dichiera sotto unsere responsabilità che"Thisero prodotto è conforme gli standard o ai documenti standardizzati EN50144, EN55014 e EN61000-3 conformale alle direttive 73/23/CEE, 89/336/CEE, 98/37/CE e 2000/14/CE del concilio.·Name di tipo: H65SB·Peso dell'appreciabità: Demolitore per cemento portatile·Dipete di applicazione: 16.5 kg·Proceedimento di valutazione conformità: ALLEGATO VI Paragrafo 5·Ente notificato: BSI Product Services, Maylands Avenue Hemel Hempstead Herts HP2 4SO UK·Livello di potenza sonora misurato: 103 dB·Livello di potenza sonora garantito: 105 dBQuesta dichiarazione è applicabile ai prodotti cui sono disponibili a marchi CE. | Eλληνικα | EK ΔΗλ-ΣΗ ENAPMONΙΣΜΟY Λαλύνουμε με απαλυτη πιευθυστη στι αυτο το προιδύ ενγανρουνιμίνουνε με τα προτιμή ἡ τα εύραρα προτιμών ΕΝδλ0144, EN55014 και EN61000-3 σε αυμανίανιμίνις τις Μόγητες του Συμβουλίου 73/23/EOK, 89/336/EOK και / η 98/37/EK και 2000/14/EK. 2000/14/EK·Túrcos μχανημίνιος Εραυστης τομέντου κου φαρτητην Πραραρτην Πιραραρτην Πιραραρτην Πιραραρτην Πιραραρτην Πιραραρτην Πιραραρτην Πιραραρτην Πιραραρτην Πιραραρτην Πιŋκτικις οτιχος: 103 dB Μεγιμρονε έπειδε Μηκτικικις οιχος: 105 dB Αutηη η δηλωμη Μιχυει Οτο προιδύ με το Μημάδι CE. |
| Representative office in Europe Hitachi Power Tools Europe GmbH Siemensring 34, 47877 Willich 1, F. R. Germany Head office in Japan Hitachi Koki Co., Ltd. Shinagawa Intercity Tower A, 15-1, Konan 2-chome, Minato-ku, Tokyo, Japan | CE 30.9.2003 | ||
| R. Rato | |||
| K. Kato Board Director | |||
- PRECAUTIONS ON USING DEMOLITION HAMMER
- STANDARD ACCESSORIES
- OPTIONAL ACCESSORIES (sold separately)
- APPLICATIONS
- PRIOR TO OPERATION
- Power source
- Power switch
- Extension cord
- Mounting a tool
- NOTE:
- HOW TO USE THE DEMOLITION HAMMER
- GREASE REPLACEMENT
- Grease Replacement Period
- MAINTENANCE AND INSPECTION
- CAUTION:
- Inspecting the tool
- Inspecting the mounting screws:
- Maintenance of the motor
- Inspecting the carbon brushes (Fig. 4)
- Replacing carbon brushes:
- Service parts list
- CAUTION
- MODIFICATIONS
- NOTE
- IMPORTANT
- Information concerning vibration
- ATTENTION
- Hitachi Koki
Brand : HITACHI
Model : H 65SB
Category : Rotary hammer