
MOD74 - Vacuum Cleaner MPM - Free user manual and instructions
Find the device manual for free MOD74 MPM in PDF.
| Product type | Bagless vacuum cleaner |
| Brand | MPM |
| Model | MOD74 |
| Capacity of the container | 0.7 liter |
| Power cord length | 7.00 m |
| Operating radius | 8.40 m (telescopic tube included) |
| Filtration type | HEPA filter + exhaust filter |
| Included accessories | Telescopic tube, floor/carpet head, small multi-purpose brush, crevice tool, wall mount with plugs and screws |
| Weight | 2.5 kg (approximate) |
| Dimensions (L x W x H) | 220 x 220 x 400 mm (approximate) |
| Power supply | 230 V ~ 50 Hz |
| Power | 700 W (estimated) |
| Use | Indoor, dry surfaces only |
| Safety | Do not vacuum liquids, do not immerse, unplug before maintenance, keep out of reach of children under 8 years |
| Maintenance | Empty the container after each use; clean the HEPA filter with a dry brush; wash the exhaust filter with water and let it dry |
| Spare parts and repairability | Replaceable filters; wall mount supplied; repair by authorized center |
| General information | Manual available in several languages; device intended for household use |
Frequently Asked Questions - MOD74 MPM
User questions about MOD74 MPM
0 question about this device. Answer the ones you know or ask your own.
Ask a new question about this device
Download the instructions for your Vacuum Cleaner in PDF format for free! Find your manual MOD74 - MPM and take your electronic device back in hand. On this page are published all the documents necessary for the use of your device. MOD74 by MPM.
USER MANUAL MOD74 MPM
EL. Isocyanate monohydrogenase is in synthesize monooxygenase, but does not produce monooxygenase in steady state? Are there other mechanisms for the synthesis of monooxygenase? MPM
EN W/We wish you satisfactor from using the product and invite you to check a wide range of other MPM appliances.
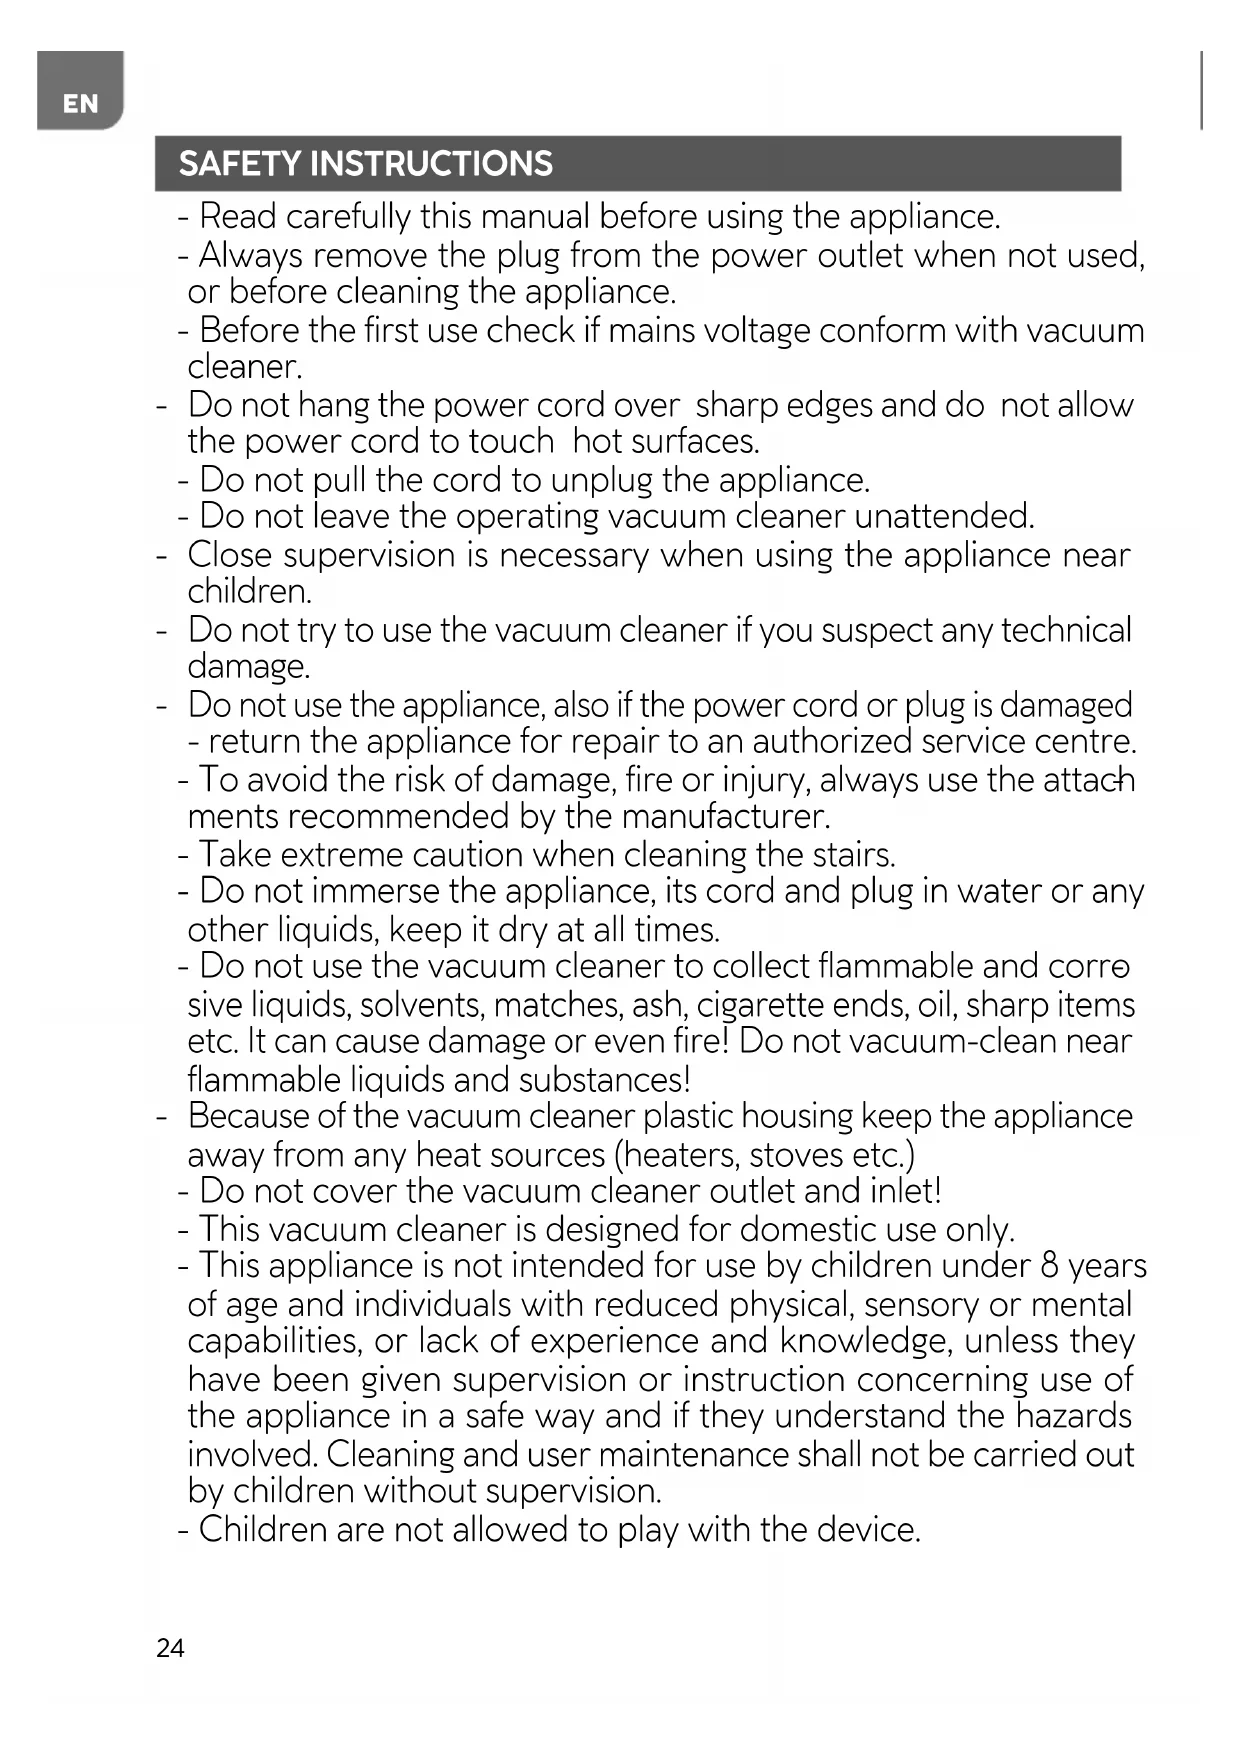
Small multifunctional soft brush
7 m power card
Floor and carpet tool for all types of flooring hard floors, carpets
mnnnne nnnnne

BEZPECNOSTNI INSTRUKCE
- Read carefully this manual before using the appliance.
- Always remove the plug from the power outlet when not used, or before cleaning the appliance.
-
Before the first use check if mains voltage conform with vacuum cleaner.
-
Do not hang the power cord over sharp edges and do not allow the power cord to touch hot surfaces.
-
Do not pull the cord to unplug the appliance.
-
Do not leave the operating vacuum cleaner unattended.
-
Close supervision is necessary when using the appliance near children.
-
Do not try to use the vacuum cleaner if you suspect any technical damage.
-
Do not use the appliance, also if the power cord or plug is damaged
-
return the appliance for repair to an authorized service centre.
-
To avoid the risk of damage, fire or injury, always use the attachments recommended by the manufacturer.
- Take extreme caution when cleaning the stairs.
- Do not immerse the appliance, its cord and plug in water or any other liquids, keep it dry at all times.
-
Do not use the vacuum cleaner to collect flammable and corrosive liquids, solvents, matches, ash, cigarette ends, oil, sharp items etc. It can cause damage or even fire! Do not vacuum-clean near flammable liquids and substances!
-
Because of the vacuum cleaner plastic housing keep the appliance away from any heat sources (heaters, stoves etc.)
-
Do not cover the vacuum cleaner outlet and inlet!
-
This vacuum cleaner is designed for domestic use only.
-
This appliance is not intended for use by children under 8 years of age and individuals with reduced physical, sensory or mental capabilities, or lack of experience and knowledge, unless they have been given supervision or instruction concerning use of the appliance in a safe way and if they understand the hazards involved. Cleaning and user maintenance shall not be carried out by children without supervision.
-
Children are not allowed to play with the device.
-
Store the appliance and its cord out of reach of children under 8 years of age.
-
Do not vacuum-clean people or animals, take special care not to move suction nozzles near eyes and ears.
- Turn off and disconnect the appliance from supply circuit before replacing accessories.
- Do not vacuum without filters and in case of damage.
- Check the hose, wand and suction nozzles and remove any litter from them.
- Use the vacuum cleaner only indoors and on dry surfaces. Dry the washed carpets before vacuum-cleaning.
- Keep your children safe: do not leave any parts of the packaging readily accessible (i.e. plastic bags, cardboard boxes, polystyrene inserts, etc.).
-WARNING! Never let children play with plastic film or bags. Choking/ asphyxiation hazard!
APPLIANCE OVERVIEW
- Motor unit
- Power switch
- Handle
- 0.7-litre dust canister
- Hinged cover
- Hinged cover release
- EPA filter
- Filter cage
-
Wand port
-
Exhaust filter
- Exhaust filter cover
- Telescopic wand
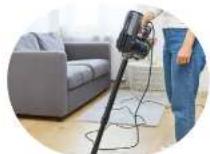
- Hard floor & carpet tool
- Small multifunctional brush
- Slot tool
- Wall parking mount
- Set of screws and plugs
BEFORE FIRST USE
- Remove the vacuum cleaner from the cardboard box. Remove all stickers, shipping locks, plastic bags, and filling material.
- Inspect the vacuum cleaner carefully for damage which may have occurred in transport. If damage is suspected, consult your reseller.
- Assemble the vacuum cleaner (see Section "ASSEMBLING THE VACUUM CLEANER").
- Verify that your power mains match the nameplate ratings of the vacuum cleaner.
ASSEMBLY AND DISASSEMBLY
- Press the hinged cover release (6) and swing open the cover (5) at the dust canister (4) bottom.
-
Insert the EPA filter (7) into the dust canister and secure: align the three bosses on the filter with the three slots within the dust canister and rotate the filter clockwise until locked.
-
Insert the filter cage (8) into the dust canister and secure: align the three bosses on the filter cage with the three slots within the dust canister and rotate the filter cage clockwise until locked.
-
Close the hinged cover (5) to lock.
-
The removal of the filter and its cage is done by releasing both with a counter-clockwise rotation and reversing the assembly procedure.
-
Attach the telescopic wand (12) to the wand port (9) and the tool you require (13), (14) or (15).
USING THE APPLIANCE
- Make sure that the vacuum cleaner has been properly assembled and with filters in place.
- Choose the best tool for vacuum cleaning the specific surface. Optimum vacuum cleaning efficiency is achieved by using the tools as follows:
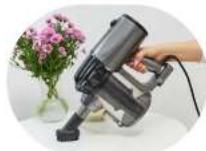
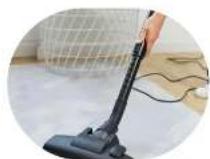
Hard floor & carpet tool (13): use it to clean carpets, rugs, and hard floors (like tiles or terrazzo).
- Slot tool (15): use it to clean narrow spaces.
- Small multifunctional brush (14): use it to clean curtains, upholstery, clothing, furniture or window blinds.
-
Plug the power cord into a mains outlet and start the vacuum cleaner with the power switch (2) CAUTION! This appliance is intended for cleaning of dry surfaces only!
-
Monitor the dust canister (4) level. When it is full, stop vacuum cleaning and empty the dust canister. Working with the dust canister overfilled reduces the vacuum cleaner's performance (the centrifugal force, which expels dust dirt into the duct canister, is reduced) and the filters become clogged too fast.
- If the suction power drops noticeably during vacuum cleaning and the dust canister is empty, immediately check the wand and the attached tool for obstruction.
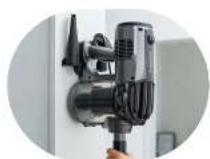
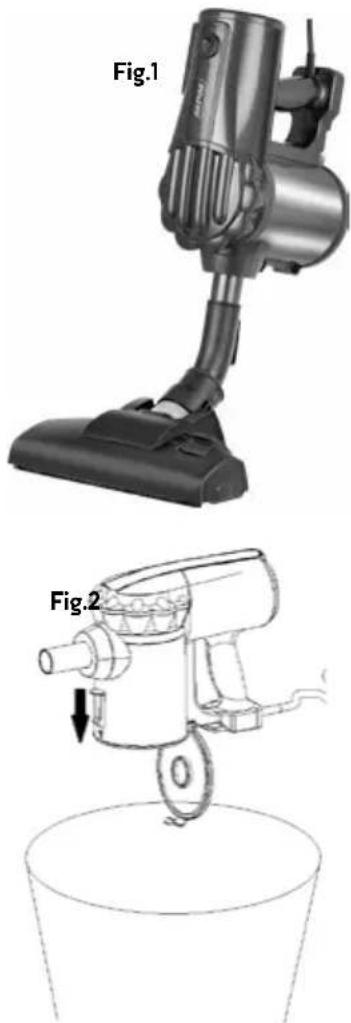
- You can also attach the tools directly to the motor unit's mouth. This makes the vacuum cleaner more compact to clean places which are hard to reach Fig.1
- When done, turn off the vacuum cleaner with the power switch (2) and unplug the power cord from the mains.
EMPTYING THE DUST CANISTER
- Turn off the vacuum cleaner with the power switch(2) and unplug the power cord from the mains.
- Hold the motor unit (1) with the dust canister (4) directly above the trash can Fig.2
- Press the hinged cover release (6) to swing open the cover (5), then shake out all dust.
- Close and lock the hinged cover (5).
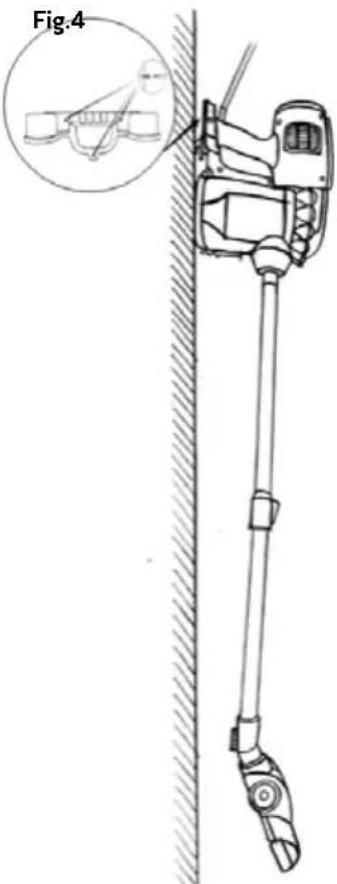
PARKING THE VACUUM CLEANER IN THE WALL MOUNT
The MOD-74 vacuum cleaner includes a wall parking mount (16) for easy and space-saving storage. Install the wall parking mount on a wall to use it:
-
Choose a place on a wall high enough above the floor so that the vacuum cleaner fits parked and with its telescopic wand and floor tool attached. Make sure there is no wiring in the wall within the envelope of the wall parking mount.
-
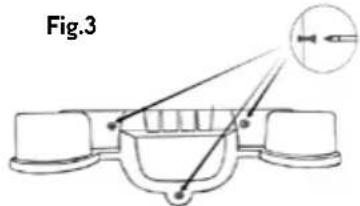
Place the wall parking mount(16) to the selected location on the wall and mark the holes to drill with the pencil. Drill the holes at the market locations to fit the plugs. Next, drive in the plugs flush and attach the wall parking mount with the screws(17) included with the product - Fig.3.
-
Now, you can park and store the vacuum cleaner on the mount (Fig. 4).
CLEANING AND MAINTENANCE
- Clean the outer surface of the vacuum cleaner, the interior of the dust canister and the accessories (tools) with a damp cloth. Next, wipe them dry. Use a mild detergent to remove persistent dirt.
- Empty the dust canister every time you finish vacuum cleaning. Clean the EPA (7) and the filter cage(8) (which is also a coarse filter) every few times you empty the dust canister. See the assembly and disassembly of the filter in "ASSEMBLY AND DISASSEMBLY". Wash the filter cage(8) in water and leave to dry. The EPA filter (7) must be cleaned gently on the outside, with a soft brush.
CAUTION! Do not clean the EPA filter (7) wet!
- Periodically clean the exhaust filter(10). It is accessed by removing the exhaust filter cover(11). Open the exhaust filter cover by turning it a bit counter-clockwise. Remove the exhaust filter(10), flush it clean with water, and leave until thoroughly dry. Replace the exhaust filter. Close and secure the exhaust filter cover by turning it a bit clockwise.
CAUTION! Do not install the exhaust filter(10) when wet! Dry it completely before reassembly.
TECHNICAL SPECIFICATION
See the product's nameplate for technical specifications.
Power cord length: 7.00 m
Vacuum cleaner reach from the mains outlet: 8.40m

CAUTION! MPM agd S.A. reserves the right to technical changes.
Proper disposal of the product (waste electrical and electronic equipment)
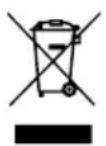
Marking on the product indicates that after the service-life of the product expires, it should not be disposed with other type of municipal waste. Used equipment may have a negative impact on the environment and health of people due to potentially containing hazardous substances, mixtures and components. Mixing electric waste with other types of waste or disassembling those in an unprofessional manner may cause a release of substances that are hazardous to the environment and health.
Used equipment should be handed-over to a point for collection of electric waste. In order to obtain detailed information regarding the electric waste collection points, the user should contact the municipal point of electric waste collection or used equipment processing department.
APPPARAAT BESCHRIJVING
TEXHUNECKNEXAPAKTEPNUKNI
TexHnueckne xapaKTepeNCTnKu yKa3aHbI
Legible signature of the buyer
- BEZPECNOSTNI INSTRUKCE
- APPLIANCE OVERVIEW
- BEFORE FIRST USE
- ASSEMBLY AND DISASSEMBLY
- USING THE APPLIANCE
- EMPTYING THE DUST CANISTER
- PARKING THE VACUUM CLEANER IN THE WALL MOUNT
- CLEANING AND MAINTENANCE
- CAUTION! Do not clean the EPA filter (7) wet!
- TECHNICAL SPECIFICATION
- Proper disposal of the product (waste electrical and electronic equipment)
- APPPARAAT BESCHRIJVING
- TEXHUNECKNEXAPAKTEPNUKNI
Brand : MPM
Model : MOD74
Category : Vacuum Cleaner