
Sensity Compact Non Stop - Iron TAURUS - Free user manual and instructions
Find the device manual for free Sensity Compact Non Stop TAURUS in PDF.
| Product type | Steam iron with boiler |
| Brand | Taurus |
| Model | Sensity Compact Non Stop |
| Power supply | 220-240 V, 50-60 Hz |
| Power | Approximately 2400 W |
| Water tank capacity | Approximately 1 L |
| Functions | Continuous steam ironing, dry ironing, vertical ironing |
| Anti-scale filter | Replacement every 6 months |
| Cleaning | Damp cloth, do not immerse |
| Safety | Ready temperature indicator, water shortage indicator |
| Use | Flat and stable surface, adjustable temperature according to fabric |
| Soleplate material | Ceramic or non-stick coating (not specified, estimate) |
| Power cord length | Approximately 2 m (estimate) |
| Flexible hose length | Approximately 1.5 m (estimate) |
| Temperature indicator | Indicator light |
| Programming type | Manual (temperature and steam regulator) |
Frequently Asked Questions - Sensity Compact Non Stop TAURUS
User questions about Sensity Compact Non Stop TAURUS
0 question about this device. Answer the ones you know or ask your own.
Ask a new question about this device
Download the instructions for your Iron in PDF format for free! Find your manual Sensity Compact Non Stop - TAURUS and take your electronic device back in hand. On this page are published all the documents necessary for the use of your device. Sensity Compact Non Stop by TAURUS.
USER MANUAL Sensity Compact Non Stop TAURUS
natural_image
Black and white image of a steam iron with a circular lid and handle (no text or symbols visible)

Español
Centro de Planchado
Sensity Compact NS
DISTINGUIDO CLIENTE:
Many thanks for choosing to purchase a TAURUS brand product.
Thanks to its technology, design and operation and the fact that it exceeds the strictest quality standards, a fully satisfactory use and long product life can be assured.
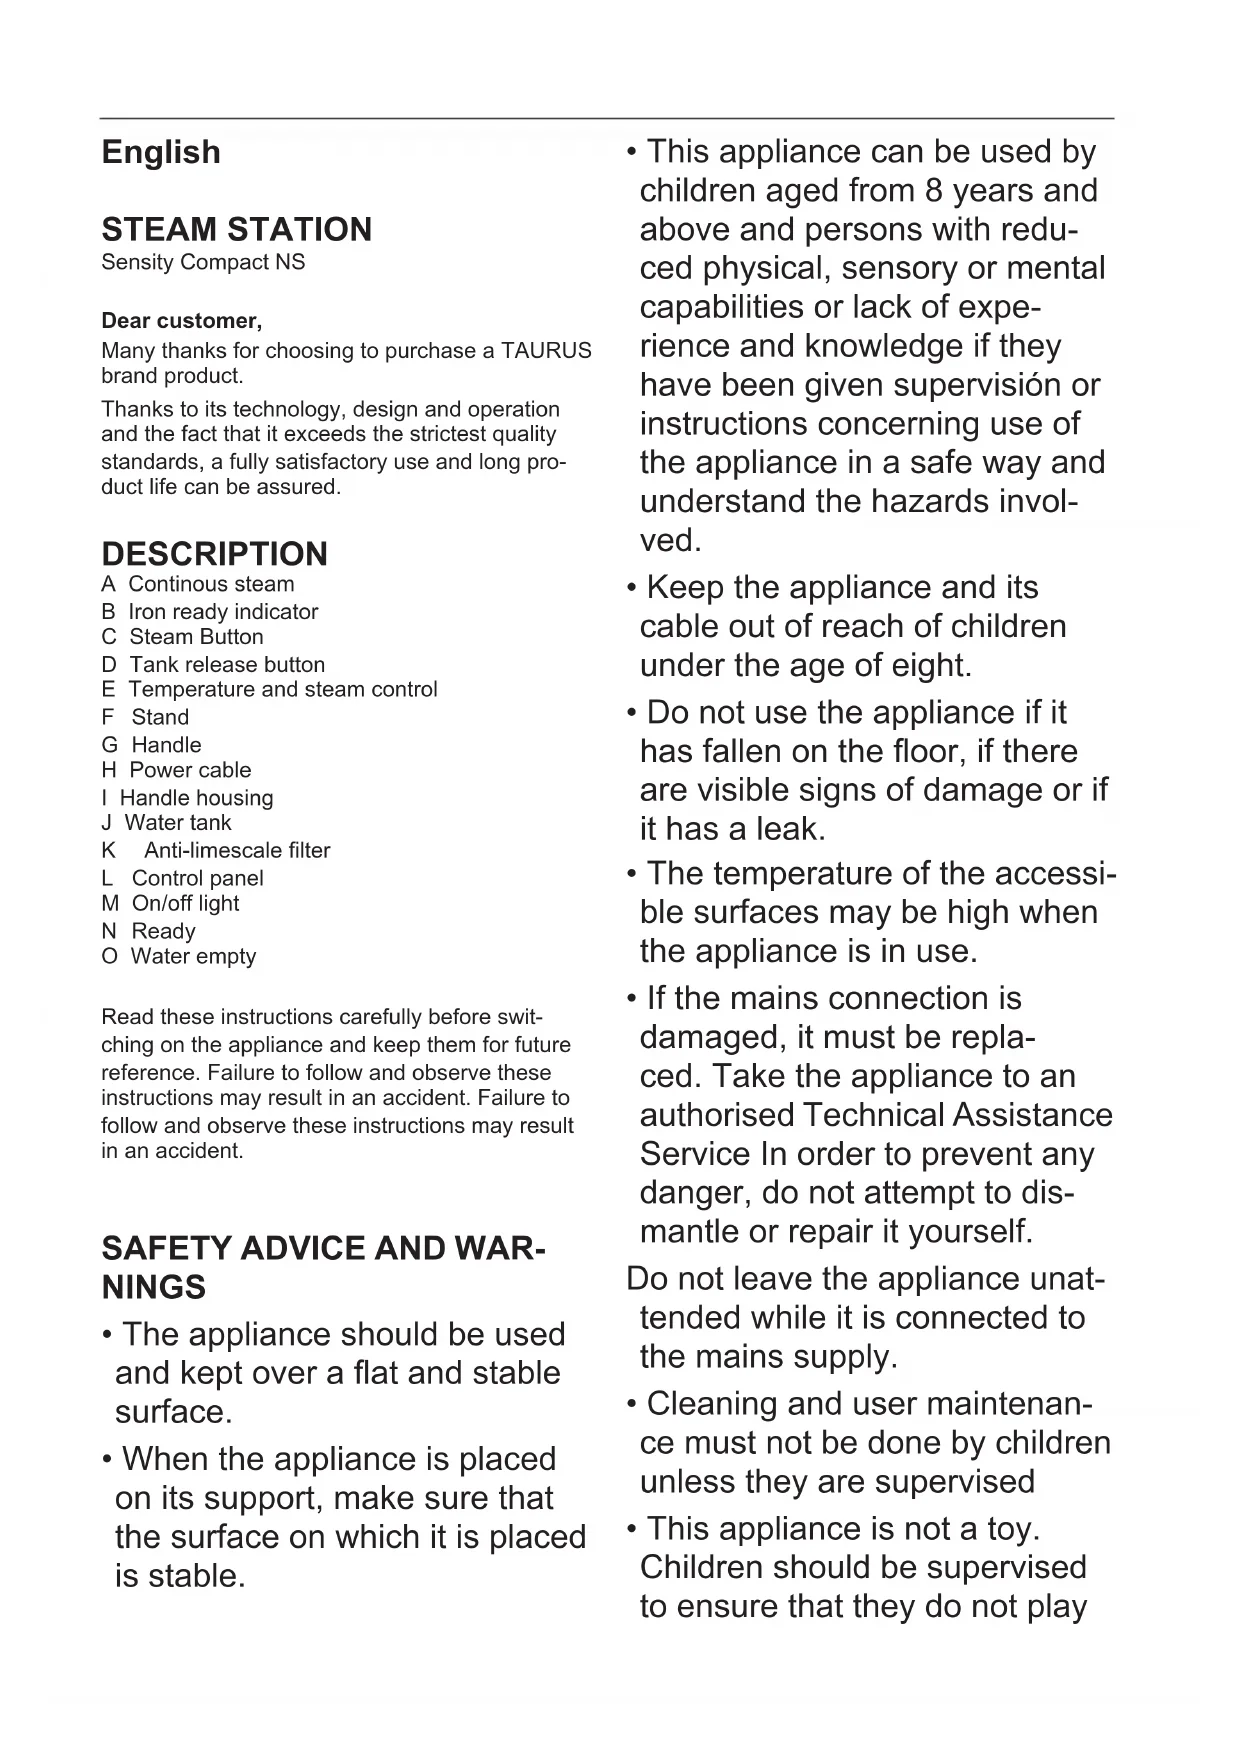
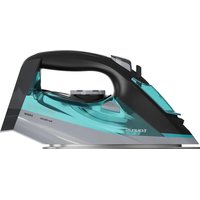
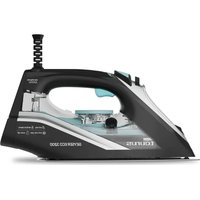
DESCRIPTION
A Continuous steam
B Iron ready indicator
C Steam Button
D Tank release button
E Temperature and steam control
F Stand
G Handle
H Power cable
I Handle housing
J Water tank
K Anti-limescale filter
L Control panel
M On/off light
N Ready
O Water empty
Read these instructions carefully before switching on the appliance and keep them for future reference. Failure to follow and observe these instructions may result in an accident. Failure to follow and observe these instructions may result in an accident.
SAFETY ADVICE AND WAR- NINGS
- The appliance should be used and kept over a flat and stable surface.
- When the appliance is placed on its support, make sure that the surface on which it is placed is stable.
- This appliance can be used by children aged from 8 years and above and persons with reduced physical, sensory or mental capabilities or lack of experience and knowledge if they have been given supervisión or instructions concerning use of the appliance in a safe way and understand the hazards involved.
- Keep the appliance and its cable out of reach of children under the age of eight.
- Do not use the appliance if it has fallen on the floor, if there are visible signs of damage or if it has a leak.
- The temperature of the accessible surfaces may be high when the appliance is in use.
- If the mains connection is damaged, it must be replaced. Take the appliance to an authorised Technical Assistance Service In order to prevent any danger, do not attempt to dismantle or repair it yourself.
Do not leave the appliance unattended while it is connected to the mains supply. - Cleaning and user maintenance must not be done by children unless they are supervised
• This appliance is not a toy. Children should be supervised to ensure that they do not play
with the appliance.
- Ensure that the voltage indicated on the nameplate matches the mains voltage before plugging in the appliance.
- Connect the appliance to a base with an earth socket withstanding a minimum of 16 amperes.
- Do not use or store the appliance outdoors.
- Do not force the electrical wire. Never use the electric wire to lift up, carry or unplug the appliance.
- Check the state of the power cord. Damaged or tangled cables increase the risk of electric shock.
- Do not touch the plug with wet hands.
- If any of the appliance casings breaks, immediately disconnect the appliance from the mains to prevent the possibility of an electric shock.
- Do not touch metal parts or the body when it is operating, as it may cause serious burns.
USE AND CARE:
- Fully unroll the appliance's power cable before each use.
- Do not use the appliance if the accessories or parts are not fastened together properly.
- Use the appliance handle/s, to catch it or move it.
- Respect the MAX level (Fig. 2)
- Disconnect the appliance from the mains when not in use and before undertaking any cleaning task.
- This appliance is for household use only, not professional or industrial use.
- This appliance should be stored out of reach of children and/or those with reduced physical, sensorial or mental abilities or who are unfamiliar with its use.
- Do not store or transport the appliance if it is still hot.
- To ensure that the iron functions correctly, keep the iron face smooth and do not hit it against metallic objects (for example, the ironing board, buttons, zips...)
- IMPORTANT: Replace the ANTISCALE filter (See anti-scale warning) whenever the appliance indicates to do so, use demineralised water with a depleted filter.
- The use of demineralised water is recommended, especially if the water in your area contains any type of grit or is “hard” (contains calcium or magnesium).
N.B.: It is normal to hear a pumping sound as the water is pumped into the steam generator.
- Never leave the appliance connected and unattended if is not in use. This saves energy and prolongs the life of the appliance.
- Do not use the appliance on any part of the body of a person or animal.
- Do not use the appliance with pets or animals.
- Turn the thermostat control to the minimum (MIN) setting. This does not mean that the iron is switched off permanently.
SERVICE:
- Make sure that the appliance is serviced only by specialist personnel, and that only original spare parts or accessories are used to replace existing parts/accessories.
- Any misuse or failure to follow the instructions for use renders the guarantee and the manufacturer's liability null and void.
INSTRUCTIONS FOR USE
Before use:
- Prepare the appliance according to the function you wish to use.
FILLING WITH WATER:
- It is essential to have filled the deposit with water to be able to work with steam.
Remove the tank from the appliance with (D) handle located at the base of the tank.
- Fill the deposit taking care to observe the MAX level (Fig. 2).
- Replace the tank in its housing, ensuring that it is well fitted.
USE:
- Uncoil the cable completely and lift the handle before plugging it in.
IMPORTANT: Check that the water tank is coupled correctly to the anti-scale filter on the inside before switching on the appliance (Fig. 1)
- Fill the deposit taking care to observe the MAX level (Fig. 2)
- Connect the appliance to the mains. (Fig. 3)
- Switch the appliance on (On/off) (L), setting the temperature and steam control (E) to the position that corresponds to the desired temperature. (Fig. 4)
- The indicator lamps (B), (M) will light up (Fig. 3 and 5)
- During the heating process, pilot N will remain
off until the steamer is ready, once this happens the indicator will remain constant, indicating that it is fully ready to iron. This process takes about 60" and is controlled by the product's electronics.
- Do not use temperatures higher than those indicated on the garments to be treated.
- Temperature for synthetic fibres (Polyester, Nylon...). (don't use this position to produce steam)
- Temperature for silk, wool. (Minimum temperature for ironing with steam)
●●● Temperature for cotton.
Max Temperature for linen.
- If garment has various kinds of fibres, select the temperature for the fibre that requires the lowest temperature. (For example, select the temperature for polyester for an article made out of 60% polyester and 40% cotton).
- Wait until the pilot light (B) has gone out which will indicate that the appliance has reached an adequate temperature.
- Press and hold the steam button (C) for 10 seconds
- During use the pilot light (B) will automatically flash on and off, thus indicating that the heating elements are operating in order to maintain the desired temperature.
DRY IRONING:
- The appliance has a steam and temperature control (E) which when set to the MIN position allows dry ironing (no steam).
STEAM IRONING:
- It is possible to iron with steam whenever the deposit is filled with water and the adequate temperature is selected.
STEAM FLOW CONTROL:
- The appliance allows the temperature and steam flow (E) to be regulated, to adjust the steam use a higher or lower temperature and the appliance's electronics will adjust the steam accordingly
- If the light (O) is switched, the water tank is without water.
VERTICAL STEAMING
It is possible to iron hanging curtains, items of clothing on his hanger, etc. To do so, follow the instructions:
Select the maximum temperature of the iron, while turning the temperature regulator of the iron in a clockwise direction.
- Move the iron in a top to bottom direction while pressing the steam control (C). Important: for cotton and linen, its recommended to put the iron base in contact with the material. For other more dedicated fibres, it's recommended to keep the iron base at some centimetres of distance.
ANTI-SCALE WARNING:
- ANTI-SCALE FILTER: To ensure correct operation, replace the anti-scale filter after every 6 months of continued use. Fit the new cartridge into its housing. Use demineralised water to continue using an already depleted cartridge.
ONCE YOU HAVE FINISHED USING THE APPLIANCE:
- Select the minimum position (MIN) using the steam and temperature control.
- Unplug the appliance to the mains.
- Remove the water from the water tank.
- Clean the appliance
CLEANING
- Disconnect the appliance from the mains and let it cool before undertaking any cleaning task.
- Clean the equipment with a damp cloth with a few drops of washing-up liquid and then dry.
- Do not use solvents, or products with an acid or base pH such as bleach, or abrasive products, for cleaning the appliance.
- Do not submerge the appliance in water or any other liquid, or place it under a running tap.
- Quick cleaning guide:
1) Fill the tank with approximately 1 litre of water. (Do not put vinegar or other descaling agents into the water tank)
2) Plug in the ironing system and set the temperature control to MIN.
3) Hold the iron vertically over the sink and press the steam button (C) for 1 minute to pump the water from the tank to the iron.
4) Increase the iron's temperature setting to number 2
5) Place the iron horizontally over the sink, keep pressing the steam button (C) and gently rock the iron backwards and forwards for 1 minute.
6) Unplug the ironing system from the mains supply and immediately rub the soleplate with a damp cotton cloth folded several times. (Never
use scouring pads or chemicals).
* Repeat the cleaning process at least twice.
** We recommend performing the process once a month to prolong the service life of the ironing system. If the water in your area is very hard or you notice limescale coming out through the soleplate during ironing, use this function more often.
ANOMALIES AND REPAIR
• Take the appliance to an authorised technical support service if problems arise. Do not try to dismantle or repair without assistance, as this may be dangerous.
For EU product versions and/or in the case that it is requested in your country:
ECOLOGY AND RECYCLABILITY OF THE PRODUCT
The materials used to make the packaging of this appliance are covered by a system for collecting, classifying and recycling them. Should you wish to dispose of them, use the appropriate public containers for each type of material.
The product does not contain concentrations of substances that could be considered harmful to the environment

This symbol means that in case you wish to dispose of the product once its working life has ended, take it to an authorised waste agent for the selective collection of waste electrical and electronic equipment (WEEE)
This appliance complies with Directive 2014/35/EU on Low Voltage, with Directive 2014/30/EU on Electromagnetic Compatibility, with Directive 2011/65/EU on restrictions on the use of certain dangerous substances in electrical and electronic appliances.
Français
CENTRALE VAPEUR
Sensity COMPACT NS
Cher Client,
KONTROLA WYPŁYWU PARY:
AVERTIZARE ANTI-CALCAR:


- Español
- Centro de Planchado
- DISTINGUIDO CLIENTE:
- DESCRIPTION
- SAFETY ADVICE AND WAR- NINGS
- with the appliance.
- USE AND CARE:
- SERVICE:
- INSTRUCTIONS FOR USE
- FILLING WITH WATER:
- USE:
- DRY IRONING:
- STEAM IRONING:
- STEAM FLOW CONTROL:
- VERTICAL STEAMING
- ANTI-SCALE WARNING:
- ONCE YOU HAVE FINISHED USING THE APPLIANCE:
- CLEANING
- ANOMALIES AND REPAIR
- ECOLOGY AND RECYCLABILITY OF THE PRODUCT
- Français
- CENTRALE VAPEUR
- Cher Client,
- KONTROLA WYPŁYWU PARY:
- AVERTIZARE ANTI-CALCAR:
Brand : TAURUS
Model : Sensity Compact Non Stop
Category : Iron