SASWDB401 - Wireless doorbell KONIG - Free user manual and instructions
Find the device manual for free SASWDB401 KONIG in PDF.
| Title | Description |
|---|---|
| Product type | Uncategorized |
| Brand | KONIG |
| Model | SASWDB401 |
| Dimensions | Not specified |
| Weight | Not specified |
| Power supply | Not specified |
| Usage | Not specified |
| Maintenance | Not specified |
| Safety | Not specified |
| General information | Not specified |
Frequently Asked Questions - SASWDB401 KONIG
User questions about SASWDB401 KONIG
0 question about this device. Answer the ones you know or ask your own.
Ask a new question about this device
Download the instructions for your Wireless doorbell in PDF format for free! Find your manual SASWDB401 - KONIG and take your electronic device back in hand. On this page are published all the documents necessary for the use of your device. SASWDB401 by KONIG.
USER MANUAL SASWDB401 KONIG
MANUAL DE USO (p. 22)
NAVOD (s. 74)
MANUAL (p. 26)
ROKASGRAMATA (Ipp. 78)
HASZNÁLATI UTMUTATO (0.30)
NAUDOJIMO VADOVAS (82 p.)
KÄYTTOOHJE (s. 34)
PRIRUCNIK(str.86)
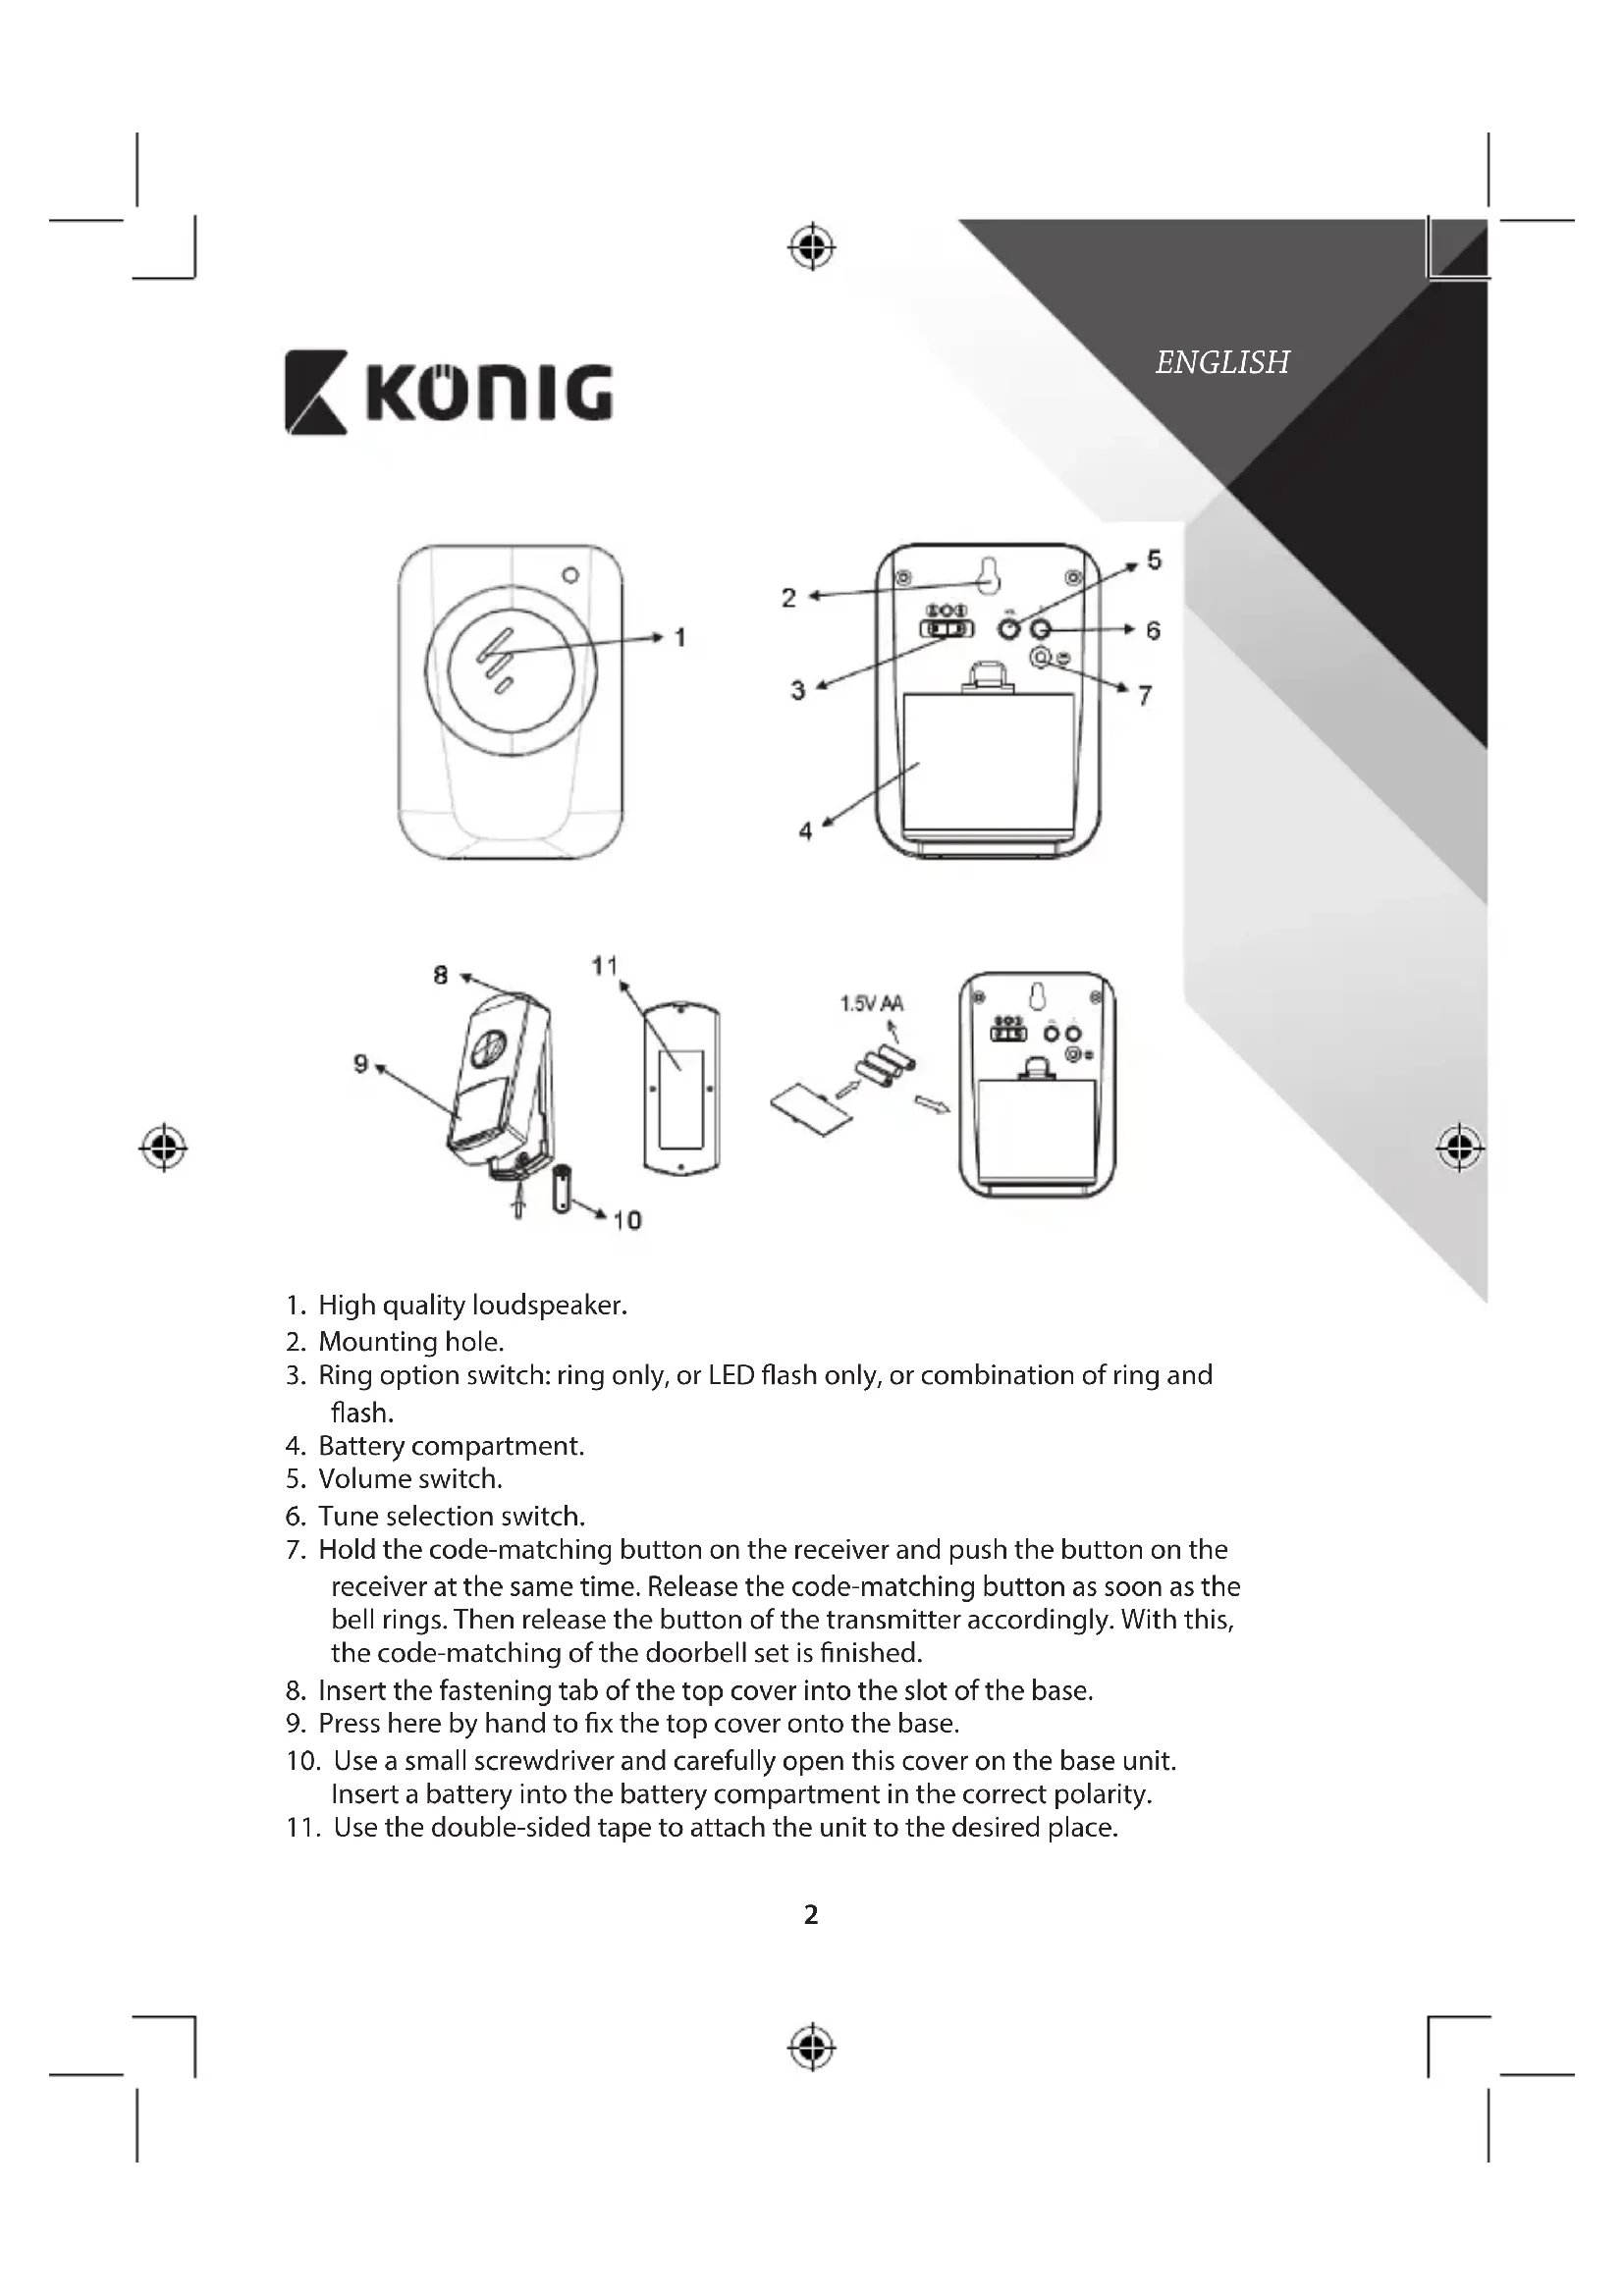
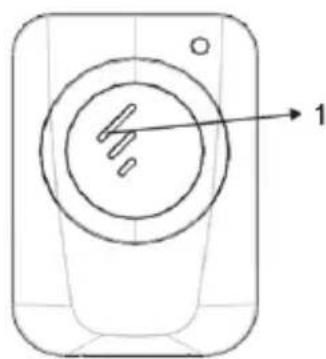
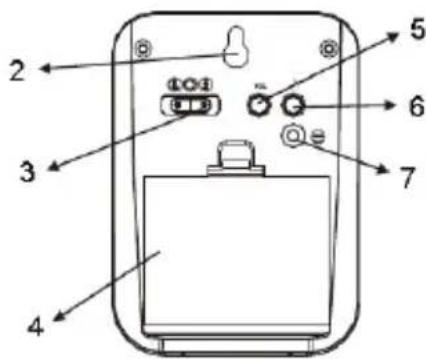
- High quality loudspeaker.
- Mounting hole.
- Ring option switch: ring only, or LED flash only, or combination of ring and flash.
- Battery compartment.
- Volume switch.
- Tune selection switch.
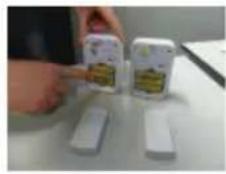
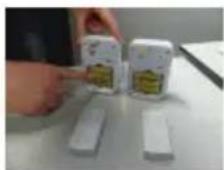
- Hold the code-matching button on the receiver and push the button on the receiver at the same time. Release the code-matching button as soon as the bell rings. Then release the button of the transmitter accordingly. With this, the code-matching of the doorbell set is finished.
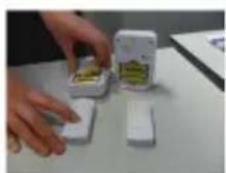
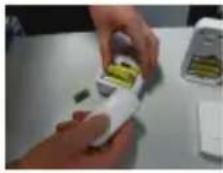
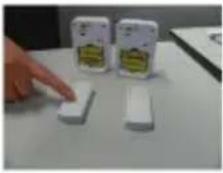
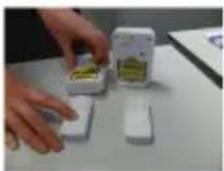
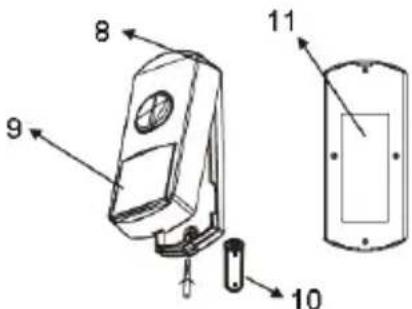
- Insert the fastening tab of the top cover into the slot of the base.
- Press here by hand to fix the top cover onto the base.
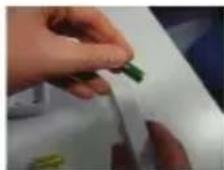
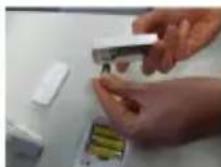
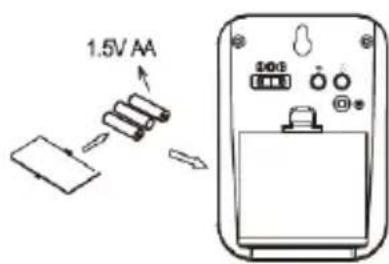
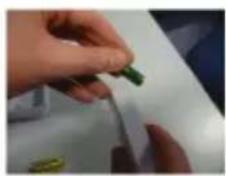
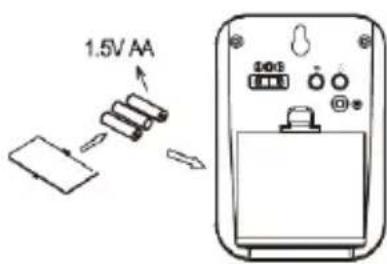
- Use a small screwdriver and carefully open this cover on the base unit. Insert a battery into the battery compartment in the correct polarity.
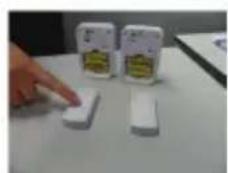
- Use the double-sided tape to attach the unit to the desired place.

KONIG
Specifications:
SAS-WDB301
- 36 melodies for your selection
- Battery operated (3x AA and 1x V23GA)
- 100 meter reach
- Double blister packing
- Indicator light
- Waterproof transmitter
SAS-WDB401
- 36 melodies for your selection
- Battery operated (2x AA and 1x CR2032)
- 80 meter reach
- Double blister packing
- Indicator light
- Waterproof transmitter
Supplement instructions
SAS-WDB301
Follow the steps below to set the channel of several doorbells to 1 bell button or to set a different channel from your neighbours.
First remove the back plate of the battery compartment of main unit and bell button.
Press and hold the bell button.
Keep pressing the bell button and remove the batteries from the main unit.

KONIG
ENGLISH
Keep pressing the bell button and now also remove the batteries from the bell button.
Keep on pressing the bell button and insert the batteries back into the main unit.
Keep on pressing the bell button and insert the batteries back into the bell button. Now the channel of the doorbell is changed.

KONIG
ENGLISH
Maintenance:
Clean only with a dry cloth.
Do not use cleaning solvents or abrasives.
Warranty:
No guarantee or liability can be accepted for any changes and modifications of the product or damage caused due to incorrect use of this product.
General:
Designs and specifications are subject to change without notice.
All logos brands and product names are trademarks or registered trademarks of their respective holders and are hereby recognized as such.
This manual was produced with care. However, no rights can be derived. Konig Electronic can not accept liability for any errors in this manual or their consequences.
Keep this manual and packaging for future reference.
Attention:

This product is marked with this symbol. It means that used electrical and electronic products should not be mixed with general household waste. There is a separate collections system for these products.
This product has been manufactured and supplied in compliance with all relevant regulations and directives, valid for all member states of the European Union. It also complies to all applicable specifications and regulations in the country of sales.
Formal documentation is available upon request. This includes, but is not limited to: Declaration of Conformity (and product identity), Material Safety Data Sheet, product test report.
Please contact our customer service desk for support:
via website: http://www.nedis.com/en-us/contact/contact-form.htm
via e-mail: service@nedis.com
via telephone: +31 (0)73-5993965 (during office hours)
NEDIS B.V., De Tweeling 28, 5215 MC 's-Hertogenbosch, THE NETHERLANDS

KONIG


DEUTSCH
B cnyae n3MeHn H moHnKauu yctpoCTBa, a paBHO B cnyae NOBpeJeHn yctpoCTBa BCJeCTBne erO HnpabNbHoro NcNoB3OBaHn rapaTnHhble 6o3aTeNbCTBa pOn3BODnte TepHOT CBOI cnly.
06uaHnΦopmaun:
Ia3aHIn HexTHMueKHe XapaKTePnCTKn MoryT 6b1b NMeHEHb 6e3 PpeBapTeNBOrO yBeoMNEHH. Bce norotinbl 6peHOBn HaaBaHnPoJyKOth TBAIOHTcTOBAPbIMn 3AkaHmnn 3ApERiCTpPOBaHbIMn TOPROBBIMn MAPkAM INX COOTBECTBYUOxIN BnaDeJIbEu CnDEObaTEBHO pni3HAOTc TAOKBbIMn.
3To pyKOBOCTBO 6bIIO COCTABNEHO TtAteNBbIM O6pa3OM. TEM He MeHee, OHO He HApEnaET UHTaTeN KaKIMN-JIN60 npabAMn. Konig Electronic He HeceT OTBeTCTBHeHOCTH 3a BO3MOXHbIe Ow6Kn B DaHHOM pyKOBOCTBe N IN NOcNeIcTBNA. CoxpanHe HAcTOAuee pyKOBOCTBO N yNaKOBky Dn DaJIbHeMero IcONNb3OBAHnA.
BHHMaHHe:

DAnHHbI npOyKT OTMeueH 3Tm CnBONOM. 3To O3HaayeT, qTo TaKne 3NeKtpuYeCKne uN 3NeKtpoHNbIe N3DeJINr He DOnKhbI B6paCbBaTCB MecTe C 6bITOBbIMN OTXODAMN. IINr 3TNx N3denn cyueCTBYOT OTdJIbHbIe MeCTa C6OpKn.
IaHHe 3dJIeN6 bIIO I3rOToBNeHO NocTbNEHO B COOTBeCTCBM CO BCEMN PnIMeHMbIMN NOJIOKeHNMAH IN dIpeKTHaMn, DeIcTByIOUIMM DnA BCEX cTpaH-ueHOB EBponeckoro Co1o3a. OHO TaKke coOTBeCTByET BcEM HopMaMn nPpABINAMn, DeIcTBYIOUIMB C TpaHE pOdaJN.
OfuiabHnDokymentau npedocTabnTcno3aNpOcy.3aDokymeTaBkUoAet (HO He orpaHnBaTc 3tM): Deknapaunco0rBctTBn (u n3denn), naOpnt 6eOnacnOCTn, oTuET no npOBepke npOdykTA.
IynoyuHnnoMoOnnOBpaNTcBbHauSyx6y noepKKnneHTOB:
uepe3 Be6-cai: http://www.nedis.com/en-us/contact/contact-form.htm
DOnbJIHHTeHN HNCTpyKcUN
SAS-WDB301
CneBaIte NocOueHInTe NO-DOy CTbNKn, 3a Da 3aJaTe KaHaJa 3a HRAKoNko 3BbHn Ha 1 6yToH nII Na 3aJaTe pa3nueH KaHaJ O T cbCeDInTe.
PbBOOTcpaHete3aHaTnHaHaOTeHeTo3a 6aTePNHaOCHOBnMaOnyN6yToHaHa3BbHeca.


KONIG


HaTnchHe n 3aDpBxKTe 6yToHa Ha 3BbHeua.
IpoDbJxKaBae Da HATNCKaTe 6yToHa Ha 3BbHeua N OTCTpaHete 6atePnnte OT OCHOBnmaOdyn.
IpoJbJIkaBaIte Da HATNCKaTe 6yToHa Ha 3BbHeua N OTCTpaHete 6atepuNTe OT 6yToHa.
PpOdbJIkaBaTe DaHaTnCKaTe 6yToHa Ha 3BbHeuca NnoCTabeTe 6aTeepnnte Ha MxTO B OCHOBHm MOyJ.
PpOdbJxabAte Da HATNCKaTe 6yToHa Ha 3BbHeua N noCTabeTe 6aTeepnnte 6paTHo B 6yToHa Ha 3BbHeua. Ppi TOBa KaHaNbT Ha 3BbHeua 3a Bpata Ce npomeHr.
B'JIAPCKH

KONIG
B'JIAPCKH
NoaPbXkKa:
TouncBaIe CaMo CbC CyXa Kbpna.
He n3non3BaIte 3a nouHCTBaHE pa3TbOpTeINn a6pa3NB.
Tapaanua:
He ce noeMat rapaHcHm n OTROBOPHOCT 3a KaKbTo n Da e npOMEHN mnn MoDnKcHn Ha npOdykTa nn uetn, npuHHeHn nopadn HnnpabunHOTo My n3non3BaHe.
06n nooxhen:
H3aHbT nCneuΦkaUHTe ca npedMeT Ha npomHa 6e3 npedn3BecTne.
BcNkneM6nem, TpbroBCKn MapKn n mHeHa Na pOdyKTn Ca TbproBckn MapKn nnnpeRnCTpnpaHn TbproBckn MapKn Ha CbOTBeHTHe NpnteKaTeN n Ce npu3HaBaT 3a TaKnBa.
HactoToTO pkoOCTBO e c3daeHO BHMATEHO. BbIpeKu TOBa He MoarTa 6bDaT DaEHN HnKaBn rapaHcMn. Konig Electronic He noema OTROBOPHOCT 3a rpeKu B TOBa pkoOCTBO mN TEXHMe NOCEJCTBNA.
3ana3BaTe pbkoBOOCTBTOI onaKOBKaTa 3a 6bdeu cnpaBKN.
BHHMaHHe:

IpoNyKTb e 06o3aueH c 03n CmB0J. ToBa O3HaUaBa, ye eneKtpuyecknTe n eneKtpoHHn IpoyKn He TpaBa da ce CmecBaT c 06nKHOBEHnTe DOMaKNHcKn OTnAdbu. 3a Teu npOdykTN CbueCTByBa dpyra CnCTema 3a cb6upaHe Ha OTnAdbu.
IpoNDyKTbT e npOn3BedeH nOCTaBeH B cBoTBcETCBn CBCuKN pnpNoKmnpa3nope6n n DnpeKtNB, BaMn 3a BCuKn cTpaHn-ueHKn Ha EBponeckn CbIO3. OcbH ToBa cBoTBcETBA Ha BCuKN npNoKmCneunFkauuN pa3nope6n B cTpaHnTe, B KOnTo ce npedna.
MoKeTe Na noLyuHTe OfNUaHnHa TdoKymEHTaun npi NOnCKBaHe. Ta BKnIOyBa, Ho He ce OrpaHuaBa Do: KeIapaua 3a CbOTBeTCTBnE (N IeENTMnHOCt Ha npOdykTa), nacnpT 3a 6e3oNaCHOCT Ha BeueCTBaTa N DOKlaD OT TcTeOBeTe Ha npOdykTa.
CbpxKeTe c 6oPoTo 3a 06cnykBaHe Ha KIneHTn 3a DonbHInTeHa HΦopMaIHa:
Upe3 MPexkata: http://www.nedis.com/en-us/contact/contact-form.htm
Upe3 mmei:n: service@nedis.com
no Tenefoha:+31(0)73-5993965(npe3pa6oTHBpeMe)
NEDIS B.V., De Tweeling 28, 5215 MC's-Hertogenbosch, XOJIAHДИA

KONIG

POLSKI